With Jotform’s Store Locator Widget, you can help visitors quickly find your business locations using an interactive map and searchable location list. Simply add your store locations, customize how they’re displayed, and embed the widget on your website in just a few steps.
A store locator makes it easier for customers to discover the nearest branch, office, or retail location. Whether you have a single storefront or multiple locations, this widget improves the visitor experience by providing directions, contact details, and other helpful location information in one convenient place.
Creating Your Store Locator Widget and Getting the Embed Code for it
Before you can add the Store Locator Widget to your website, you’ll first need to add your business locations, customize how they’re displayed, and copy its embed code. Here’s how to do it:
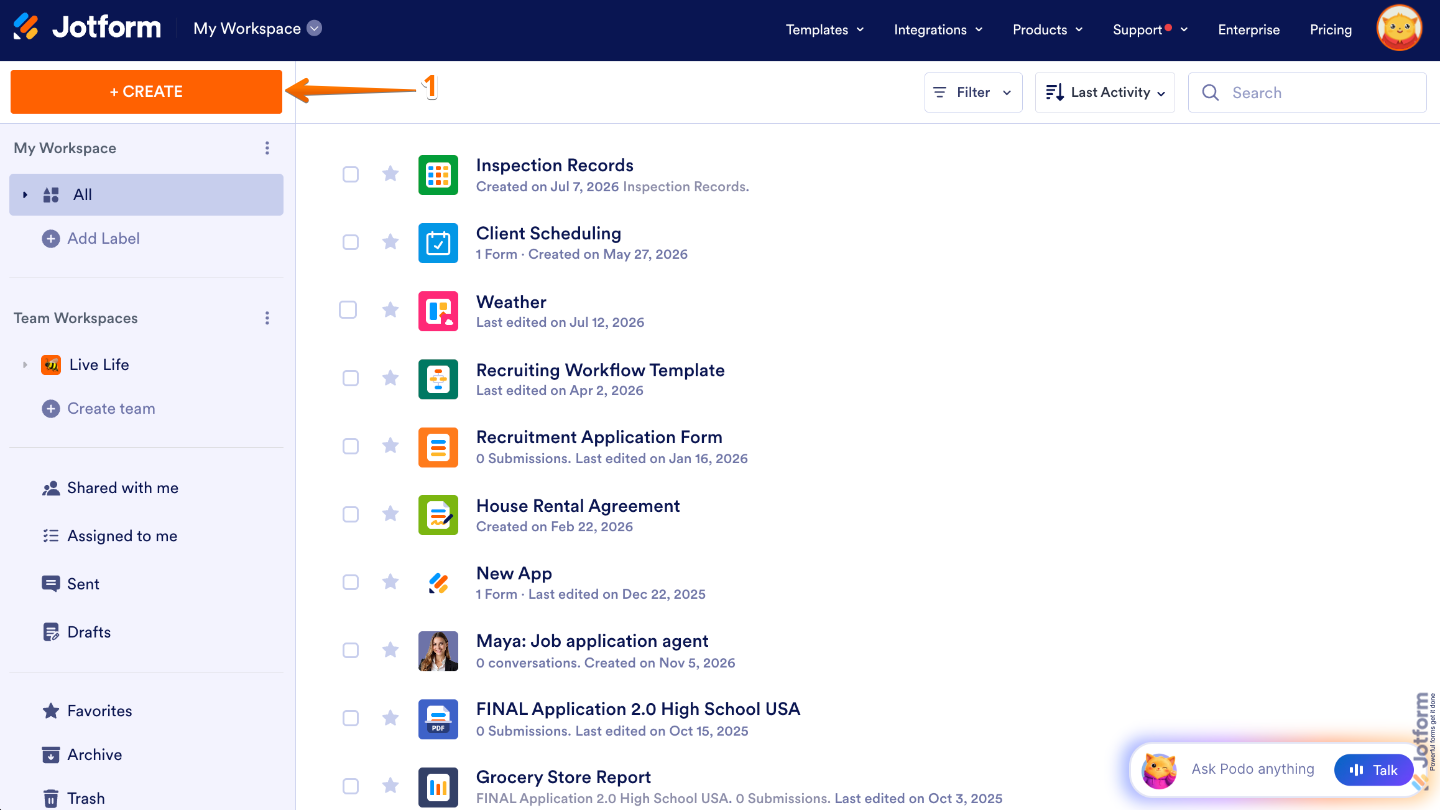
- On the top-left side of your Workspace page, click on Create.
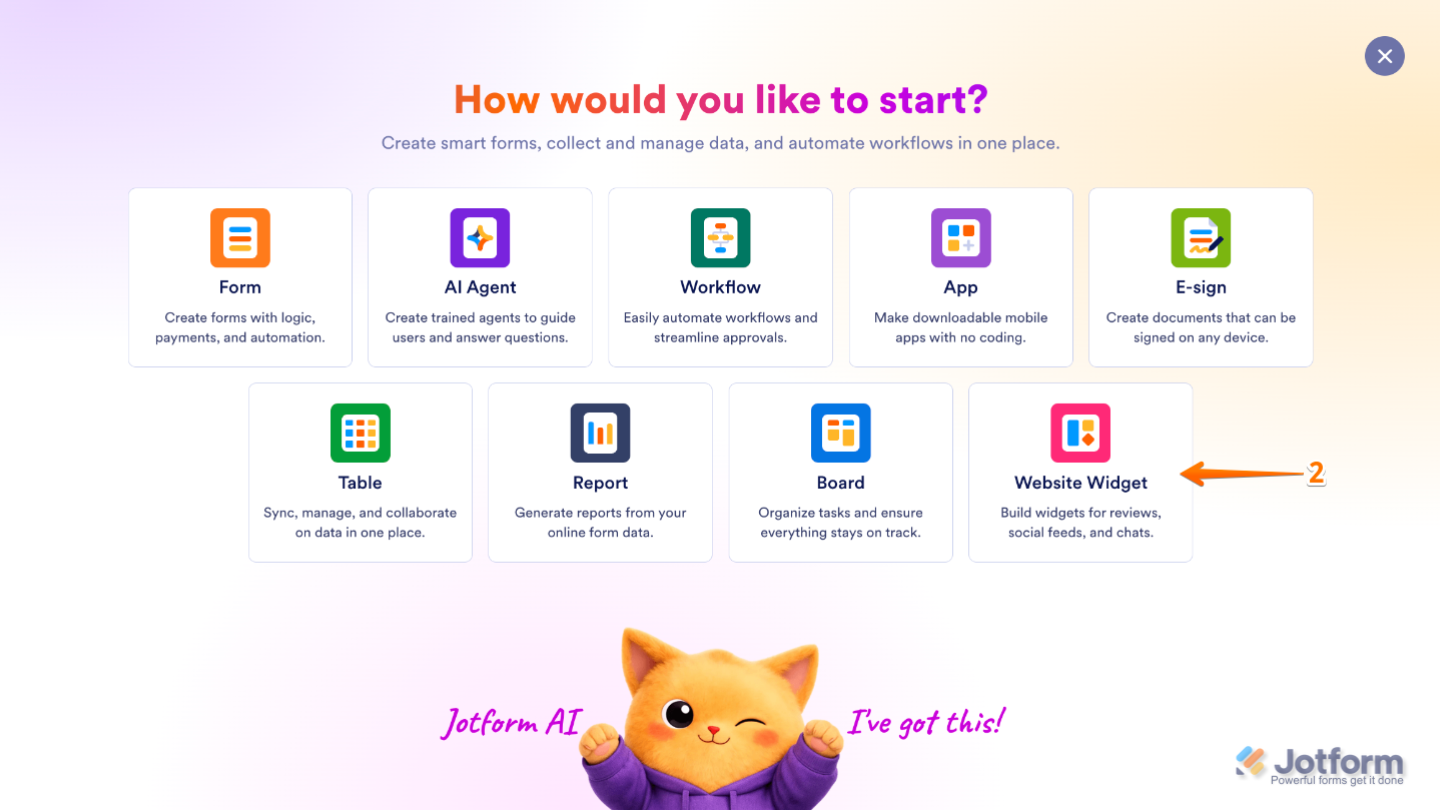
- Then, in the menu that opens up, select Website Widget.
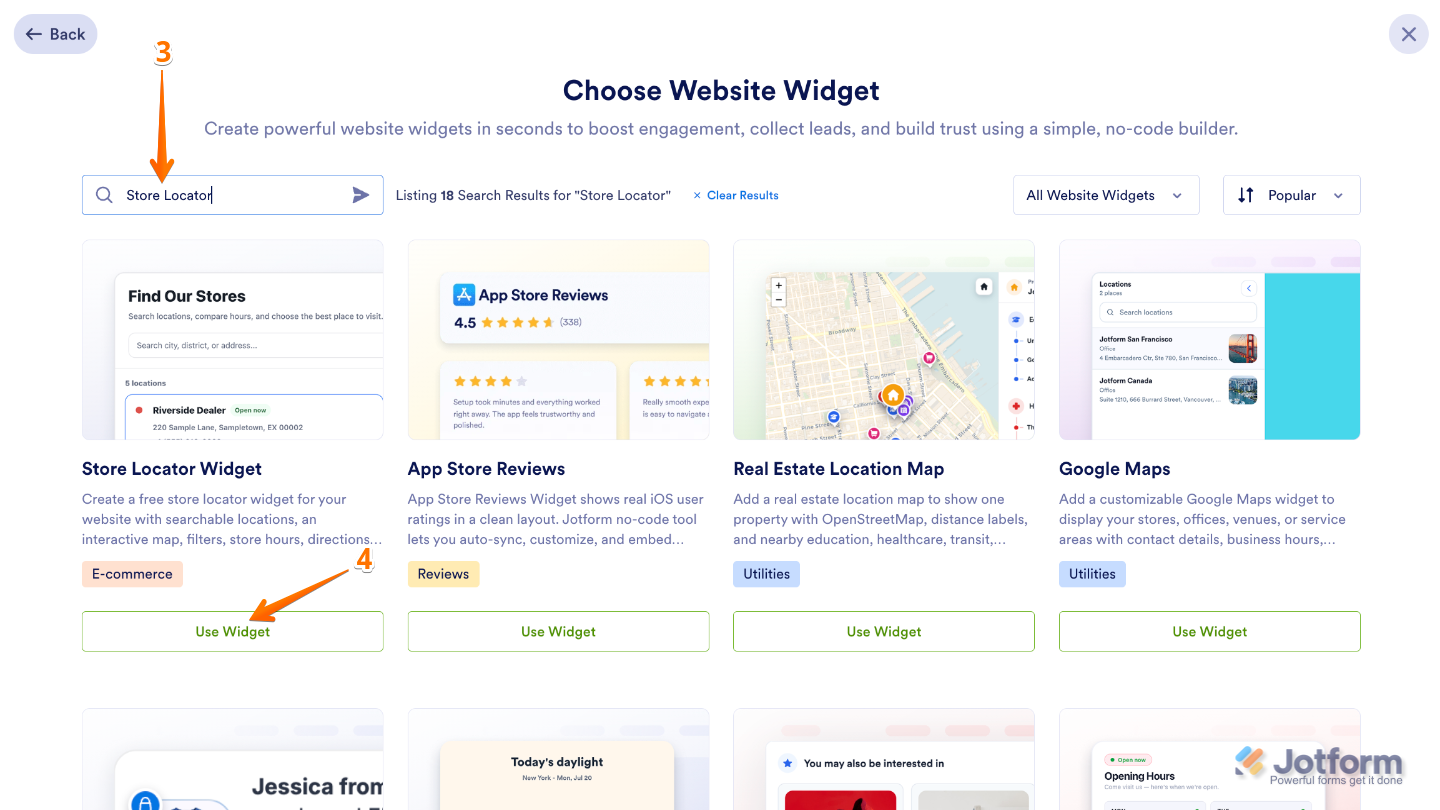
- Next, in the Search bar in the upper-left corner of the Choose Website Widget menu, enter Store Locator.
- Then, at the bottom of the search results, click on Use Widget.
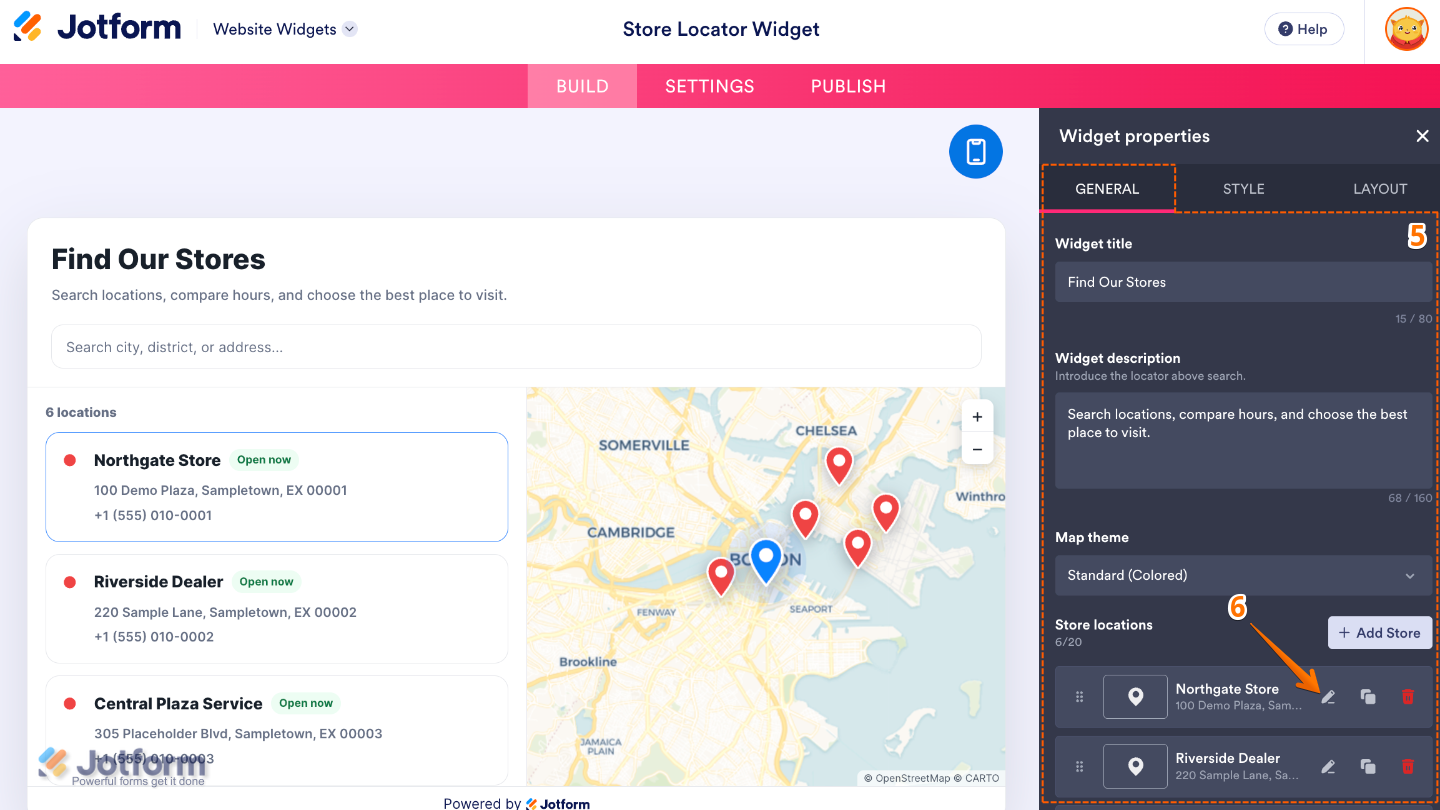
- Now, in the Widget Properties menu that opens on the right side of Website Widgets, under the General tab, set up these properties:
- Widget Title — Enter a title that appears at the top of your Store Locator widget.
- Widget Description — Add a short description to introduce your locations or provide helpful information for visitors.
- Map Theme — Choose the visual style of the map to match your website’s design.
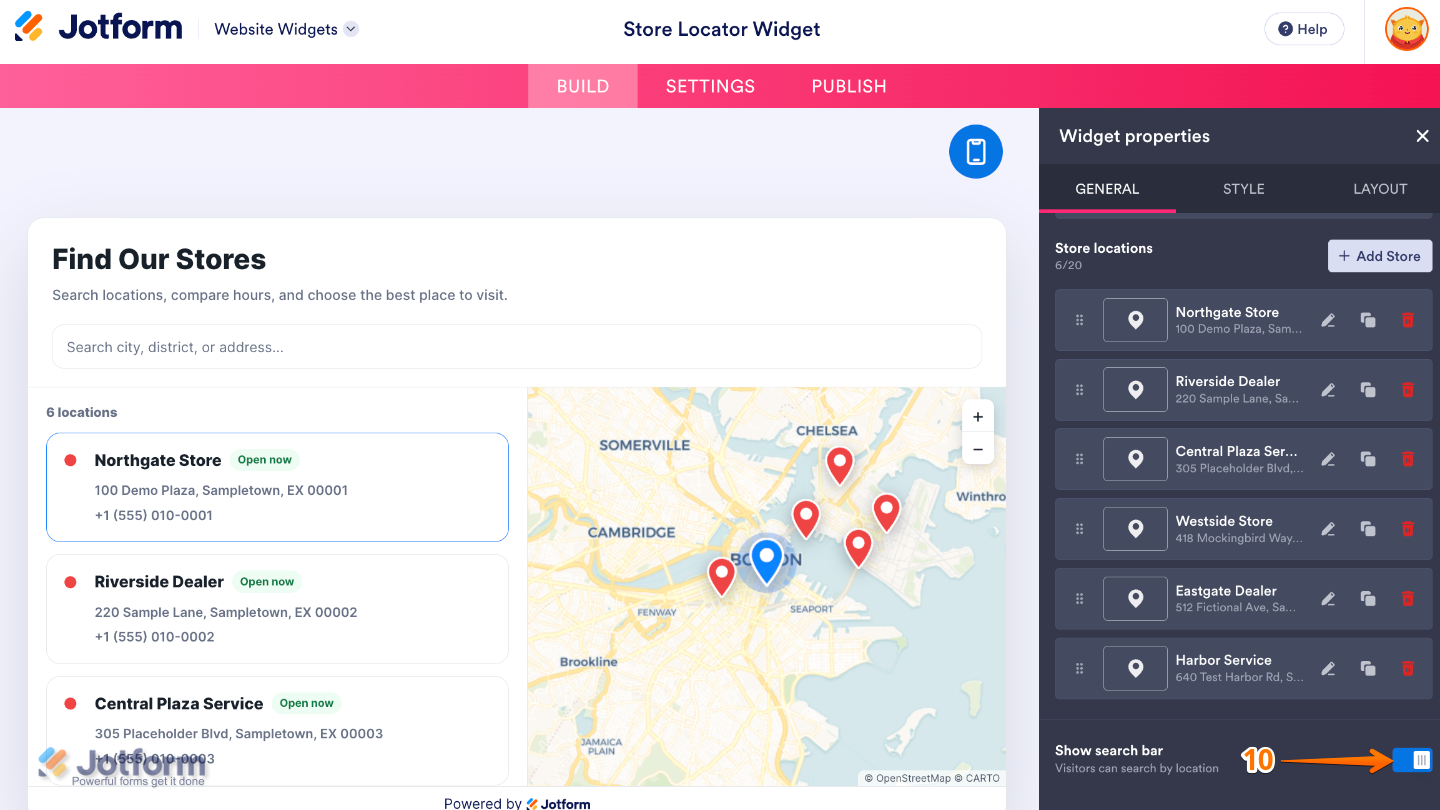
- Store Locations
- Add Store — Add a new business location to your Store Locator.
- Edit Store (Pencil Icon) — Update the details of an existing store location.
- Duplicate Store (Duplicate Icon) — Create a copy of an existing store to quickly add a similar location.
- Delete Store (Trash Can Icon) — Remove a store location from the widget.
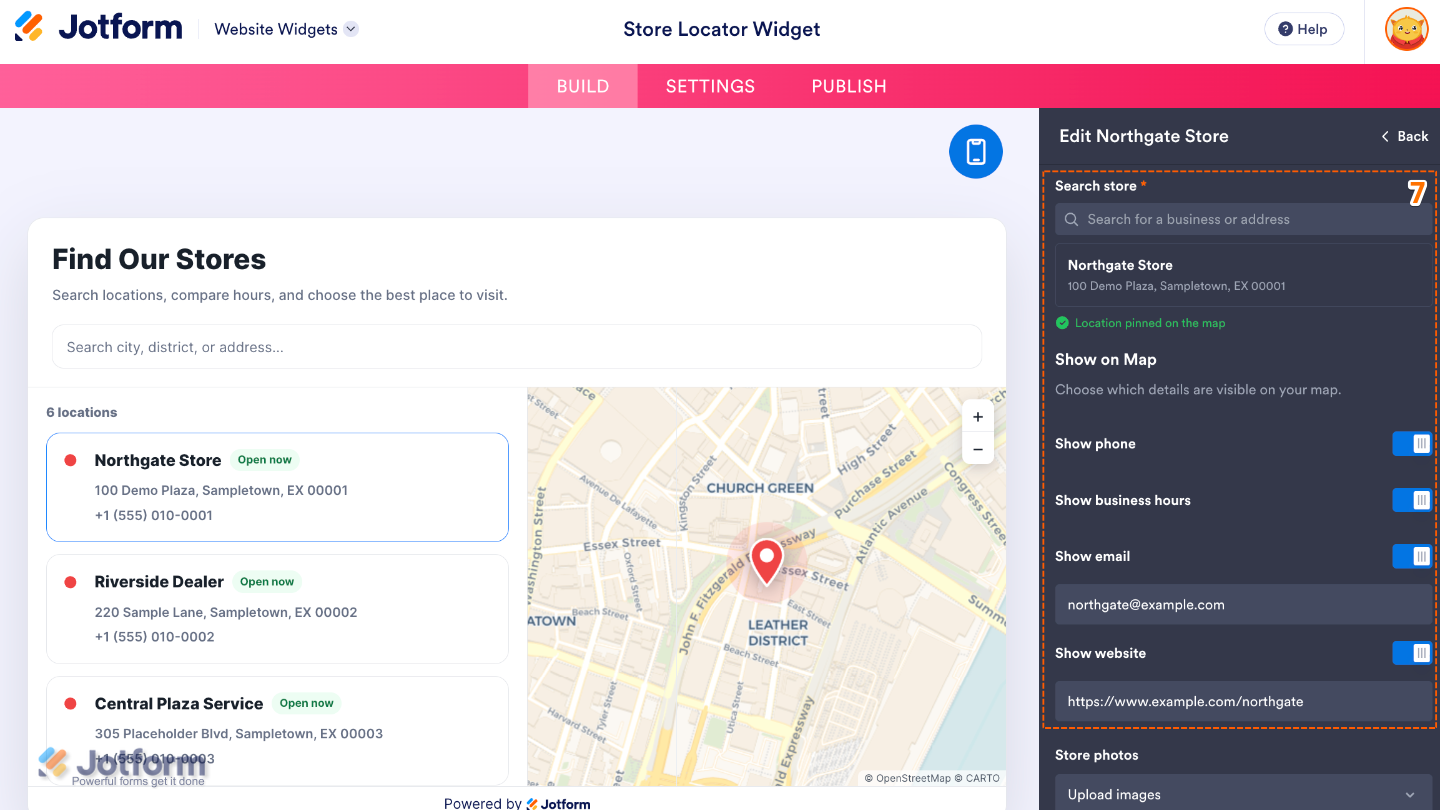
- To show you an example, click on the Pencil icon to edit the Northgate Store settings.
- Then, configure the Store settings below:
- Search Store — Search for a specific store in your list to quickly edit its details.
- Show on Map
- Show Phone — Display the store’s phone number in its information panel.
- Show Business Hours — Show the store’s operating hours to help visitors know when it’s open.
- Show Email — Display the store’s email address for easy contact.
- Show Website — Display a link to the store’s website.
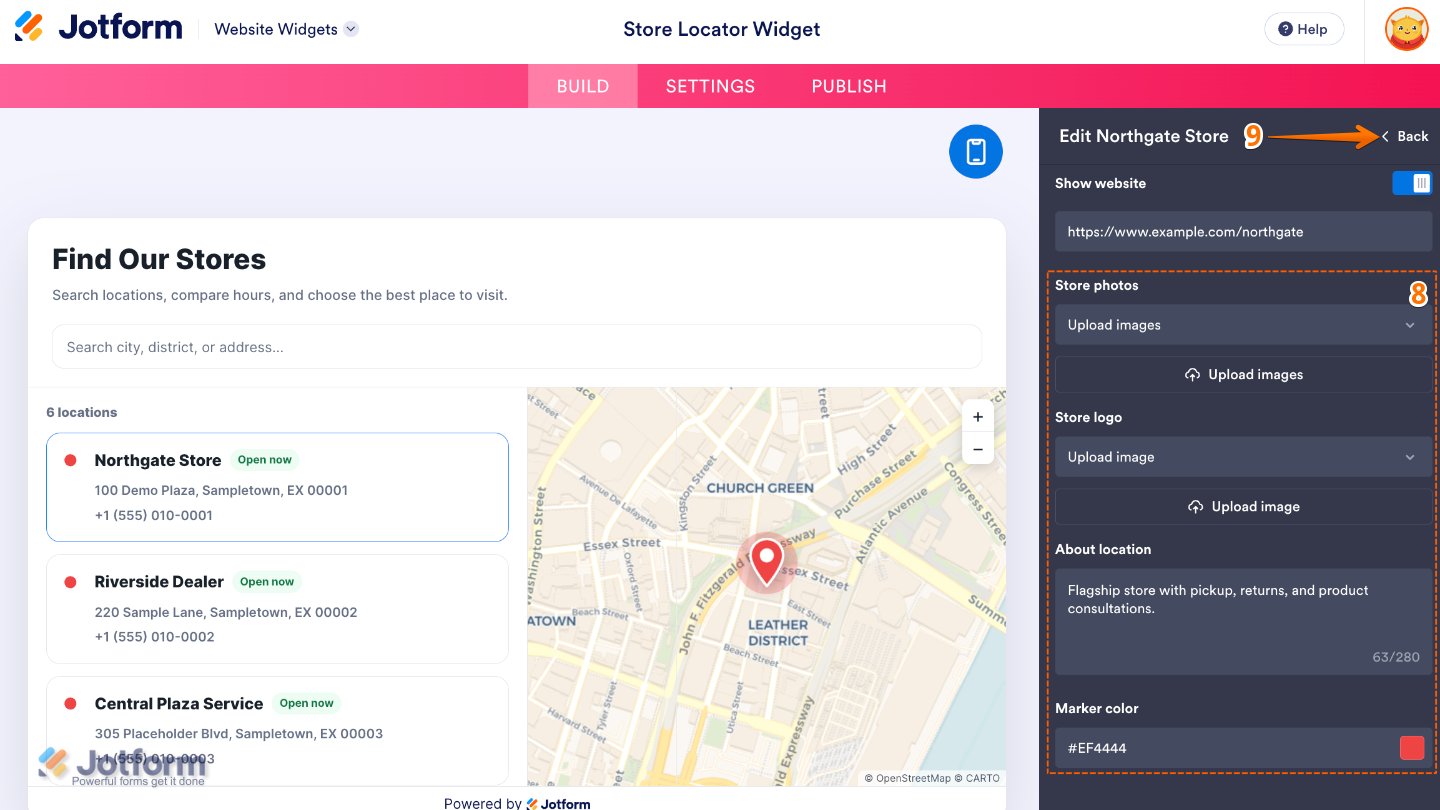
- Next, scroll down and adjust these settings:
- Store Photos — Upload or manage photos that represent the selected store.
- Store Logo — Upload a logo for the selected store to help visitors recognize your brand.
- About Location — Add a short description or additional information about the selected location.
- Marker Color — Choose the color of the store’s map marker to make locations easier to identify.
- Once everything’s set, in the upper-right corner of the Edit Store menu, click on Back.
- Now, scroll down and configure the Show Search Bar to show or hide a search bar that helps visitors quickly find a specific store or location.
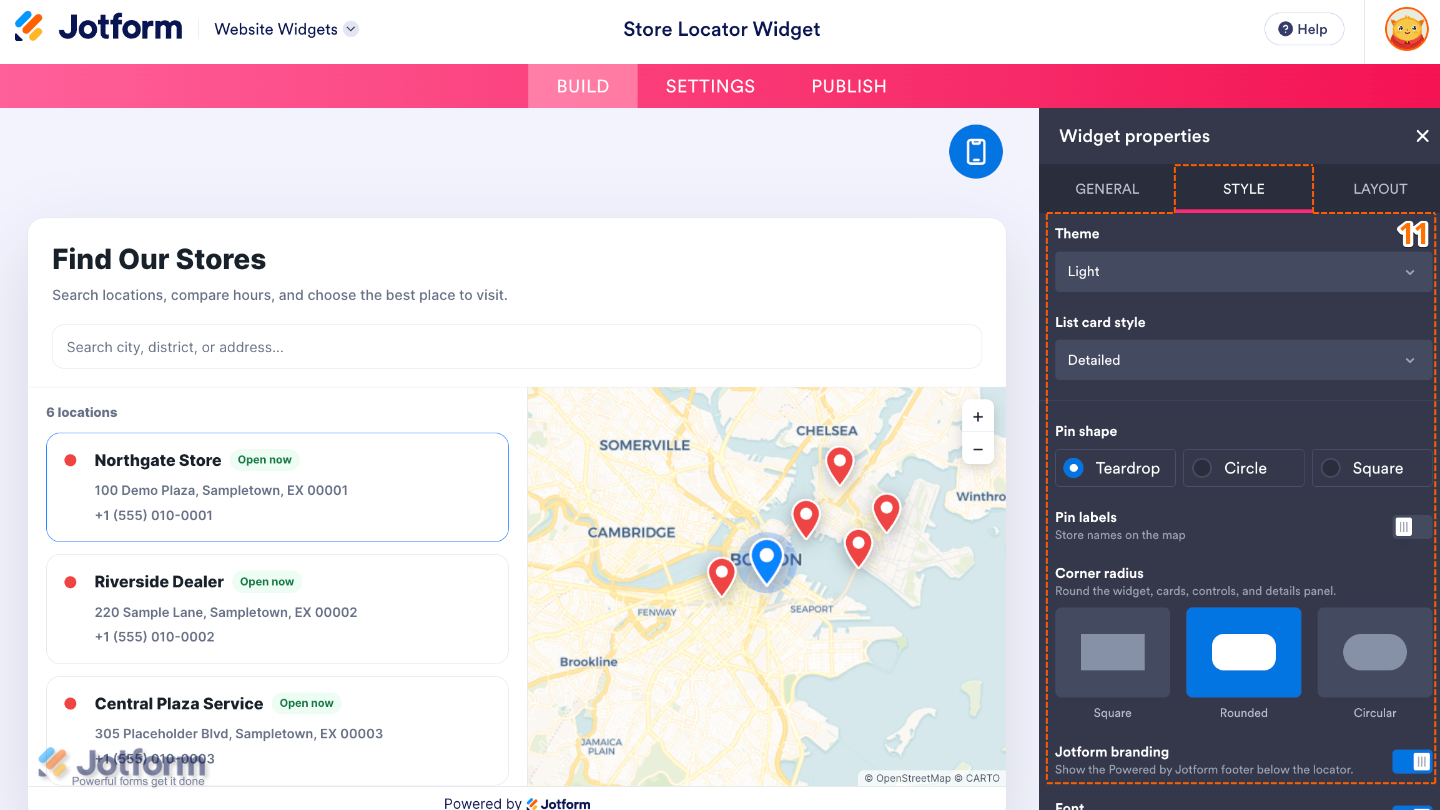
- Next, under the Styles tab, customize these properties:
- Theme — Choose a visual theme that complements your website’s design.
- List Card Style — Select the appearance of the store cards displayed alongside the map.
- Pin Shape — Choose the shape of the map markers used for your store locations.
- Pin Labels — Show or hide labels on the map markers to make locations easier to identify.
- Corner Radius — Adjust how rounded the corners of the widget and store cards appear.
- Jotform Branding — Show or hide Jotform branding on the widget.
- Then, scroll down and continue with these settings:
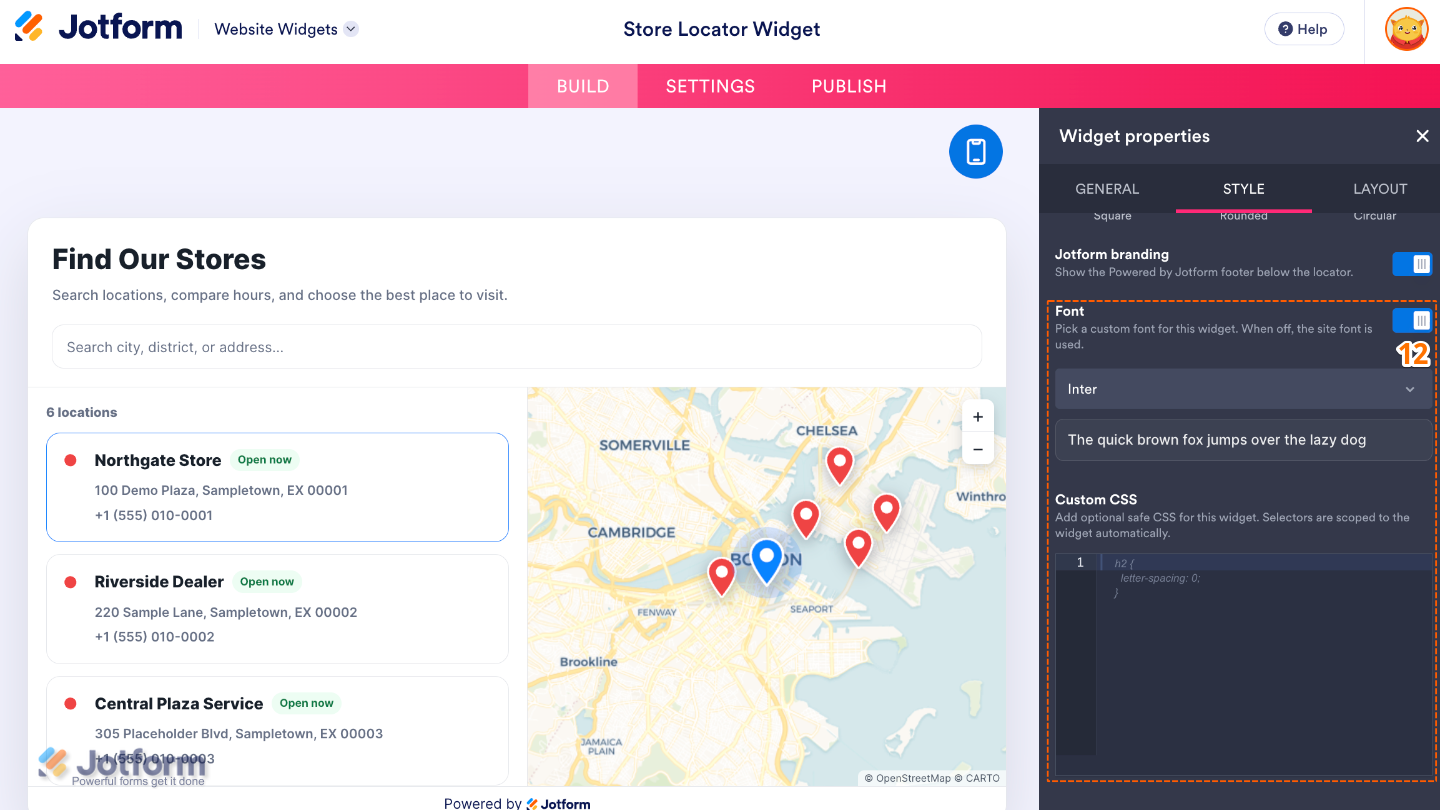
- Font — Select the font used throughout the Store Locator widget.
- Custom CSS — Apply your own CSS code for advanced styling beyond the built-in settings.
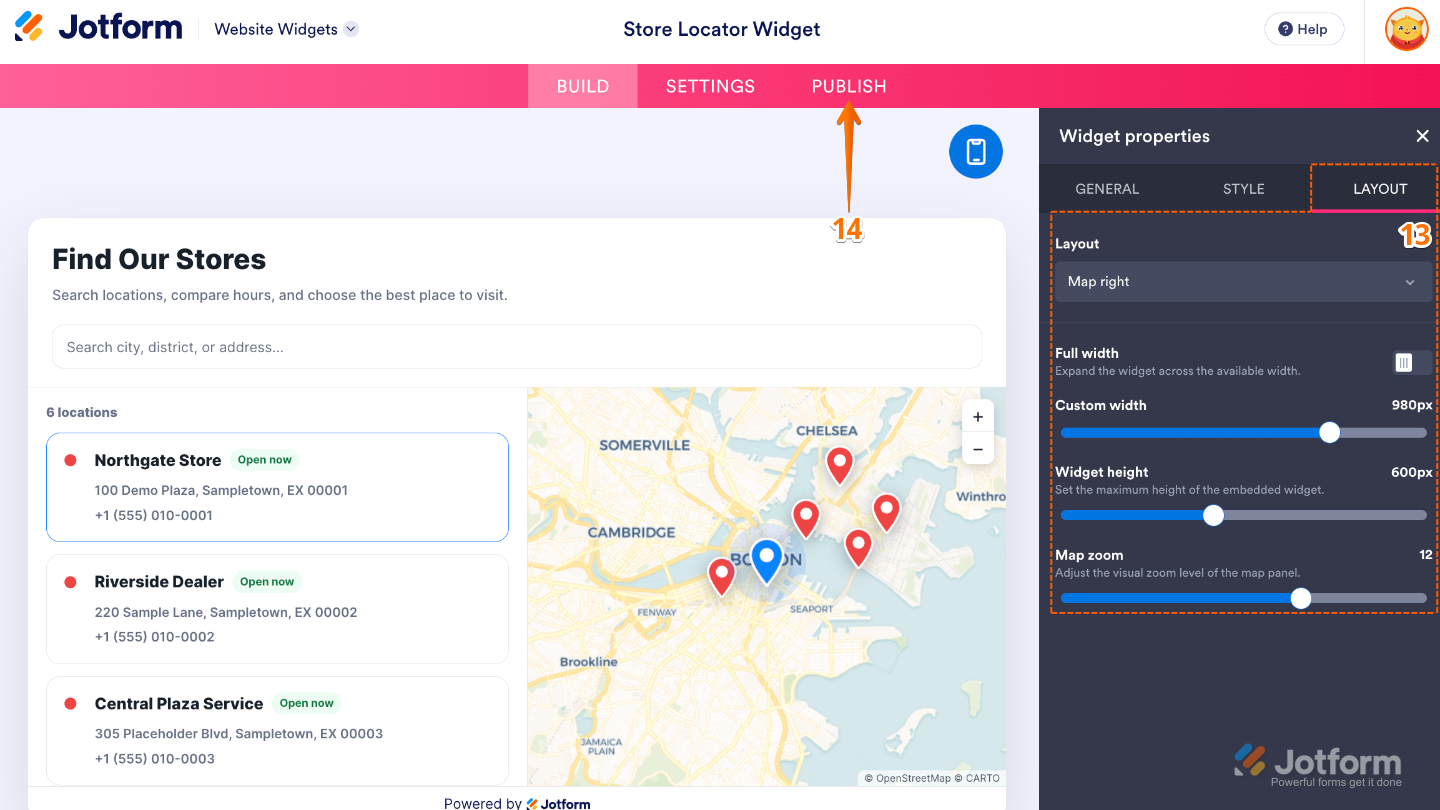
- Now, under the Layout tab, configure these properties:
- Layout — Choose how the map and store list are arranged within the widget.
- Full Width — Expand the widget to fill the entire width of its container.
- Custom Width — Set a custom width for the widget to better fit your website’s layout.
- Widget Height — Adjust the height of the Store Locator widget.
- Map Zoom — Set the default zoom level of the map when visitors first load the widget.
- Once you’ve finished configuring the widget, in the pink navigation bar at the top of the page, click on Publish.
Note
You’ll be asked to log in to your Jotform account or sign up for one. Once you’ve done that, you’ll be able to get the embed code for your widget.
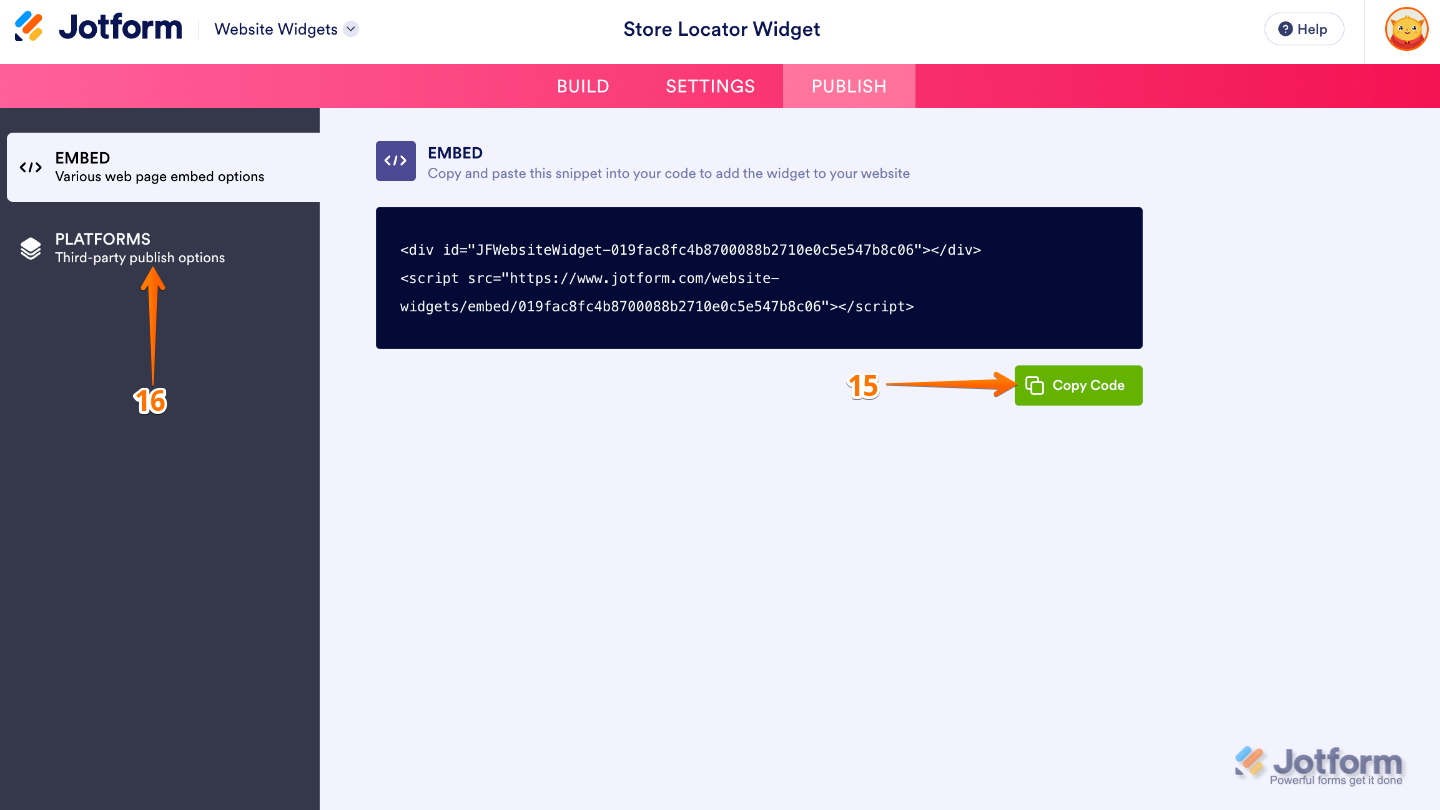
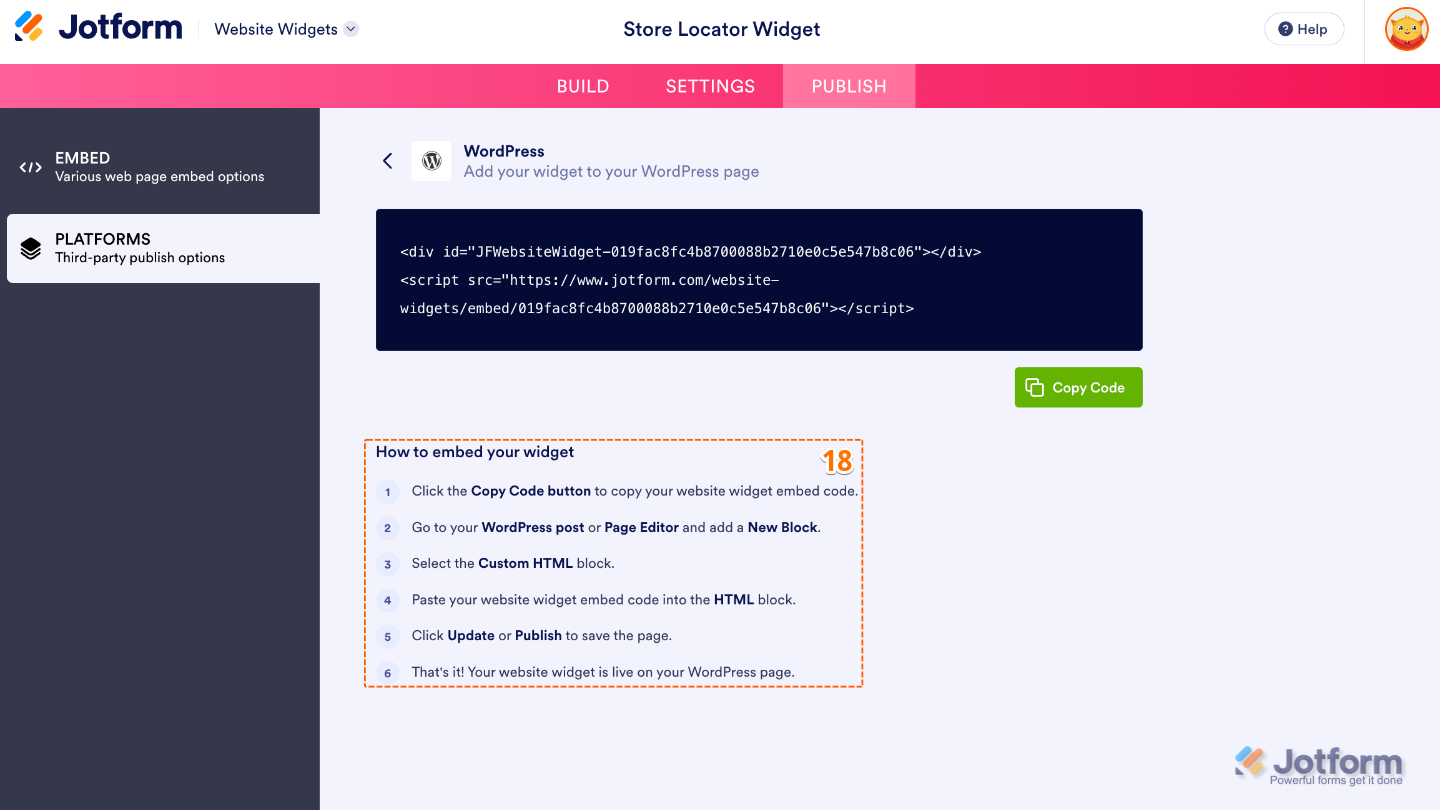
- Then, in the Embed section, click on Copy Code, and, if you already know how, paste that into the Embed section on your platform, and you’re good to go.
- To view embedding instructions for your widget, click on Platforms in the menu on the left side of the page.
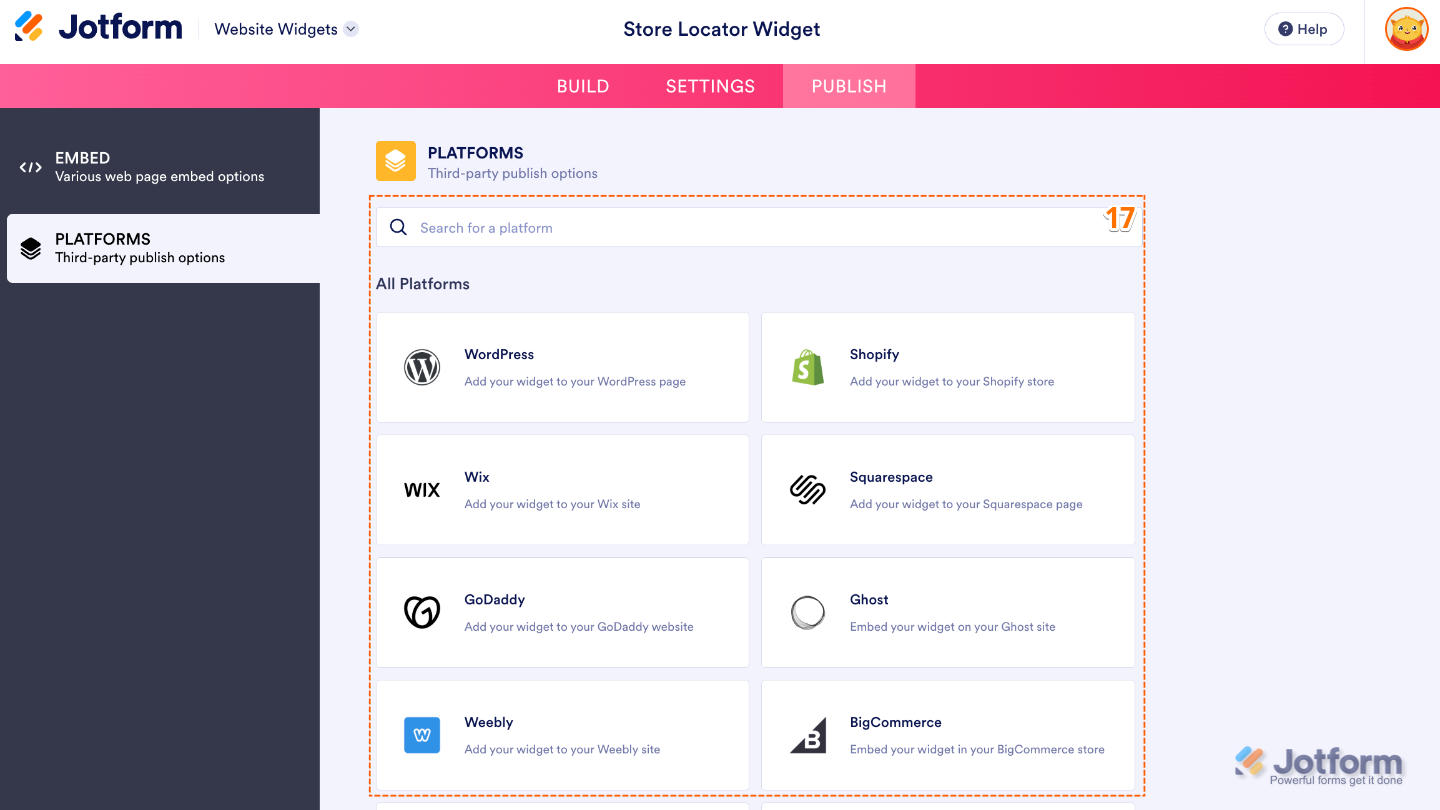
- Next, in the Platforms section on the right, select the platform you want to view embedding instructions for. Or, use the Search bar at the top of the section to find it easily.
- Then, follow the steps in the How to Embed Your Widget section to add it to your website.
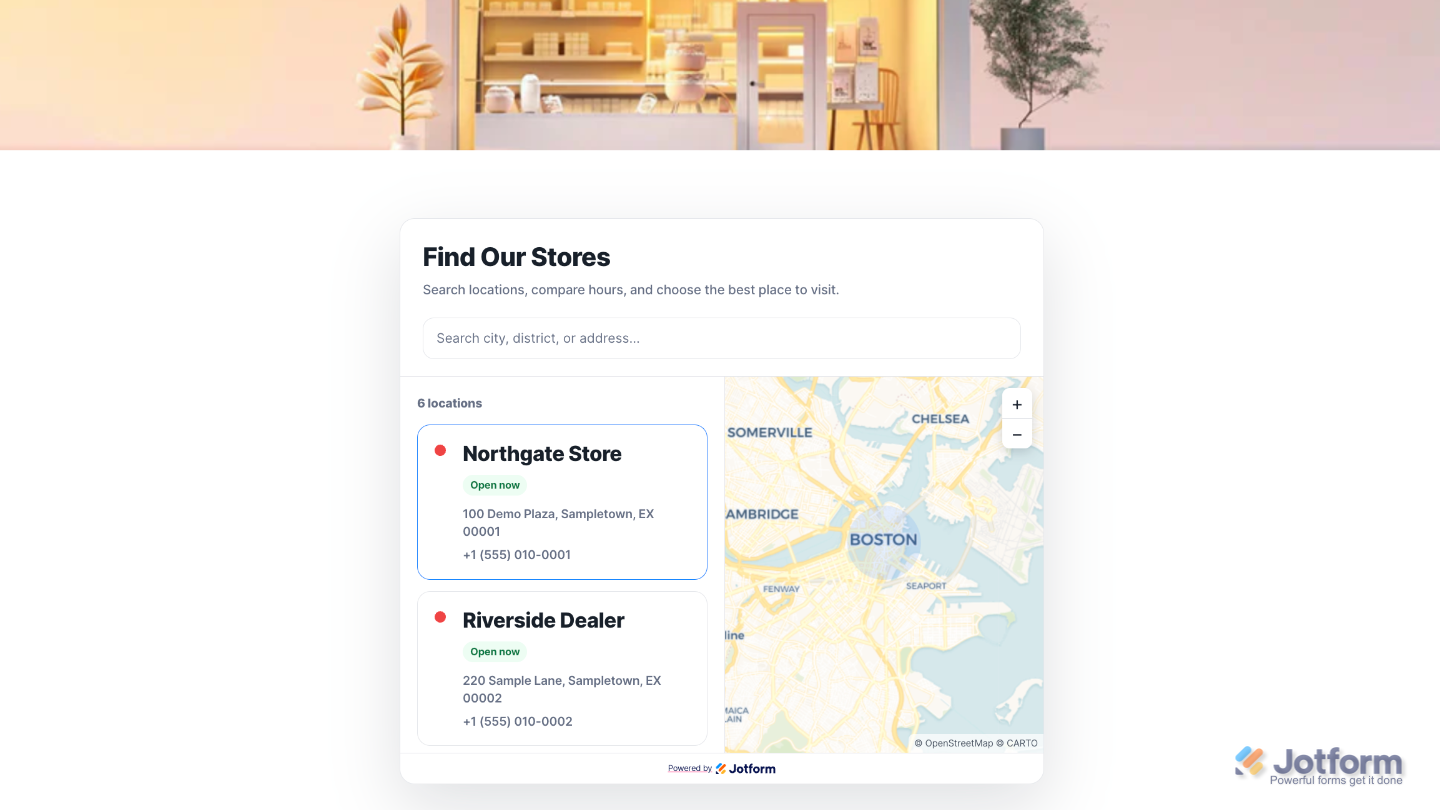
That’s it! Your Store Locator Widget will now appear on your website with the locations, design, and settings you selected, making it easy for visitors to find your stores, offices, or business locations. See the screenshot below for an example of how it looks on a website.
Note
You can manage the website widgets you’ve created at any time from your account. For a full breakdown of how to do it, head over to our guide on How to Manage Website Widgets.
Pro Tips
- Enable the search bar if you have multiple locations so visitors can quickly find the store they’re looking for.
- Choose a map theme and widget style that matches your website’s branding for a more seamless appearance.


Send Comment: