With Jotform’s Instagram Feed widget, you can display your Instagram content directly on your website in just a few steps. Customize the layout to match your site’s design, and then embed the widget to showcase posts, products, customer experiences, or behind-the-scenes content.
It’s a simple way to keep your site fresh, support your brand, and give visitors easy access to your social content without leaving the page.
Note
Before your Instagram posts can appear in the widget, you’ll need to connect a valid Instagram account or source and ensure you have access to the account you’re connecting.
Creating Your Instagram Feed Widget and Getting the Embed Code for It
Before you can add the Instagram Feed Widget to your website, you’ll first need to enter your data, customize how your feed will look, and copy the embed code for it. Here’s a quick walkthrough:
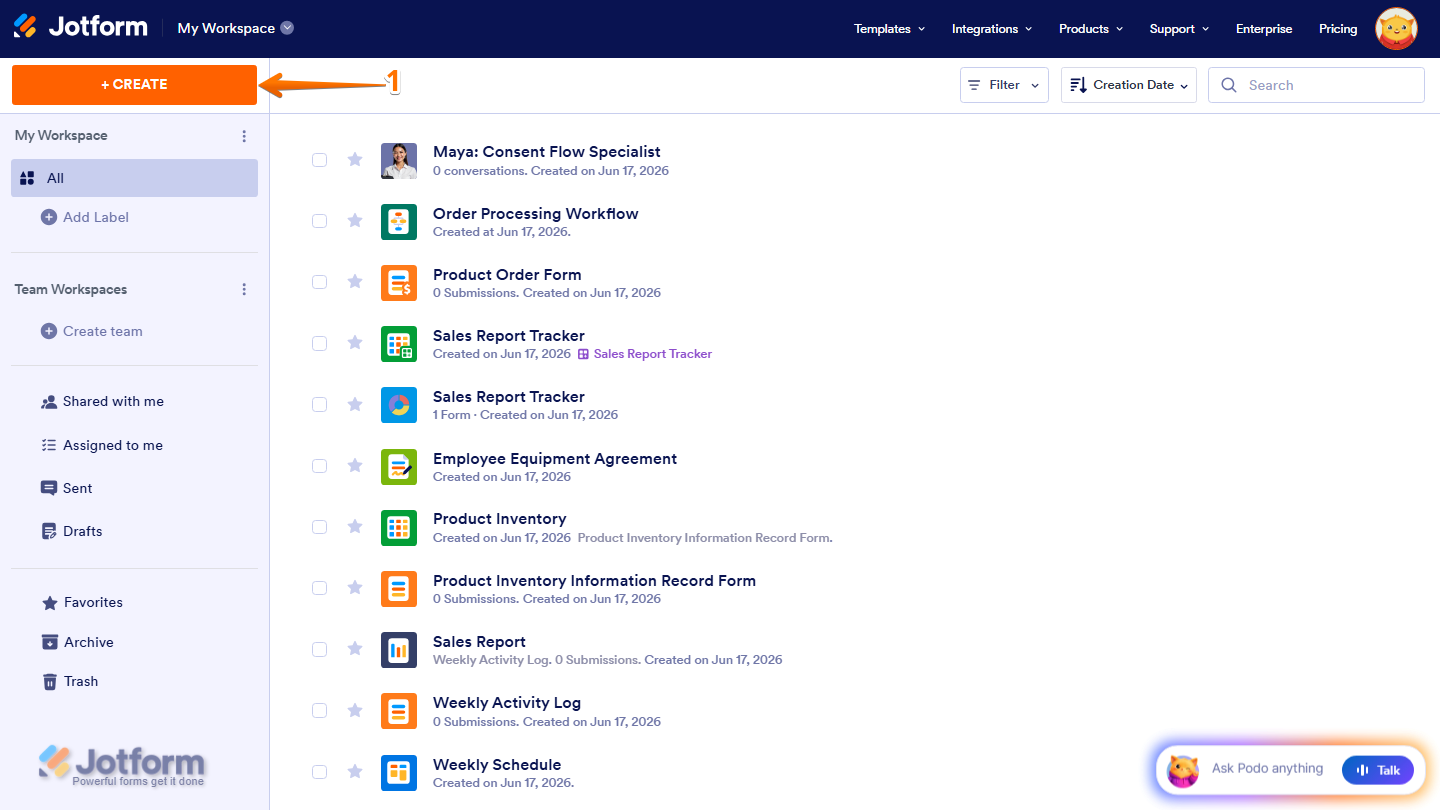
- On the top-left side of your Workspace page, click on Create.
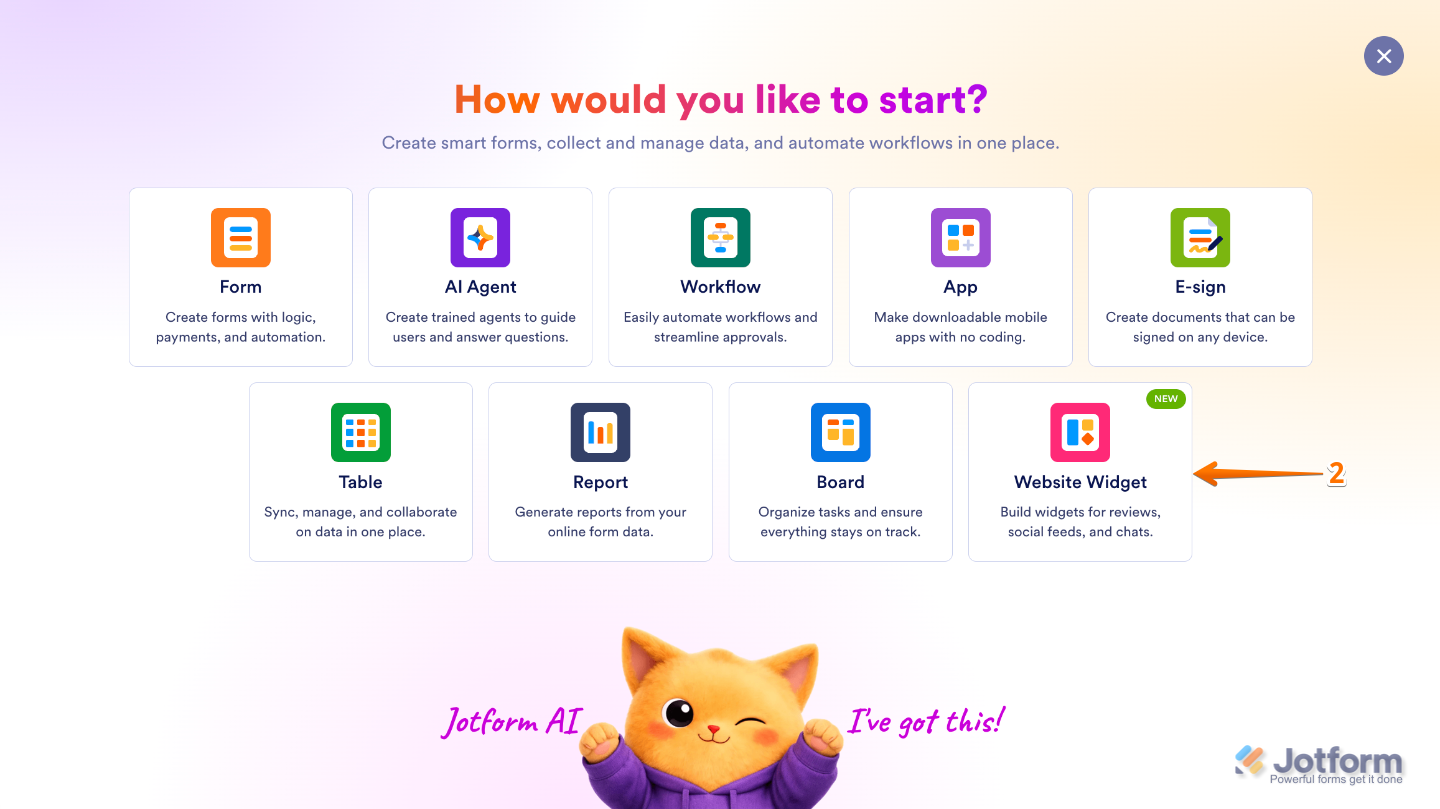
- Then, in the menu that opens up, select Website Widget.
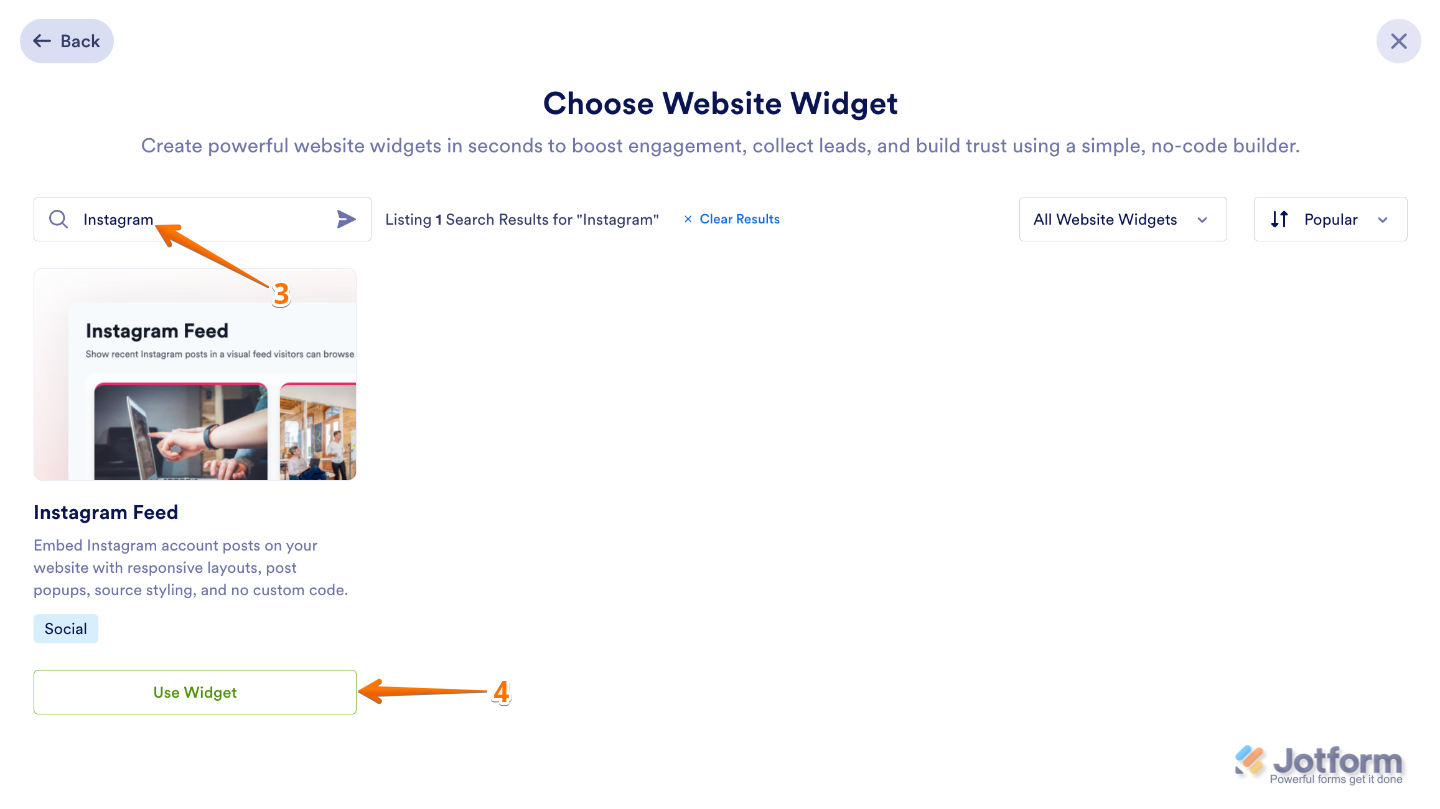
- Next, in the Search bar in the upper-left corner of the Choose Website Widget page, enter Medium Feed.
- Then, at the bottom of the search results, click on Use Widget.
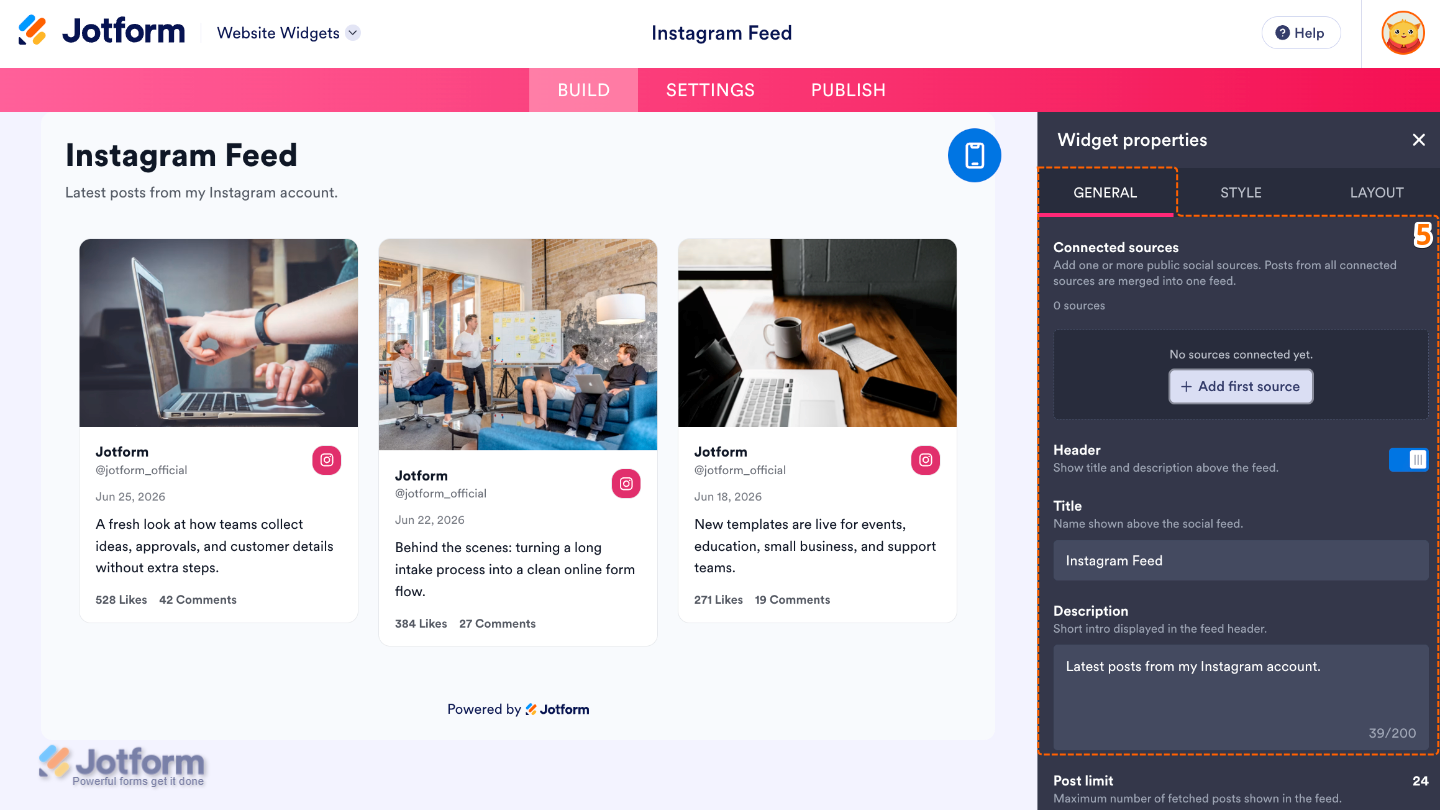
- Now, in the Widget Properties menu that opens on the right side of Website Widgets, set up these properties:
- Connected Sources — Add the URL for the Instagram account or source you want the widget to display
- Header — Toggle this on to show or hide the widget’s header.
- Title — Enter a title to be shown at the top of the widget.
- Description — Add a short description below the title to give context for your Instagram feed.
- Then, scroll down and continue with these settings:
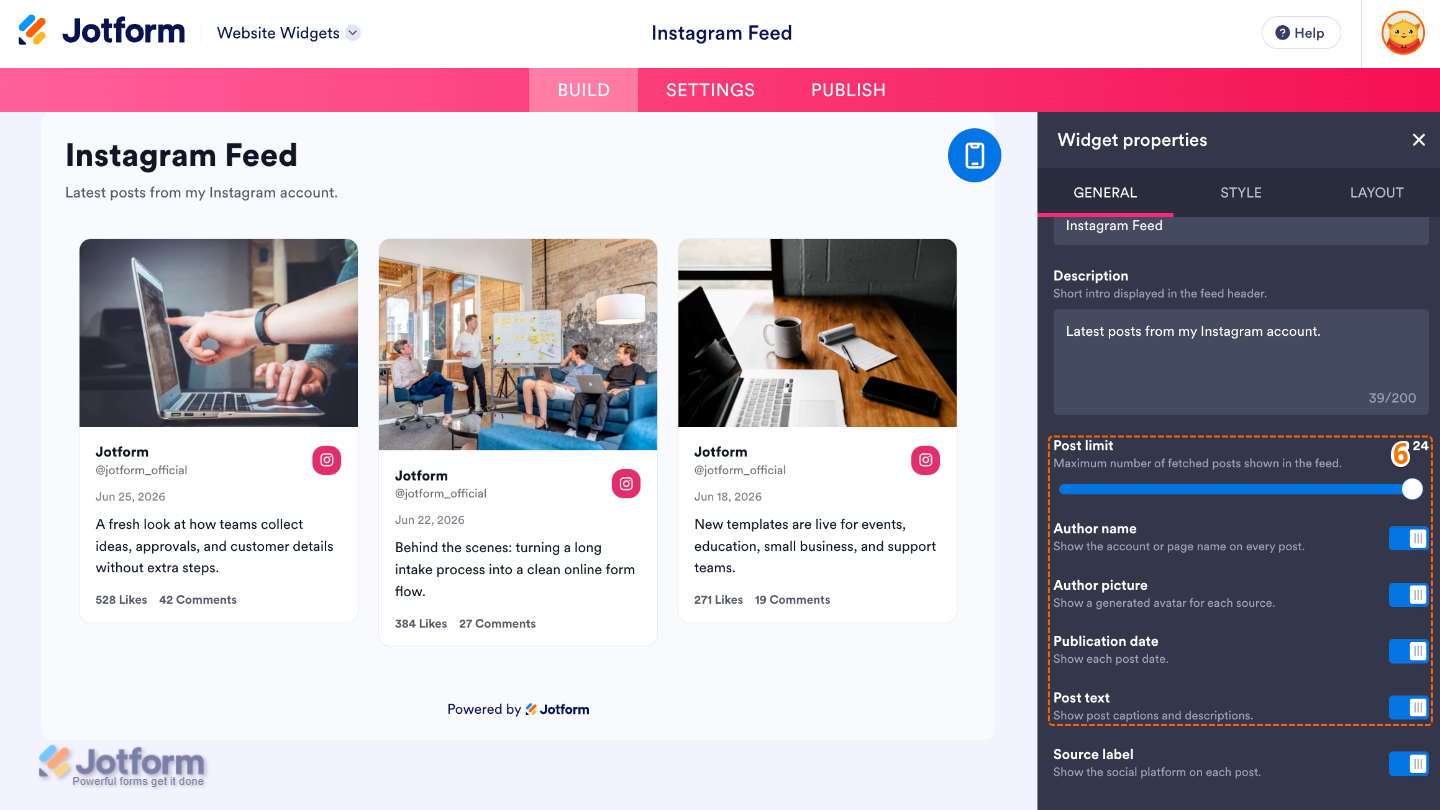
- Post Limit — Set the maximum number of Instagram posts you want to display in the feed.
- Author Name — Show or hide the name of the Instagram account that each post was published from.
- Author Picture — Show or hide the profile picture of the Instagram account.
- Publication Date — Show or hide the date each Instagram post was published on.
- Post Text — Show or hide the caption or text associated with each Instagram post.
- Source Label — Display a label indicating which connected Instagram source each post is from.
- Next, under the Styles tab, customize these properties:
- Theme — Choose the overall visual theme for the Instagram feed to match the look and feel of your website.
- Corner Radius — Adjust how rounded the corners of the post cards appear. A higher value creates more rounded corners.
- Post Style — Select how each Instagram post card will look.
- Action on Post Click — Choose what happens when a visitor clicks on a post, such as opening it in a popup or redirecting them to Instagram.
- External Links — Show or hide links that redirect visitors to Instagram.

- Then, continue scrolling and adjust these options:
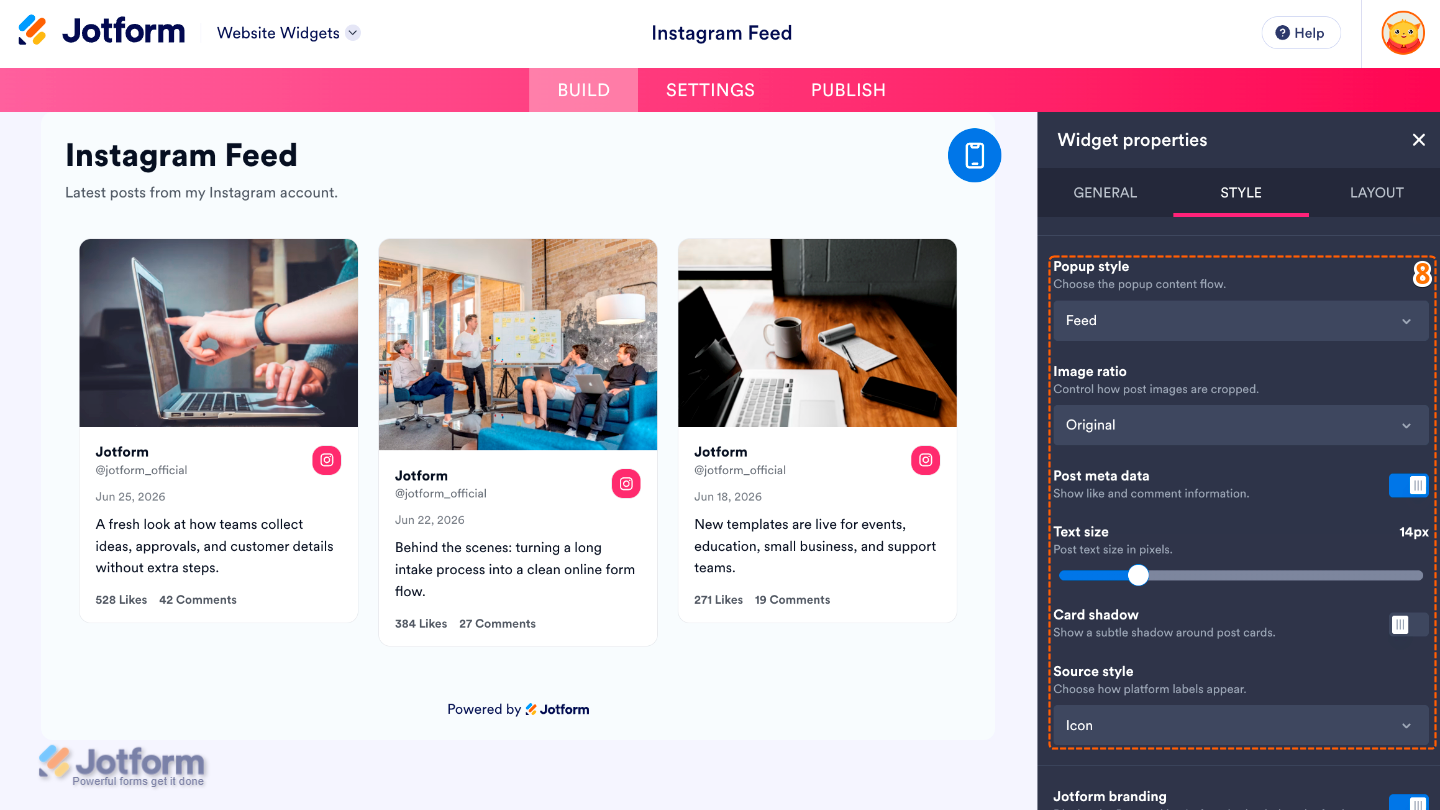
- Popup Style — Customize the appearance of the popup displayed when visitors open a post.
- Image Ratio — Adjust how images are cropped or displayed within each post.
- Post Meta Data — Choose which additional information about each Instagram post, such as the post date or other details, you want to display.
- Text Size — Adjust the size of the text displayed in the Instagram feed to make it easier to read and match your website’s design.
- Card Shadow — Add or adjust the shadow around each post card to give the feed more depth.
- Source Style — Customize how the connected Instagram source information is displayed.
- Next, scroll down and adjust these settings:
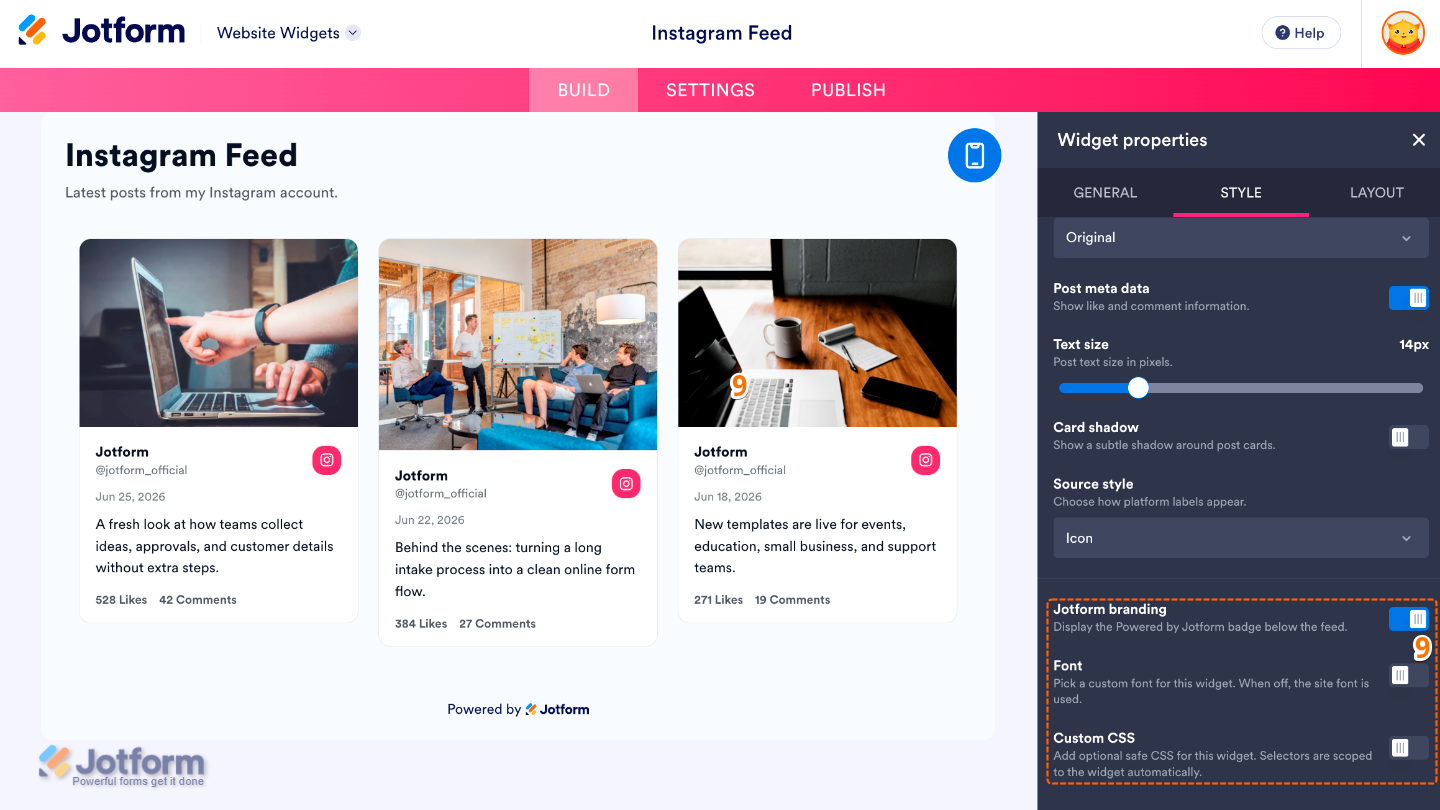
- Jotform Branding — Show or hide Jotform branding on the widget, depending on your plan and preferences.
- Font — Choose the font used for the text displayed in the Instagram feed.
- Custom CSS — Add your own CSS code to further customize the appearance of the Instagram feed beyond the available settings.
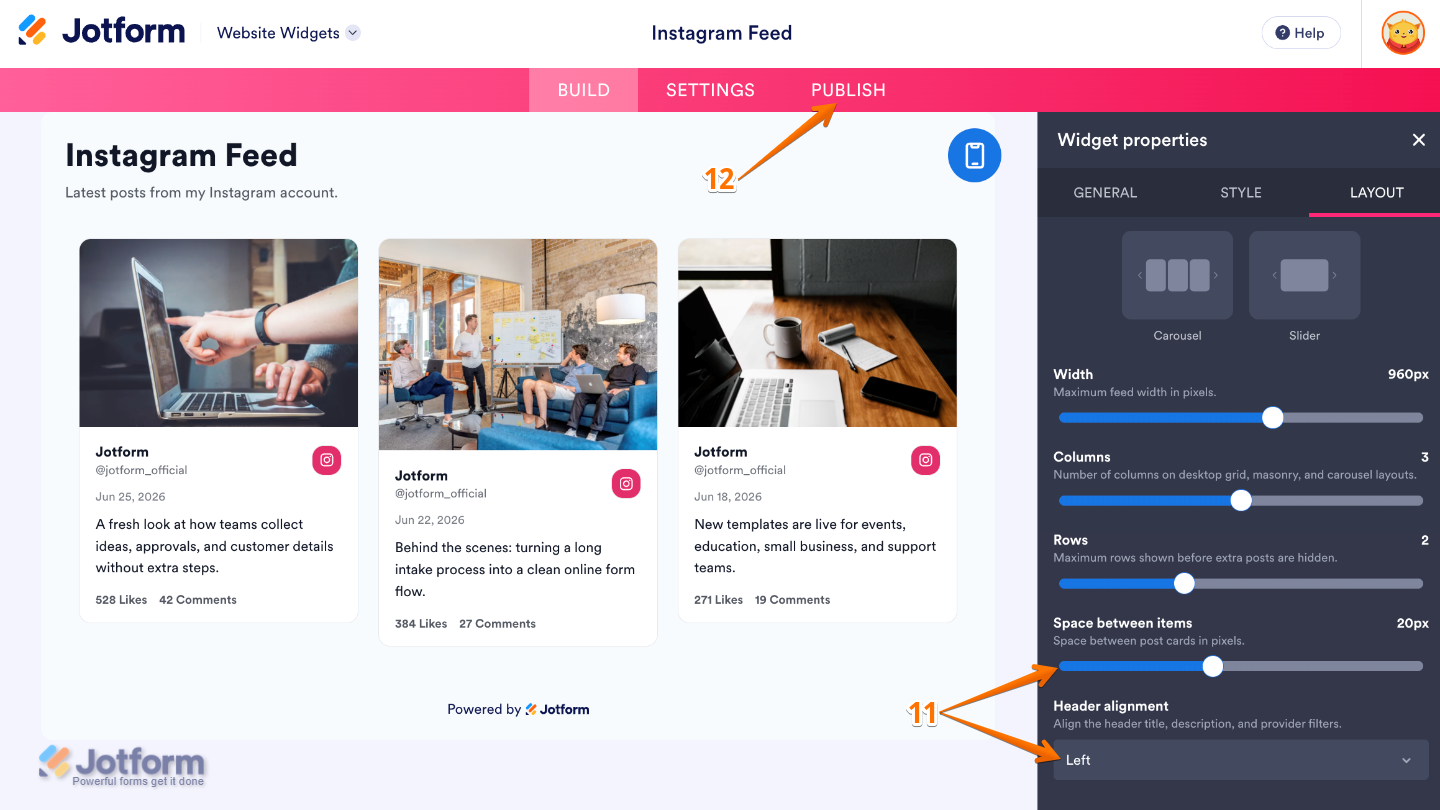
- Then, under the Layout tab, configure these properties:
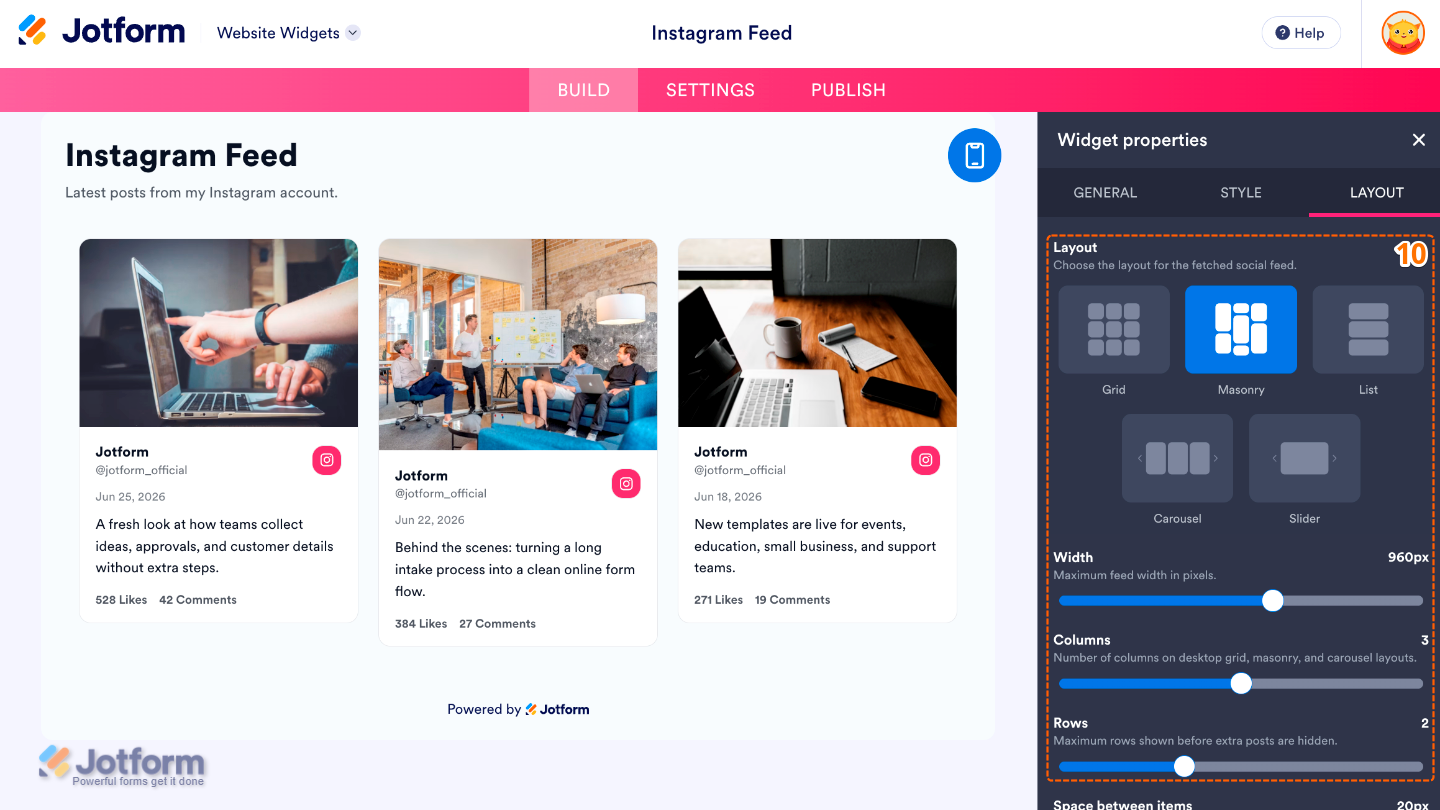
- Layout — Choose how your Instagram posts are arranged, such as in a grid, masonry, carousel, or another supported layout.
- Width — Adjust the overall width of the widget to fit your website’s layout.
- Columns — Choose how many columns of Instagram posts are displayed at once. More columns allow more posts to be shown side by side.
- Rows — Set the number of rows displayed in the widget, controlling how many posts are shown vertically.
- Next, scroll down and adjust these settings:
- Space Between Items — Adjust the amount of space between the posts in your Instagram feed.
- Header Alignment — Choose how the Instagram feed’s header is aligned within the widget.
- Once you’ve finished configuring the widget, in the pink navigation bar at the top of the page, click on Publish.
Note
You’ll be asked to log in to your Jotform account, if you’re not already, or sign up for one. Once you’ve done that, you’ll be able to get the embed code for your widget.
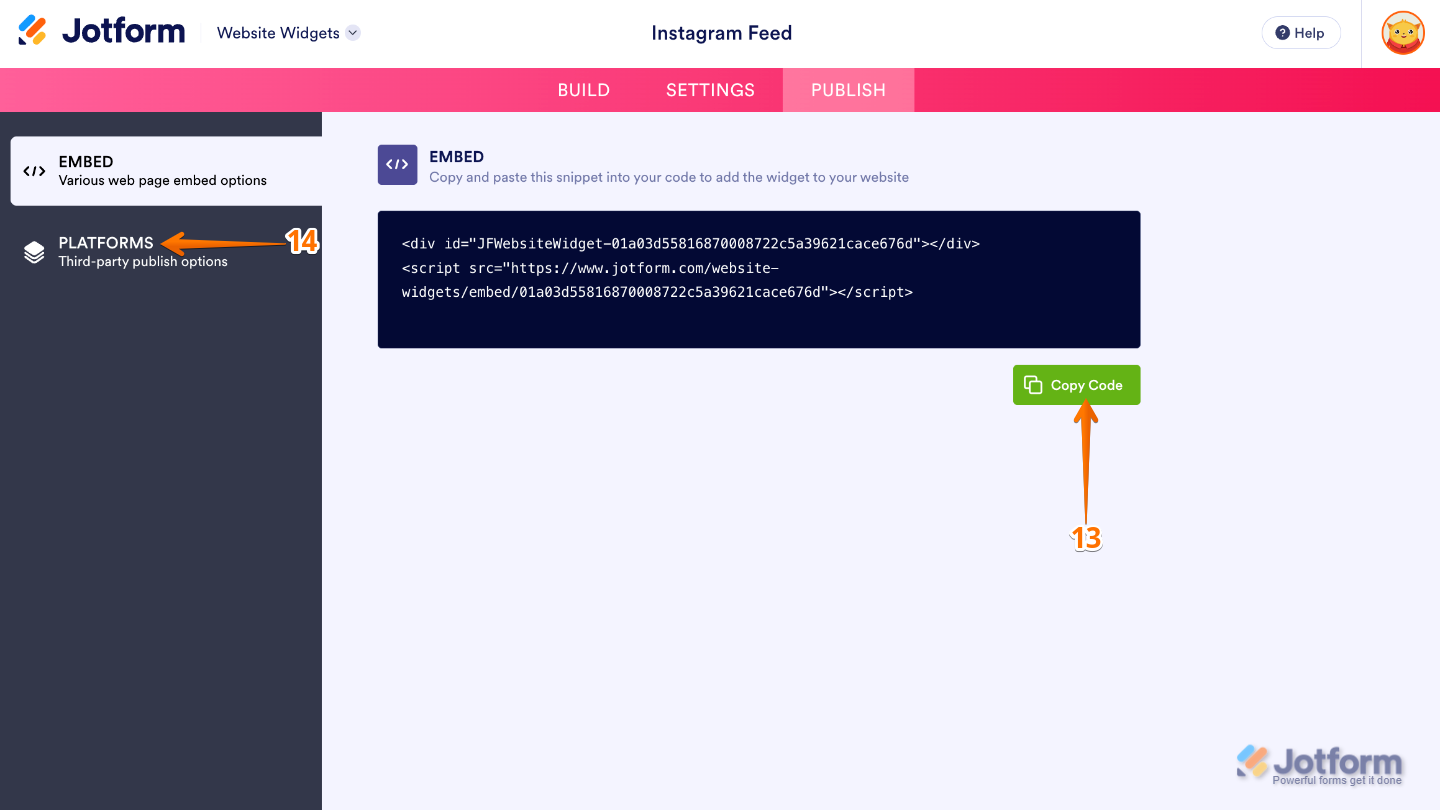
- Then, in the Embed section, click on Copy Code, and, if you already know how, paste that into the Embed section on your platform, and you’re good to go.
- To view embedding instructions for your widget, click on Platforms in the menu on the left side of the page.
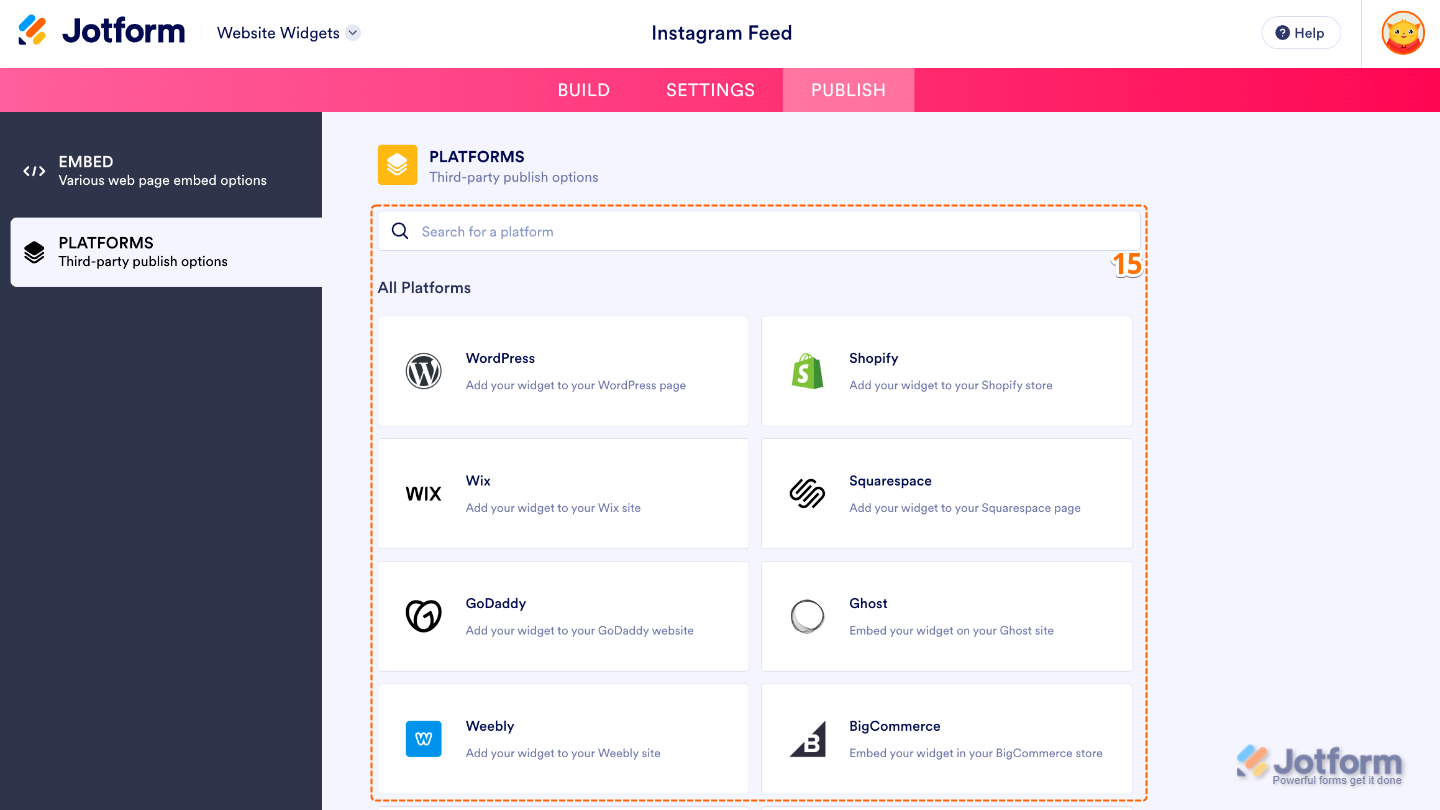
- Next, in the Platforms section on the right, select the platform you want to view embedding instructions for. Or, use the Search bar at the top of the section to find it easily.
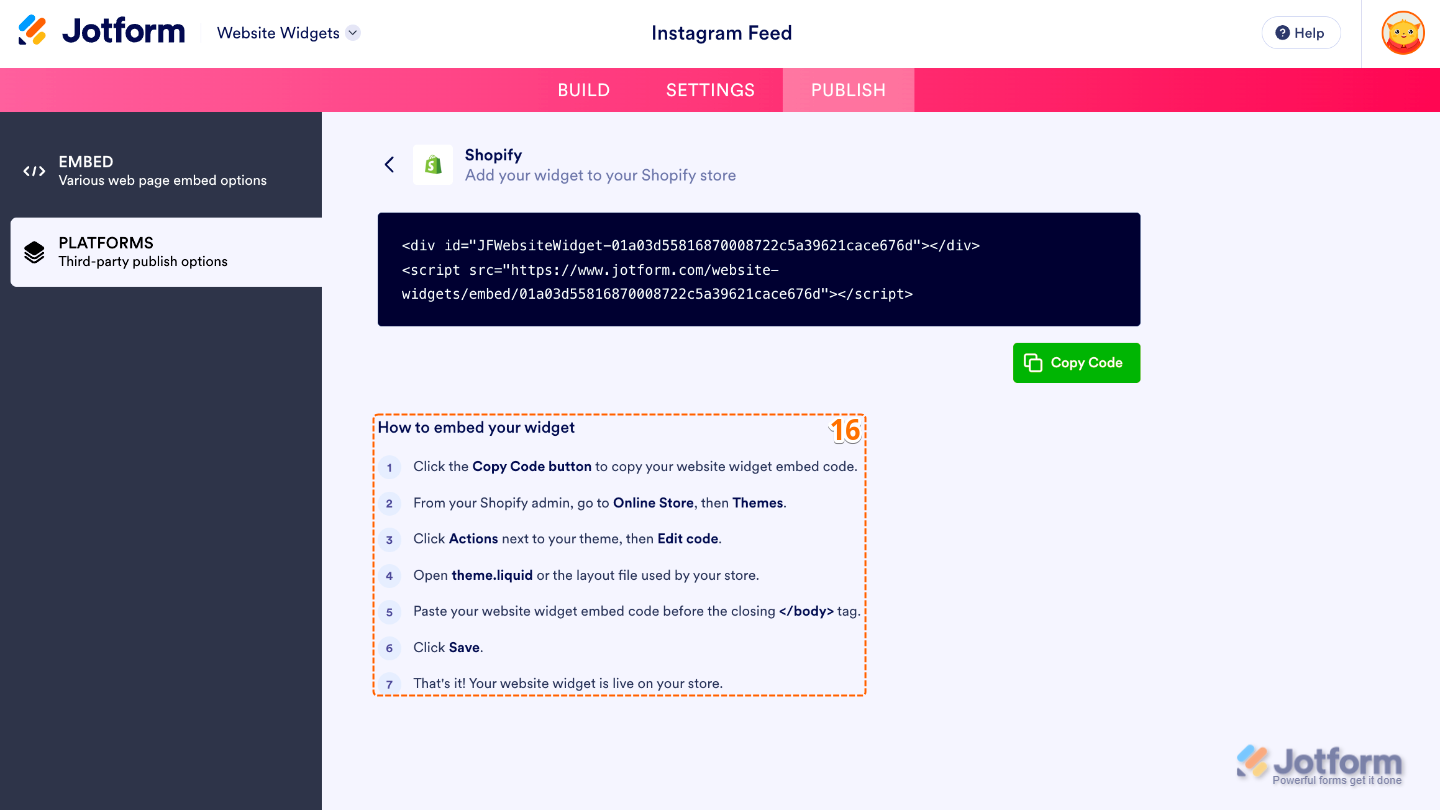
- Then, follow the steps in the How to Embed Your Widget section to add it to your website.
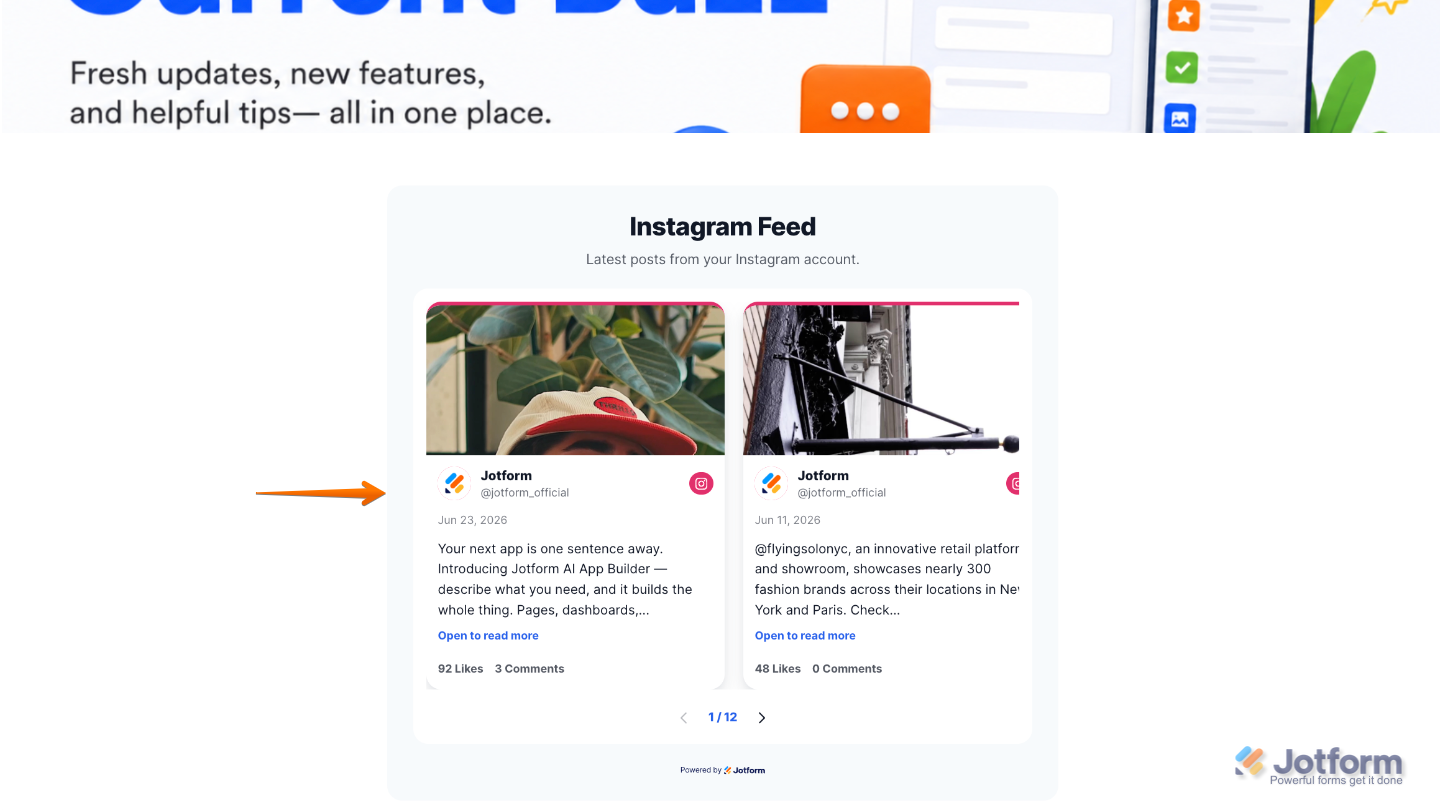
That’s it! Your Instagram Feed widget will appear on your website with the design and settings you selected for it. See the screenshot below for an example of how it’ll look:
Note
You can manage the website widgets you’ve created at any time from your account. For a full breakdown of how to do it, head over to our guide on How to Manage Website Widgets.
Pro Tips
- Display your Instagram Feed Widget on your homepage, About page, or product pages to keep your website fresh with your latest social media content.
- Choose a layout that best fits your content. For example, a grid works well for showcasing photos, while a carousel is ideal if you want to save space.




Send Comment: