Showcasing the companies, organizations, or brands you work with is a great way to build trust and reinforce your credibility with visitors. Whether you’re highlighting clients, partners, sponsors, or media features, displaying their logos on your website helps create a stronger first impression and demonstrates your experience at a glance.
With the Logo Showcase widget, it’s easy to create a professional logo gallery without any coding experience. Jotform lets you display logos in a grid, carousel, or scrolling ticker, customize the spacing and appearance, and seamlessly match the widget to your website’s overall design.
Creating and Getting the Embed Code of Your Logo Showcase Widget
To embed a logo showcase on your website, you’ll first need to configure the widget and copy its embed code. Here’s how to get started:
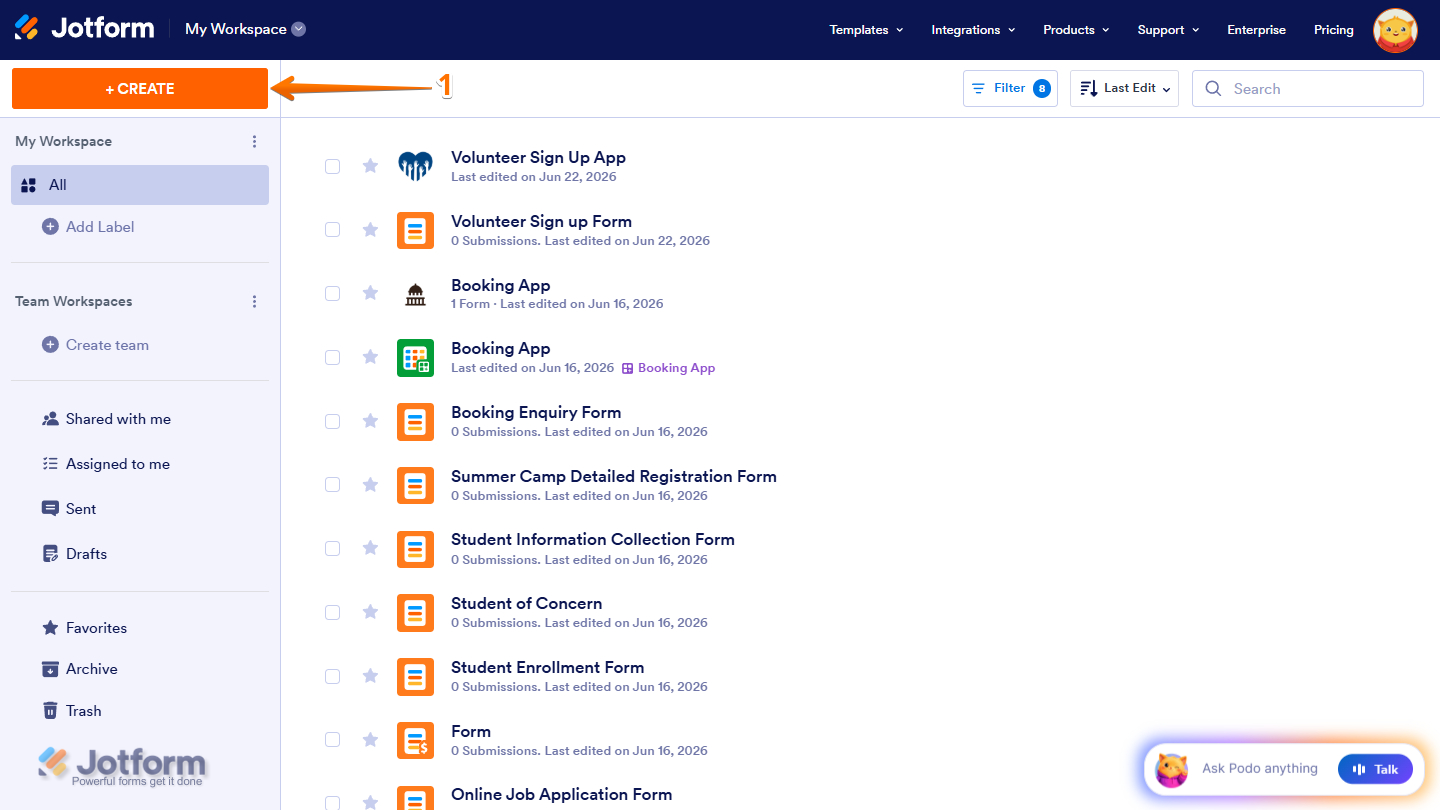
- On your Workspace page, click on Create on the top-left side of the page.
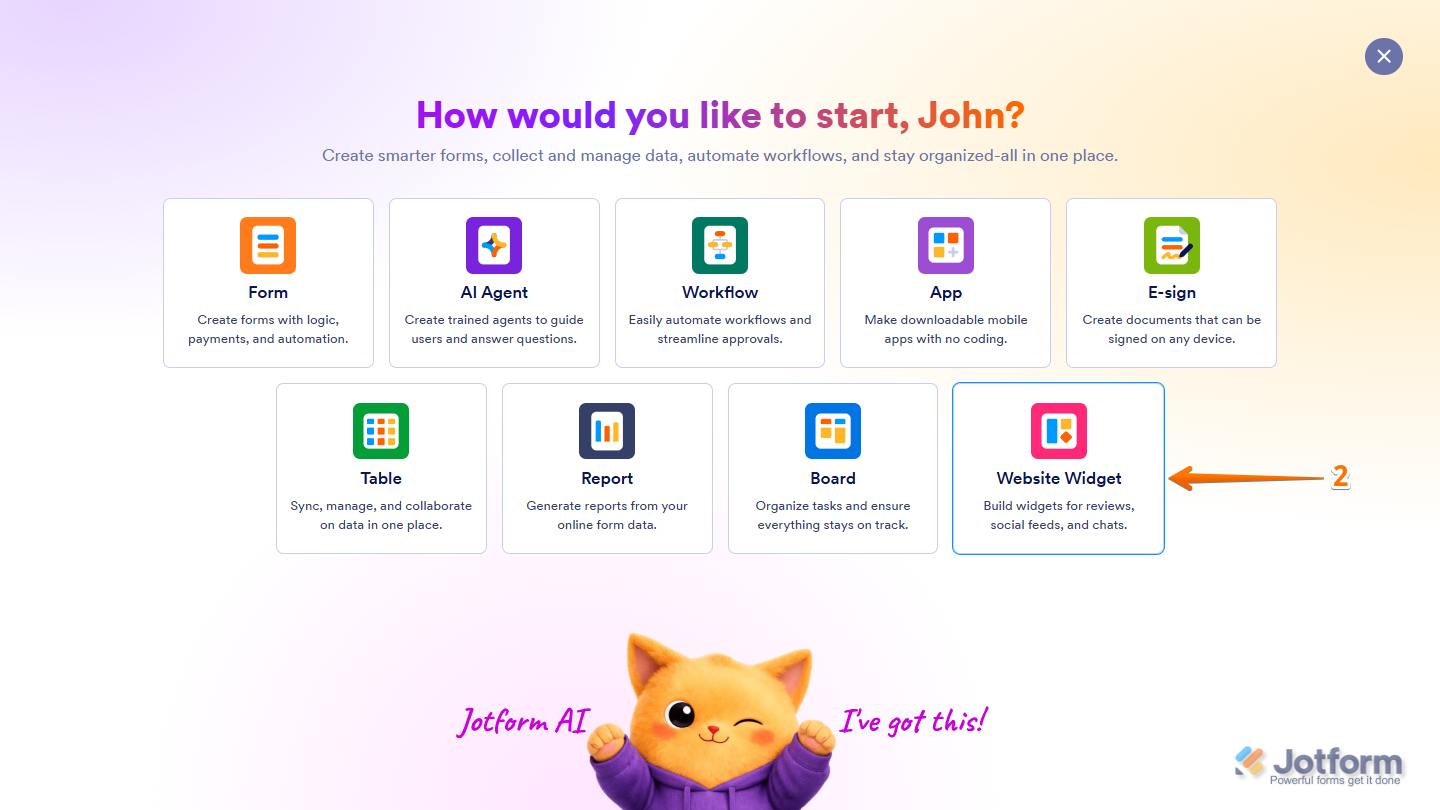
- Then, in the window that opens up, select Website Widget from the assets.
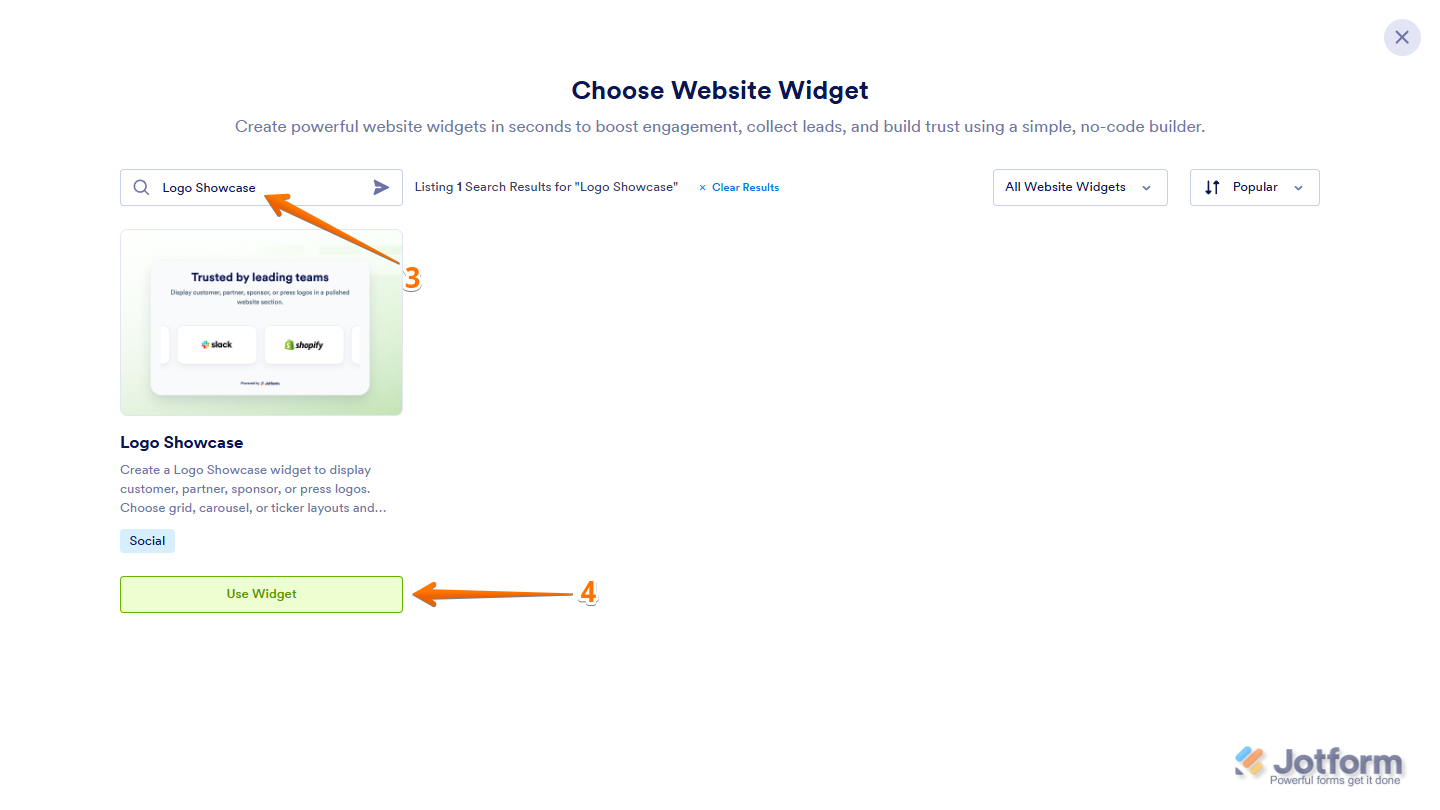
- Next, in the Search bar at the top of the Choose Website Widget page, search for the Logo Showcase.
- Now, in the search results, click on Use Widget.
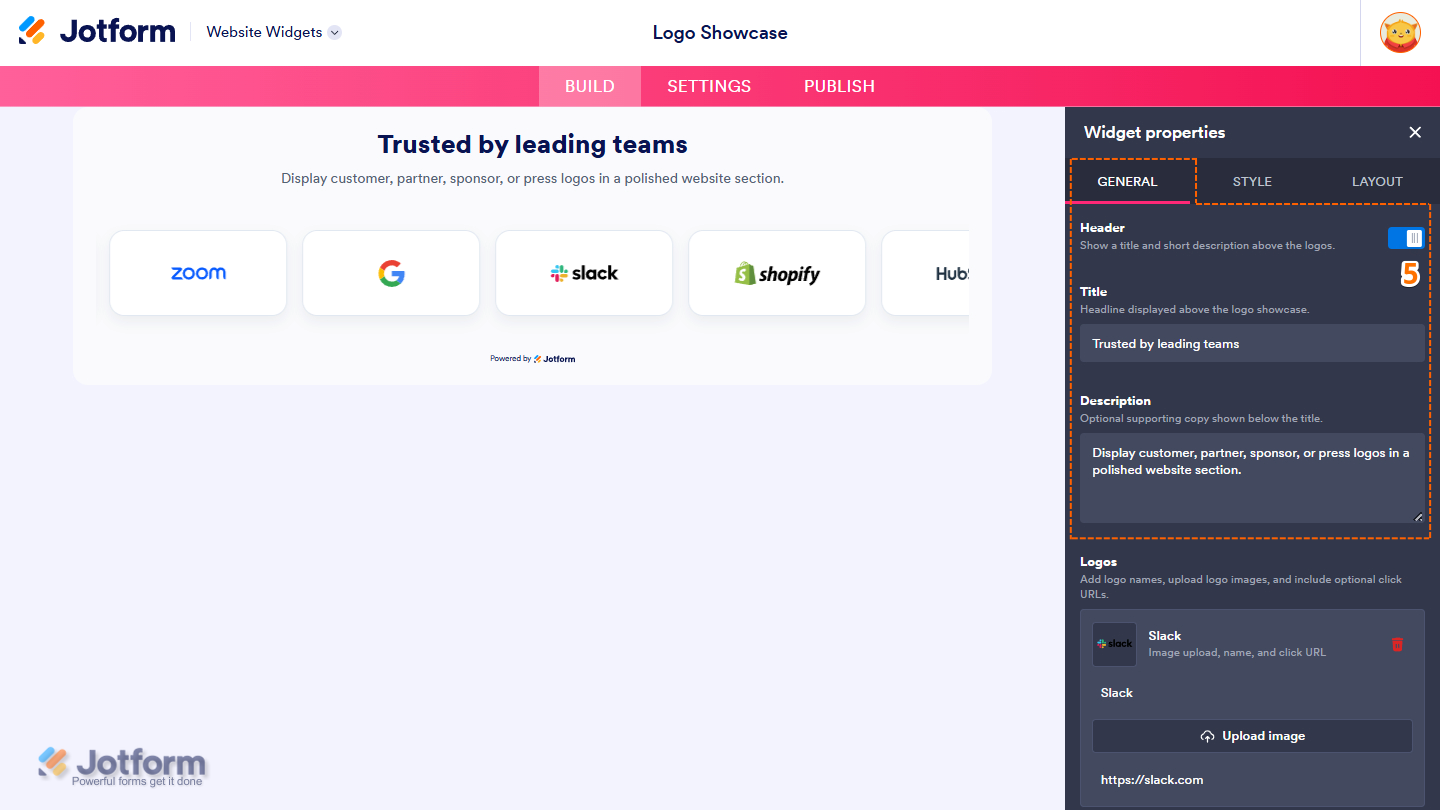
- Once the widget opens, in the Widget Properties menu that opens automatically on the right side of the Website Widgets, under the General tab, set up these things:
- Header — Show or hide a title and short description above the logo showcase.
- Title — Enter the heading displayed above the logos.
- Description — Add optional supporting text displayed below the title.
- Header — Show or hide a title and short description above the logo showcase.
- Then, scroll down to the Logos section and then click on the Add Logo button.
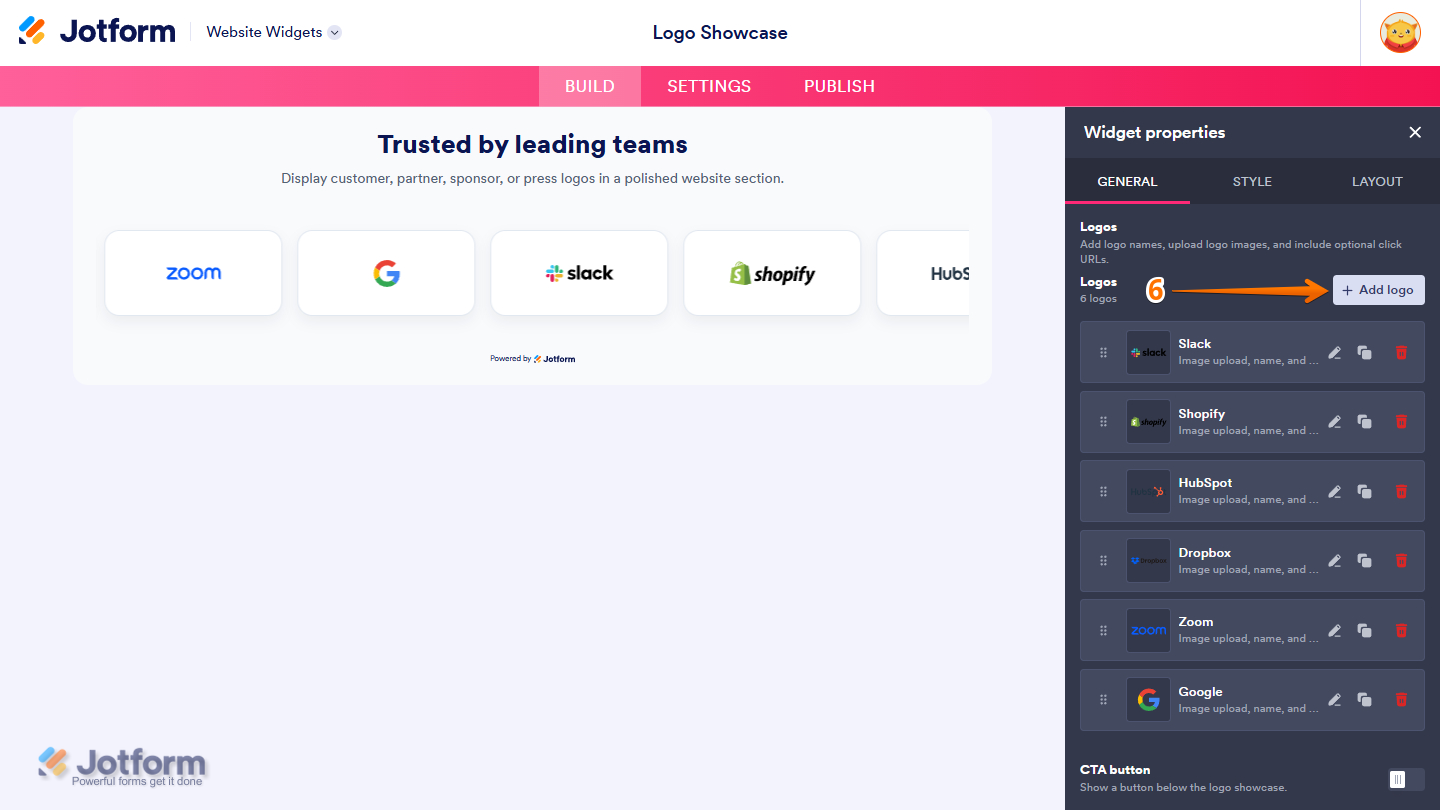
- Next, on the Add Logo menu on the right, set up the following:
- Logo Name — Enter a name for the logo.
- Upload Image or Image URL — Upload a logo image or enter the URL of an online image.
- Logo URL — Enter the website or page to which users will be redirected when they click the logo.
- Now, click on Save Logo at the bottom to save and add the new logo.
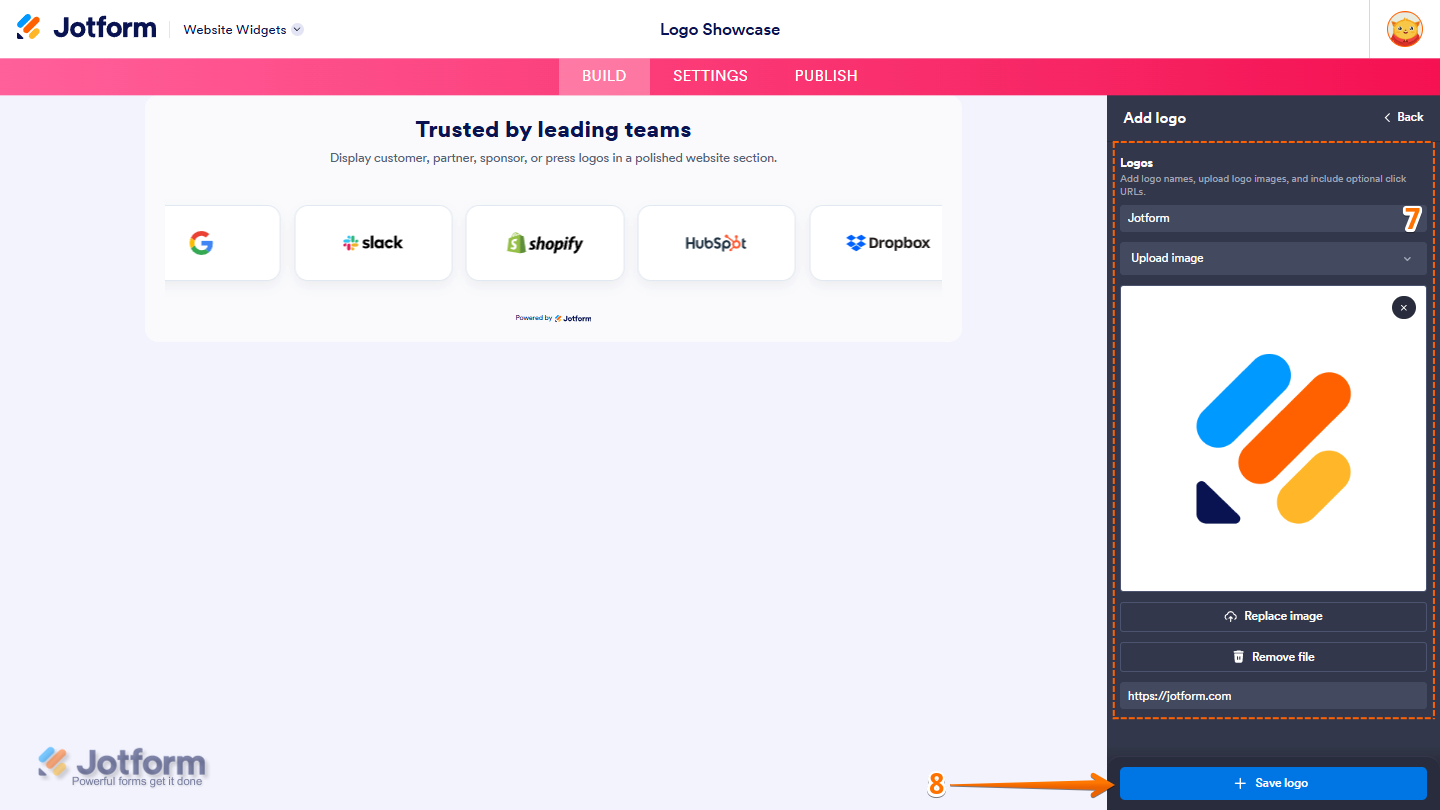
- After that, scroll down to the bottom and then complete these options:
- CTA Button — Toggle this on to display a call-to-action button below the logo showcase.
- Button Text — Enter the text displayed on the button.
- Button URL — Enter the URL to which users are redirected when they click the button.
- Logo Names — Show or hide logo names when a logo image is not available.
- CTA Button — Toggle this on to display a call-to-action button below the logo showcase.
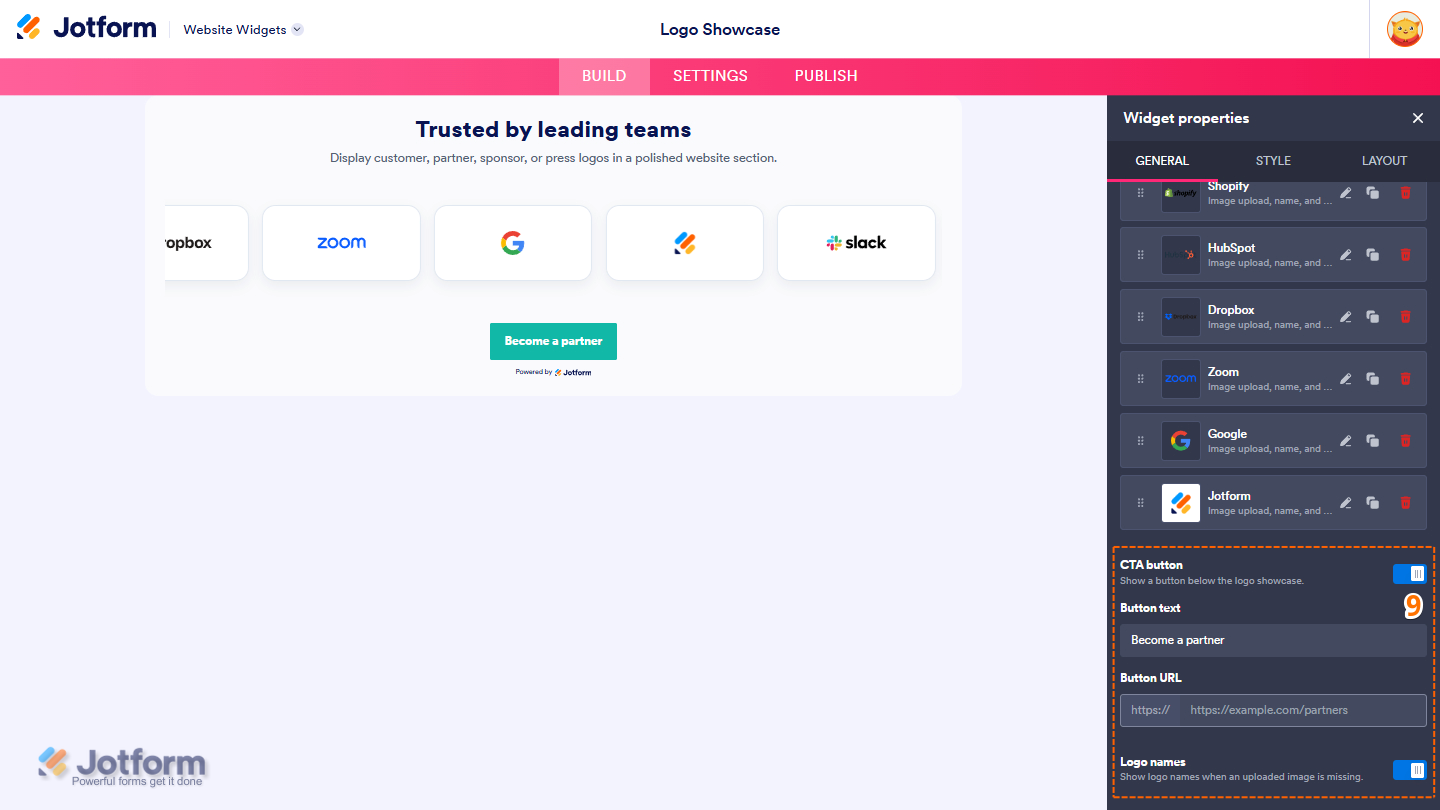
- Then, in the Style tab, personalize the appearance of your logo showcase with these options:
- Content Width — Select whether to display the logo showcase at the content width or the full width of the page.
- Content Max Width — Set the maximum width of the logo showcase when using the Content Width layout.
- Left-Right Padding — Adjust the horizontal spacing inside the widget.
- Top-Bottom Padding — Adjust the vertical spacing inside the widget.
- Logo Style — Select the visual style applied to each logo.
- Hover Effect — Choose how logos respond when visitors hover over them.
- Start Grayscale — Display logo images in grayscale until visitors hover over them.
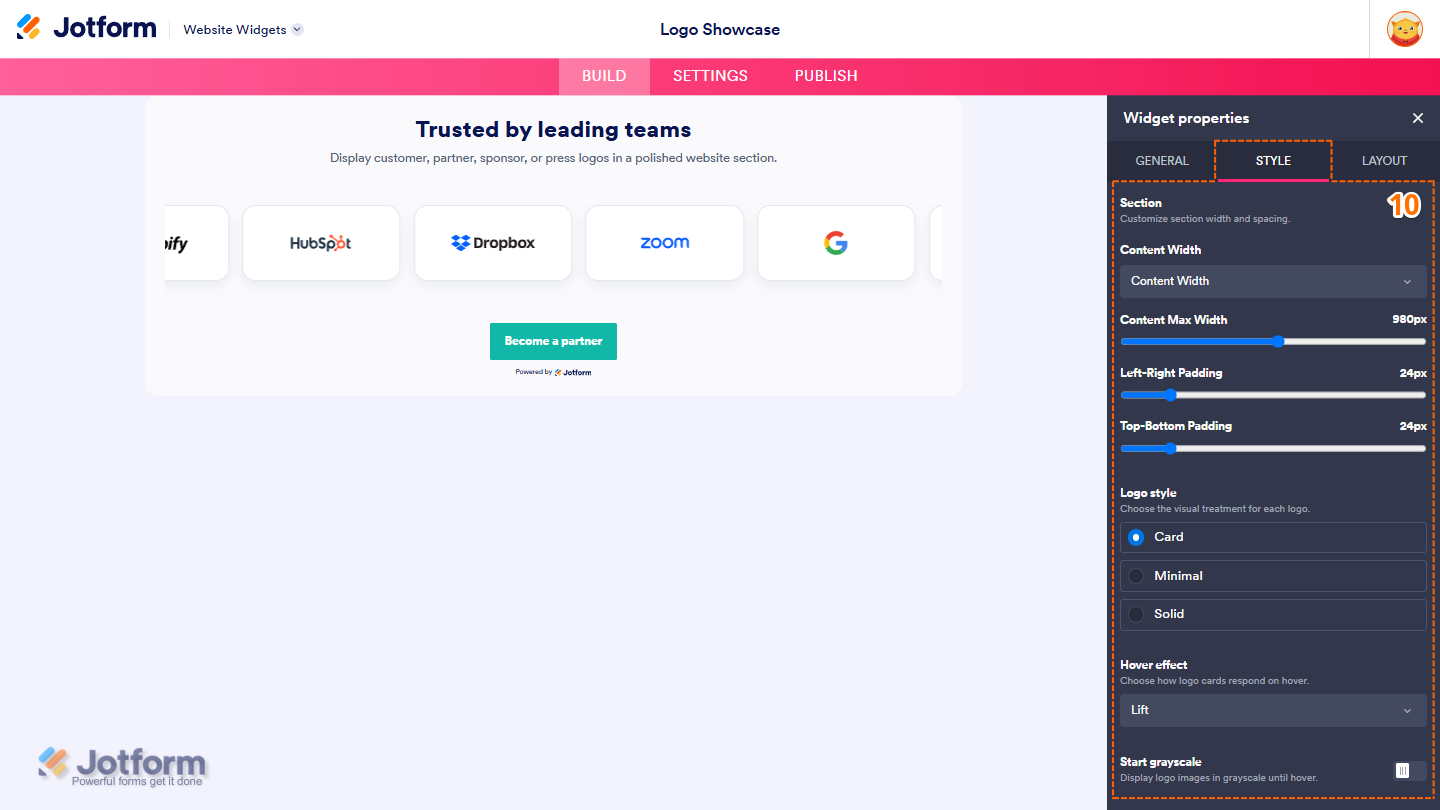
- Next, continue scrolling and set up these options:
- Corner Radius — Adjust the rounded corners of the widget and logo cards.
- Card Shadow — Add a subtle shadow beneath each logo card.
- Surface Colors — Customize the widget’s overall colors.
- Background Color — Set the widget background color.
- Title — Set the title text color.
- Text — Set the description text color.
- Logo Card Colors — Customize the appearance of the logo cards.
- Card — Set the logo card background color.
- Border — Set the logo card border color.
- Button Colors — Customize the optional CTA button.
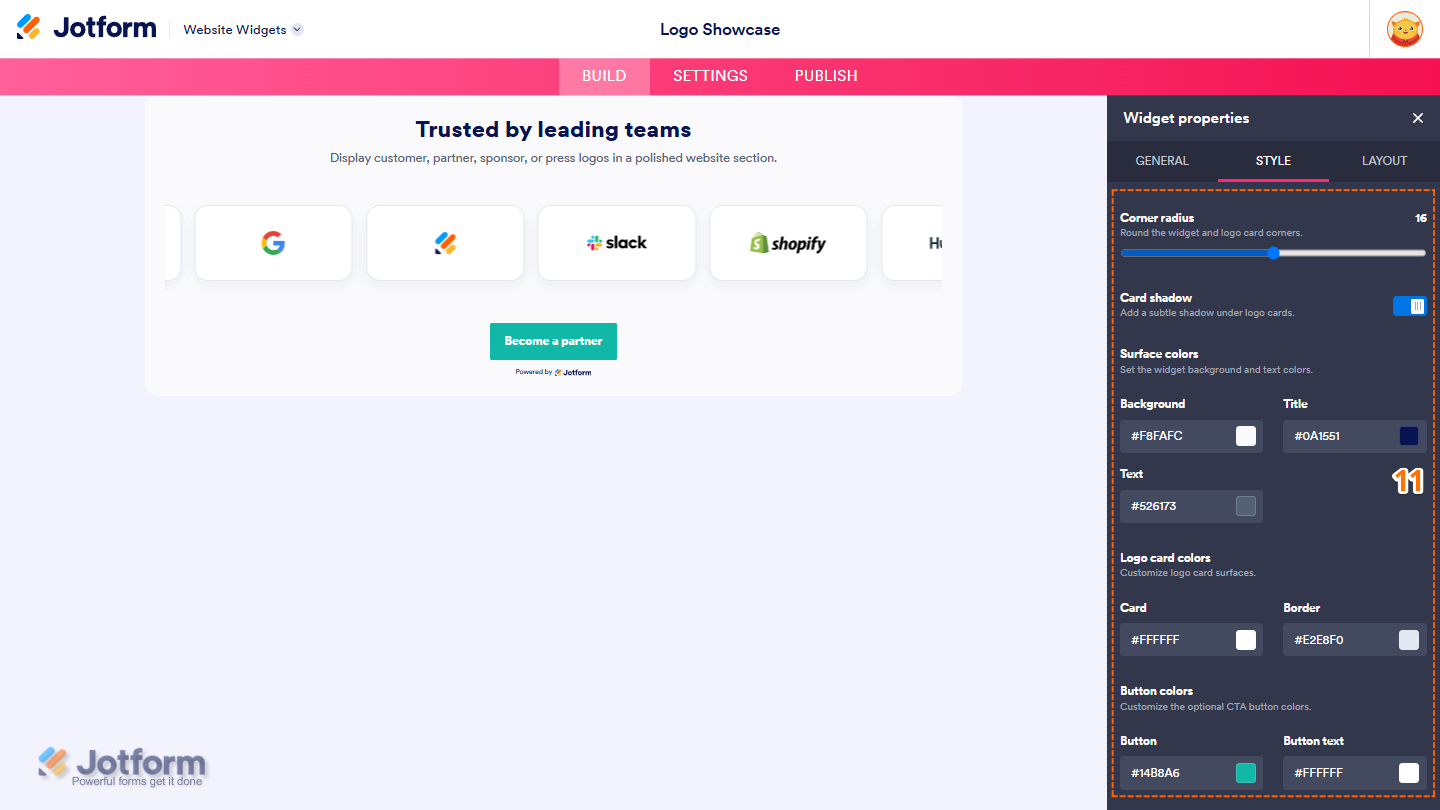
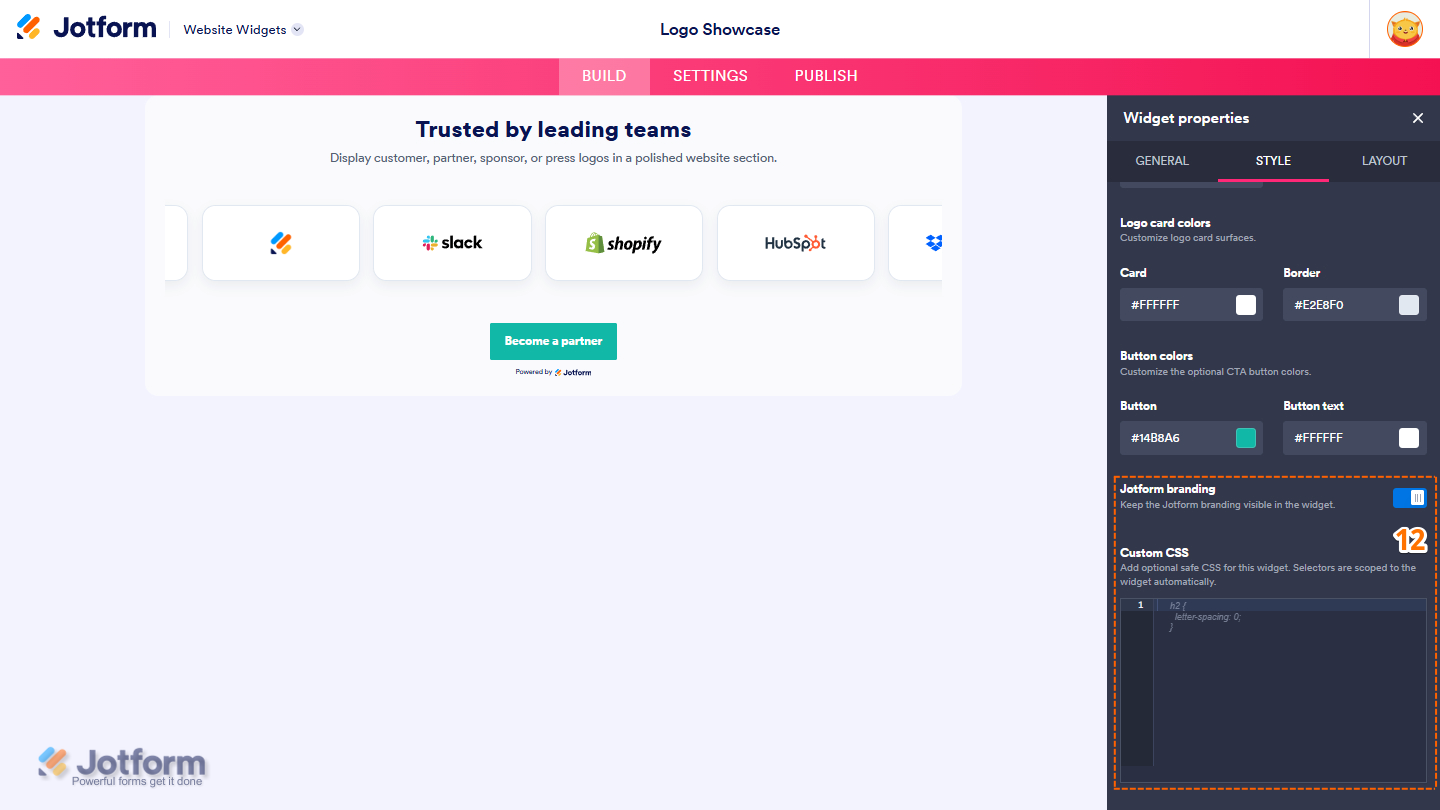
- Now, scroll down to the bottom and then complete these options:
- Jotform Branding — Show or hide the Jotform branding displayed on the widget.
- Custom CSS — Add custom CSS to further customize the widget’s appearance.
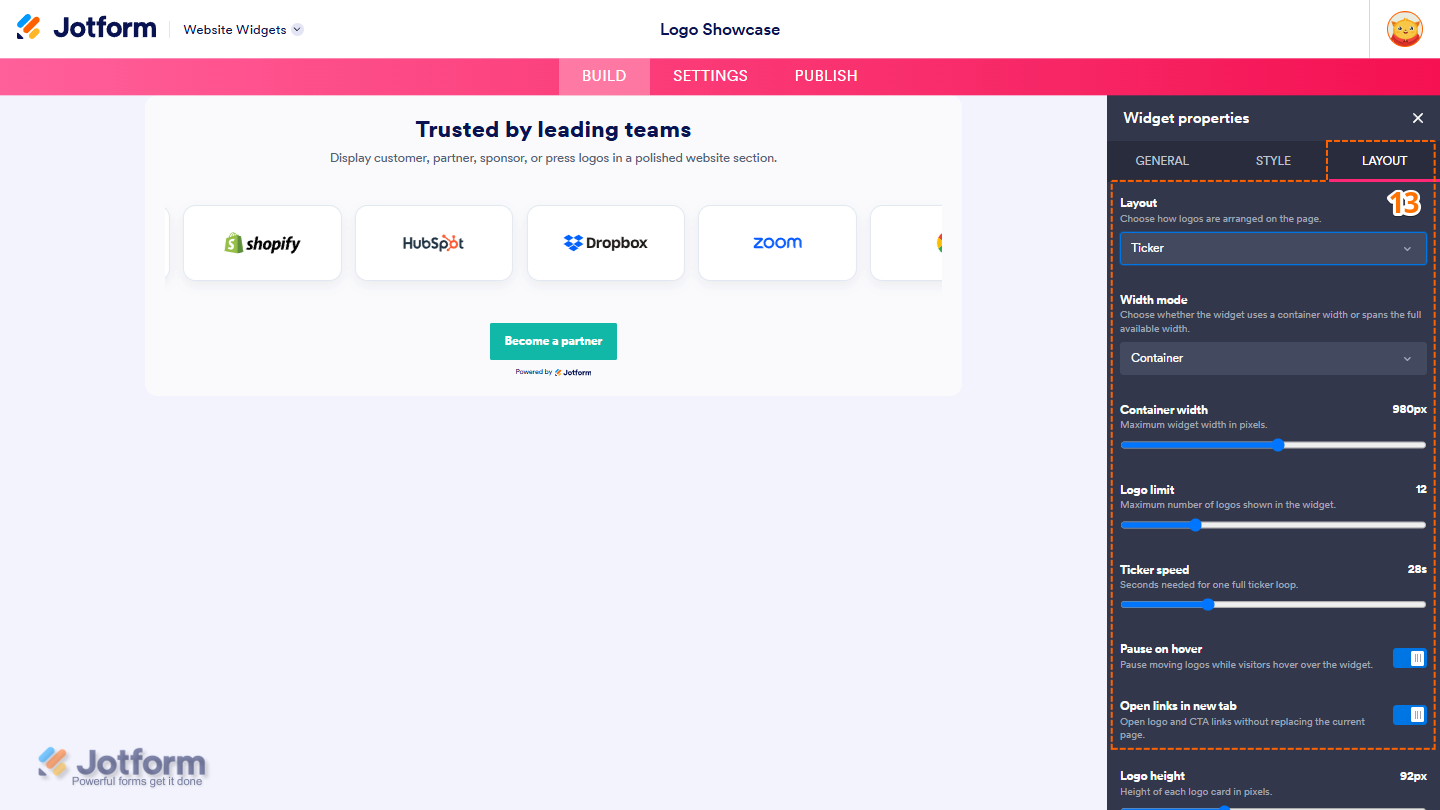
- Next, under the Layout tab, adjust these layout settings:
- Layout — Select how logos are displayed on the page: Ticker, Grid, or Carousel.
- Width Mode — Select whether the widget uses a container width or spans the full available width.
- Container Width — Set the maximum width of the widget in pixels.
- Logo Limit — Set the maximum number of logos displayed in the widget.
- Ticker Speed — Set the number of seconds it takes for the ticker to complete one full loop.
- Pause on Hover — Pause the scrolling animation when visitors hover over the widget.
- Open Links in New Tab — Open logo and CTA links in a new browser tab.
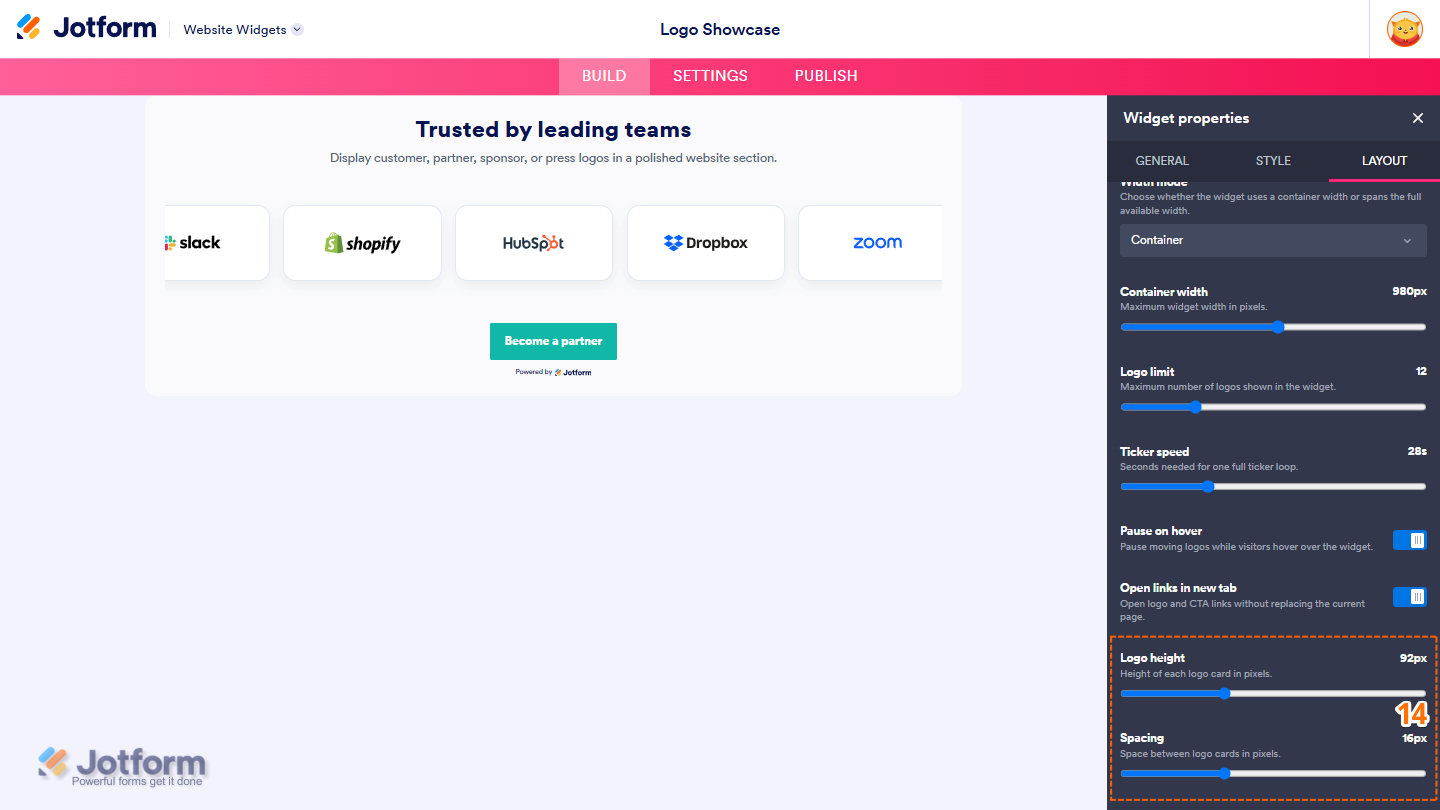
- Then, scroll to the bottom and adjust these options:
- Logo Height — Set the height of each logo card in pixels.
- Spacing — Set the space between logo cards in pixels.
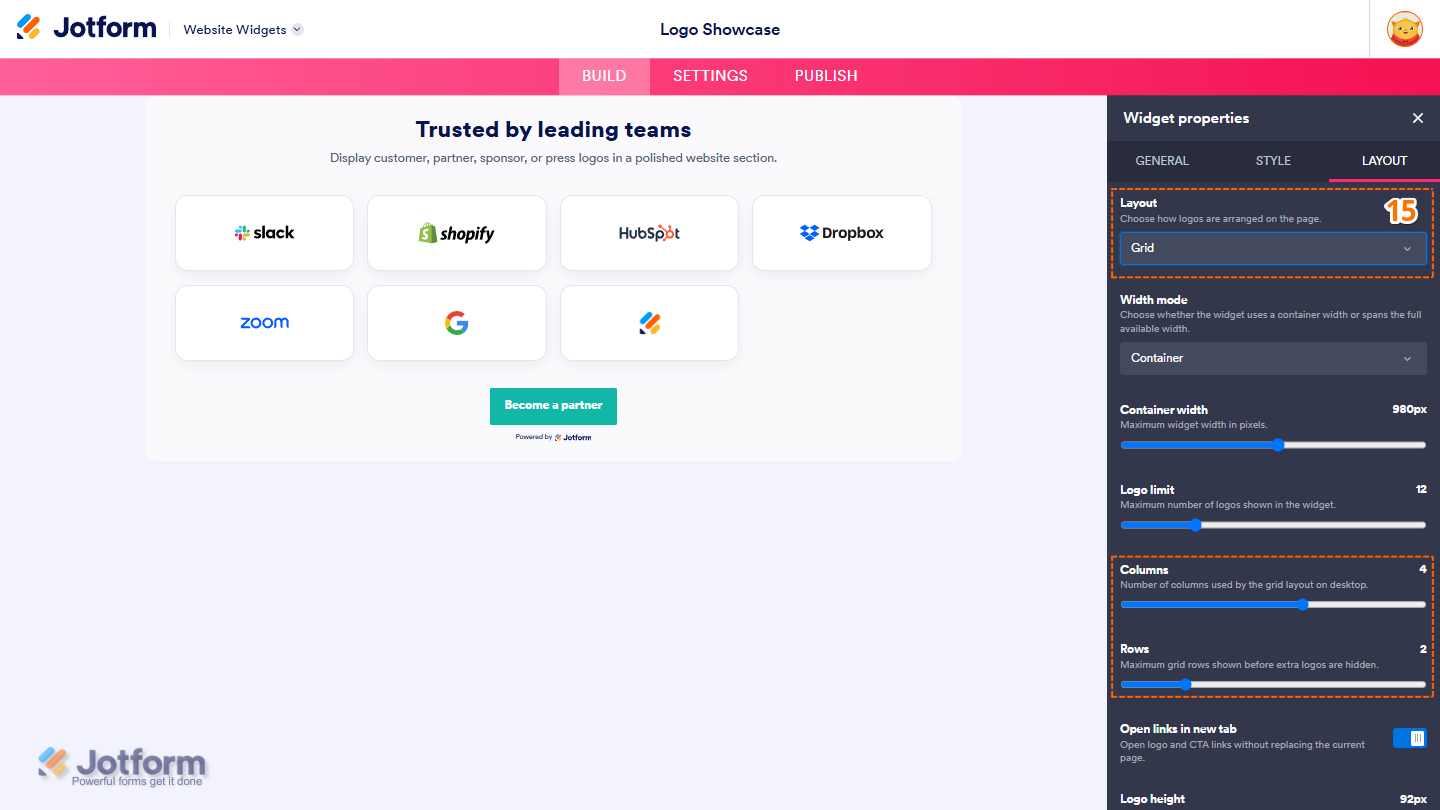
- Or, if you select Grid from the Layout dropdown menu, set the following:
- Columns — Set the number of logo columns displayed in the grid layout on the desktop.
- Rows — Set the maximum number of rows displayed before additional logos are hidden.
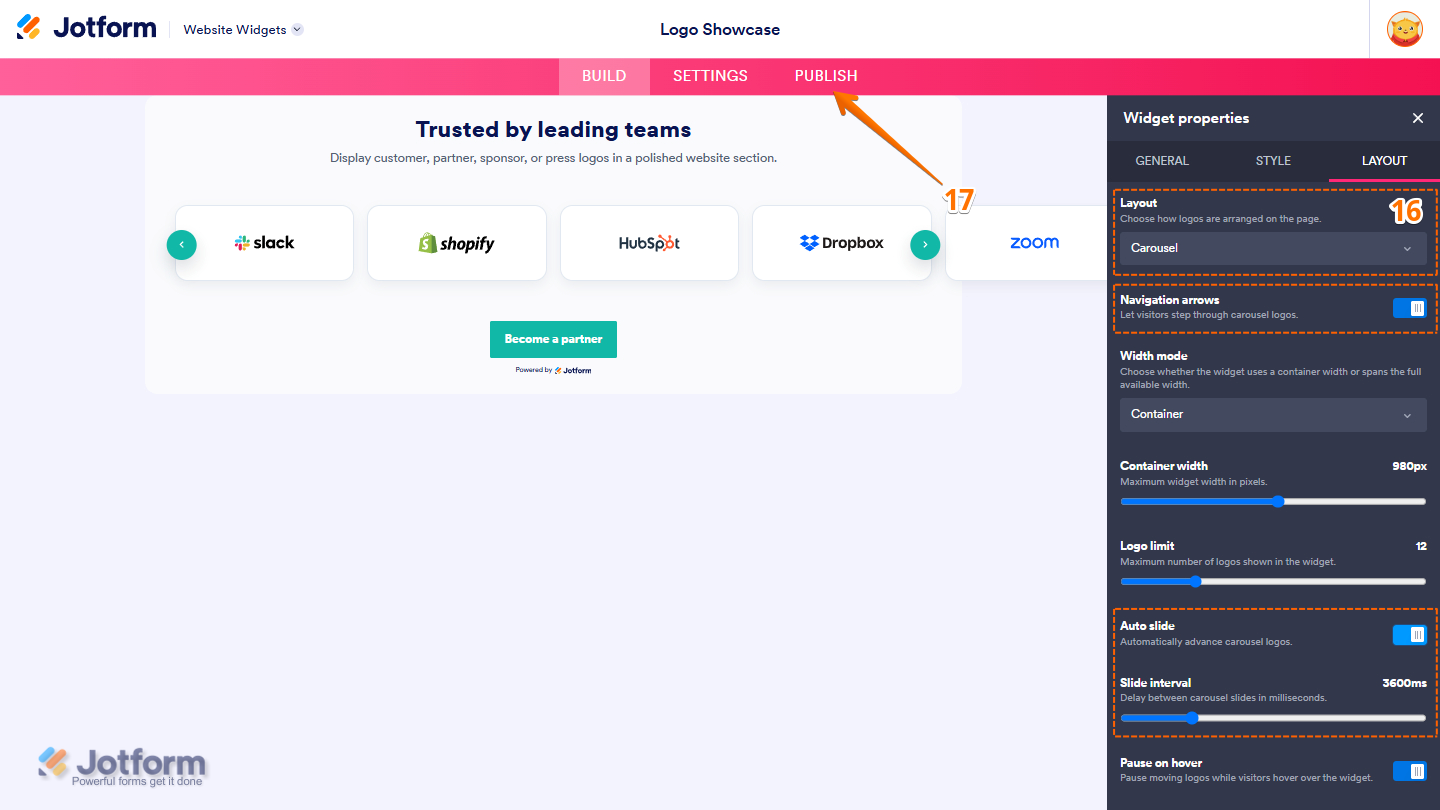
- And, if you select Carousel from the Layout dropdown menu, configure these extra things:
- Navigation Arrows — Show or hide navigation arrows for moving through carousel logos.
- Auto Slide — Automatically rotate through the carousel logos.
- Slide Interval — Set the delay between carousel slides in milliseconds.
- Once you’ve finished configuring the widget, in the pink navigation bar at the top of the page, click on Publish.
Note
If you’re not logged in, you’ll be asked to log in to your Jotform account or sign up for one. Once you’ve done that, you’ll be able to get the embed code for your widget.
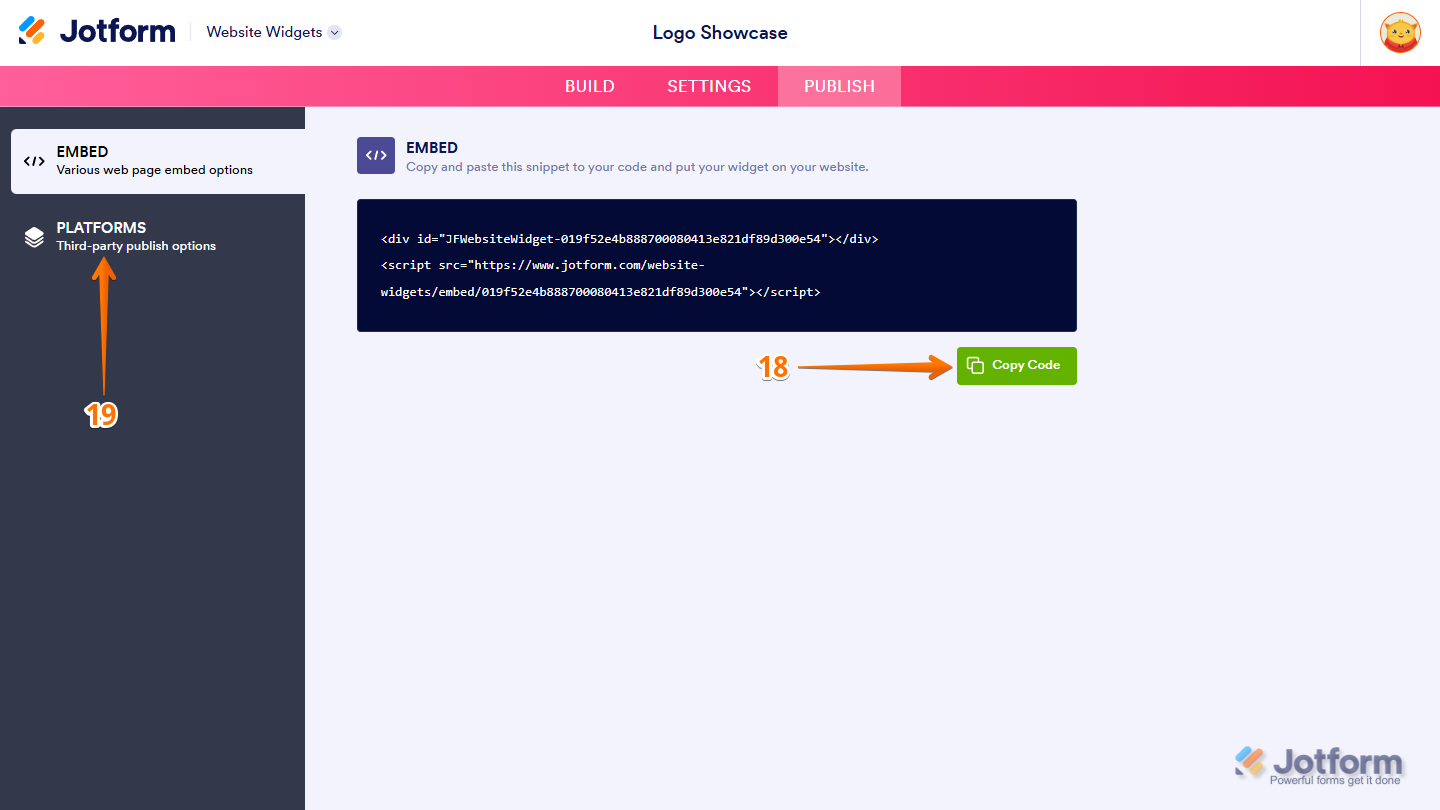
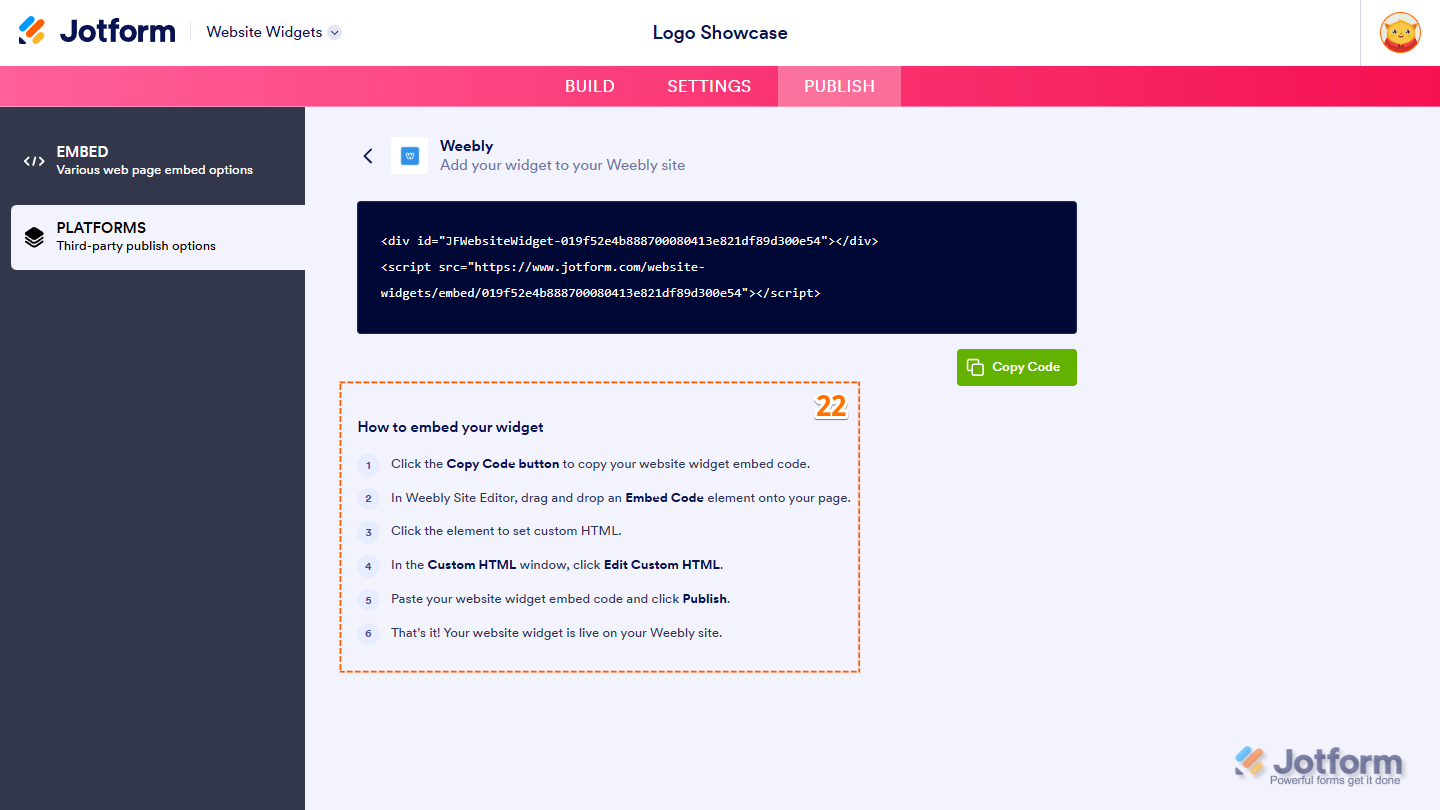
- Then, in the Embed section, click on Copy Code, and, if you already know how, paste that into the Embed section on your platform, and you’re good to go.
- To view embedding instructions for your widget, click on Platforms in the menu on the left side of the page.
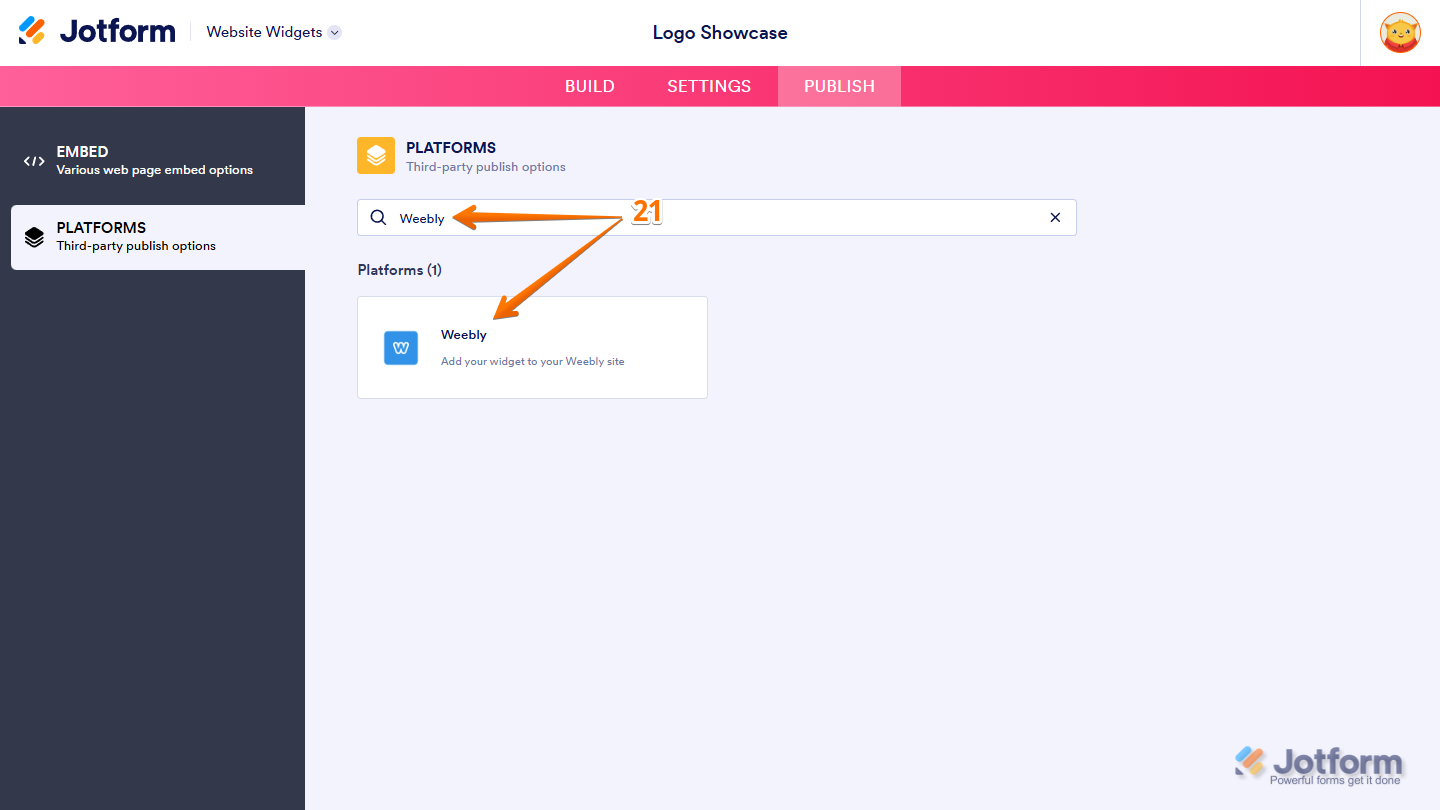
- Next, in the Platforms section on the right, select the platform you want to view embedding instructions for. Or, use the Search bar at the top of the section to find it easily.
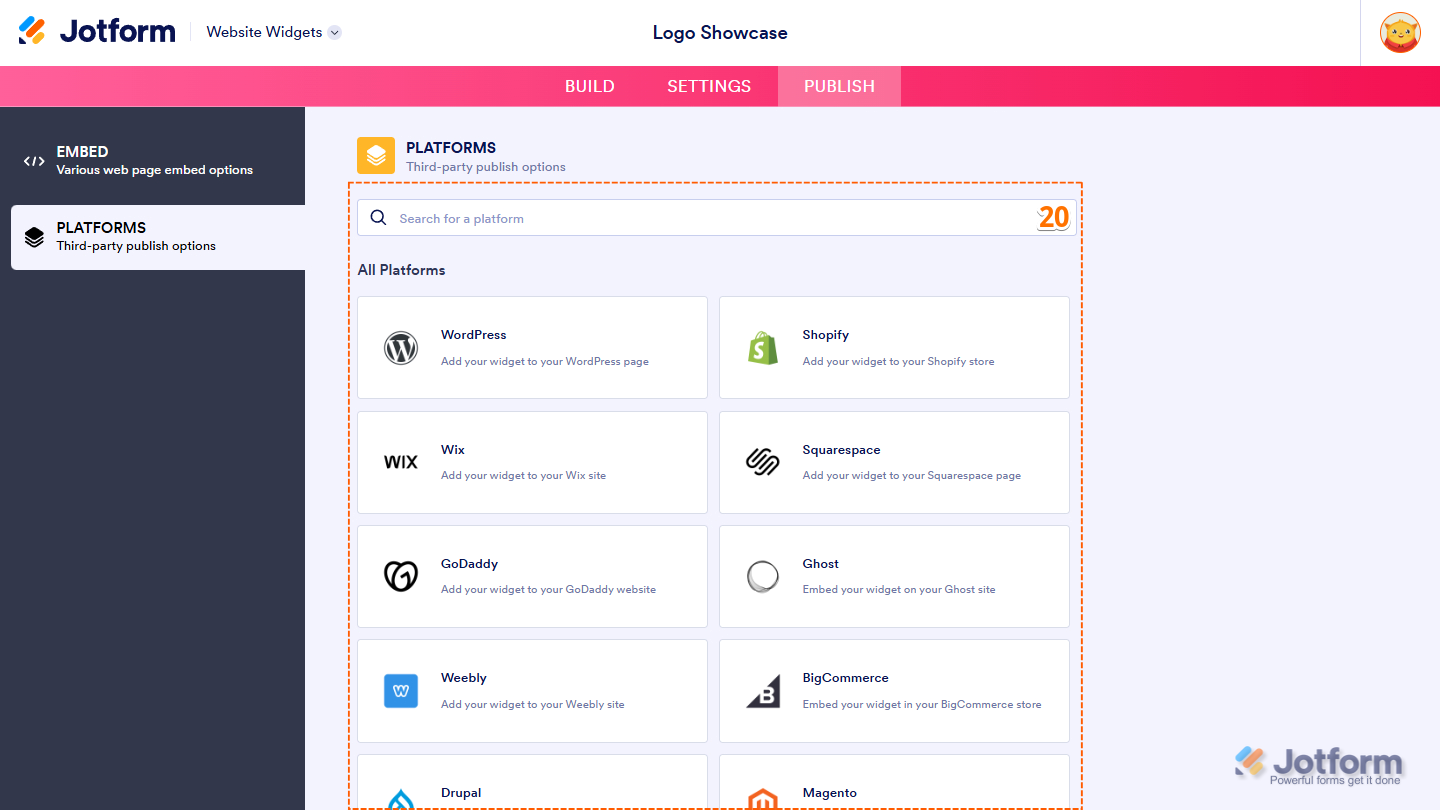
- For this example, let’s use the Weebly platform. In Platforms, search for Weebly and then click on it.
- Finally, follow the steps in the How to Embed Your Widget section to add it to your platform.
That’s it! Your Logo Showcase widget is now ready to be embedded on your website, helping you highlight clients, partners, sponsors, or featured brands in a professional and visually appealing way. The screenshot below shows an example of how the widget will look when embedded:



Send Comment: