Jotform makes it easy to add social sharing buttons to your website with the Social Share widget. Visitors can quickly share your content across popular social media platforms, helping you reach a wider audience with just a few clicks.
Whether you’re promoting products, announcing events, or publishing new blog posts, the Social Share widget makes it easier for visitors to share the content they enjoy.
To add a Social Share Buttons to your website, you’ll first need to configure the Social Media Share widget and copy its embed code. Here’s how to get going:
- On the top-left side of your Workspace page, click on Create.
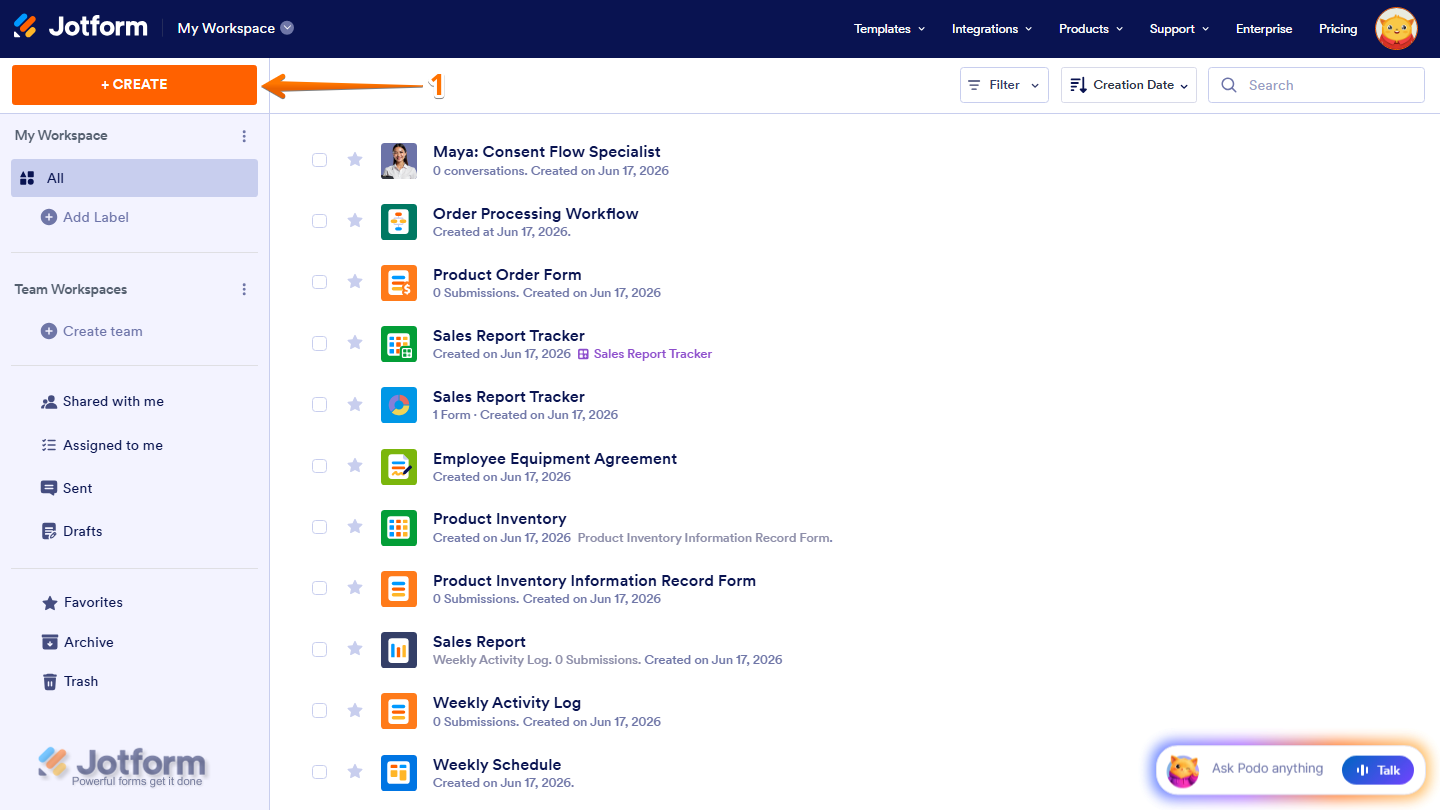
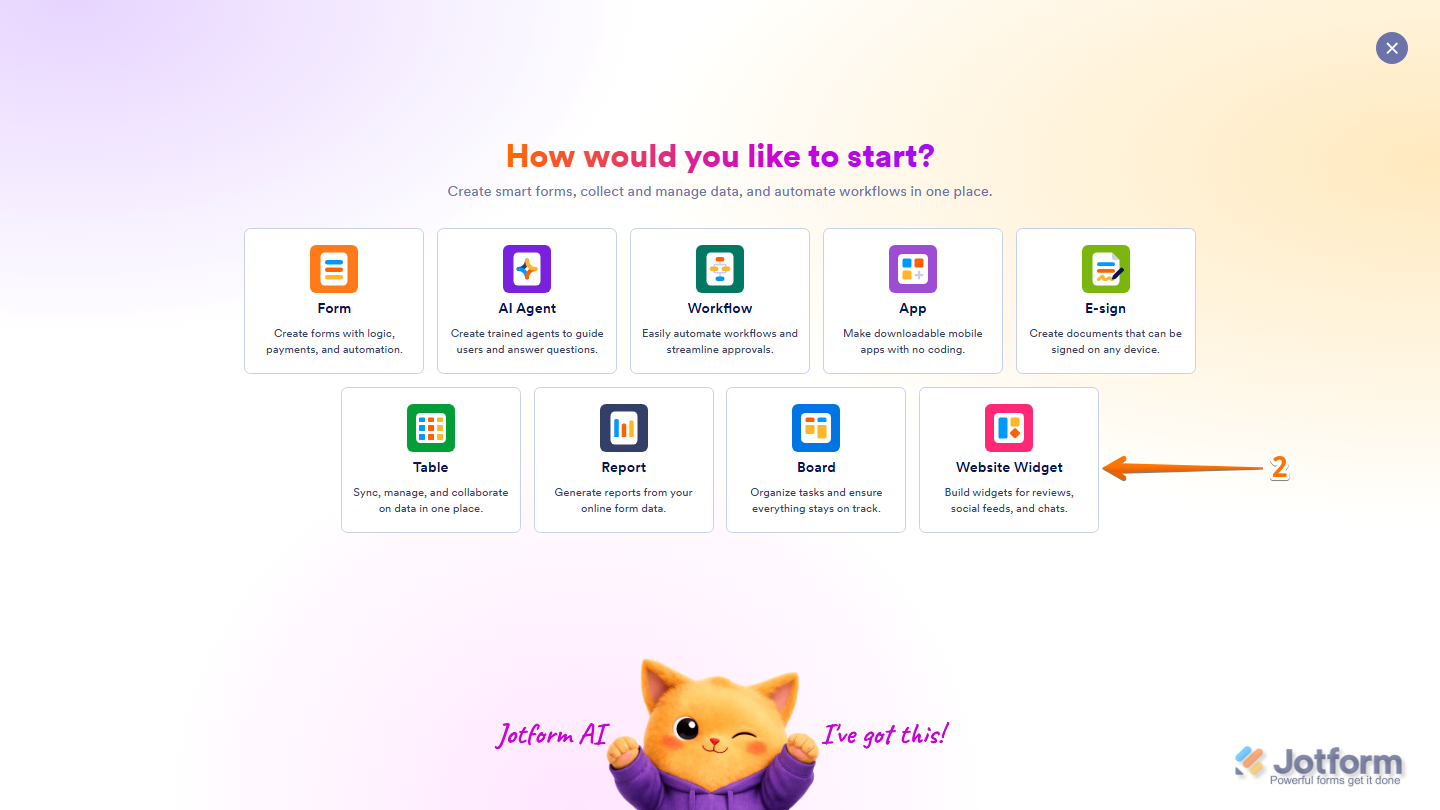
- Then, in the menu that opens up, select Website Widget.
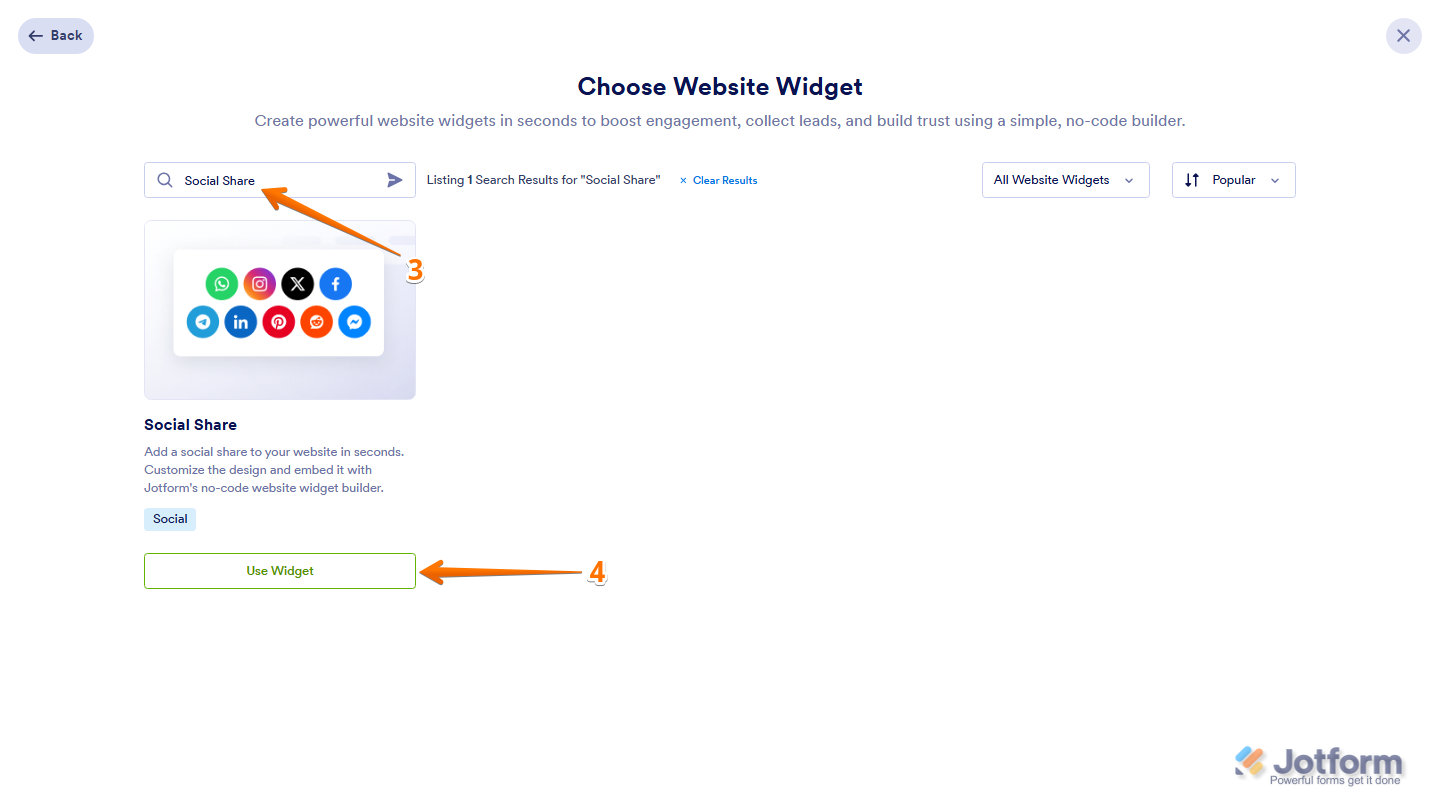
- Next, in the Search bar in the upper-left corner of Choose Website Widget, enter Social Share.
- Now, in the search results, click on Use Widget.
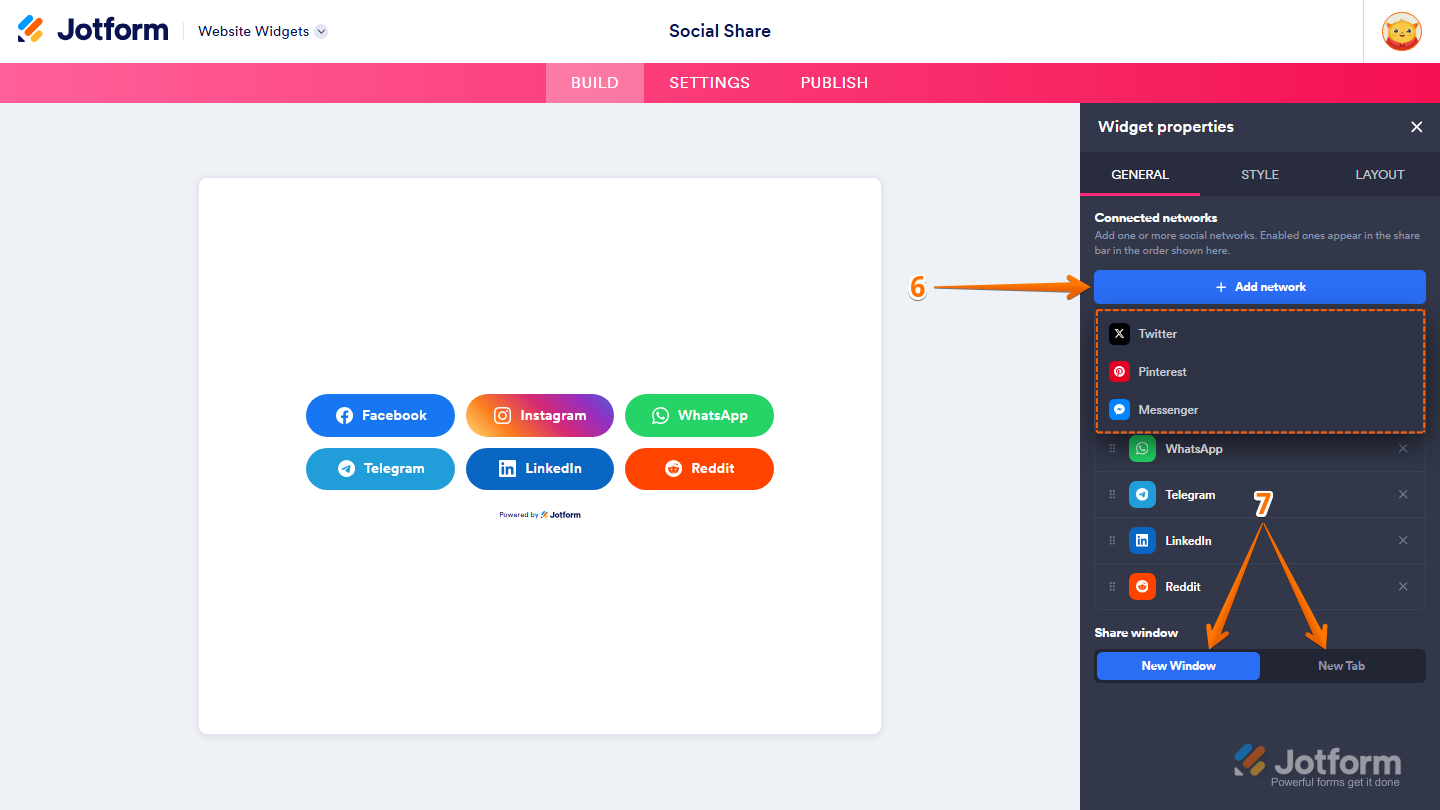
- Then, in the Widget Properties menu that opens on the right side of Website Widgets, under the General tab, you’ll notice that the widget already includes several connected social networks. You can manage them using the available action icons:
- Six Dots icon — Drag and drop to reorder the connected social networks.
- X icon — Click on it to remove the connected social network.
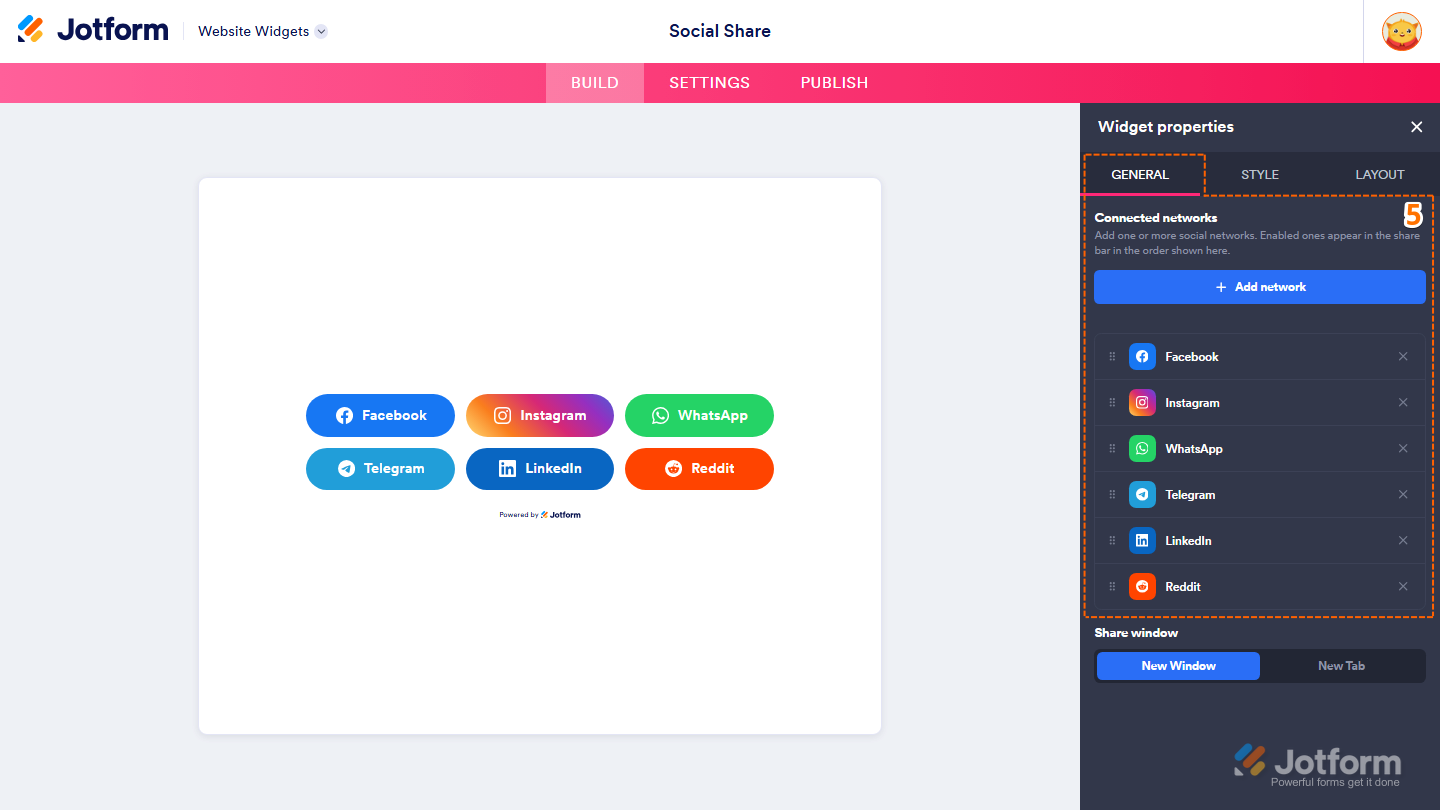
- To add another social network, click on Add Network, and then select the social network you want to include.
- Now, under the Share Window section, choose whether shared links open in a New Window or a New Tab.
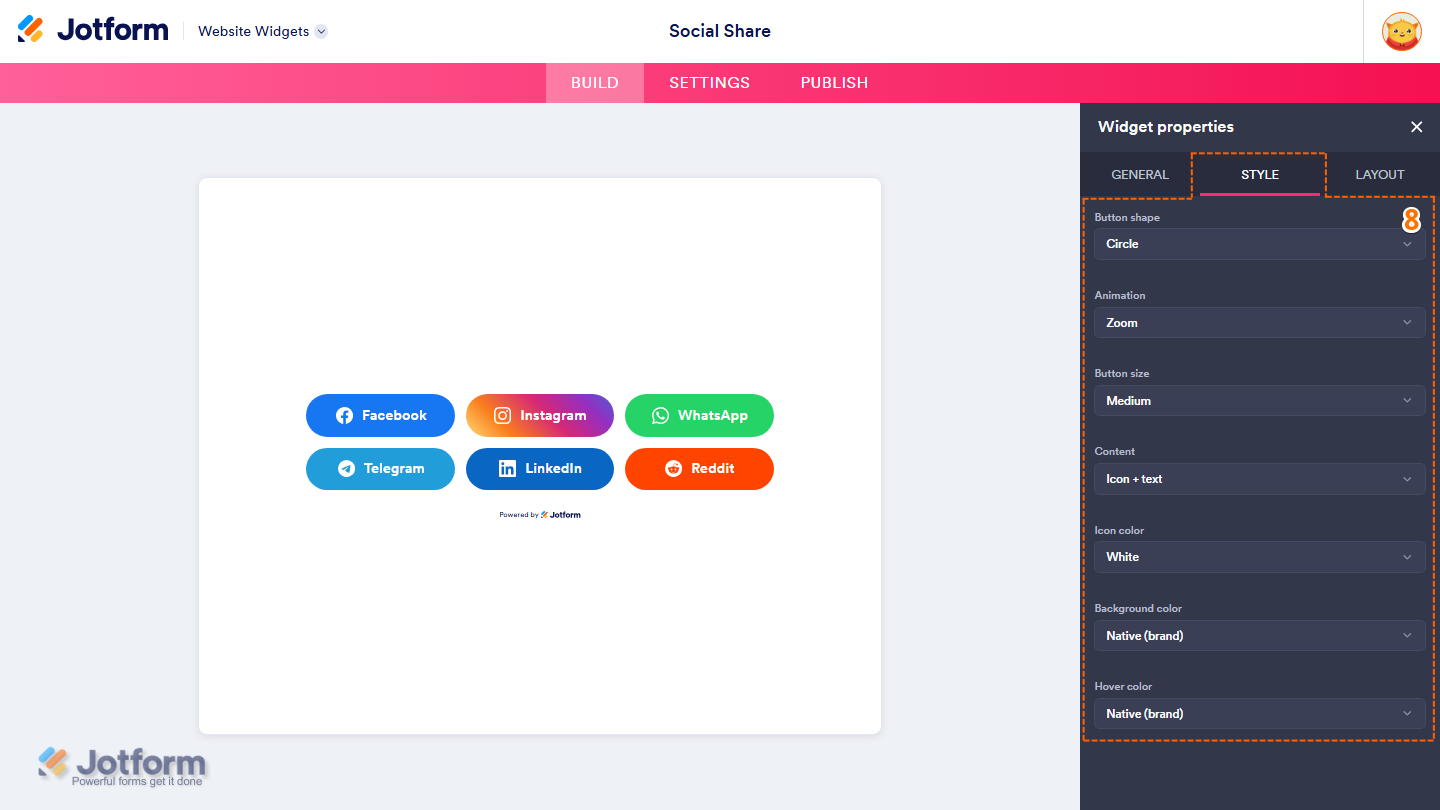
- Next, under the Style tab, customize these properties:
- Button Shape — Select the shape you want to use for the social share buttons from the Dropdown menu.
- Animation — Use the Dropdown menu to select the animation effect applied when visitors hover over the social share buttons.
- Button Size — Click on the Dropdown menu and select the size you want to use for the social share buttons.
- Content — Choose what you want to display on the social share buttons from the Dropdown menu.
- Icon Color — Use the Dropdown menu to select the color of the social share button icons.
- Background Color — Click on the Dropdown menu and select the background color for the social share buttons.
- Hover Color — Choose the background color displayed when visitors hover over the social share buttons from the Dropdown menu.
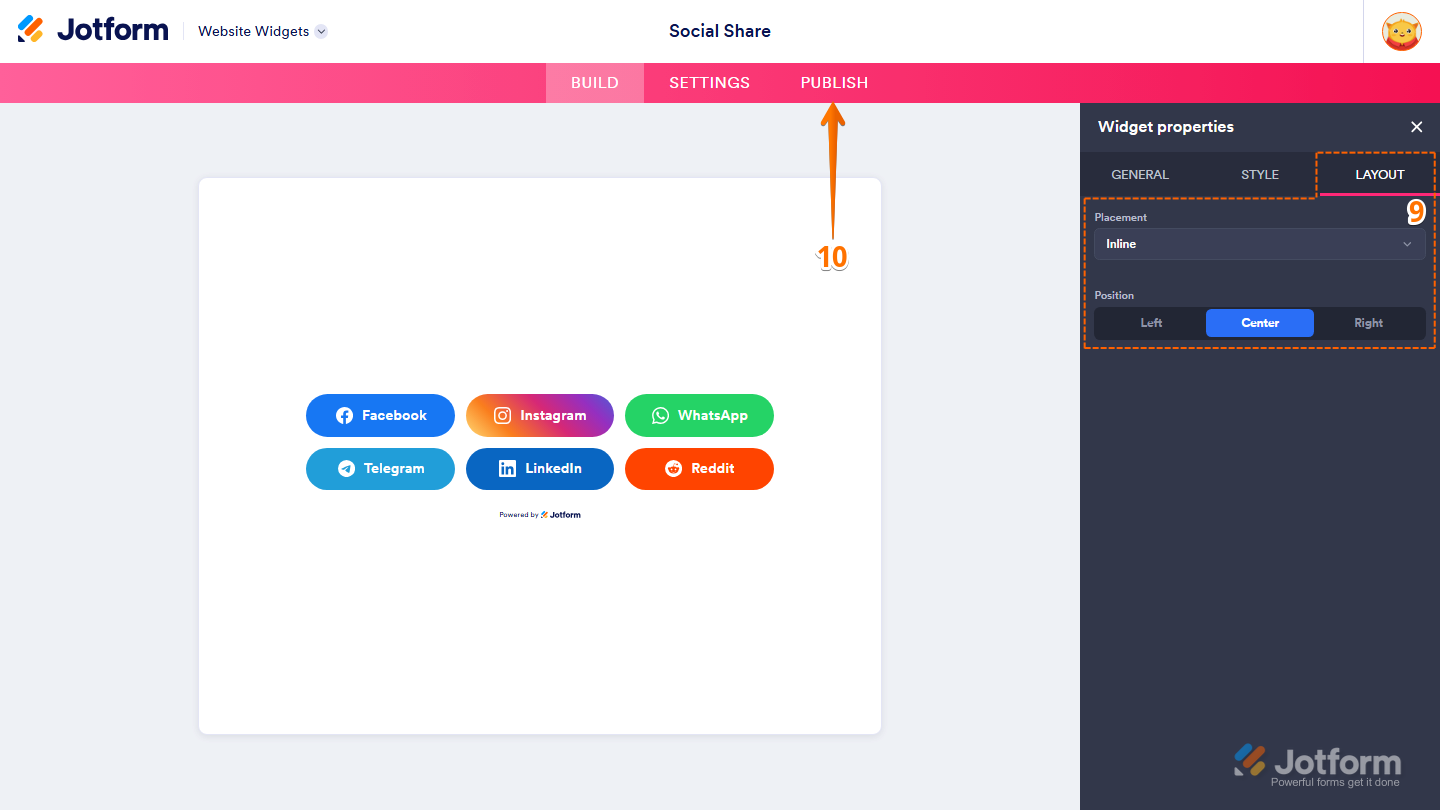
- After that, under the Layout tab, configure these settings:
- Placement — Select where you want to place the social share buttons from the Dropdown menu.
- Position — Select one of the following options to choose the position of the social share buttons:
- Left — Select this to align the social share buttons to the left.
- Center — Select this to center the social share buttons.
- Right — Select this to align the social share buttons to the right.
- Once you’ve finished configuring the widget, in the pink navigation bar on the top of the page, click on Publish.
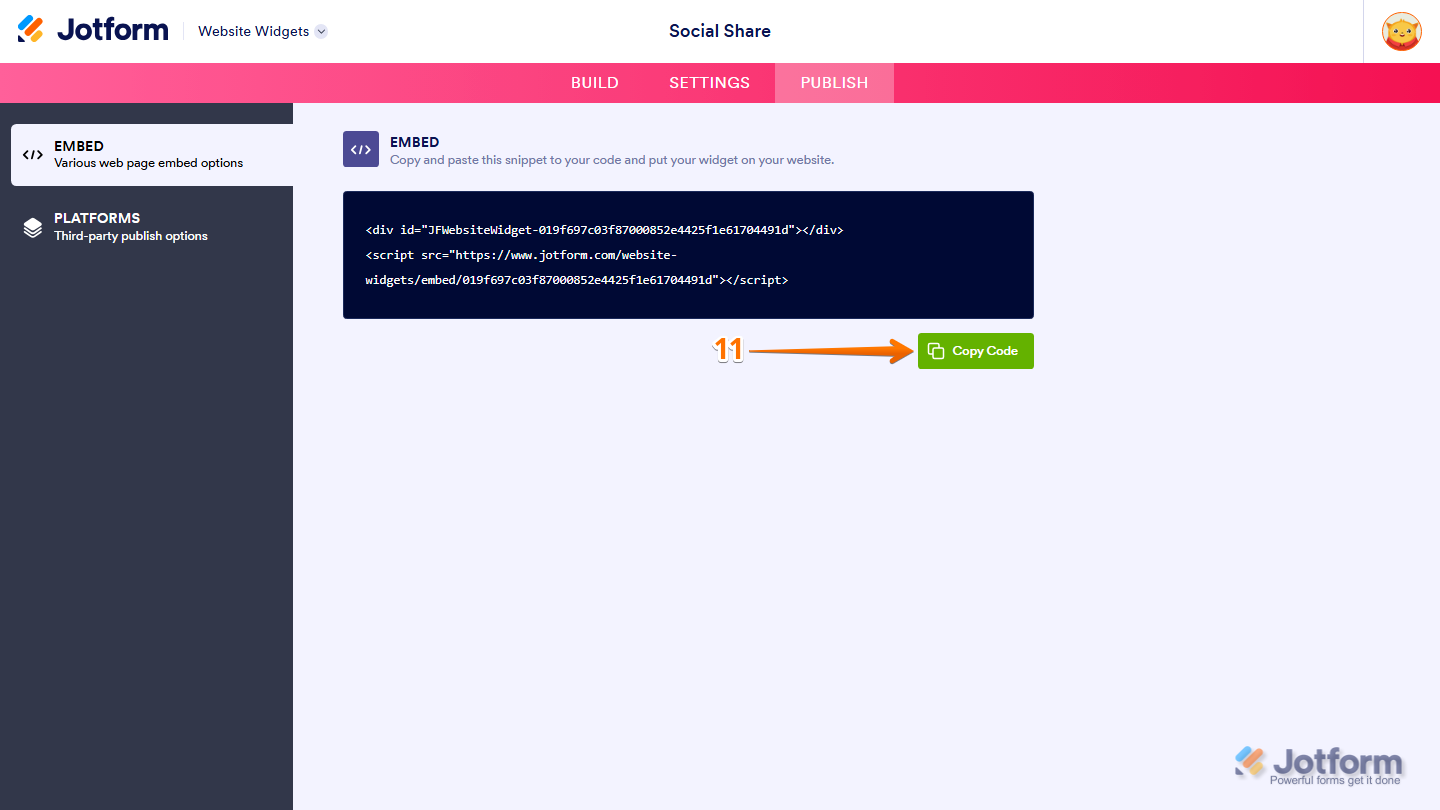
- Then, in the Embed section, click on Copy Code, and, if you already know how, paste that into the Embed section on your platform, and you’re good to go.
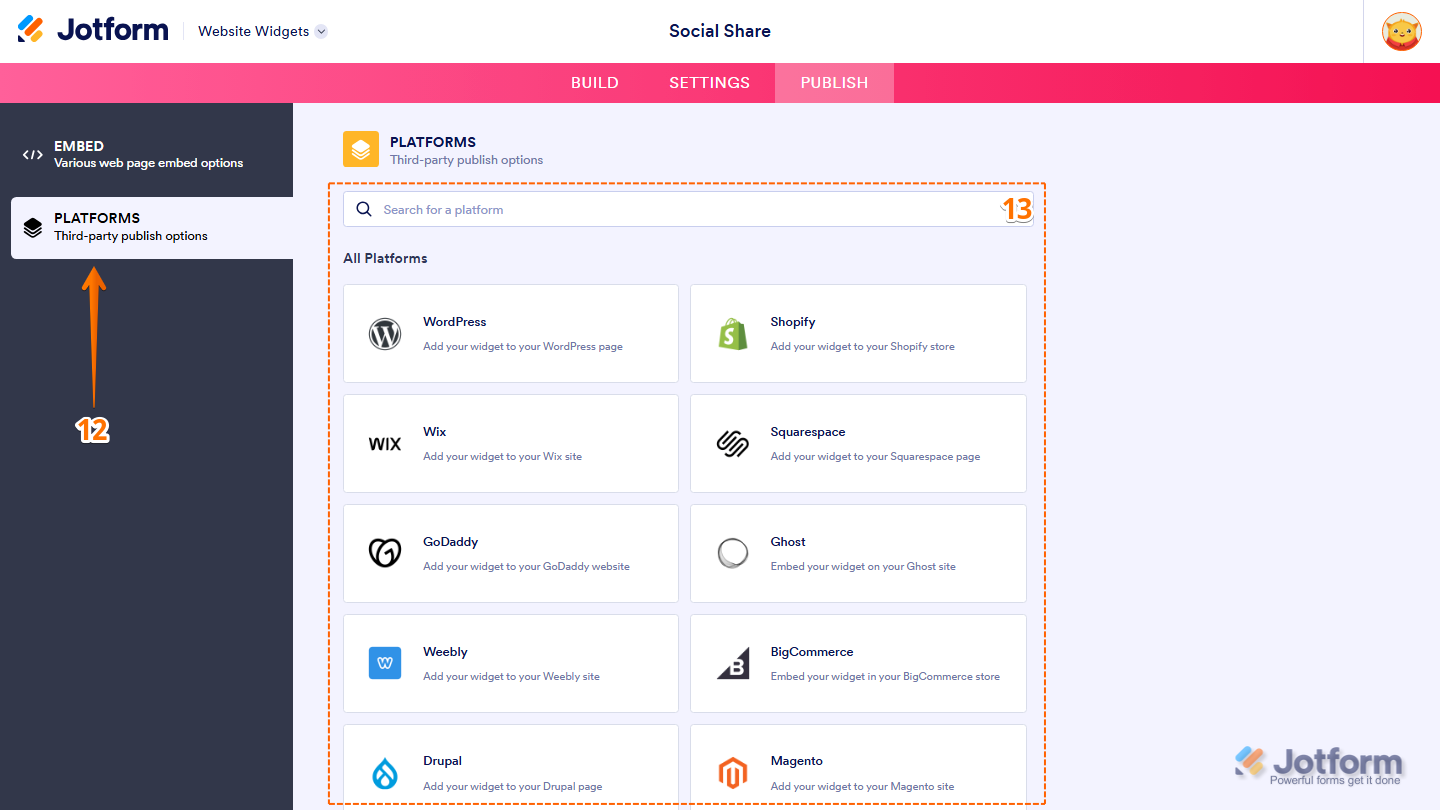
- To view embedding instructions for your widget, click on Platforms in the menu on the left side of the page.
- Next, in the Platforms section on the right, select the platform you want to view embedding instructions for. Or, use the Search bar at the top of the section to find it easily.
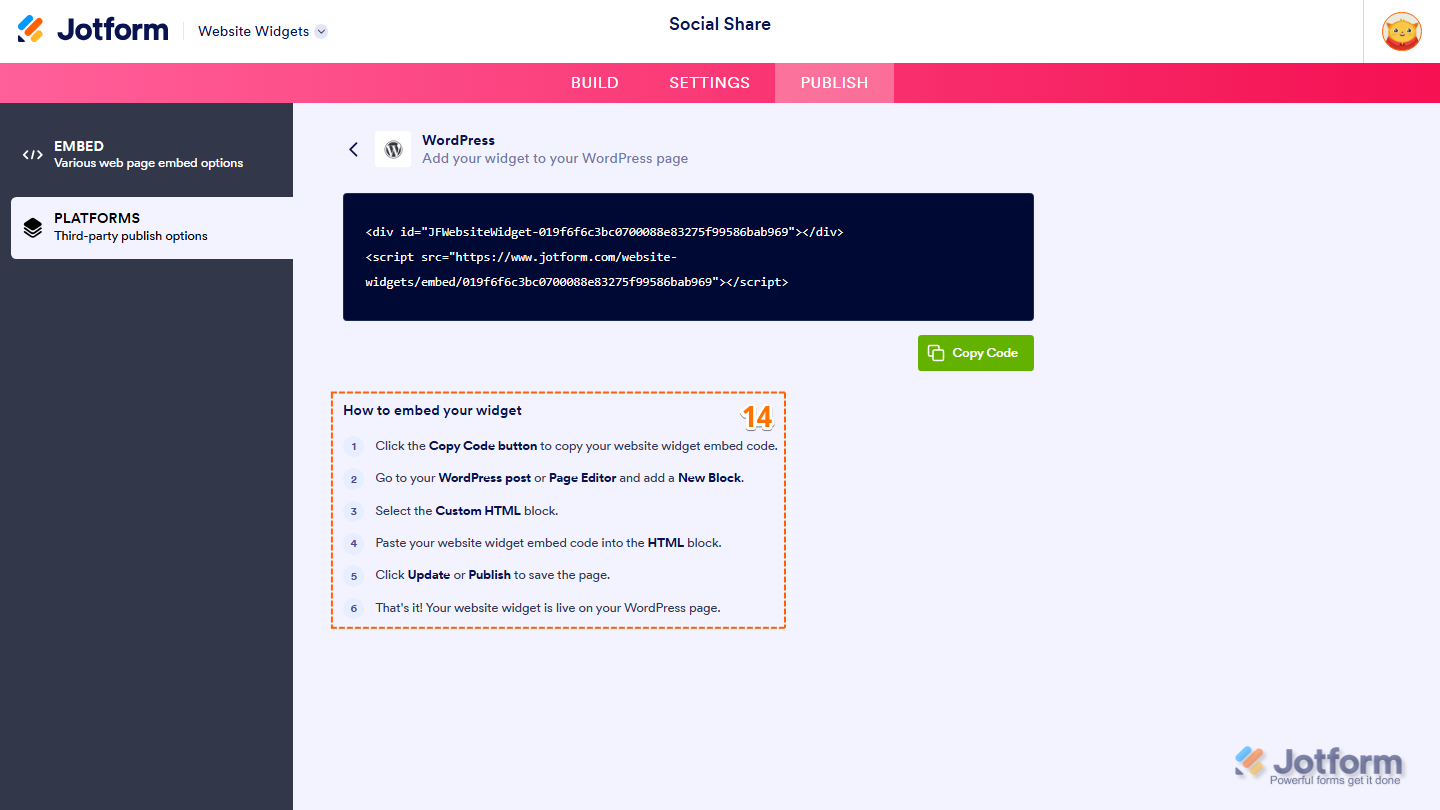
- Then, follow the steps in the How to Embed Your Widget section to add it to your website.
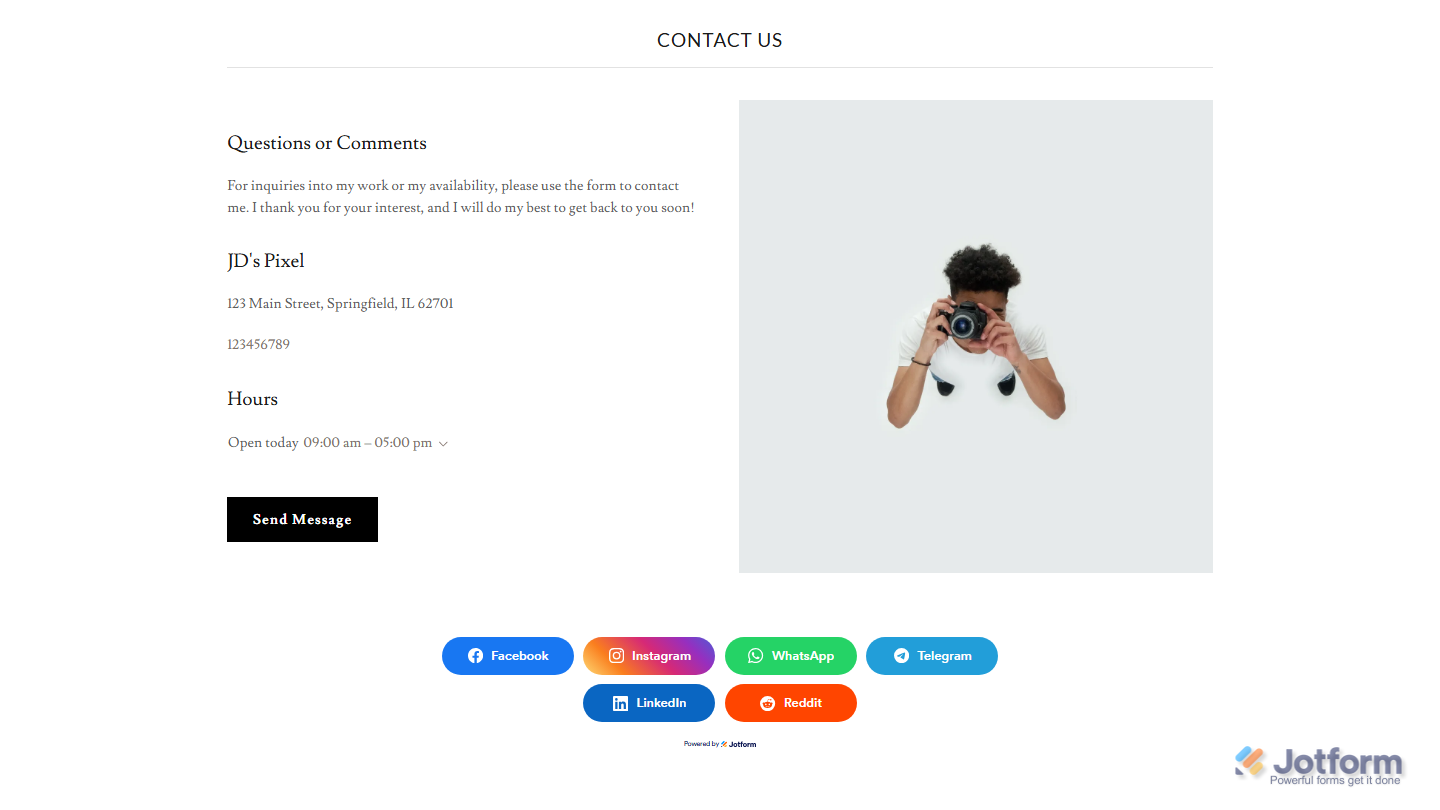
That’s it! Your Social Media Share widget will appear on your website based on how you set it up.Take a look at the example below to see how it’ll look on a website.
Note
You can manage the website widgets you’ve created at any time from your account. For a full breakdown of how to do it, head over to our guide on How to Manage Website Widgets.


Send Comment: