With Jotform’s Spotify Player, you can embed music, podcasts, and other Spotify content directly on your website, allowing visitors to listen without leaving the page.
Use it to showcase a playlist, promote a podcast, feature an album, or share a specific track with your audience.
Setting Up Your Spotify Embed Widget
To embed a Spotify Player on your website, you’ll first need to configure the Spotify Embed widget and copy the embed code for it. Here’s how to get going:
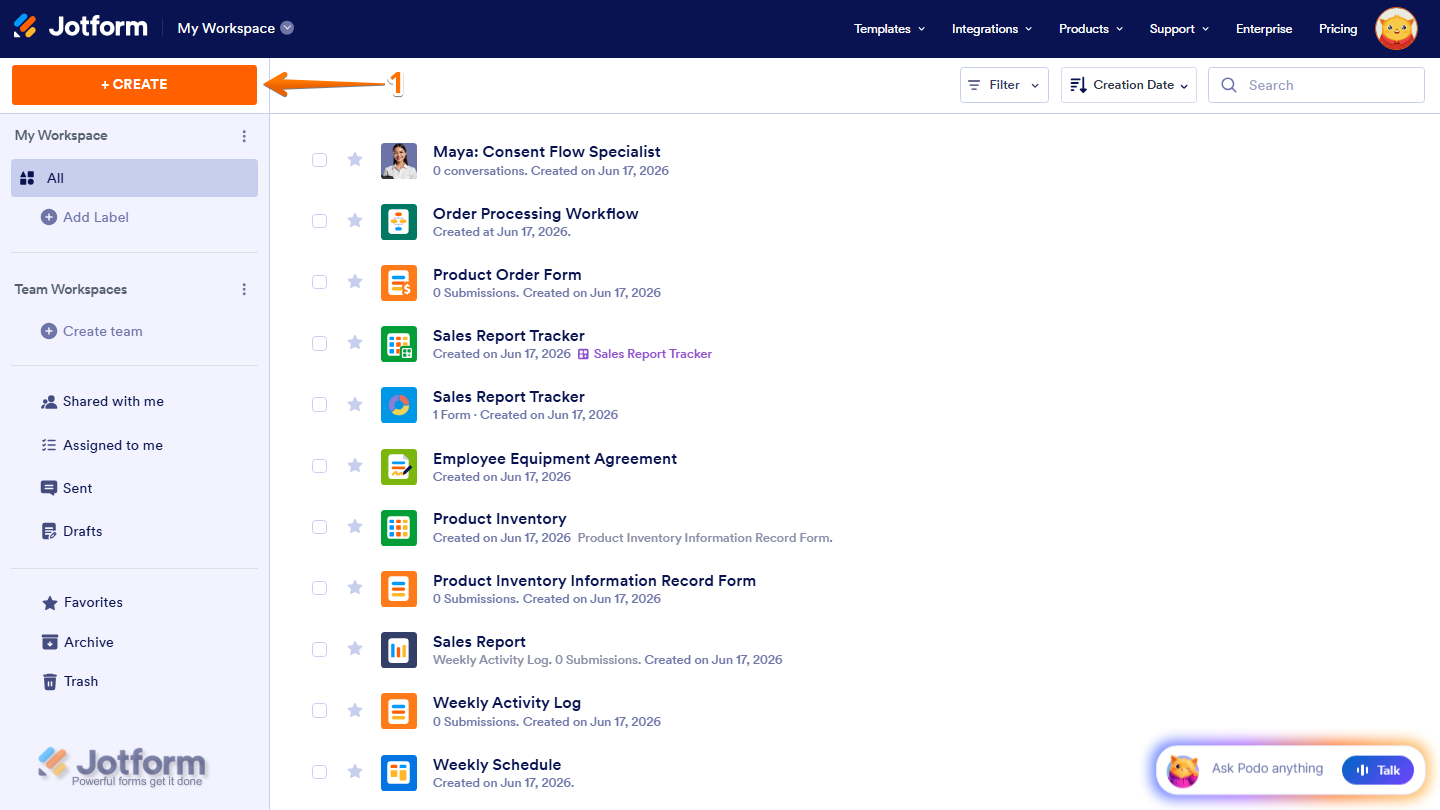
- On the top-left side of your Workspace page, click on Create.
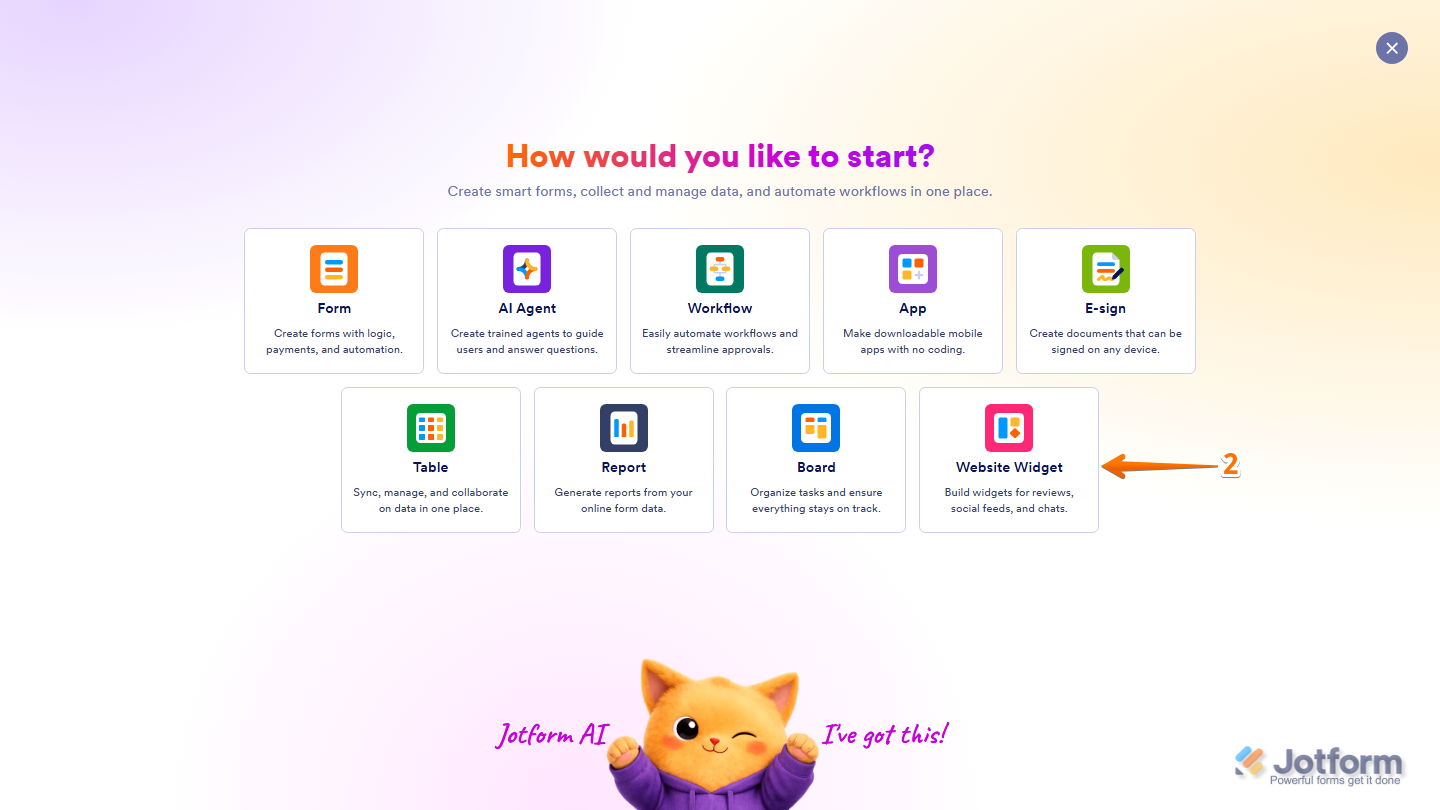
- Then, in the menu that opens, select Website Widget.
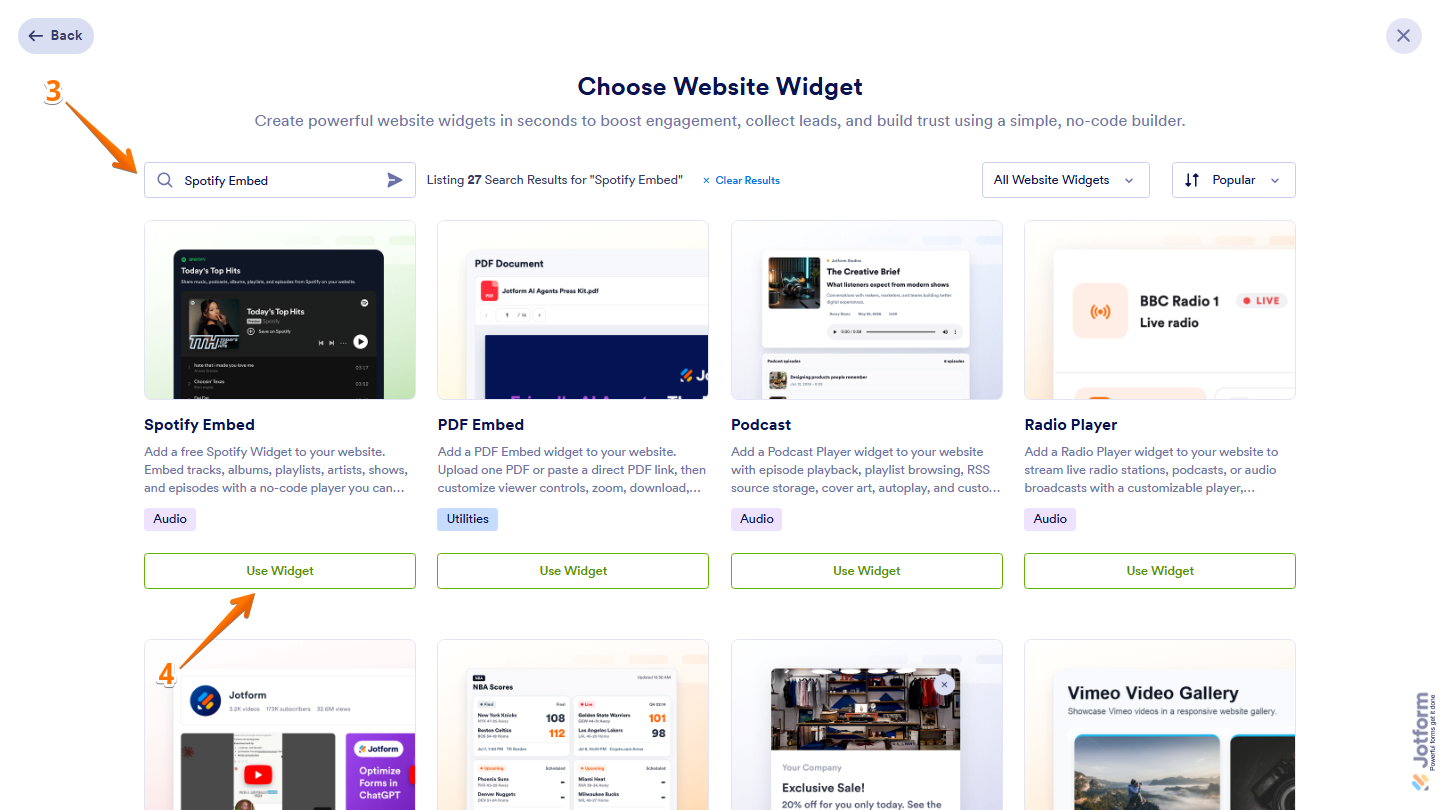
- Next, in the Search bar in the upper-left corner of the Choose Website Widget page, enter Spotify Embed.
- Then, at the bottom of the Spotify Embed widget, click on Use Widget.
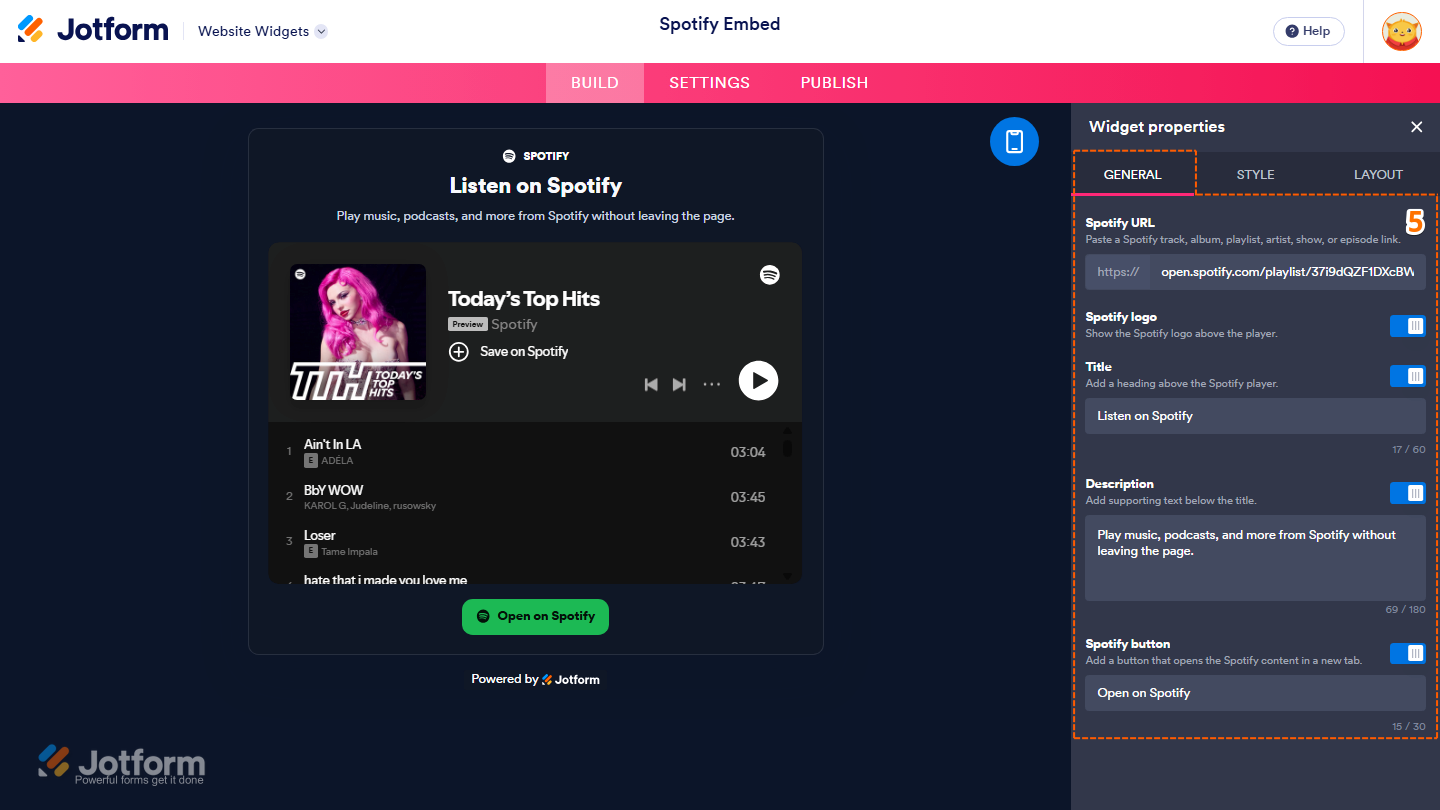
- Now, in the Widget Properties menu that opens on the right side of Website Widgets, set up these properties:
- Spotify URL — Enter the Spotify URL for the track, album, playlist, artist, show, or episode you want to embed.
- Spotify Logo — Show or hide the Spotify logo above the Spotify player.
- Title — Show or hide a heading above the Spotify player.
- Description — Enter supporting text to display below the title.
- Spotify Button — Show or hide the Spotify button above the Spotify player.
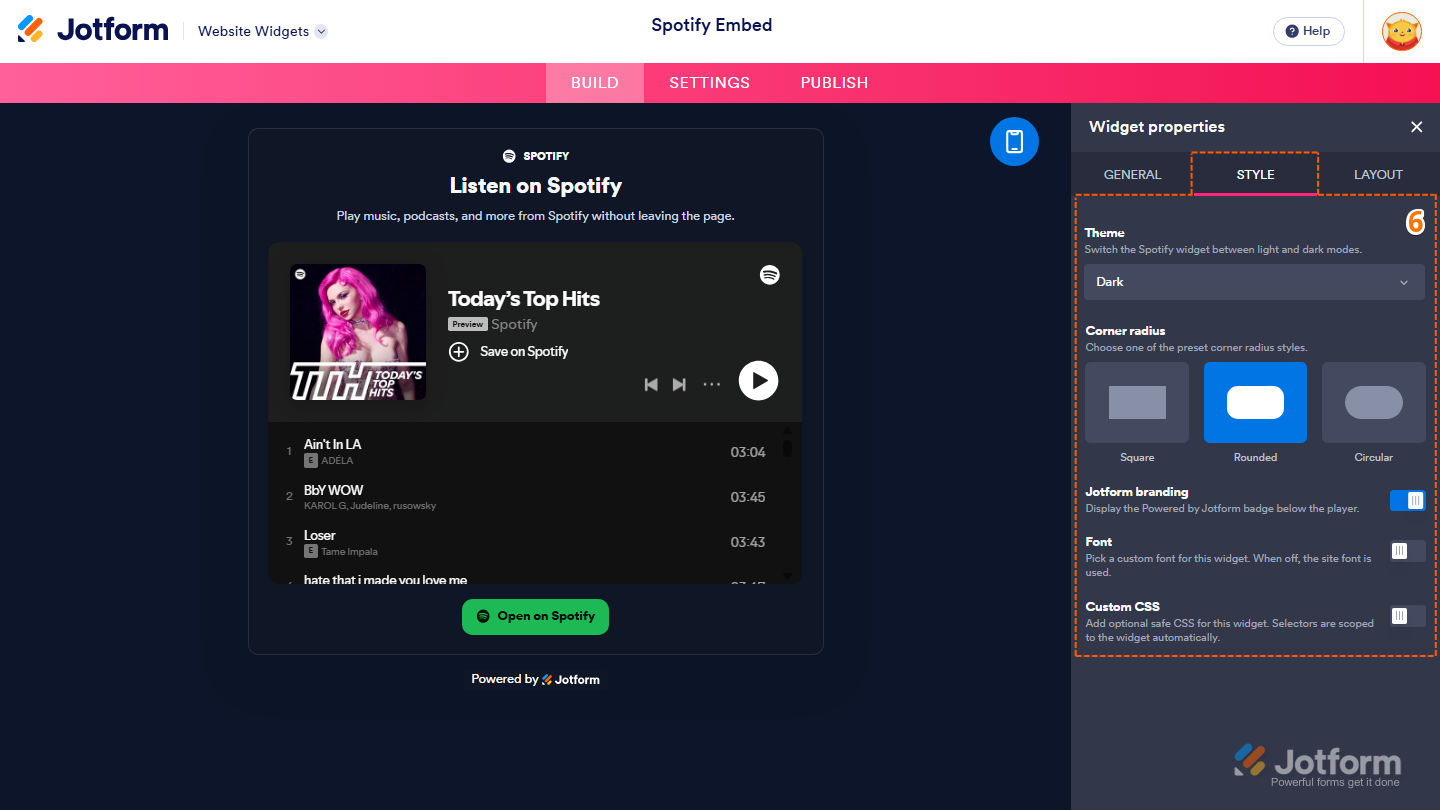
- Now, under the Style tab, customize these properties:
- Theme — Choose between light and dark mode.
- Corner Radius— Choose the corner radius style for the widget:
- Square Corners — Display the widget with square corners.
- Rounded Corners — Display the widget with rounded corners.
- Circular Corners — Display the widget with fully rounded corners.
- Jotform Branding — Show or hide Powered by Jotform on the widget.
- Font — Toggle this on, click on the Downward Arrow icon below it, and select Site Font to match your website’s font, System to use each visitor’s device font, or another available font.
- Custom CSS — Toggle this on, and then in the Code Editor below it, enter custom CSS code to apply advanced styling to the widget.
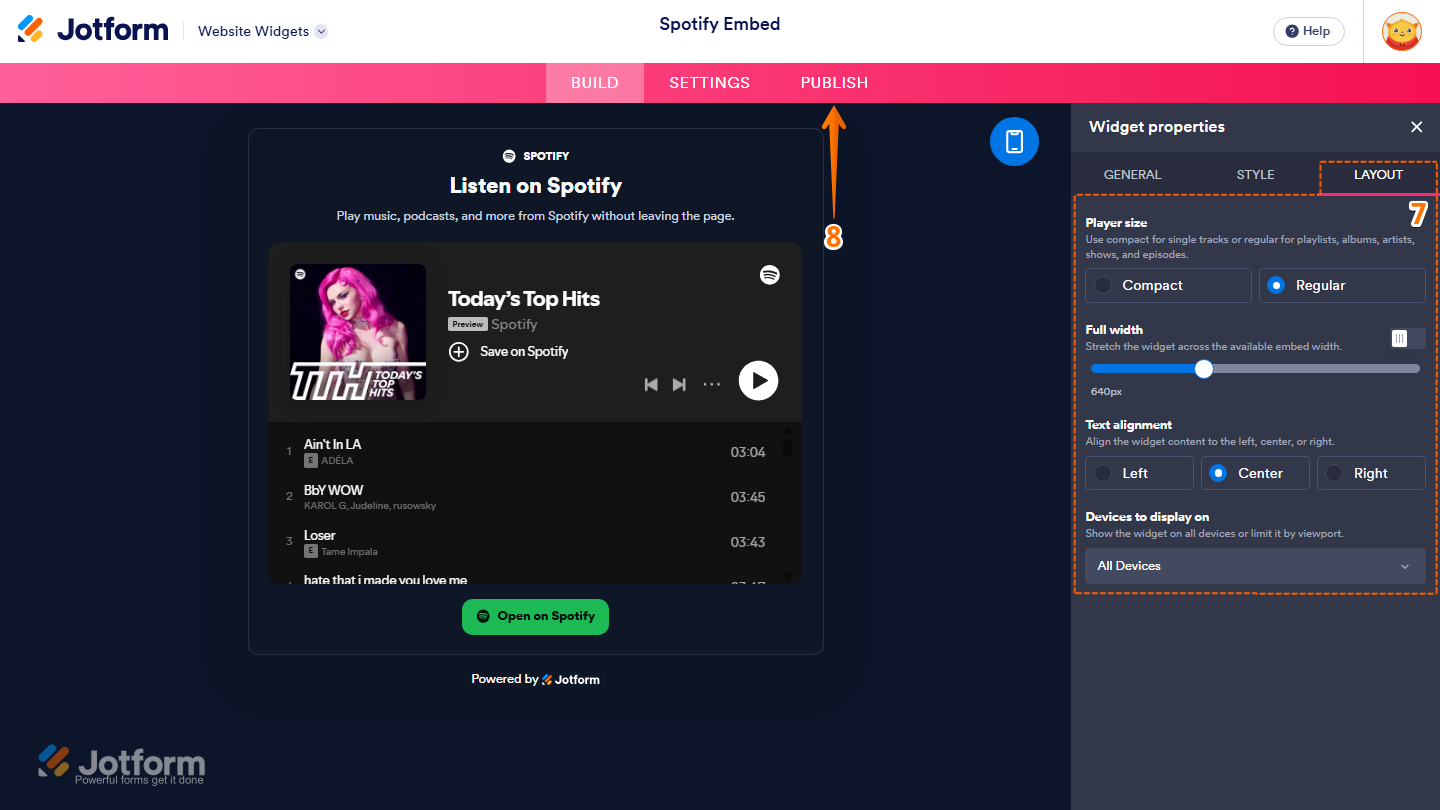
- Next, under the Layout tab, configure these options:
- Player Size — Choose the size of the Spotify player:
- Compact — Display a smaller player for single tracks.
- Regular — Display the standard player for playlists, albums, artists, shows, and episodes.
- Full Width — Set the widget to its full width.
- Text Alignment — Choose how the player content is aligned within the embed area:
- Left — Align the player content to the left.
- Center — Center the player content.
- Right — Align the player content to the right.
- Devices to Display On — Click on the Downward Arrow icon and select which devices to display the widget on.
- Player Size — Choose the size of the Spotify player:
- Once you’ve finished configuring the widget, in the pink navigation bar on the top of the page, click on Publish.
Note
You’ll be asked to log in to your Jotform account, if you’re not already, or sign up for one. Once you’ve done that, you’ll be able to get the embed code for your widget.
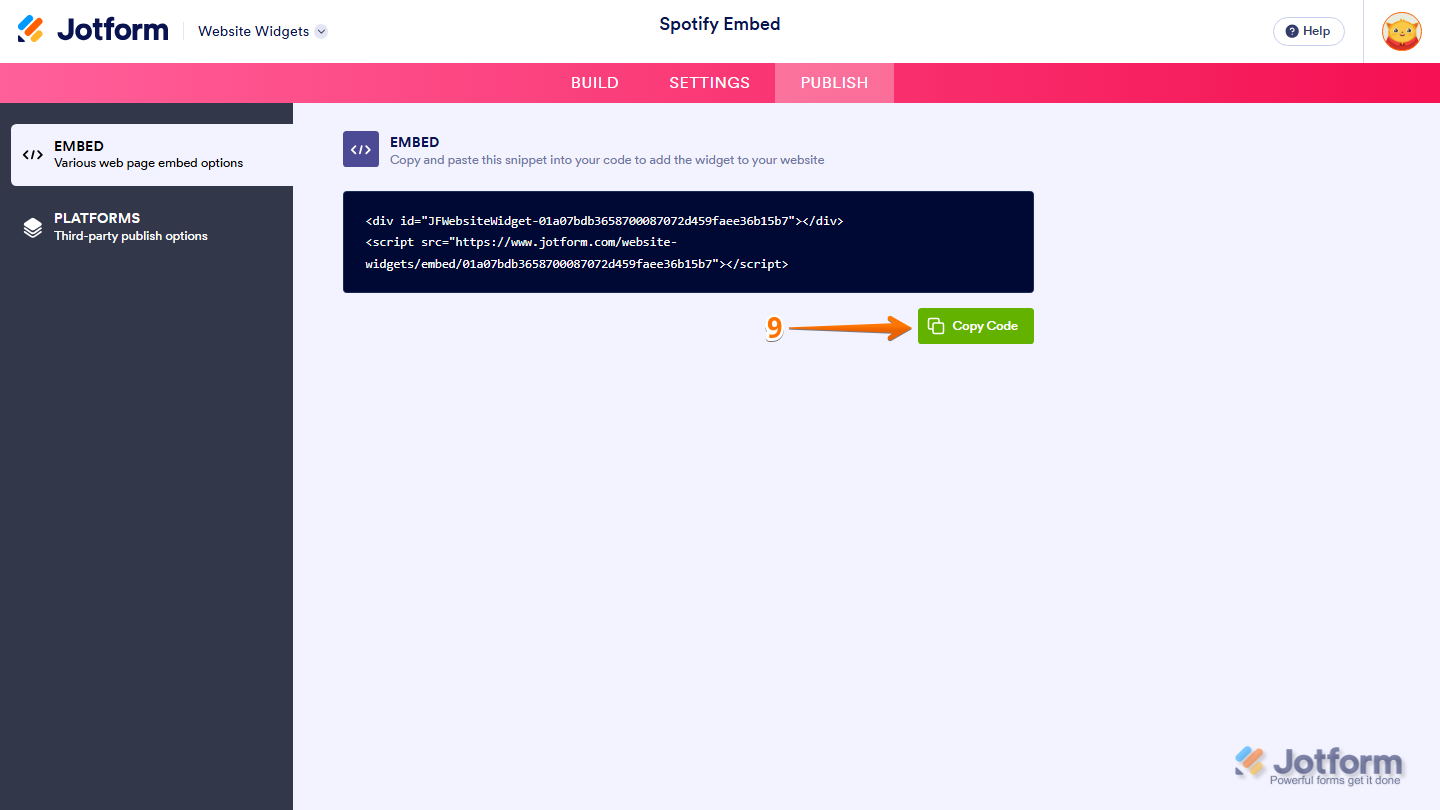
- Then, in the Embed section, click on Copy Code, and, if you already know how, paste that into the Embed section on your platform, and you’re good to go.
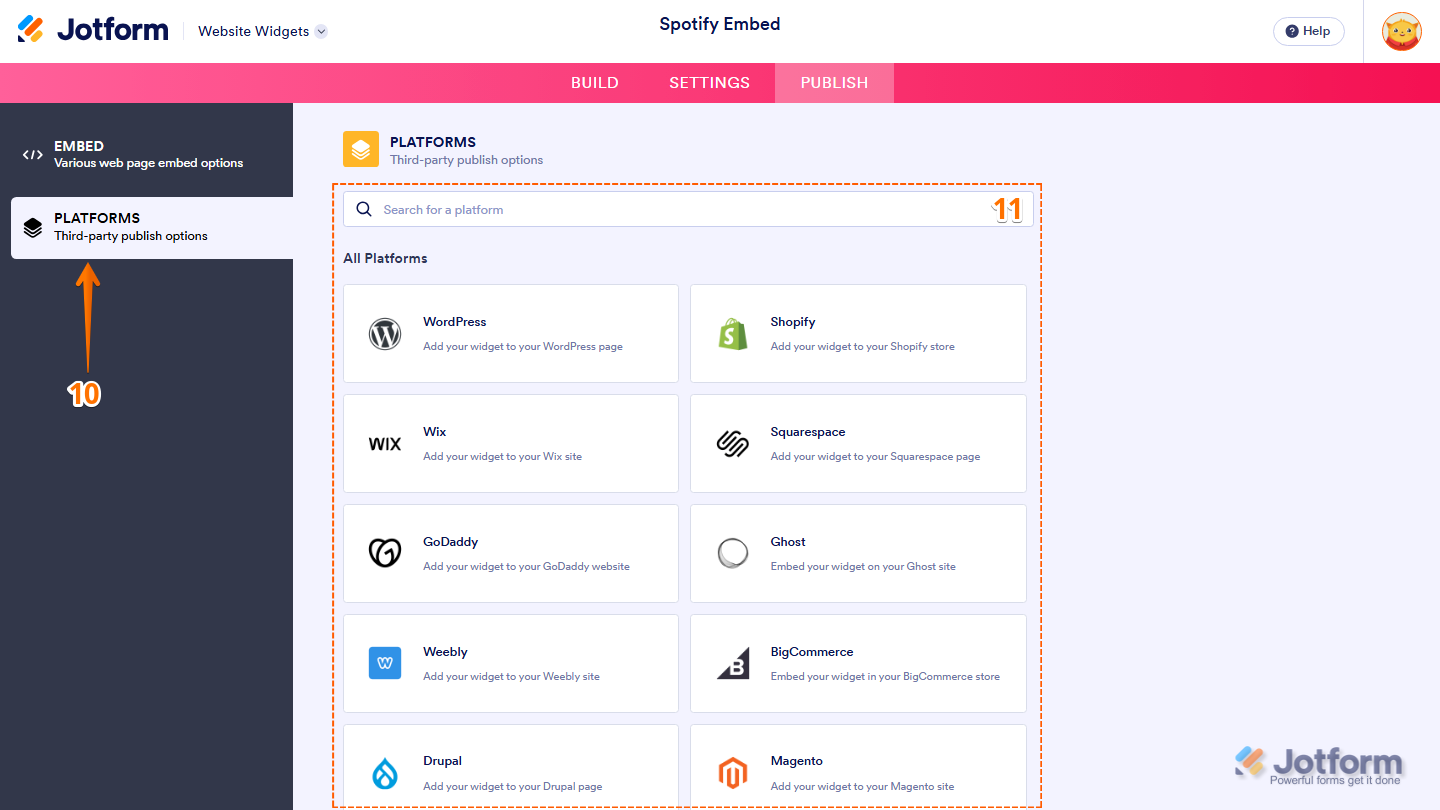
- To view embedding instructions for your widget, click on Platforms in the menu on the left side of the page.
- Next, in the Platforms section on the right, select the platform you want to view embedding instructions for. Or, use the Search bar at the top of the section to find it easily.
- Then, follow the steps in the How to Embed Your Widget section to add it to your website.
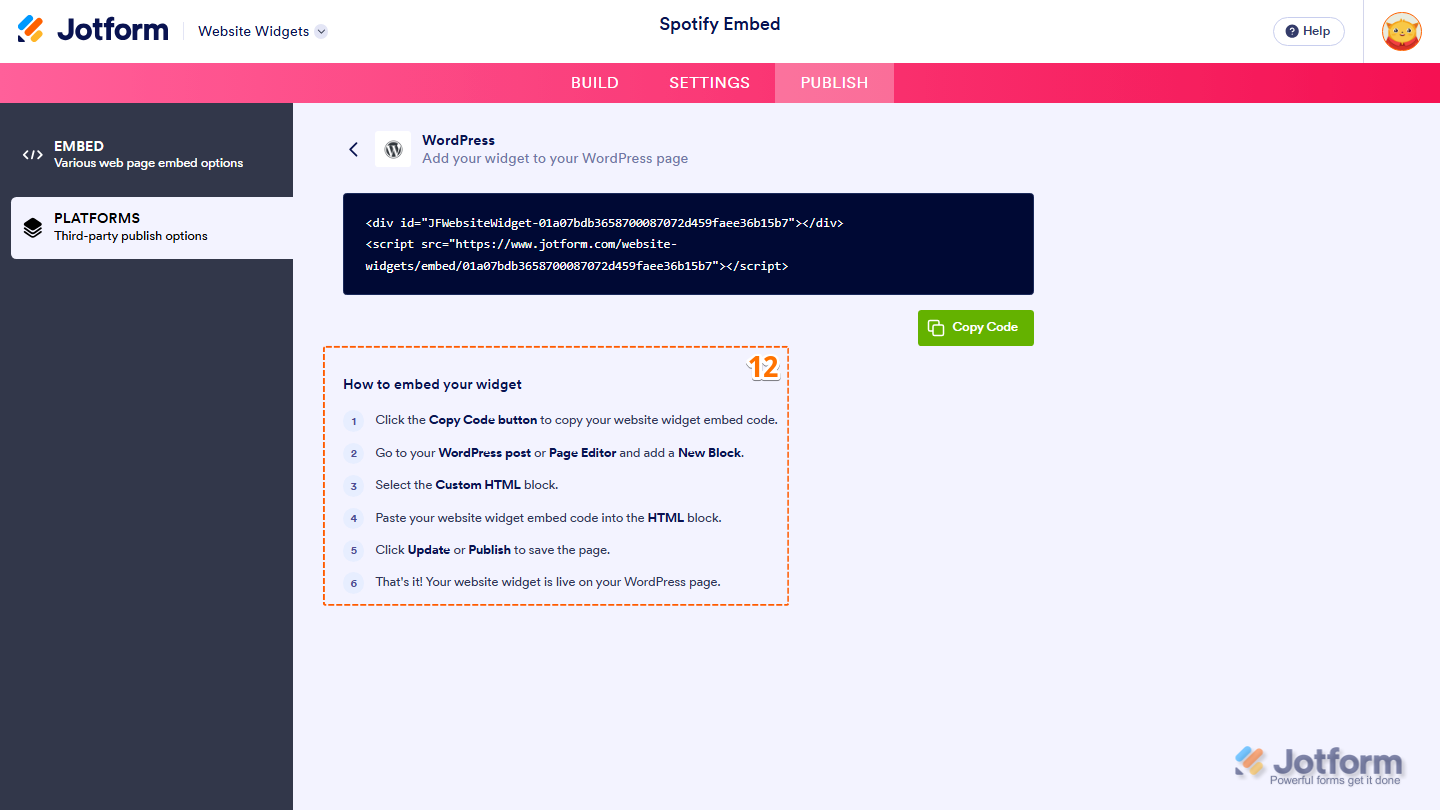
That’s it! Your Spotify Embed widget will appear on your website with the design and settings you selected for it. Take a look at the example below to see how it’ll look:
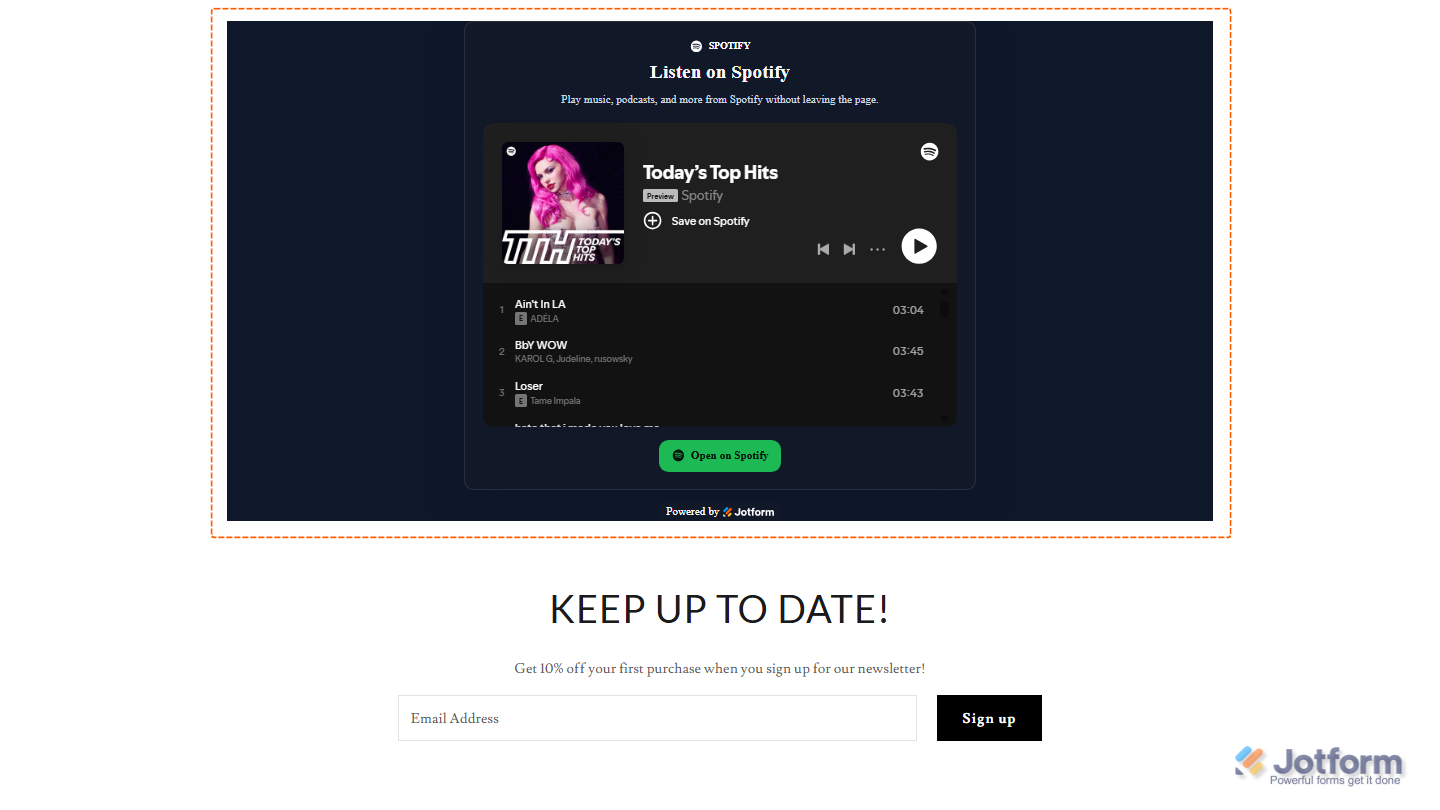
Note
You can manage the website widgets you’ve created at any time from your account. For a full breakdown of how to do it, head over to our guide on How to Manage Website Widgets.
Updating Your Spotify Content
You can update your Spotify Player widget at any time after it’s embedded on your website. Here’s a quick how-to:
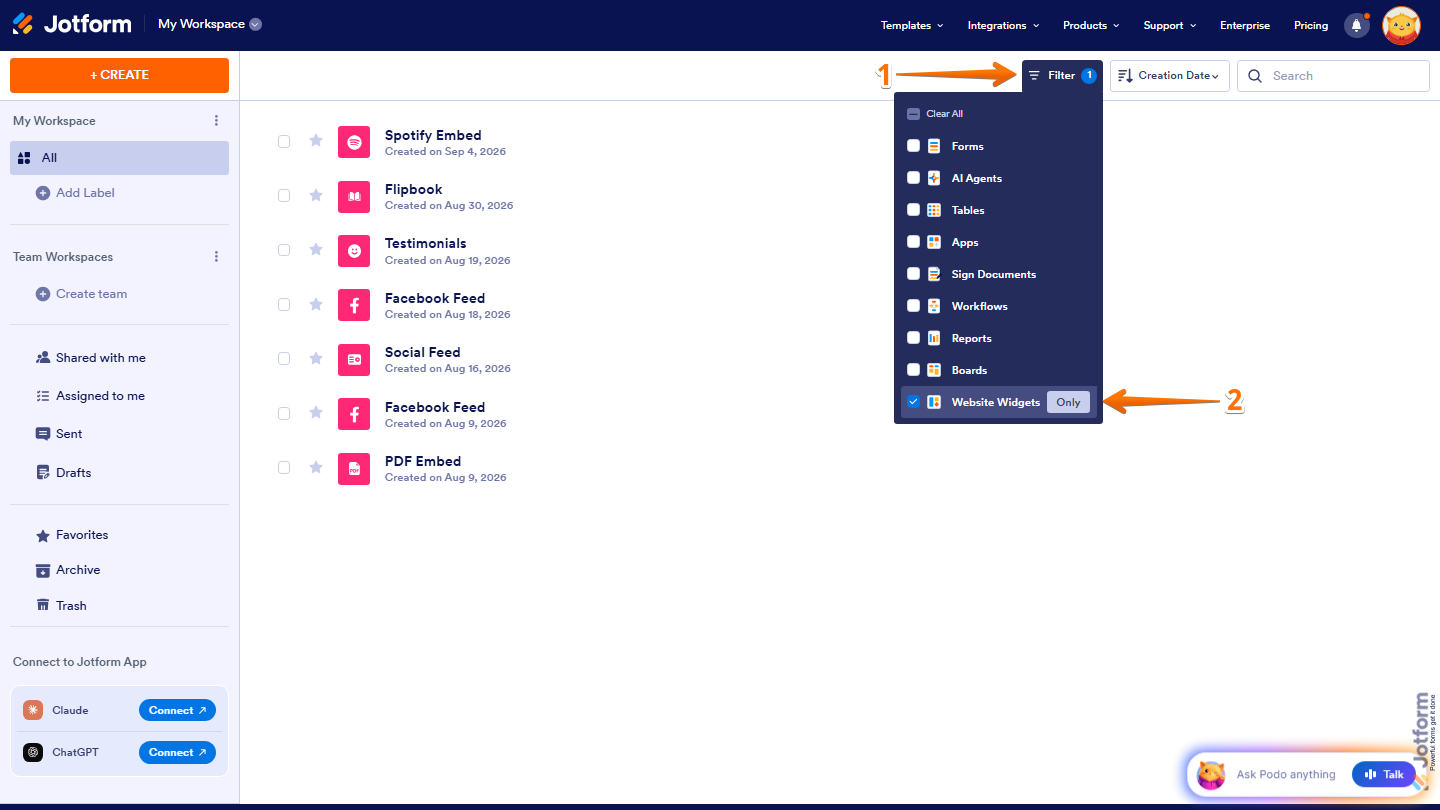
- At the top of your Workspace page, click on Filter.
- Then, in the Dropdown menu that opens, hover your mouse over Website Widgets, and on the right side of it, click on Only.
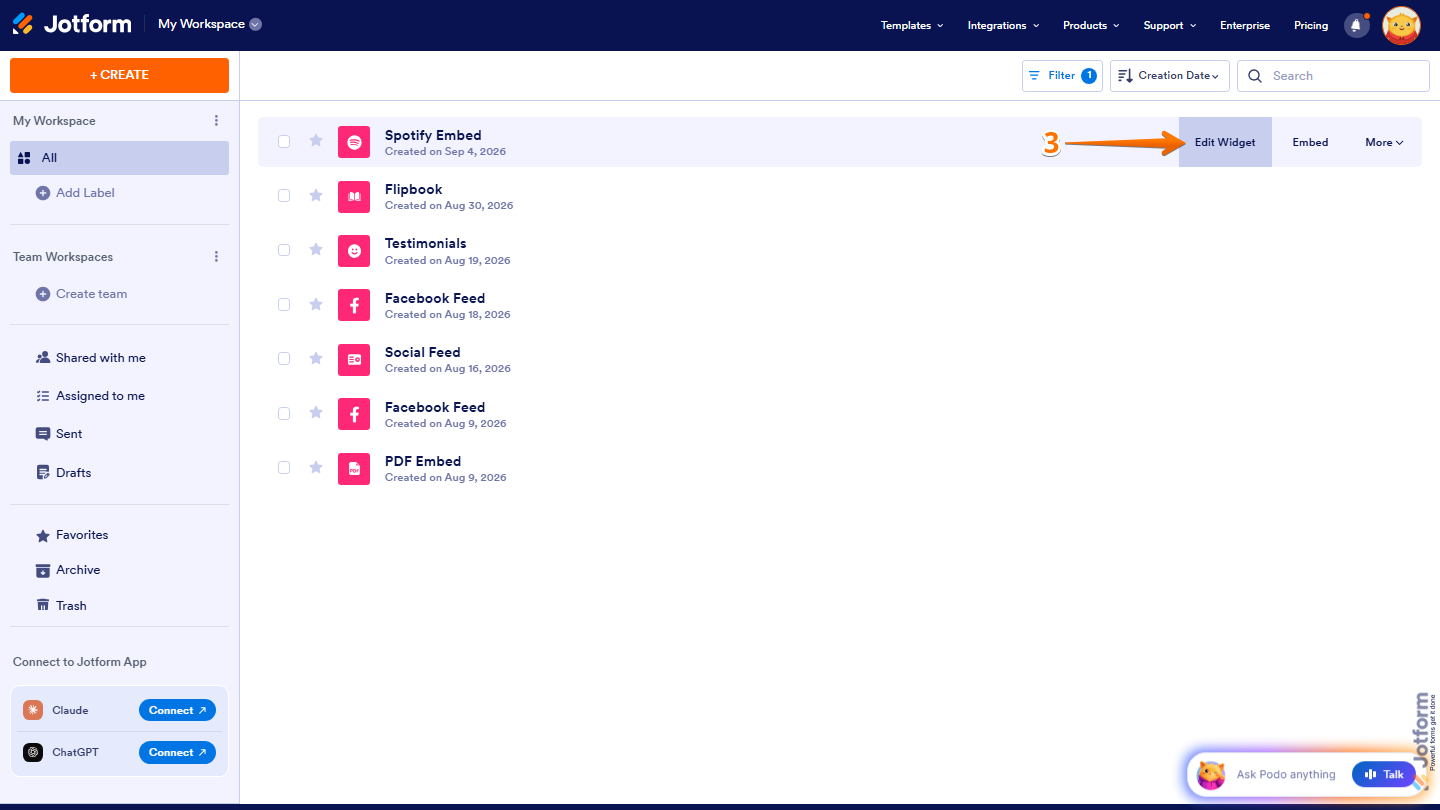
- Next, hover your mouse over the Spotify Content widget you want to update, and then click on Edit Widget on the right side of the page.
- Now, in the Widget Properties menu that opens on the right side of Website Widgets, enter the Spotify URL for the track, album, playlist, artist, show, or episode you want to display.
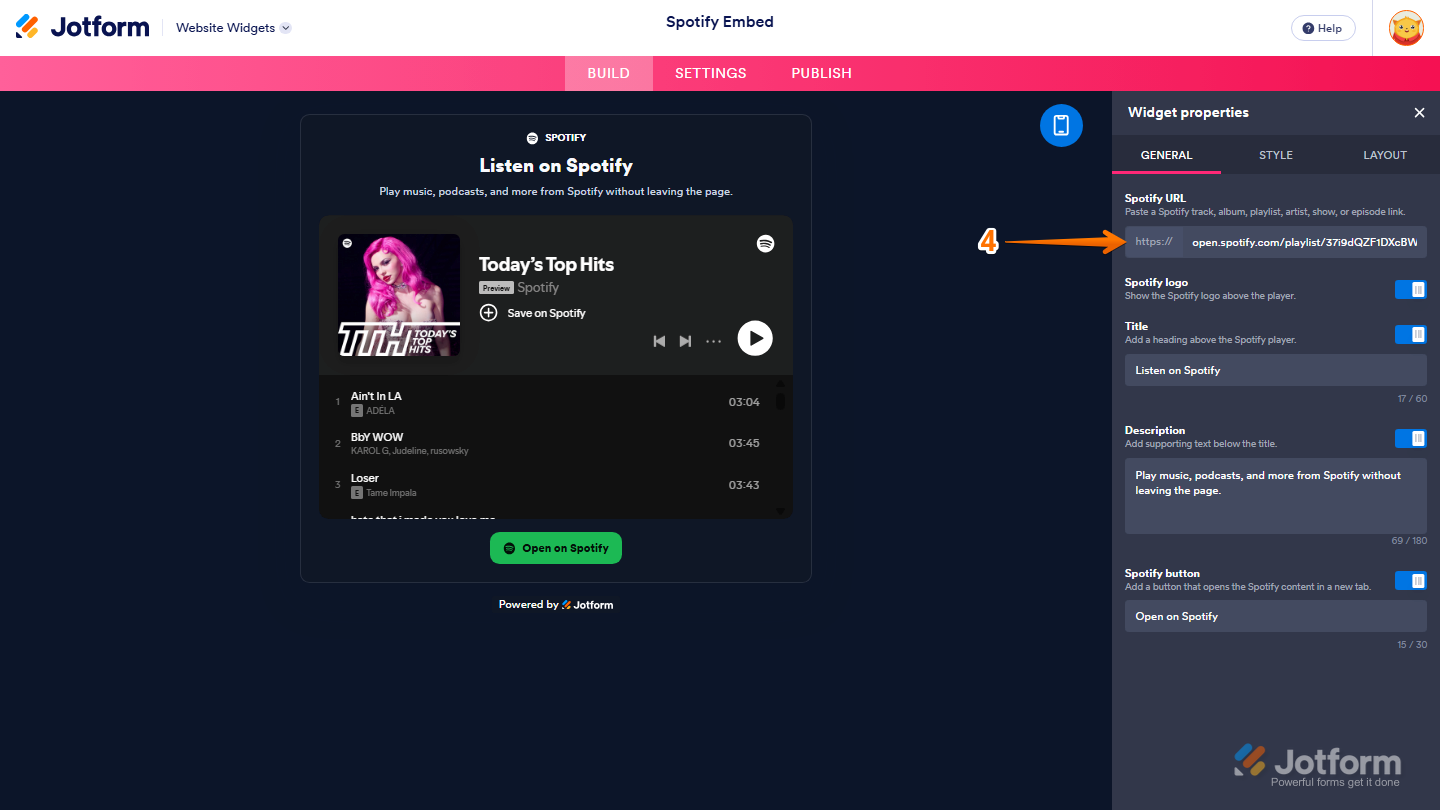
That’s it. You’ve successfully updated your Spotify Embed content.
Note
Any changes you make in the Widget Properties menu are automatically saved and reflected in the Spotify Embed widget on your website.


Send Comment: