Jotform takes the hassle out of introducing your team on your website with the Team Showcase widget. Display team members with their names, roles, photos, biographies, and social media links to help visitors get to know the people behind your business.
Whether you’re highlighting your leadership team, introducing staff members, or showcasing project contributors, the Team Showcase widget helps you build trust and create a more personal connection with your audience.
Adding a Team Showcase to your website only takes a few steps. Here’s how to set it up:
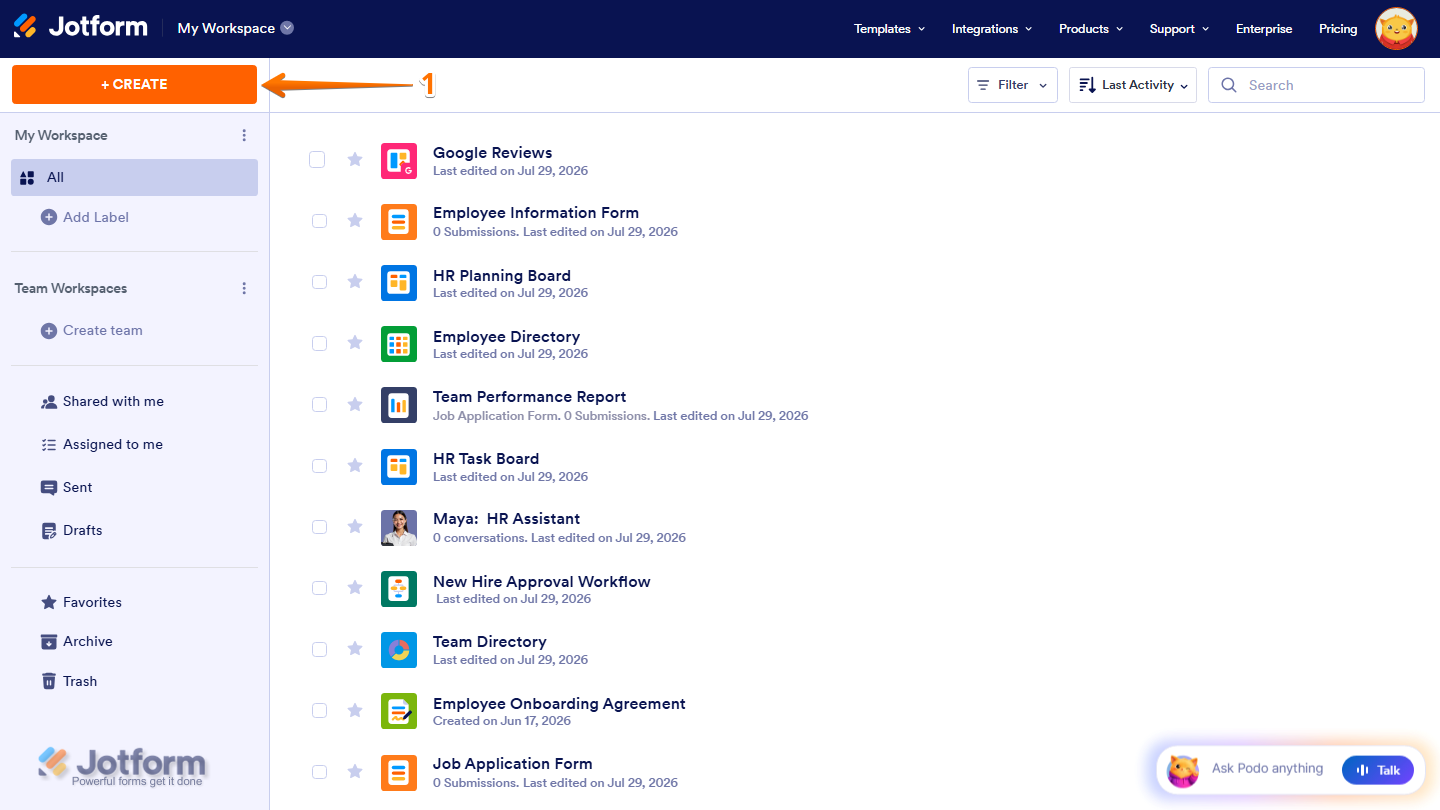
- On the top-left side of your Workspace page, click on Create.
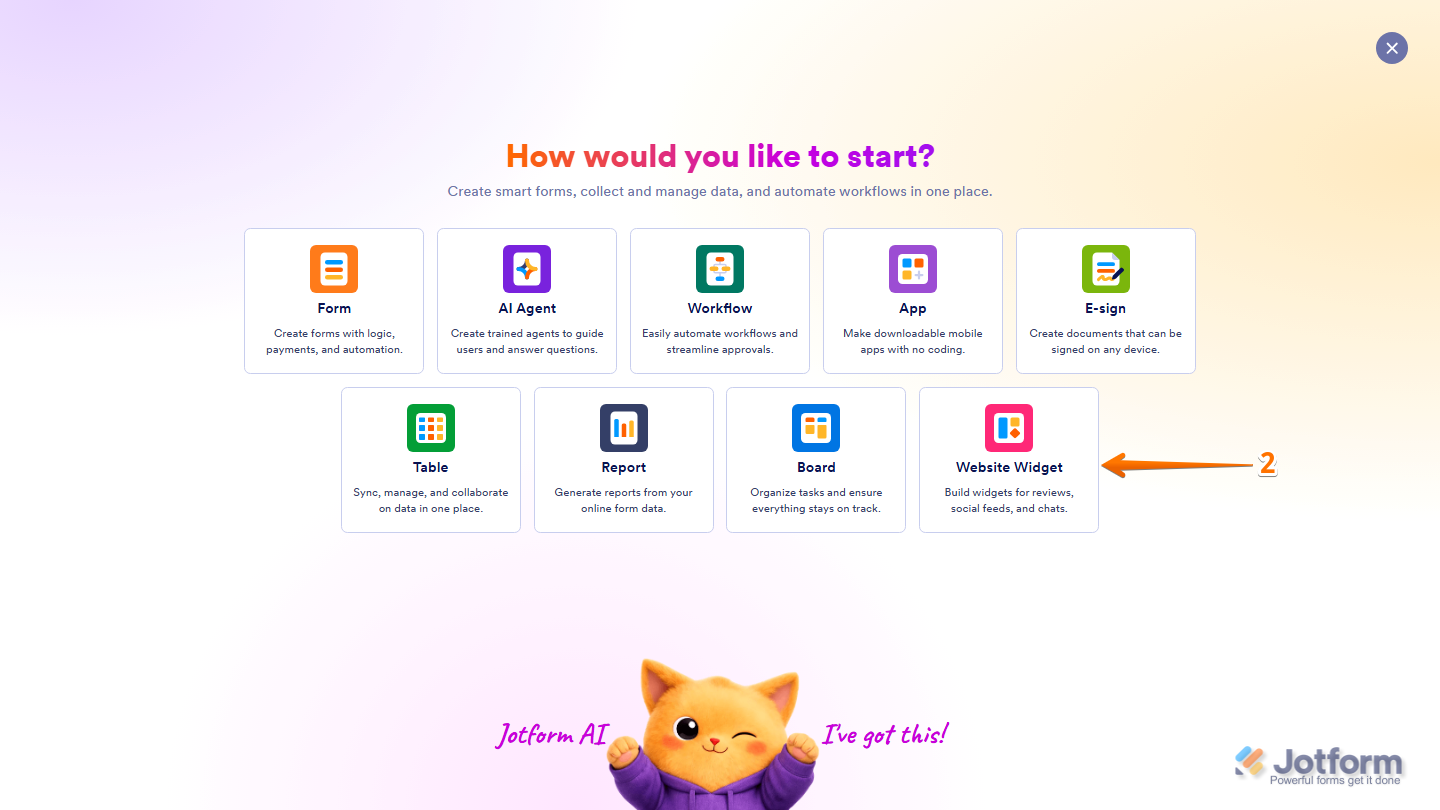
- Then, in the menu that opens up, select Website Widget.
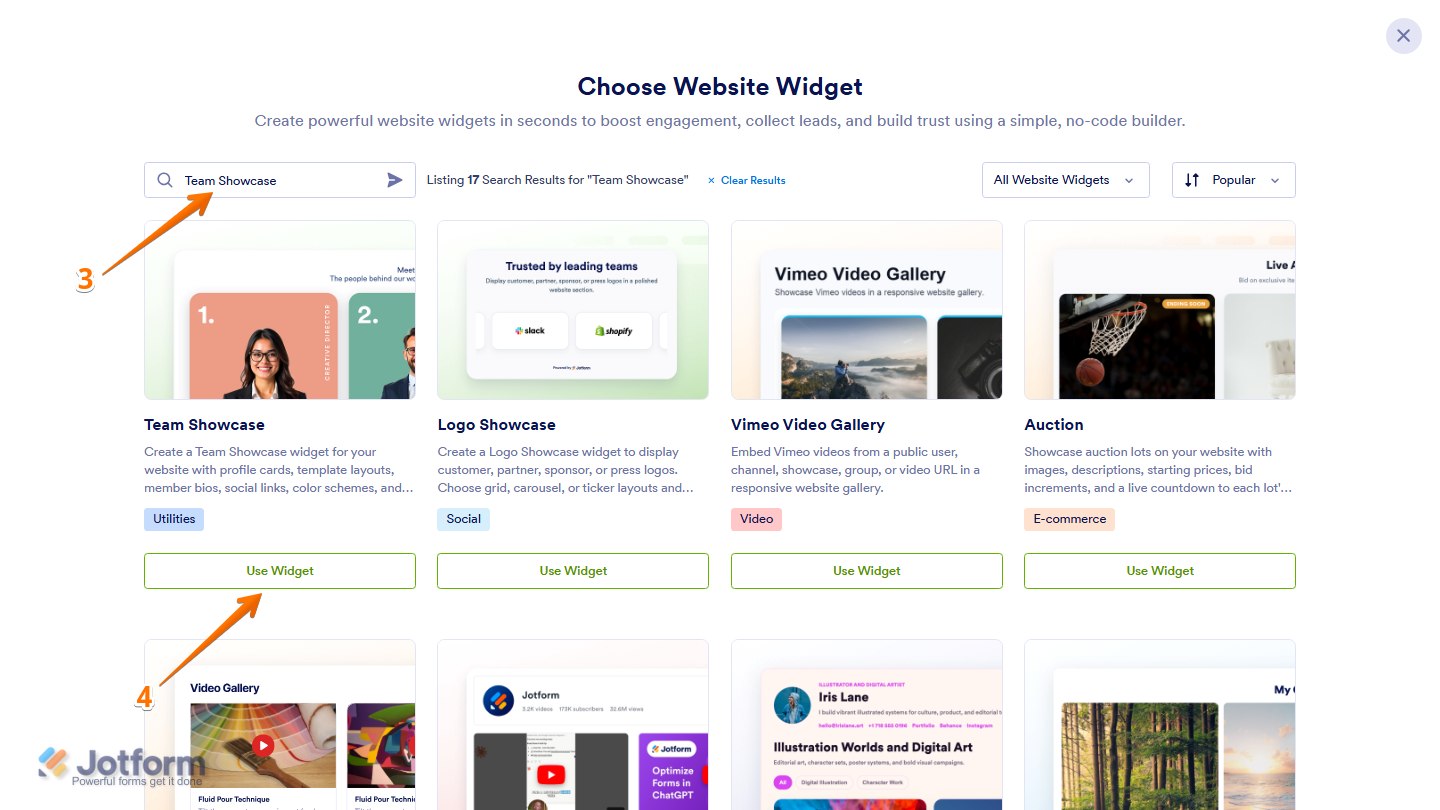
- Next, in the Search bar in the upper-left corner of the Choose Website Widget menu, enter Team Showcase.
- Then, at the bottom of the Team Showcase widget in the search results, click on Use Widget.
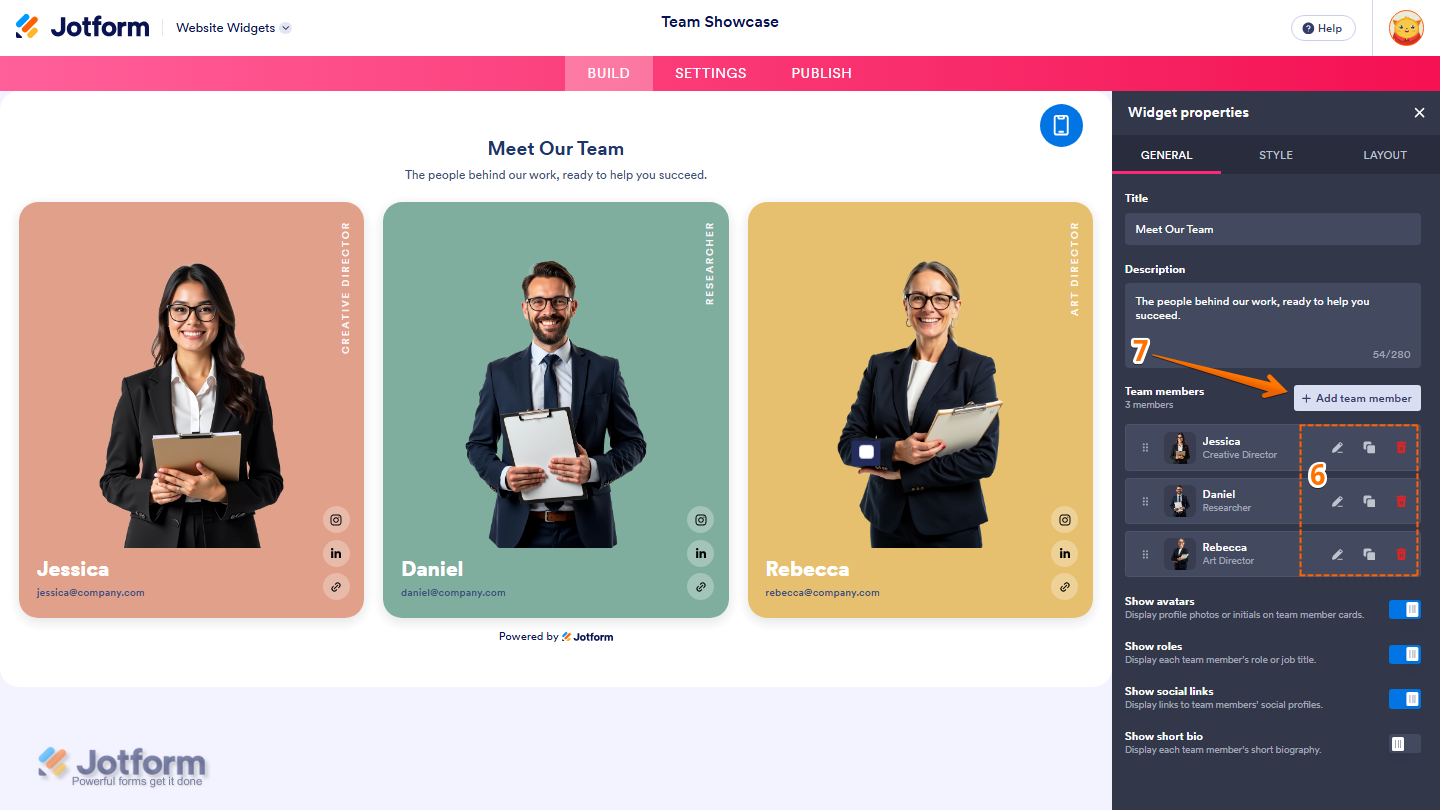
- Now, in the Widget Properties menu that opens on the right side of Website Widgets, under the General tab, set up these properties:
- Title — Delete the existing title in the input box and enter the title you want to display.
- Description — Delete the existing description in the input box and enter the supporting text you want to display below the title.

- Then, under the Team Members section, you’ll find sample team members that you can manage using these action icons:
- Pencil icon — Click on the Pencil icon to edit the team member’s information.
- Duplicate icon — Click on the Duplicate icon to create a copy of the team member.
- Trash Can icon — Click on the Trash Can icon to delete the team member.
- To add another Team Member, click on Add Team Member.
- Now, in the Add Team Member menu that appears, configure these things:
- Photo — Drag and drop an image from your device into the Upload Area, or select Image URL from the Dropdown menu and enter the direct URL of your image.
- Full Name — Delete the existing name in the input box and enter the team member’s full name.
- Role / Title — Delete the existing role in the input box and enter the team member’s role or job title.
- Email — Enter the team member’s email address in the input box.
- Short Bio — Delete the existing text in the input box and enter a short biography for the team member.
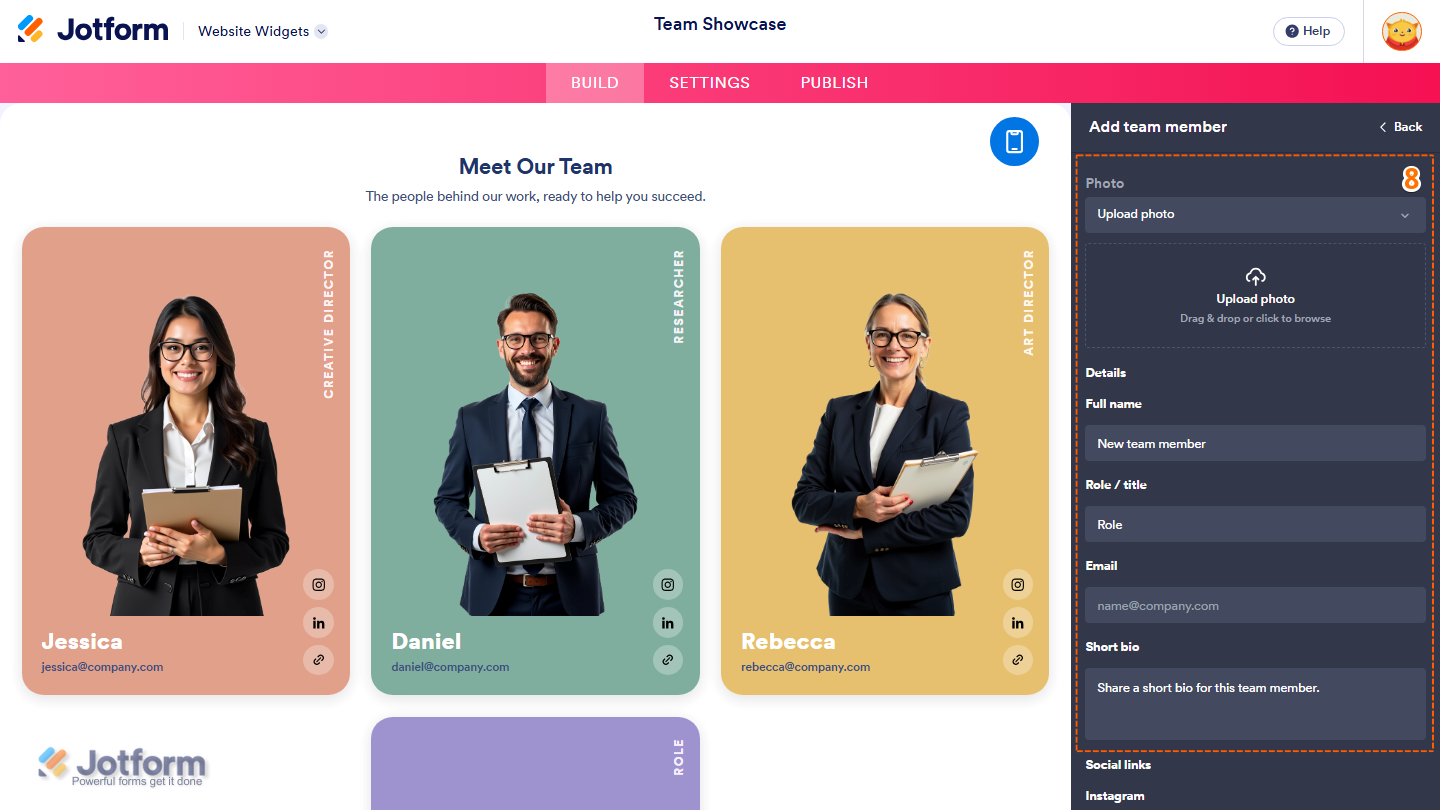
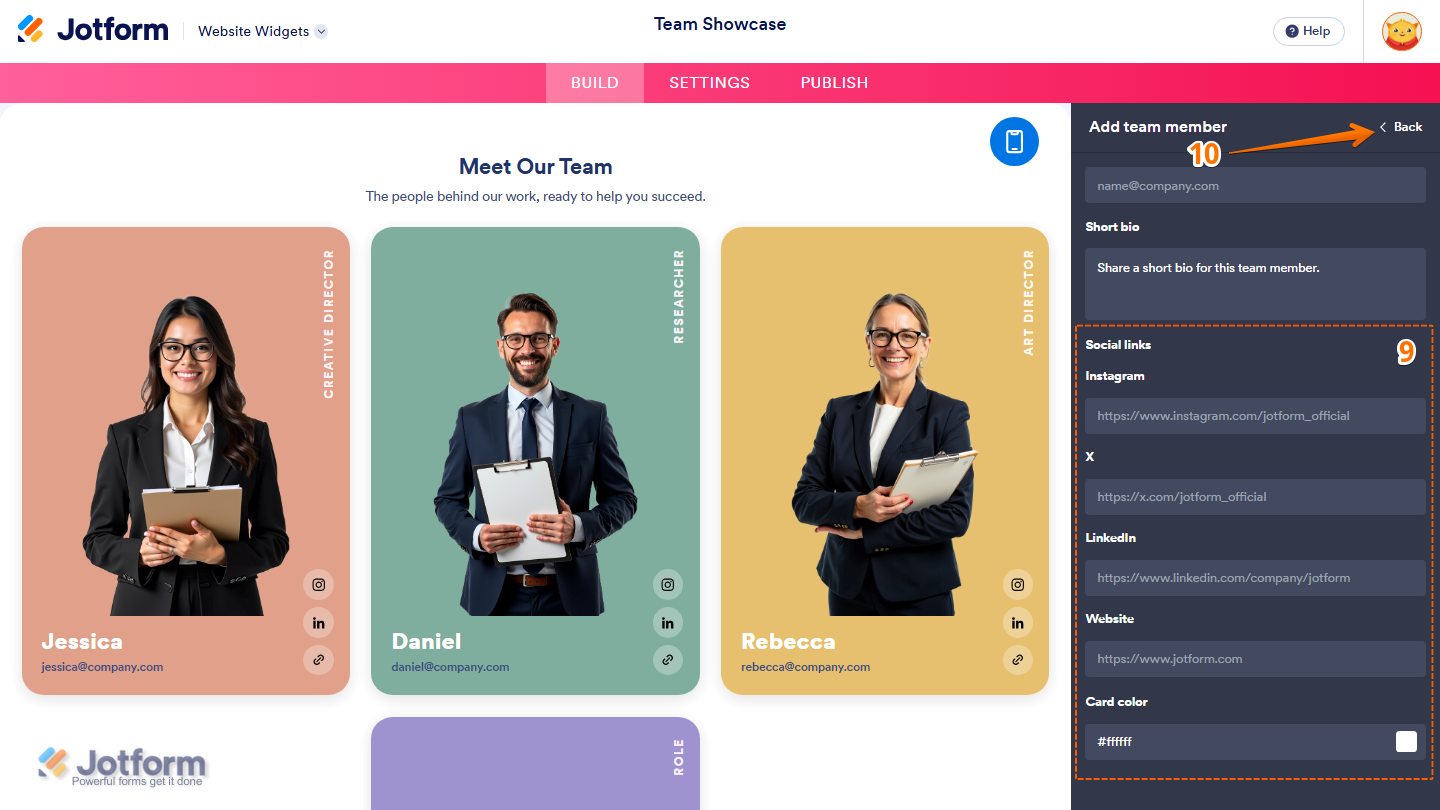
- Then, scroll down and continue to configure these things:
- Social Links — Enter the corresponding profile URLs for the following platforms:
- Instagram — Enter the team member’s Instagram profile URL.
- X — Enter the team member’s X profile URL.
- LinkedIn — Enter the team member’s LinkedIn profile URL.
- Website — Enter the team member’s website URL.
- Card Color — Enter a hex color code in the input box or click on the color box to customize the background color of the team member card.
- Social Links — Enter the corresponding profile URLs for the following platforms:
- Once you’re done, in the upper-right corner, click on Back to return to the Widget Properties menu under the General tab.
- Then, set up these things:
- Show Avatars — Keep this on to display profile photos or initials on the team member cards, or toggle it off to hide them.
- Show Roles — Keep this on to display each team member’s role or job title, or toggle it off to hide it.
- Show Social Links — Keep this on to display links to each team member’s social profiles, or toggle it off to hide them.
- Show Short Bio — Keep this on to display each team member’s short biography, or toggle it off to hide it.

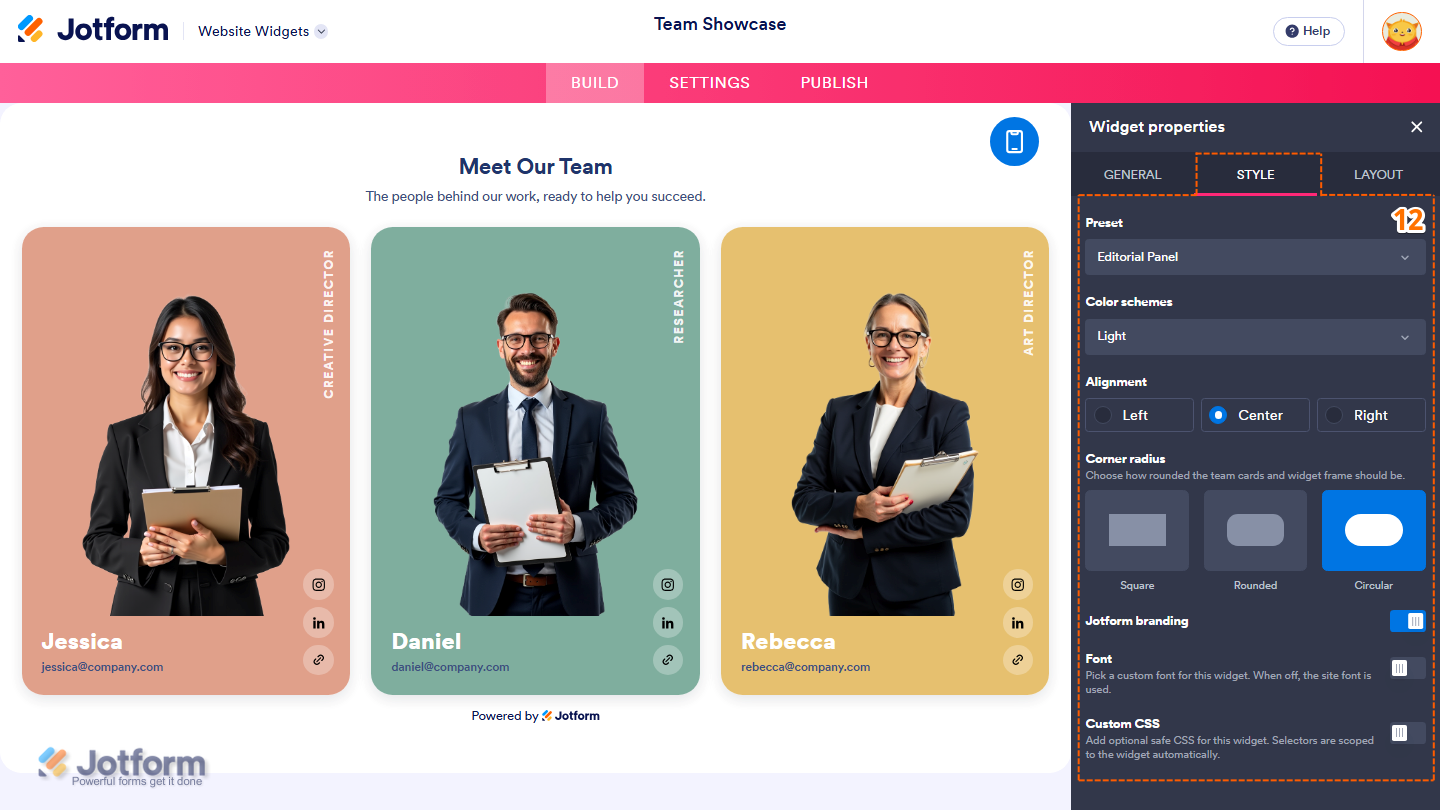
- Next, under the Style tab, customize these properties:
- Preset — Click on the Dropdown menu and select the predefined visual style you want to use for the team showcase.
- Color Schemes — Click on the Dropdown menu and select the color scheme you want to apply to the team showcase.
- Alignment — Select one of the following options to align the content within each team member card:
- Left — Align the content to the left.
- Center — Center the content within the card.
- Right — Align the content to the right.Square — Display sharp corners.
- Corner Radius — Select one of the following options to choose how rounded the team cards and website widget frame should be:
- Square — Display sharp corners.
- Rounded — Display moderately rounded corners.
- Circular — Display fully rounded corners.
- Jotform Branding — Keep this on to display Powered by Jotform in your widget, or toggle it off to hide it.
- Font — Toggle this on, then in the Dropdown menu that appears below it, keep Site Font selected to match the font used on your website, select System to use the font from each visitor’s device, or select another available font. Leave this off to continue using your website’s font.
- Custom CSS — Toggle this on, then in the code editor that appears below it, enter custom CSS to apply advanced styling to your widget.
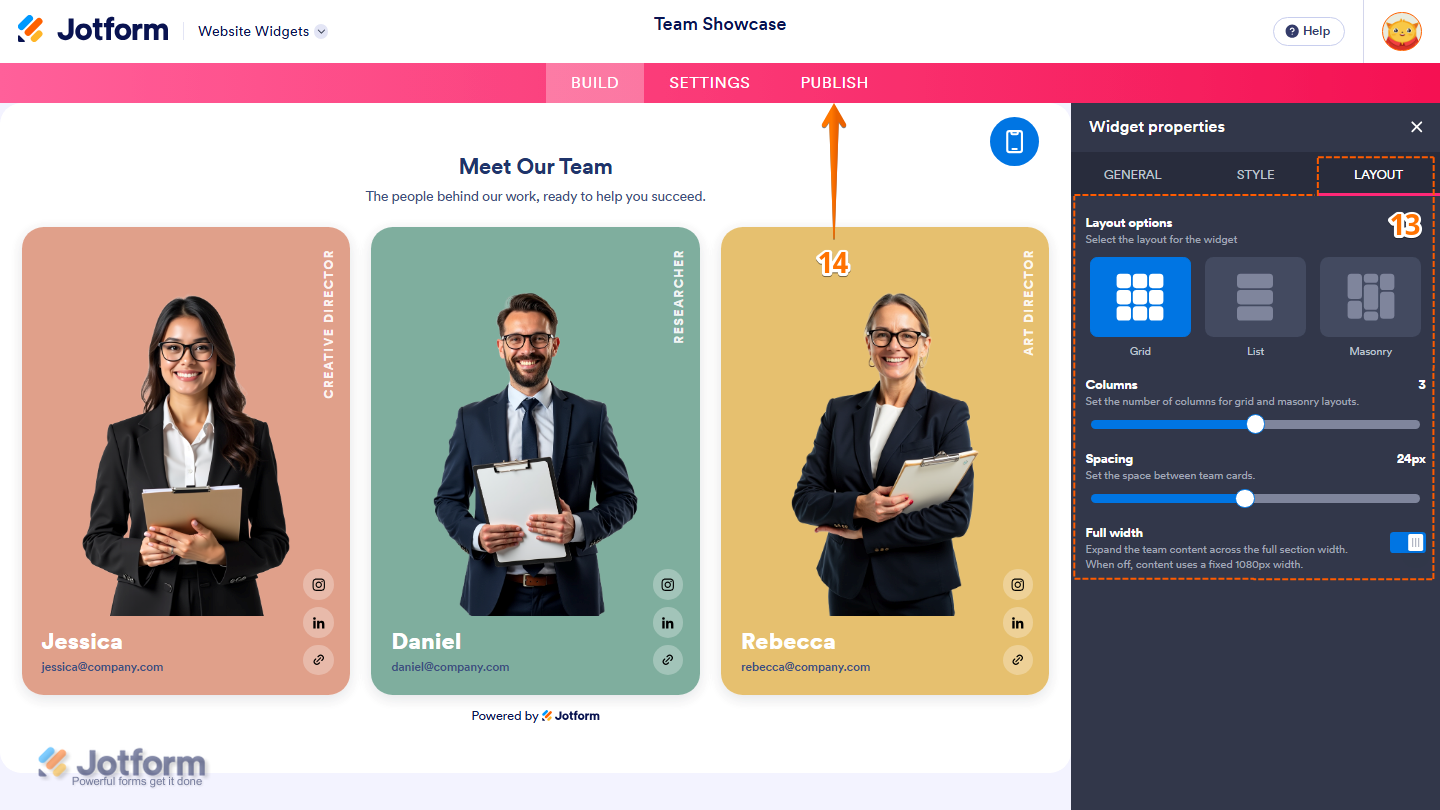
- Now, under the Layout tab, configure these properties:
- Layout Options — Select one of the following options to choose how the team members are displayed:
- Grid — Display team members in evenly sized cards arranged in rows and columns.
- List — Display team members in a vertical list.
- Masonry — Display team members in a masonry layout with varying card heights.
- Columns — Click on and hold the slider handle, then drag it to set the number of columns for the Grid and Masonry layouts.
- Spacing — Click on and hold the slider handle, then drag it to adjust the spacing between team member cards.
- Full Width — Keep this on to expand the team content across the full section width, or toggle it off to display the content within a fixed 1080 px width.
- Layout Options — Select one of the following options to choose how the team members are displayed:
- Once everything’s set, in the pink navigation bar at the top of the page, click on Publish.
Note
You’ll be asked to log in to your Jotform account or sign up for one before you can continue using your widgets.
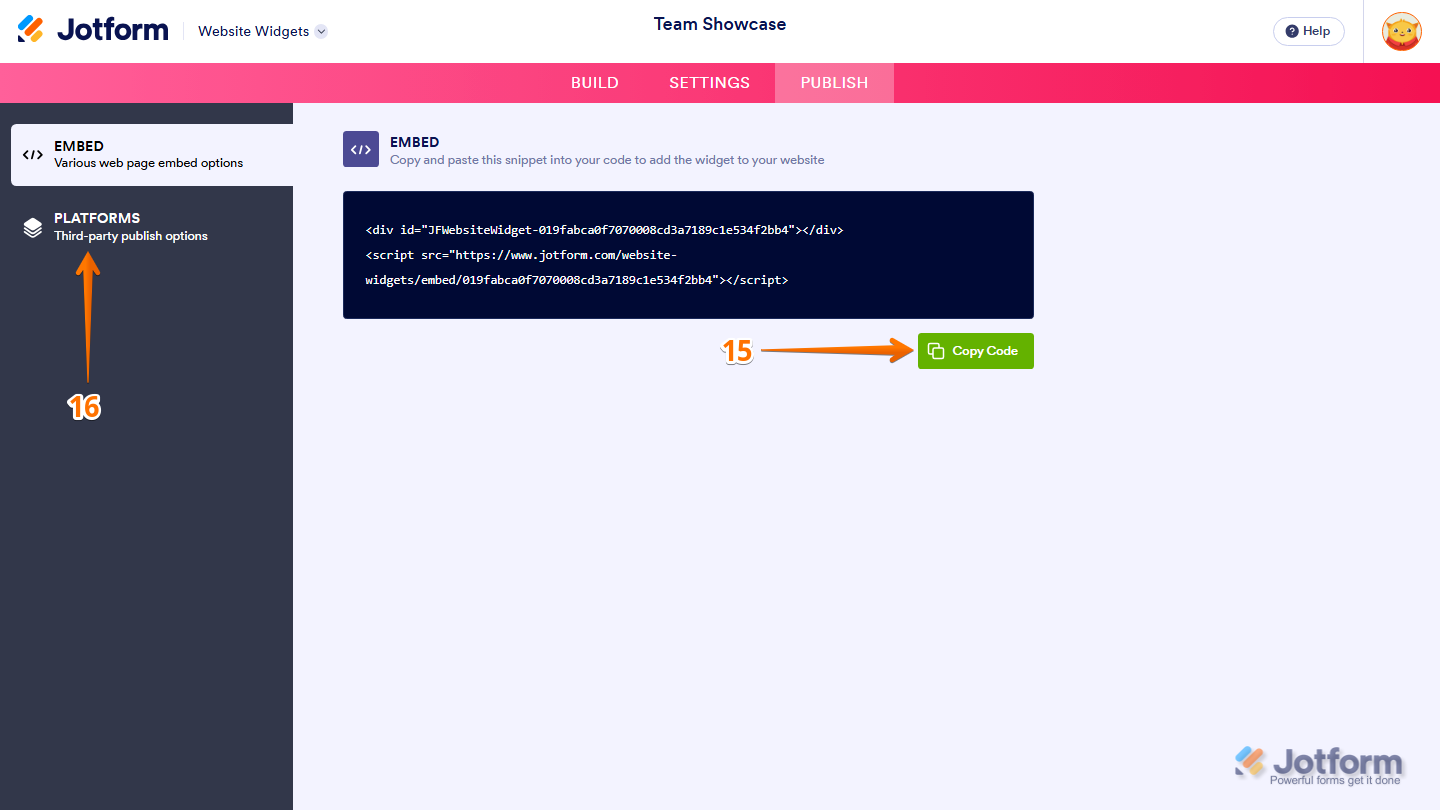
- Then, in the Embed section, click on Copy Code, and, if you already know how, paste that into the Embed section on your platform, and you’re good to go.
- To view embedding instructions for your widget, click on Platforms in the menu on the left side of the page.
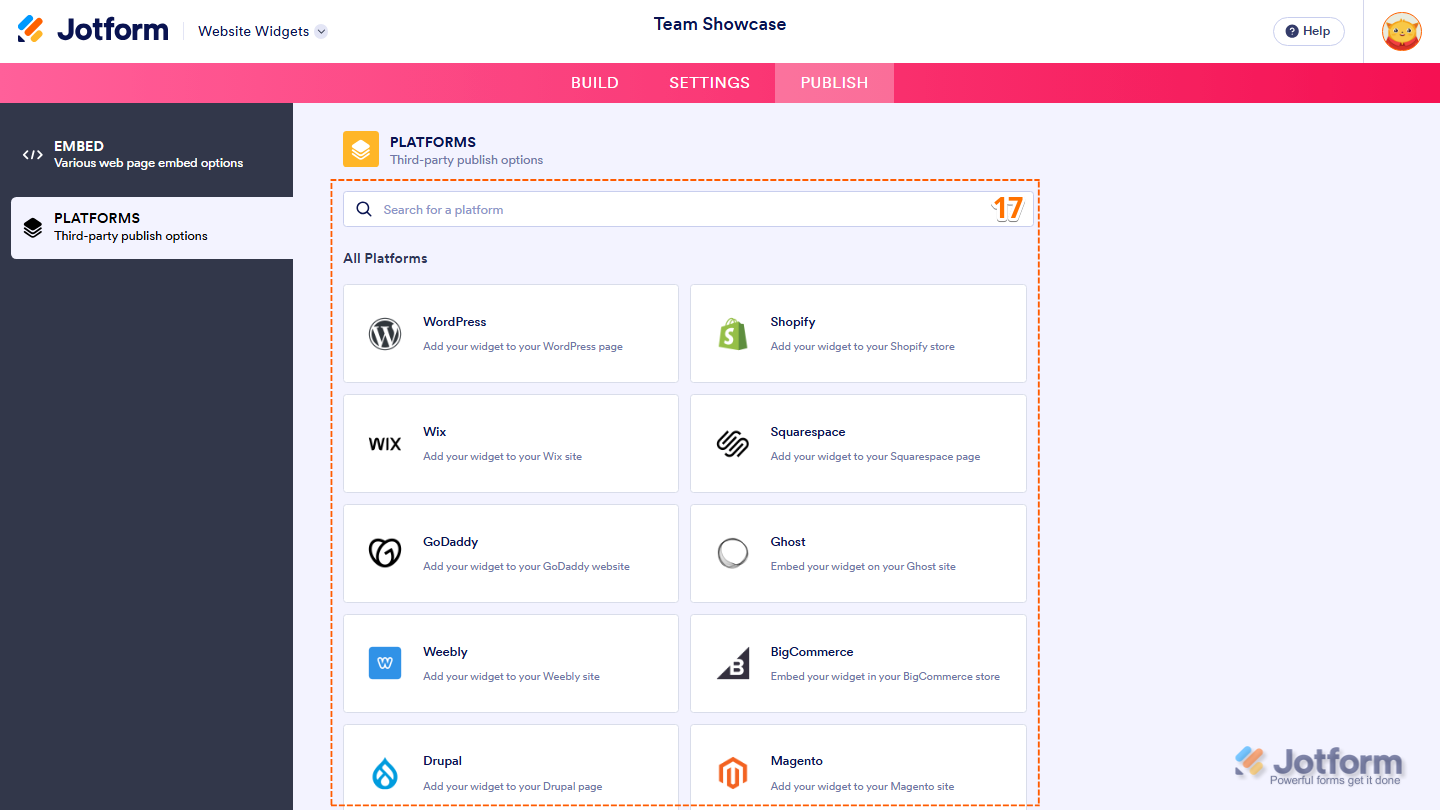
- Next, in the Platforms section on the right, select the platform you want to view embedding instructions for. Or, use the Search bar at the top of the section to find it easily.
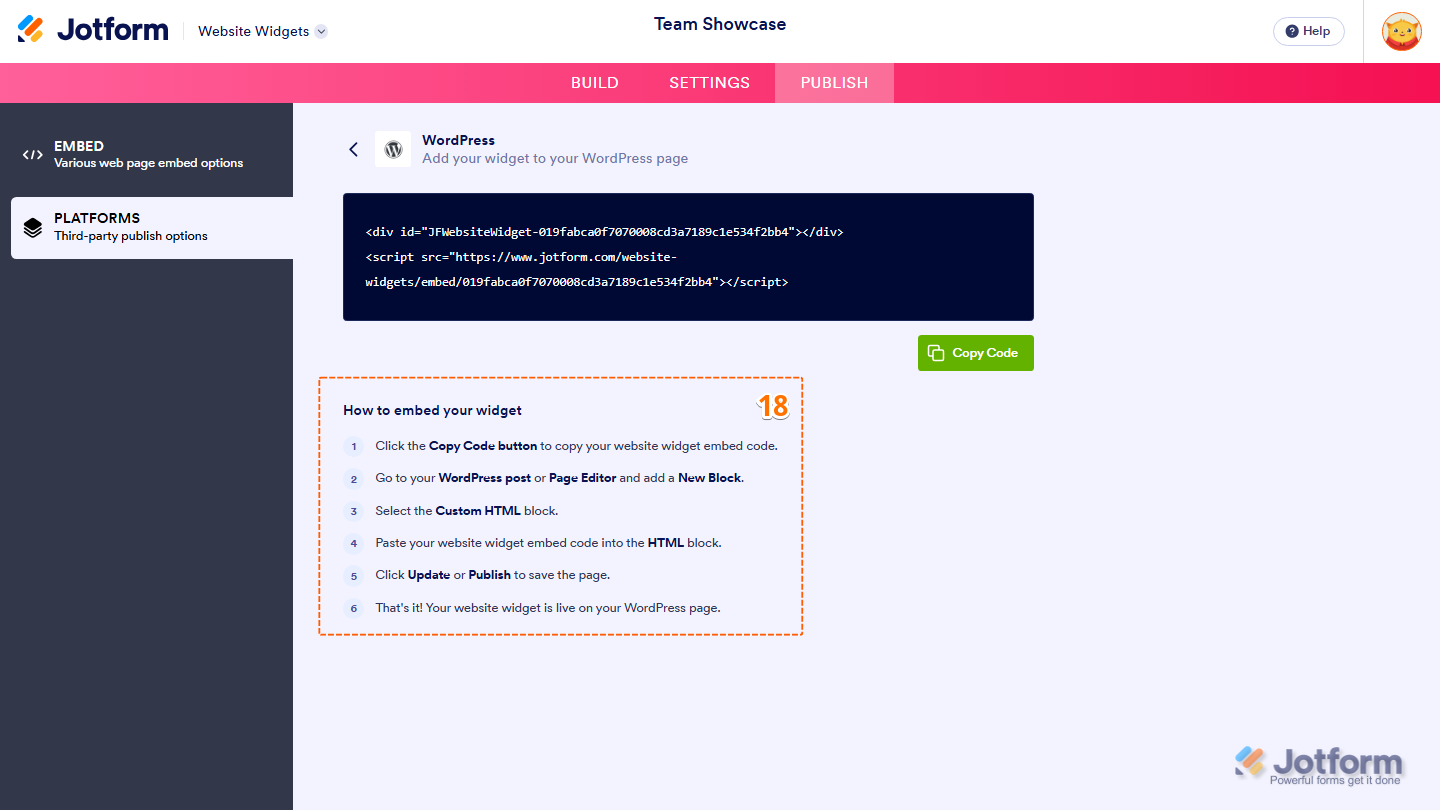
- Then, follow the steps in the How to Embed Your Widget section to add it to your website.
That’s it! Your Team Showcase widget will appear on your website just the way you customized it. The screenshot below shows how it looks on a website.



Send Comment: