Displaying customer testimonials on your website is a great way to build trust and showcase positive experiences from real customers. Instead of simply telling visitors about the quality of your products or services, you can highlight authentic testimonials that help establish credibility and encourage potential customers to take action.
With the Testimonial Slider widget, it’s easy to embed an interactive testimonial section on your website without any coding experience. Jotform lets you customize the layout, adjust the design, and seamlessly match the widget to your website’s overall style.
Creating and Getting Your Testimonials Slider Widget Embed Code
To add a Testimonial Slider to your website, you’ll first need to configure the Testimonial Slider widget and get its embed code. Here’s how to get going:
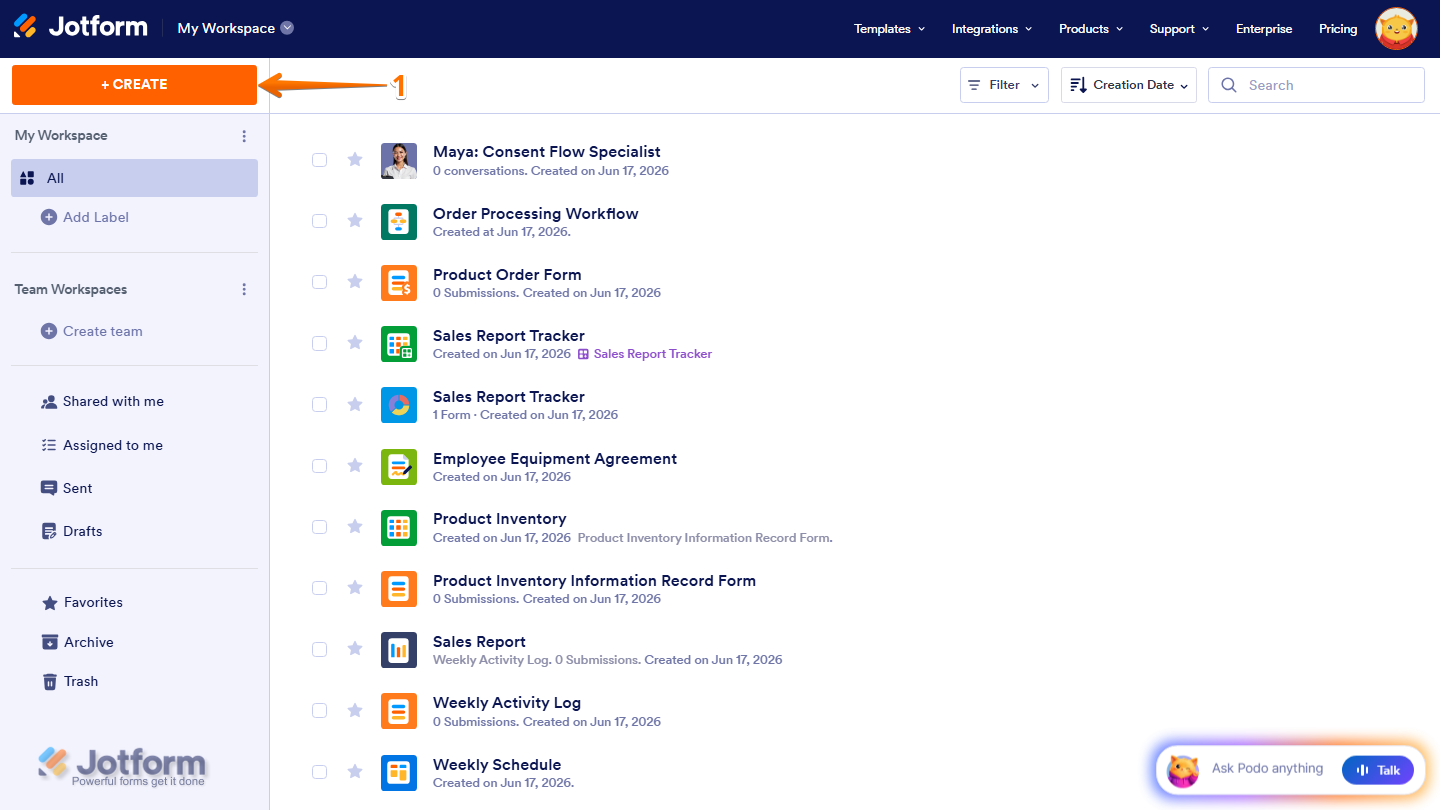
- On your Workspace page, click on Create on the top-left side of the page.
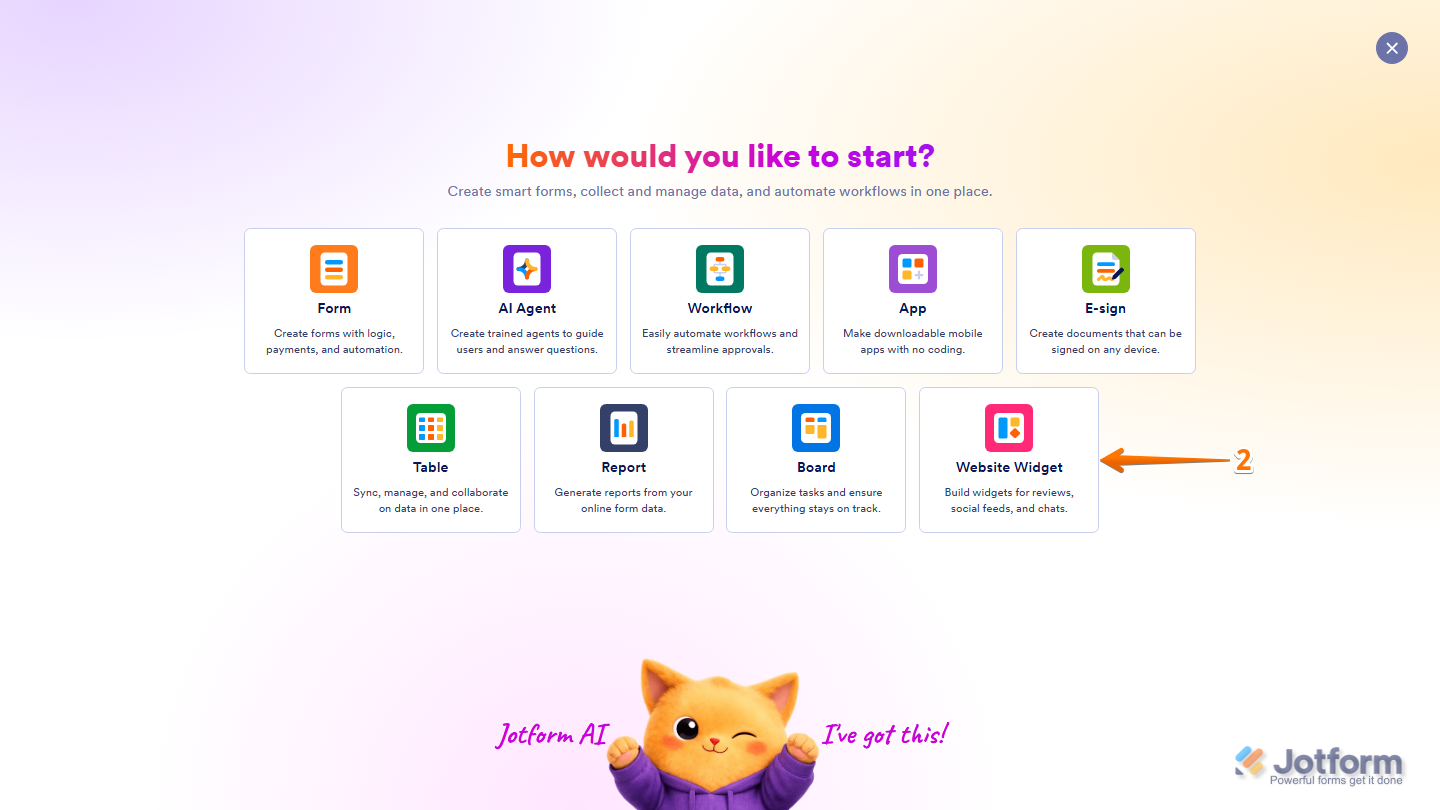
- Then, in the window that opens up, select Website Widget from the assets.
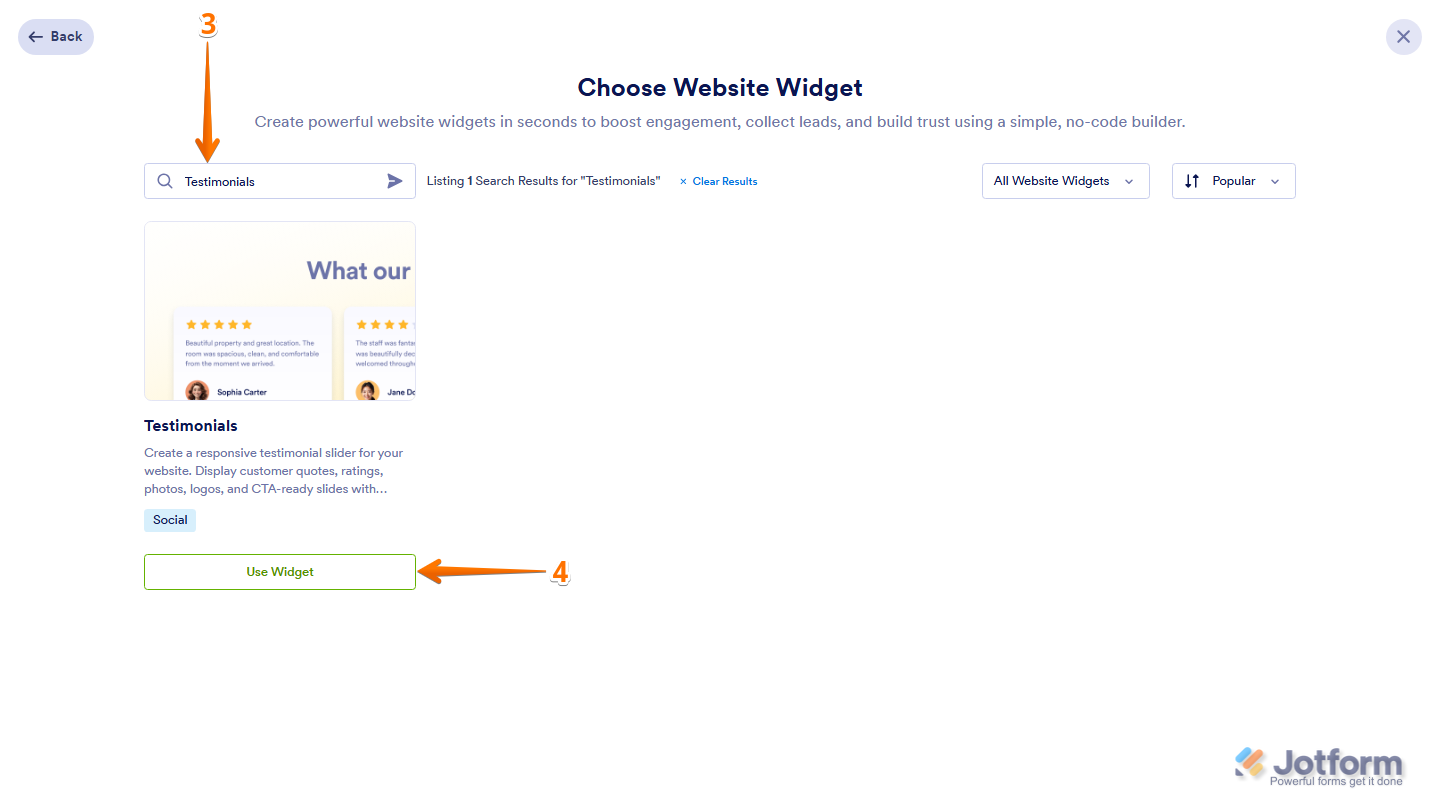
- Next, in the Search bar at the top of the Choose Website Widget page, search for the Testimonials.
- Now, in the search results, click on Use Widget.
- Once the widget opens, the Widget Properties menu will automatically appear on the right side of the Website Widgets. You’ll notice that the widget already includes sample testimonials. You can edit or remove these testimonials, or add your own.
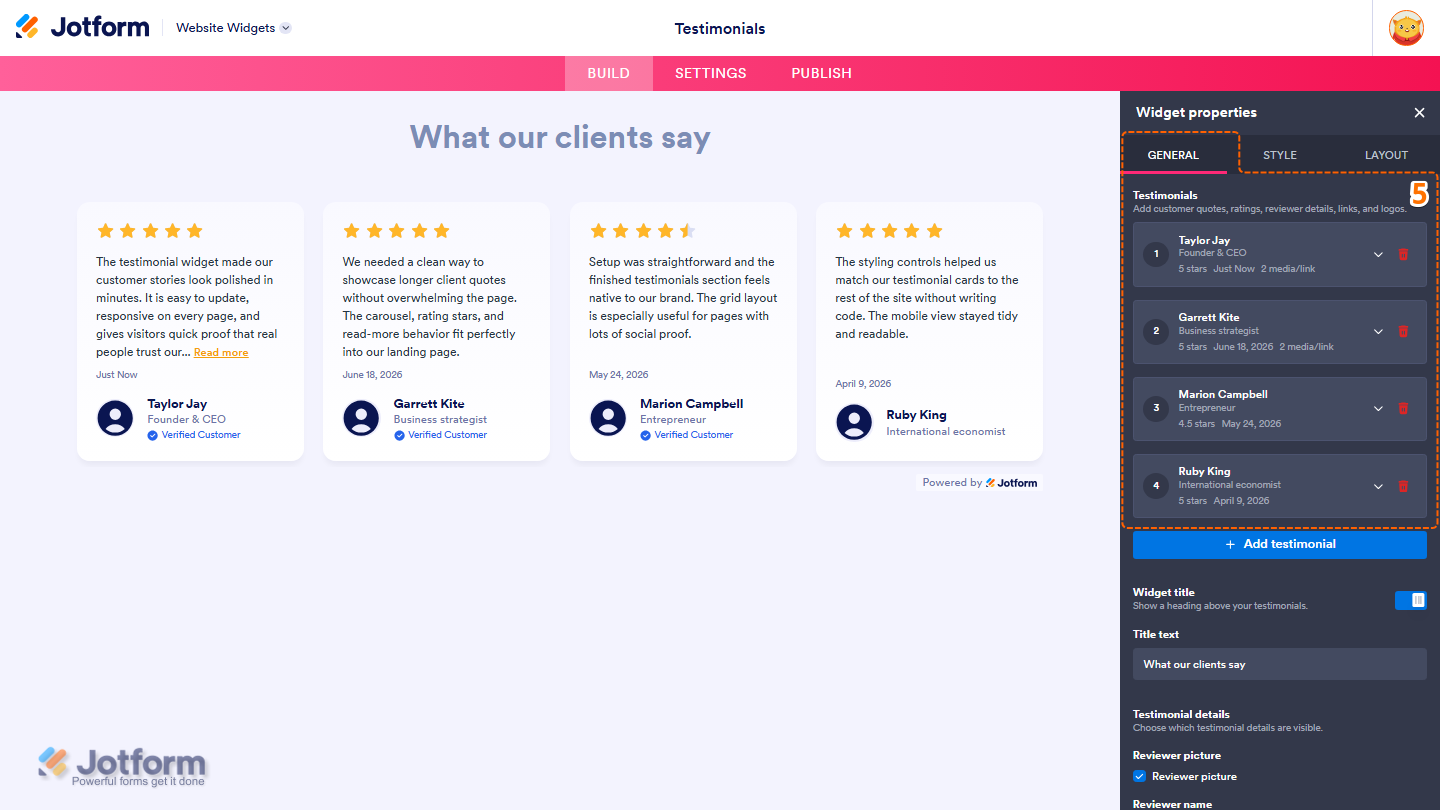
- To add a new testimonial, click on Add Testimonial.
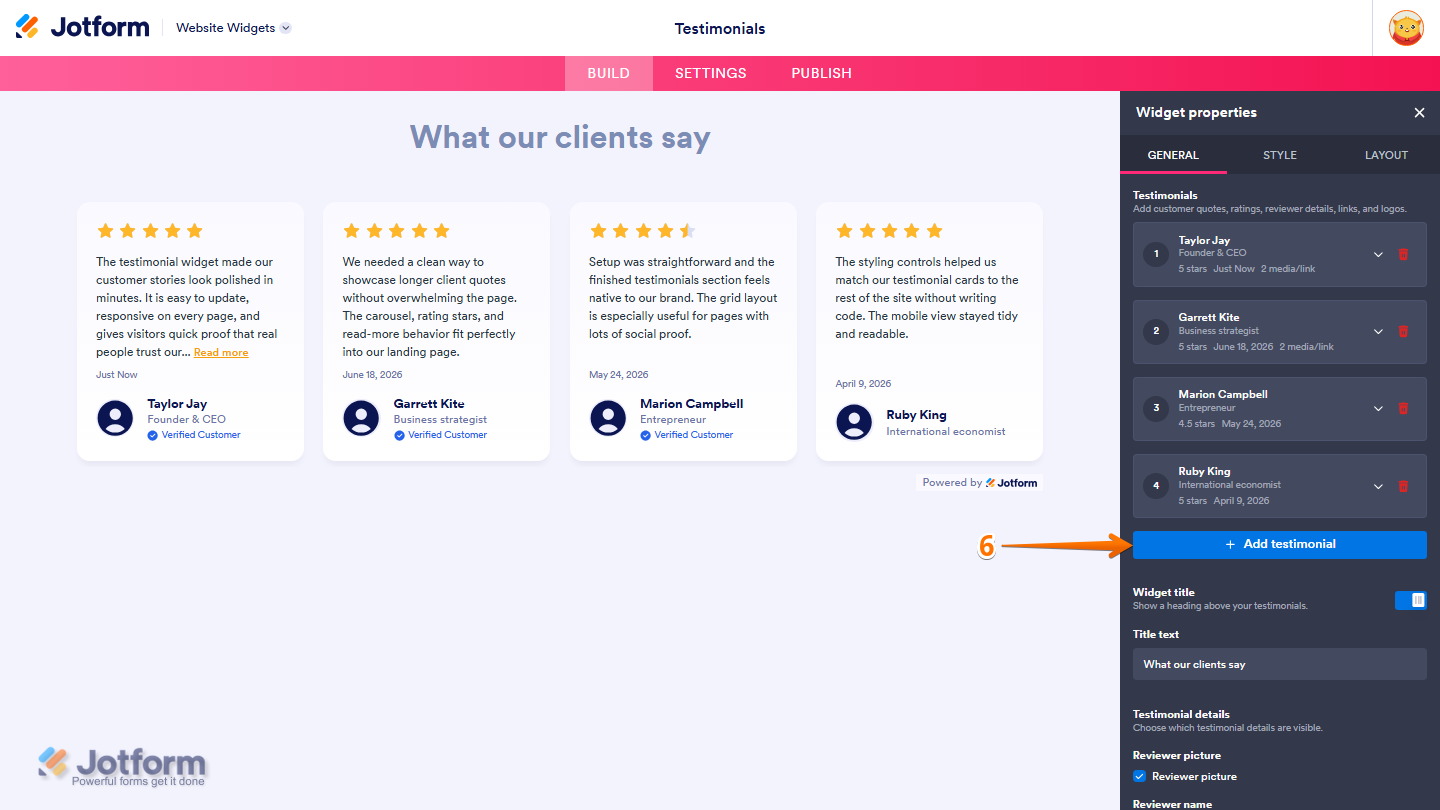
- Then, in the new customer card that appears, fill in these details:
- Quote — Enter the testimonial text.
- Name — Enter the reviewer’s name.
- Caption — Add the reviewer’s job title, company, or role.
- Rating — Select the star rating.
- Date — Enter or select the review date.
- Verified Customer — Tick the checkbox to display a verified customer badge.
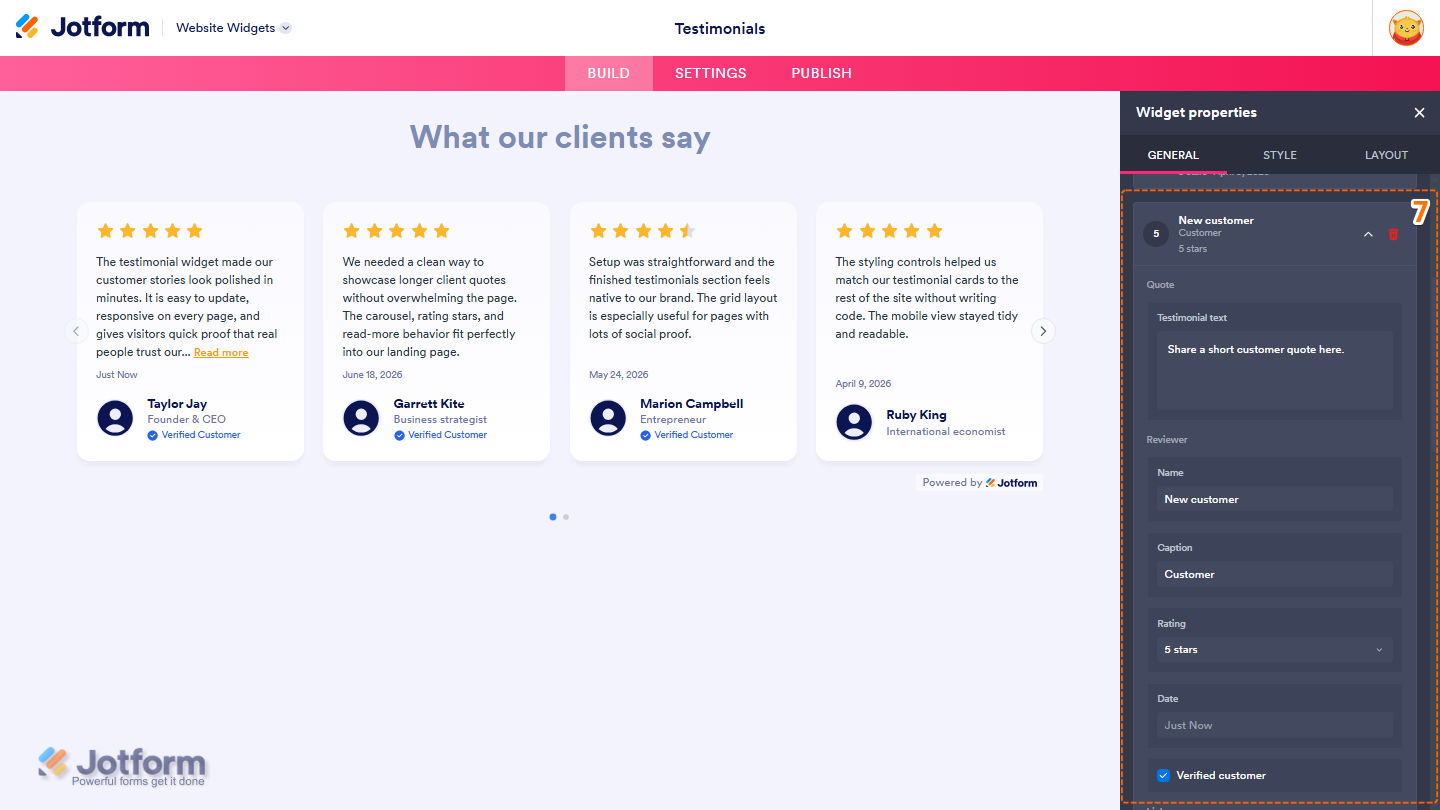
- After that, scroll down to continue filling in these details:
- Social Profile URL — Add the reviewer’s social media profile URL.
- Website URL — Add the reviewer’s website URL.
- Reviewer Photo — Upload the reviewer’s photo.
- Company Logo — Upload the company logo.
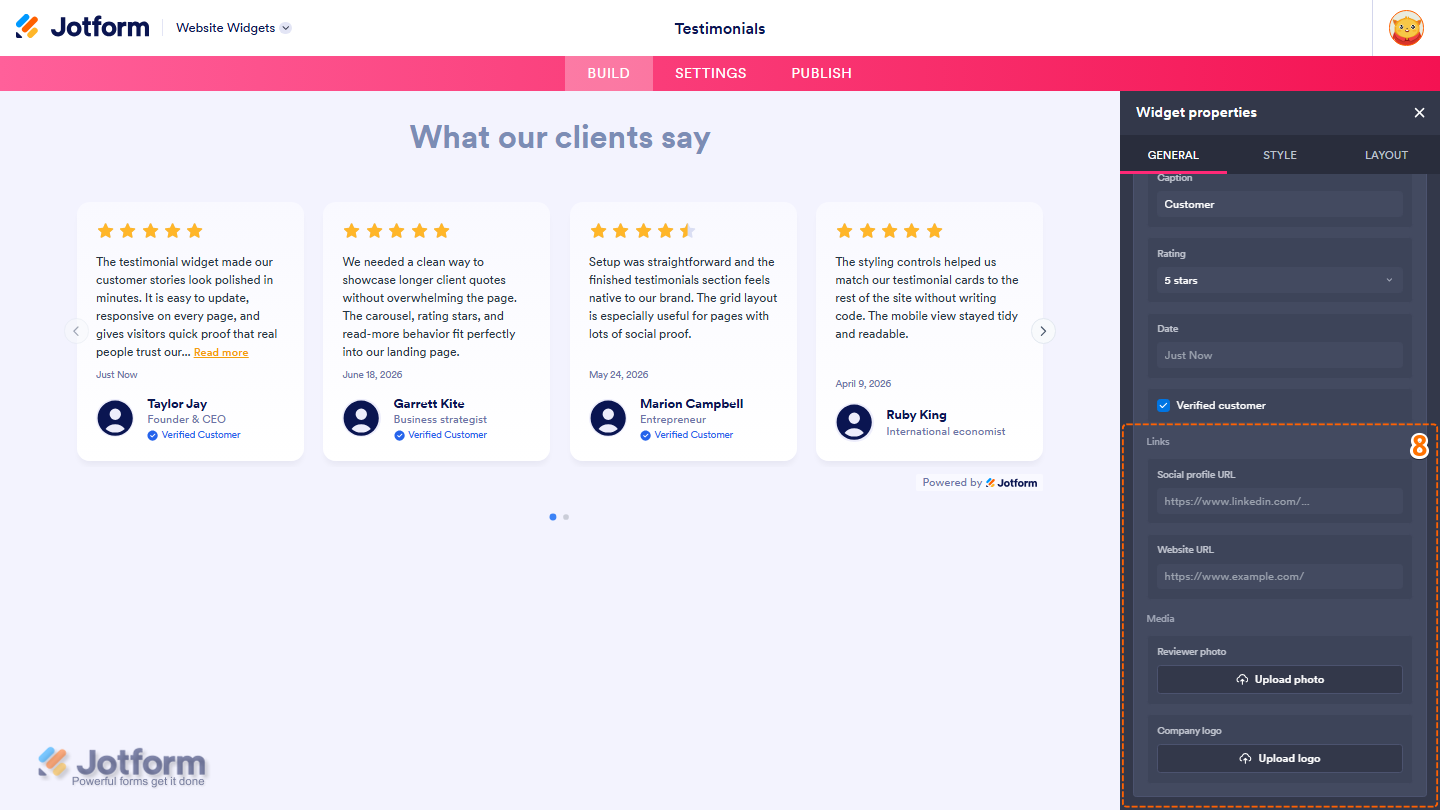
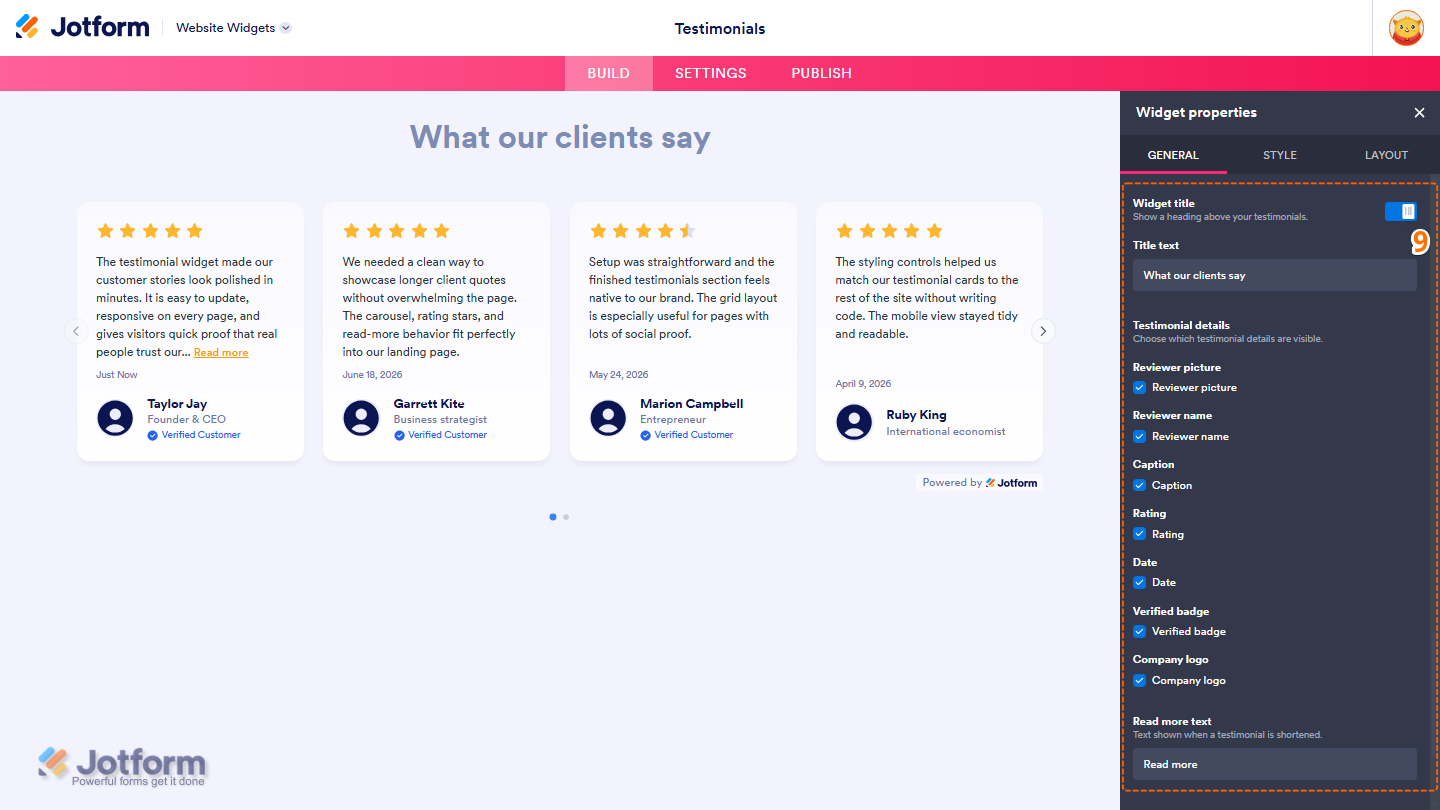
- Then, scroll down to configure these settings:
- Widget Title — Show or hide the title displayed above the testimonials.
- Title Text — Enter the title displayed at the top of the widget.
- Reviewer Picture — Show or hide reviewer photos.
- Reviewer Name — Show or hide reviewer names.
- Caption — Show or hide reviewer captions.
- Rating — Show or hide star ratings.
- Date — Show or hide review dates.
- Verified Badge — Show or hide the verified customer badge.
- Company Logo — Show or hide company logos.
- Read More Text — Customize the text shown when a testimonial is truncated.
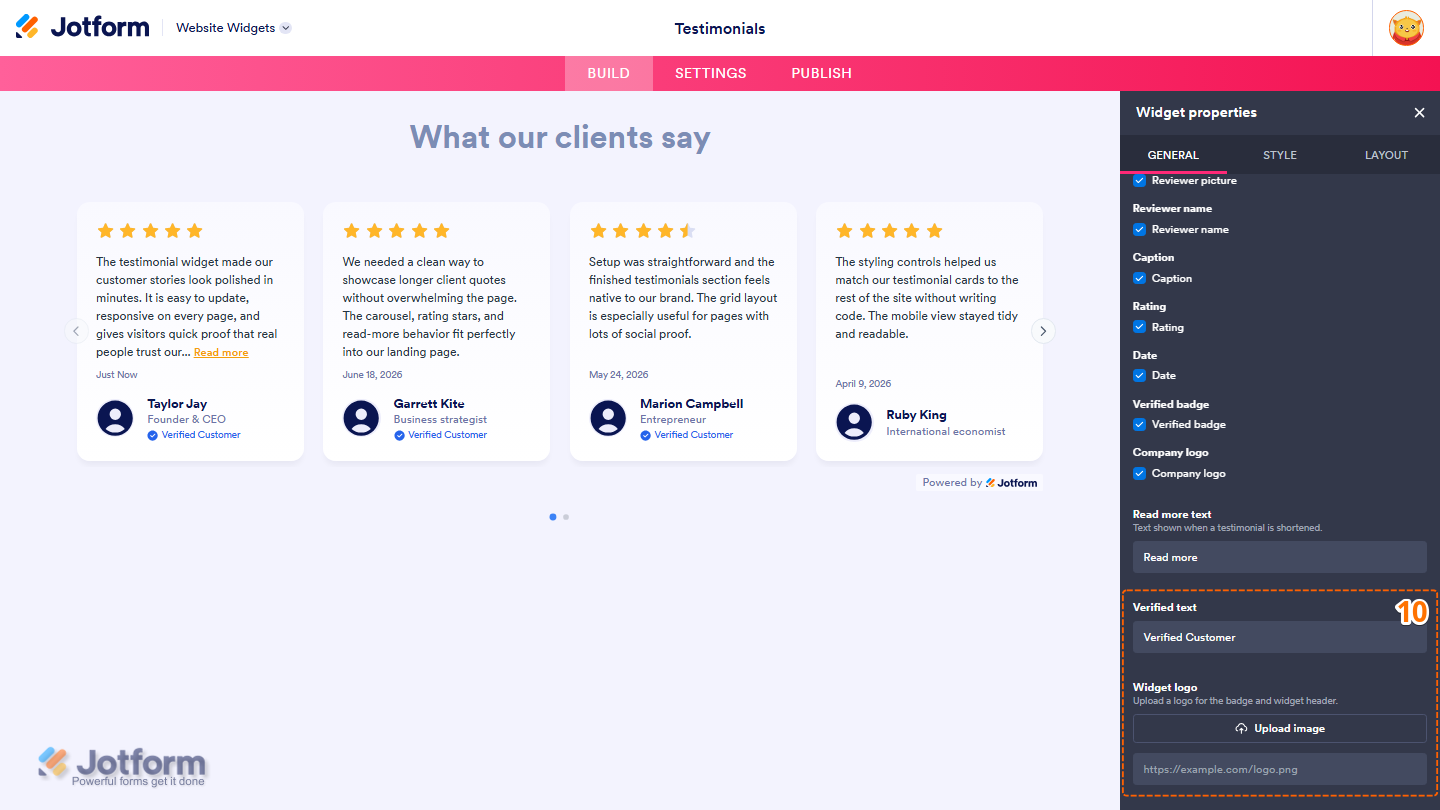
- At the bottom of the General tab, configure these remaining settings:
- Verified Text — Customize the text displayed on the verified customer badge.
- Widget Logo — Upload a logo displayed in the widget.
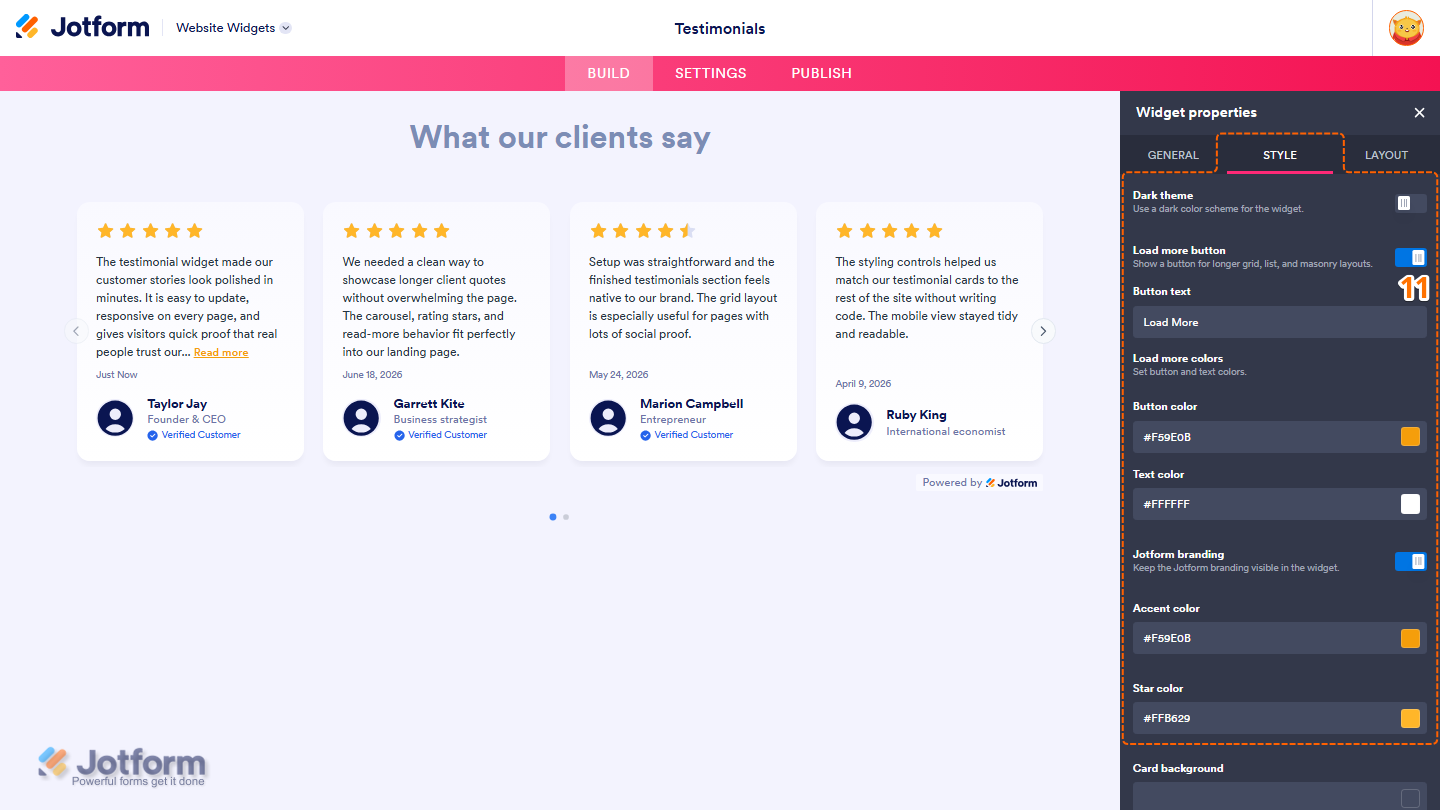
- Next, under the Style tab, customize the appearance of your Testimonials widget with these settings:
- Dark Theme — Switch between the light and dark widget themes.
- Load More Button — Show or hide the Load More button.
- Button Text — Customize the text displayed on the Load More button.
- Load More Colors — Set the Button Color and Text Color for the Load More button.
- Jotform Branding — Show or hide the Jotform branding.
- Accent Color — Choose the widget’s accent color.
- Star Color — Customize the color of the review stars.
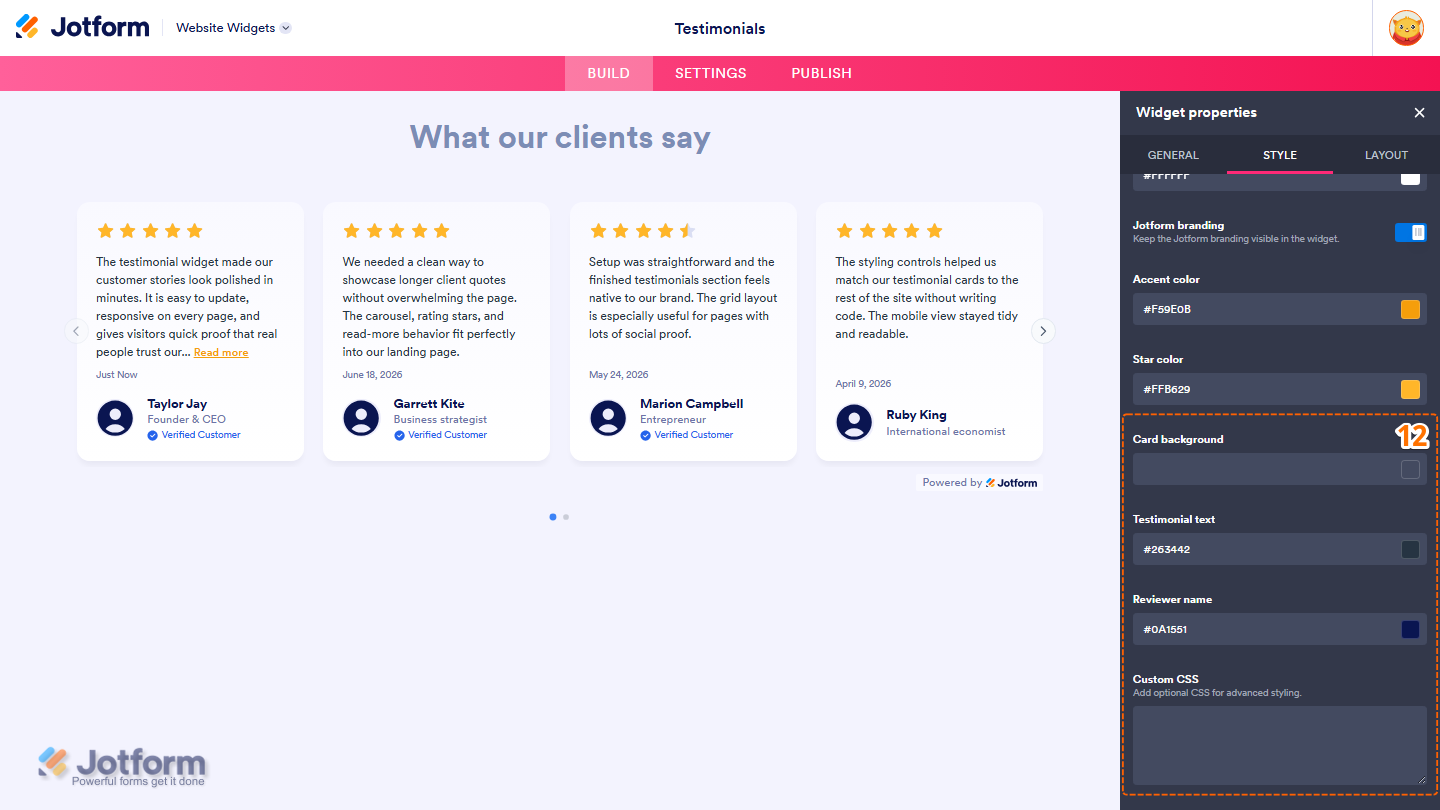
- After that, scroll down to customize these additional style settings:
- Card Background — Set the background color of the testimonial cards.
- Testimonial Text — Customize the testimonial text color.
- Reviewer Name — Choose the color of the reviewer’s name.
- Custom CSS — Add your own CSS for advanced styling.
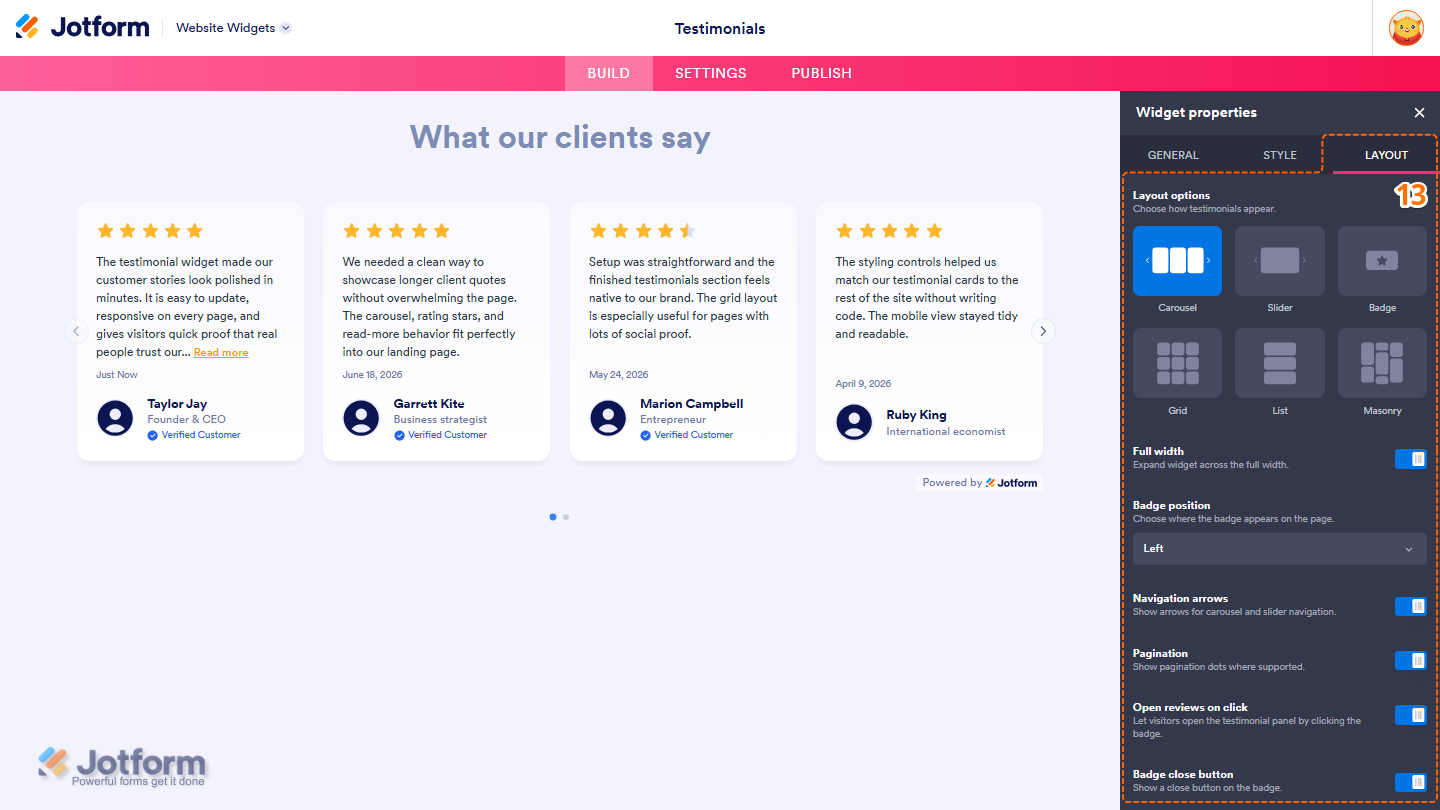
- Next, under the Layout tab, set up these settings:
- Layout Options — Choose how your testimonials are displayed.
- Full Width — Expand the widget across the full width of the page.
- Badge Position — Choose where the badge appears on the page.
- Navigation Arrows — Show or hide the navigation arrows for Carousel and Slider layouts.
- Pagination — Show or hide pagination dots where supported.Open Reviews on Click — Allow visitors to open the testimonial panel by clicking the badge.
- Badge Close Button — Show or hide the badge close button.
- Then, scroll down to set up these additional layout settings:
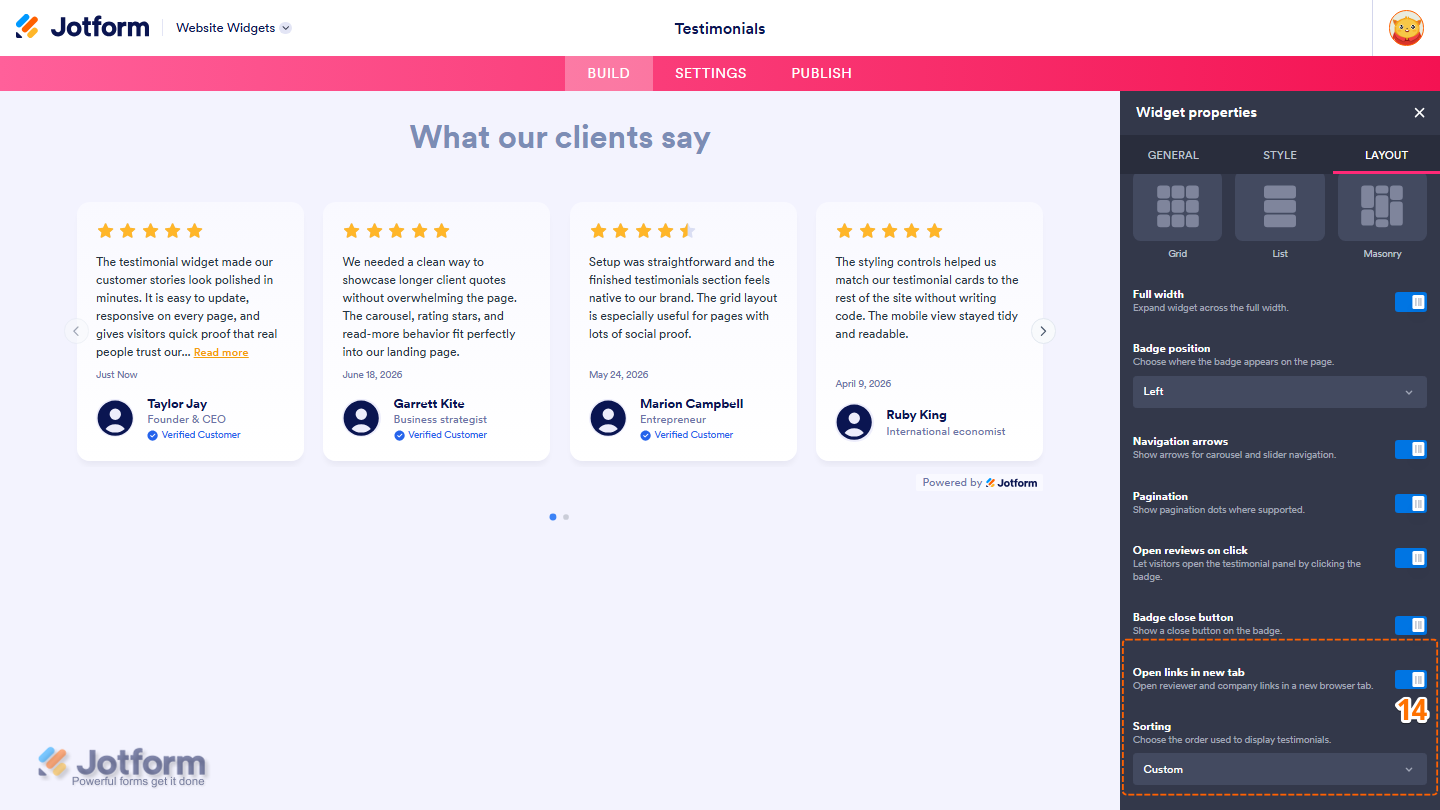
- Open Links in New Tab — Open reviewer and company links in a new browser tab.
- Sorting — Choose the order used to display testimonials.
Note
If you’re not logged in, you’ll be asked to log in to your Jotform account or sign up for one. Once you’ve done that, you’ll be able to get the embed code for your widget.
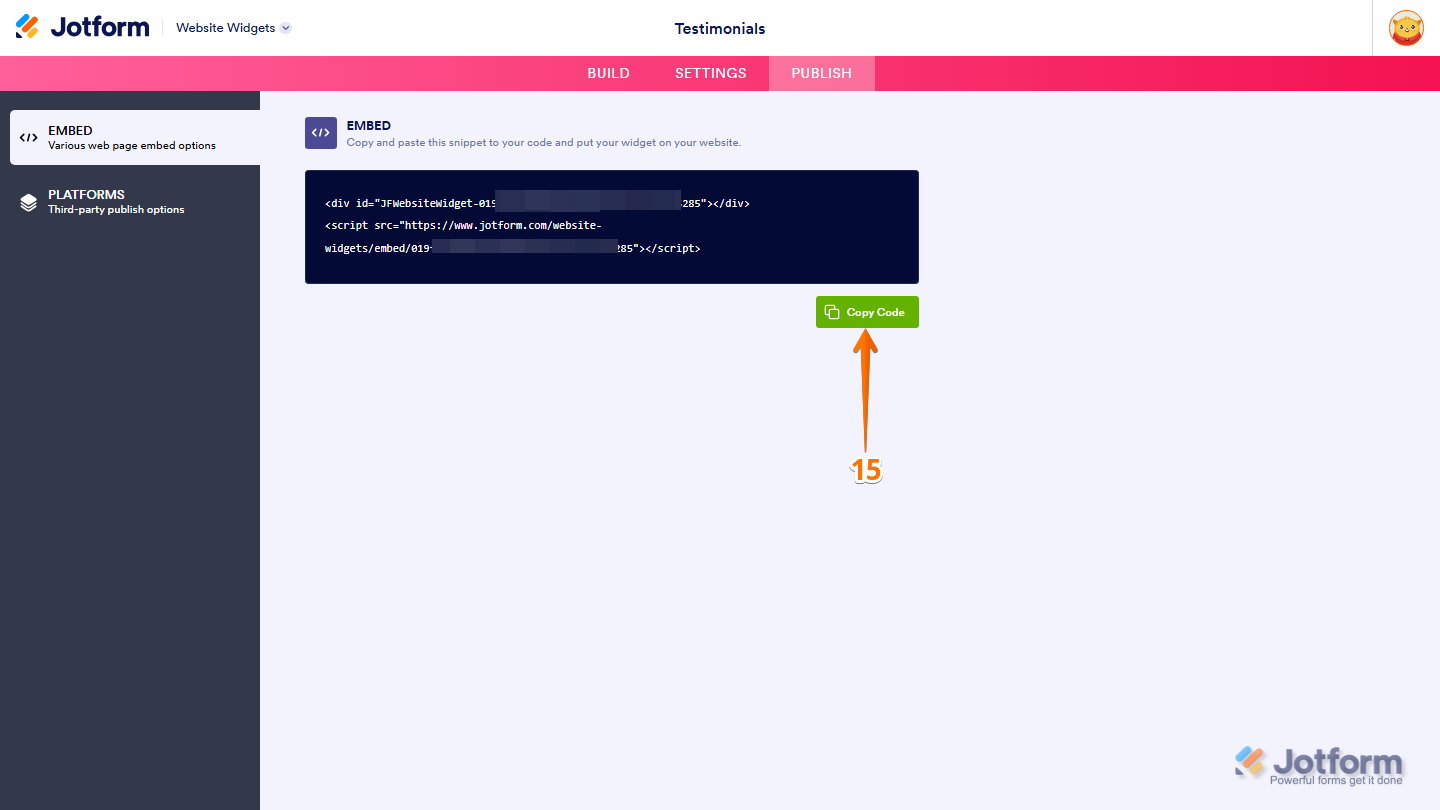
- Finally, in the Embed section, click on Copy Code.
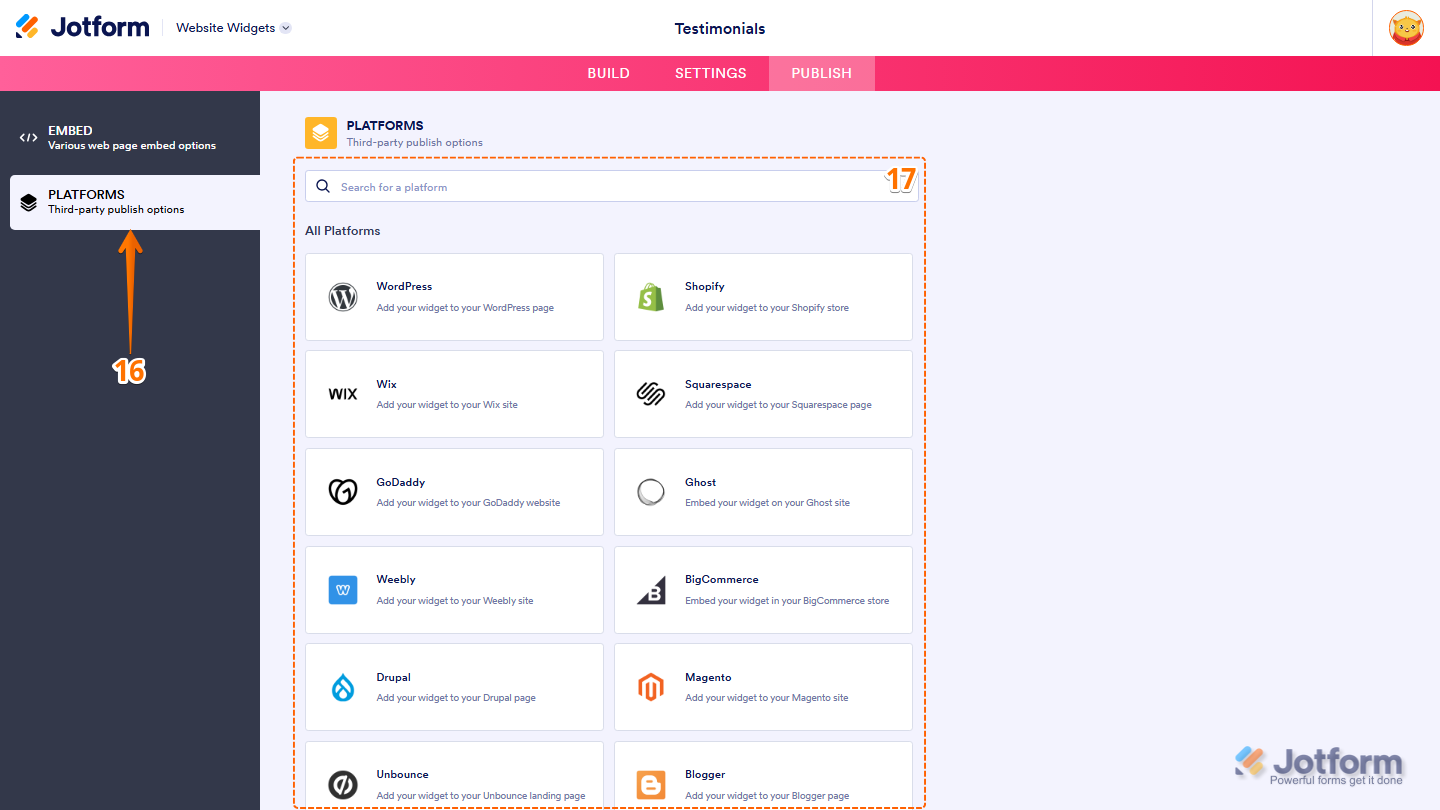
- Or, if your website is built on a supported platform, in the menu on the left side of the page, click on Platforms.
- Then, search for or select your platform to copy the embed code and view platform-specific embedding instructions, and you’re done.
That’s it! You can now paste the copied embed code into your website or follow the platform-specific instructions to add the widget to your site. The screenshot below shows an example of how your Testimonials Widget will look when embedded:

Updating Your Testimonials Slider Widget
You can update your Testimonials Slider widget at any time after it’s embedded on your website. Here’s a quick how-to:
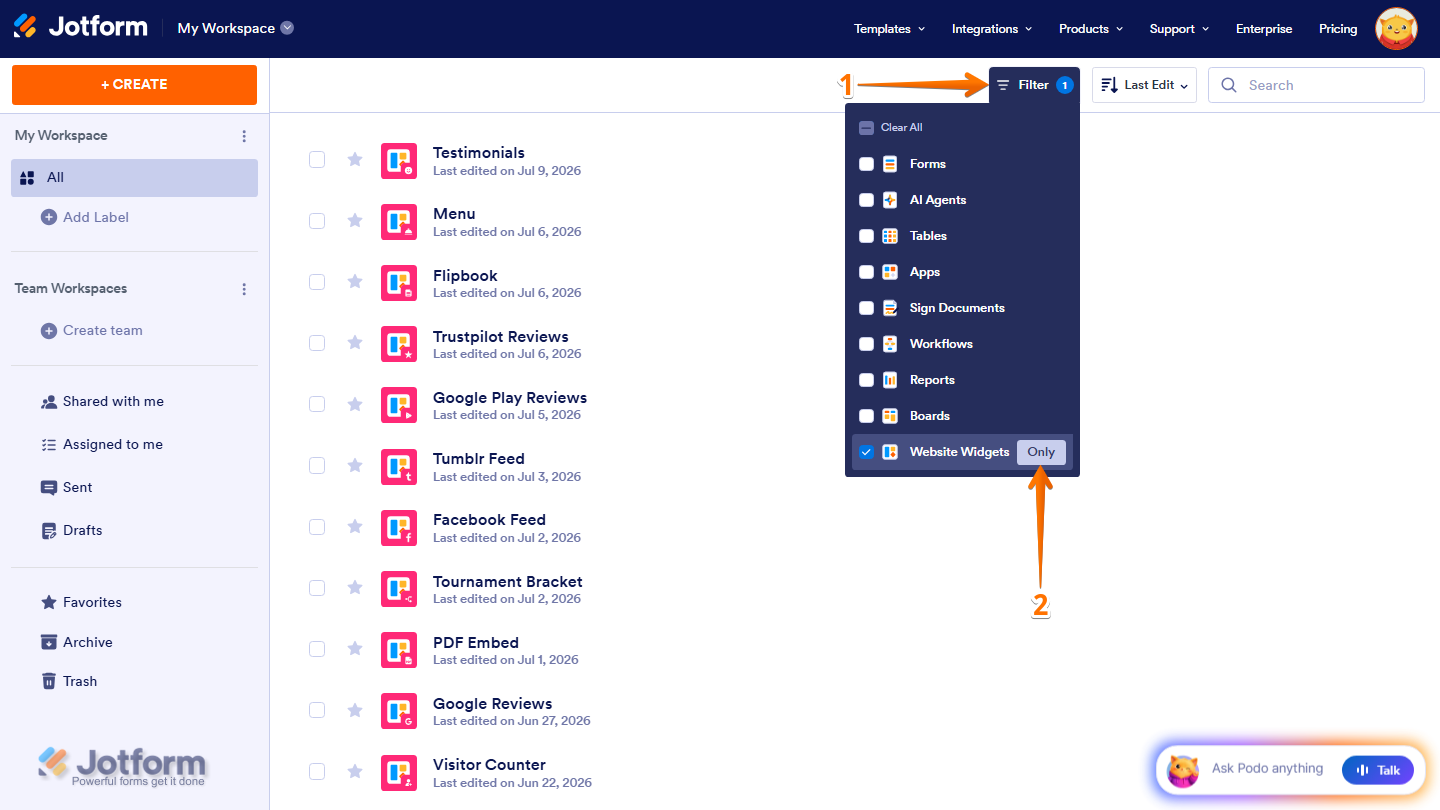
- On your Workspace page, at the top, click on Filter.
- Then, in the menu that opens, hover over Website Widgets and click on Only to display only website widgets assets on the page.
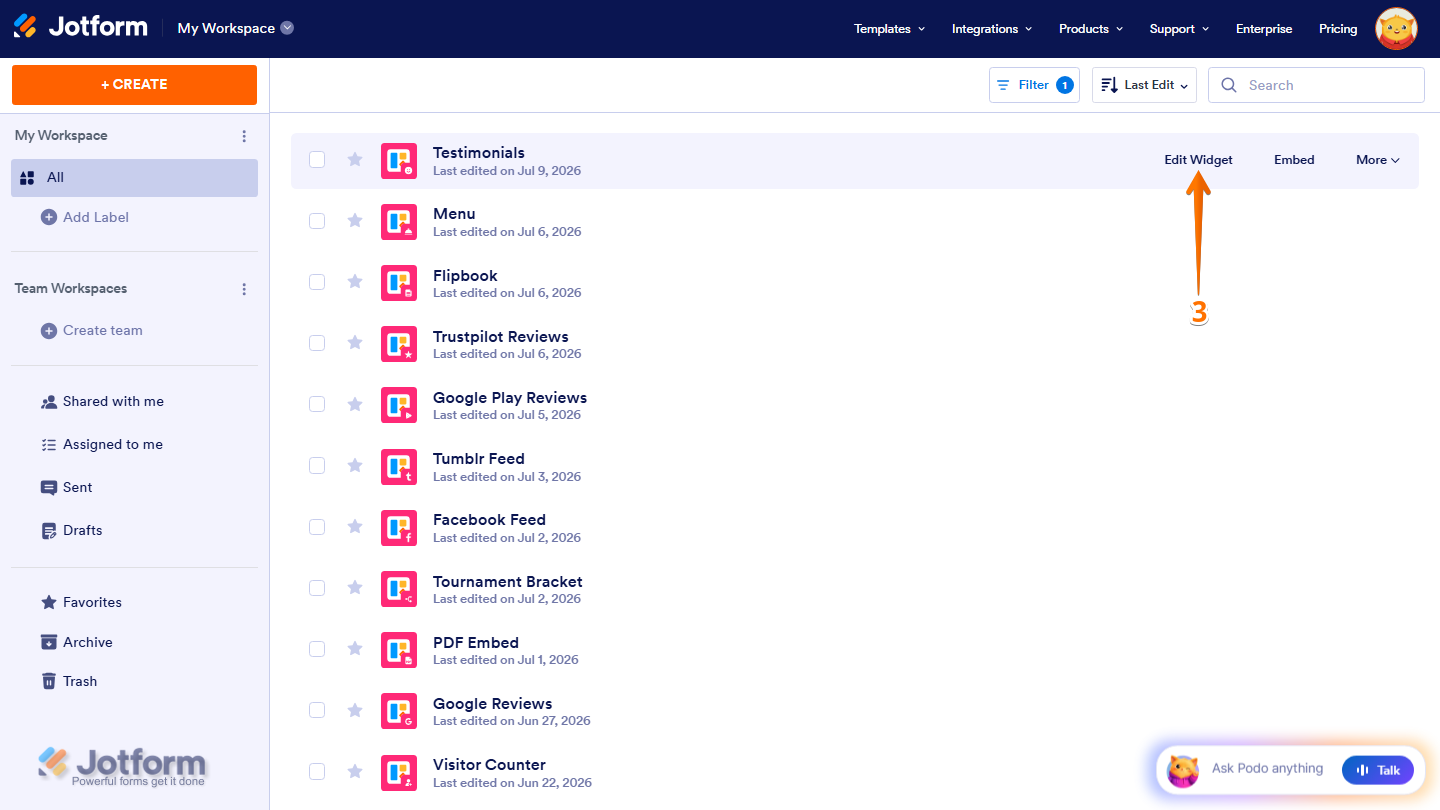
- Next, hover your mouse over the widget you want to edit and click on Edit Widget on the right side of the page.
- Now, in the Widget Properties menu that opens on the right side of Website Widgets, under the General, Style, and Layout tabs, edit the properties to change how your Testimonials Slider looks and works on your website.
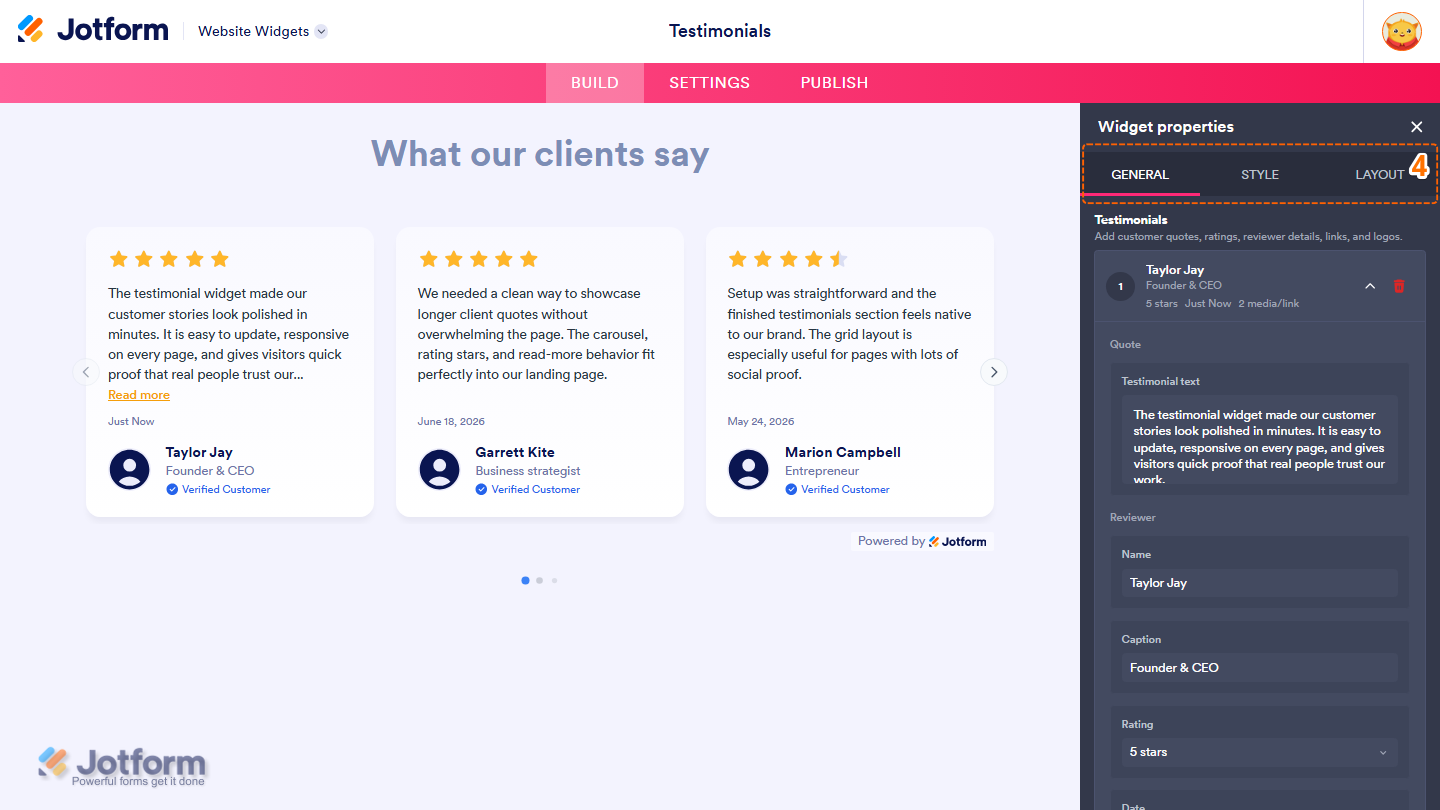
That’s it! Your changes will be applied to your Testimonials Slider widget automatically.
Note
Your Testimonials Slider widget remains editable after it’s embedded on your website. Any changes you make will automatically appear on your website without requiring a new embed code.


Send Comment: