With Jotform’s Google Maps Widget, you can easily display an interactive map on your website to help visitors find your business, event venue, office, or any other location. You can customize the map’s appearance, set your preferred location, and generate an embed code in just a few steps.
Adding a map to your website makes it easier for visitors to navigate to your location without leaving your page. Whether you’re showcasing a storefront, promoting an event, or providing directions to your office, an embedded Google Map offers a convenient and user-friendly experience.
Note
To use the Google Maps Widget, you’ll need a valid Google Maps API key. Make sure your API key is active and properly configured in your Google Cloud account before embedding the widget.
Creating Your Google Maps Widget and Getting the Embed Code for it
Before you can add the Google Maps Widget to your website, you’ll first need to choose the location you want to display, customize the map’s appearance, and copy its embed code. Get started like this:
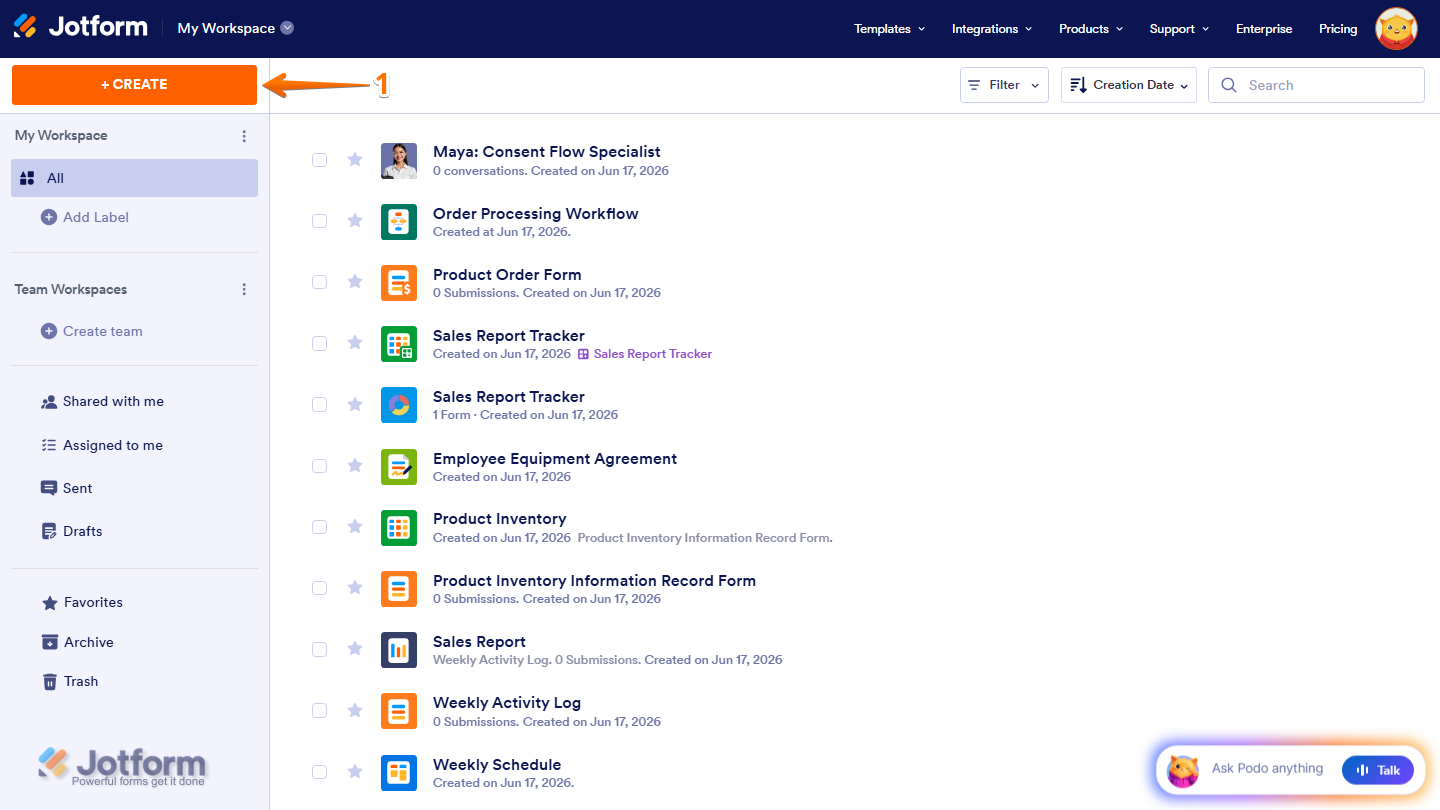
- On the top-left side of your Workspace page, click on Create.
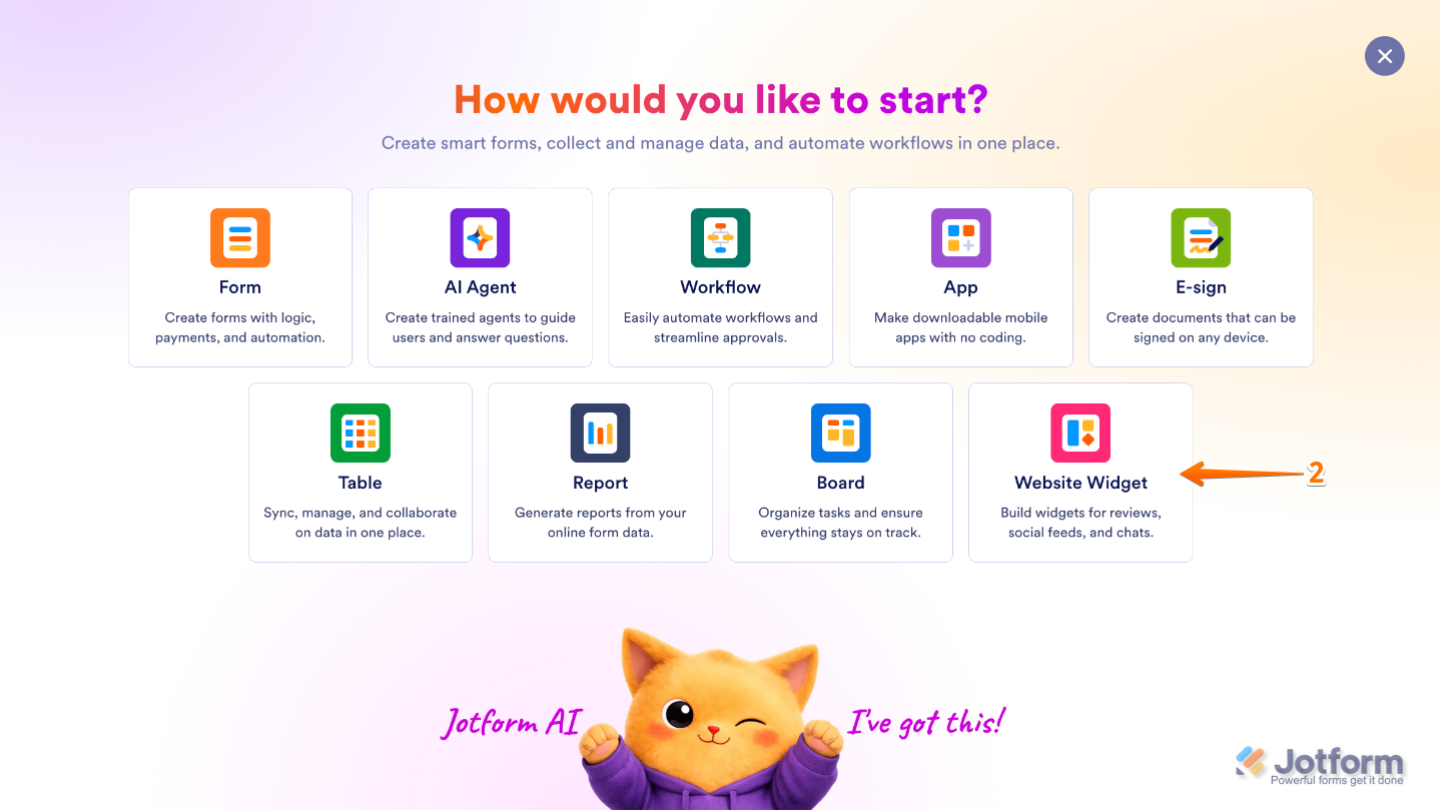
- Then, in the menu that opens up, select Website Widget from the assets.
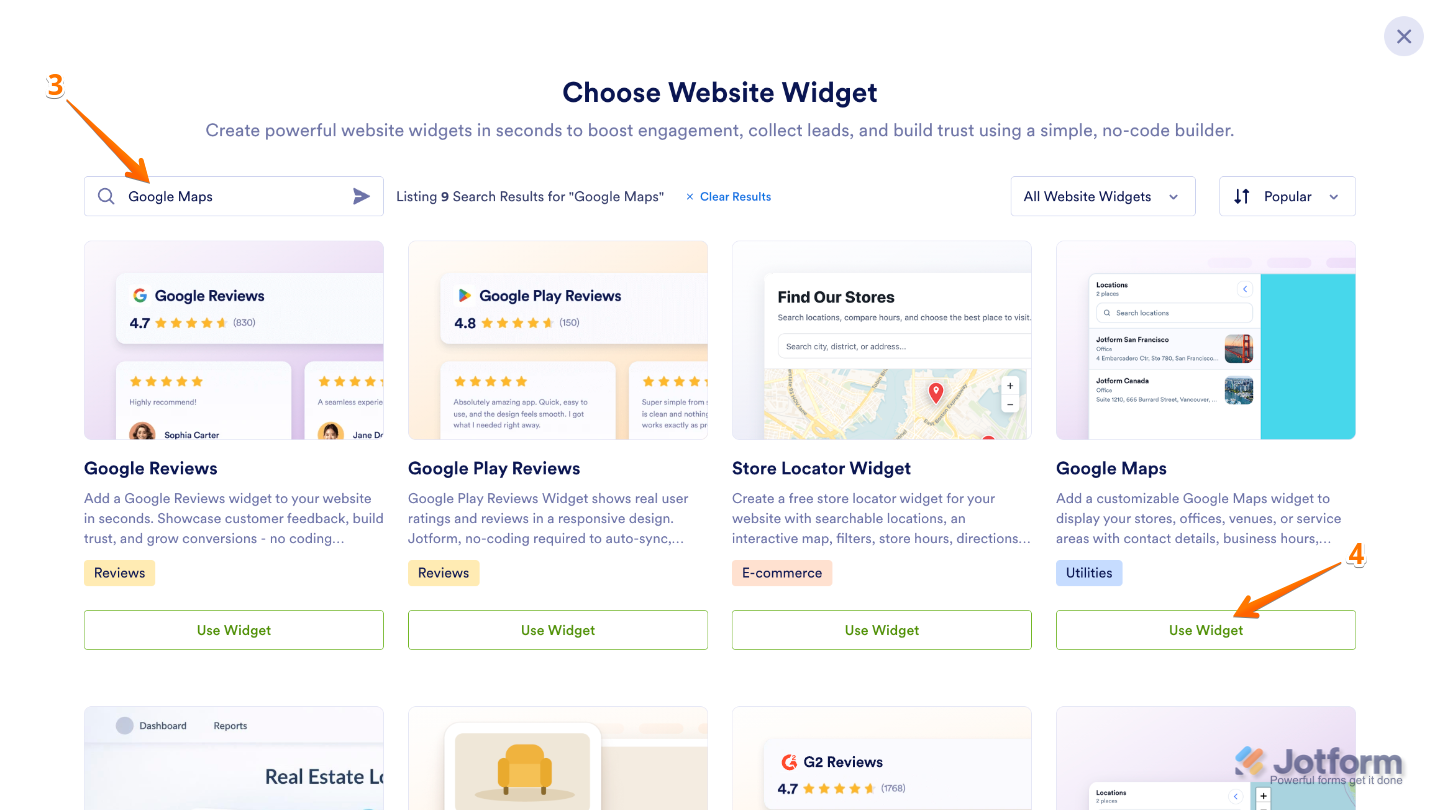
- Next, in the Search bar in the upper-left corner of the Choose Website Widget menu, enter Google Maps.
- Then, in the search results, hover over the Google Maps widget and then click on Use Widget.
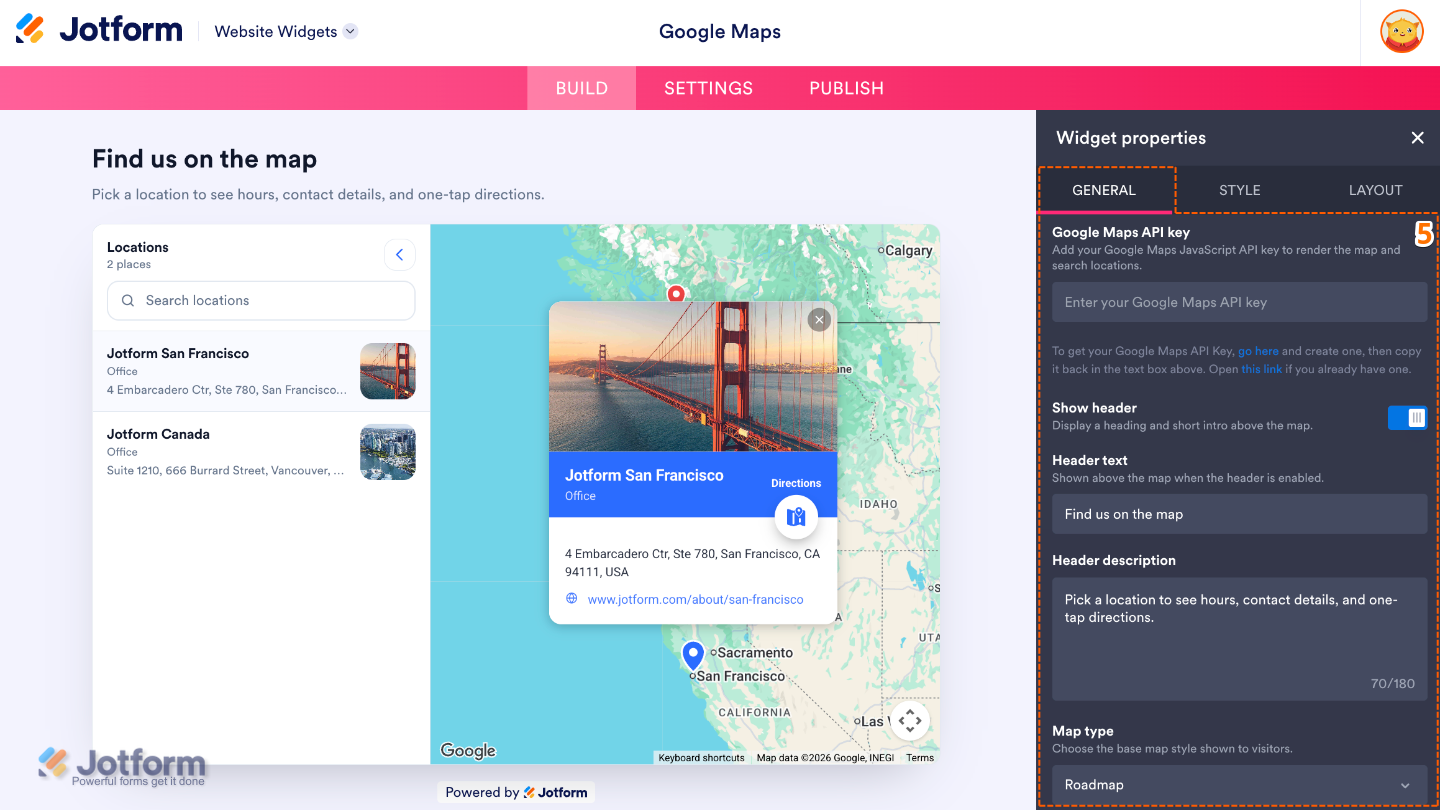
- Now, in the Widget Properties menu that opens on the right side of Website Widgets, under the General tab, set up these properties:
- Google Maps API Key — Enter your Google Maps API key to enable the widget and display Google Maps on your website.
- Show Header — Display a header above the map to introduce the locations shown in the widget.
- Header Text — Enter the main title displayed in the map header.
- Header Description — Add a short description below the header title to provide additional information about the map.
- Map Type — Choose the style of map you want to display, such as Roadmap, Satellite, Terrain, or Hybrid.
- Then, scroll down and adjust these settings:
- Map Mode — Select how the map is presented, such as displaying a single location or multiple locations.
- Locations
- Edit Location (Pencil Icon) — Modify the details of an existing location.
- Duplicate Location (Duplicate Icon) — Create a copy of an existing location and its settings.
- Delete Location (Trash Can Icon) — Remove the selected location from the map.
- Add Location — Click on it to add a new location to display on the map.
- To show you an example, click on the Pencil icon to edit the Jotform San Francisco location settings.
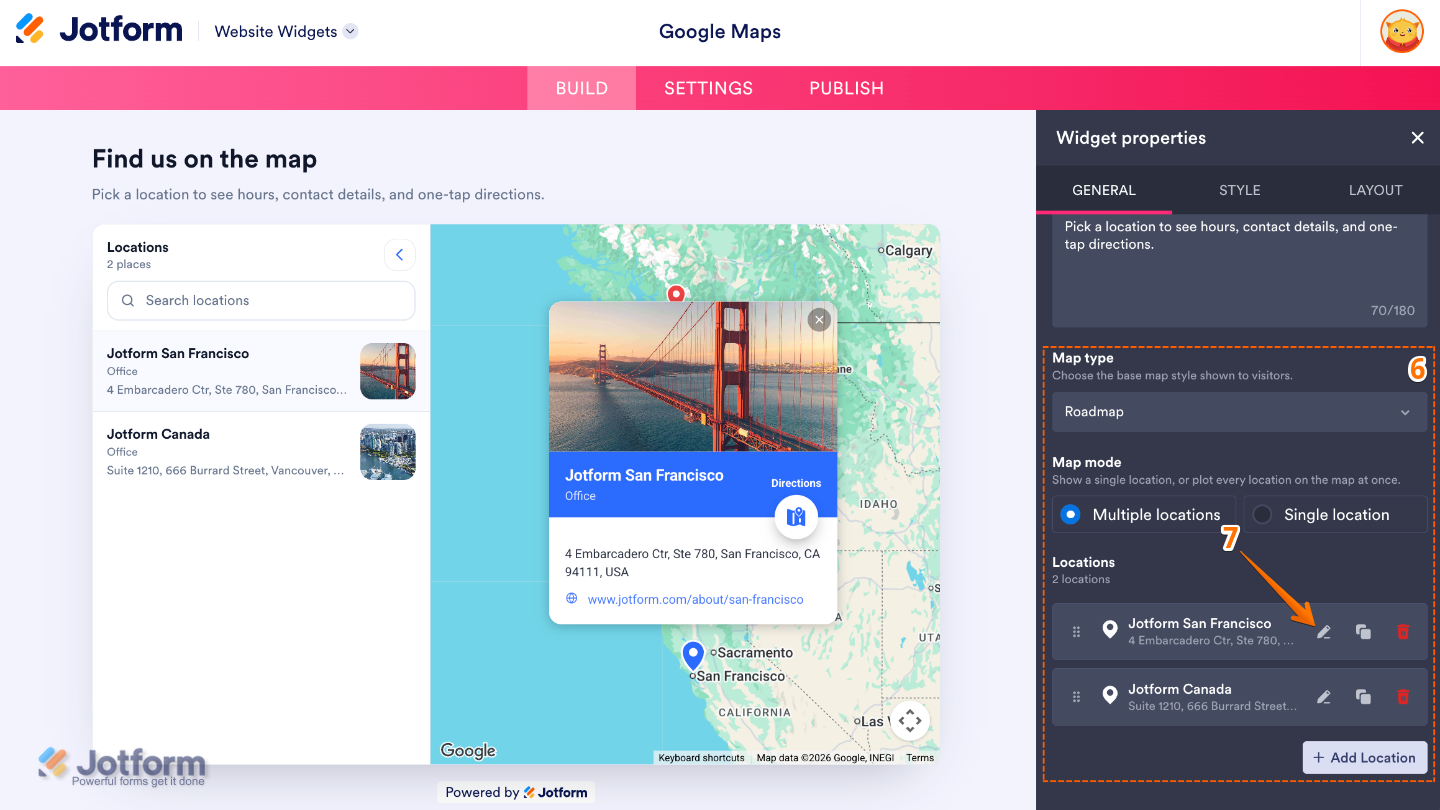
- Now, depending on the number of locations you selected, click on the Pencil icon for each location to configure these settings:
- Location Search — Search for and select the location you want to display on the map.
- Show on Map
- Phone — Add a phone number for the selected location.
- Working Hours — Display the operating hours or business hours for the location.
- Email — Add an email address that visitors can use to contact the location.
- Website — Provide a website URL associated with the location.
- Map Mode — Choose how the selected location is displayed on the map.
- Image — Upload or select an image to represent the location.
- Category — Assign the location to a category, making it easier for visitors to filter and browse locations.
- Once everything’s set, click on Save Location to save your changes.
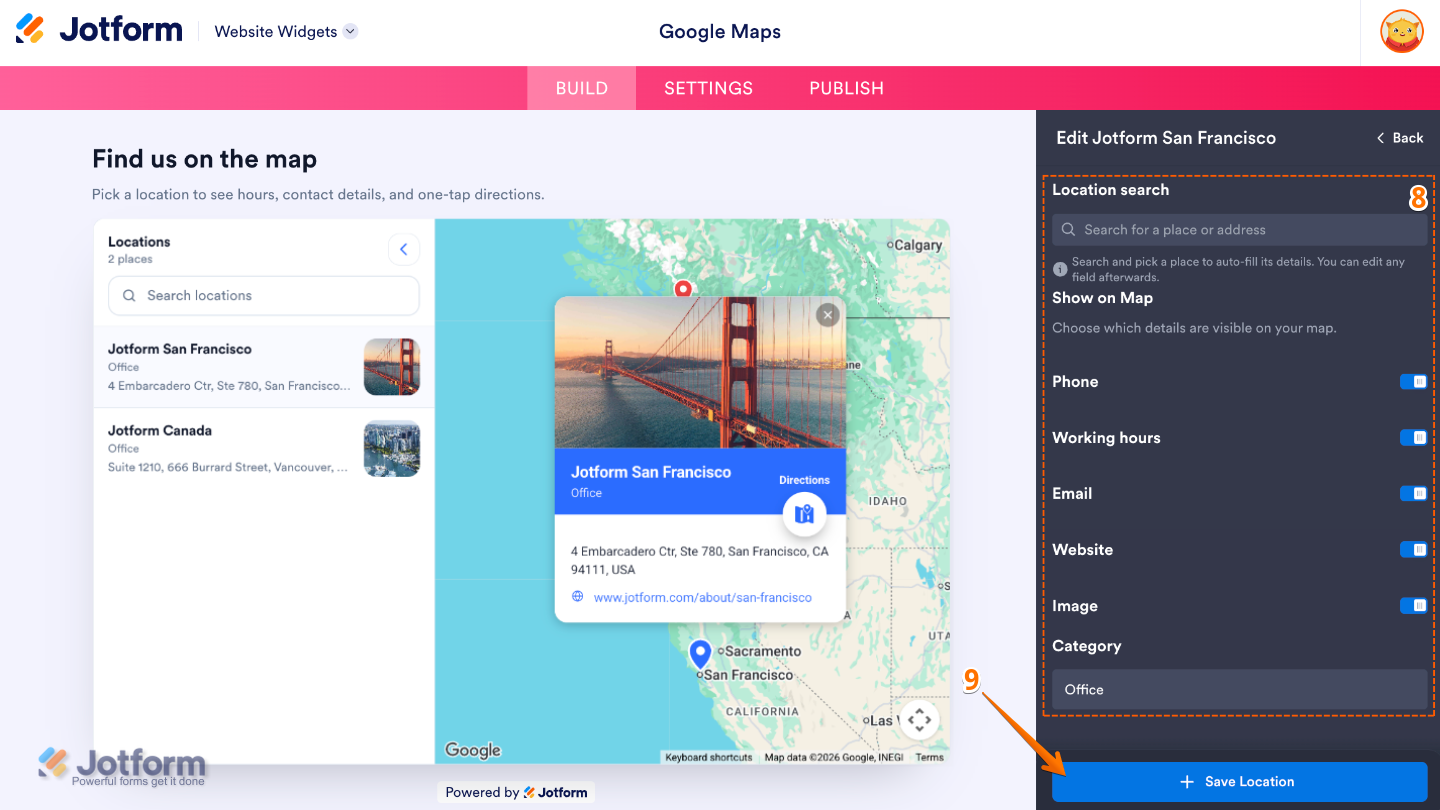
- Next, under the Styles tab, customize these properties:
- Theme — Choose a visual theme that matches the look and feel of your website.
- Corner Radius — Adjust how rounded the corners of the widget appear.
- Jotform Branding — Show or hide Jotform branding on the widget.
- Custom CSS — Apply your own CSS codes for advanced styling beyond the built-in settings.
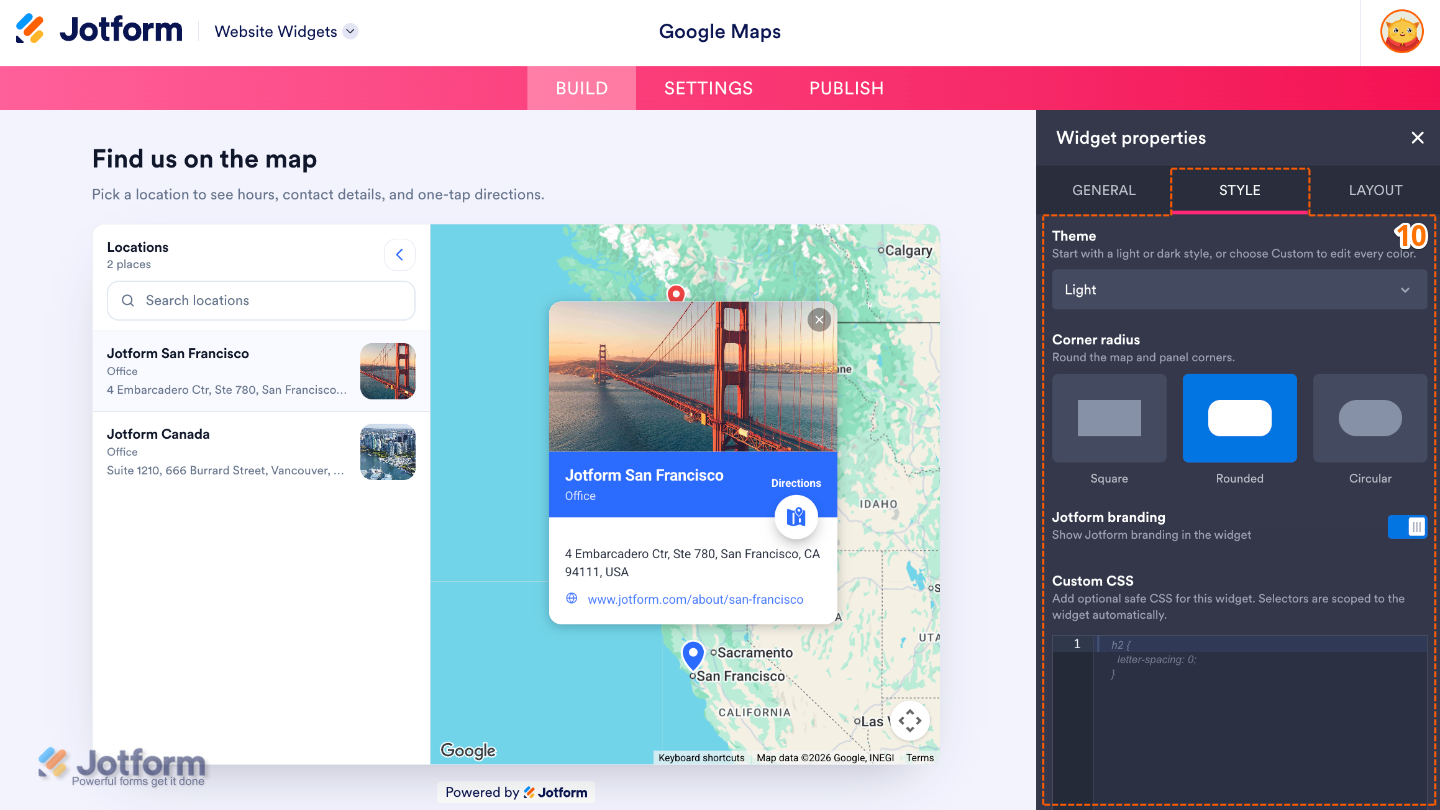
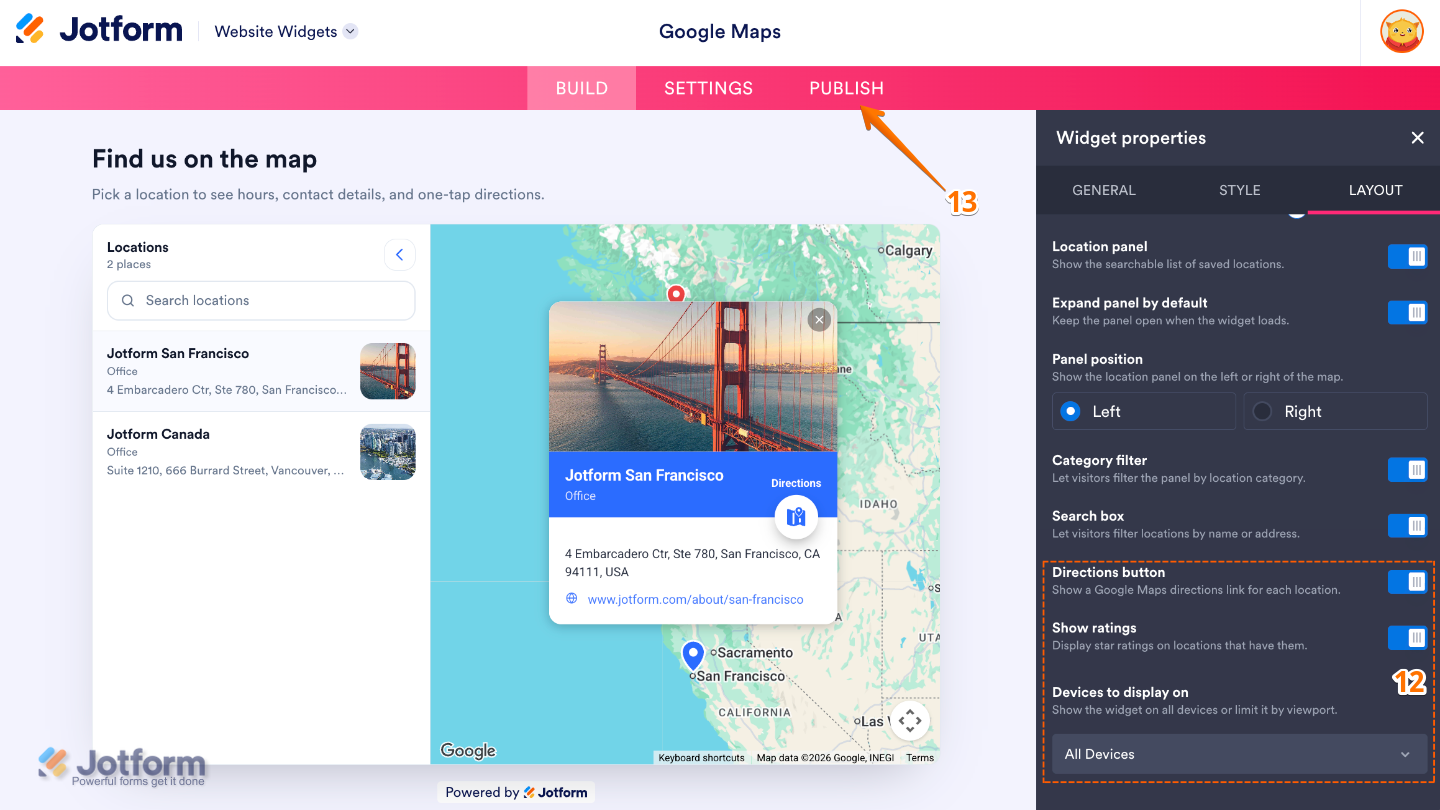
- Now, under the Layout tab, configure these properties:
- Layout — Choose how the map and location details are arranged within the widget.
- Map Height — Set the height of the embedded map.
- Zoom Level — Control how closely the map is zoomed in when it loads.
- Location Panel — Show or hide the panel that lists all available locations.
- Expand Panel by Default — Automatically open the location panel when the widget loads.
- Panel Position — Choose whether the location panel appears on the left or right side of the map.
- Category Filter — Allow visitors to filter locations by category.
- Search Box — Display a search field so visitors can quickly find specific locations.
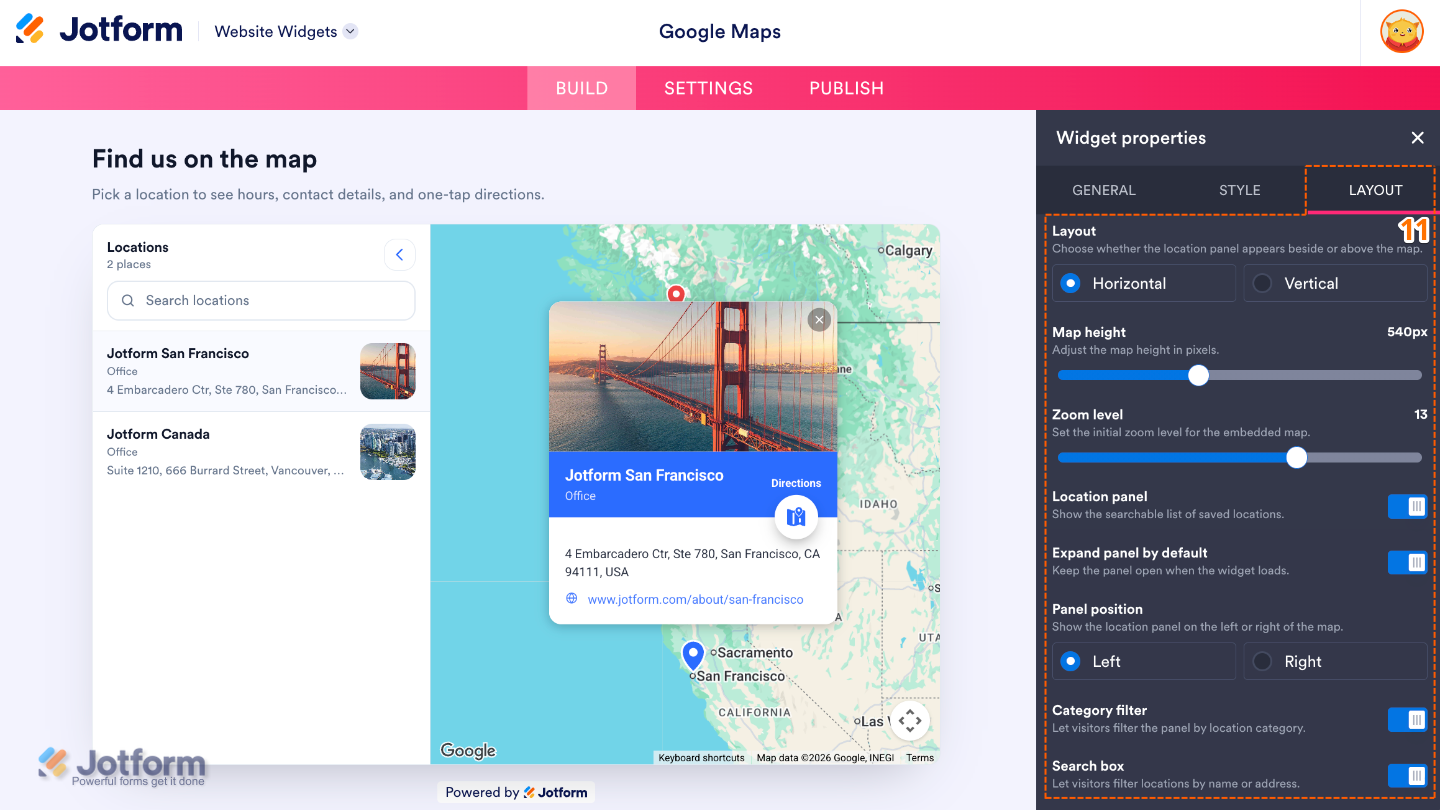
- Then, scroll down and adjust these settings:
- Directions Button — Show a button that lets visitors get directions to a selected location using Google Maps.
- Show Ratings — Display Google ratings and reviews for supported locations.
- Devices to Display On — Choose whether the widget appears on desktop devices, mobile devices, or both.
- Once you’ve finished configuring the widget, in the pink navigation bar at the top of the page, click on Publish.
Note
You’ll be asked to log in to your Jotform account or sign up for one. Once you’ve done that, you’ll be able to get the embed code for your widget.
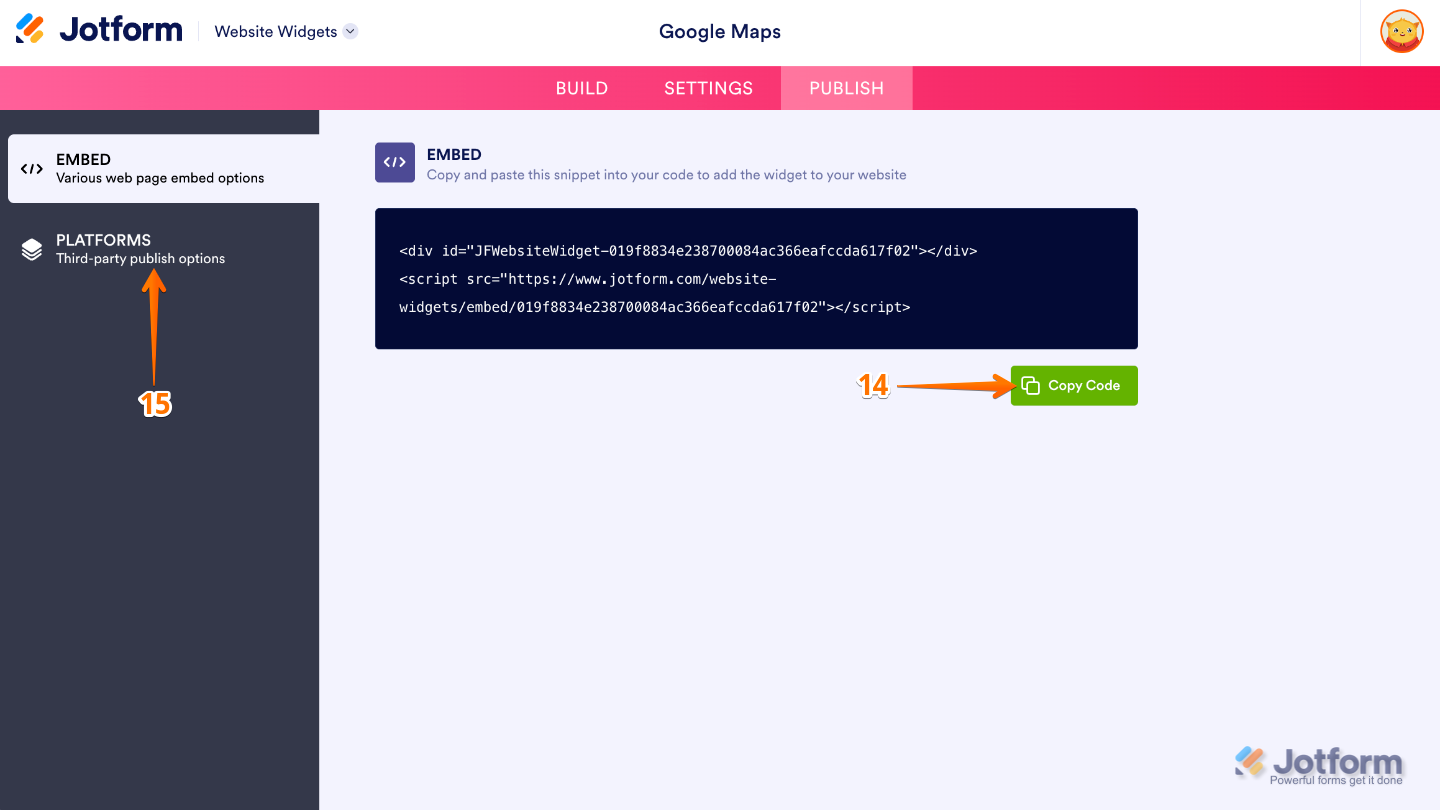
- Then, in the Embed section, click on Copy Code, and, if you already know how, paste that into the Embed section on your platform, and you’re good to go.
- To view embedding instructions for your widget, click on Platforms in the menu on the left side of the page.
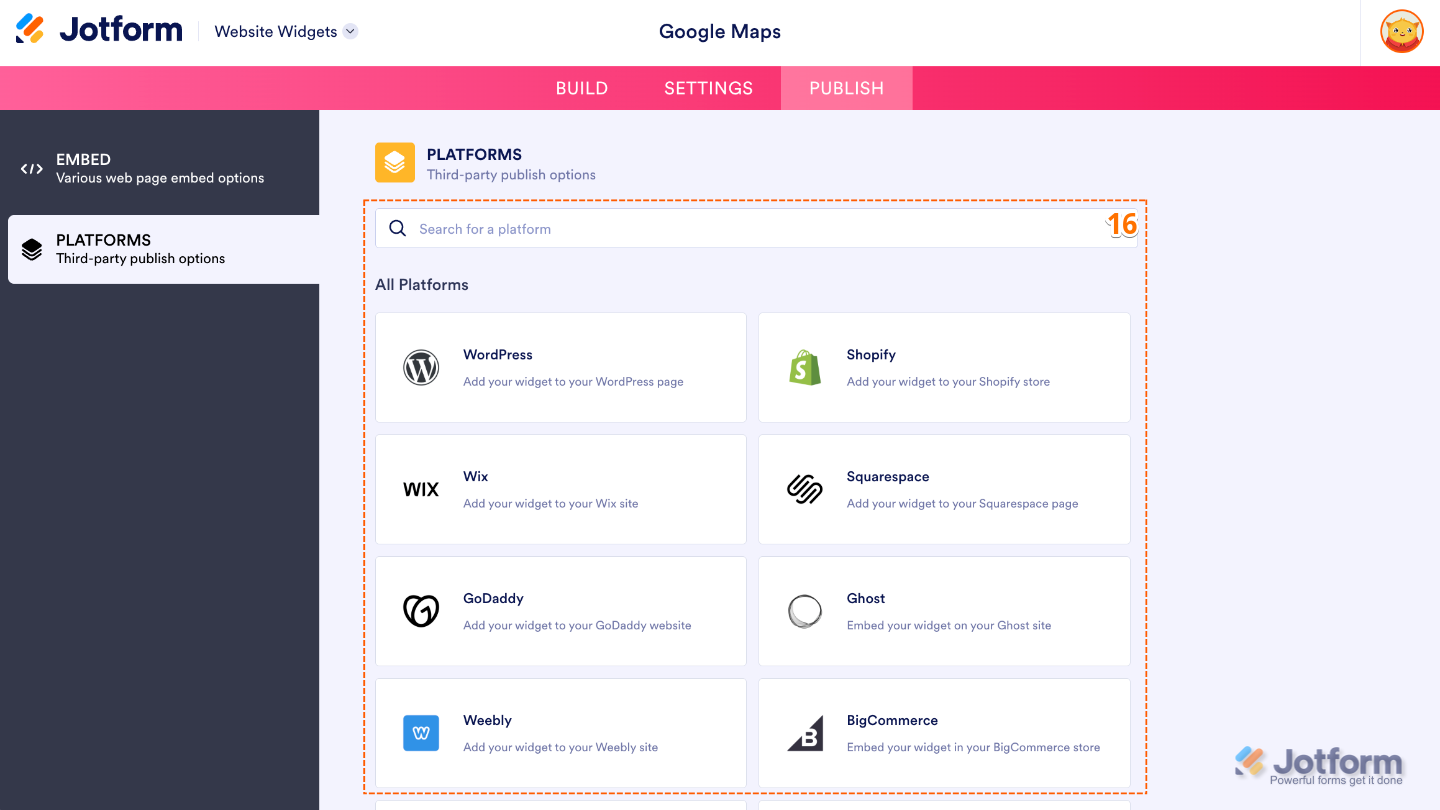
- Next, in the Platforms section on the right, select the platform you want to view embedding instructions for. Or, use the Search bar at the top of the section to find it easily.
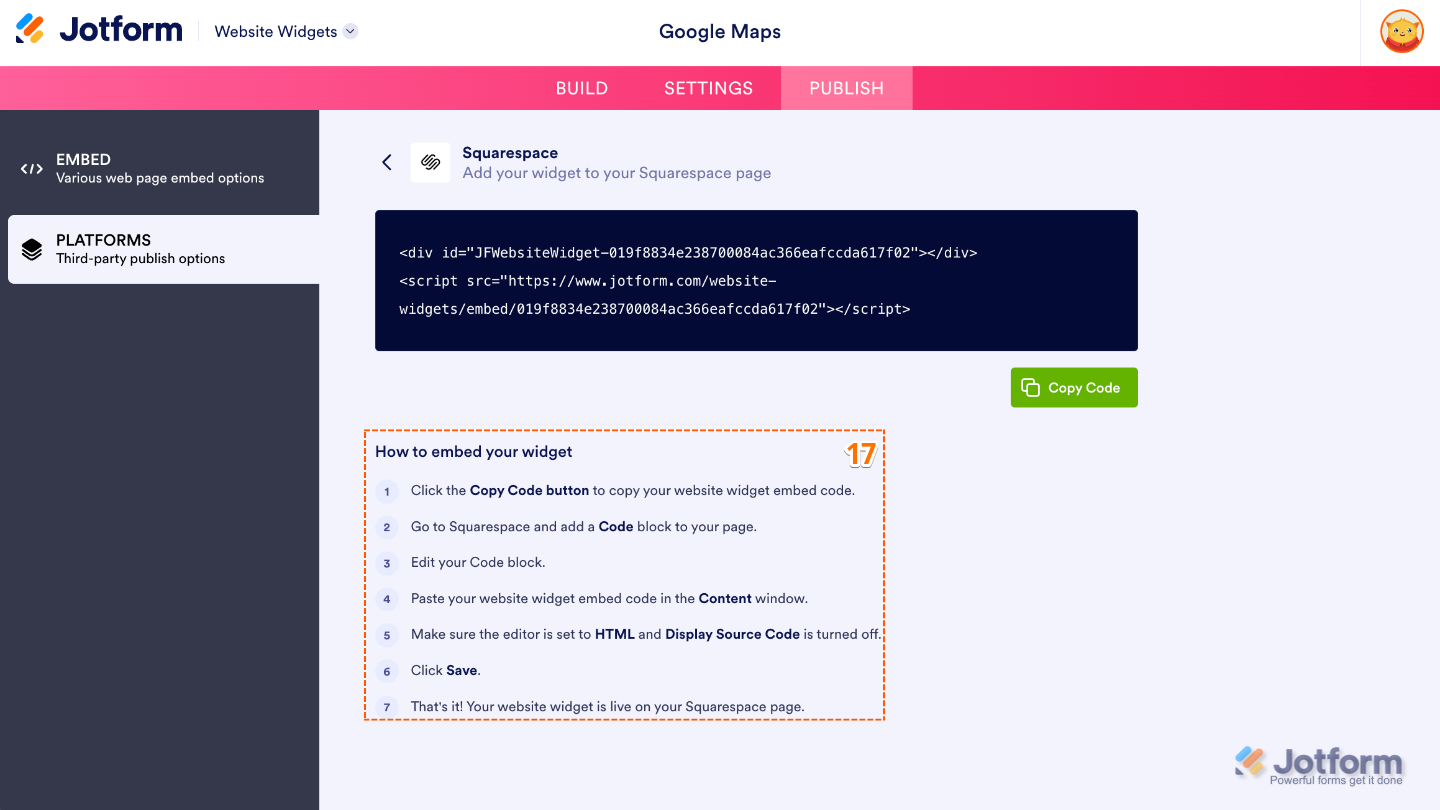
- Then, follow the steps in the How to Embed Your Widget section to add it to your website.
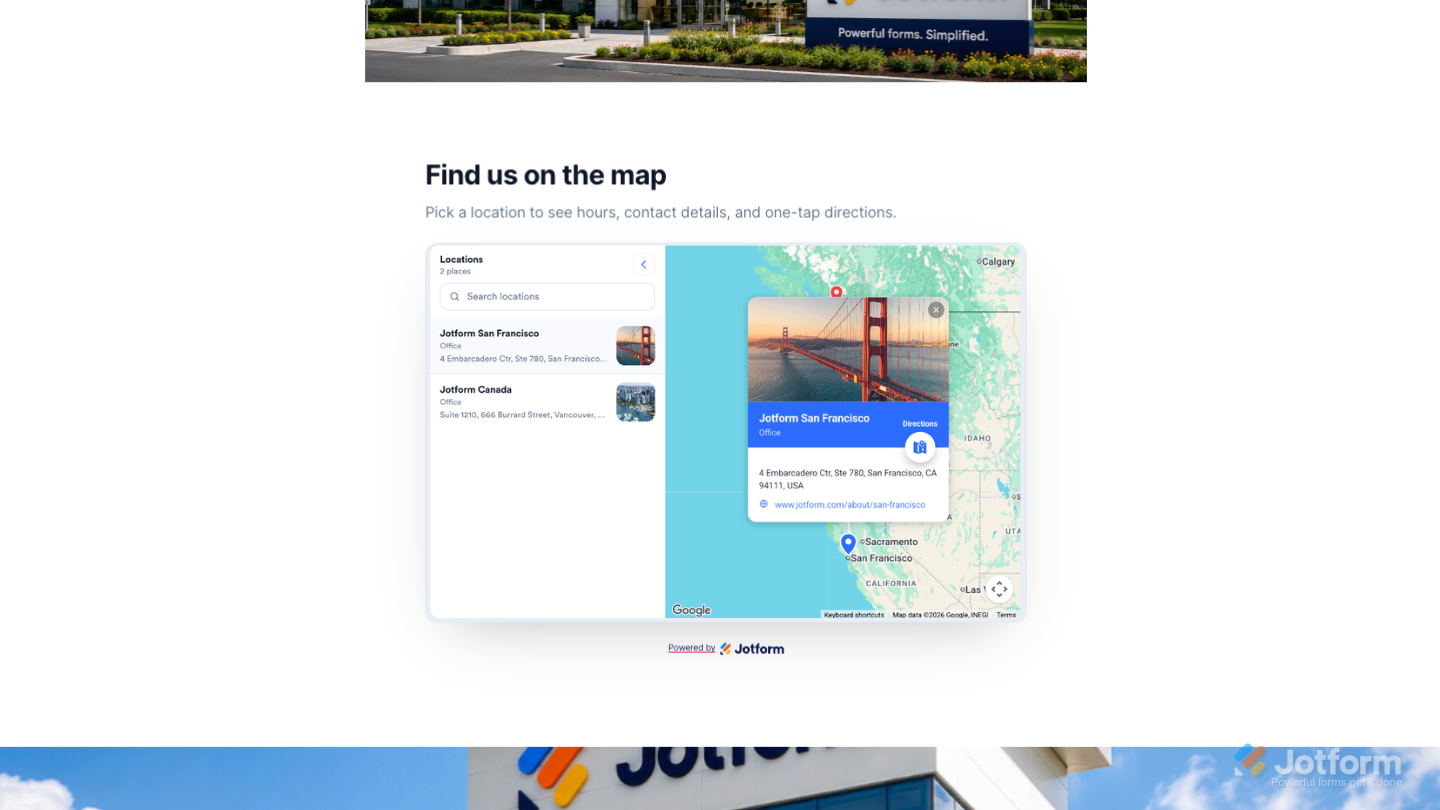
That’s it! Your Graphs and Charts widget will appear on your website with the design and settings you selected for it. See the screenshot below for an example of how it looks on a website.
Note
You can manage the website widgets you’ve created at any time from your account. For a full breakdown of how to do it, head over to our guide on How to Manage Website Widgets.
Pro Tips
- Use a clear and descriptive header to let visitors know what the map is for, such as Our Locations, Store Finder, or Visit Our Offices.
- Add helpful details like your phone number, business hours, website, and email address for each location so visitors can quickly find the information they need.


Send Comment: