Jotform makes it easy to create and display tournament brackets on your website with the Bracket Maker widget. Organize teams or players, choose from different tournament formats, and present matchups, scores, and winners in a clear, easy-to-follow bracket.
Whether you’re running a sports league, gaming tournament, classroom competition, or community event, the offers several customization options to match your event and website. Once you’re happy with the setup, simply copy the embed code and add the widget to your website.
To embed a Tournament Bracket on your website, you’ll first need to set up the Tournament Bracket widget and copy the embed code for it. Here’s how to get going:
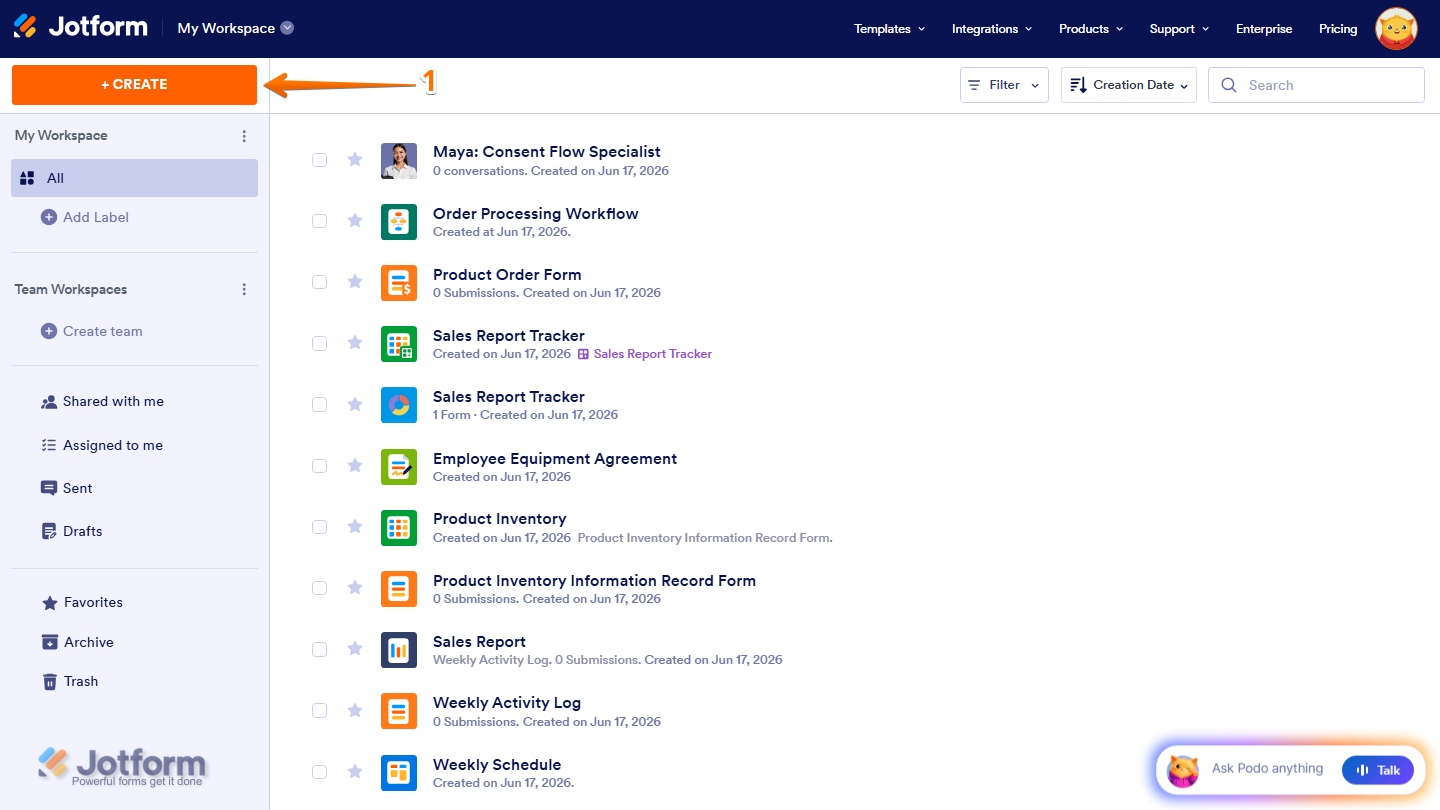
- On the top-left side of your Workspace page, click on Create.
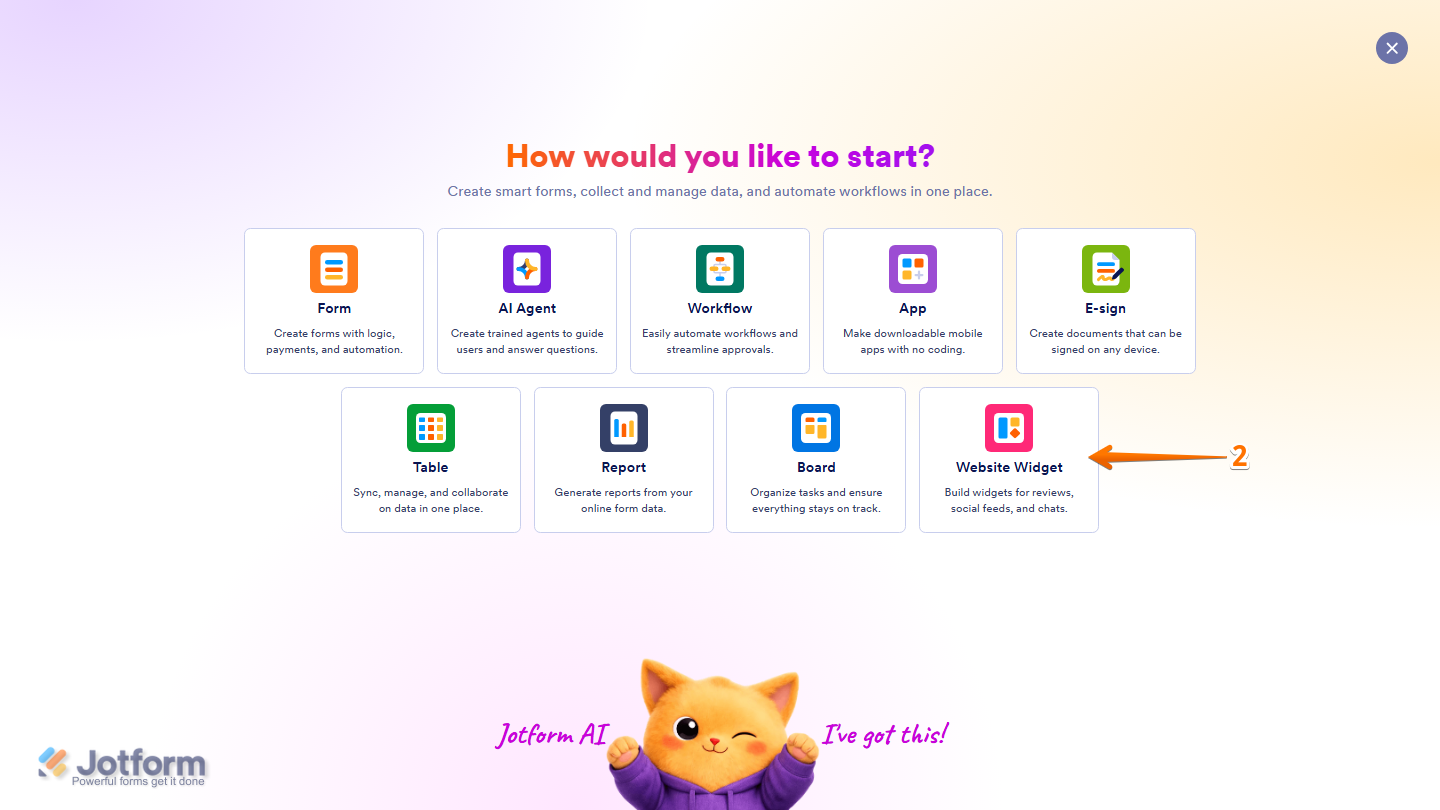
- Then, in the menu that opens up, select Website Widget.
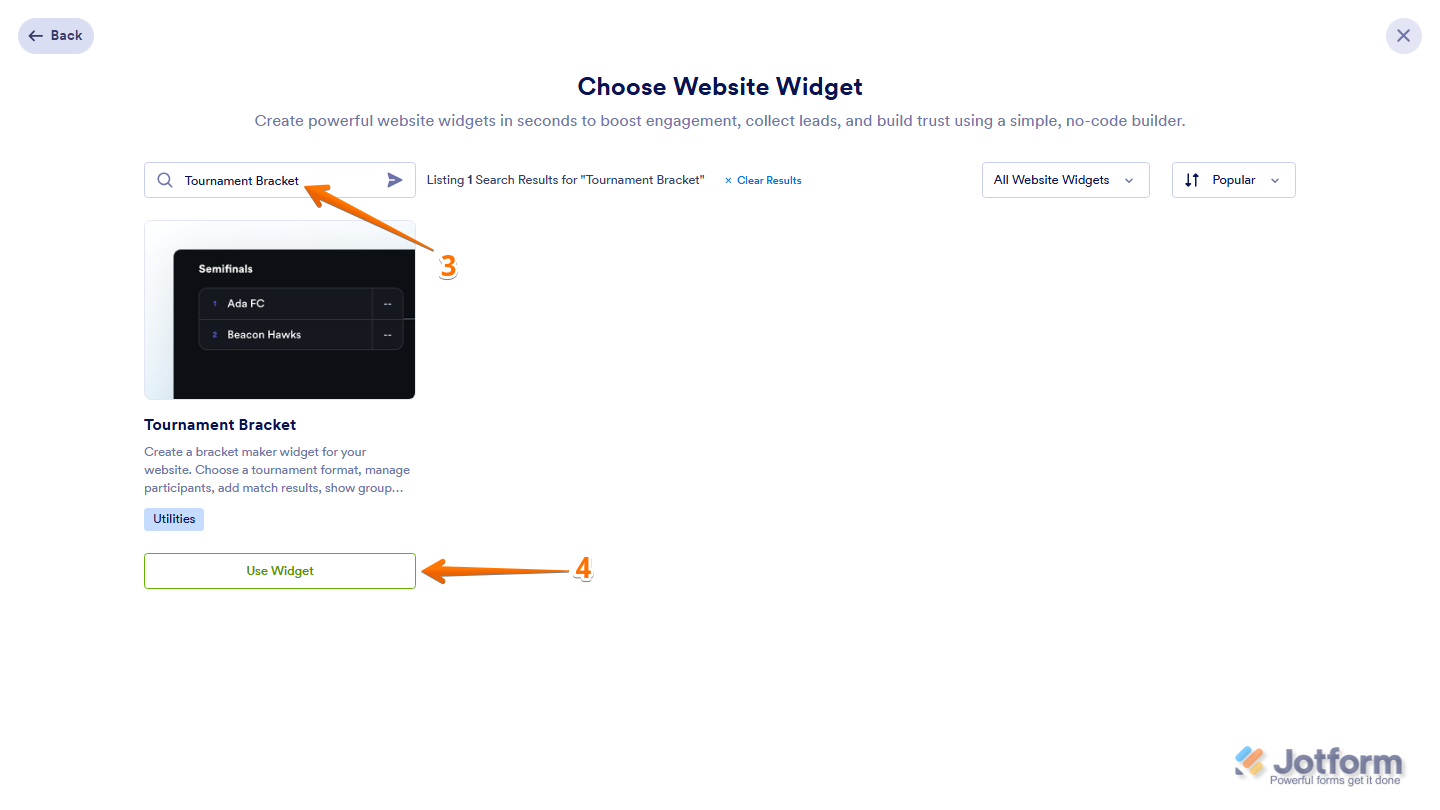
- Next, in the Search bar in the upper-left corner of Choose Website Widget, enter Tournament Bracket.
- Then, in the search results, click on Use Widget at the bottom of it.
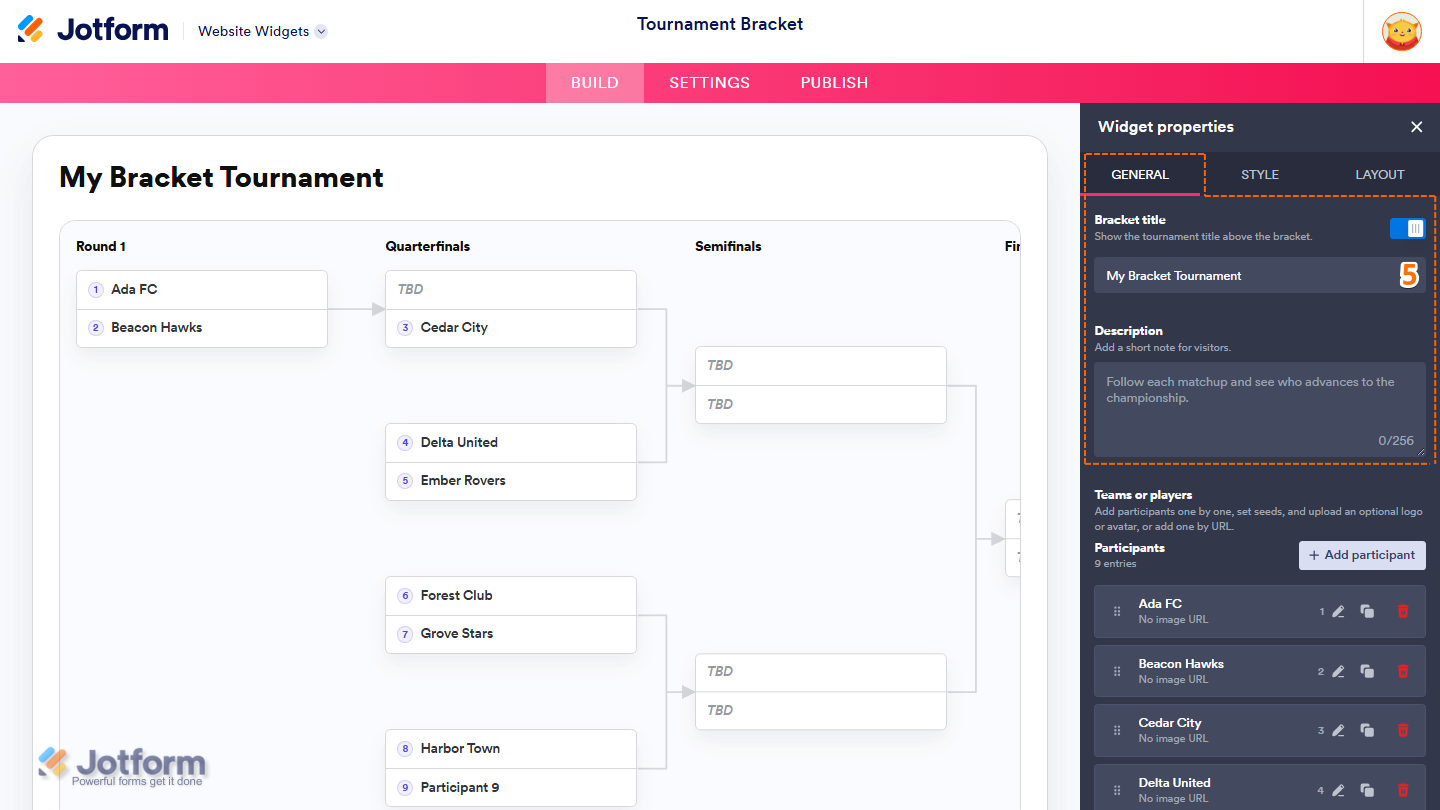
- Now, in the Widget Properties menu that opens on the right side of Website Widgets, under the General tab, set up these properties:
- Bracket Title — Keep this on to display the tournament title above the bracket, or toggle it off to hide it.
- Title — This is only shown when the Bracket Title property is enabled. Delete the default tournament title in the input box and enter the title you want to display above the bracket.
- Description — Delete the default description in the input box and enter a short note to display below the tournament title.
- Bracket Title — Keep this on to display the tournament title above the bracket, or toggle it off to hide it.
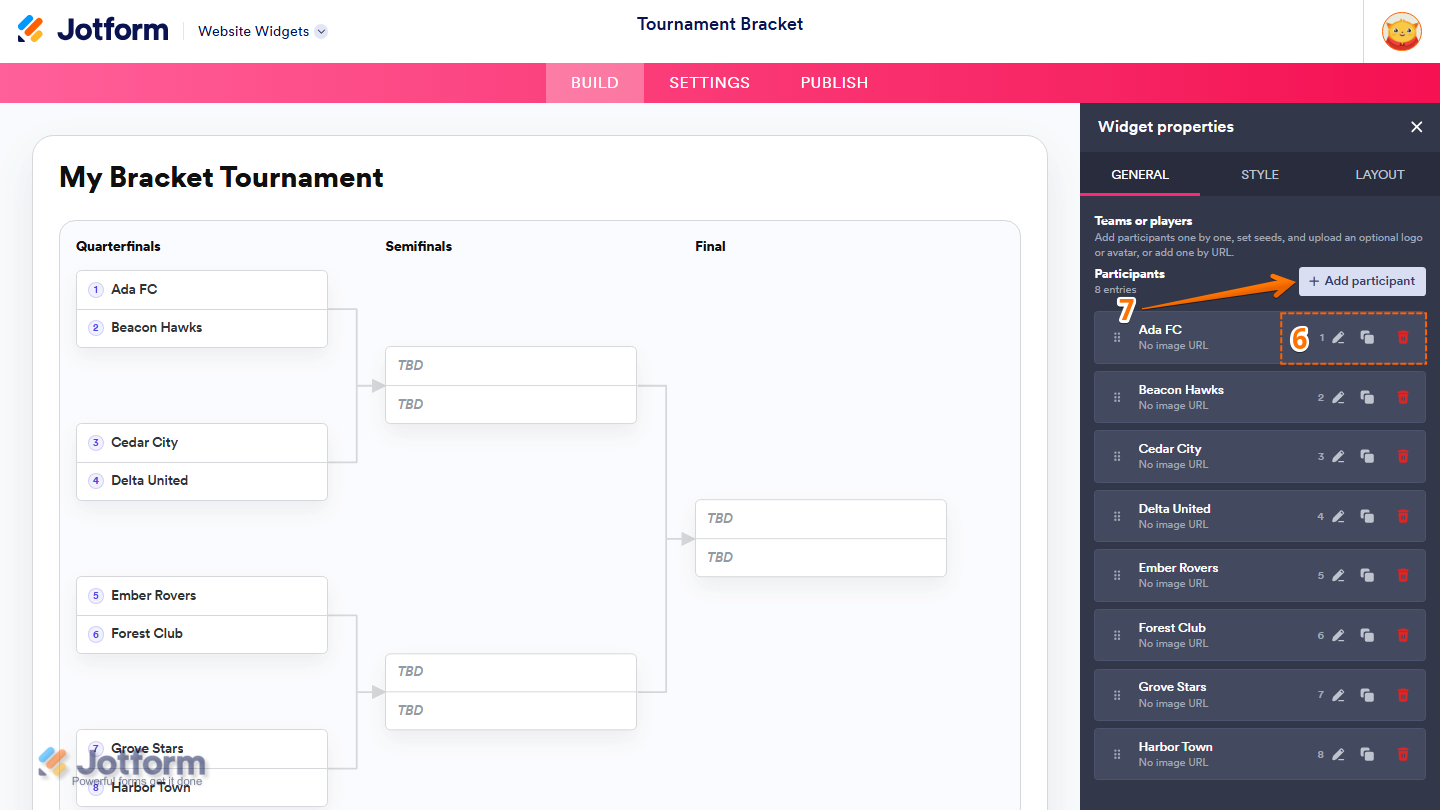
- Next, in the Teams or Players section, you’ll notice that the widget already includes sample participants. You can manage these participants using the available action icons:
- Pencil icon — Click on it to edit a participant’s details.
- Duplicate icon — Click on it to create a copy of a participant.
- Trash Can icon — Click on it to remove a participant.
- To add a new participant, click on Add Participant.
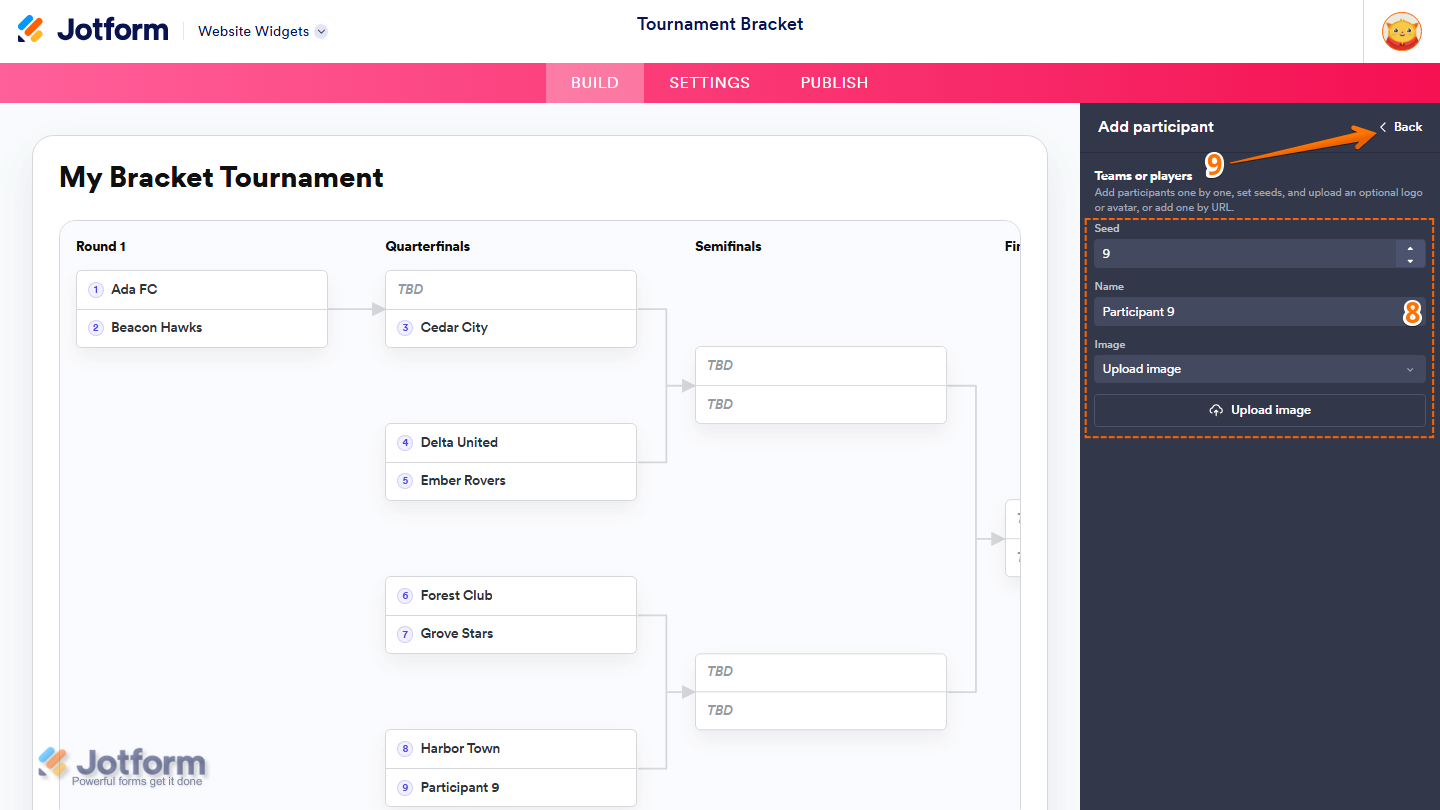
- Then, in the Add Participant menu that appears, enter these details:
- Seed — Enter or select the participant’s seed number in the tournament bracket.
- Name — Delete the default participant name in the input box and enter the participant’s name.
- Image — Choose whether to add the participant’s image by uploading an image or entering an image URL.
- Once you’re done, in the upper-right corner, click on Back to return to the Widget Properties menu under the General tab.
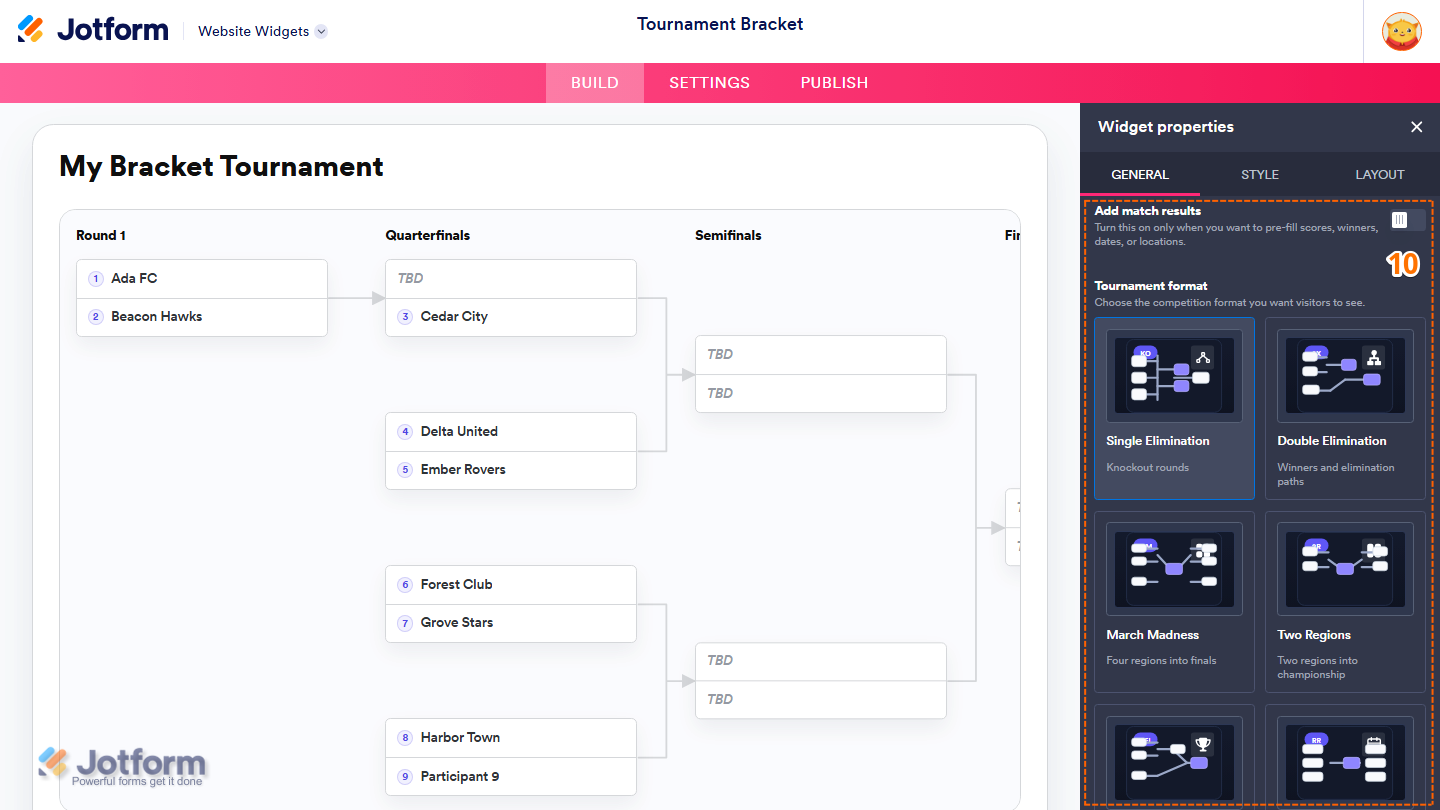
- Next, scroll down and configure these settings:
- Add Match Results — Enable this option to pre-fill match results, including scores, winners, dates, or locations, instead of entering them during the tournament.
- Tournament Format — Select one of the following tournament formats to determine how participants compete and advance through the bracket:
- Single Elimination — Participants are eliminated after one loss until only one winner remains.
- Double Elimination — Participants must lose twice before being eliminated from the tournament.
- March Madness — Organizes participants into four regions that compete until a single champion is determined.
- Two Regions — Splits participants into two regions before advancing to the championship round.
- NFL Playoff — Uses a conference-style playoff bracket where participants advance through tournament rounds.
- Round Robin — Every participant competes against every other participant before determining the winner.
- Group Stage — Divides participants into groups before advancing qualified participants to the knockout stage.
Pro Tip
Once Add Match Results is enabled, the Scores and Match Locations settings also become available under the Layout tab.
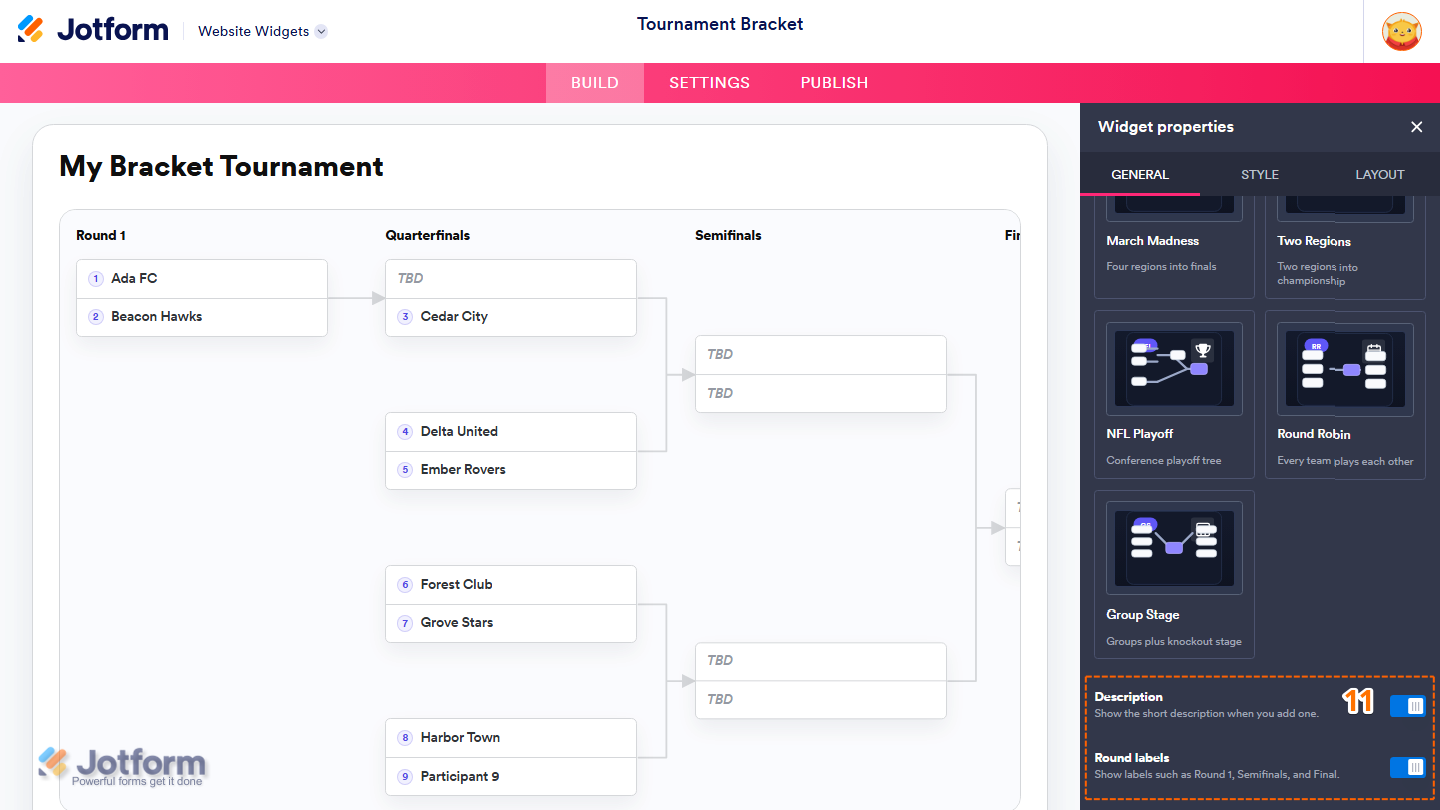
- Then, continue scrolling to configure these settings:
- Description — Enable this option to display the tournament description below the bracket title.
- Round Labels — Enable this option to display labels for each tournament round, such as Round 1, Quarterfinals, Semifinals, and Final.
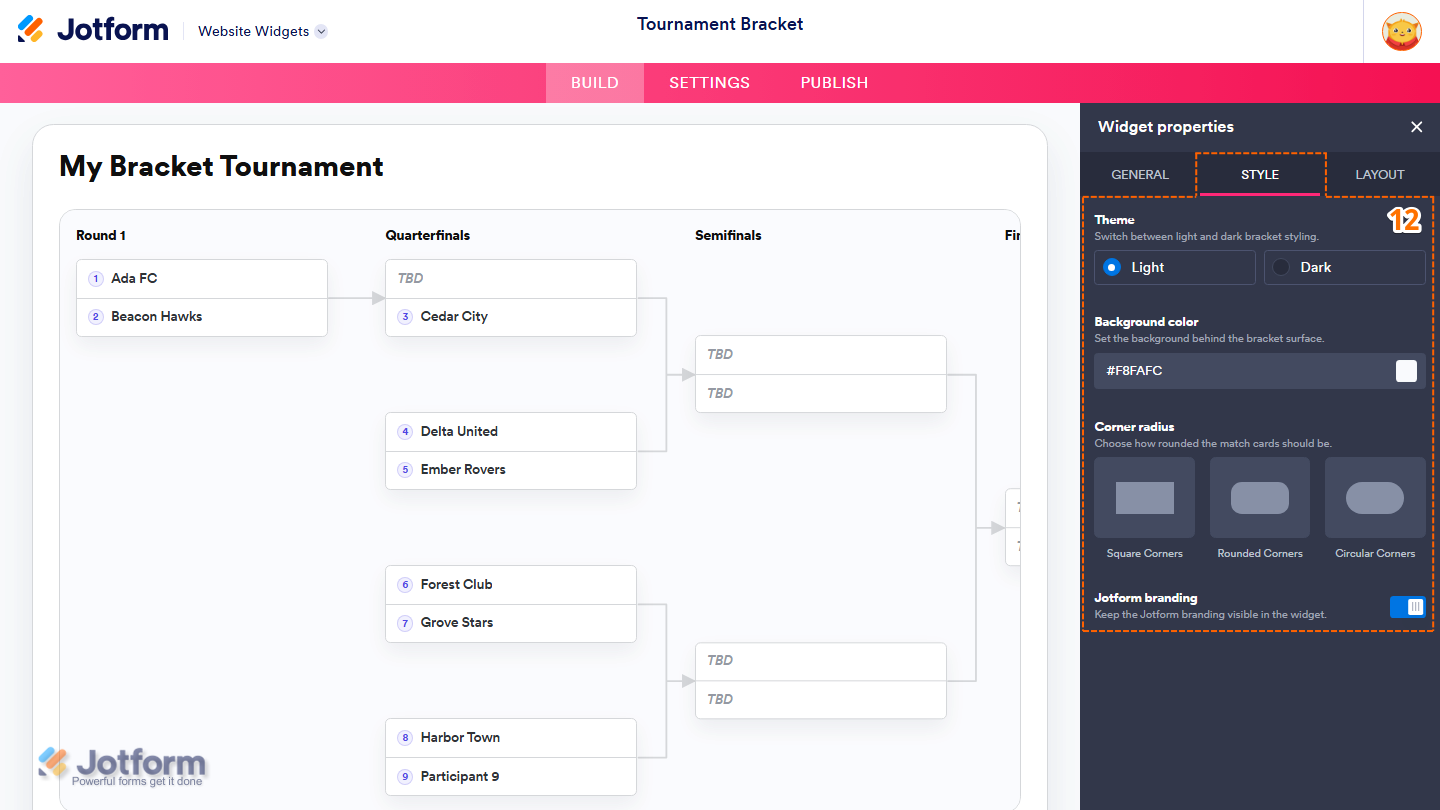
- Now, under the Style tab, customize these properties:
- Theme — Select a light or dark theme to change the overall appearance of the tournament bracket.
- Background Color — Click on the color box or enter a hex code in the input box to customize the area behind the tournament bracket.
- Corner Radius — Select a corner style to change the appearance of the match cards:
- Square Corners — Displays match cards with sharp corners.
- Rounded Corners — Displays match cards with rounded corners.
- Circular Corners — Displays match cards with fully rounded corners.
- Jotform Branding — Keep this on to display the Powered by Jotform badge below the tournament bracket, or toggle it off to hide it.
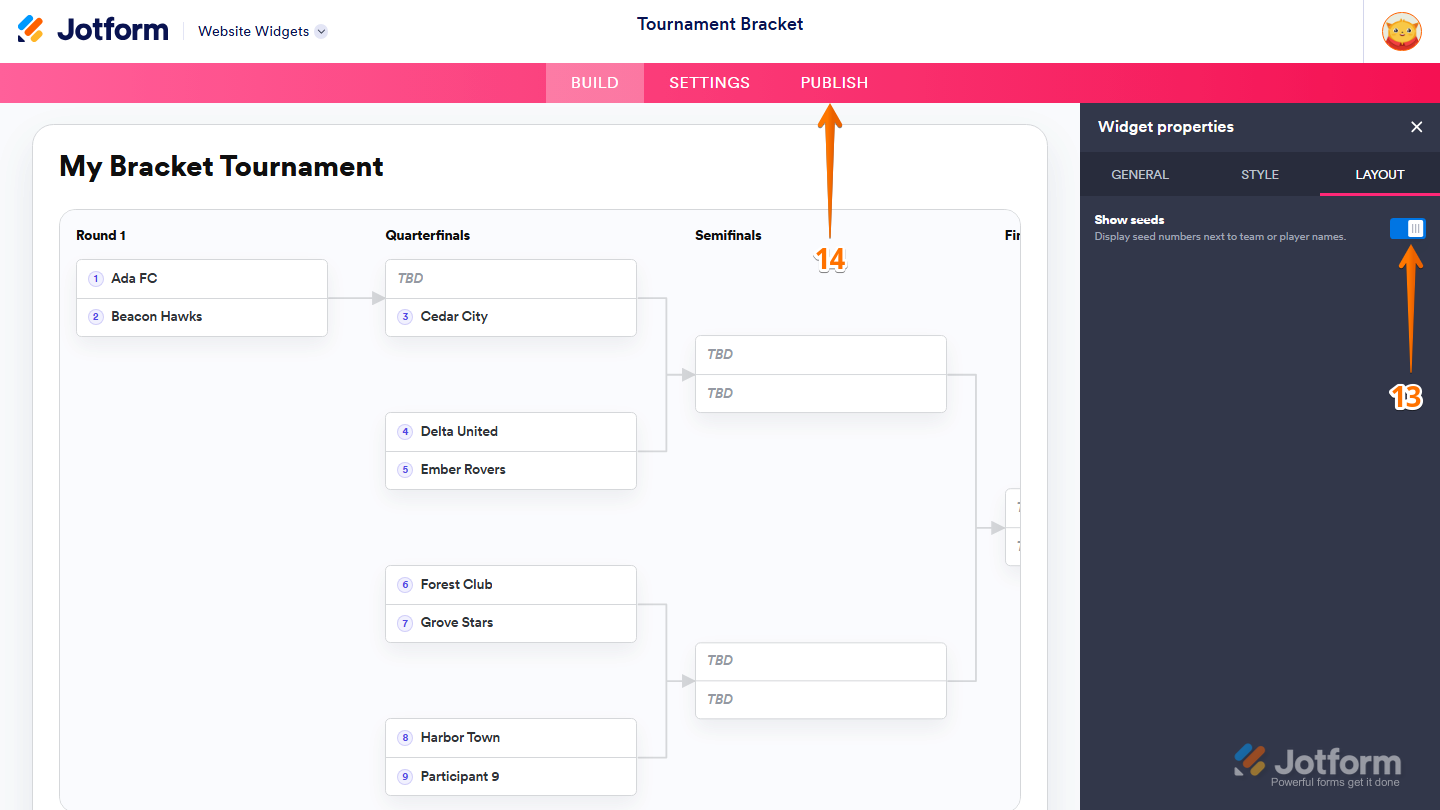
- Next, under the Layout tab, toggle Show Seeds to on or off to display or hide the seed numbers next to participant or team names.
- Once everything’s set, in the pink navigation bar at the top of the page, click on Publish.
Note
You’ll be asked to log in to your Jotform account or sign up for one. Once you’ve done that, you’ll be able to get the embed code for your widget.
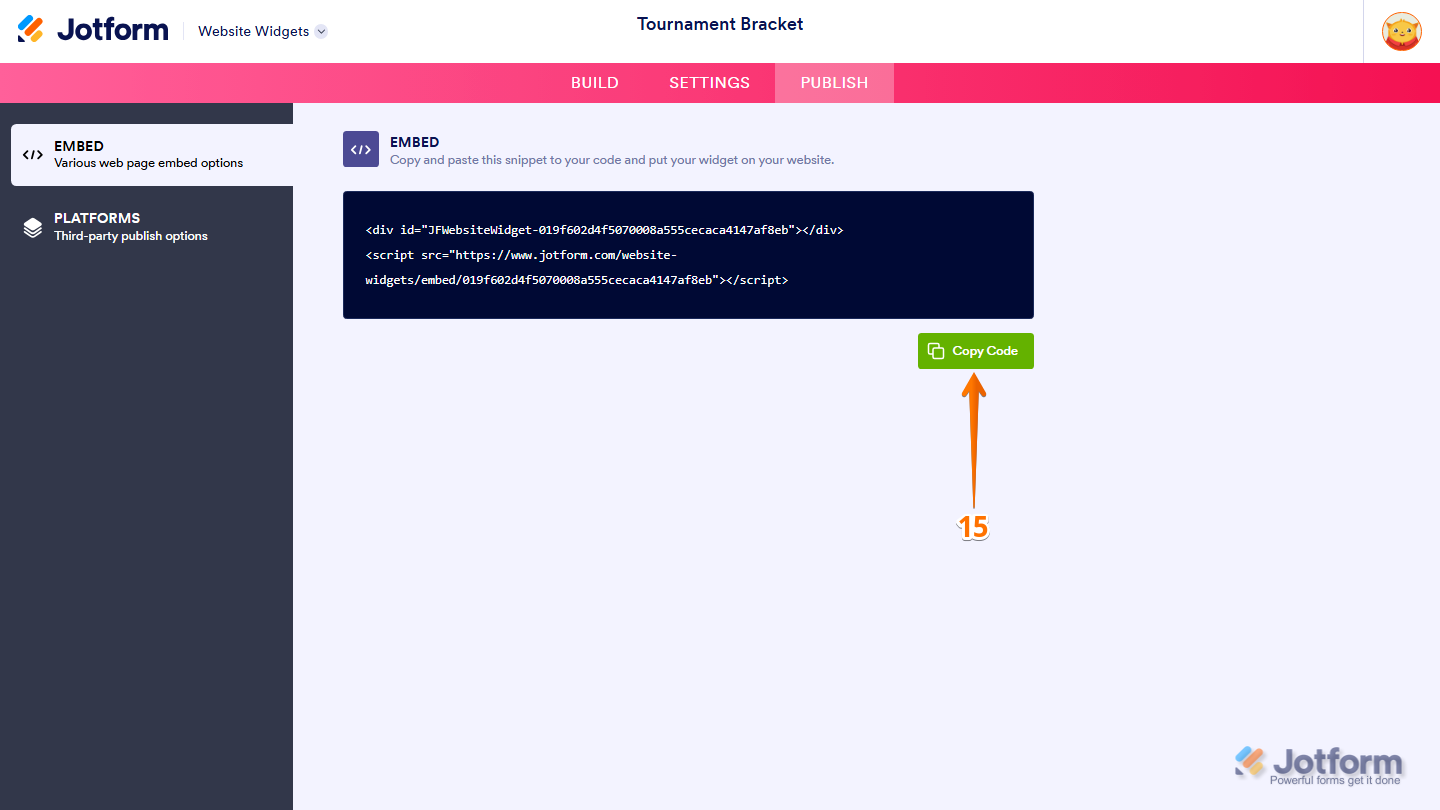
- Then, in the Embed section, click on Copy Code, and, if you already know how, paste that into the Embed section on your platform, and you’re good to go.
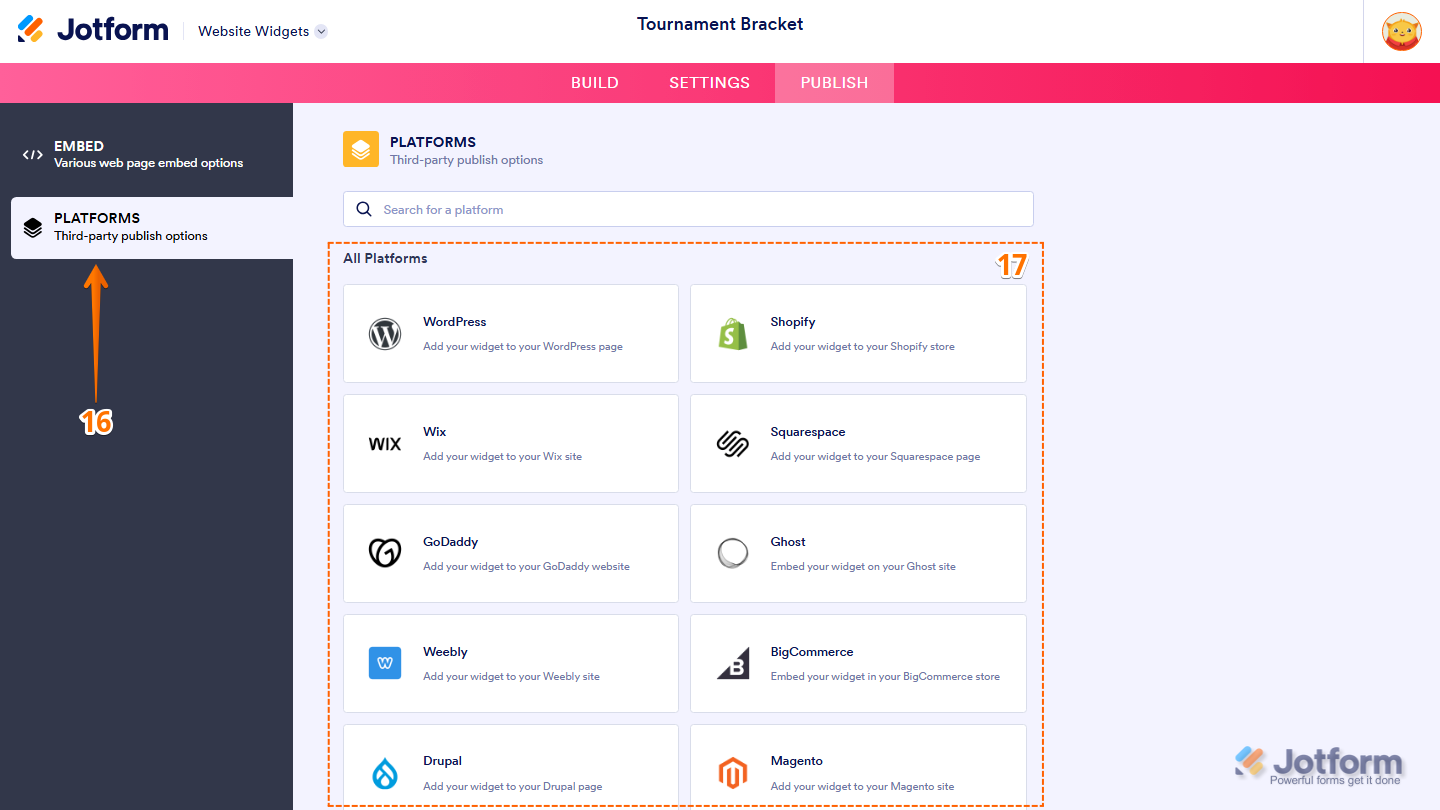
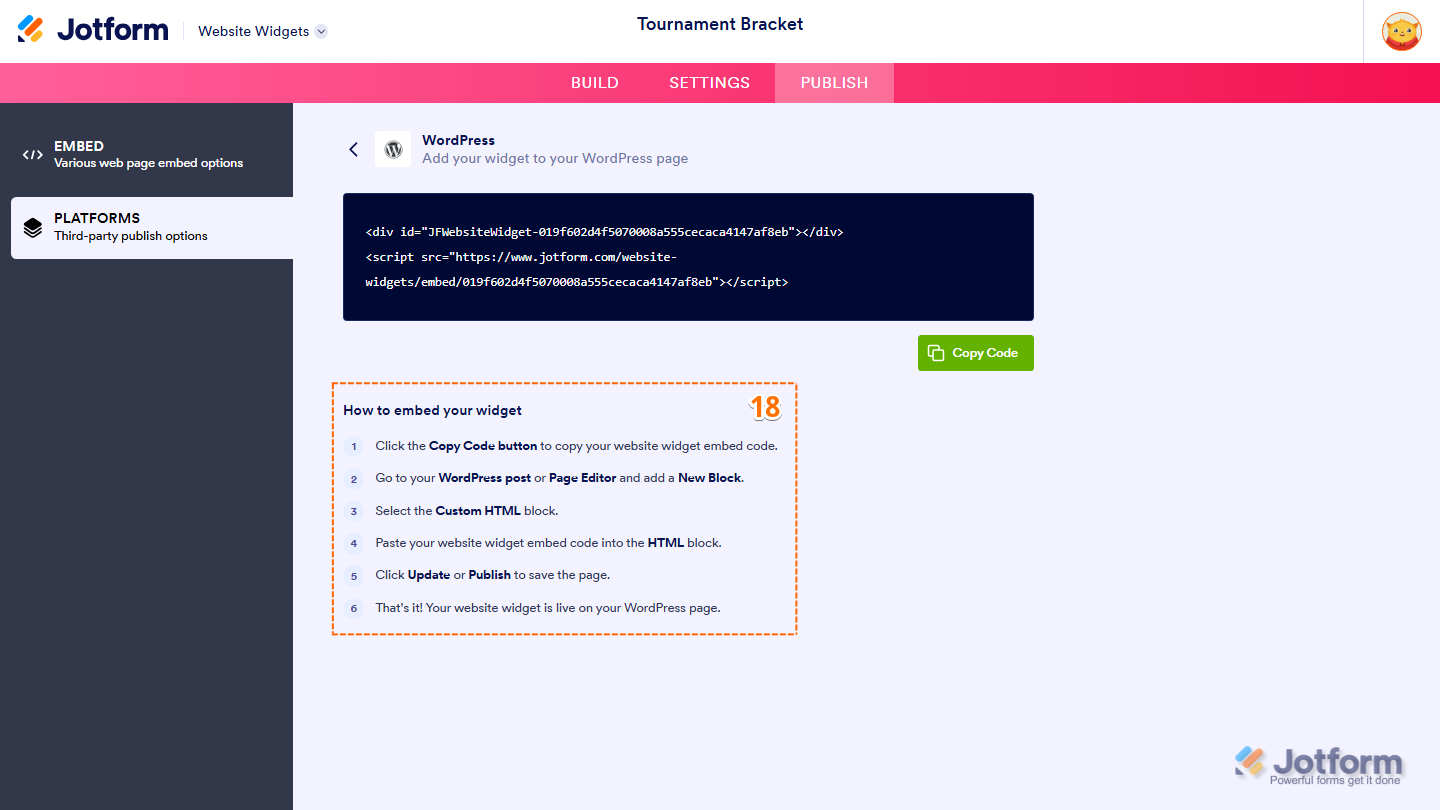
- To view embedding instructions for your widget, click on Platforms in the menu on the left side of the page.
- Next, in the Platforms section on the right, select the platform you want to view embedding instructions for. Or, use the Search bar at the top of the section to find it easily.
- Then, follow the steps in the How to Embed Your Widget section to add it to your website.
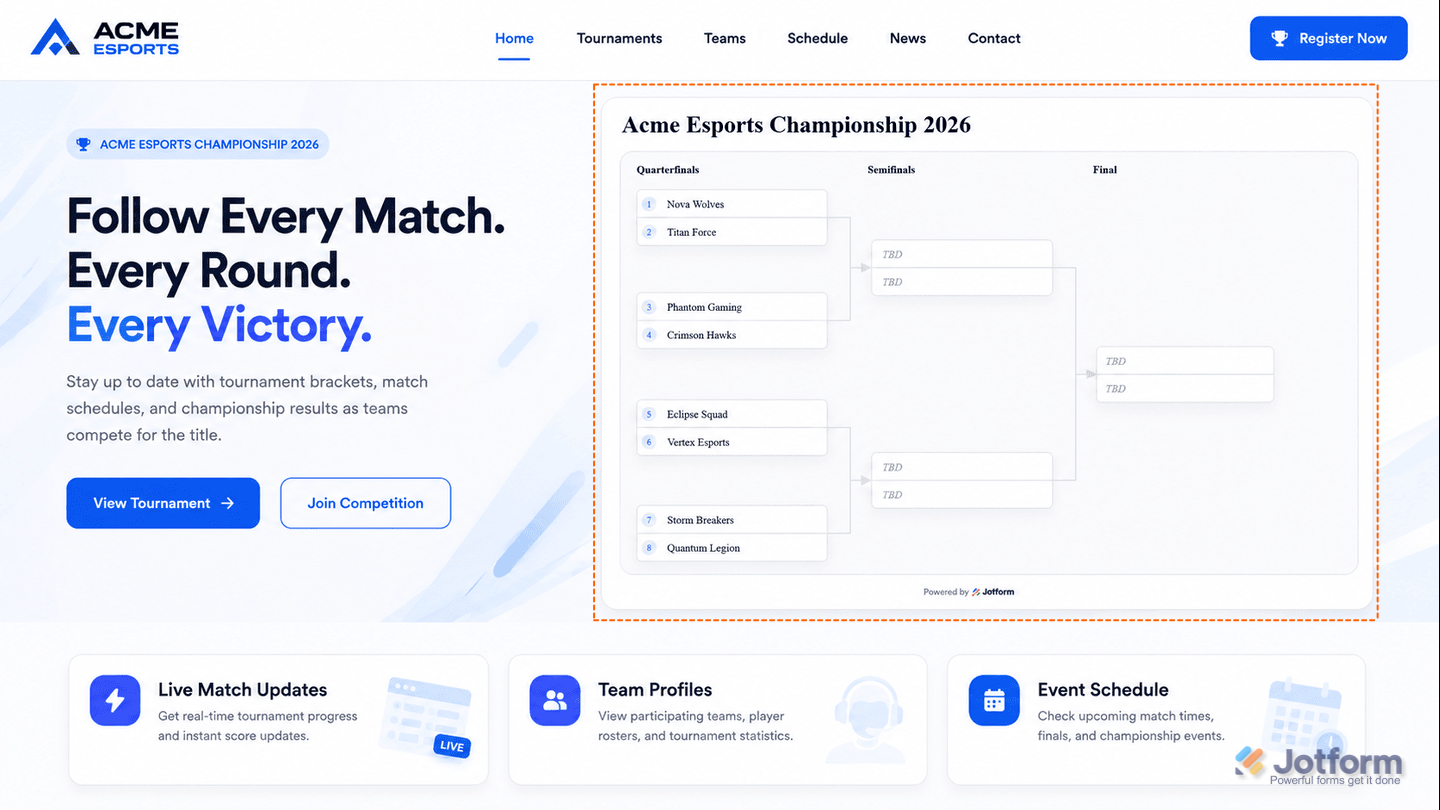
Your Tournament Bracket widget will appear on your website just as you set it up. The example below shows how it’ll look when embedded on a website.
Note
You can manage the website widgets you’ve created at any time from your account. For a full breakdown of how to do it, head over to our guide on How to Manage Website Widgets.


Send Comment: