Displaying a Tumblr feed on your website is a great way to keep your content fresh and engage visitors with your latest blog posts, photos, GIFs, videos, and other updates. Instead of manually updating your website with new content, you can automatically showcase posts from your Tumblr blog directly on your pages.
With the Tumblr Feed widget, it’s easy to embed a live, automatically updated Tumblr feed on your website without any coding experience. Jotform lets you customize the layout, choose from different display styles, and seamlessly match the widget to your website’s overall design.
Creating and Getting Your Tumblr Feed Widget Embed Code
To embed a Tumblr feed on your website, you’ll first need to configure the Tumblr Feed widget and get its embed code. Here’s how to get going:
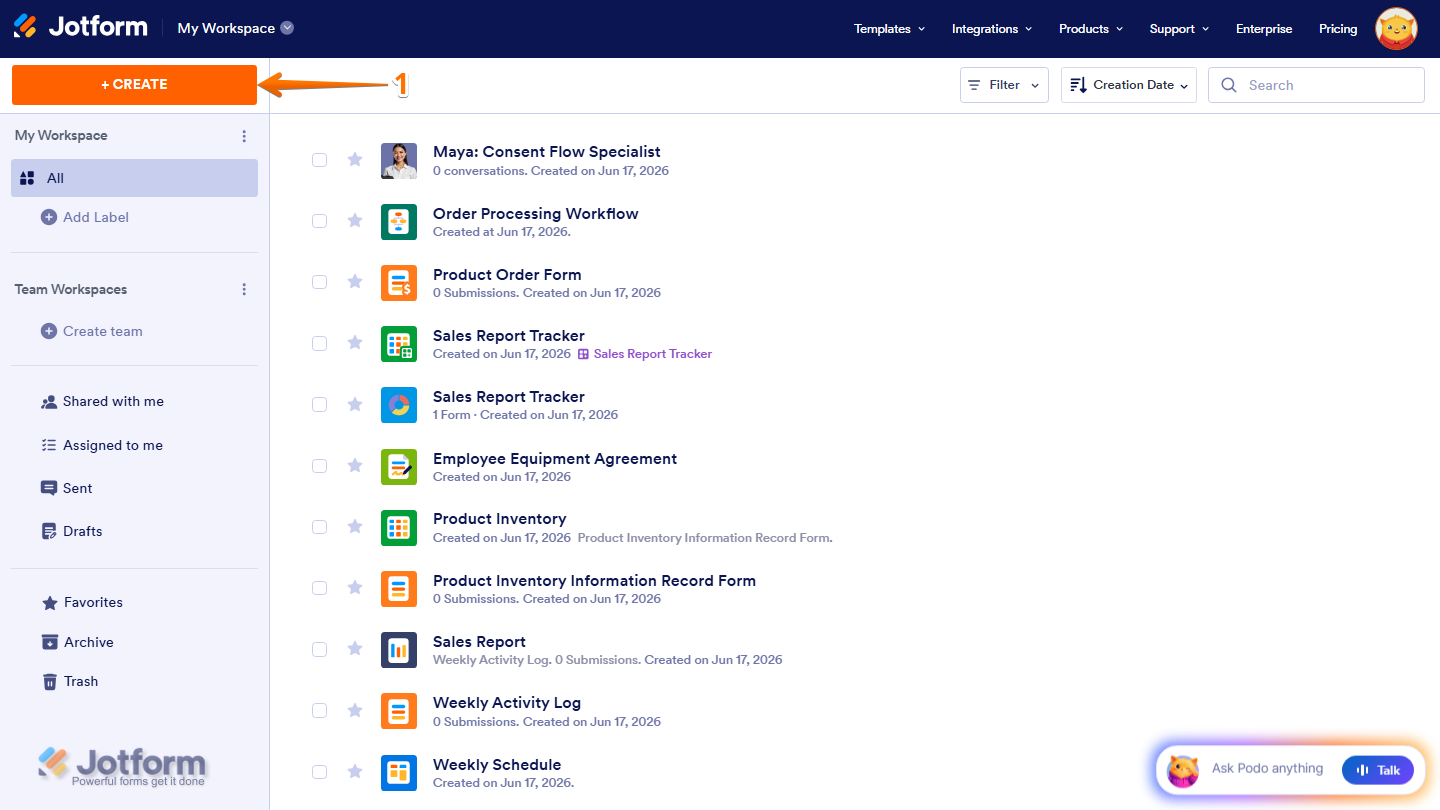
- On your Workspace page, click on Create on the top-left side of the page.
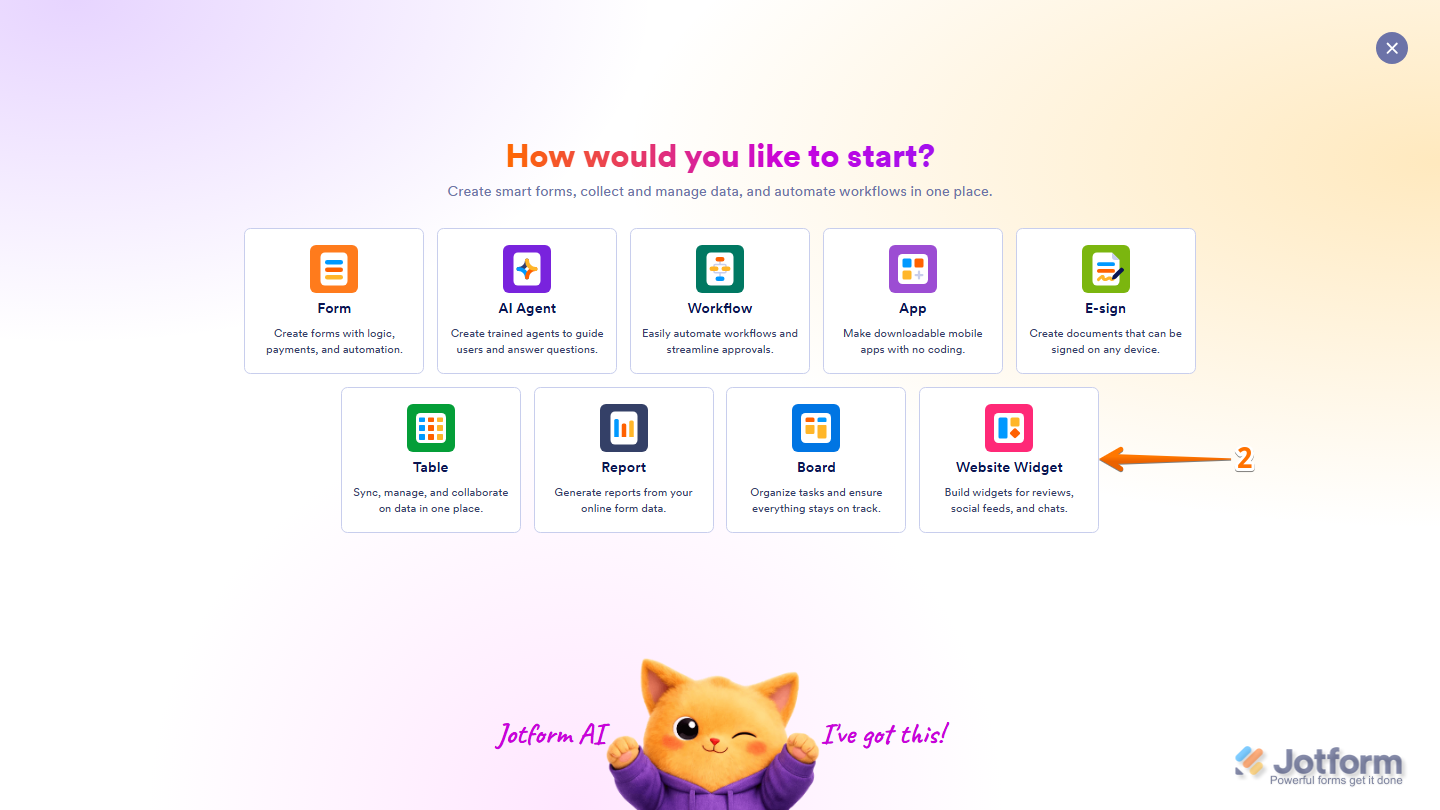
- Then, in the window that opens up, select Website Widget from the assets.
- Next, in the Search bar at the top of the Choose Website Widget page, search for the Tumblr Feed.
- Now, in the search results, click on Use Widget.

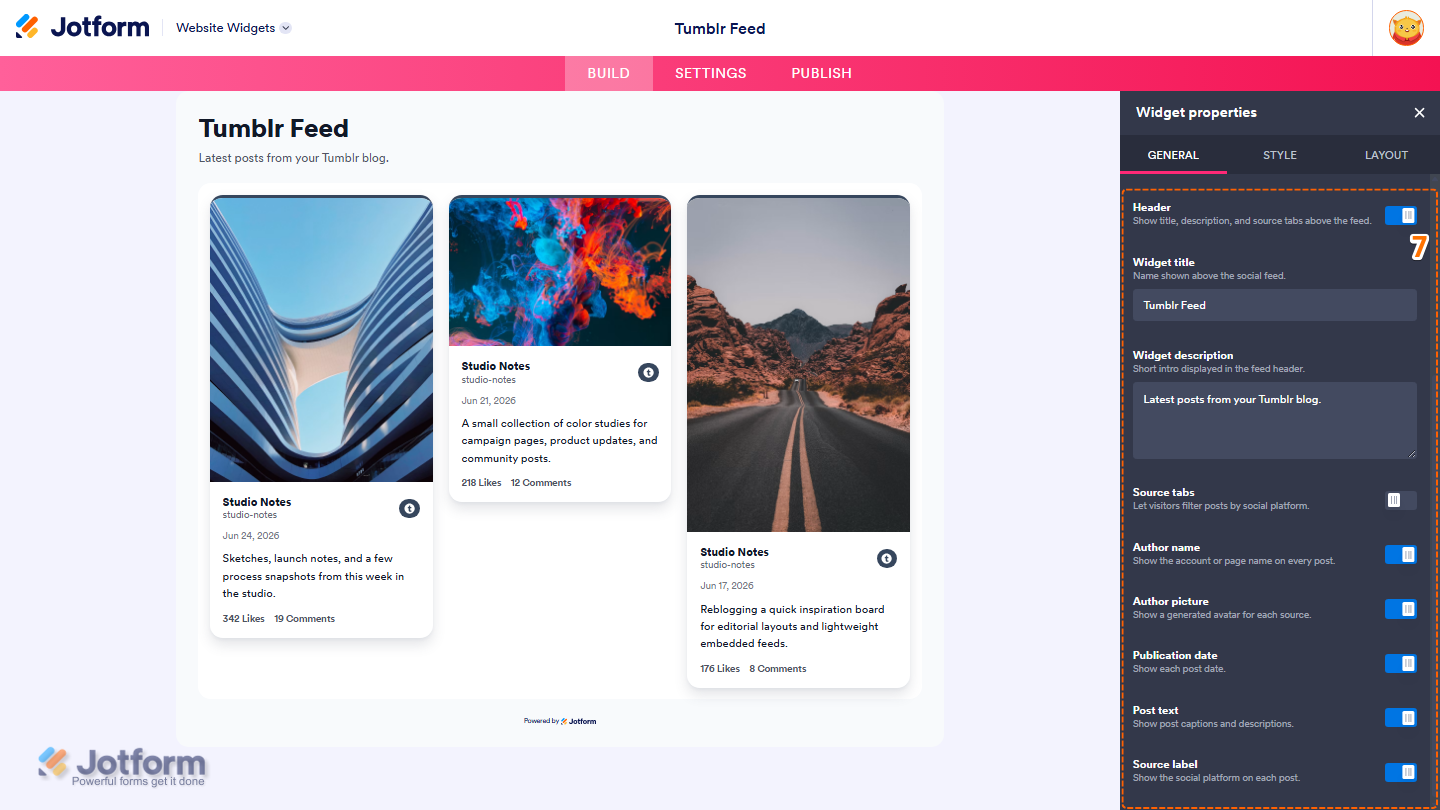
- Once the widget opens, the Widget Properties menu will automatically appear on the right side of the Website Widgets. Under the General tab, set up these things under Connected Sources:
- Source Type — This is set to Blog by default.
- Source — Enter your Tumblr blog name or public Tumblr blog URL.
- When everything looks correct, click on Add Source.

- Once the source is added, scroll down and set up these display options:
- Header — Add a header above the Tumblr feed.
- Widget Title — Enter the title shown at the top of the widget.
- Widget Description — Add a short description below the widget title.
- Source Tabs — Let visitors switch between connected Tumblr blogs.
- Author Name — Include the Tumblr blog name on each post.
- Author Picture — Display the Tumblr profile picture on each post.
- Publication Date — Include the publication date for every post.
- Post Text — Show the content or caption of each Tumblr post.
- Source Label — Display the Tumblr platform label on each post.
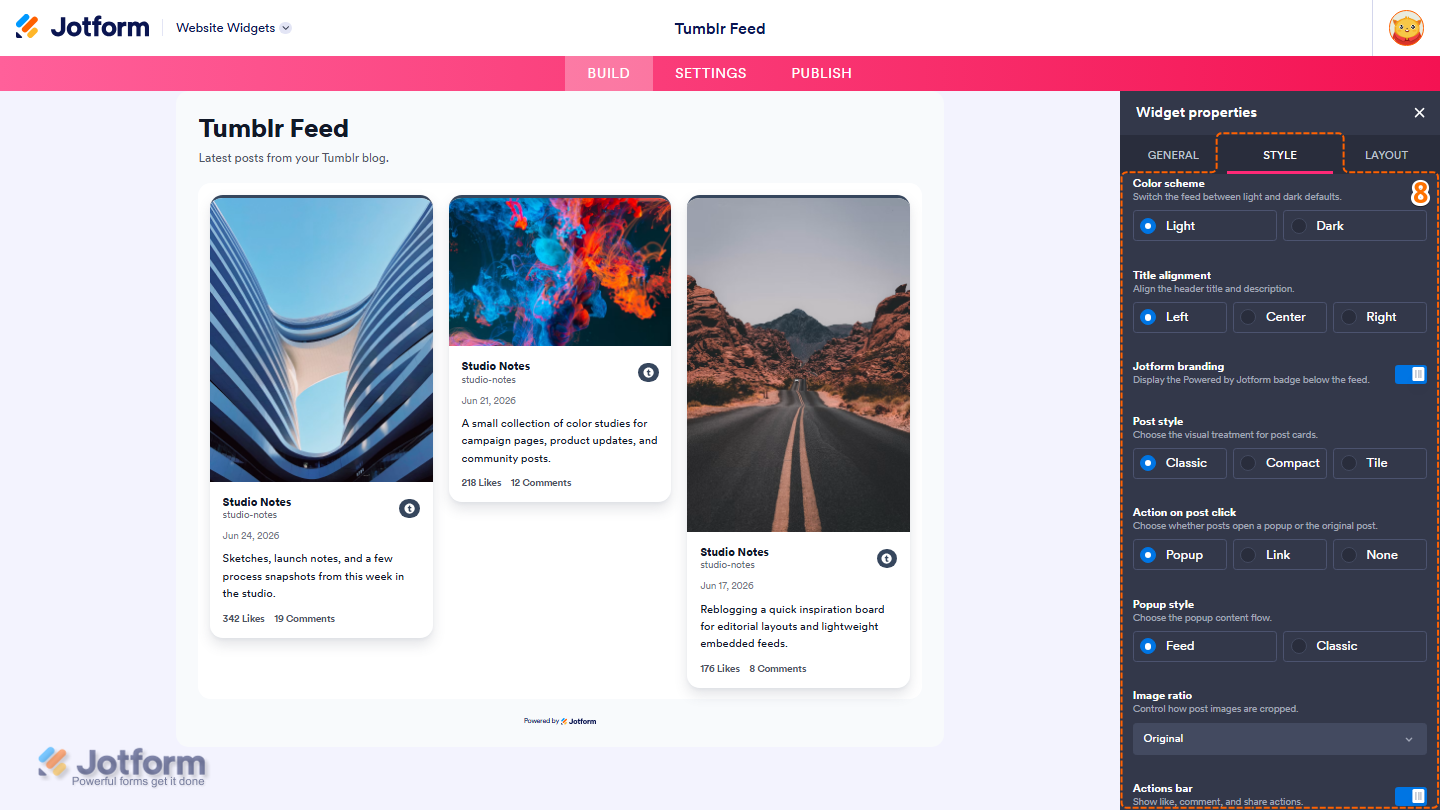
- Next, under the Style tab, personalize the appearance of your Tumblr feed with these options:
- Color Scheme — Switch between Light and Dark themes.
- Title Alignment — Align the widget title and description to the left, center, or right.
- Jotform Branding — Choose whether to display the Powered by Jotform badge below the feed.
- Post Style — Select how posts are displayed, such as Classic, Compact, or Tile.
- Action on Post Click — Choose whether clicking a post opens a popup, the original post, or does nothing.
- Popup Style — Select how post content is displayed in the popup.
- Image Ratio — Choose how post images are cropped.
- Actions Bar — Choose whether to display the Like, Comment, and Share actions.
- Then, scroll down to continue customizing the widget:
- Source Style — Display the Tumblr source as an icon or label.
- External Links — Allow visitors to open the original Tumblr post.
- Card Accent Colors — Choose whether to use Tumblr colors, a single custom color, or no card accent.
- Background Color — Customize the background color of the widget.
- Feed Surface Color — Set the background color behind the post cards.
- Post Background — Customize the background color of individual post cards.
- Post Text Color — Choose the color of the post text.
- Post Link Color — Set the color used for links within posts.
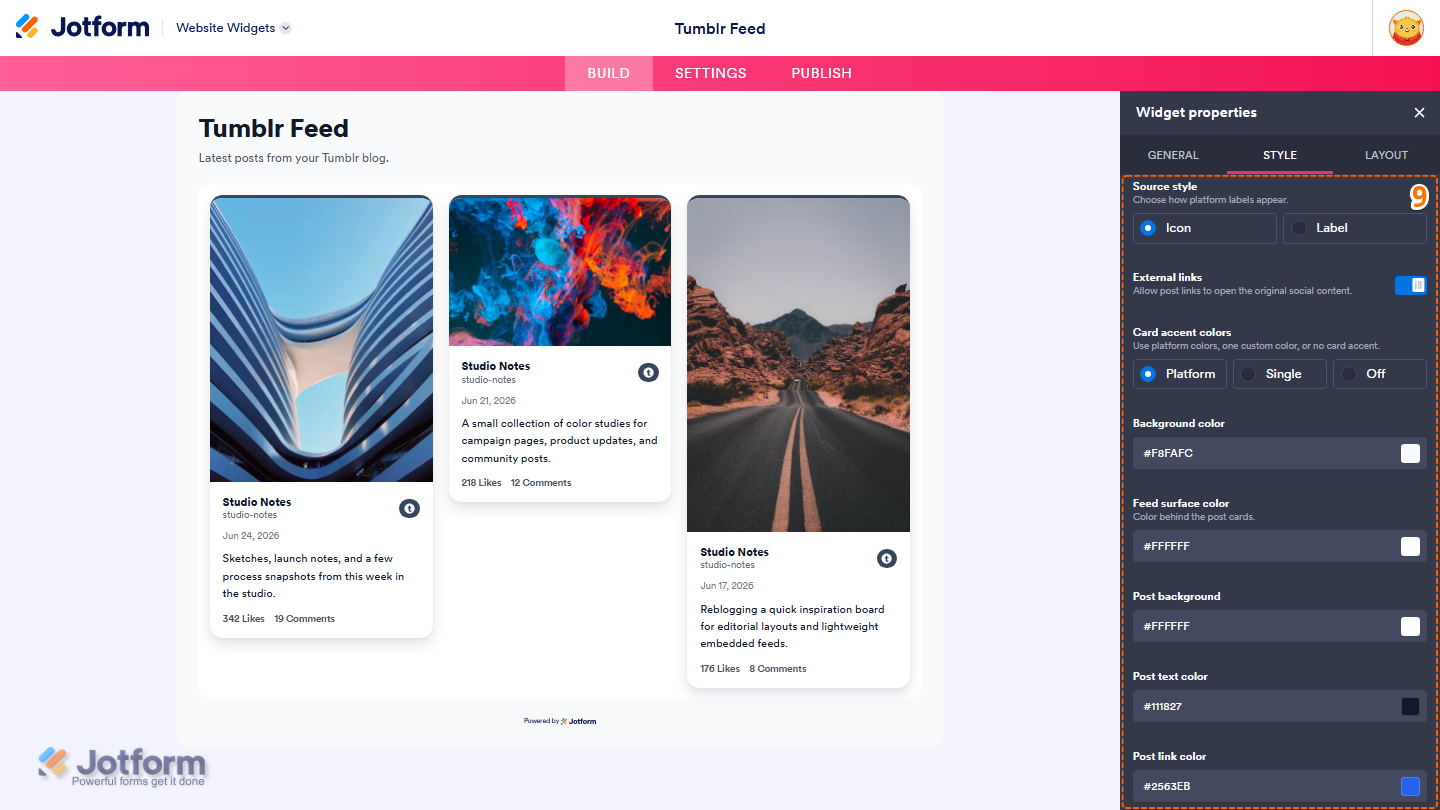
- After that, scroll down to customize these remaining appearance settings:
- Popup Background — Customize the background color of the popup window.
- Popup Backdrop Color — Choose the color displayed behind the popup.
- Popup Text Color — Set the text color used inside the popup.
- Text Size — Adjust the size of the post text.
- Corner Radius — Choose how rounded the corners of post cards and pop-ups appear.
- Card Shadow — Add or remove the shadow around each post card.
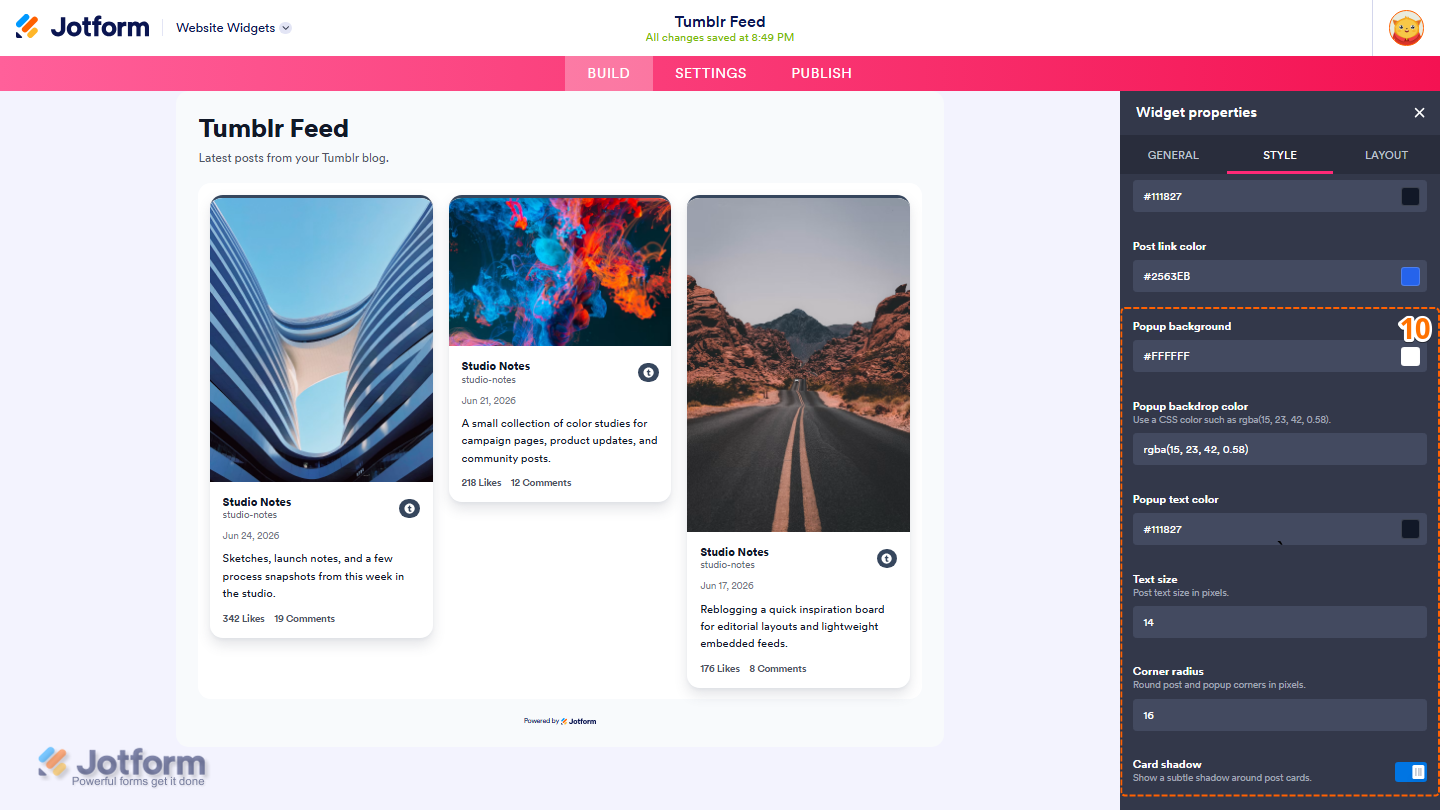
- Next, under the Layout tab, adjust these layout settings:
- Layout — Choose how your Tumblr feed is displayed, such as Grid, Masonry, List, Carousel, or Slider.
- Width — Set the maximum width of the widget.
- Columns — Choose how many columns of posts appear in the feed.
- Rows — Set the maximum number of rows displayed before additional posts are hidden.
- Item Spacing — Adjust the spacing between post cards.
- RTL — Enable right-to-left layout for languages that read from right to left.
- Open Links in New Tab — Choose whether Tumblr posts open in a new browser tab.
- Once you’ve finished configuring the widget, in the pink navigation bar on the top of the page, click on Publish.

- Finally, in the Embed section, click on Copy Code.
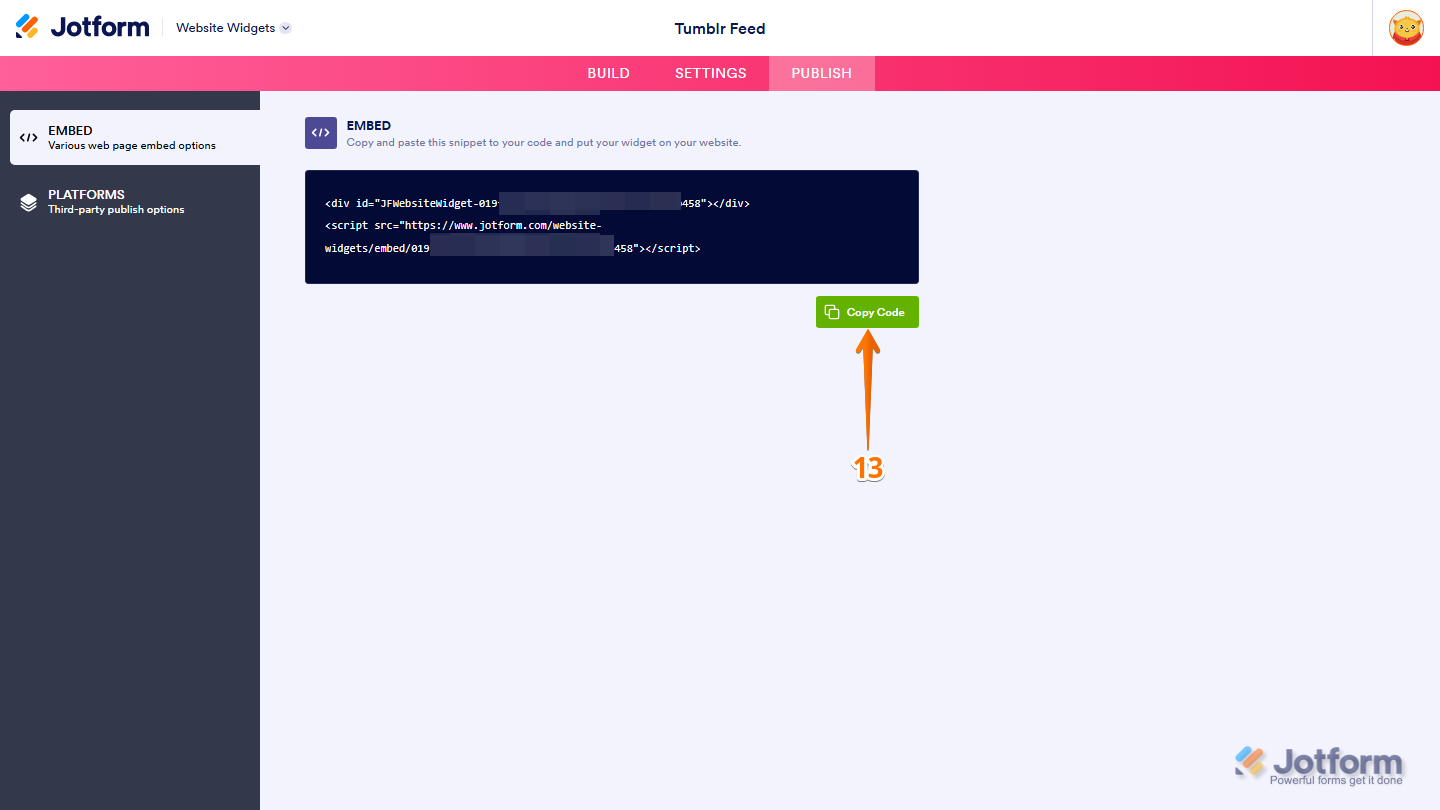
- Or, if your website is built on a supported platform, in the menu on the left side of the page, click on Platforms.
- Then, search for or select your platform to copy the embed code and view platform-specific embedding instructions, and you’re done.

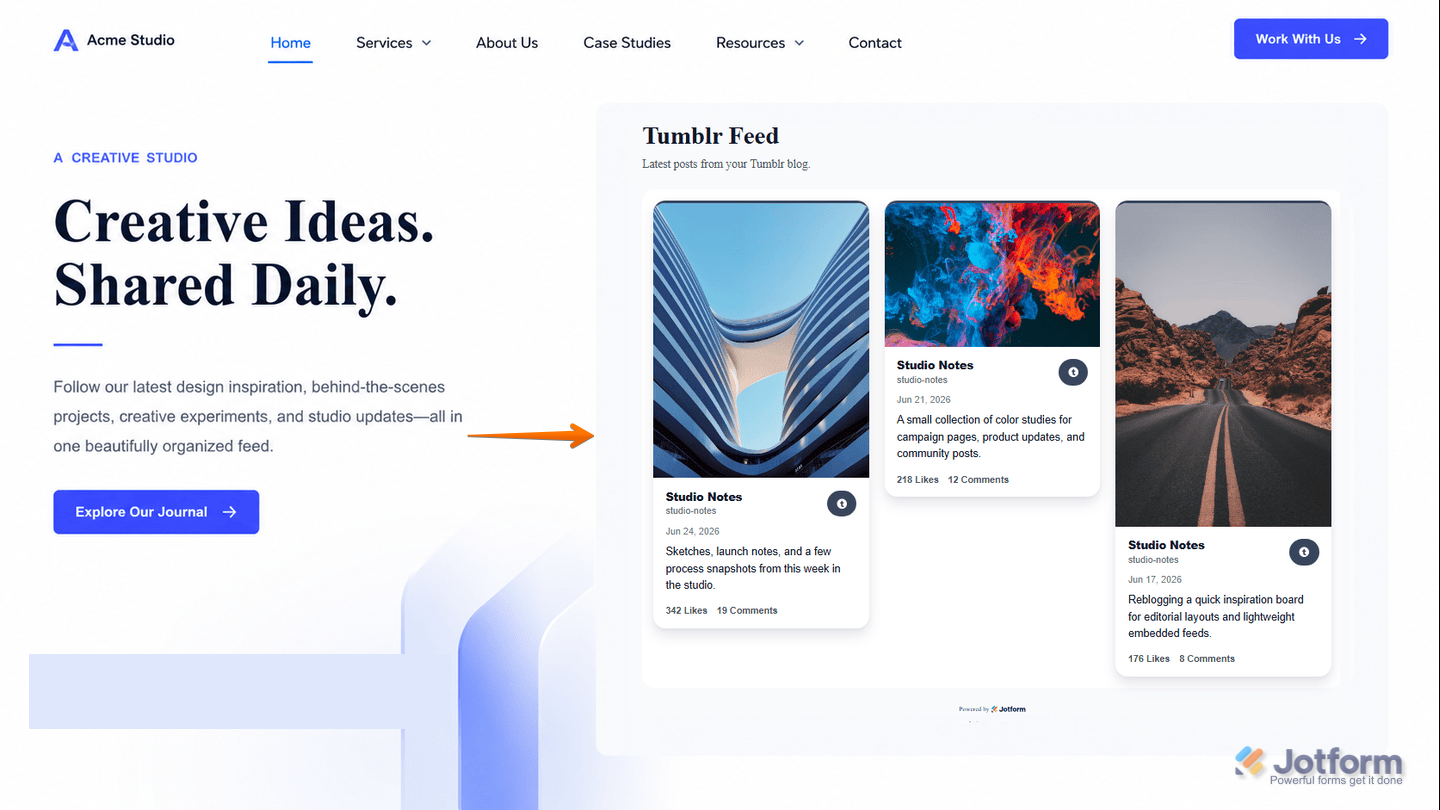
That’s it! You can now paste the copied embed code into your website or follow the platform-specific instructions to add the widget to your site. The screenshot below shows an example of how the Tumblr Feed Widget will look when embedded:
Updating Your Tumblr Feed Widget
You can update your Tumblr Feed widget at any time after it’s embedded on your website. Here’s a quick how-to:
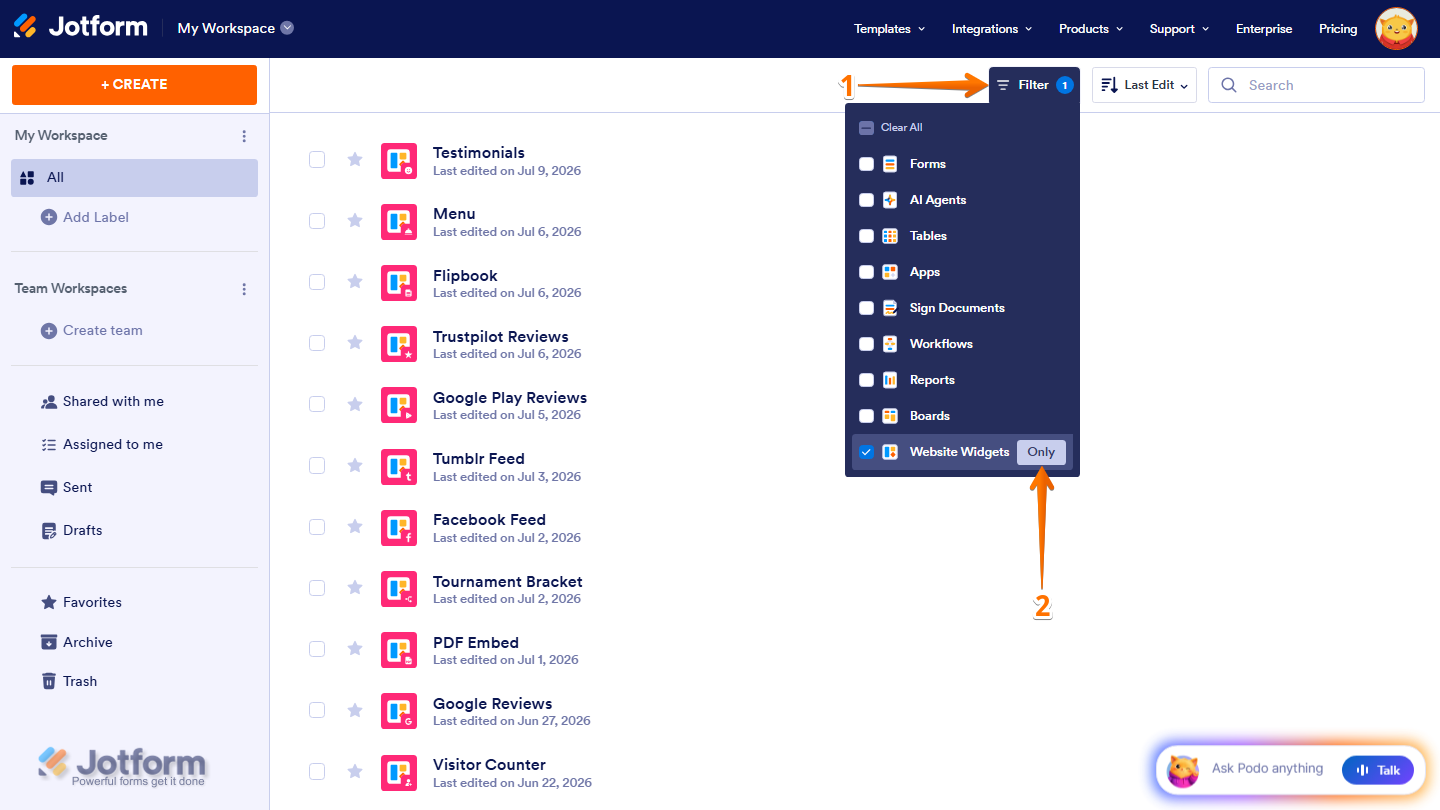
- On your Workspace page, at the top, click on Filter.
- Then, in the menu that opens, hover over Website Widgets and click on Only to display only website widgets assets on the page.
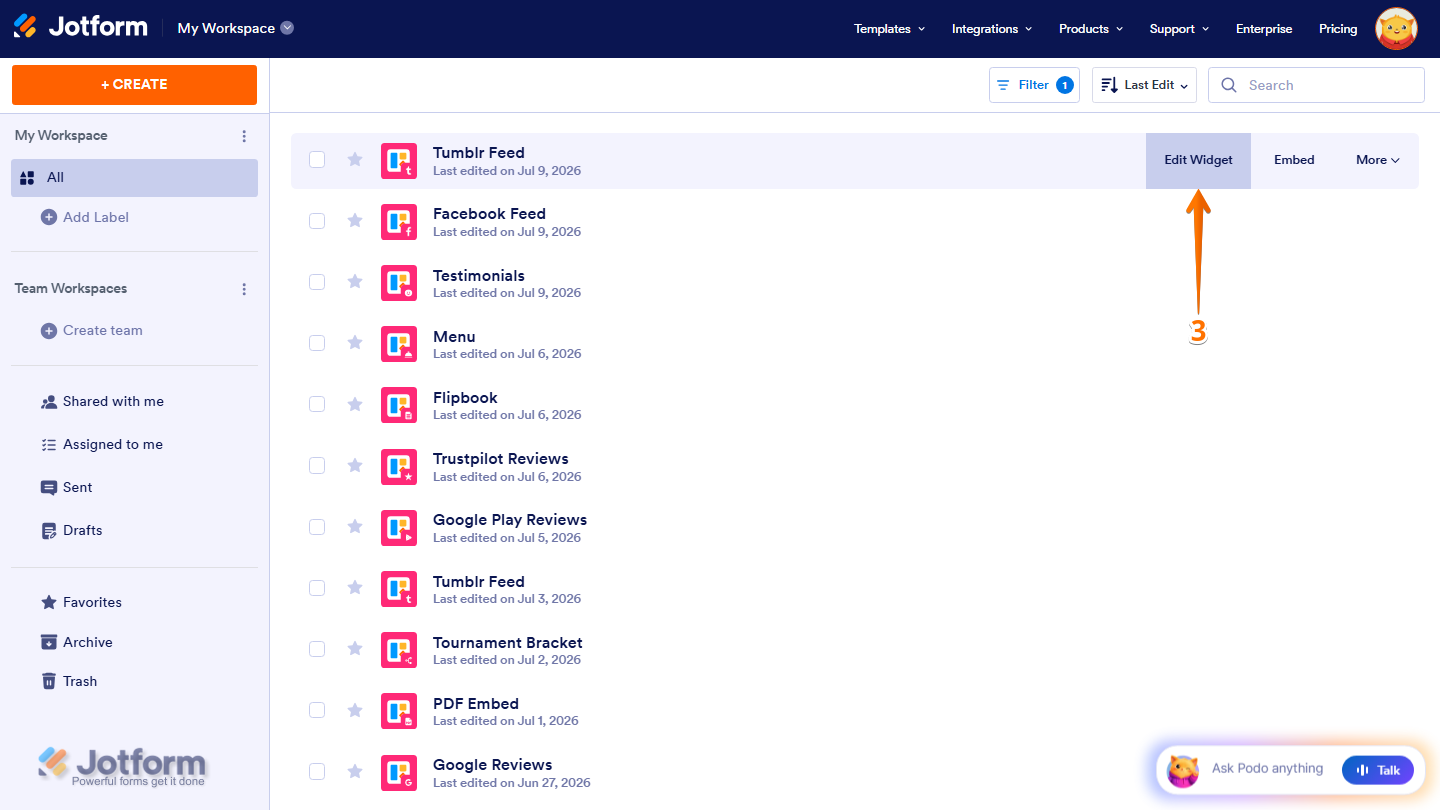
- Next, hover your mouse over the widget you want to edit and click on Edit Widget on the right side of the page.
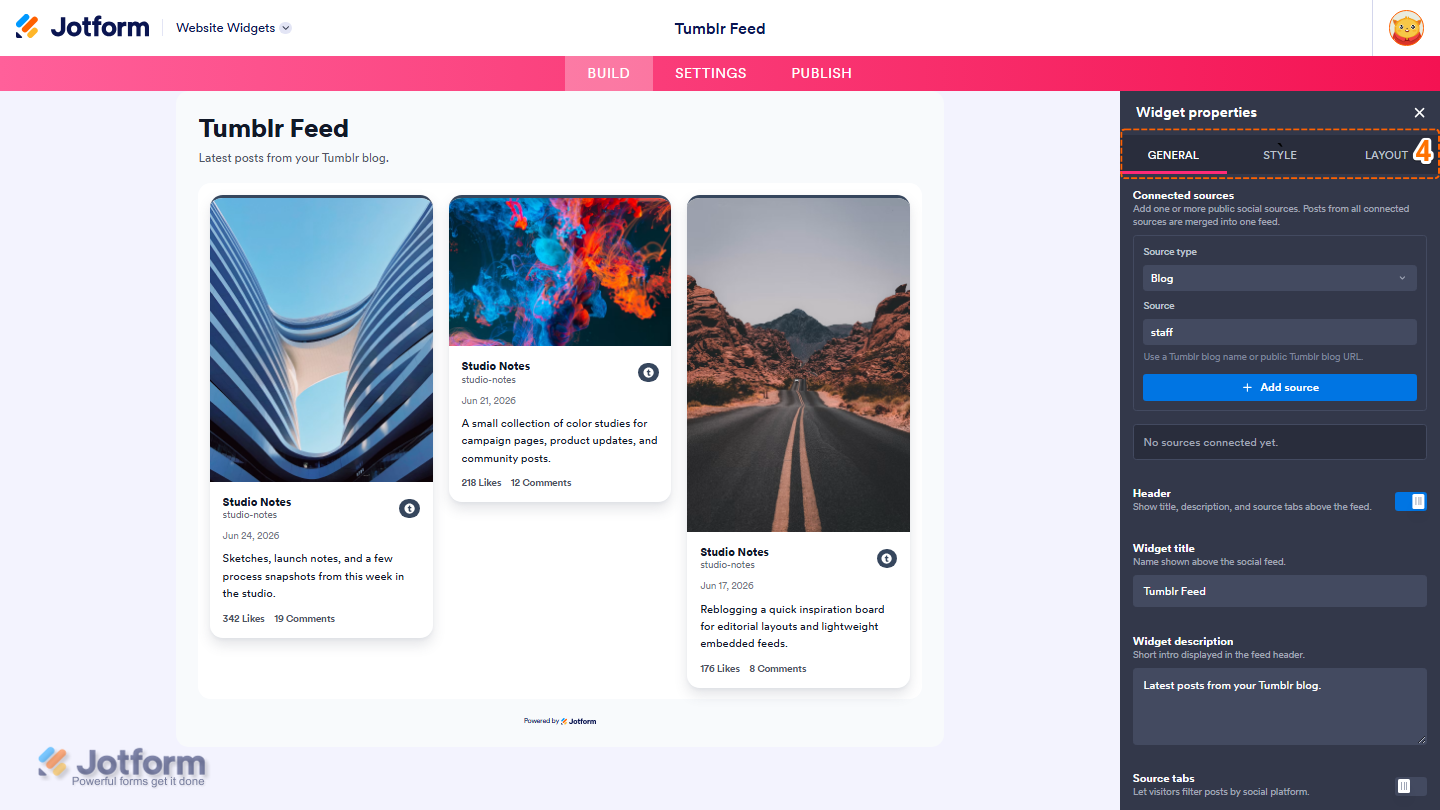
- Now, in the Widget Properties menu that opens on the right side of Website Widgets, under the General, Style, and Layout tabs, edit the properties to change how your Tumblr Feed widget looks and works on your website.
That’s it! Your changes will be applied to your Tumblr Feed widget automatically.
Note
Your Tumblr Feed widget remains editable after it’s embedded on your website. Any changes you make will automatically appear on your website without requiring a new embed code.


Send Comment: