
Jotform makes it easy to receive instant text message alerts for new form submissions. With SMS Notifications, you can get real-time updates sent straight to your mobile phone—no app installation needed. It’s a simple and reliable way to stay informed, especially if you prefer quick notifications through standard text messages.
You can enable SMS notifications in two ways: through the Notifications tab or the Integrations tab in Form Builder. The steps for each method are outlined below.
Note
If your phone number is already verified, it will appear in the Phone Number dropdown. Simply select your phone number to continue. No additional verification is required.
Setting Up SMS Notifications Through the Notifications Tab
One way to enable SMS notifications is through the Notifications tab in Form Builder. You’ll just need to follow these simple steps:
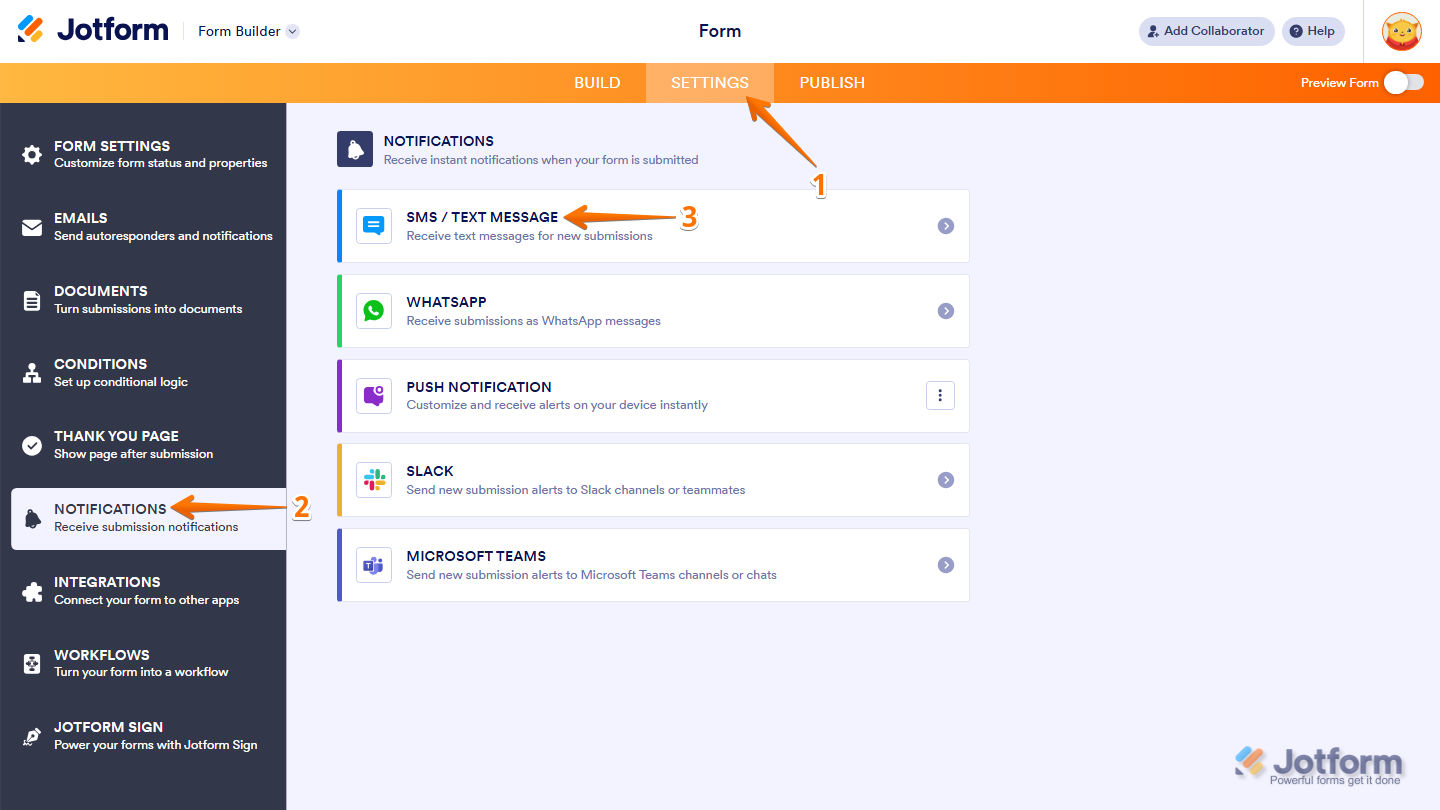
- In Form Builder, in the orange navigation bar at the top of the page, click on Settings.
- Then, in the menu on the left, click on Notifications.
- Now, select SMS/Text Message from the list of available notification channels.
- Next, in the Template section, select a template to define how your SMS message will appear.
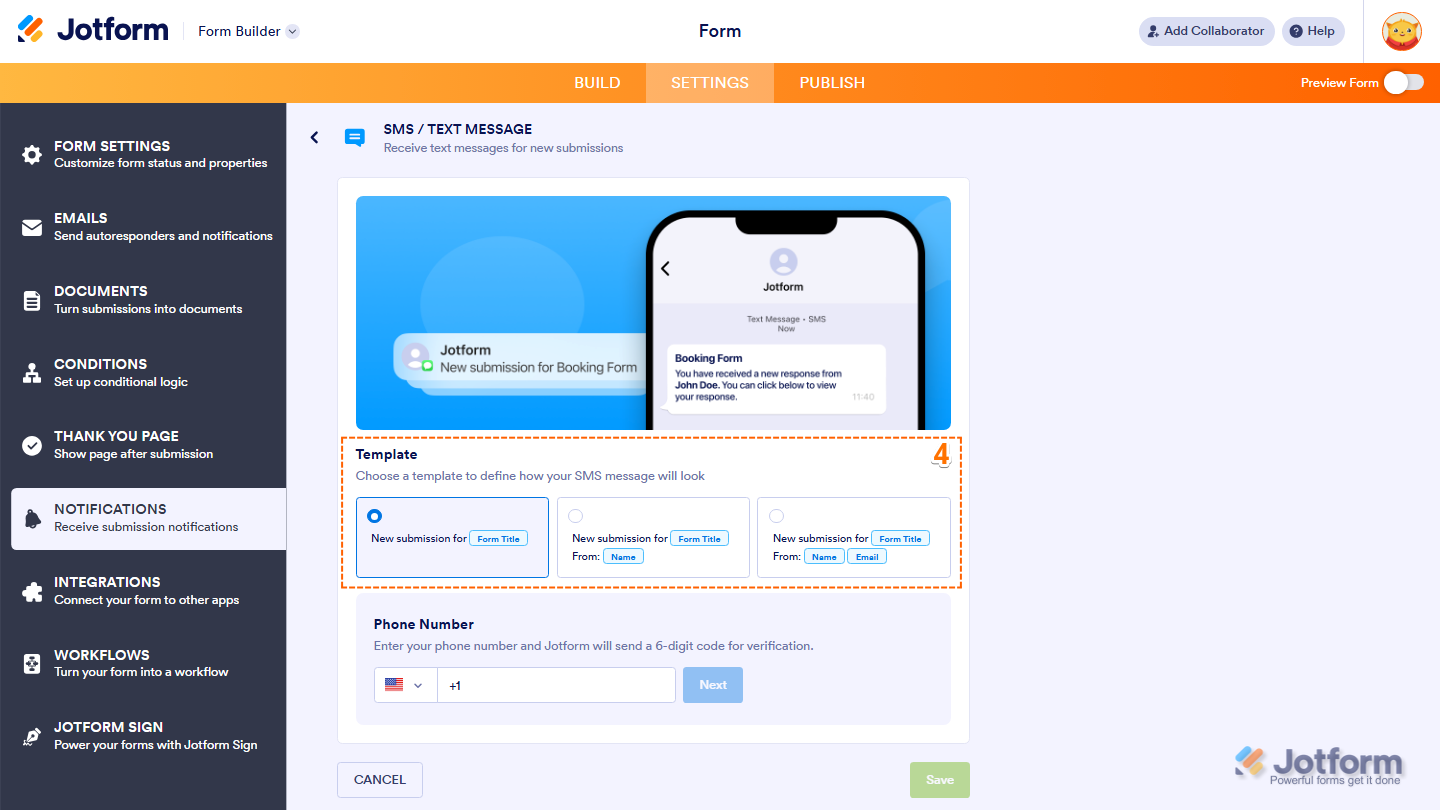
Note
SMS notification templates are predefined and can’t be customized. Each template includes only specific fields, such as the Form Title, Name, and Email. Other form fields can’t be added.
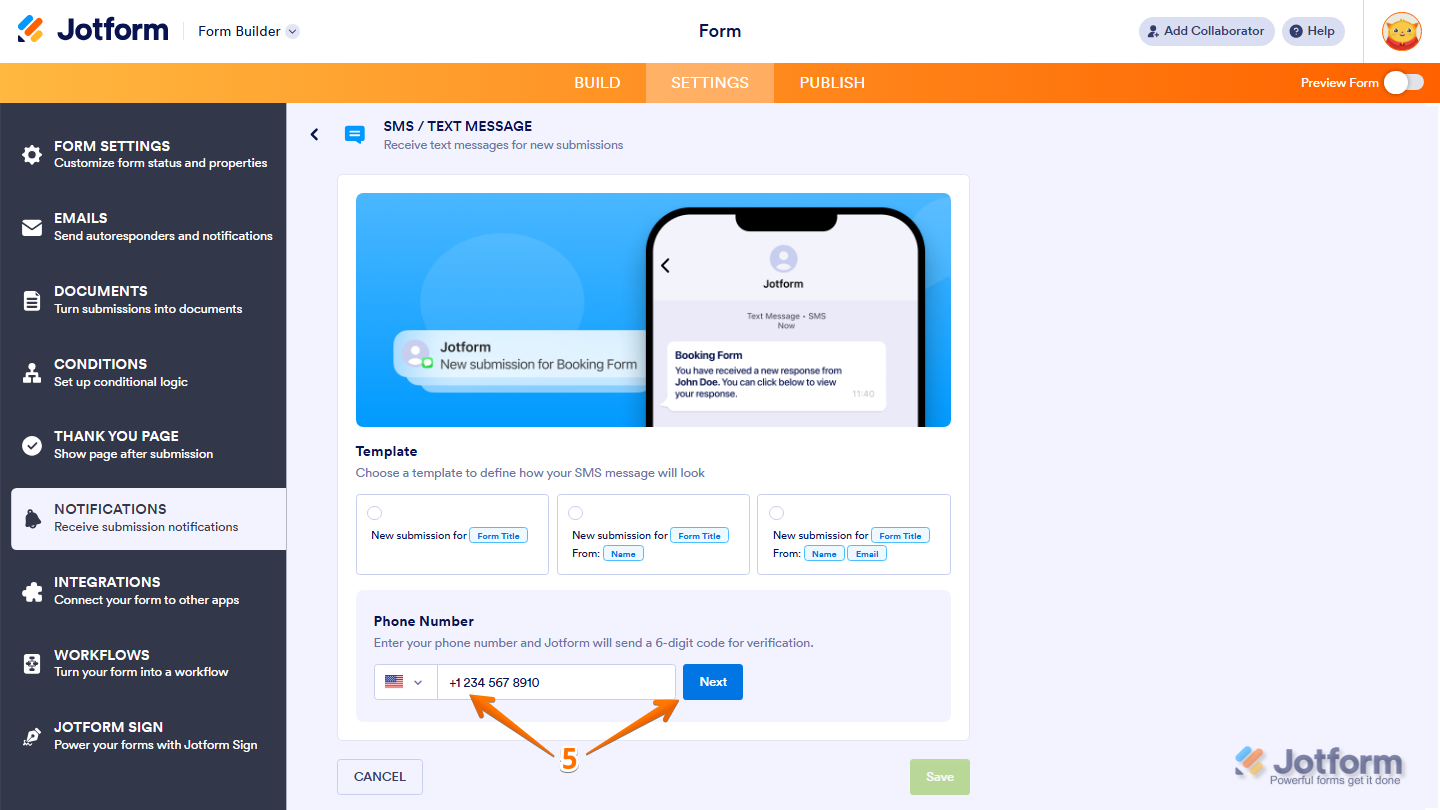
- Then, in the Phone Number section, enter your phone number and click on Next to begin the verification.
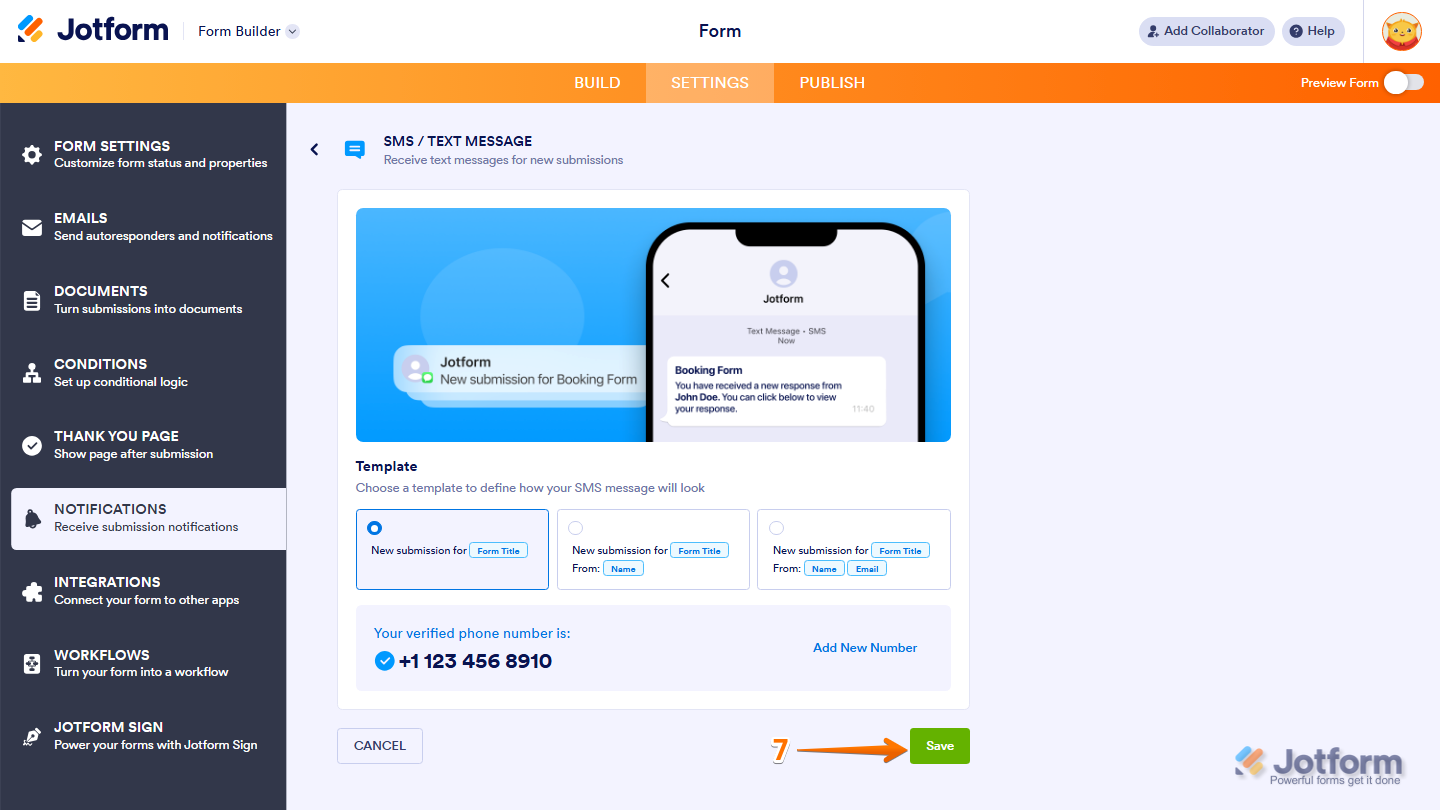
- Now, enter the Verification Code sent to your phone number and click on Next.

- Finally, once your phone number is verified, click on Save and you’re done.
Setting Up SMS Through the Integrations Tab
Another way to enable SMS is through the Integrations tab in Form Builder. You can do it in just a few steps:
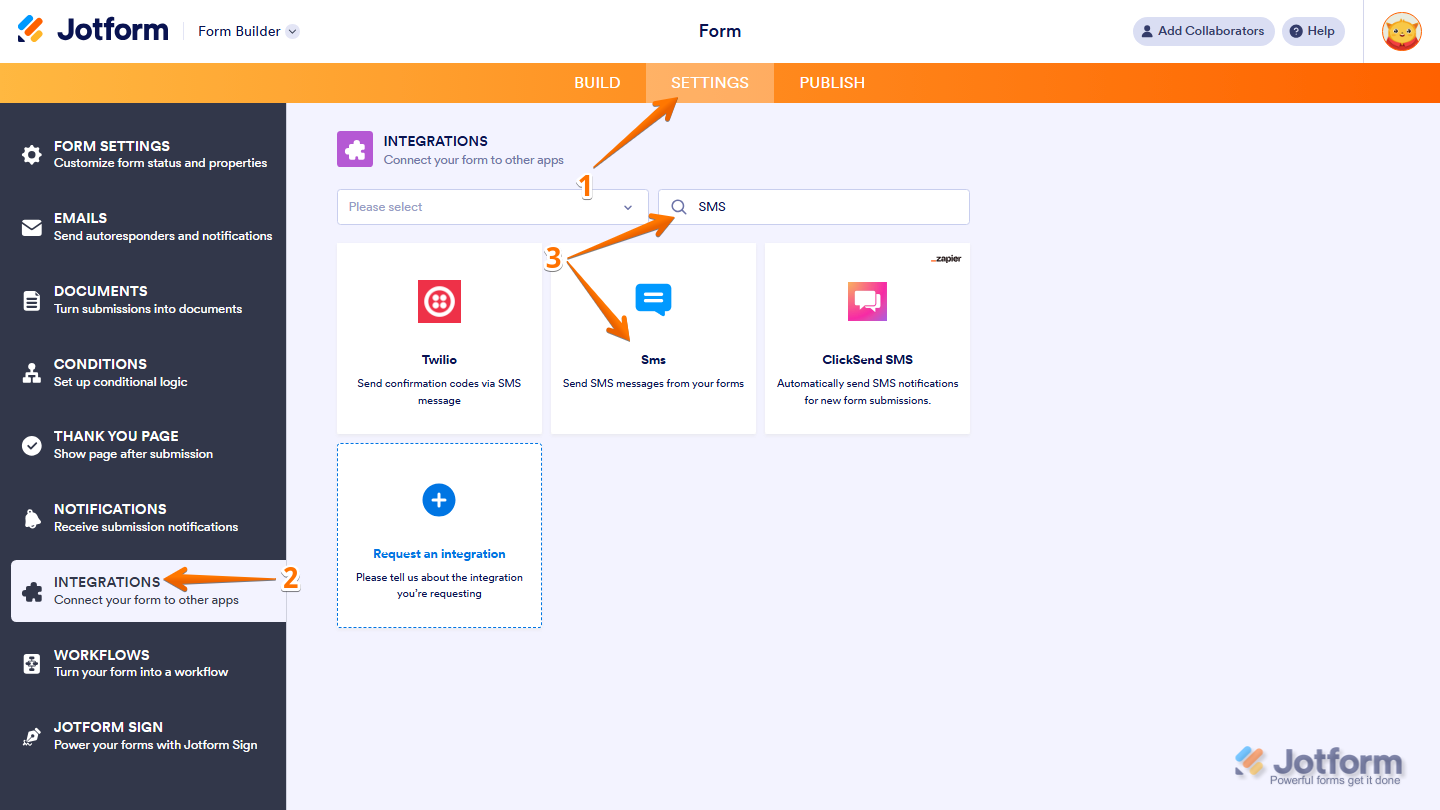
- In Form Builder, in the orange navigation bar at the top of the page, click on Settings.
- Then, in the menu on the left, click on Integrations.
- Now, search for SMS and click on it.
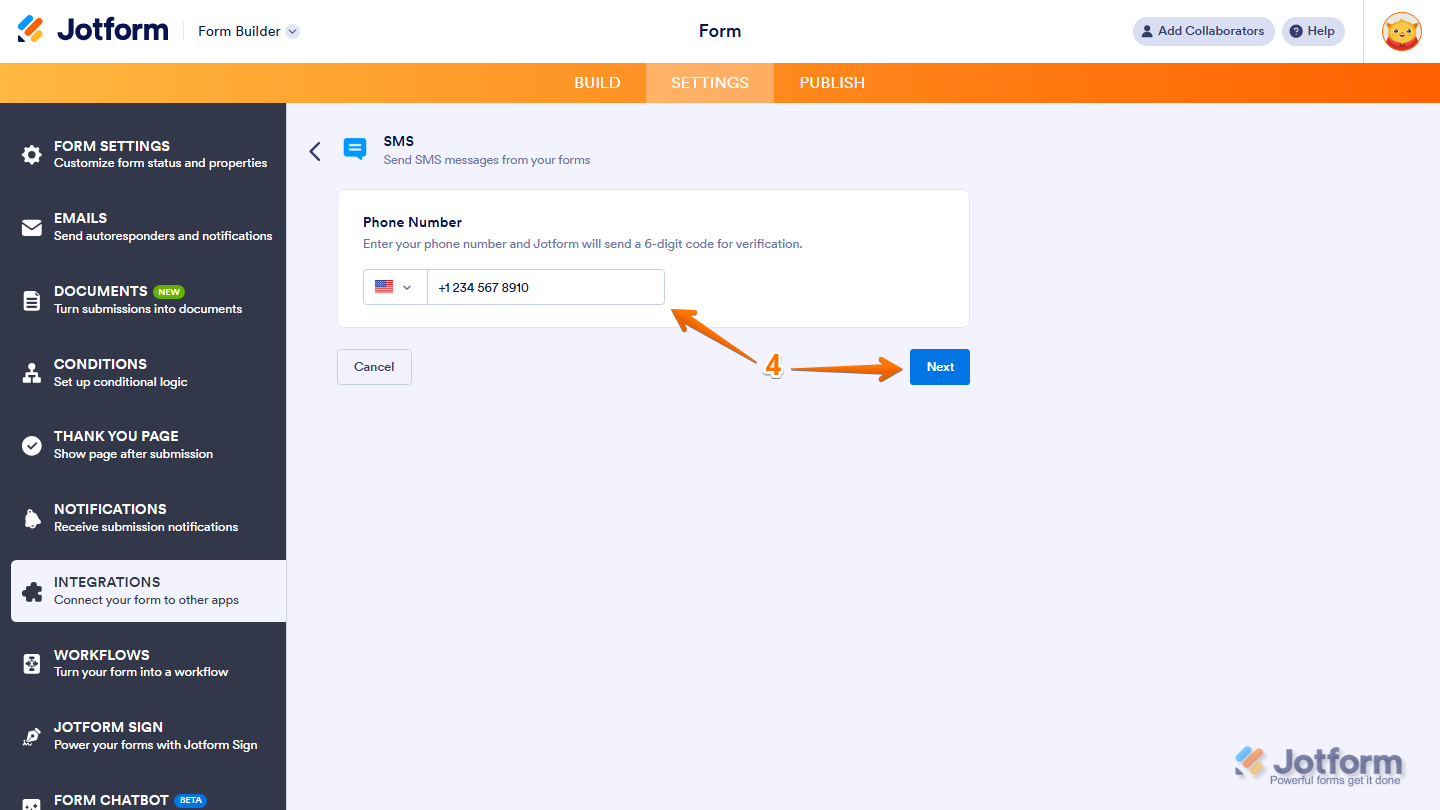
- Next, in the Phone Number section, enter your phone number and click on Next to begin the verification.
- Then, enter the Verification Code sent to your phone number and click on Verify.

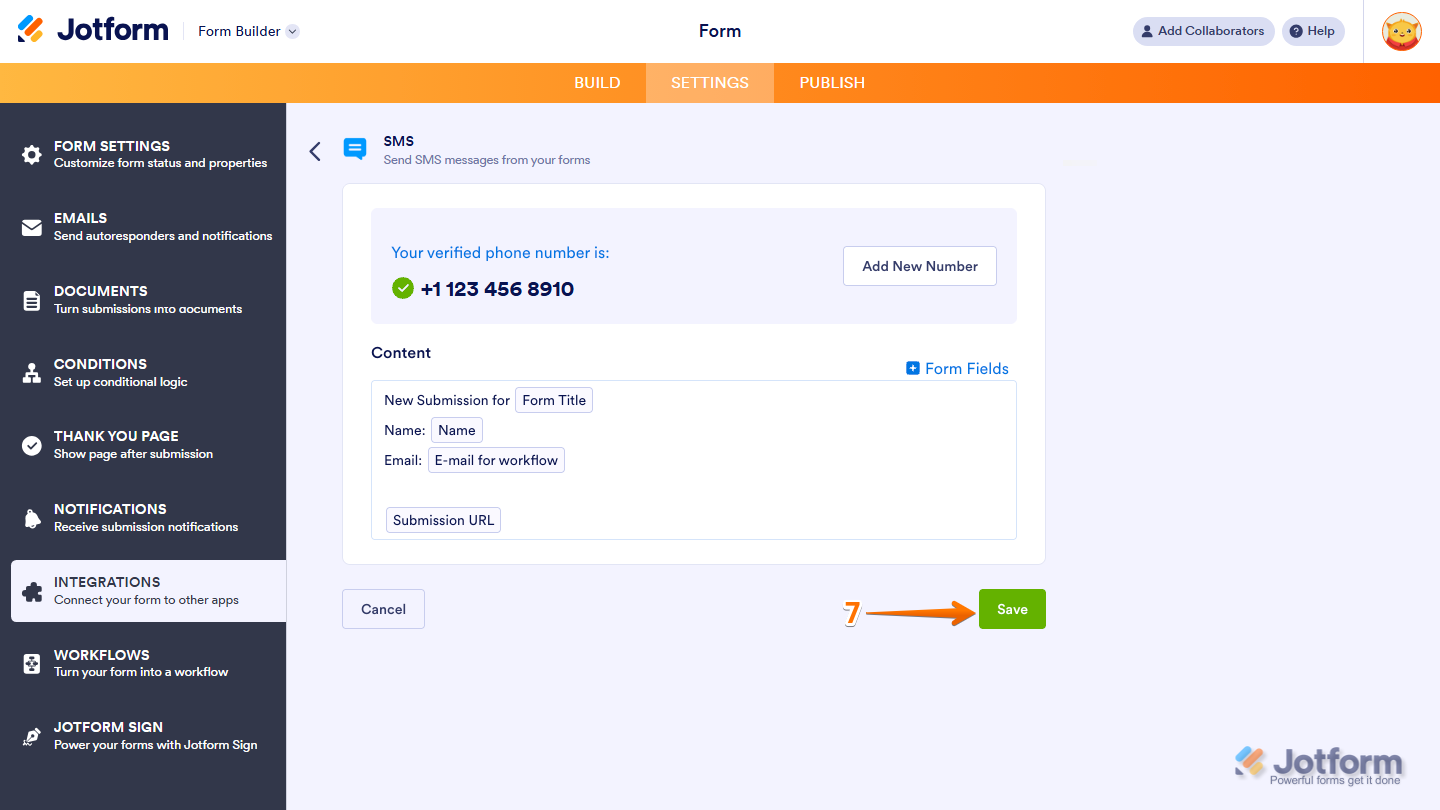
- Now, once your phone number is verified, in the Content section, customize your SMS message.

Note
While SMS templates in the Notifications tab are predefined and can’t be customized, the SMS integration allows you to customize the message content in the Content section. You’ll also need to keep in mind the following SMS formatting limitations:
- SMS doesn’t support rich text formatting.
- Use short messages to avoid multi-part SMS.
- If including the Submission URL, use a shortened URL to save characters.
- Finally, click on Save and you’re all set.
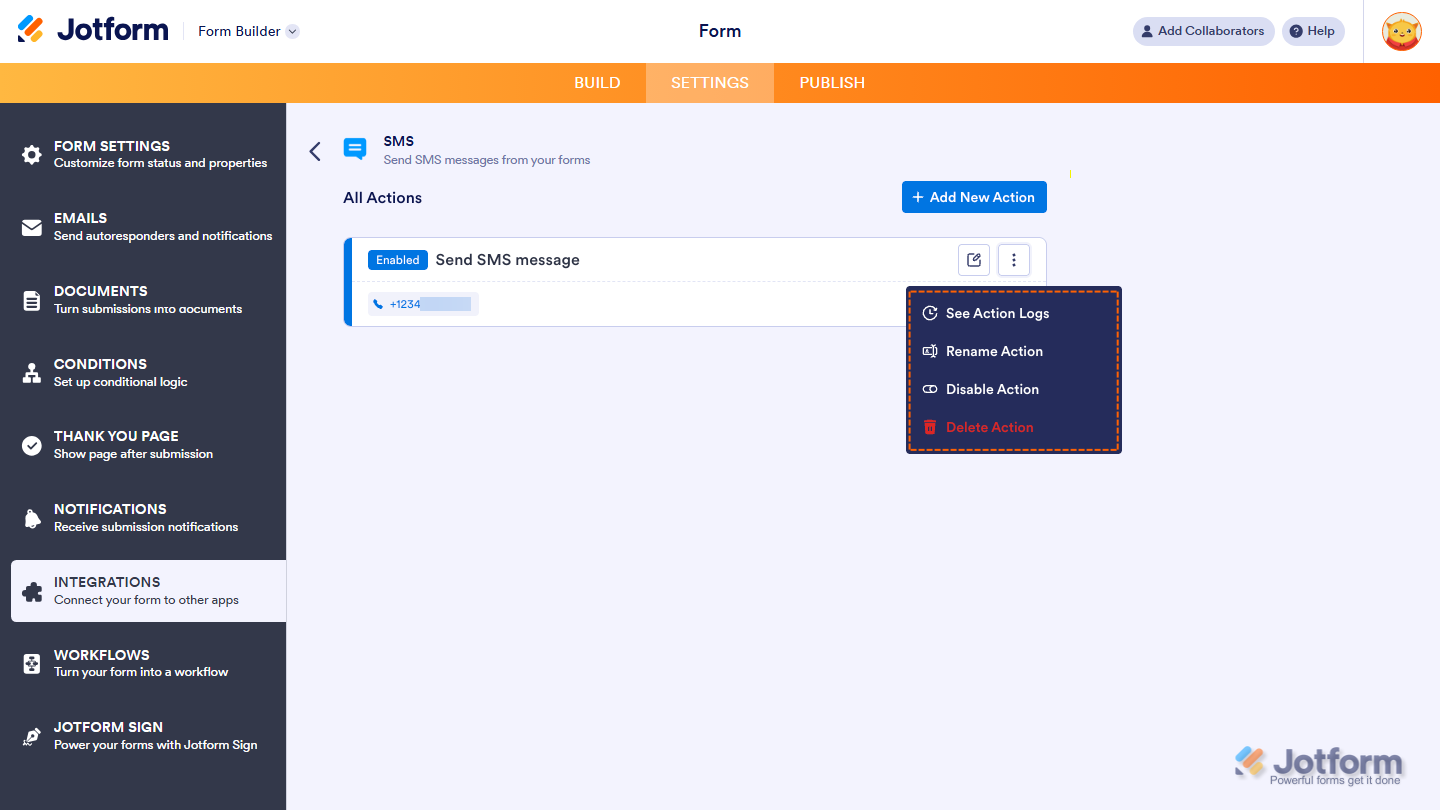
Your form is now successfully connected to SMS. After saving the integration, you’ll see the list of actions you’ve set up and the Add New Action button on the main page. Hover your mouse over an action and click on the Three Dots icon next to it on the right side to access more options:
- See Action Logs — View successful and failed runs, helpful for troubleshooting.
- Rename Action — Change the action’s title.
- Disable Action — Temporarily stop the integration from sending data.
- Delete Action — Remove the action from your form.
And that’s it. You’ve successfully set up SMS notifications for your form. You’ll now receive text message alerts based on your selected setup method whenever your form receives a new submission. You can return to the Notifications or Integrations tab at any time to update your SMS settings, change the phone number, or modify the message content.
Pro Tip
If you don’t receive SMS notifications, try the following:
- Make sure your phone number is verified.
- Confirm that the correct phone number is selected in the dropdown.
- Check that your mobile carrier supports international SMS.


Send Comment:
2 Comments:
March 18, 2026
"the SMS integration allows you to customize the message content in the Content section." I guess the second option of sending sms is no longer available? I have tried to configure it, but it's not there.
February 12, 2026
You are showing the ability to edit the text message but I don't see that on mine. I need to edit the message.