If you need to send emails conditionally, you can use the Change E-mail Recipient conditional logic. It changes or overrides the Notification or Autoresponder’s original recipients and then sends the email when triggered.
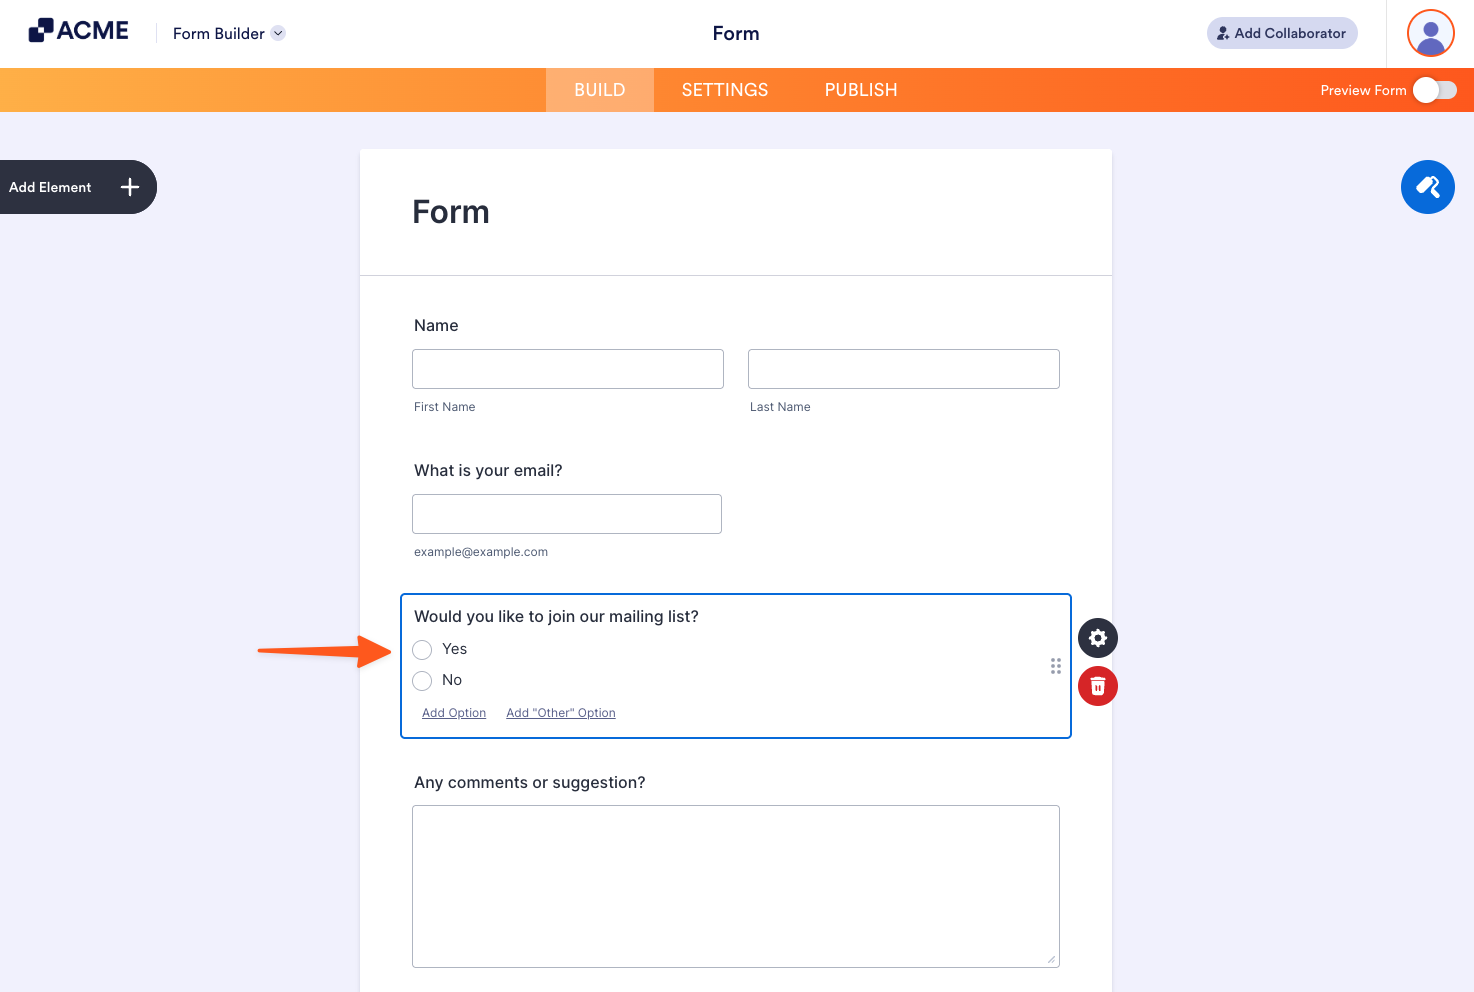
For example, conditional logic is applied to the “Would you like to join our mailing list?” question which sends different emails based on the form filler’s answer.
Creating Your Email Alerts
To create your email templates
- In the Form Builder, go to Settings at the top.
- Select Email on the left.
- Create a Notification or Autoresponder.

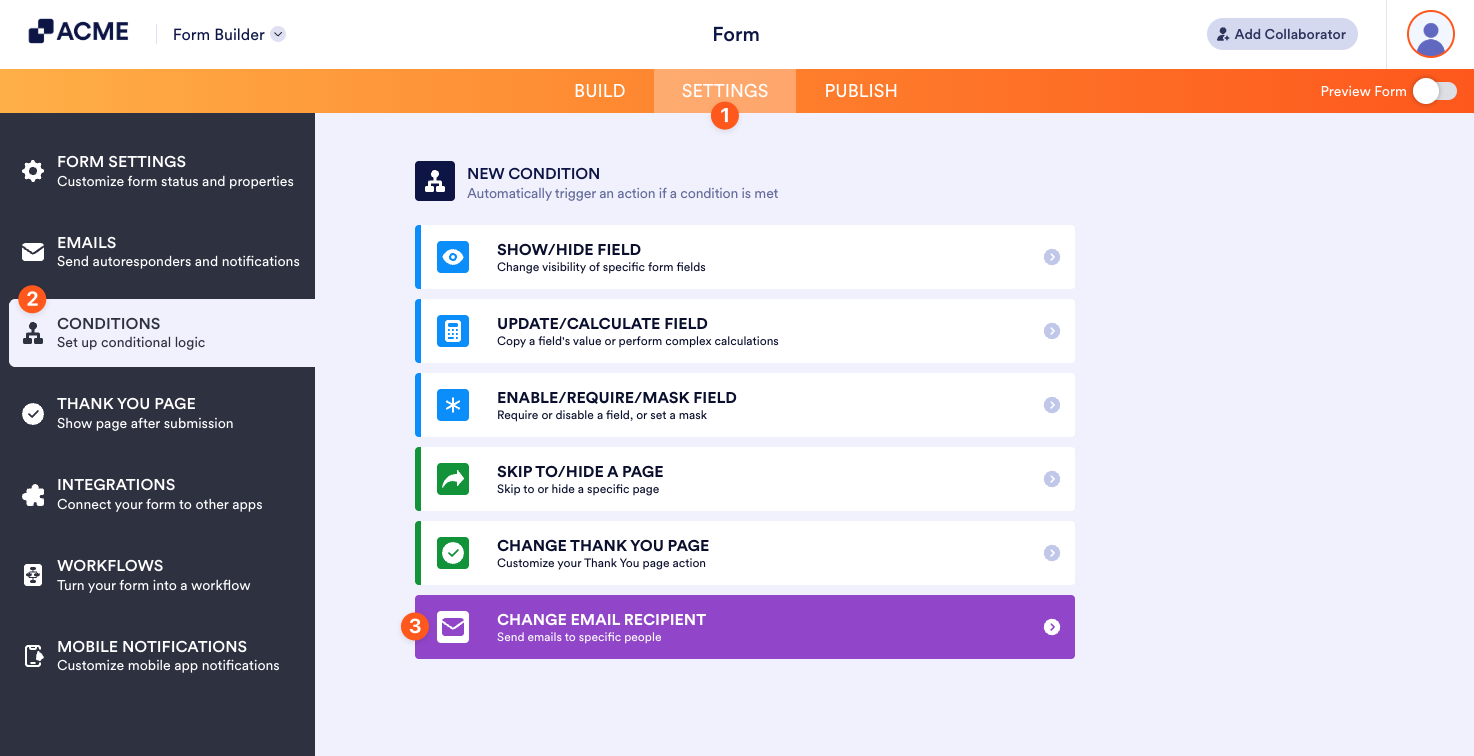
Setting Up Conditional Logic
Once your email templates are ready, the next step is to set up conditional logic:
- In the Form Builder, go to Settings at the top.
- Select Conditions on the left.
- Add a new Change E-mail Recipient condition.
- On the next page, configure your conditional logic.
- Select Save at the bottom when finished.
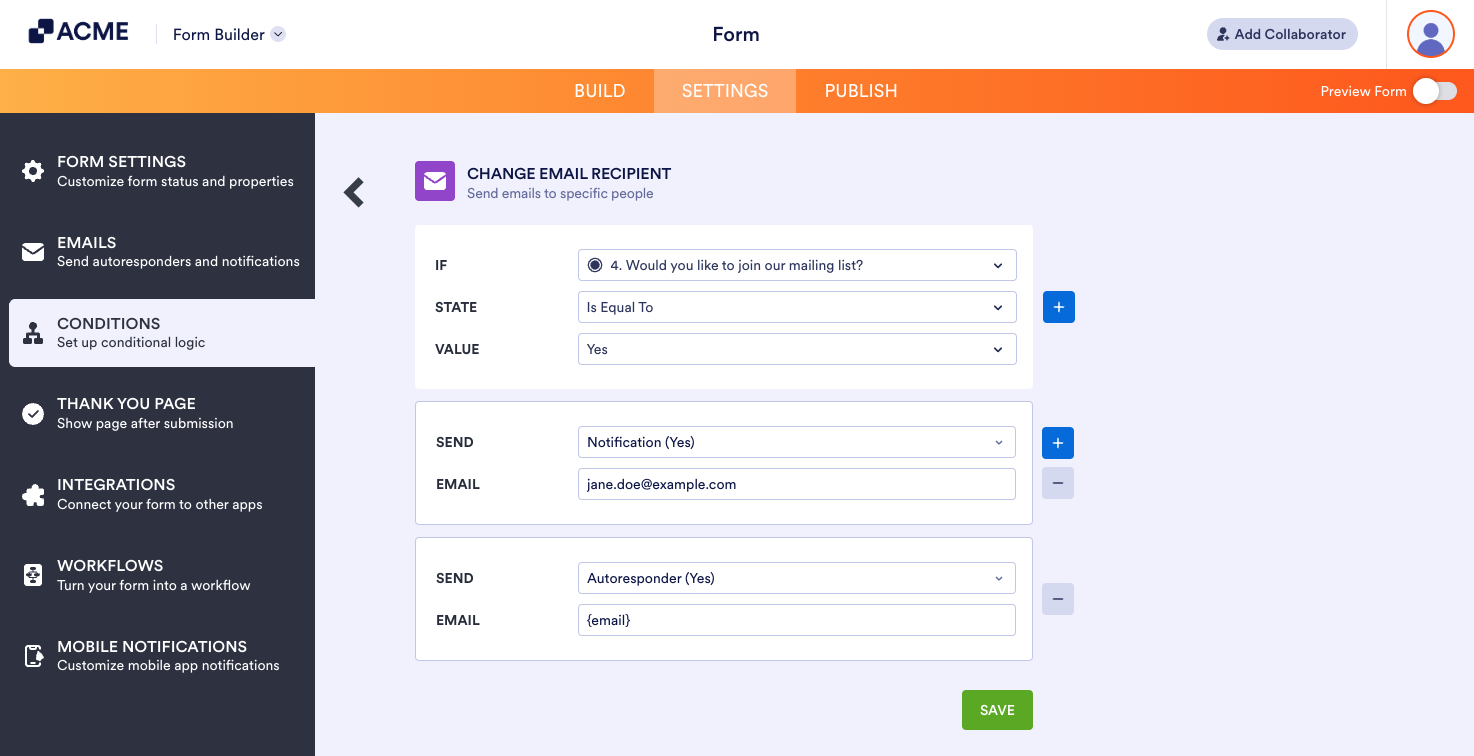
Repeat the process for your other conditions. In this example, the conditional logic for “Yes” is as follows:
- If: Would you like to join our mailing list?
- State: Is Equal To
- Value: Yes
- Send: Notification (Yes)
- Email: jane.doe@example.com
- Send: Autoresponder (Yes)
- Email: {email}
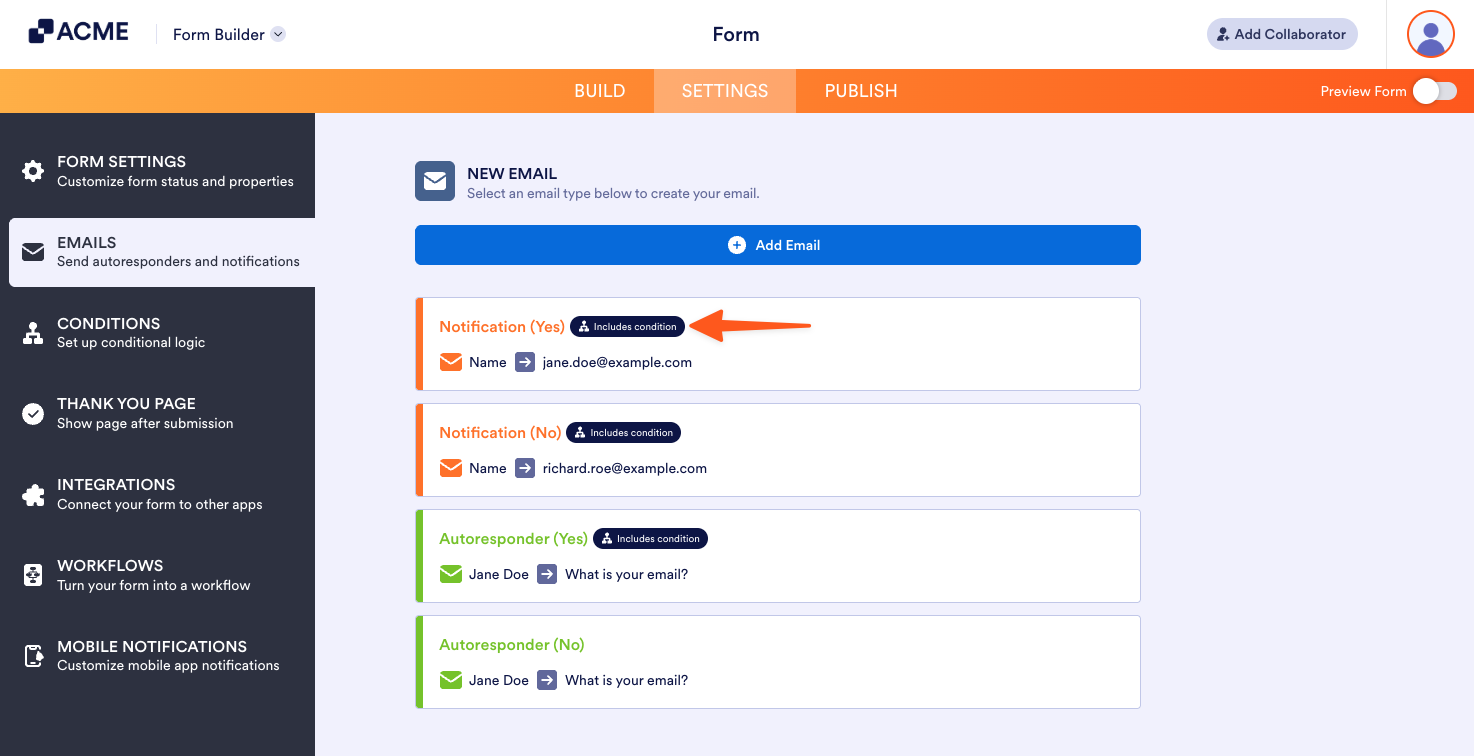
The example above will send the Notification (Yes) and Autoresponder (Yes) emails to the defined recipients if a form filler answers “Yes” to the “Would you like to join our mailing list?” question.
Notes:
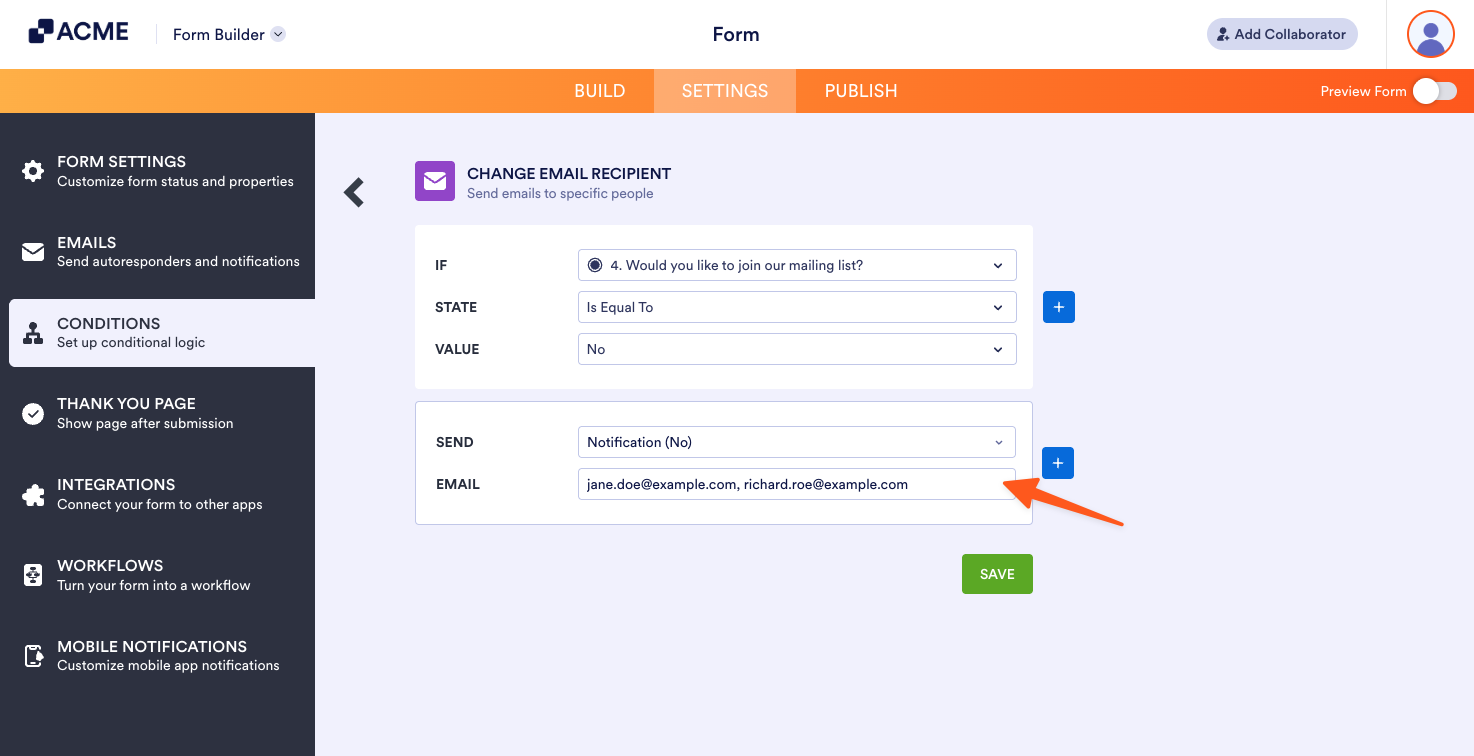
– You can enter the email address or the Email element’s tag or unique name as the recipient.
– You can enter comma-separated email addresses and email tags for multiple recipients.
– You can create unlimited Change E-mail Recipient conditions on a form.
Email alerts with a conditional logic will show the Includes Condition icon.

Send Comment: