Adding a custom sender email to an email alert is possible with the platform’s SMTP feature. This specific feature is one of the ways you can put the branding in your forms since it carries your website domain when the emails are delivered to your form responders.
First, the SMTP (Simple Mail Transfer Protocol) credentials must be ready. We highly recommend contacting your hosting provider if you don’t know where to get this. If the credentials are ready, then proceed with the steps below.
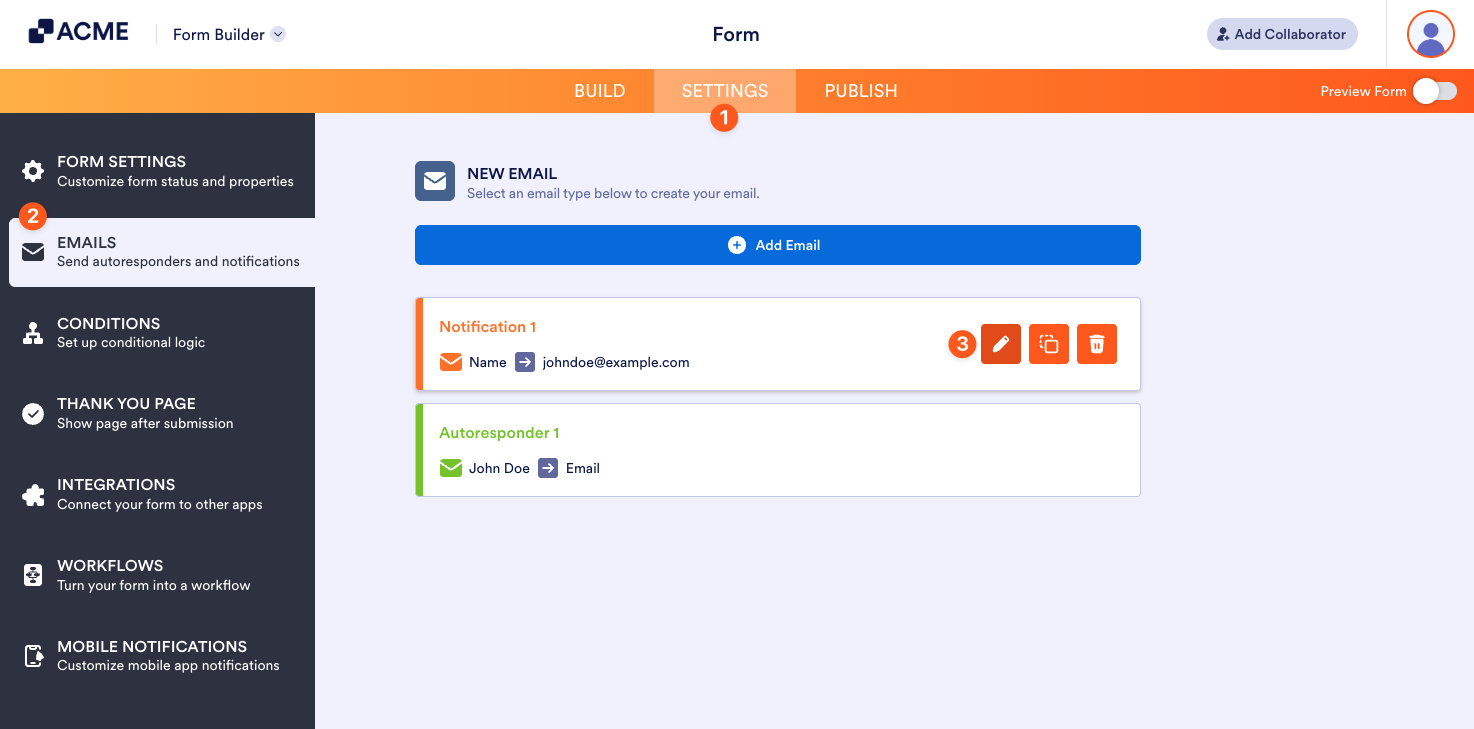
- In the Form Builder, go to the Settings tab.
- Click the Emails on the left panel.
- Hover your mouse over the notification or autoresponder email and click the Pencil icon to edit.
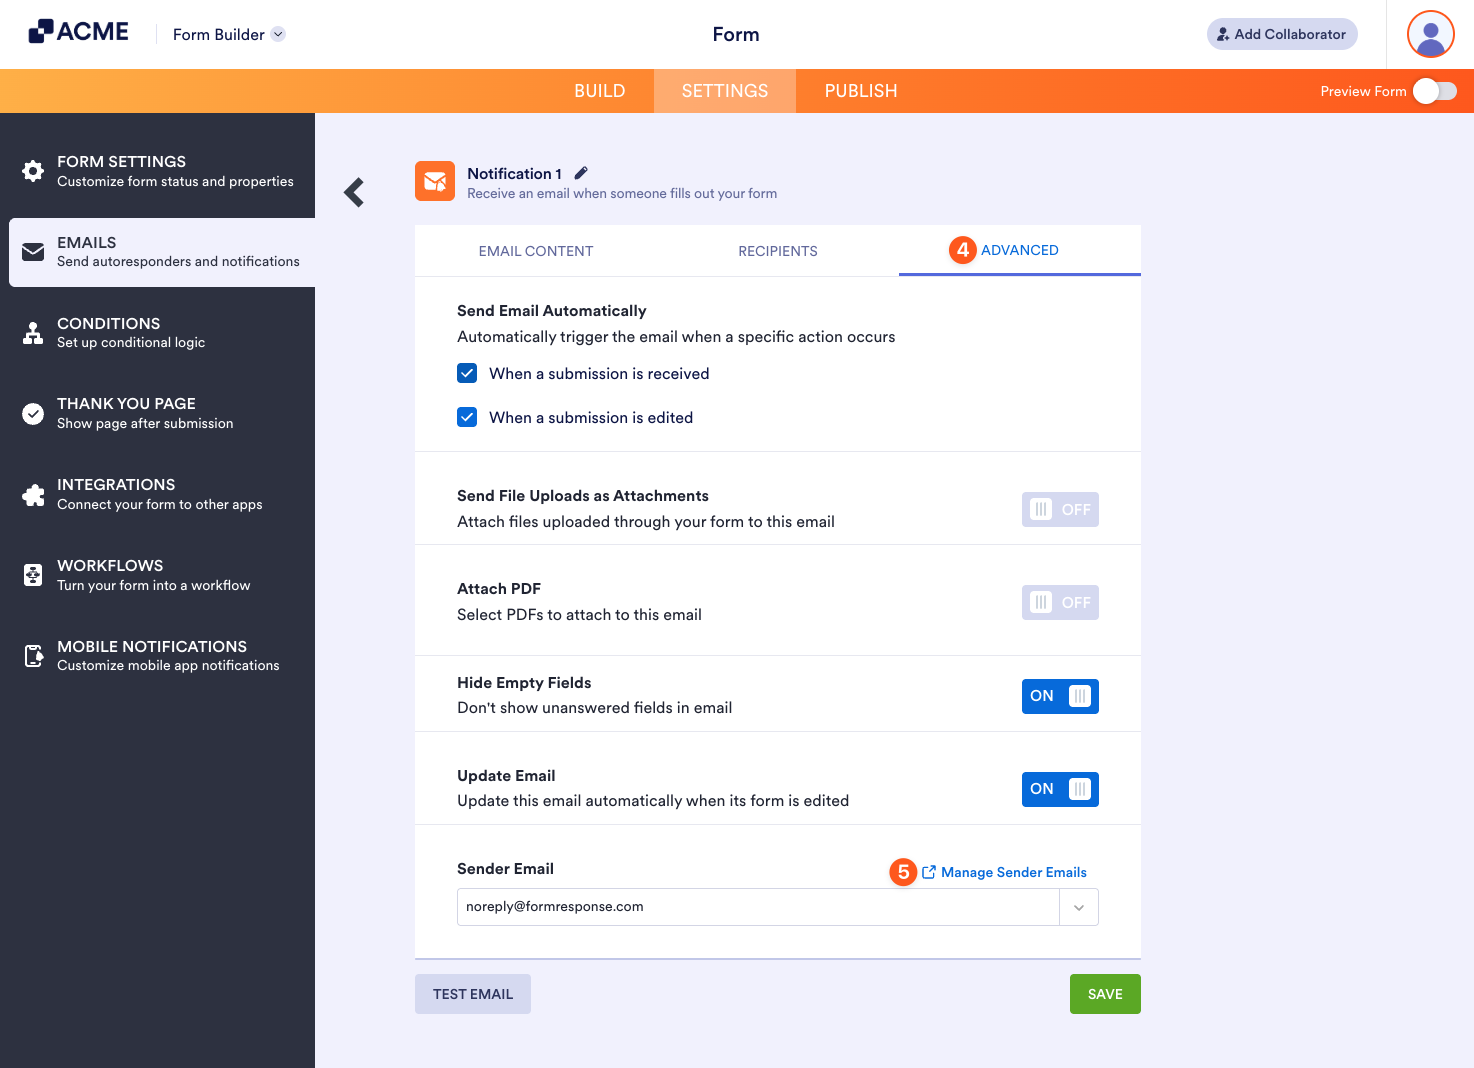
- Navigate to the Advanced tab.
- In the Sender Email section, click the Manage Sender Emails link on the right.
- On the Account Settings page, under the Send Emails section, click the Add Sender Email button. If the SMTP details are correct, you will see the success message, and the custom email address is automatically selected. If it fails, you will get a corresponding error message instead. To help you with setting up your sender emails, you might also want to check out these guides:

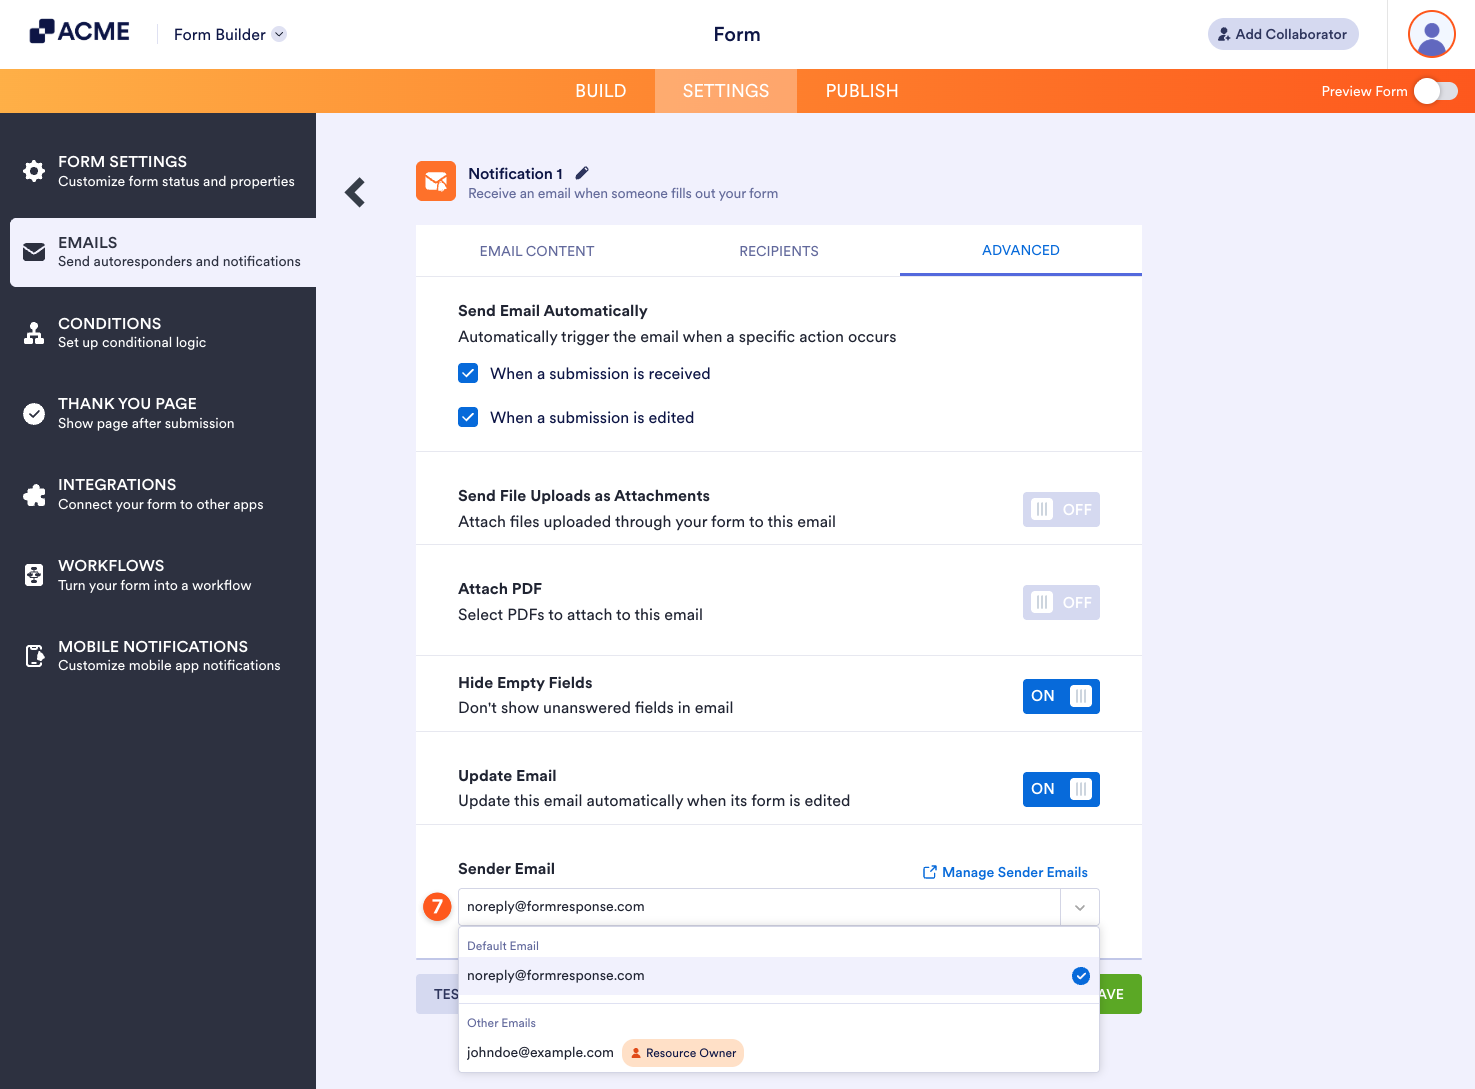
- After adding the sender email, return to the Advanced tab on the Emails page. Then, click the Sender Email Dropdown menu and select your custom sender email.
To update/delete custom Sender Emails, check this guide: How to Edit/Delete Sender Emails on SMTP Settings.

Send Comment: