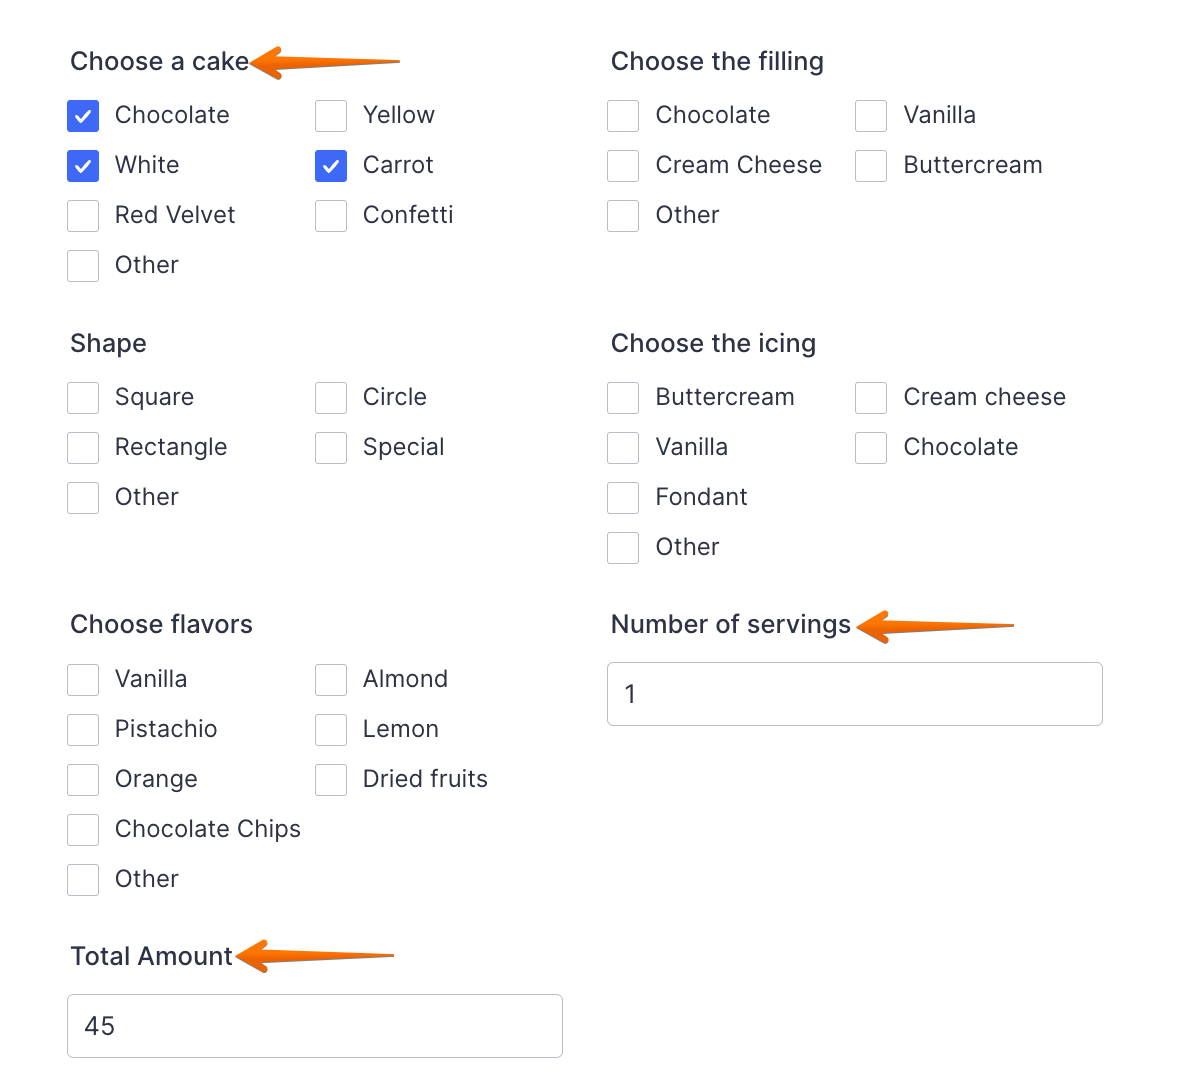
With the Form Calculation widget, you can easily perform real-time calculations using values from your form fields. It’s perfect for things like adding up totals, calculating scores, applying formulas, or generating custom results based on what users enter. Whether you’re creating an order form, a quiz, or an estimate, this widget does all the number-crunching for you—saving time, cutting down on errors, and keeping the process simple and smooth for both you and your users.
Adding and Setting Up the Form Calculation Widget
Whether you’re building a new form from scratch or updating an existing one, adding the Form Calculation widget and setting up your formulas is a breeze. You can have it up and running in just a few clicks. To get going, here’s what you’ll do:
- In Form Builder, click on Add Element on the left side of the page.
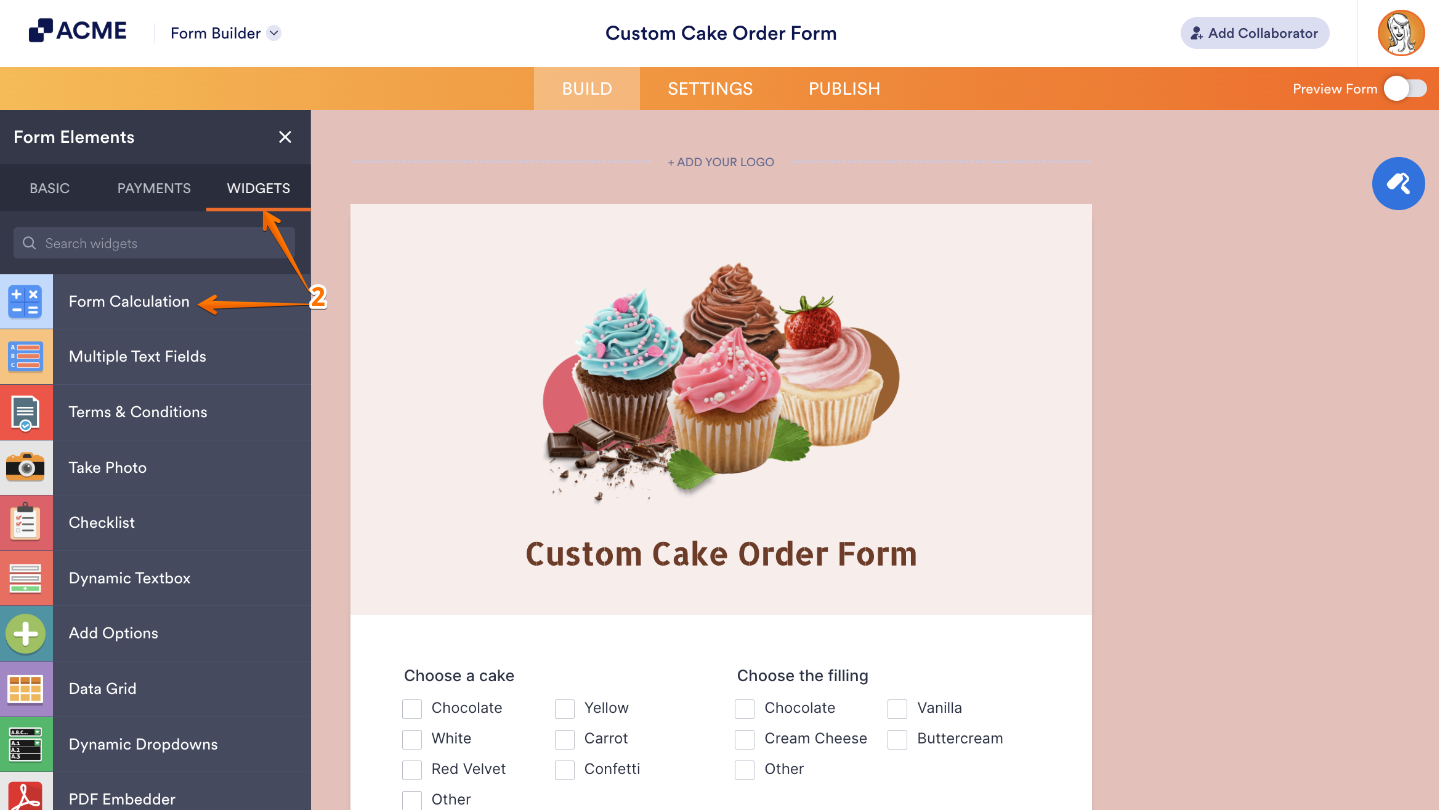
- Now, in the Form Elements menu, under the Widgets tab, click on Form Calculation. Or, just drag and then drop it to where you want it to be on your form.
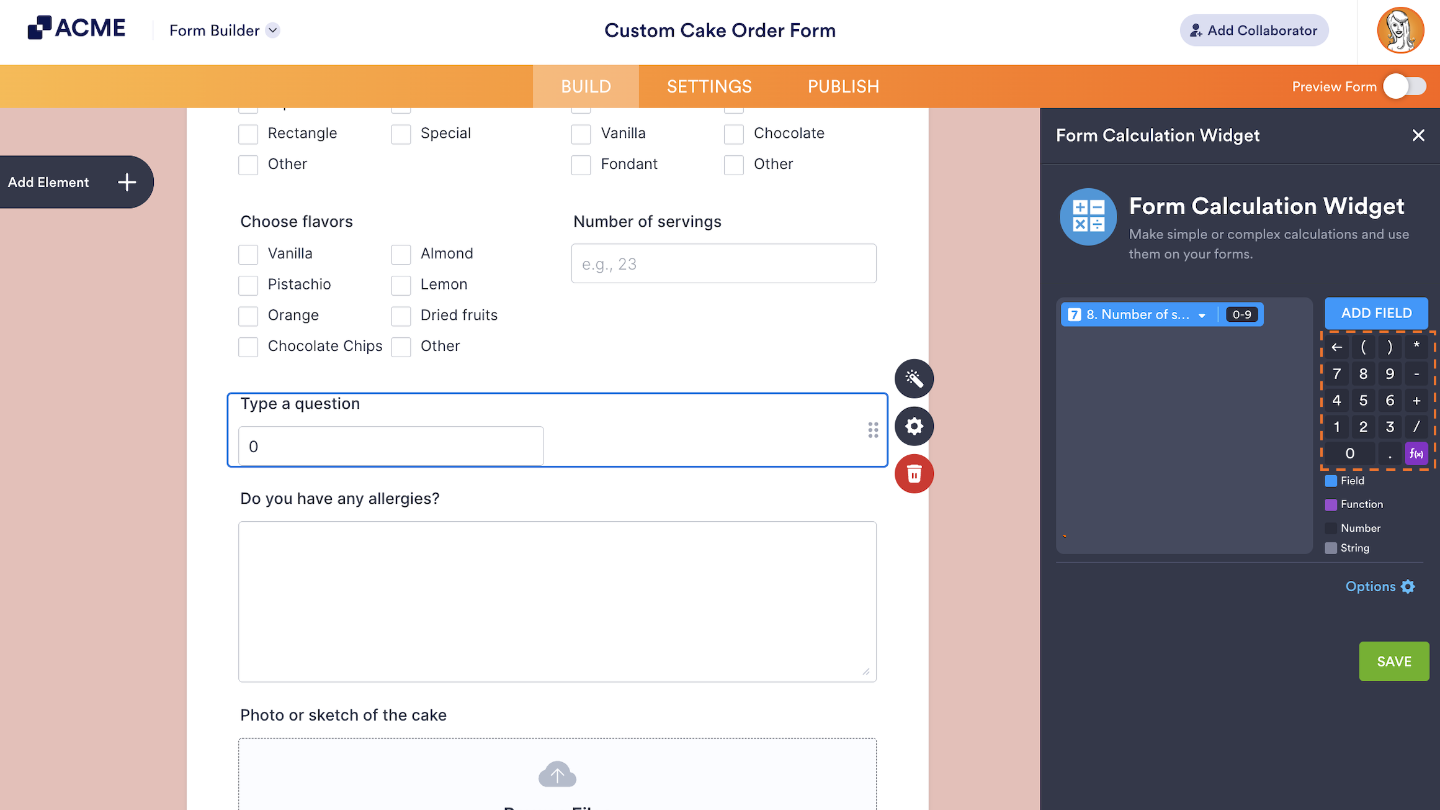
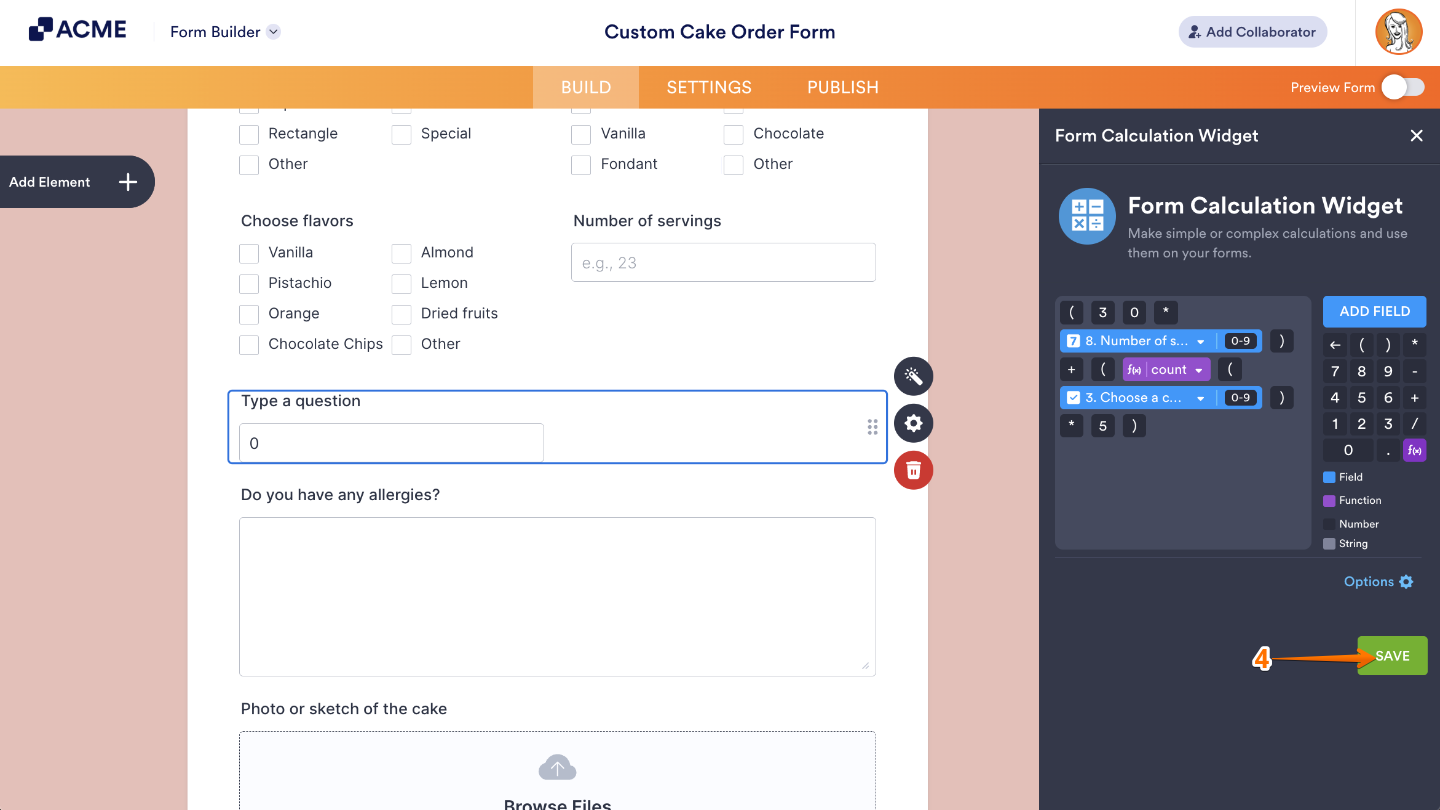
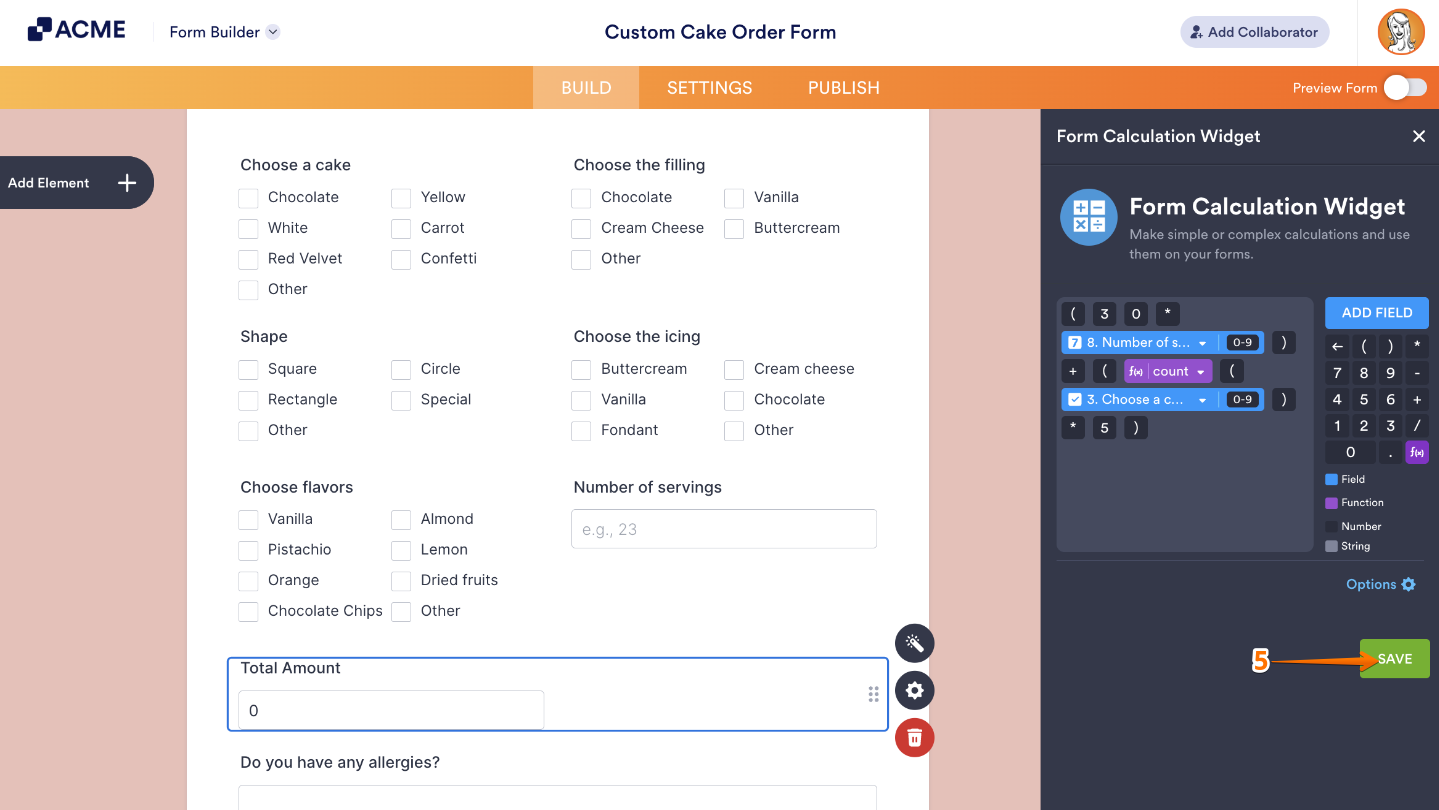
- Next, in the Form Calculation Widget window that opens on the right side of the page, you can add different elements to the formula editor based on the result you want the widget to calculate.
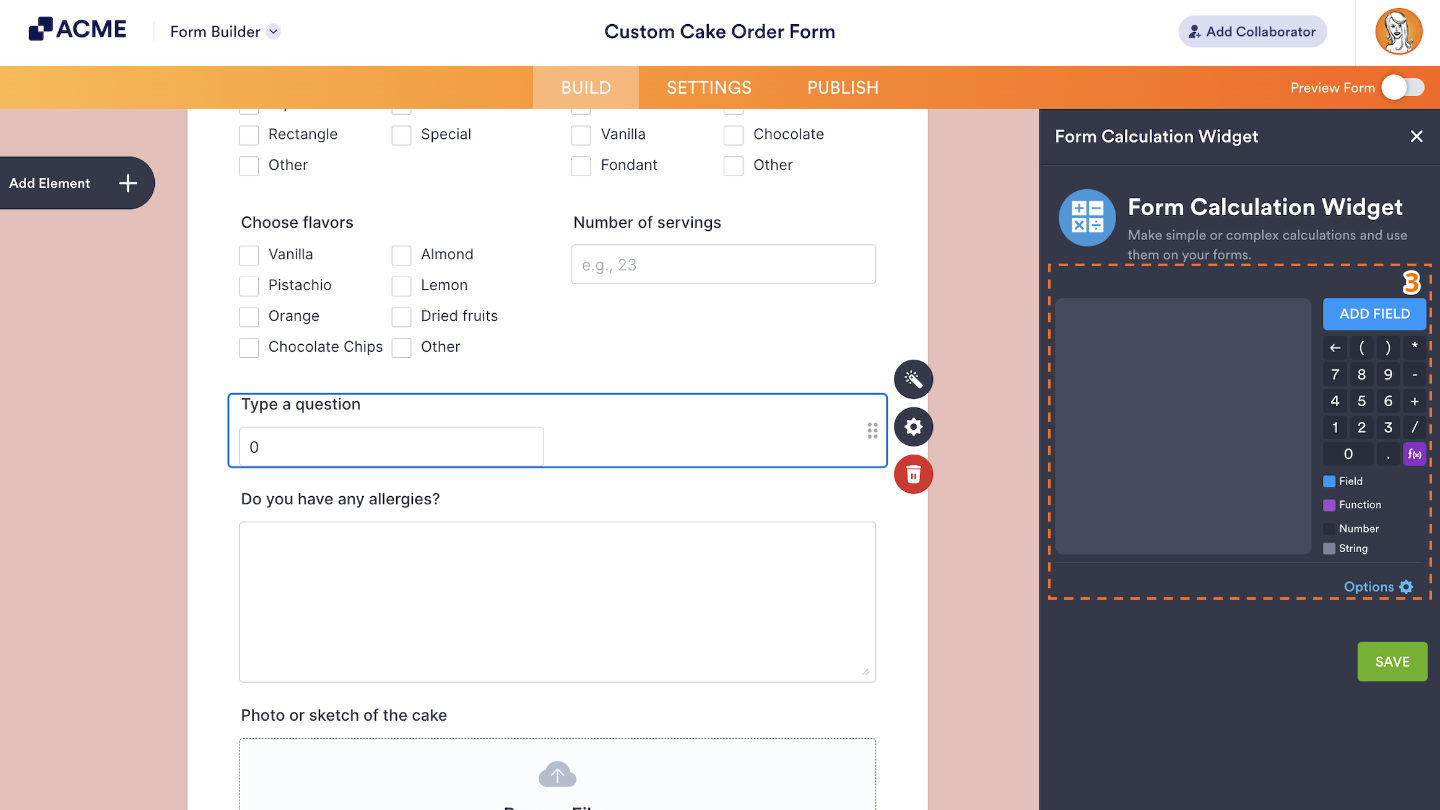
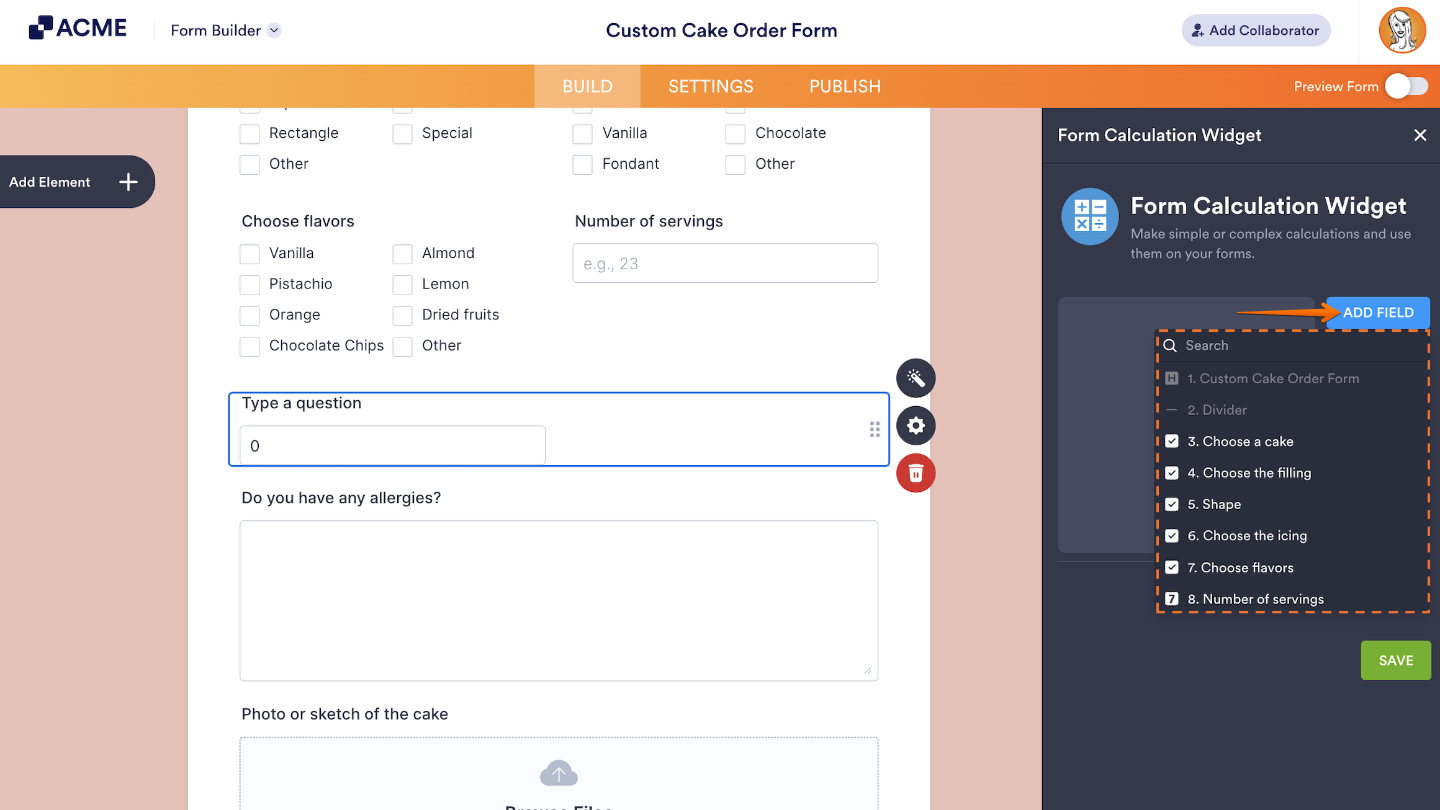
The Add Field button above the Formula Keypad section on the right side of the window lets you include Form Fields in the calculation. You can use the Search Bar in the menu that comes up, and select the formula you want to use.
A Form Field opens up with its label and a blue background in the Formula Editor. The indicator on its right needs to show 0–9 to include the field’s value in the calculation. If it shows A–Z, the value will be added as text in the result. You can click on the indicator to switch between number and string.

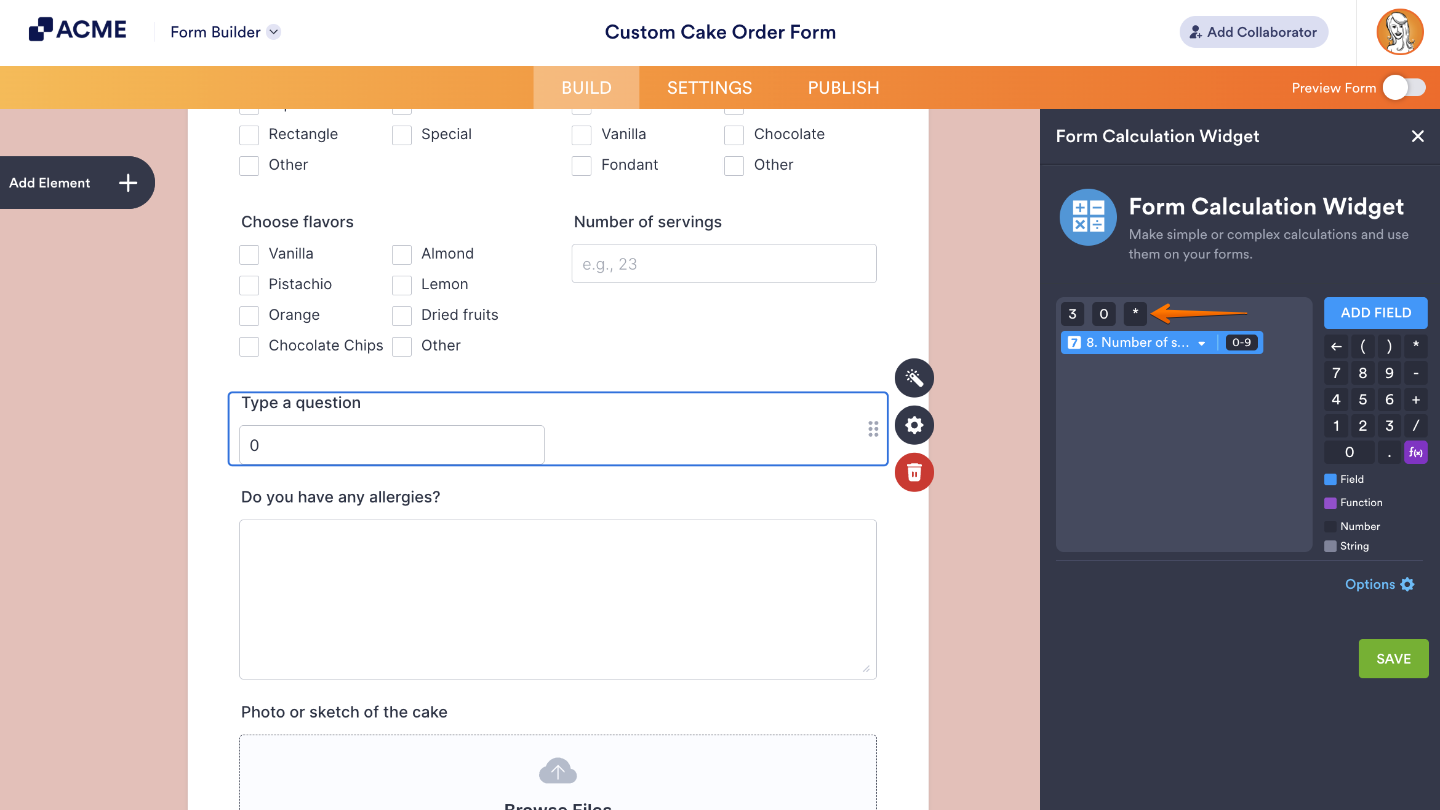
You can add digits, decimal points, parentheses, and operators (+, –, ×, ÷) using your keyboard or the Formula Keypad.
These elements need to appear with a dark gray background in the formula editor to be included in the calculation. If they appear in light gray, they’re treated as text. You can click on them to switch between formats.
The purple f(x) button in the Formula Keypad section lets you add prebuilt functions and math properties to your calculations. You can use the Search Bar in the menu that opens and select the formula you want to use.
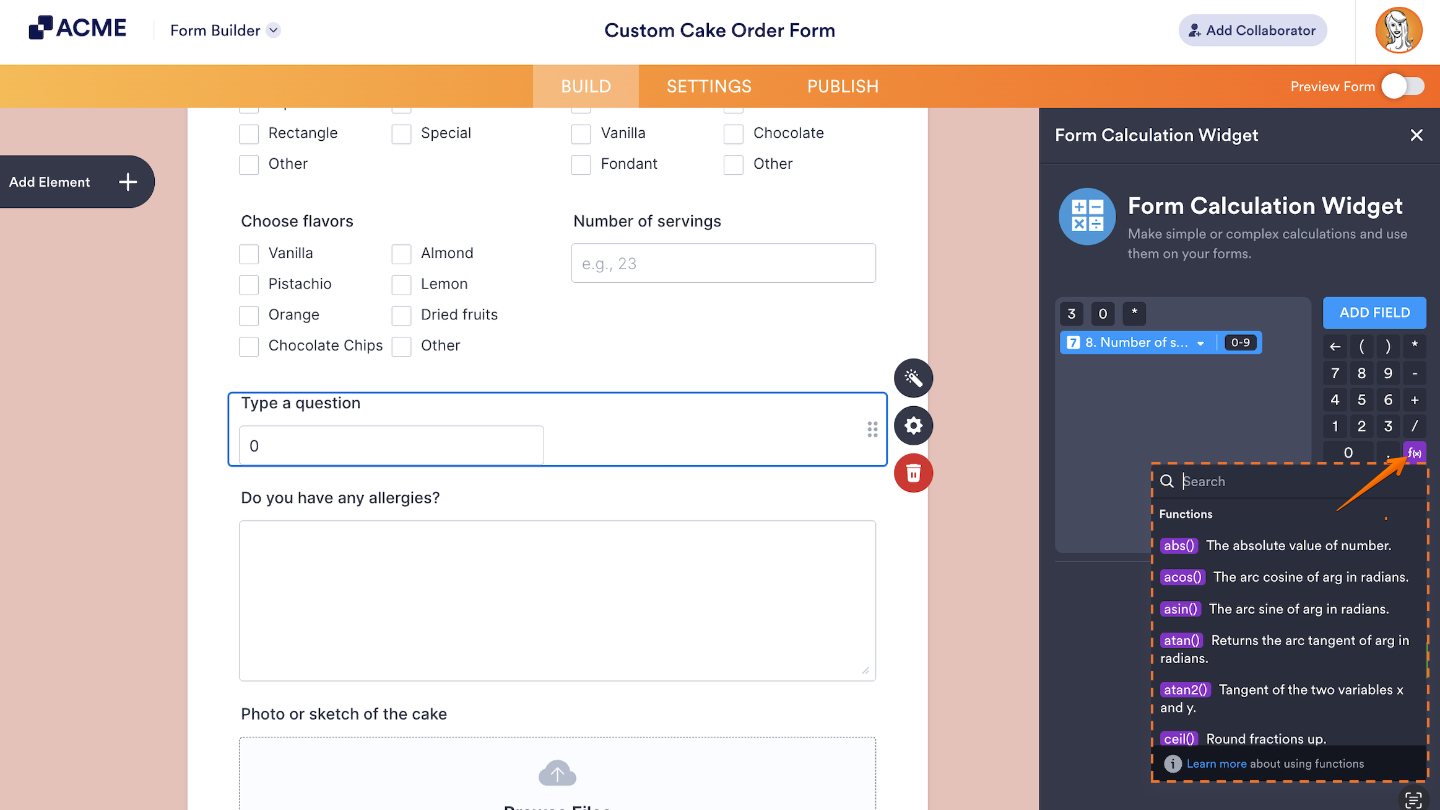
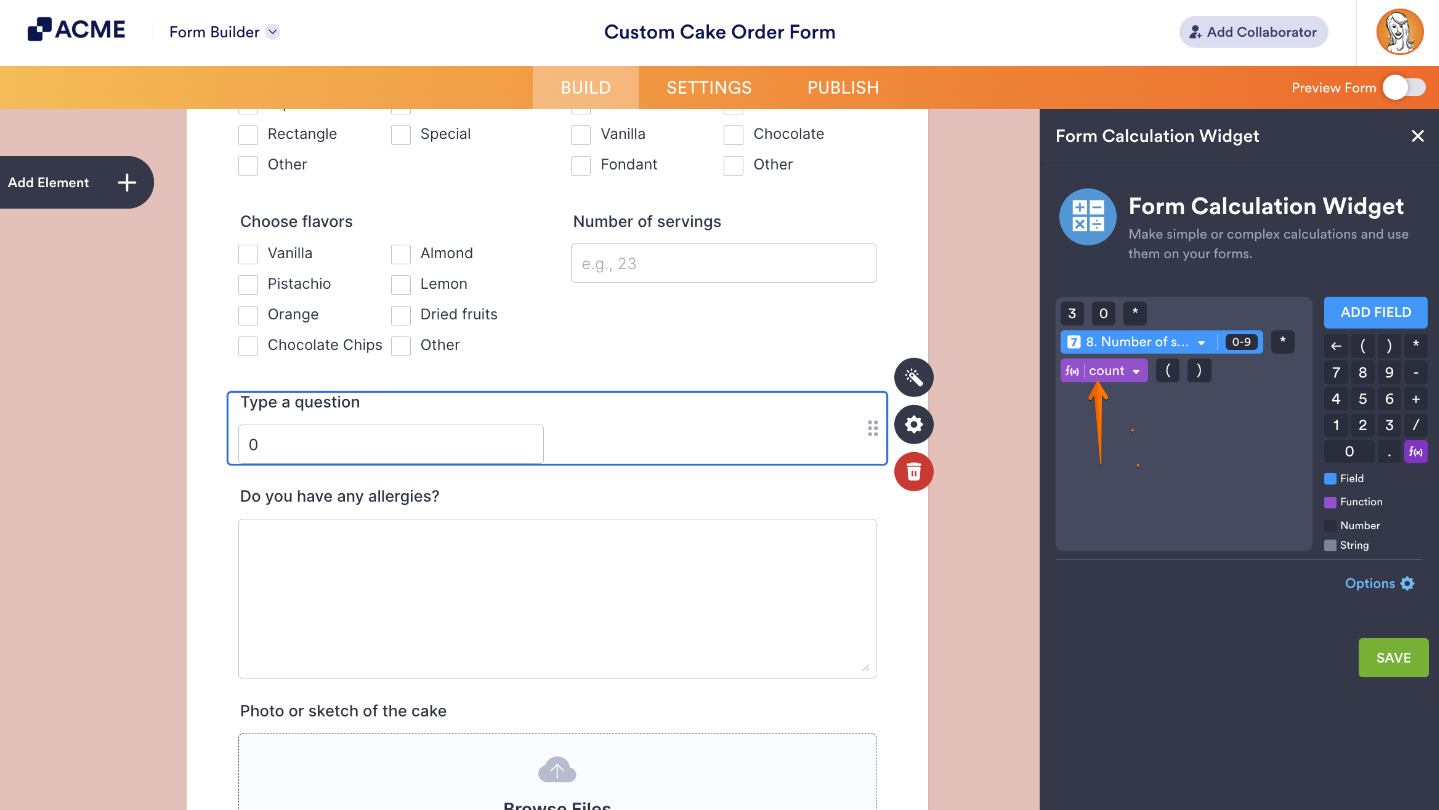
Functions follow a standard format in the Formula Editor, like abs(), min(), max(), or round(). They’ll have a purple background that’s automatically followed by parentheses where you place the value or expression they’ll work on. These are useful for more advanced calculations beyond basic arithmetic.
- Once you’re done, click on Save.
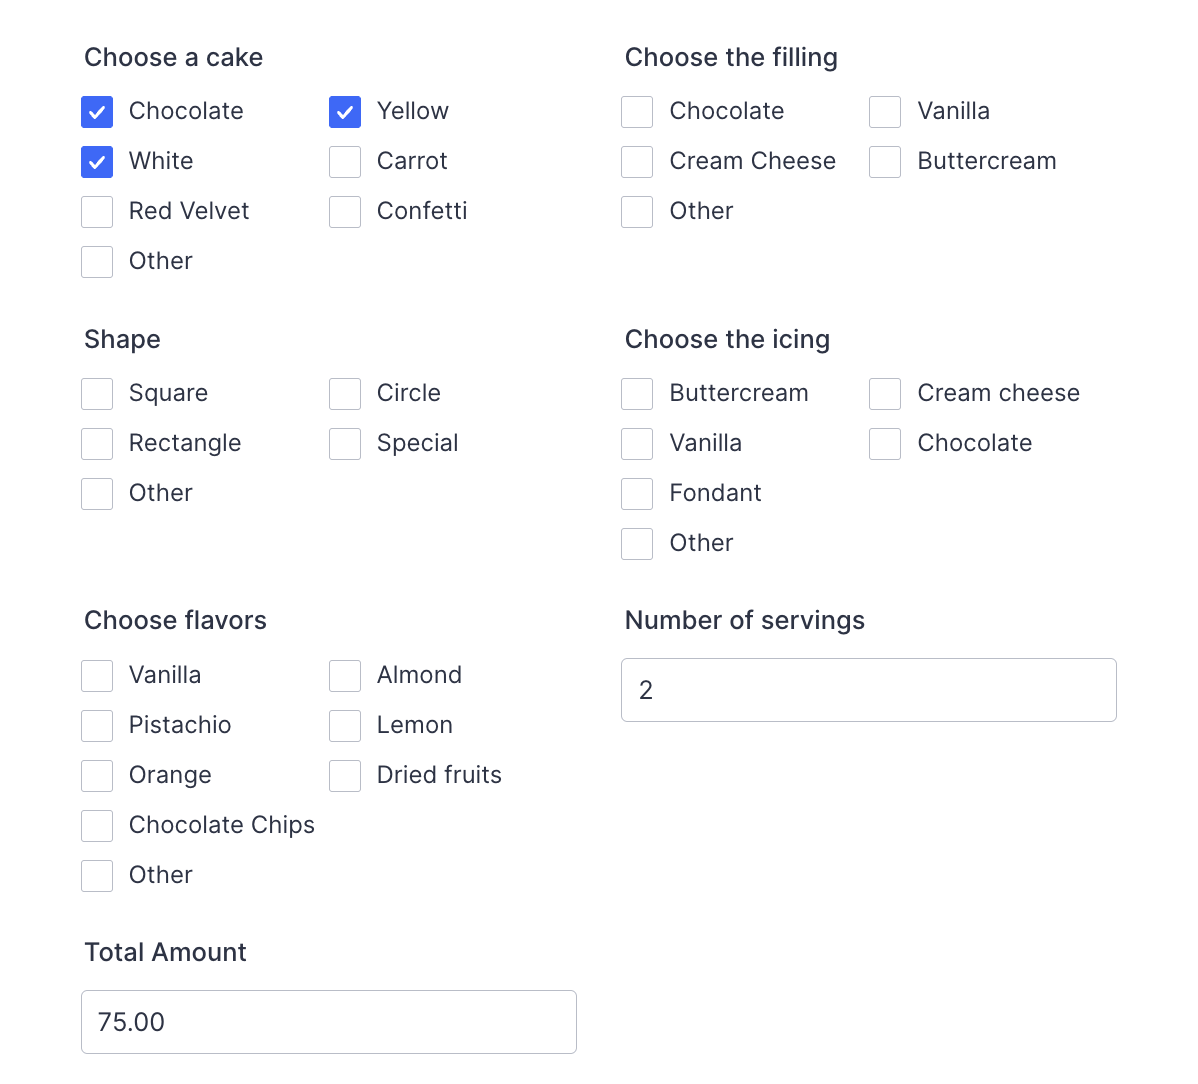
That’s it. Your form can now automatically calculate values based on what users enter—no manual math required. It’s a simple way to make your form smarter and more efficient.
Note
- The Downward Arrow icon next to the name of a field in the formula editor opens a list that lets you switch to another form field.
- The Downward Arrow icon next to the name of the function in the formula editor opens a list that lets you switch to another function.
- Place your cursor anywhere in the formula editor to insert new elements or remove existing ones.
- When using your keyboard, press the Enter key to quickly type the next element in the Formula Editor, and use the Backspace or Delete keys to remove elements easily.
- Parentheses added using the Formula Keypad in the Form Calculation Widget window are added as numbers, while parentheses typed using your keyboard are added as strings by default.
Configuring the Form Calculation Widget Options
You can fine-tune your calculation settings to control exactly how it works and how the results appear on your form. Setting it up takes no time at all—here’s how:
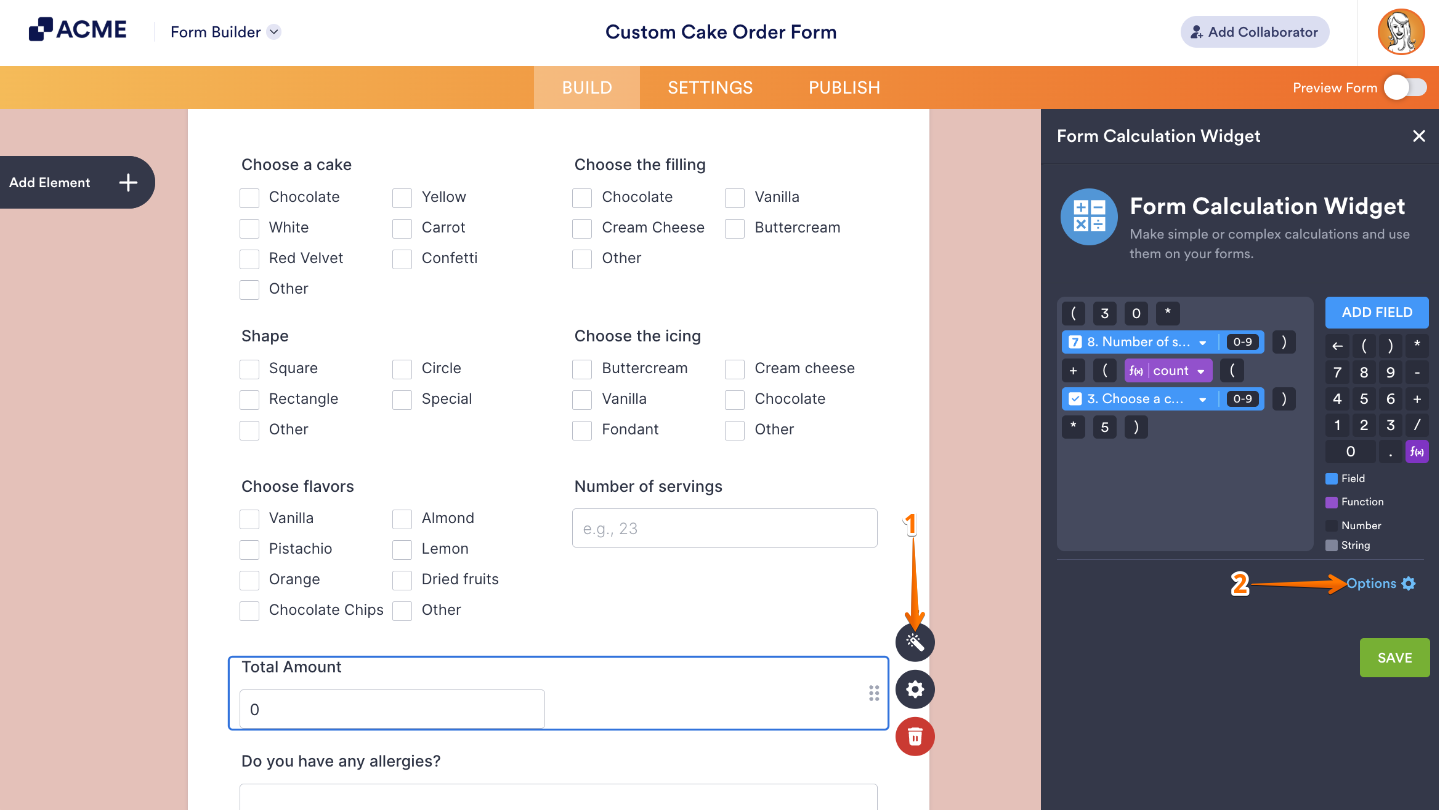
- In Form Builder, click on your Form Calculation widget and then click on the Wand icon on the right side of it.
- Then, in the Form Calculation Widget window on the right side of the page, click on Options at the bottom of the Formula Keypad section.
- Now, in the Options section, tick the boxes next to the following things to enable them as needed:
- Add field to equation as text by default — When this is enabled, form fields, numbers, operators, and functions are added to the formula editor as text. Even though they appear as strings, the calculation still works as long as the format is correct:
- Form fields are shown in curly brackets (e.g.,
{8}), which refer to their unique field IDs. - Functions are written between © symbols, followed by parentheses (e.g.,
©abs©({8})). - Full equations are enclosed in square brackets (e.g.,
[©abs©({8}) + ©min©(9,6)]).
- Form fields are shown in curly brackets (e.g.,
- Result Field is Read Only — This prevents users from editing the Result field. This keeps the calculated value locked and ensures it only updates based on the formula.
- Show Empty Decimal Places — This displays trailing zeros after the decimal point (for example, showing 5.00 instead of 5), which can be helpful for formatting prices or other fixed-decimal values.
- Ignore Hidden Fields — This skips any hidden fields in the calculation. This ensures only visible or currently active fields affect the result.
- Use Commas for Decimal Point — This changes the decimal symbol from a period (.) to a comma (,), which is common in some regions or languages.
- Decimal Places in Numerical Results — This lets you set how many digits appear after the decimal point in the result. You can choose from 0 to 10 decimal places, depending on how precise you want the result to be.
- Add field to equation as text by default — When this is enabled, form fields, numbers, operators, and functions are added to the formula editor as text. Even though they appear as strings, the calculation still works as long as the format is correct:
- Once you’re done, click on Go Back at the top.
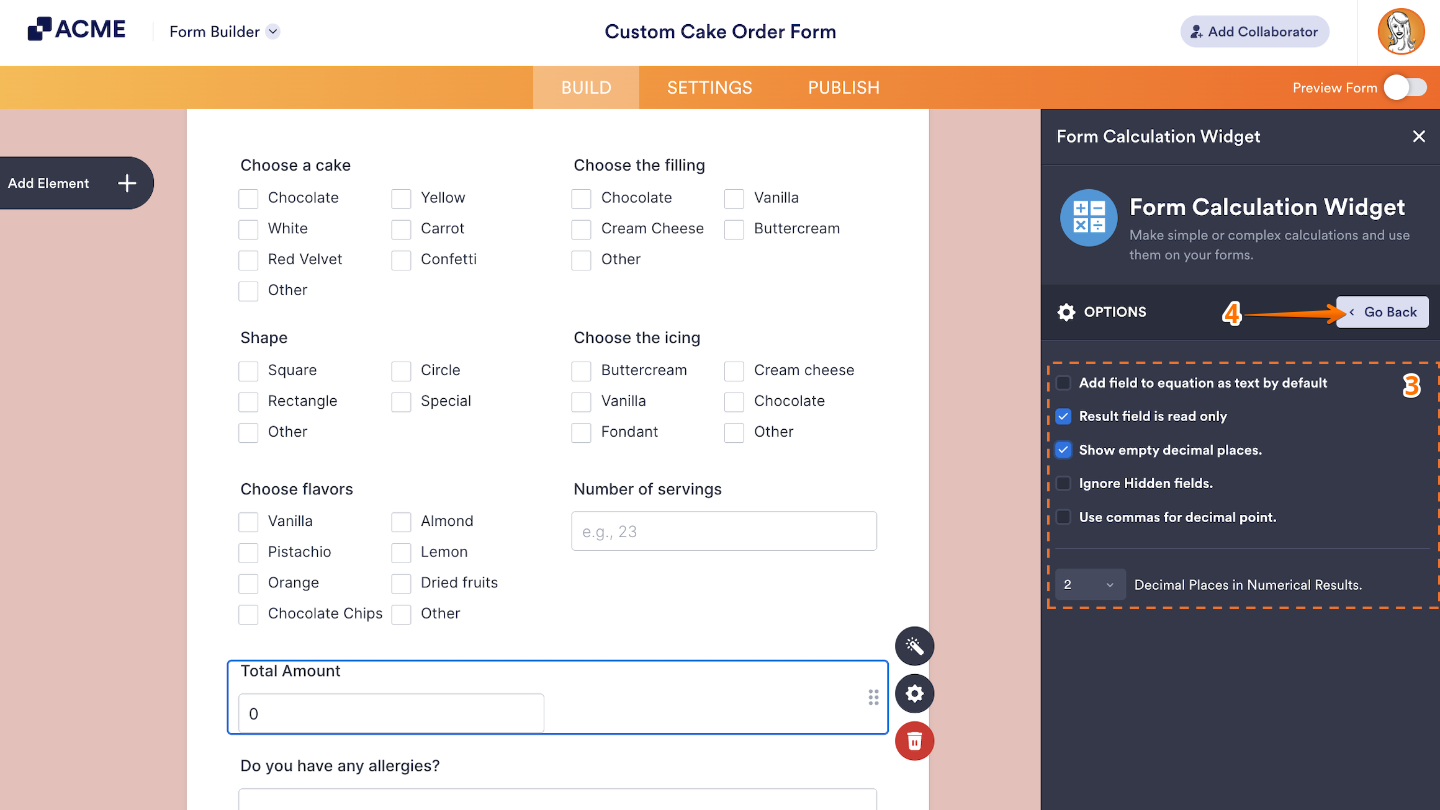
- Then, click on Save to apply the changes.
That’s it. Your calculation is now set up and ready to display the results the way you want. To see how it works on a live form, check out this demo.
Pro Tips
- You can assign calculation values to text options on fields like Dropdown, Single-Choice, or Multiple-Choice to include their value in the calculation.
- Make sure you include both parentheses in functions—missing an open parenthesis will result in no output, and a missing closed parenthesis will cause the function to be ignored.
- When using functions like atan2(), max(), min(), pow(), avg(), avgNoZero(), addDays(), subtractDays(), and nth(), make sure you add commas as numbers (dark gray). If added as strings, the function won’t work.
- Avoid consecutive operators without a number between them—they won’t return a result.
- To display a symbol or unit like $ or kg alongside the result, make sure you use strings (light gray), so they appear as plain text in the output.

Send Comment: