A common problem you may have faced is that you changed the recipient of your form’s Notification Email to have it sent to a different email address, only to find it’s gone to the old email address when you tested it out. This happens when you’re using the Test Email button in the Form Builder’s Emails Settings, which always sends the test email to the email address associated with your account.
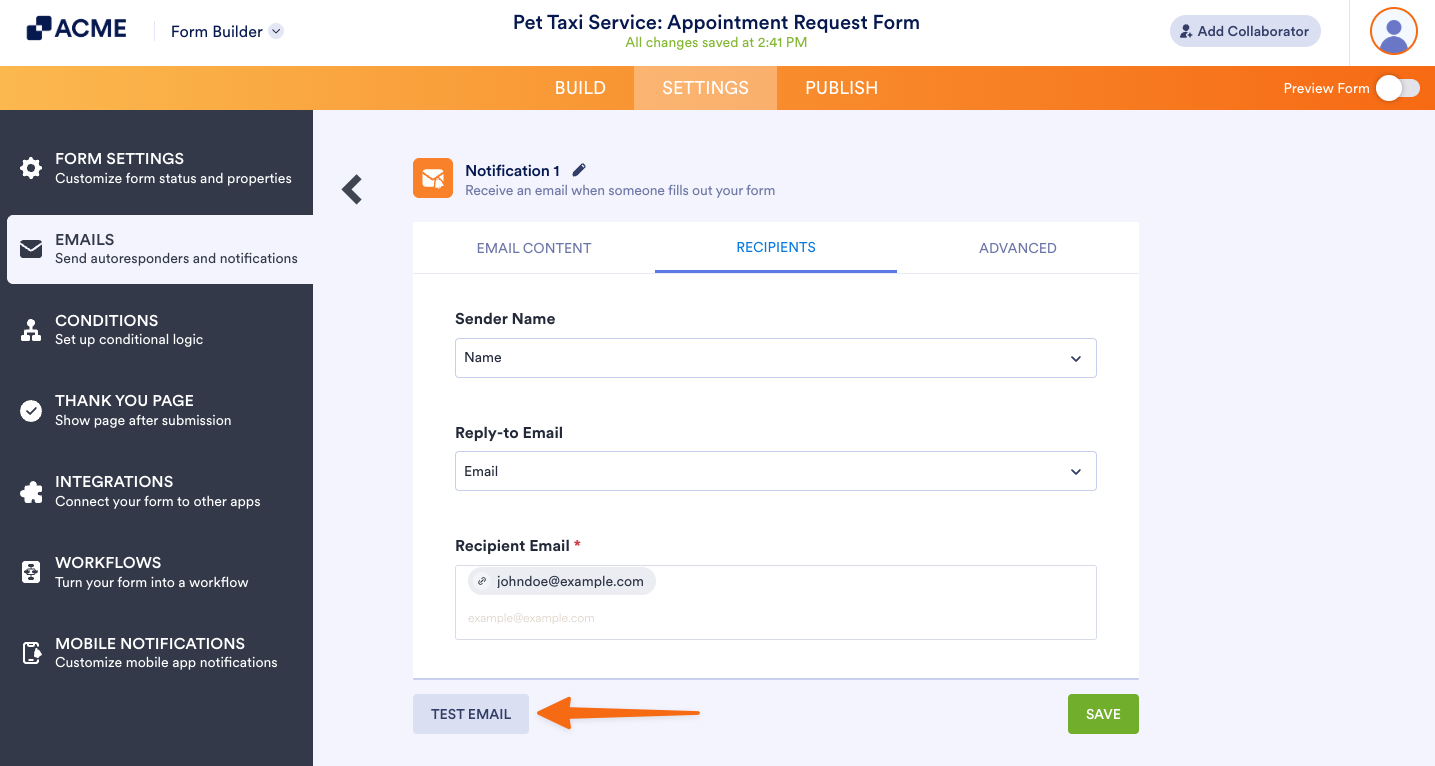
Note: Your account email address, which you can check on your Account page, is always set as the default recipient email of the Notification Email for your forms.
Adding and Changing a Notification Email Recipient Address
You can add a new recipient or change the existing one for your form’s Notification Email in a few easy steps. Here’s how to do it:
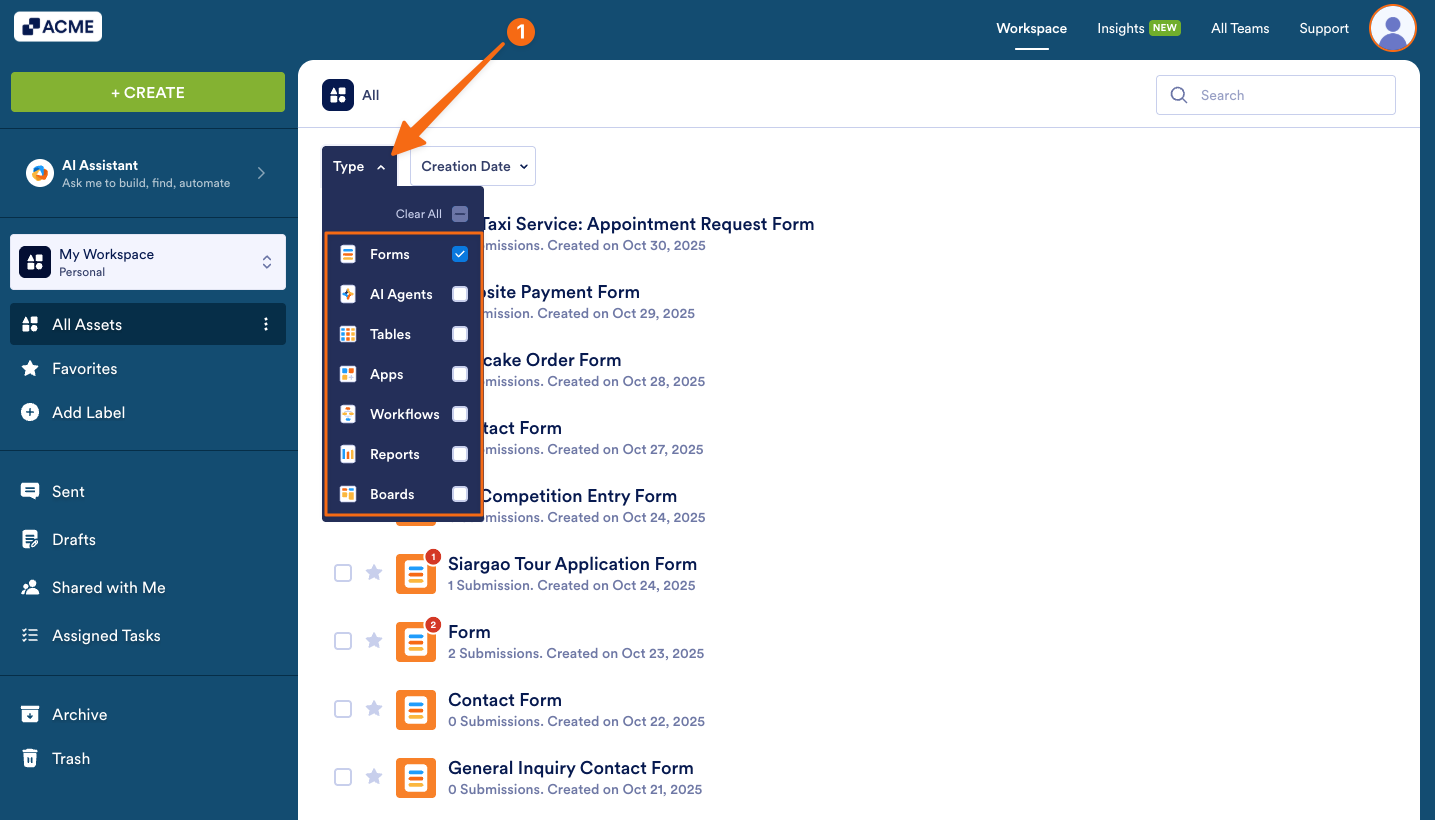
- On your Workspace page, click on Type at the top and in the Dropdown menu that opens, uncheck the boxes next to all the assets except Forms, so only they’ll be shown on the page.
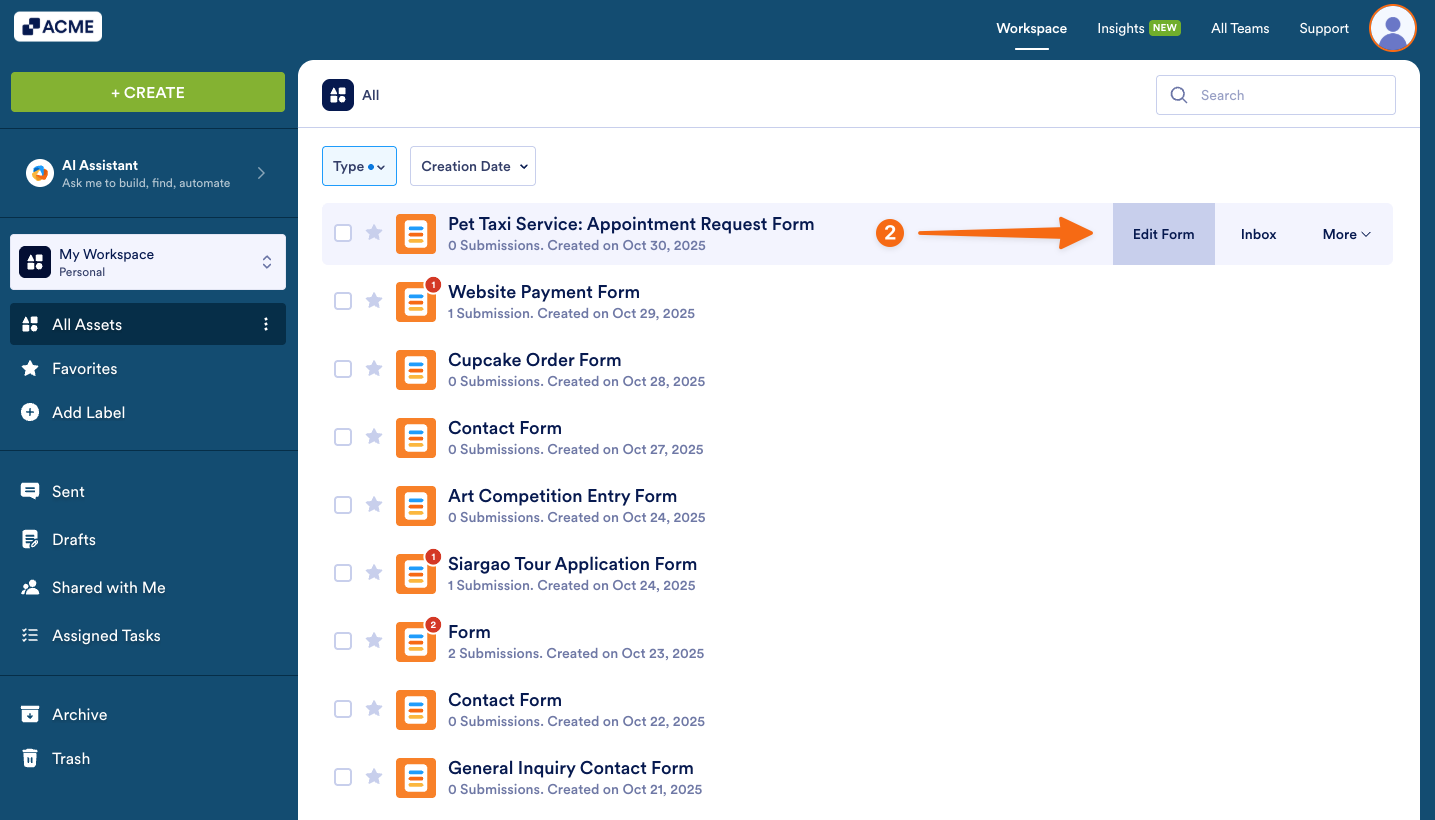
- Now, hover your mouse over the form you want to edit, and click on Edit Form on the right side of the page.
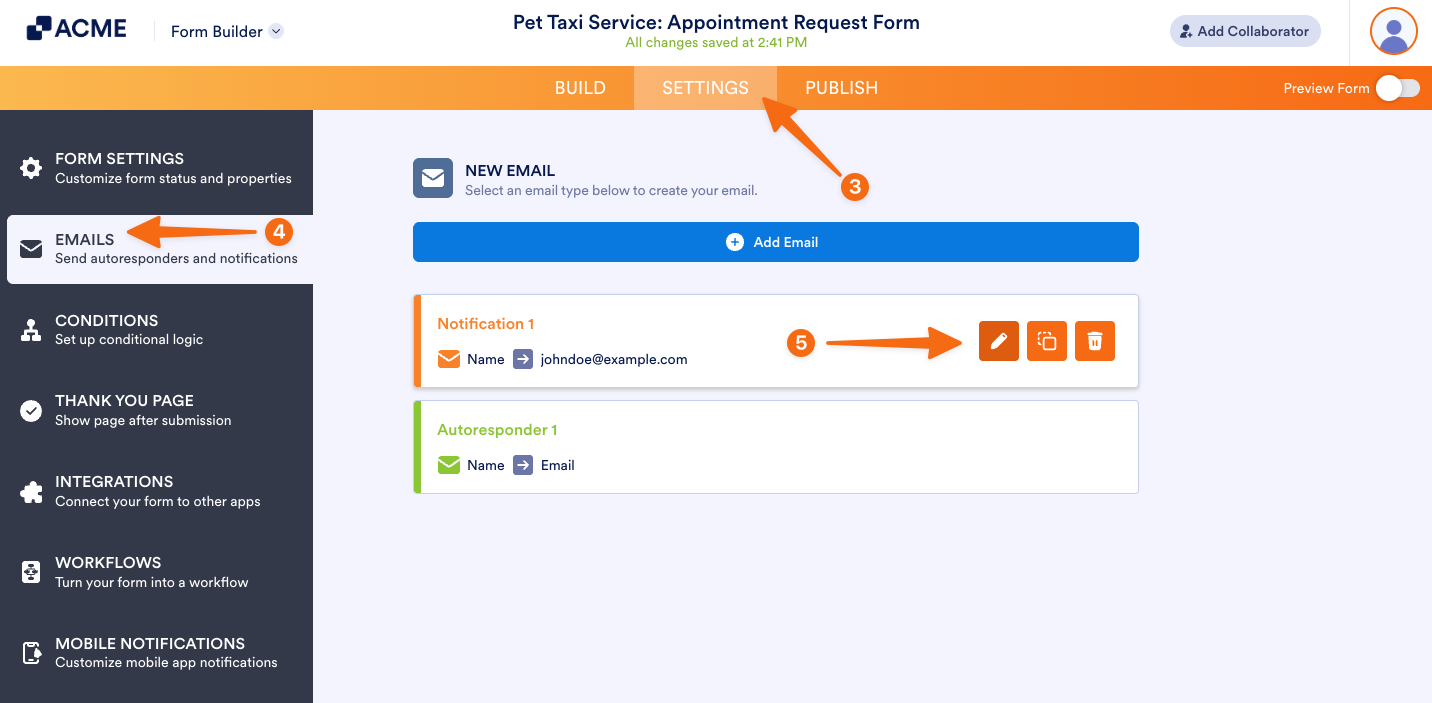
- In Form Builder, in the orange navigation bar at the top of the page, click on Settings.
- Then, click on Emails in the menu on the left.
- Hover your mouse over the Notification Email and click on the Pencil icon to edit it.
- Now, go to the Recipients tab.
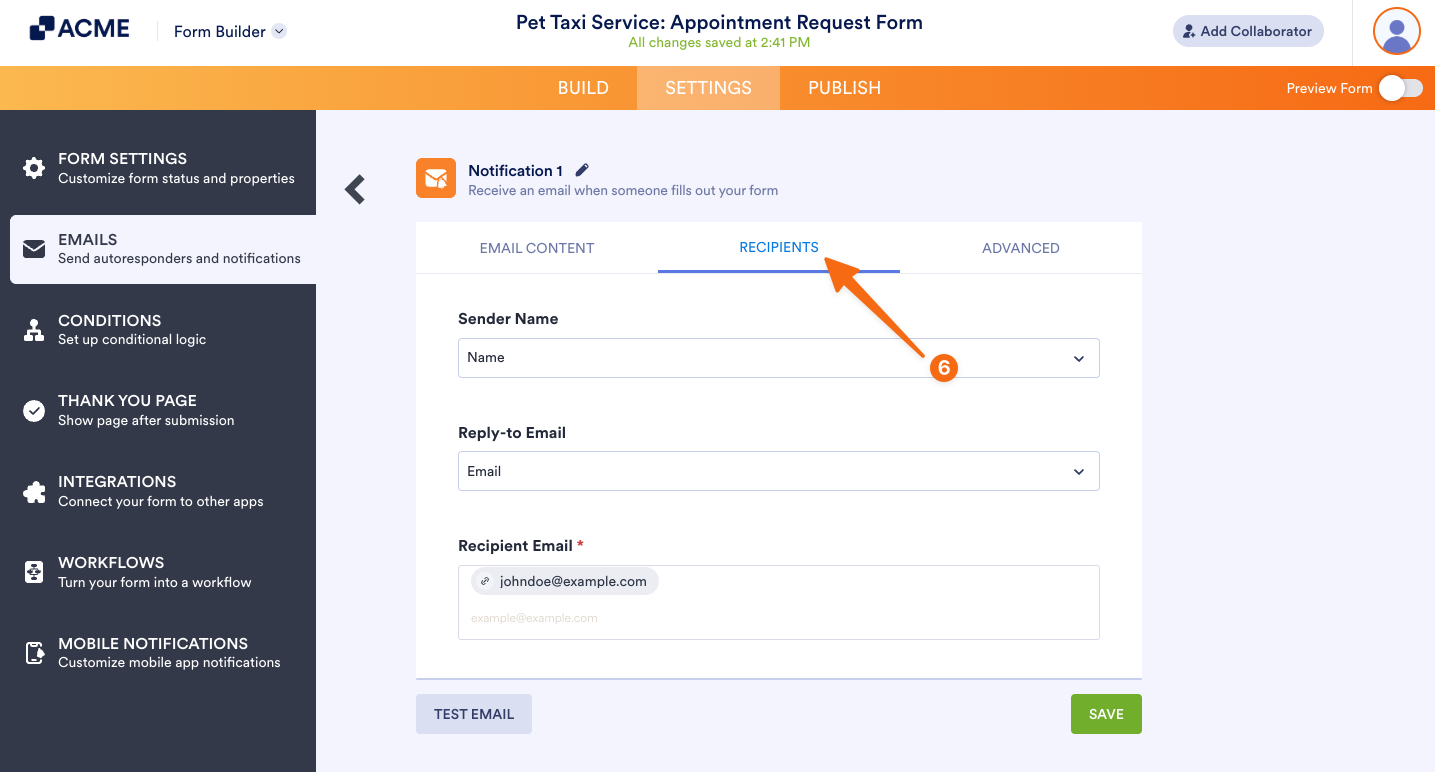
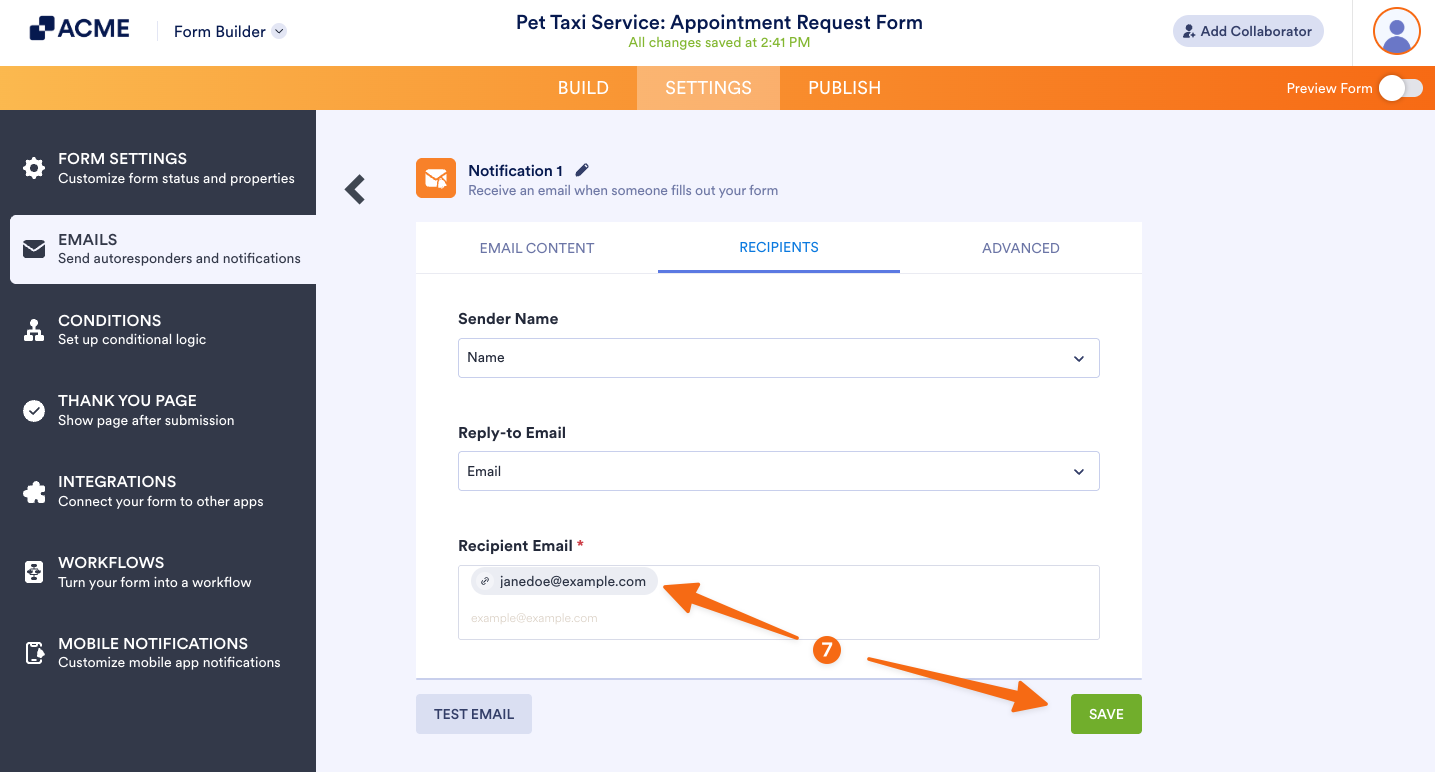
- Finally, delete the existing email address, add a new one in the Recipient Email field, and then click on Save.
Testing a New Notification Email Recipient Address
You can immediately test your Notification Email after saving the new email recipient address on the Preview Form page instead of using the Test Email button in the Notification Email settings. Here’s how to do it:
- While in Form Builder, toggle Preview Form to the On position in the top-right corner of the page to open your form in Preview Mode.
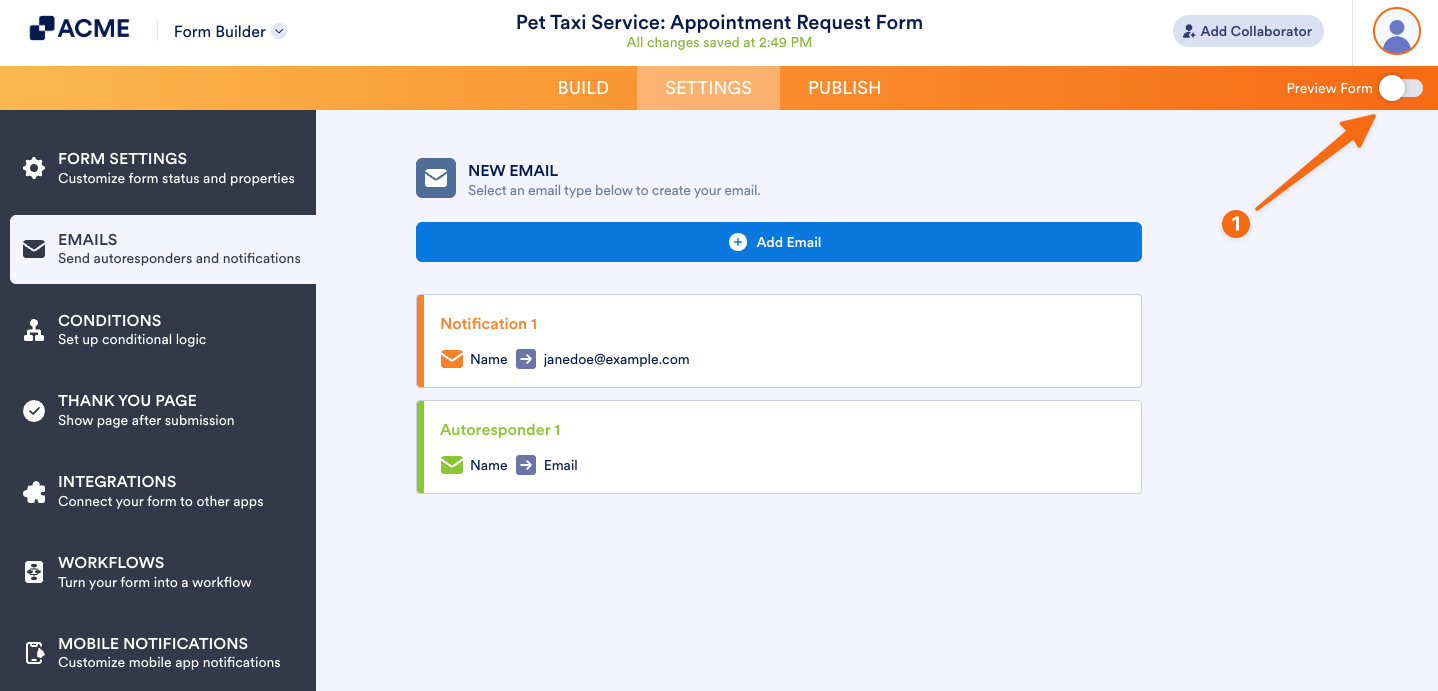
- Then, fill out and submit your form manually. You can also use the Fill Form button at the top of the page to fill out the fields on your form with test data.
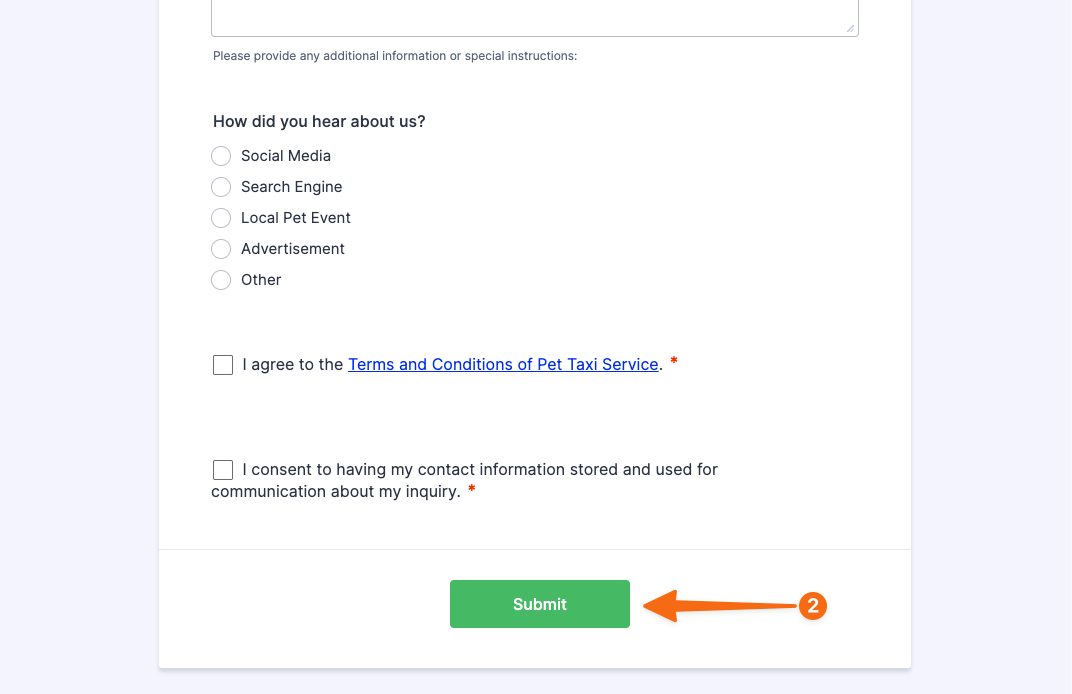
That’s it. Check the inbox of the Notification Email recipient address to confirm it was sent correctly.

Send Comment: