Constant Contact is a comprehensive marketing platform that helps businesses build and maintain customer relationships through powerful email campaigns and automation tools. It simplifies the process of creating, managing, and optimizing email marketing, enabling businesses to connect with their audience and achieve their marketing objectives efficiently.
Setting Up Constant Contact on Your Form
Integrating Constant Contact to your form is pretty simple. Here’s how to do it:
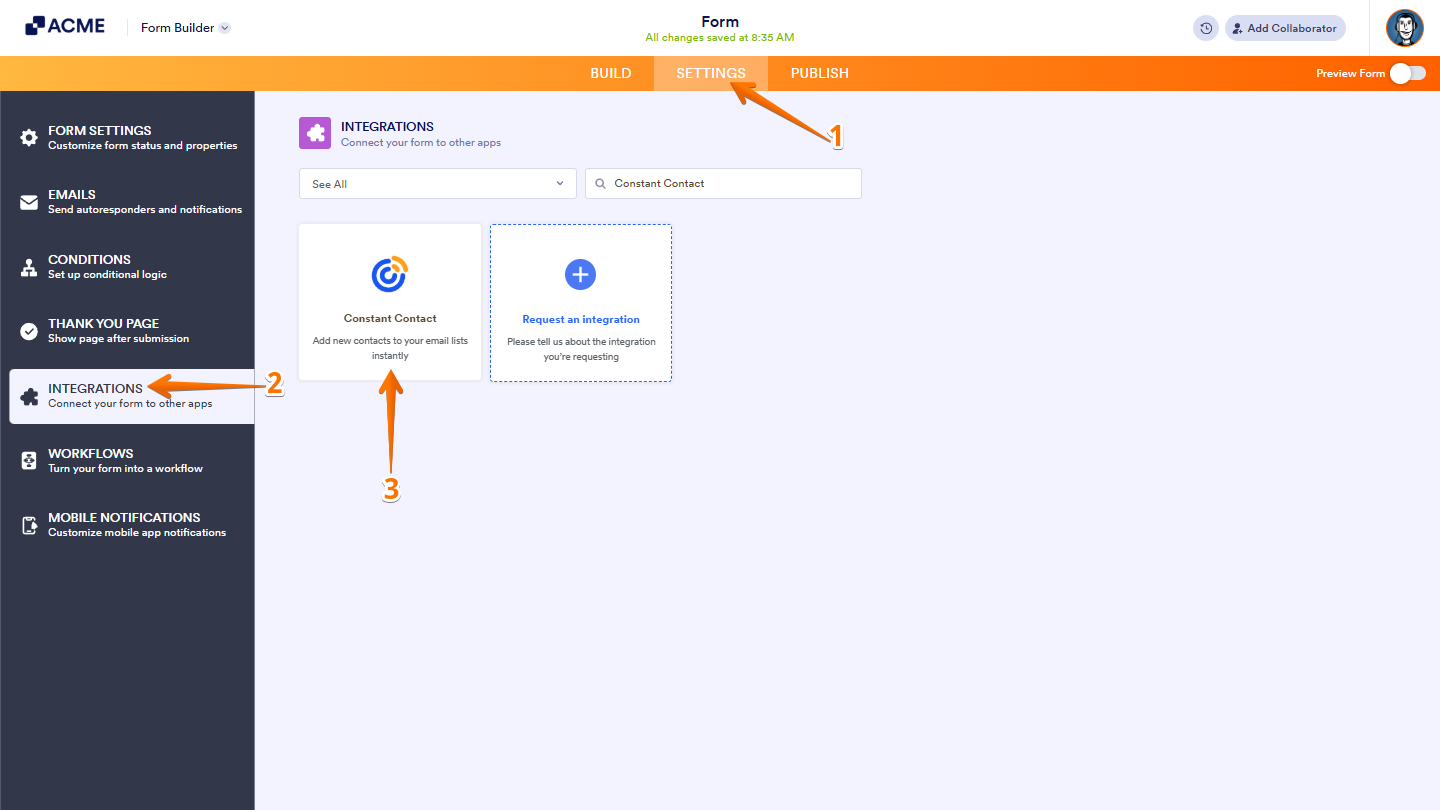
- In Form Builder, in the orange navigation bar at the top of the page, click on Settings.
- In the menu on the left, click on Integrations.
- Then, search for Constant Contact and click on it.
- Next, click on Authentate button and login to your Constant Contact account.
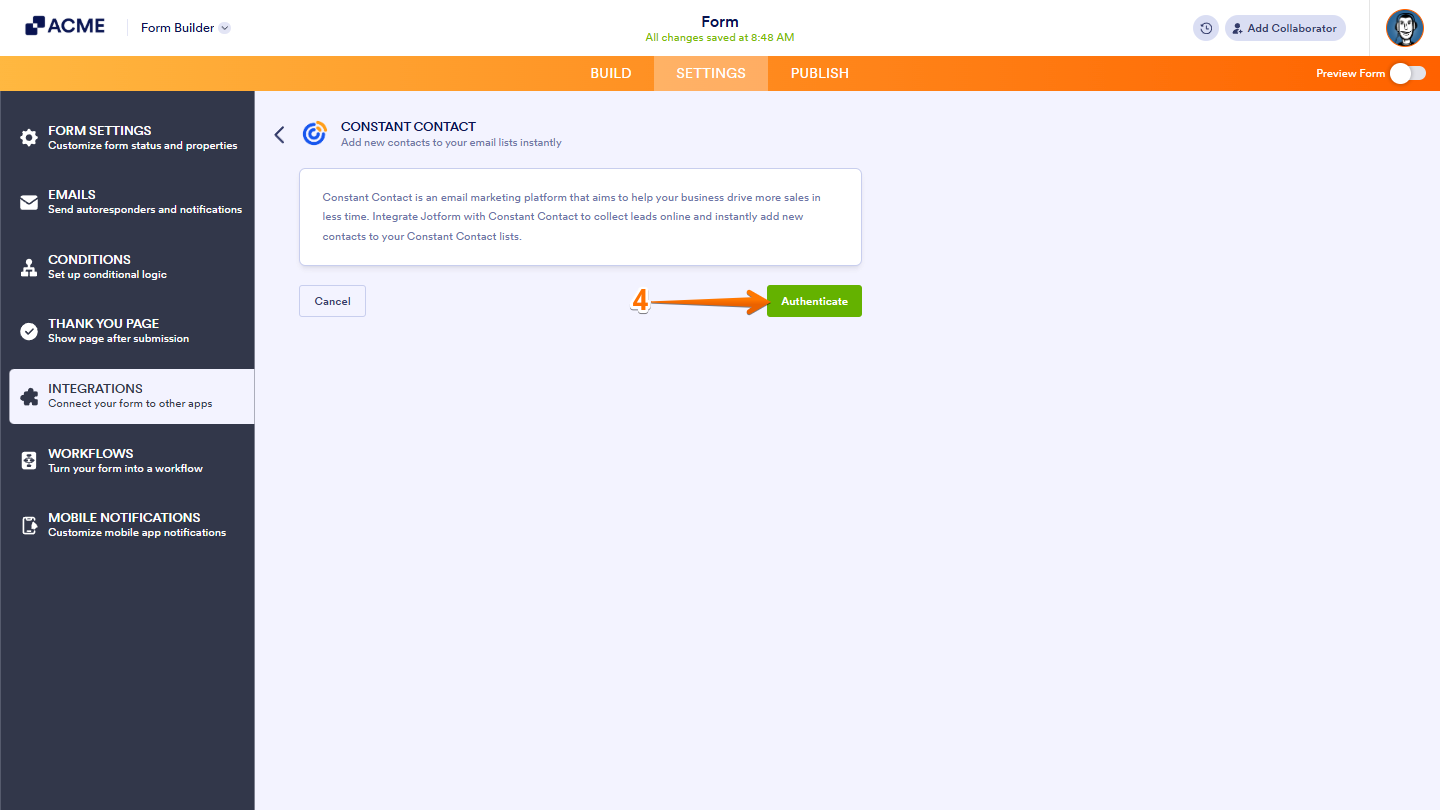
If you’ve logged in before, just pick your Constant account from the dropdown. To use a different one, click on Use another account.

- Now, set up these things:
- Choose a List — Select the Constant Contactt list you want to sync your contacts to.
- Match Your Fields — Map your form fields to Constant Contact fields like Email, First Name, or Last Name.
- Updates Existing Record — Enable this option if you want to update an existing contact instead of creating a new one.
- Once you’re done, click on Save.

Managing Constant Contact Integration Actions
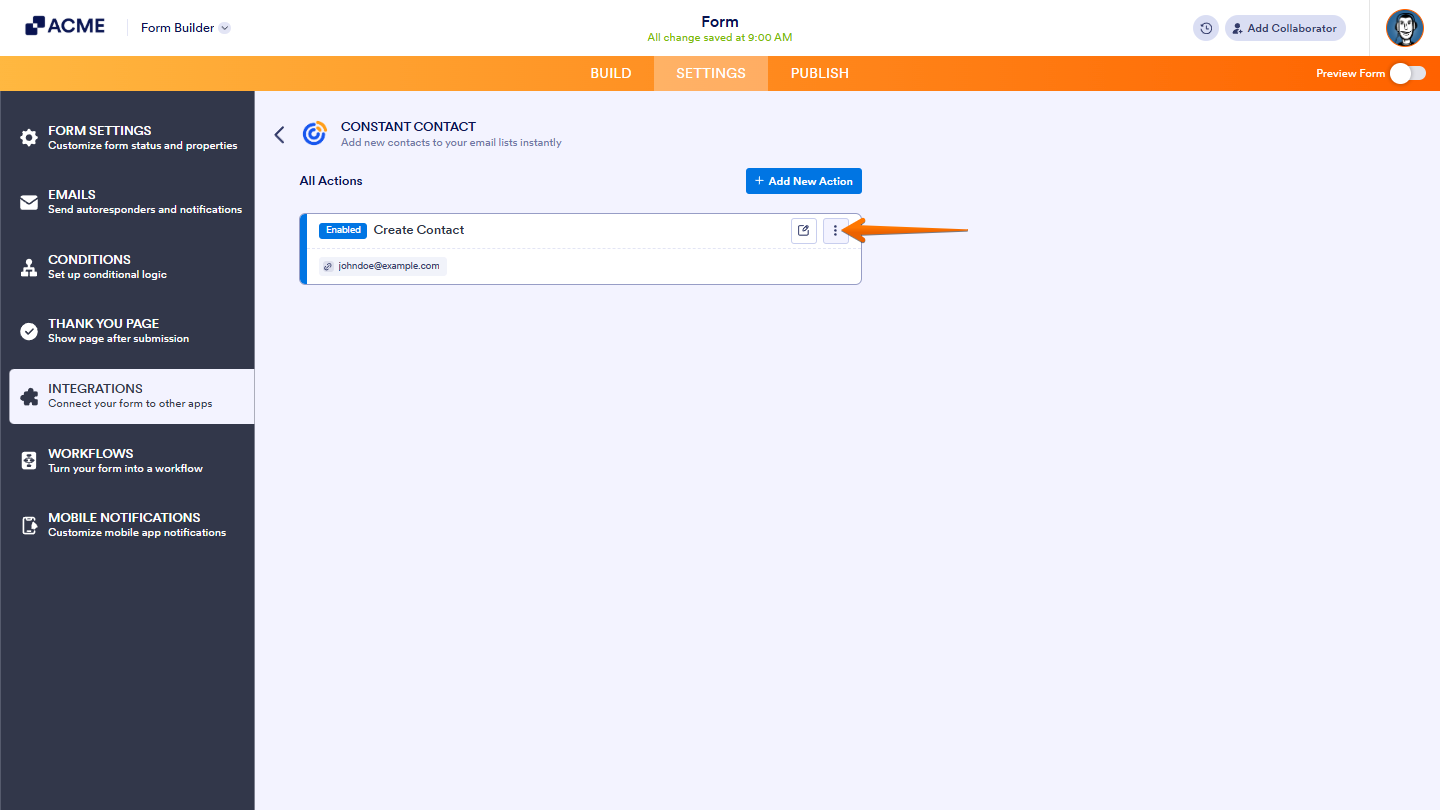
After saving the integration, you’ll see a list of the Constact actions you’ve set up and the Add New Action button on the main page. Hover your mouse over an action and click on the Three Dots icon on the right side of it to access these options:
- See Action Logs — View successful and failed runs, helpful for troubleshooting.
- Rename Action — Change the action’s title.
- Disable Action — Temporarily stop the integration from sending data.
- Delete Action — Remove the action from your form.

Send Comment: