Campaign Monitor is marketing software designed for web designers and their clients. It enables you to effortlessly send stunning autoresponders—automated emails to your subscribers.
With this integration, you can automatically add people to your subscriber list every time they fill out your form. This makes managing your audience quick and easy.
Integrating Campaign Monitor to your Form
To add and setup your Campaign Monitor to your form
- In the Form Builder, navigate to the Settings tab at the top middle of the page.
- Select Integrations on the left panel.
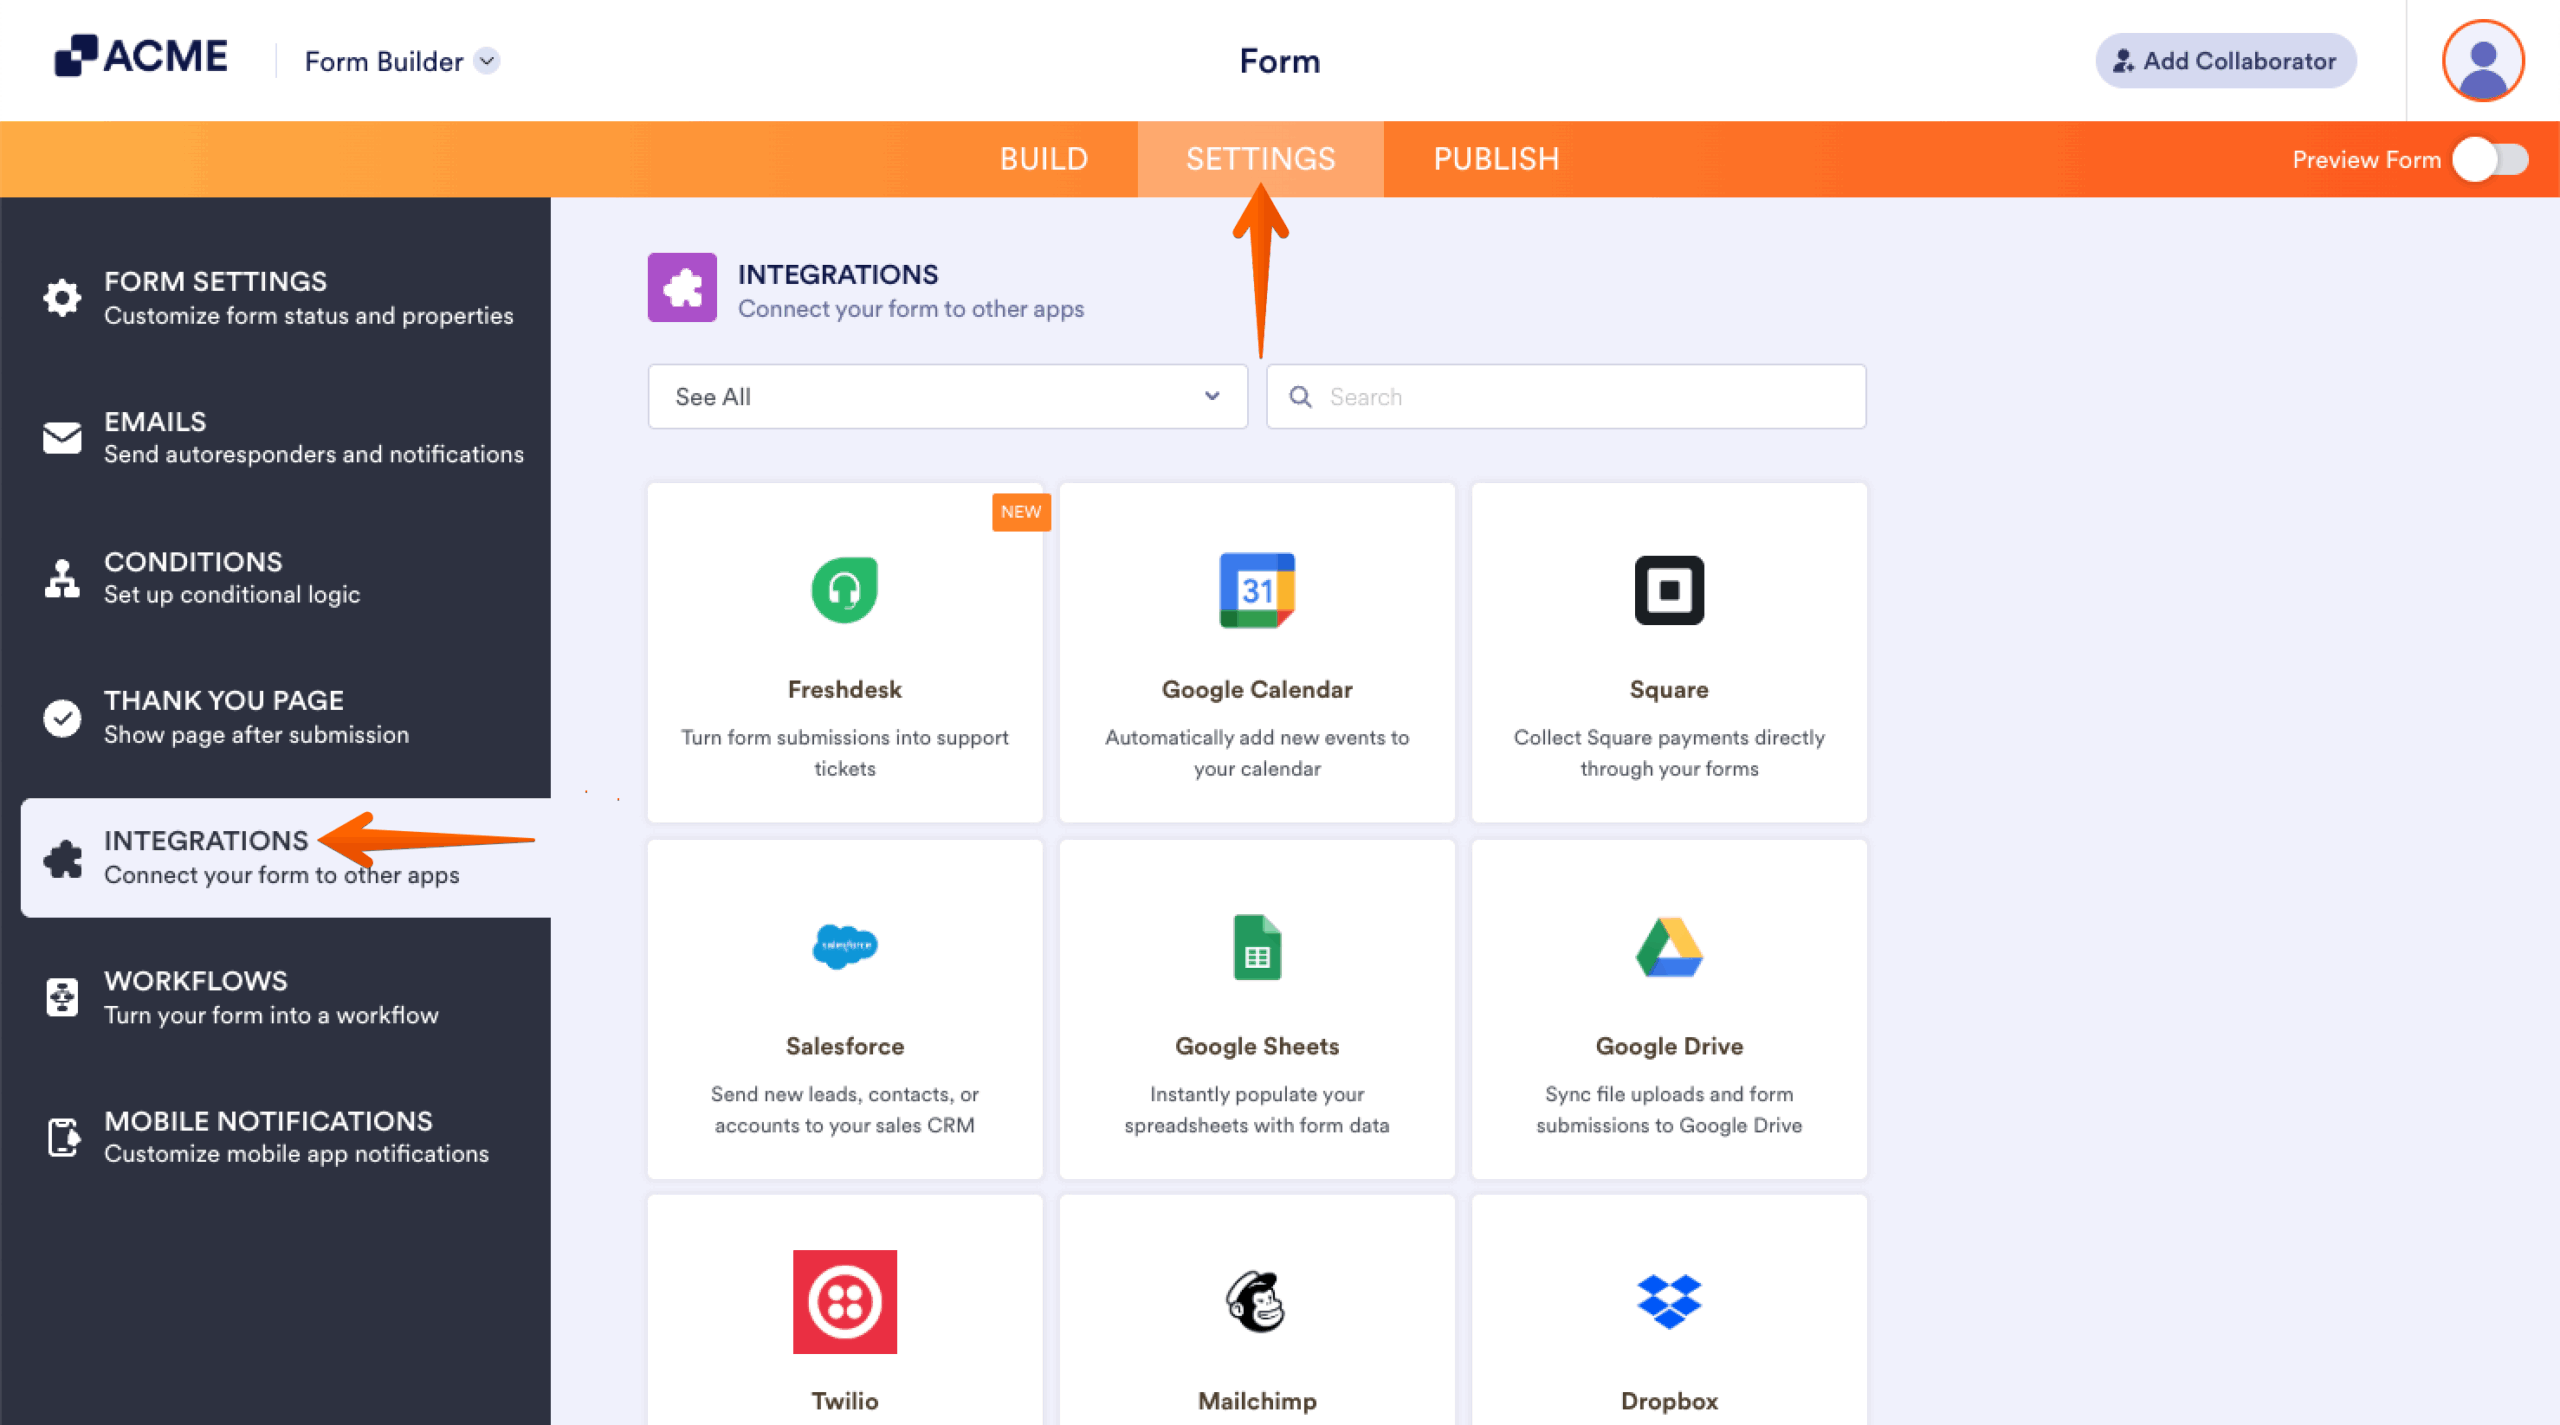
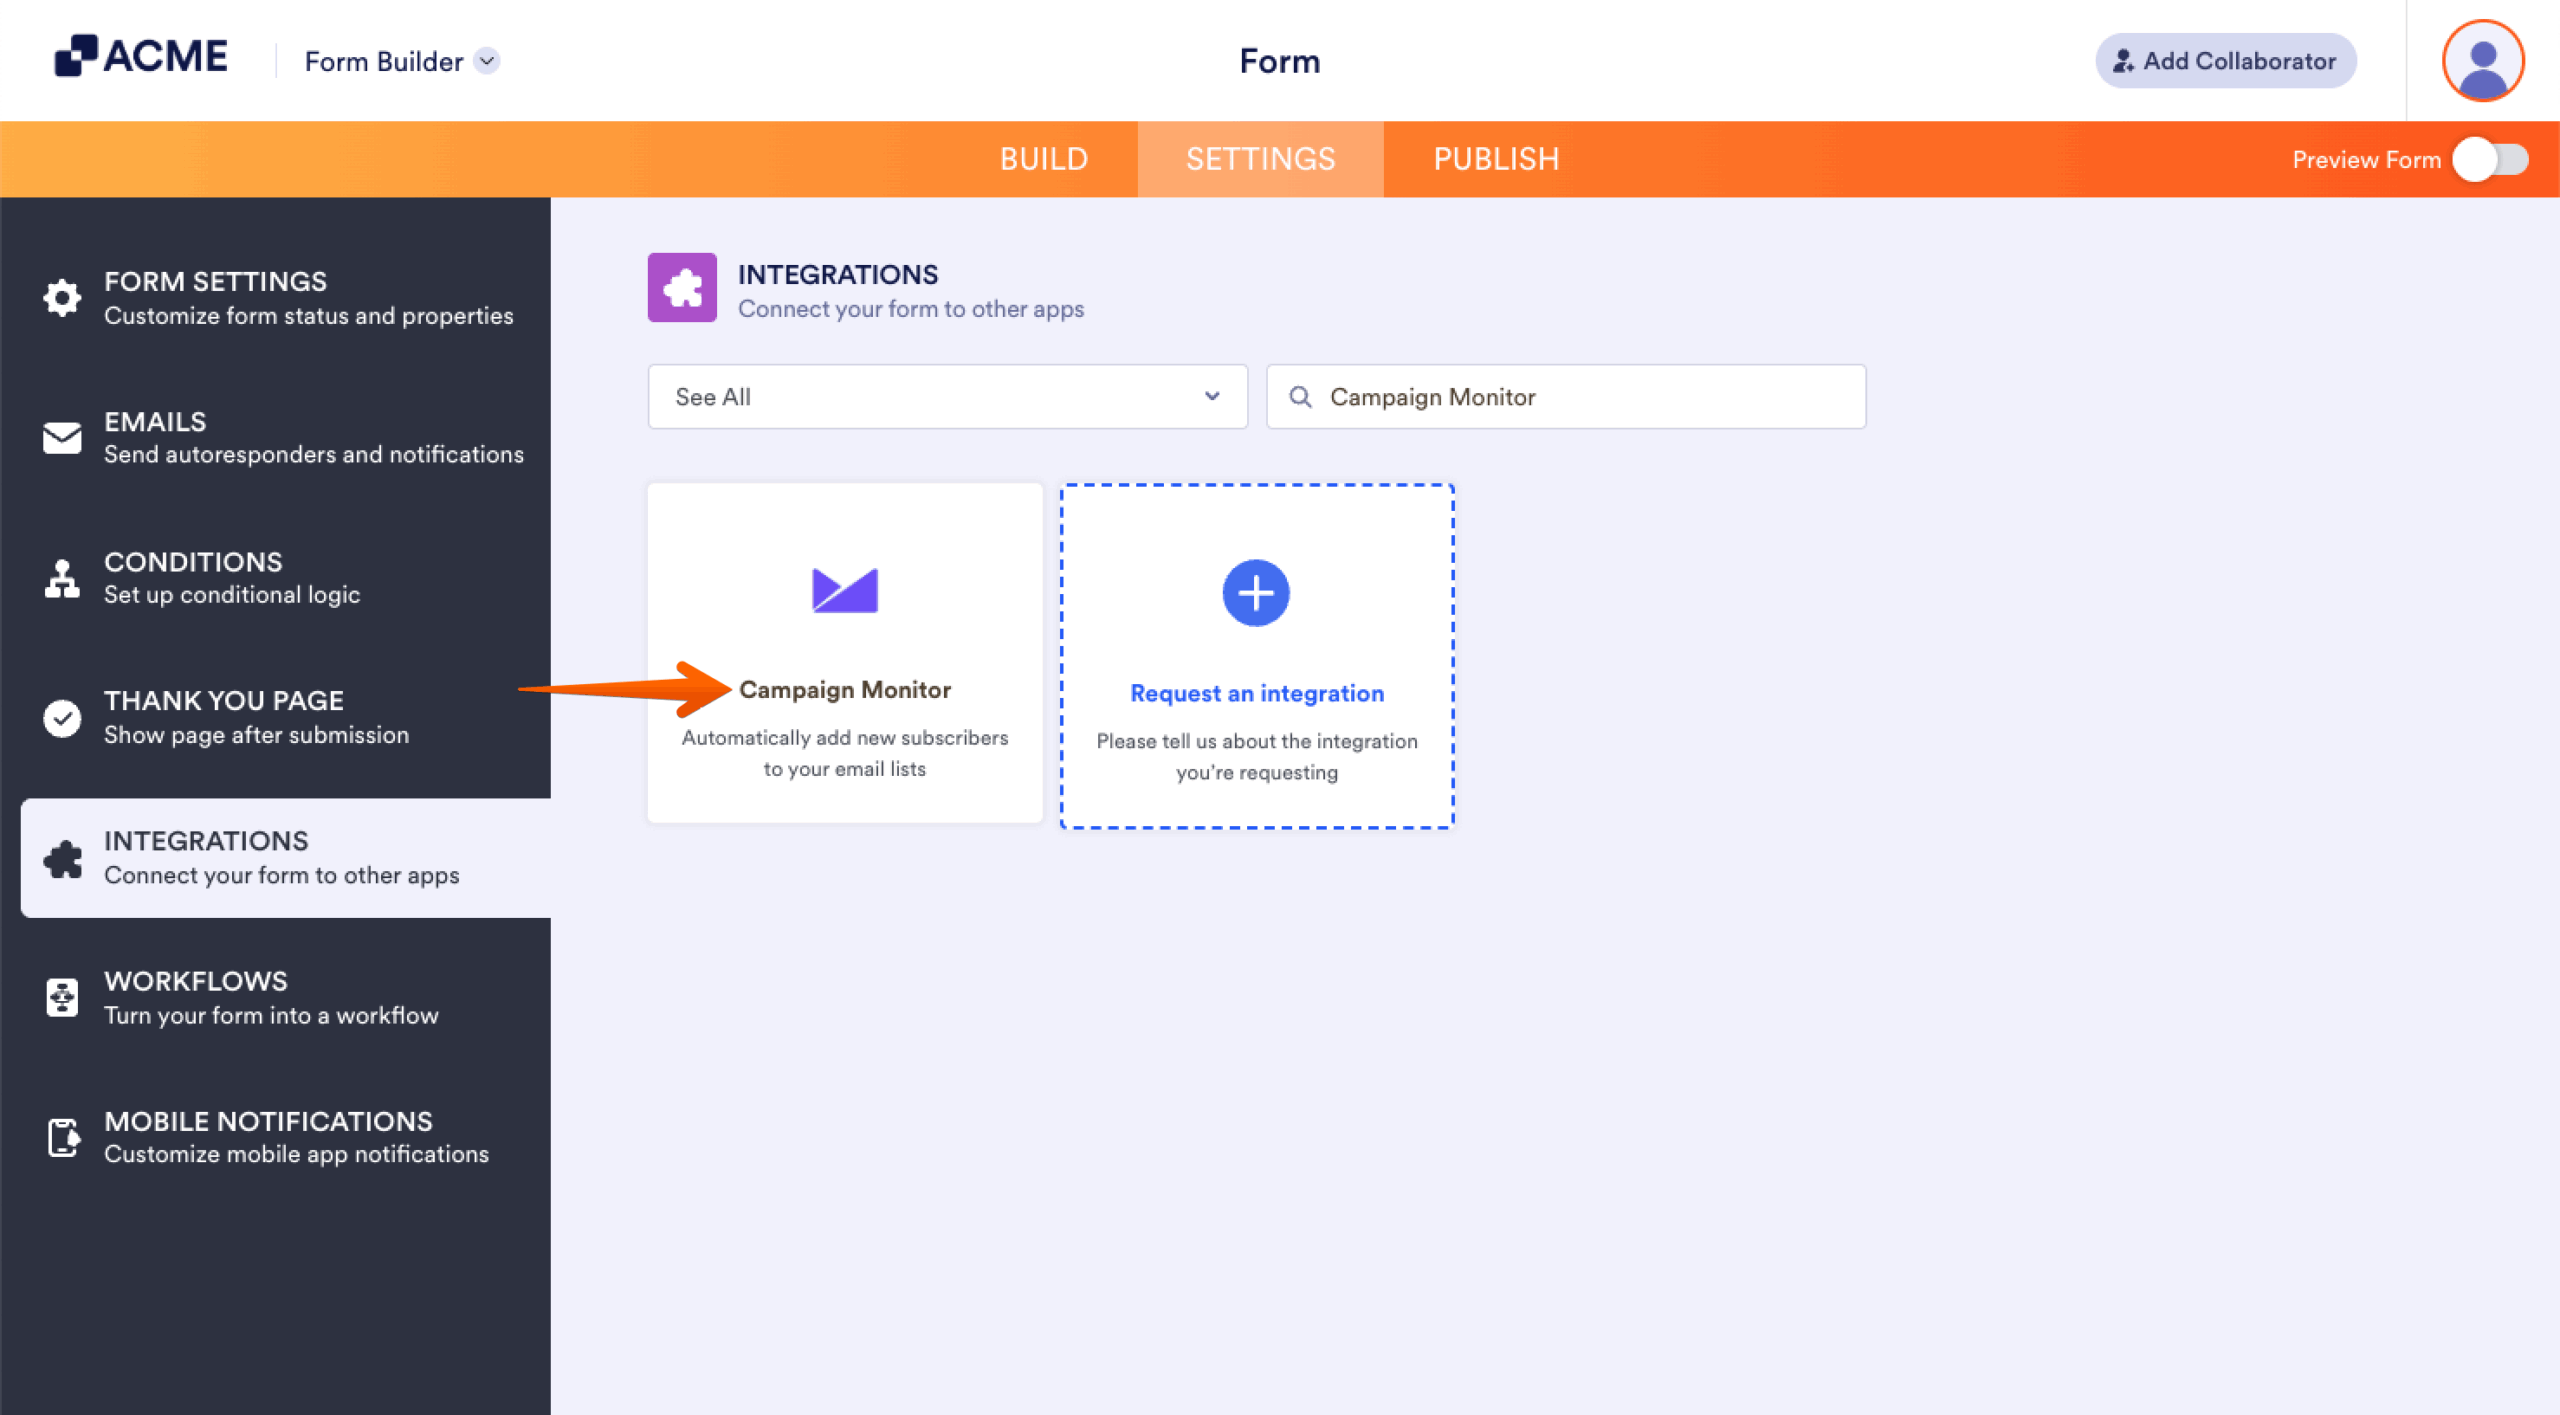
- Search for and click Campaign Monitor from the list.
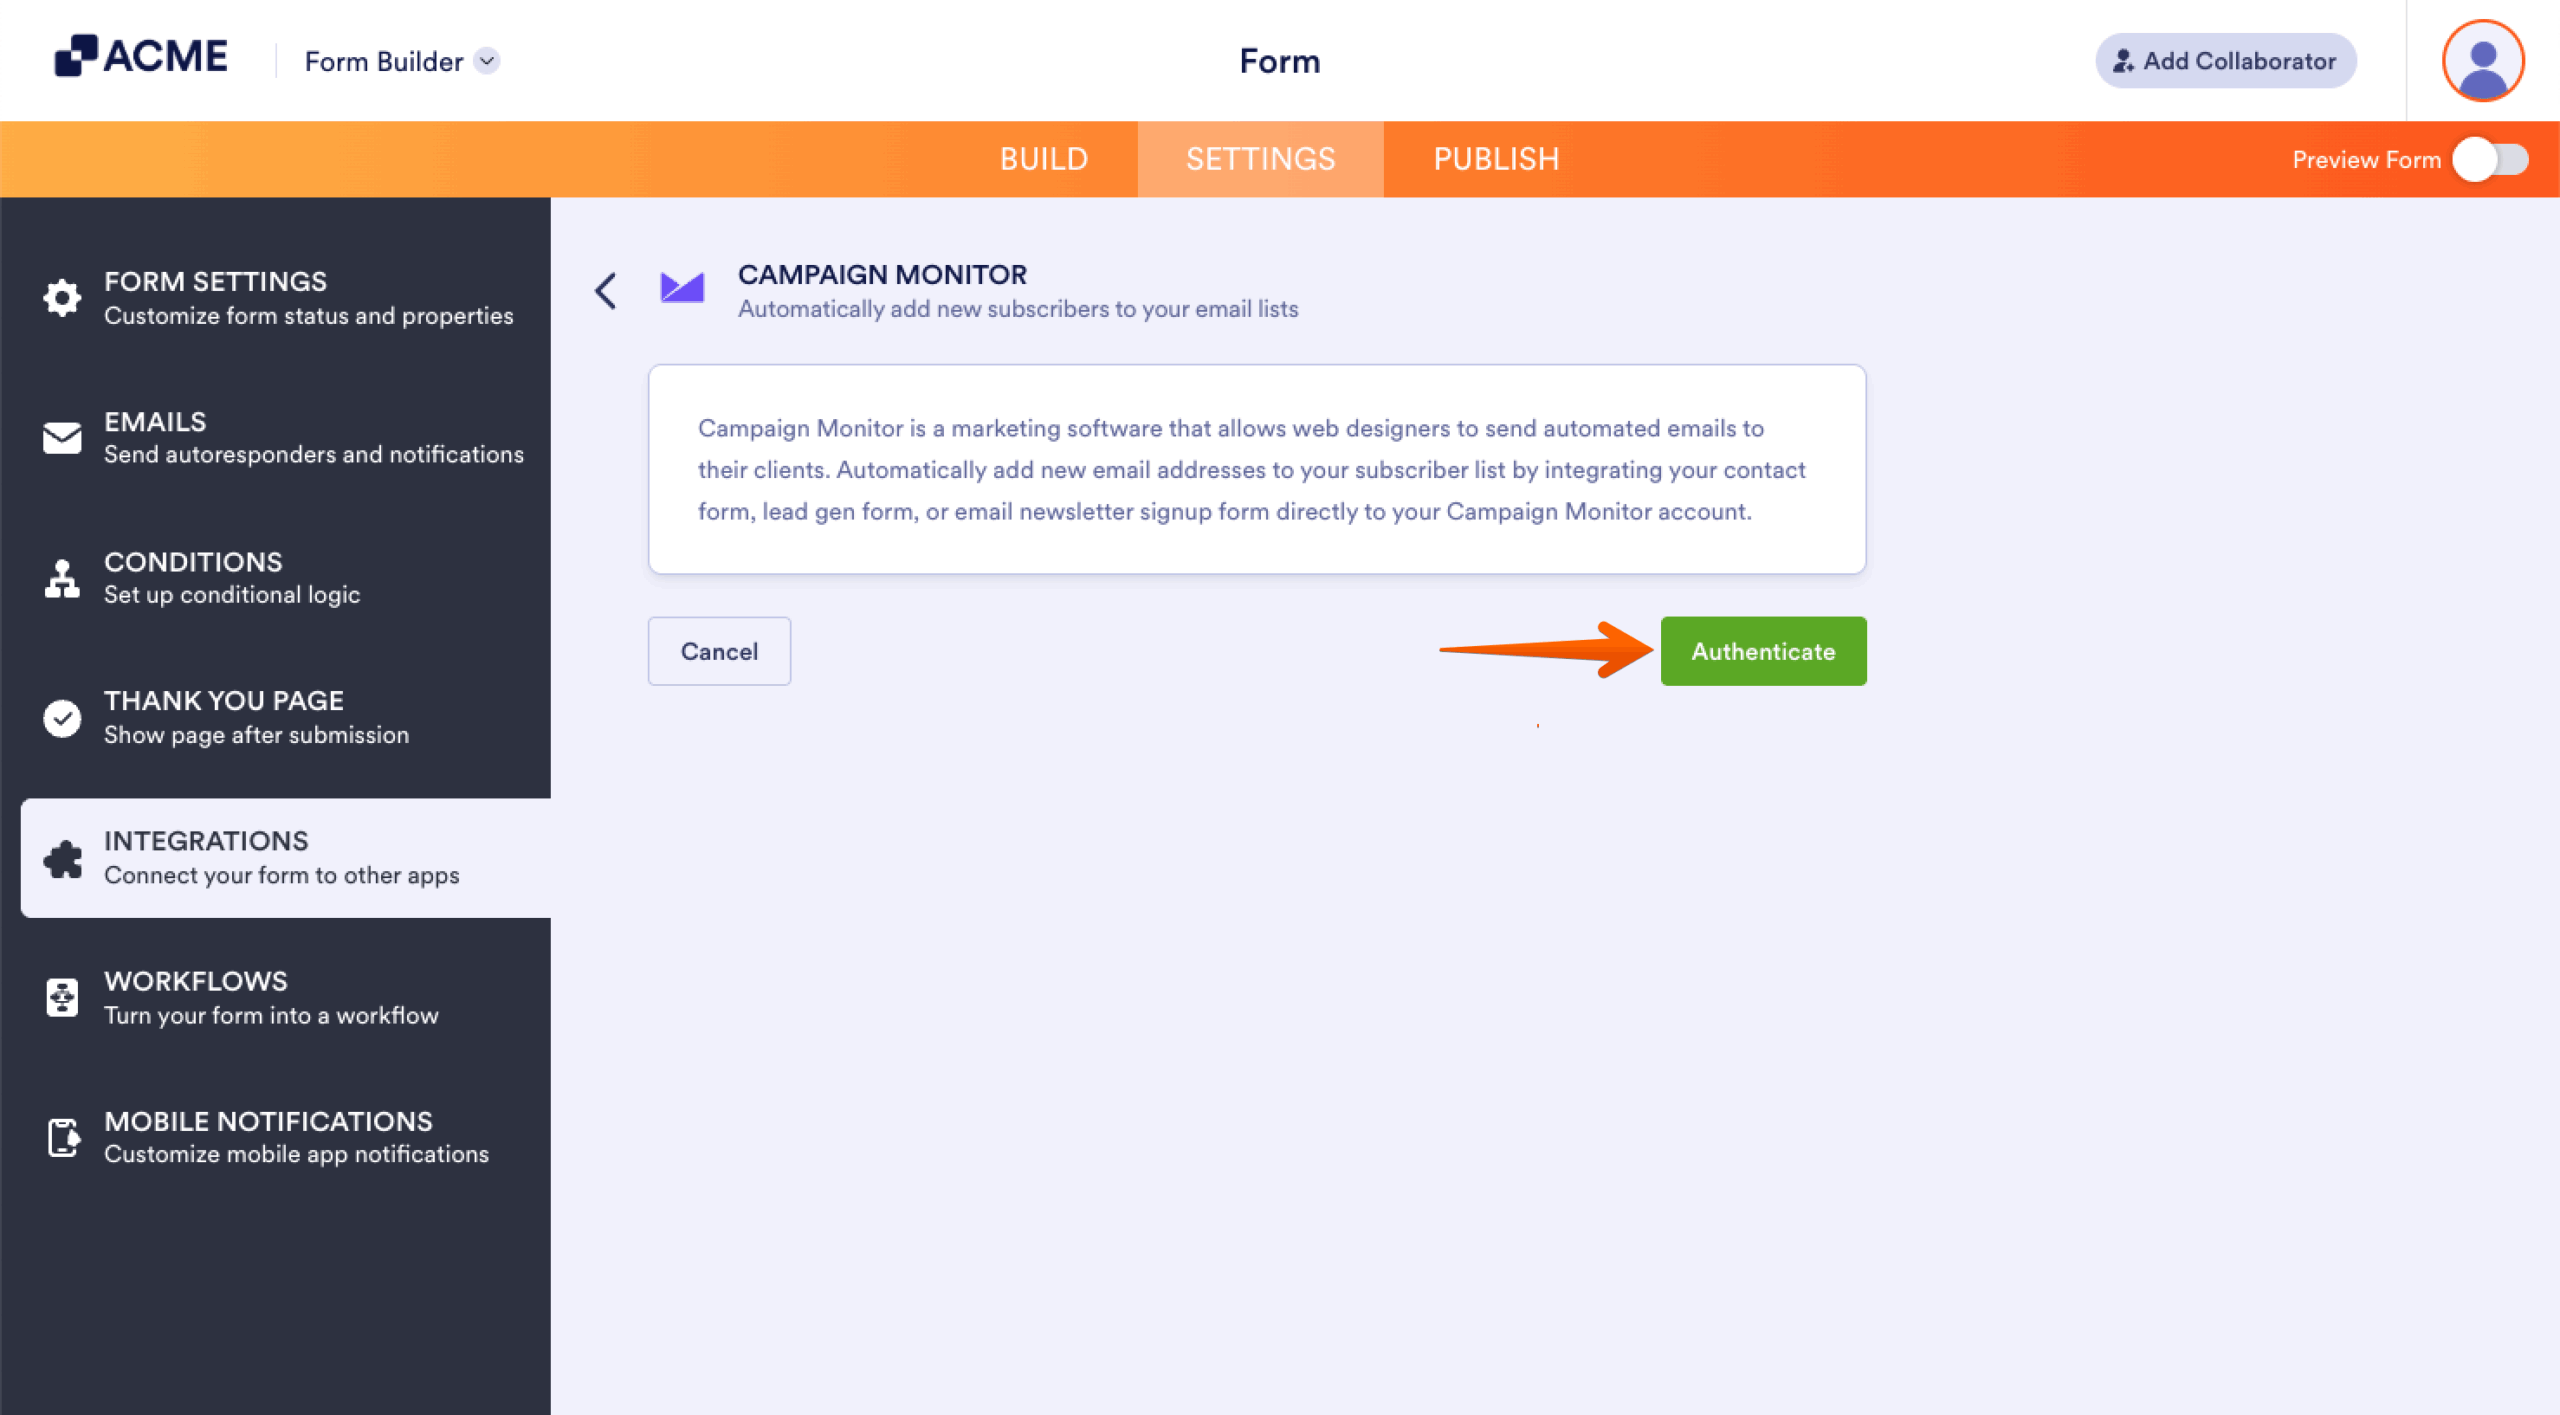
- Click on Authenticate button to connect your Campaign Monitor Account.
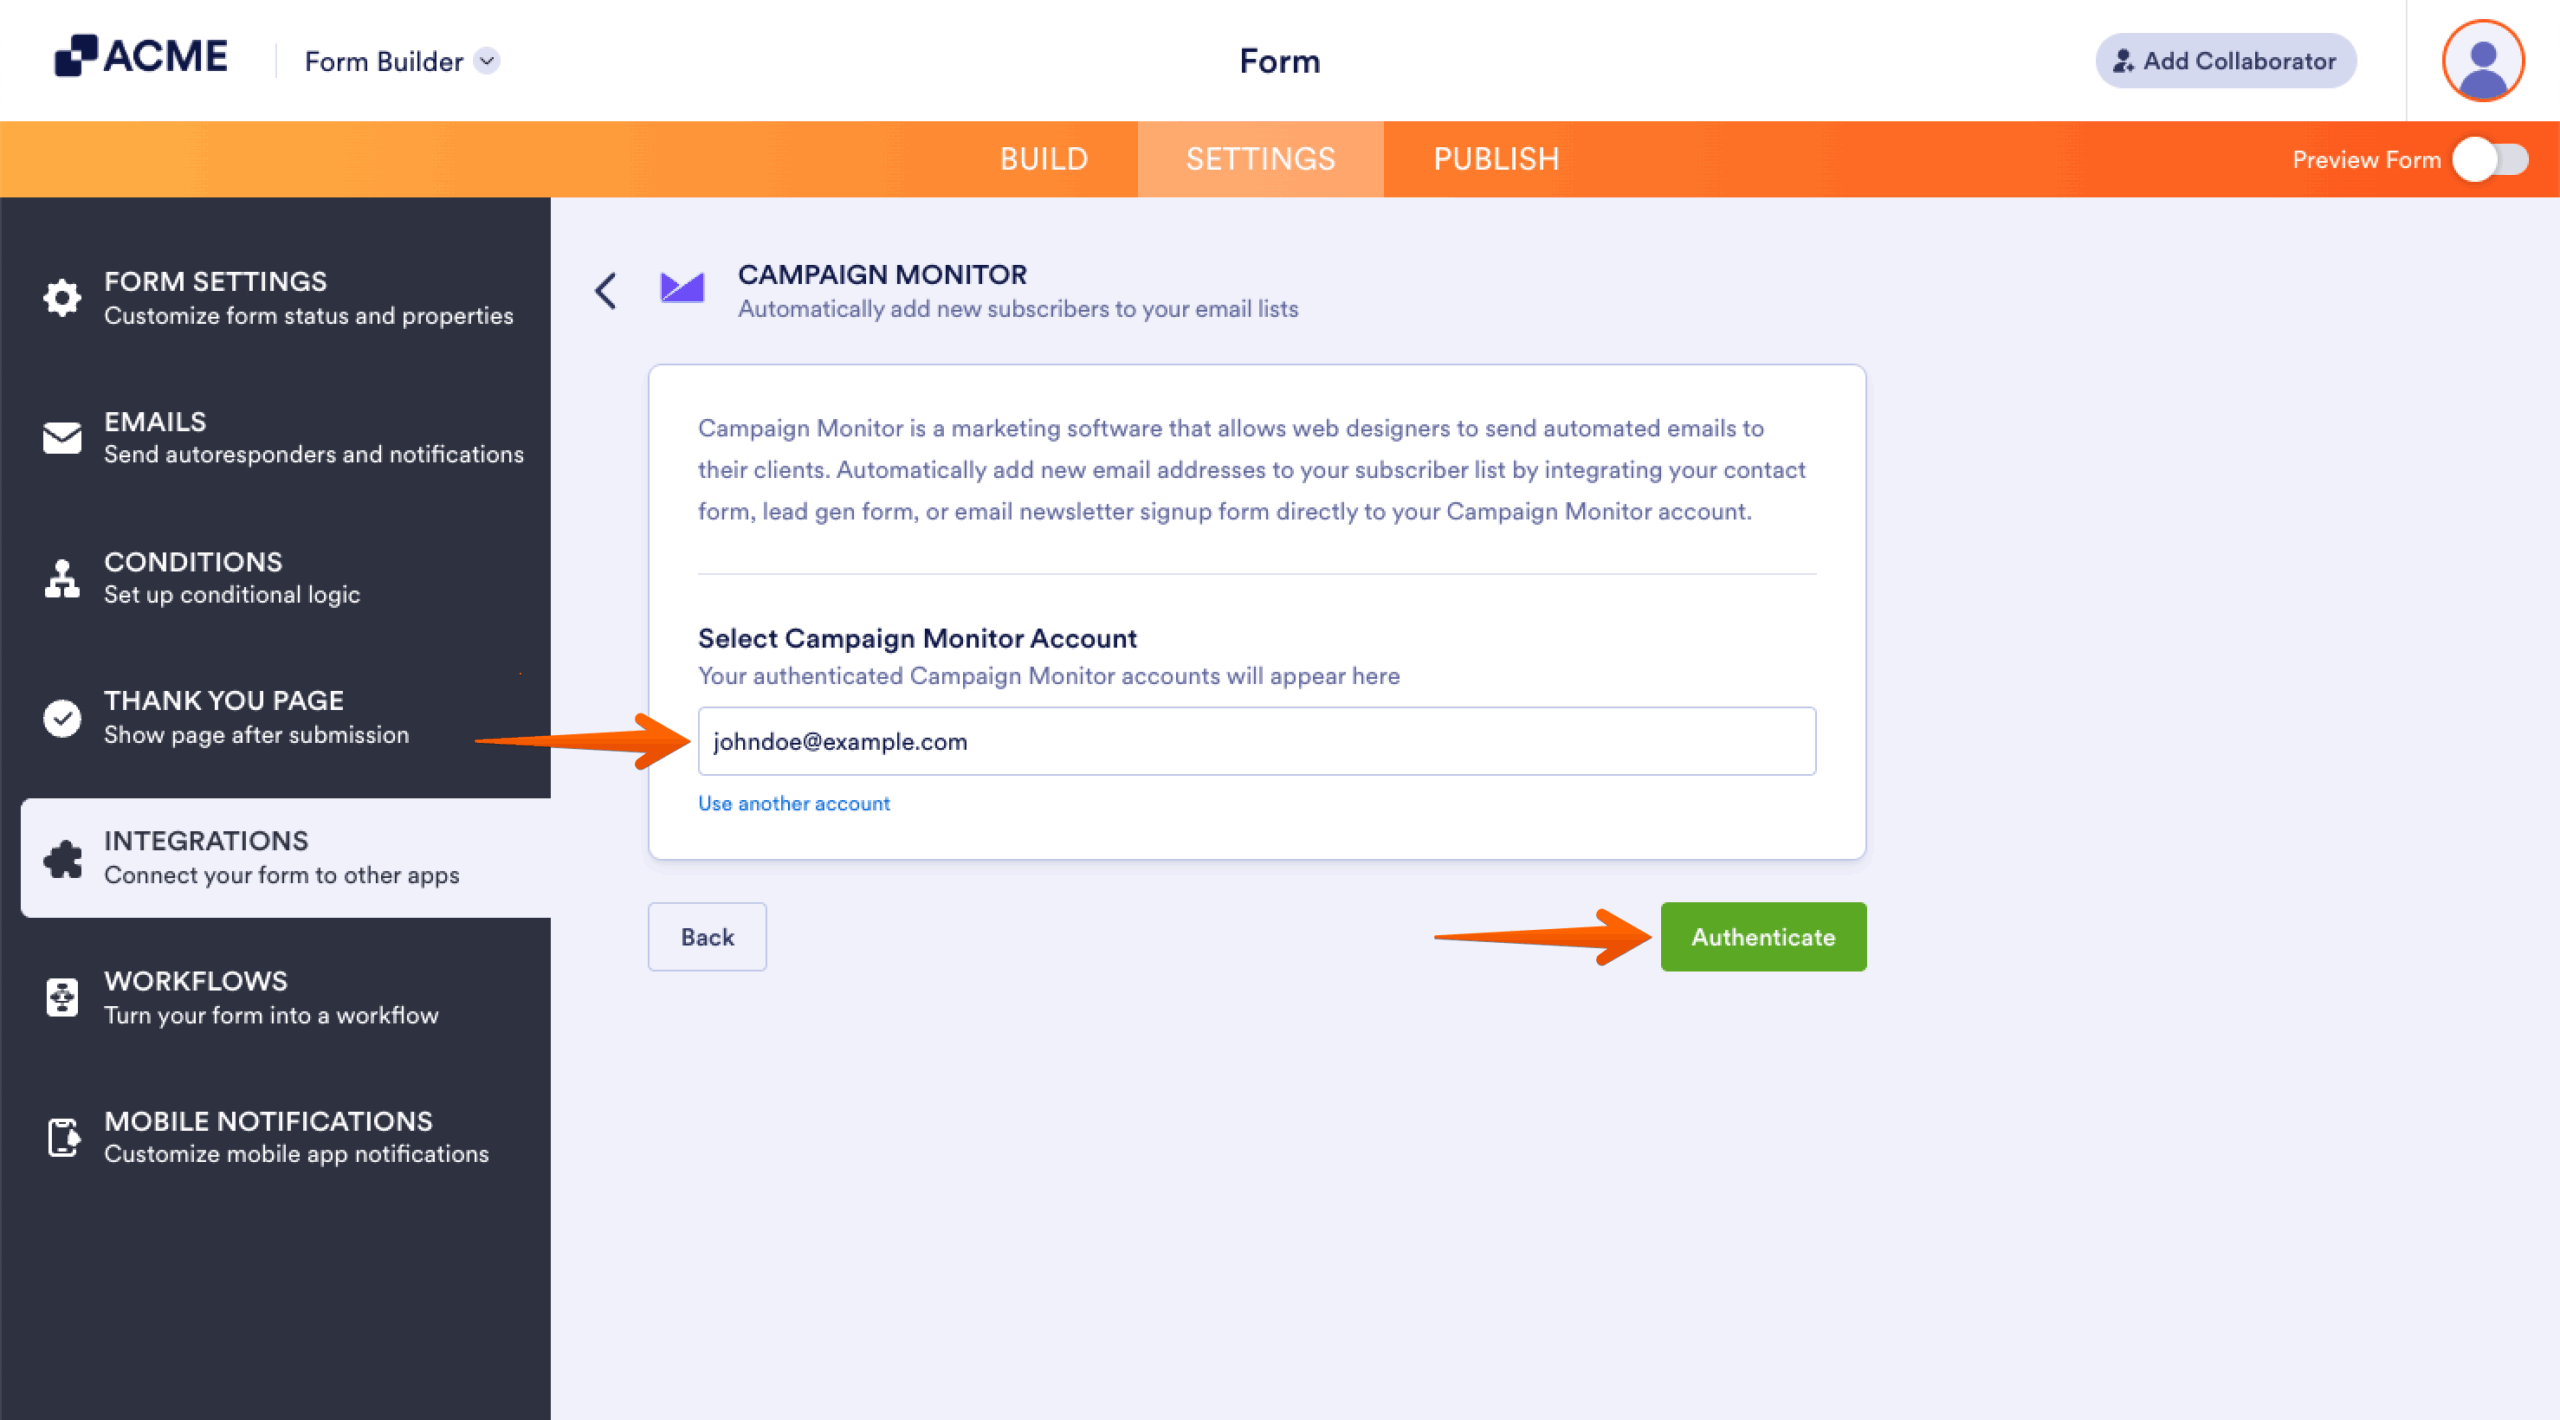
For previously authenticated accounts, choose the account to use, then click the Authenticate button.
- Now set up your integrations accordingly:
- Choose a Client — Select the specific client account within Campaign Monitor where you want to manage your subscriber list.
- Choose a List — Pick the subscriber list where you want new contacts from your form to be added automatically.
- Match your Fields — Map the form fields on your form to the corresponding fields in Campaign Monitor, ensuring accurate data transfer.
- Update Existing Contact — Enable this option to automatically update details for any existing subscriber in the selected list when new information is submitted.
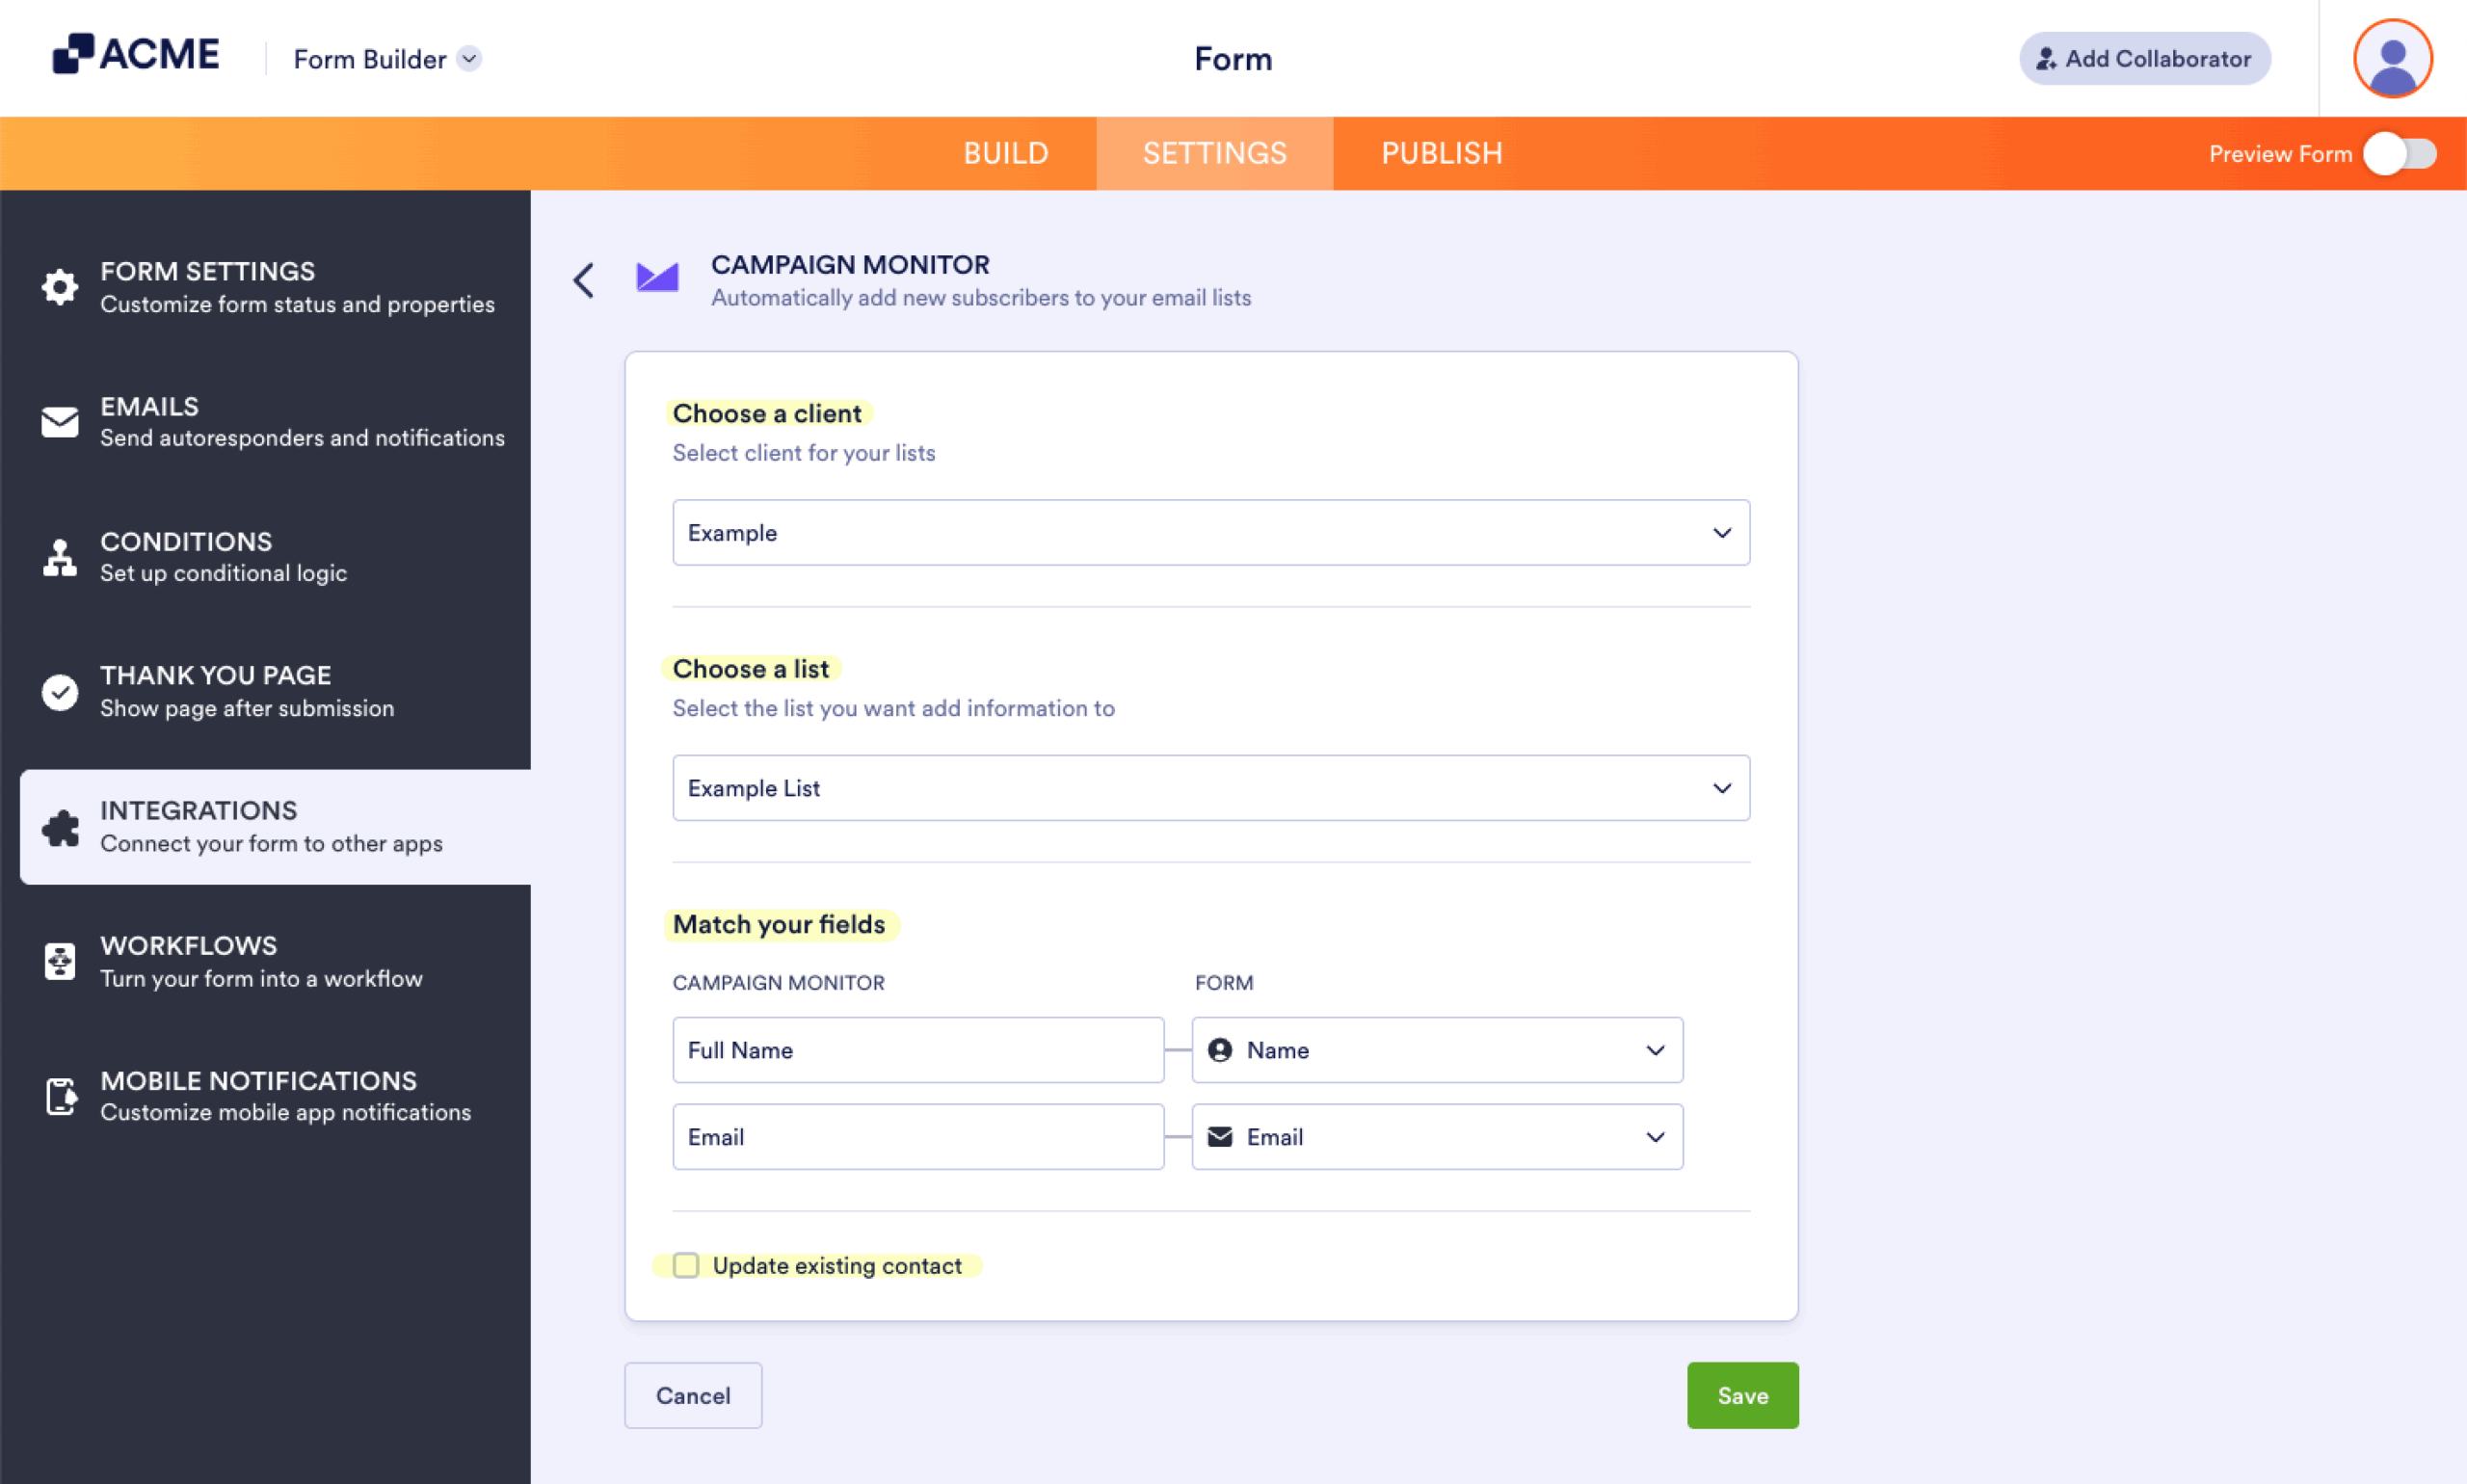
Note: By default, Campaign Monitor forms include only the Name and Email fields. To map additional fields, you’ll need to edit your Campaign Monitor form and add Custom Fields. For more details, check out the guide on Custom Field Types.
- Finally, click the Save button to complete the integration.
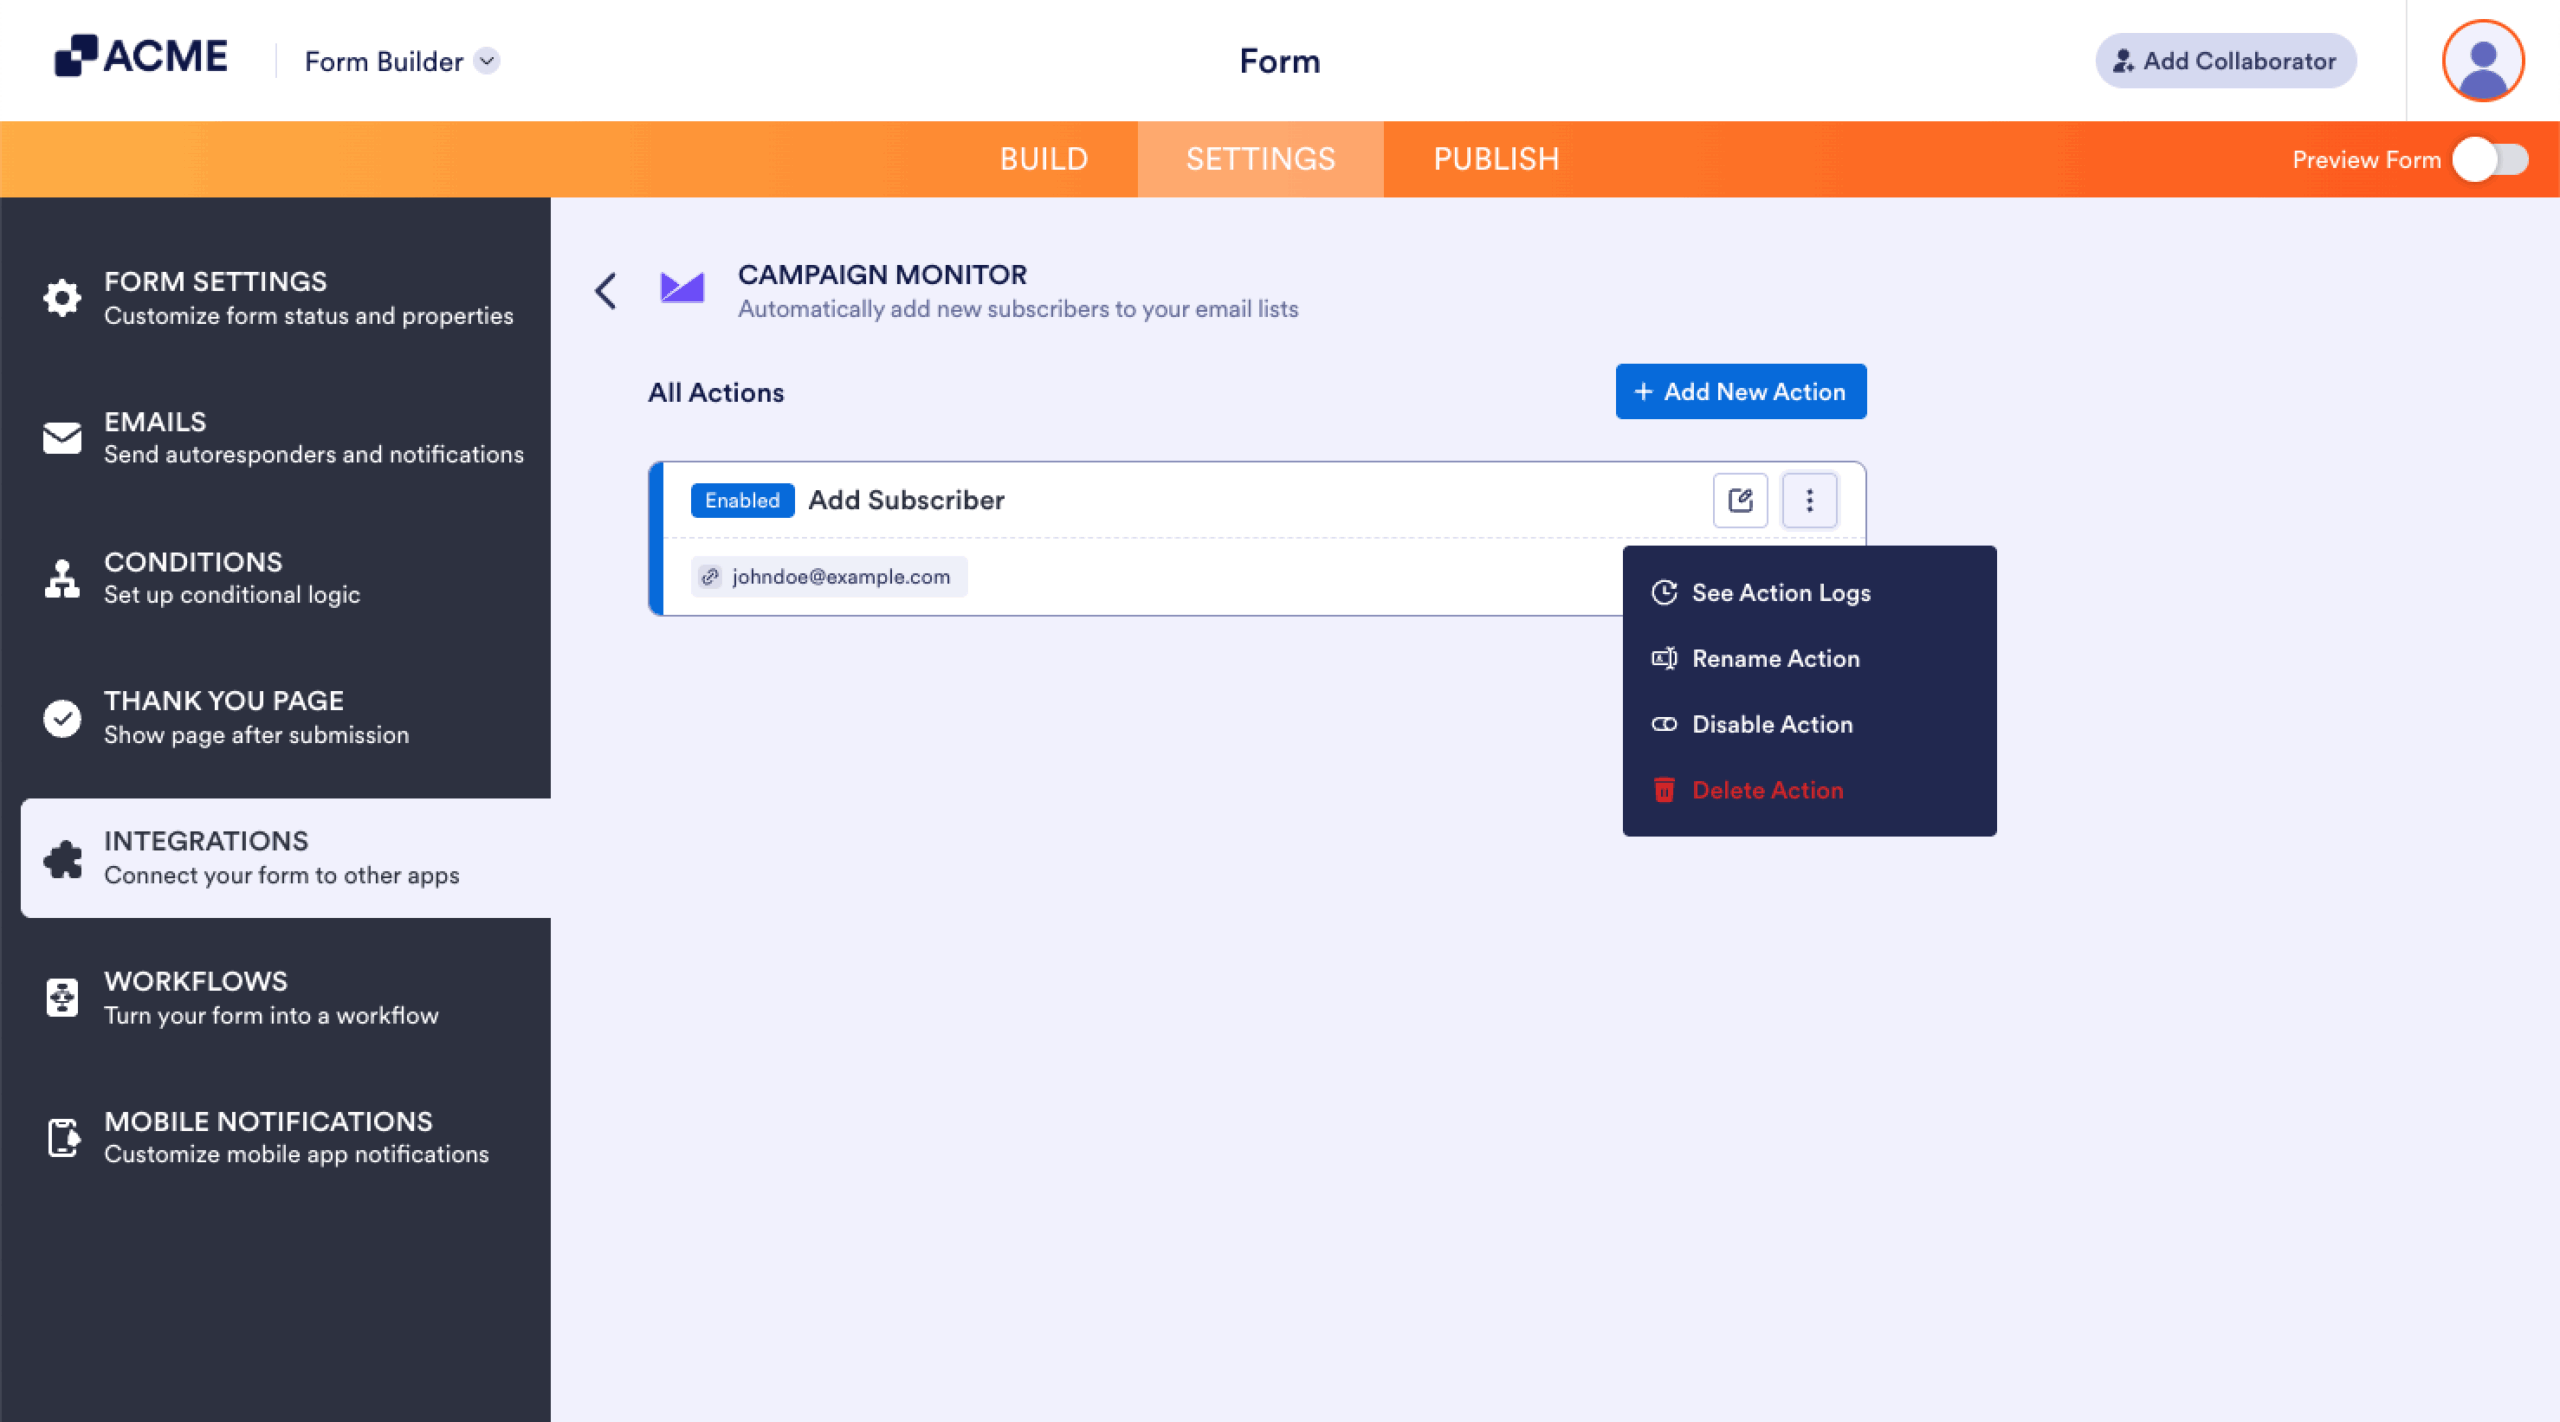
After saving the integration, you can see the list of actions you created and the Add New Action button on the main page. If you hover your mouse over the created action, you’ll see the Edit Action (pencil icon) and the More (three-dotted vertical icon) options to the right. The More option includes the following:
- See Action Logs — This section will display your Campaign Monitor successful and failed runs. It’s useful when troubleshooting issues.
- Rename Action — If you want to personalize the action’s title.
- Disable Action — This option is useful to temporarily stop the integration from sending data.
- Delete Action — If you want to delete the action/integration from your form.

Send Comment: