When you create a form, a Notification Email is automatically created as soon as you add the first field, using your account email as the default recipient. The same applies when you manually set up Notification Emails.
Over time, you might need to change that—maybe the original address belongs to a colleague or client who no longer needs alerts, or you’re handing things off to someone else and want the alerts to go to them instead. Whether you’re replacing the default or updating an existing setup, you can change the recipient email at any time to make sure notifications go to the right person.
Changing the email address for your Notification Emails is easy. Here’s how to do it:
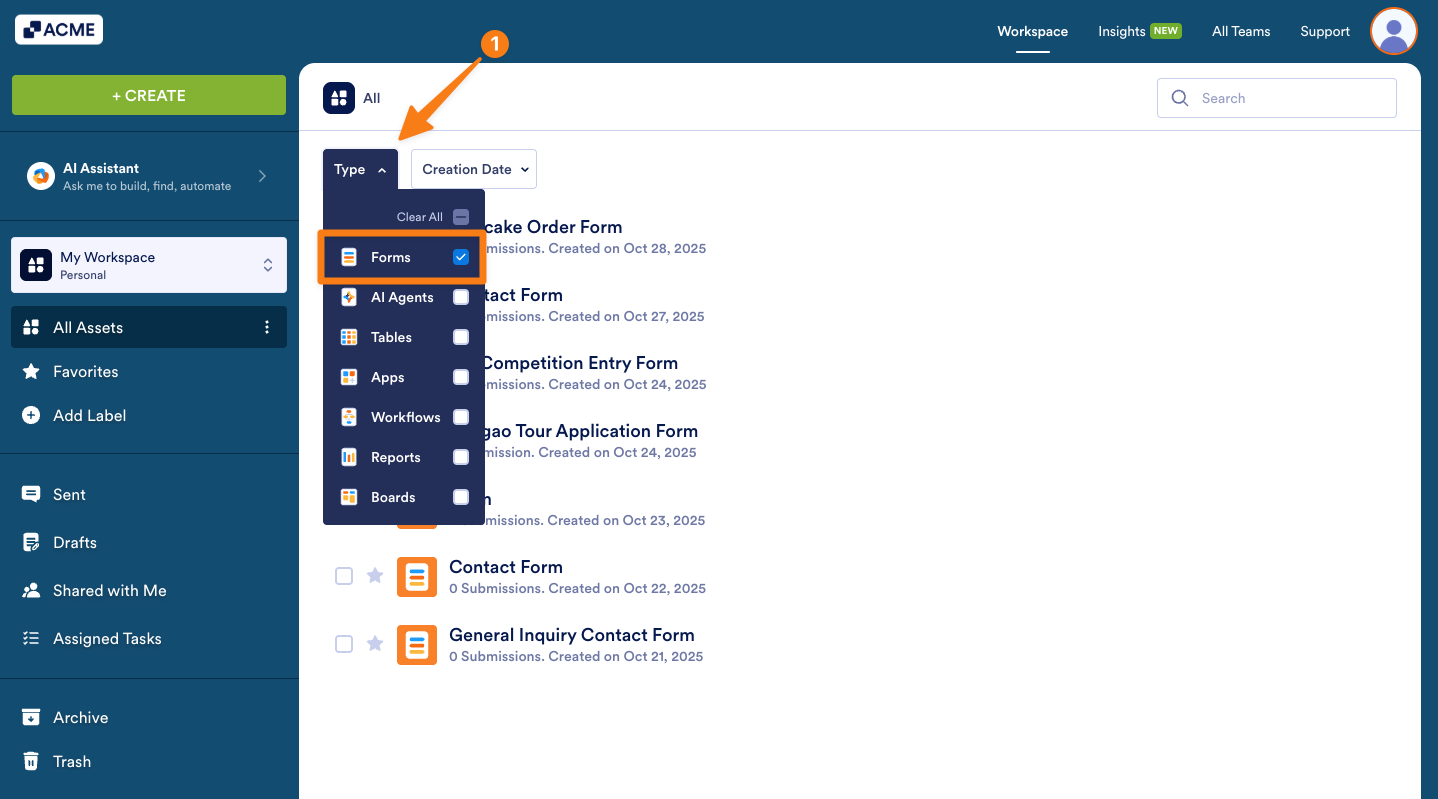
- On your Workspace page, click on Type at the top and in the Dropdown menu that opens, uncheck the boxes next to all the assets except Forms, so only they’ll be shown on the page.
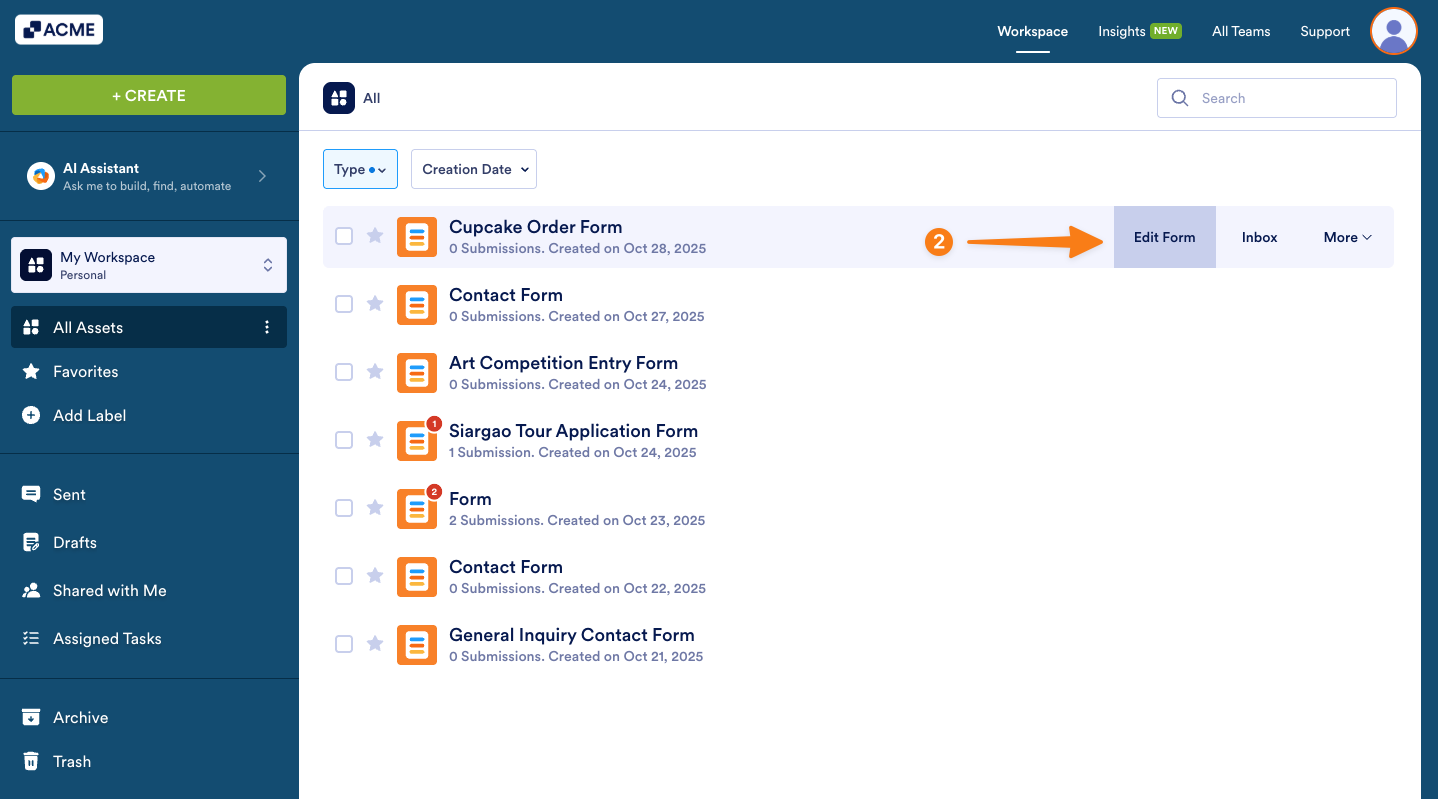
- Hover your mouse over the form you want to update the Notification Email recipient for, and click on Edit Form on the right side of the page.
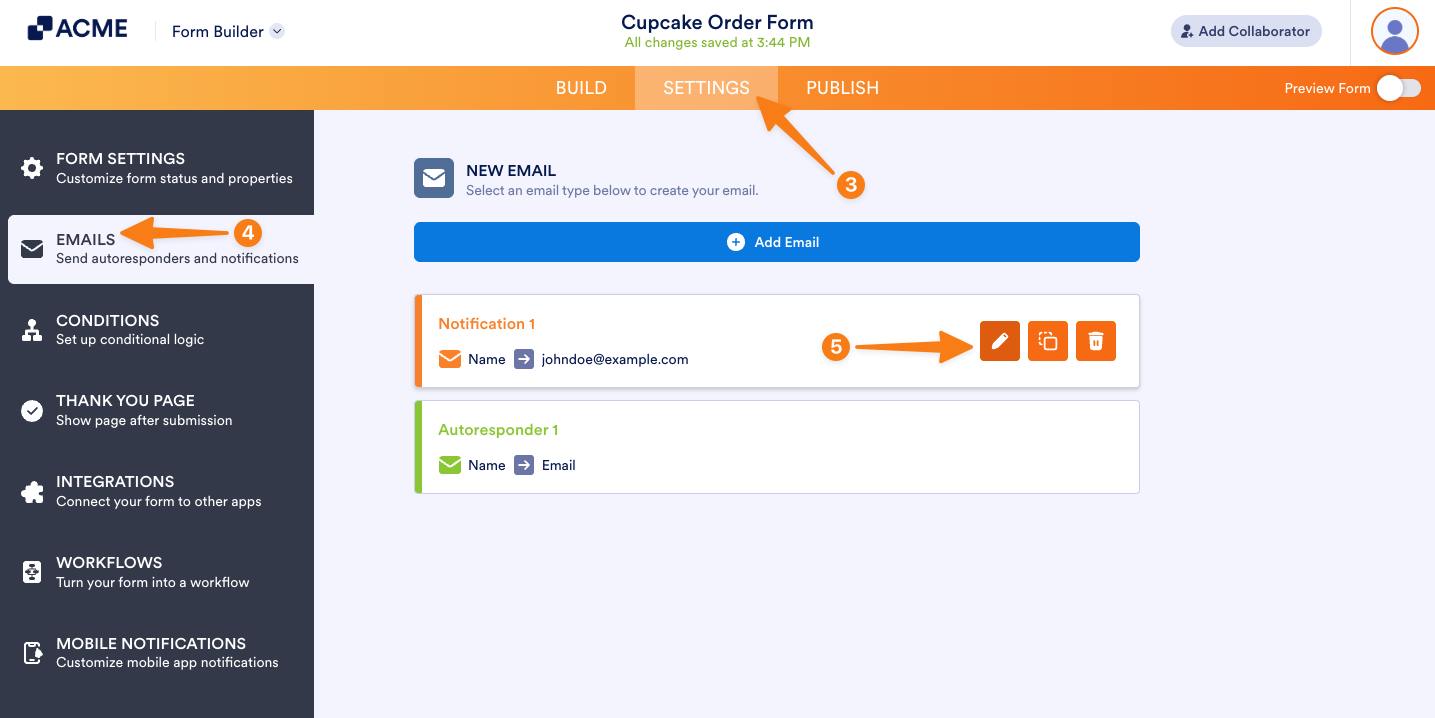
- Now, in Form Builder, in the orange navigation bar at the top of the page, click on Settings.
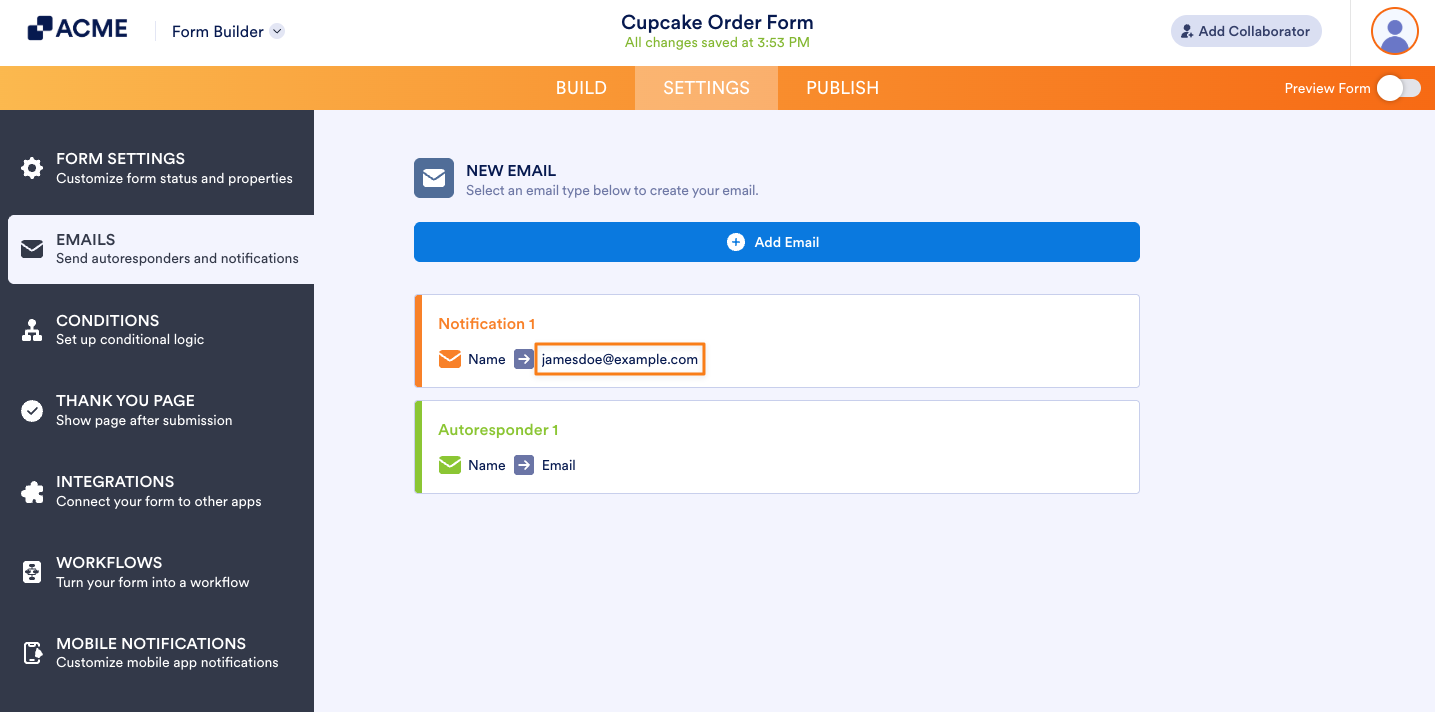
- Then, click on Emails in the menu on the left.
- Hover your mouse over the Notification Email and click on the Pencil icon to edit it.
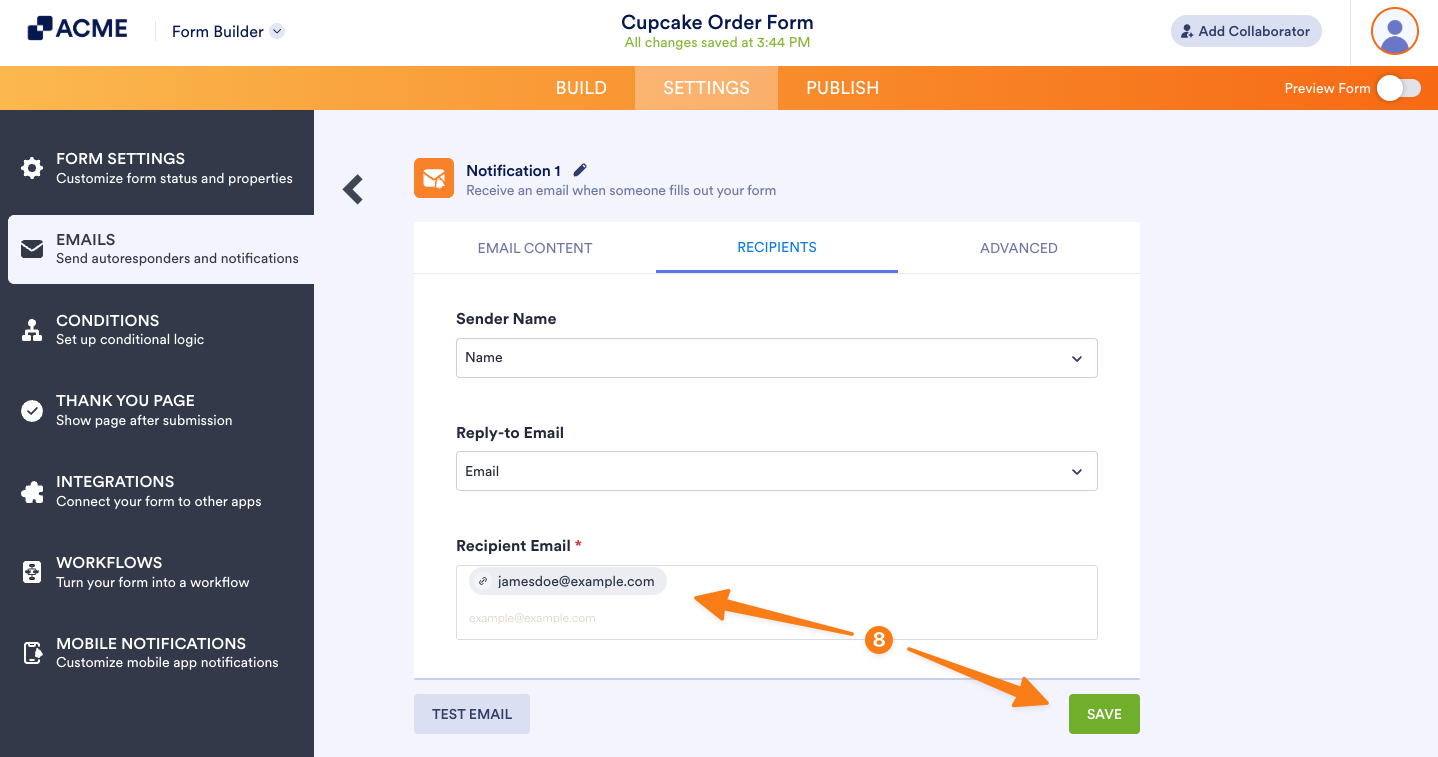
- Now, go to the Recipients tab.
- Then, in the Recipient Email field, hover your mouse over the old email address and click on the X on the right side of it, to delete it.
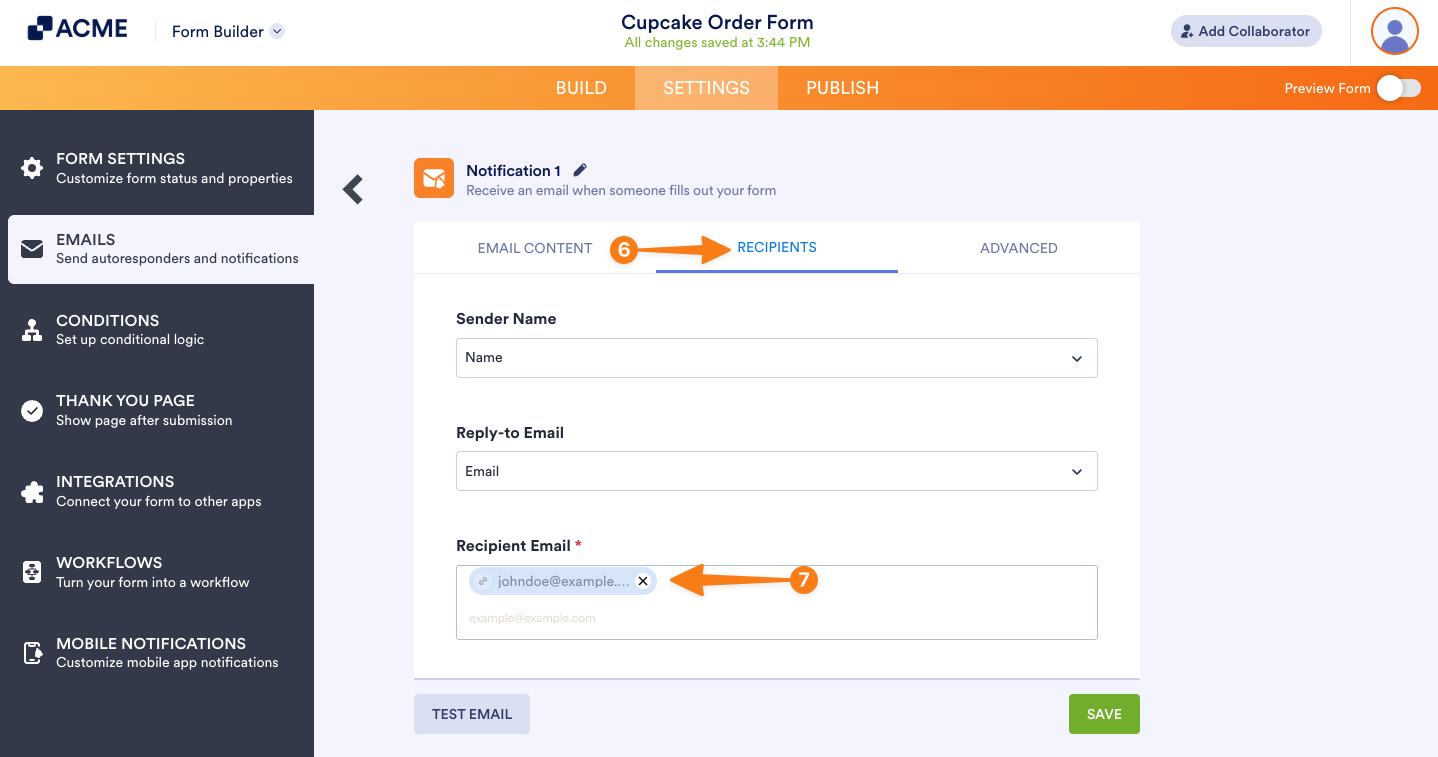
- Finally, add a new one in the Recipient Email field, and then click on Save.
That’s it. Now, you’ve updated the recipient for your form’s Notification Email.
Note: To test your Notification Email after updating the recipient address, use the Preview Form button in Form Builder instead of the Test Email button in the Notification Email settings. The Test Email button always sends to the email address linked to your account, even if you’ve already changed the recipient. You can check our guide on How to Properly Add, Change, and Test a New Notification Email Recipient Address to learn more.

Send Comment: