Editing your Notification Email and Autoresponder Email settings allows you to customize how form submission emails are sent to both recipients and form respondents. From updating the subject line and content to adjusting the recipients and setting up triggers for when emails are sent, you have full control over your form submission emails. You can also manage settings for sending attachments and configure a custom sender email, ensuring your emails align with your communication style and meet your needs.
Follow these steps to edit the Notification Emails and Autoresponder Emails set up on your form:
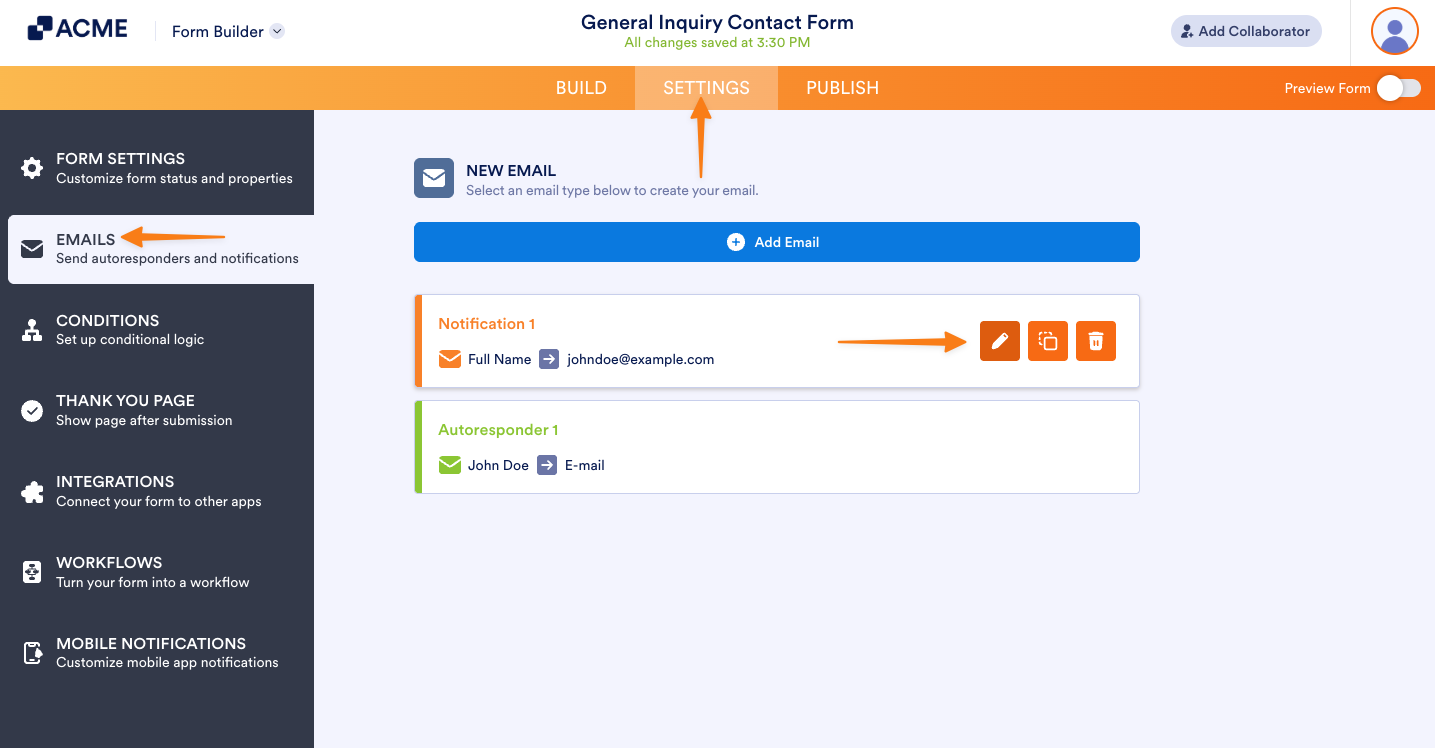
- In Form Builder, click on the Settings tab.
- Then, click on the Emails tab on the left side of the page.
- Hover your mouse over an email template and click the Pencil icon on the right. This will open the email settings.
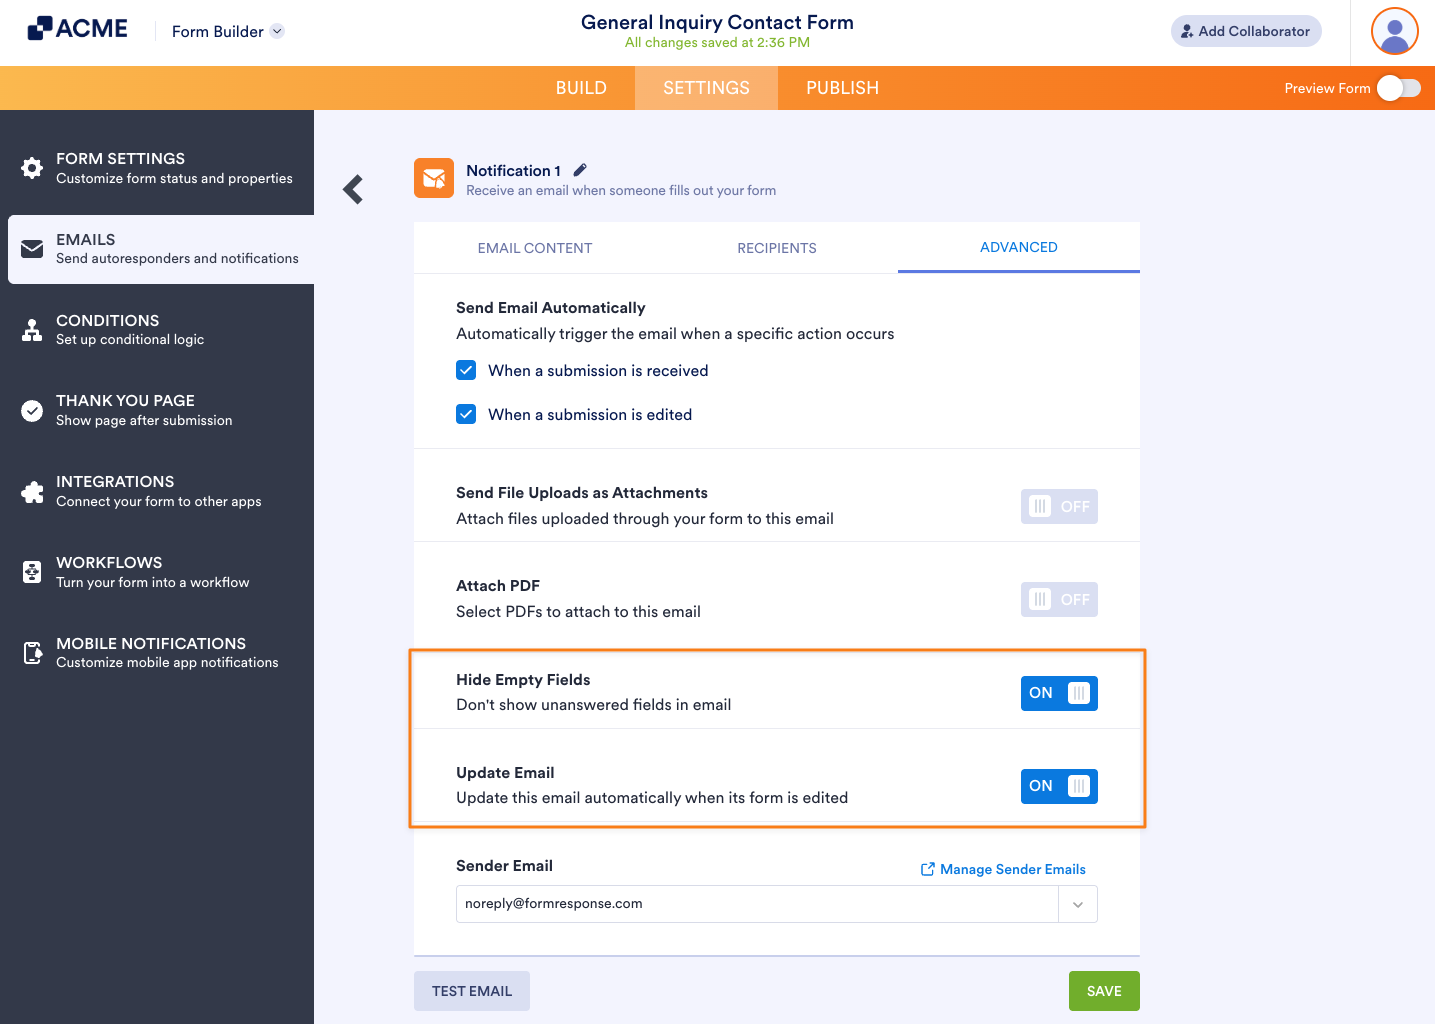
- Update each setting under the Email, Recipients, and Advanced tabs to match your preferences. See Explanation of Email Notification and Autoresponder Settings for more details.
- Click on Save once you’re done to apply your changes.
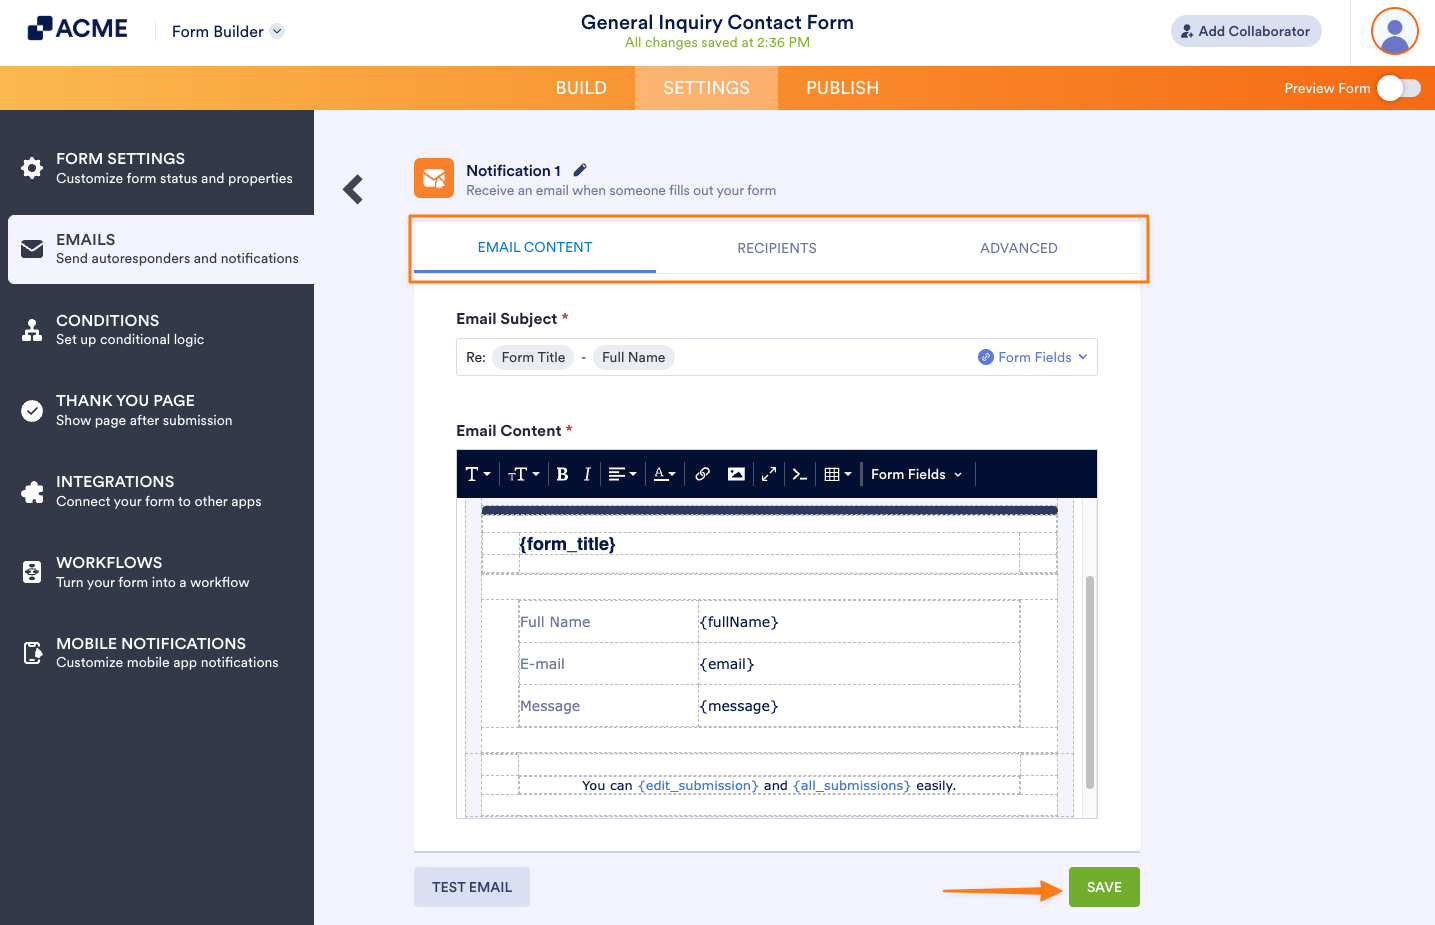
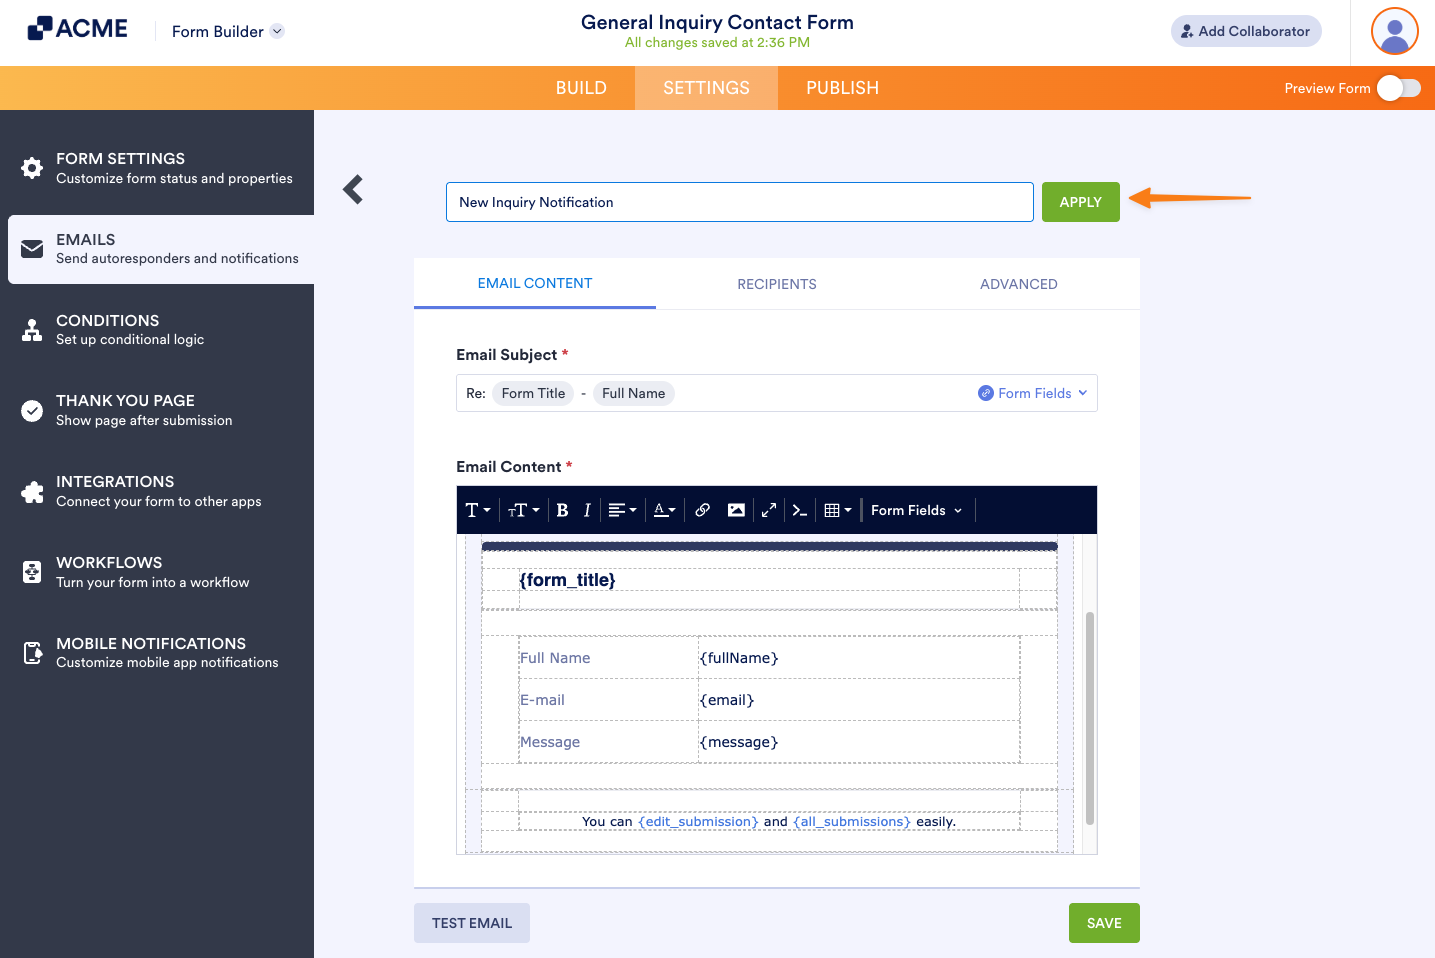
The default submission data table in the Email Content section of the Email tab displays form field labels alongside their respective field tags. When the email is sent after form submission, the table is automatically populated with the submitted data. By default, empty fields are excluded, and the table updates automatically when fields are added to or removed from your form. You can adjust this setup by changing the Hide Empty Fields and Update Email settings in the Advanced tab. These settings, however, no longer apply if the submission data table is altered.
You can rename the email templates saved on your form to identify their purpose or function easily. While in the email settings click on the Pencil icon next to the email template name to start editing it.
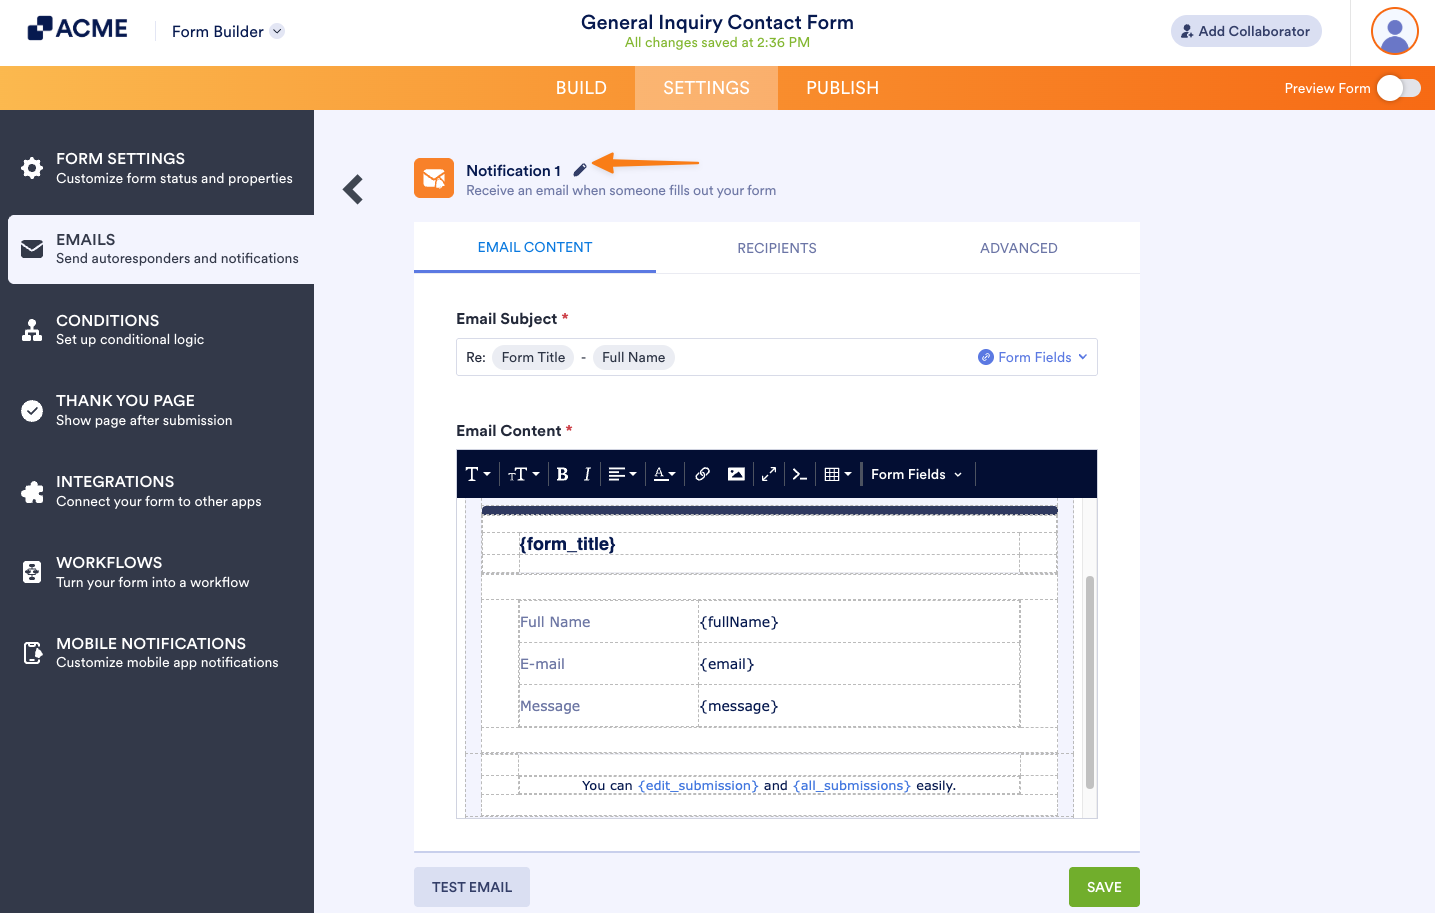
Enter a new name for your email template then click on the Apply button on the right. Don’t forget to click on the Save button at the bottom of the email settings to apply your changes.

Send Comment: