Did you know you can also use this platform as a simple email campaign solution? Suppose you want to:
- Send an automated reply to them right after submitting the form. This serves as a confirmation that you received their submission.
- Send a follow-up email campaign after seven days.
- Then, one more email after 14 days.
On top of that, did you also know that you can create email template designs using HTML/CSS? If not, then this guide will discuss these two ideas:
How to Schedule Your Autoresponders
First, you should decide when to send your email campaigns. If you’re planning to send two emails within a week interval, you would need two Autoresponders – the first one will be sent right away, and the other will be sent seven days later.
Here are the steps to set up the schedule:
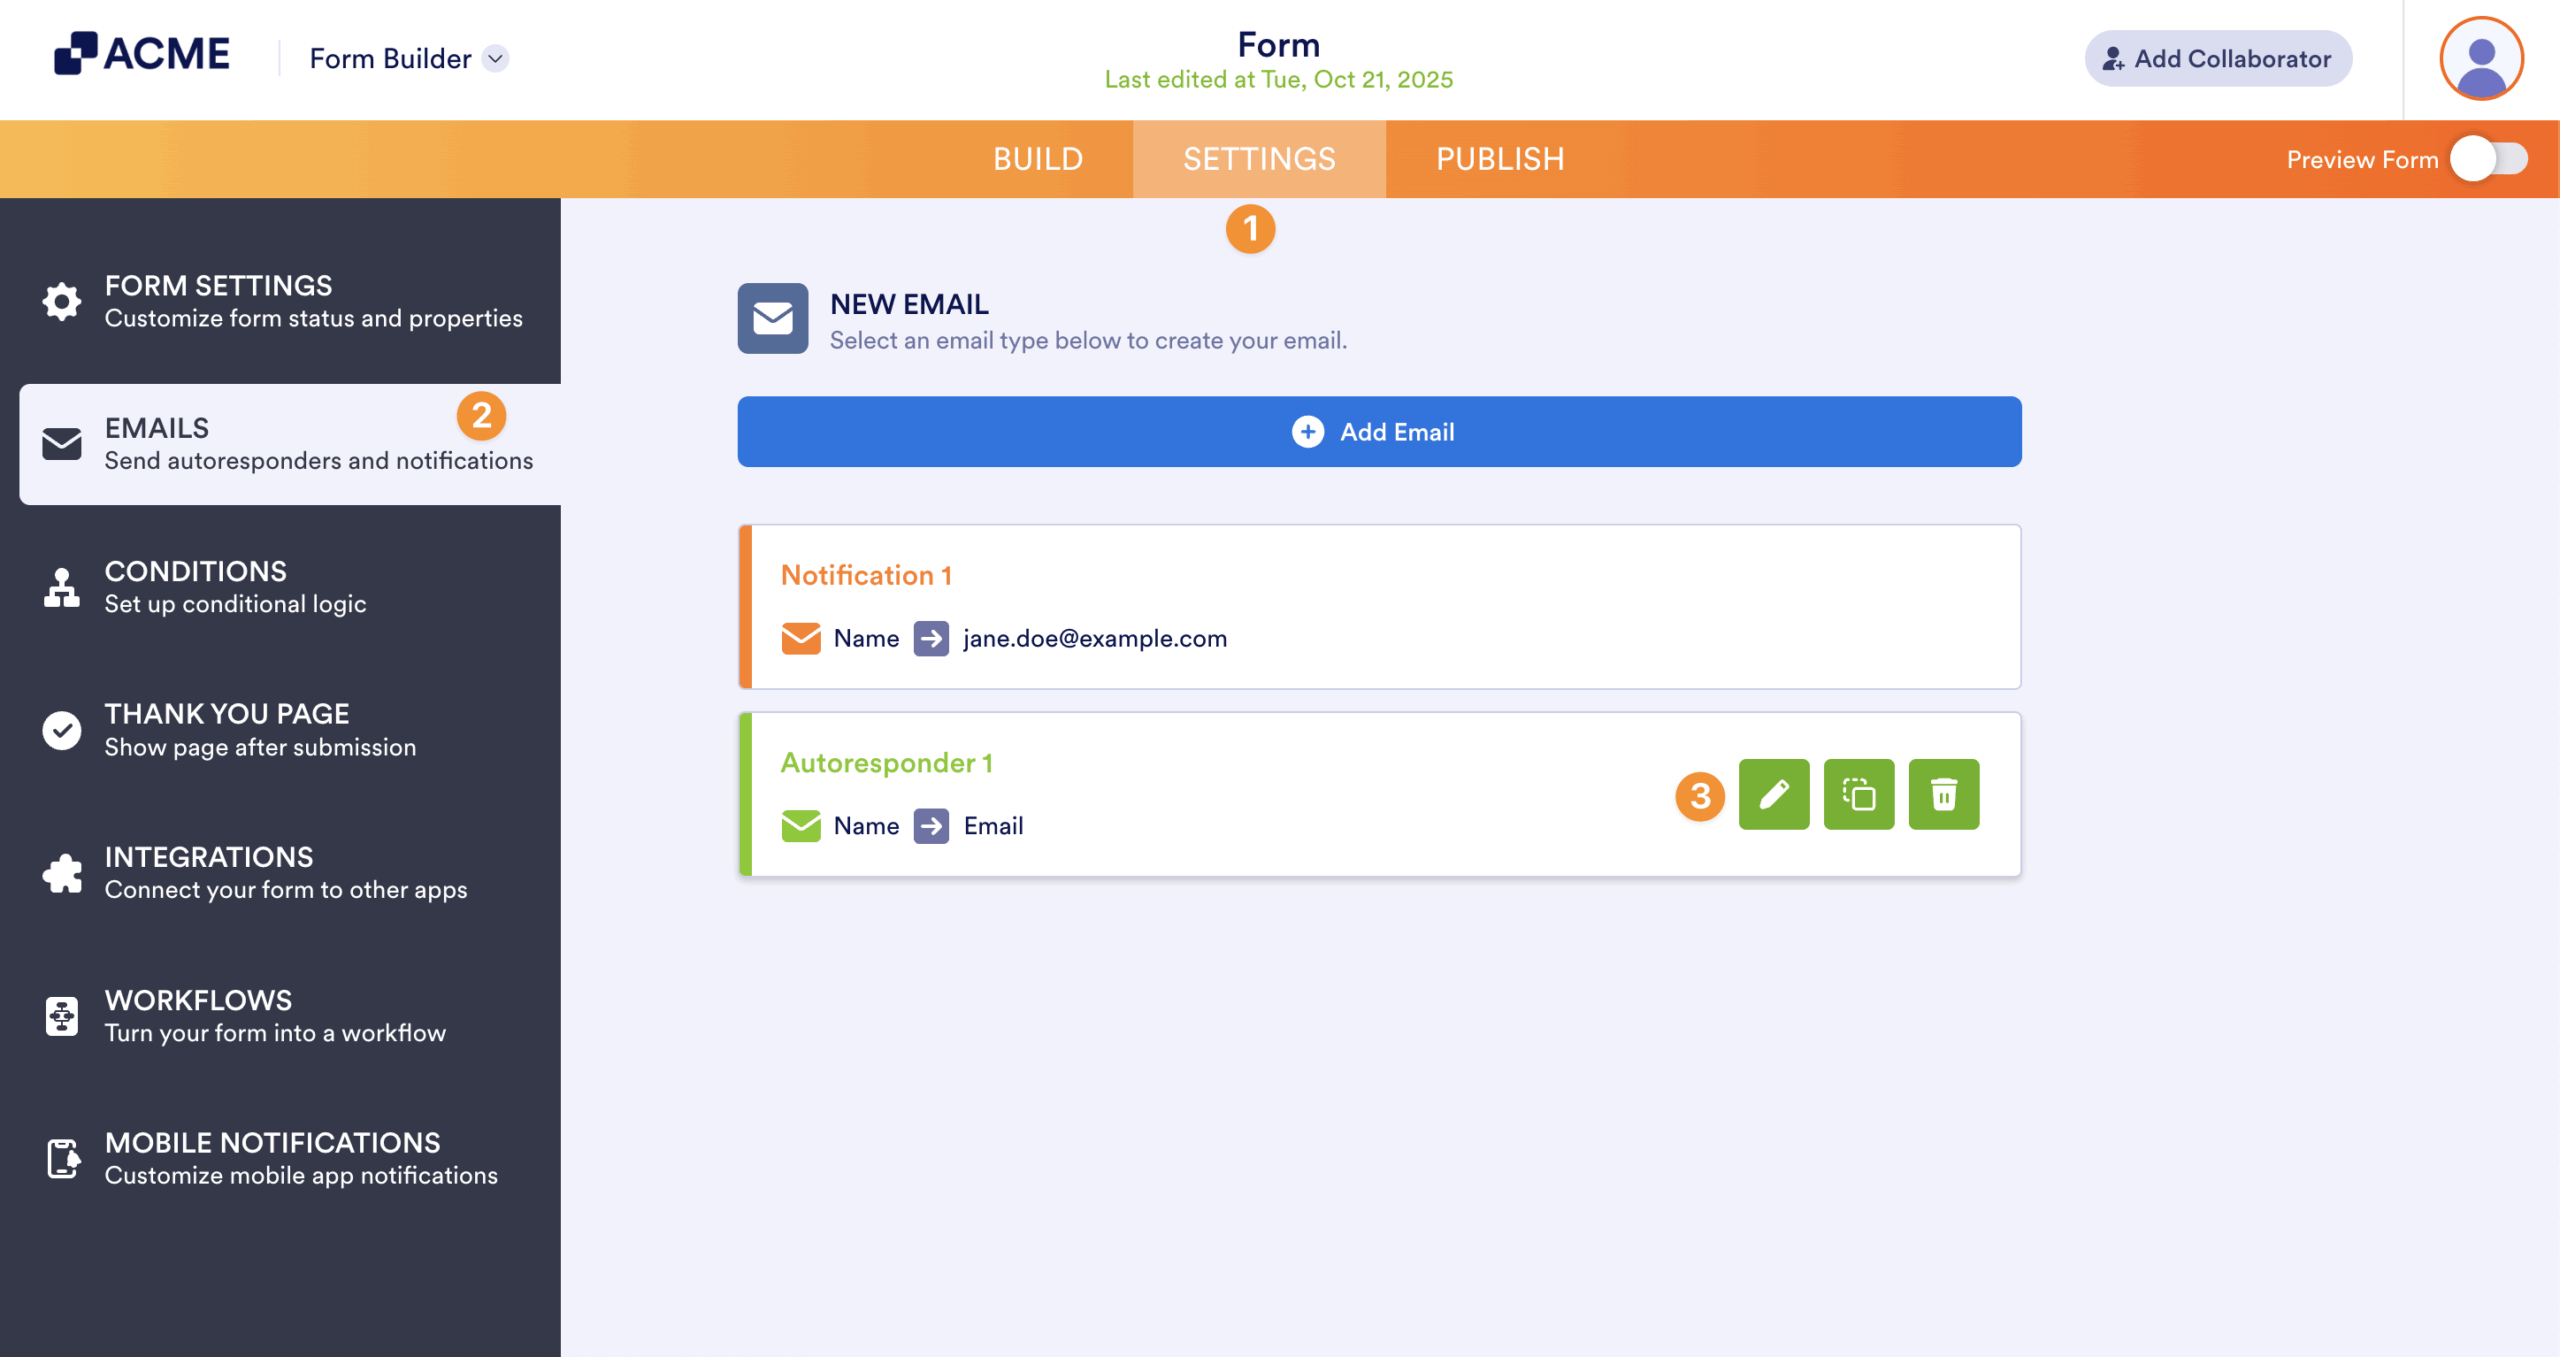
- In the Form Builder, go to the Settings tab.
- Select Emails on the left panel.
- Hover your mouse to the Autoresponder email, and click the Pencil icon to edit.
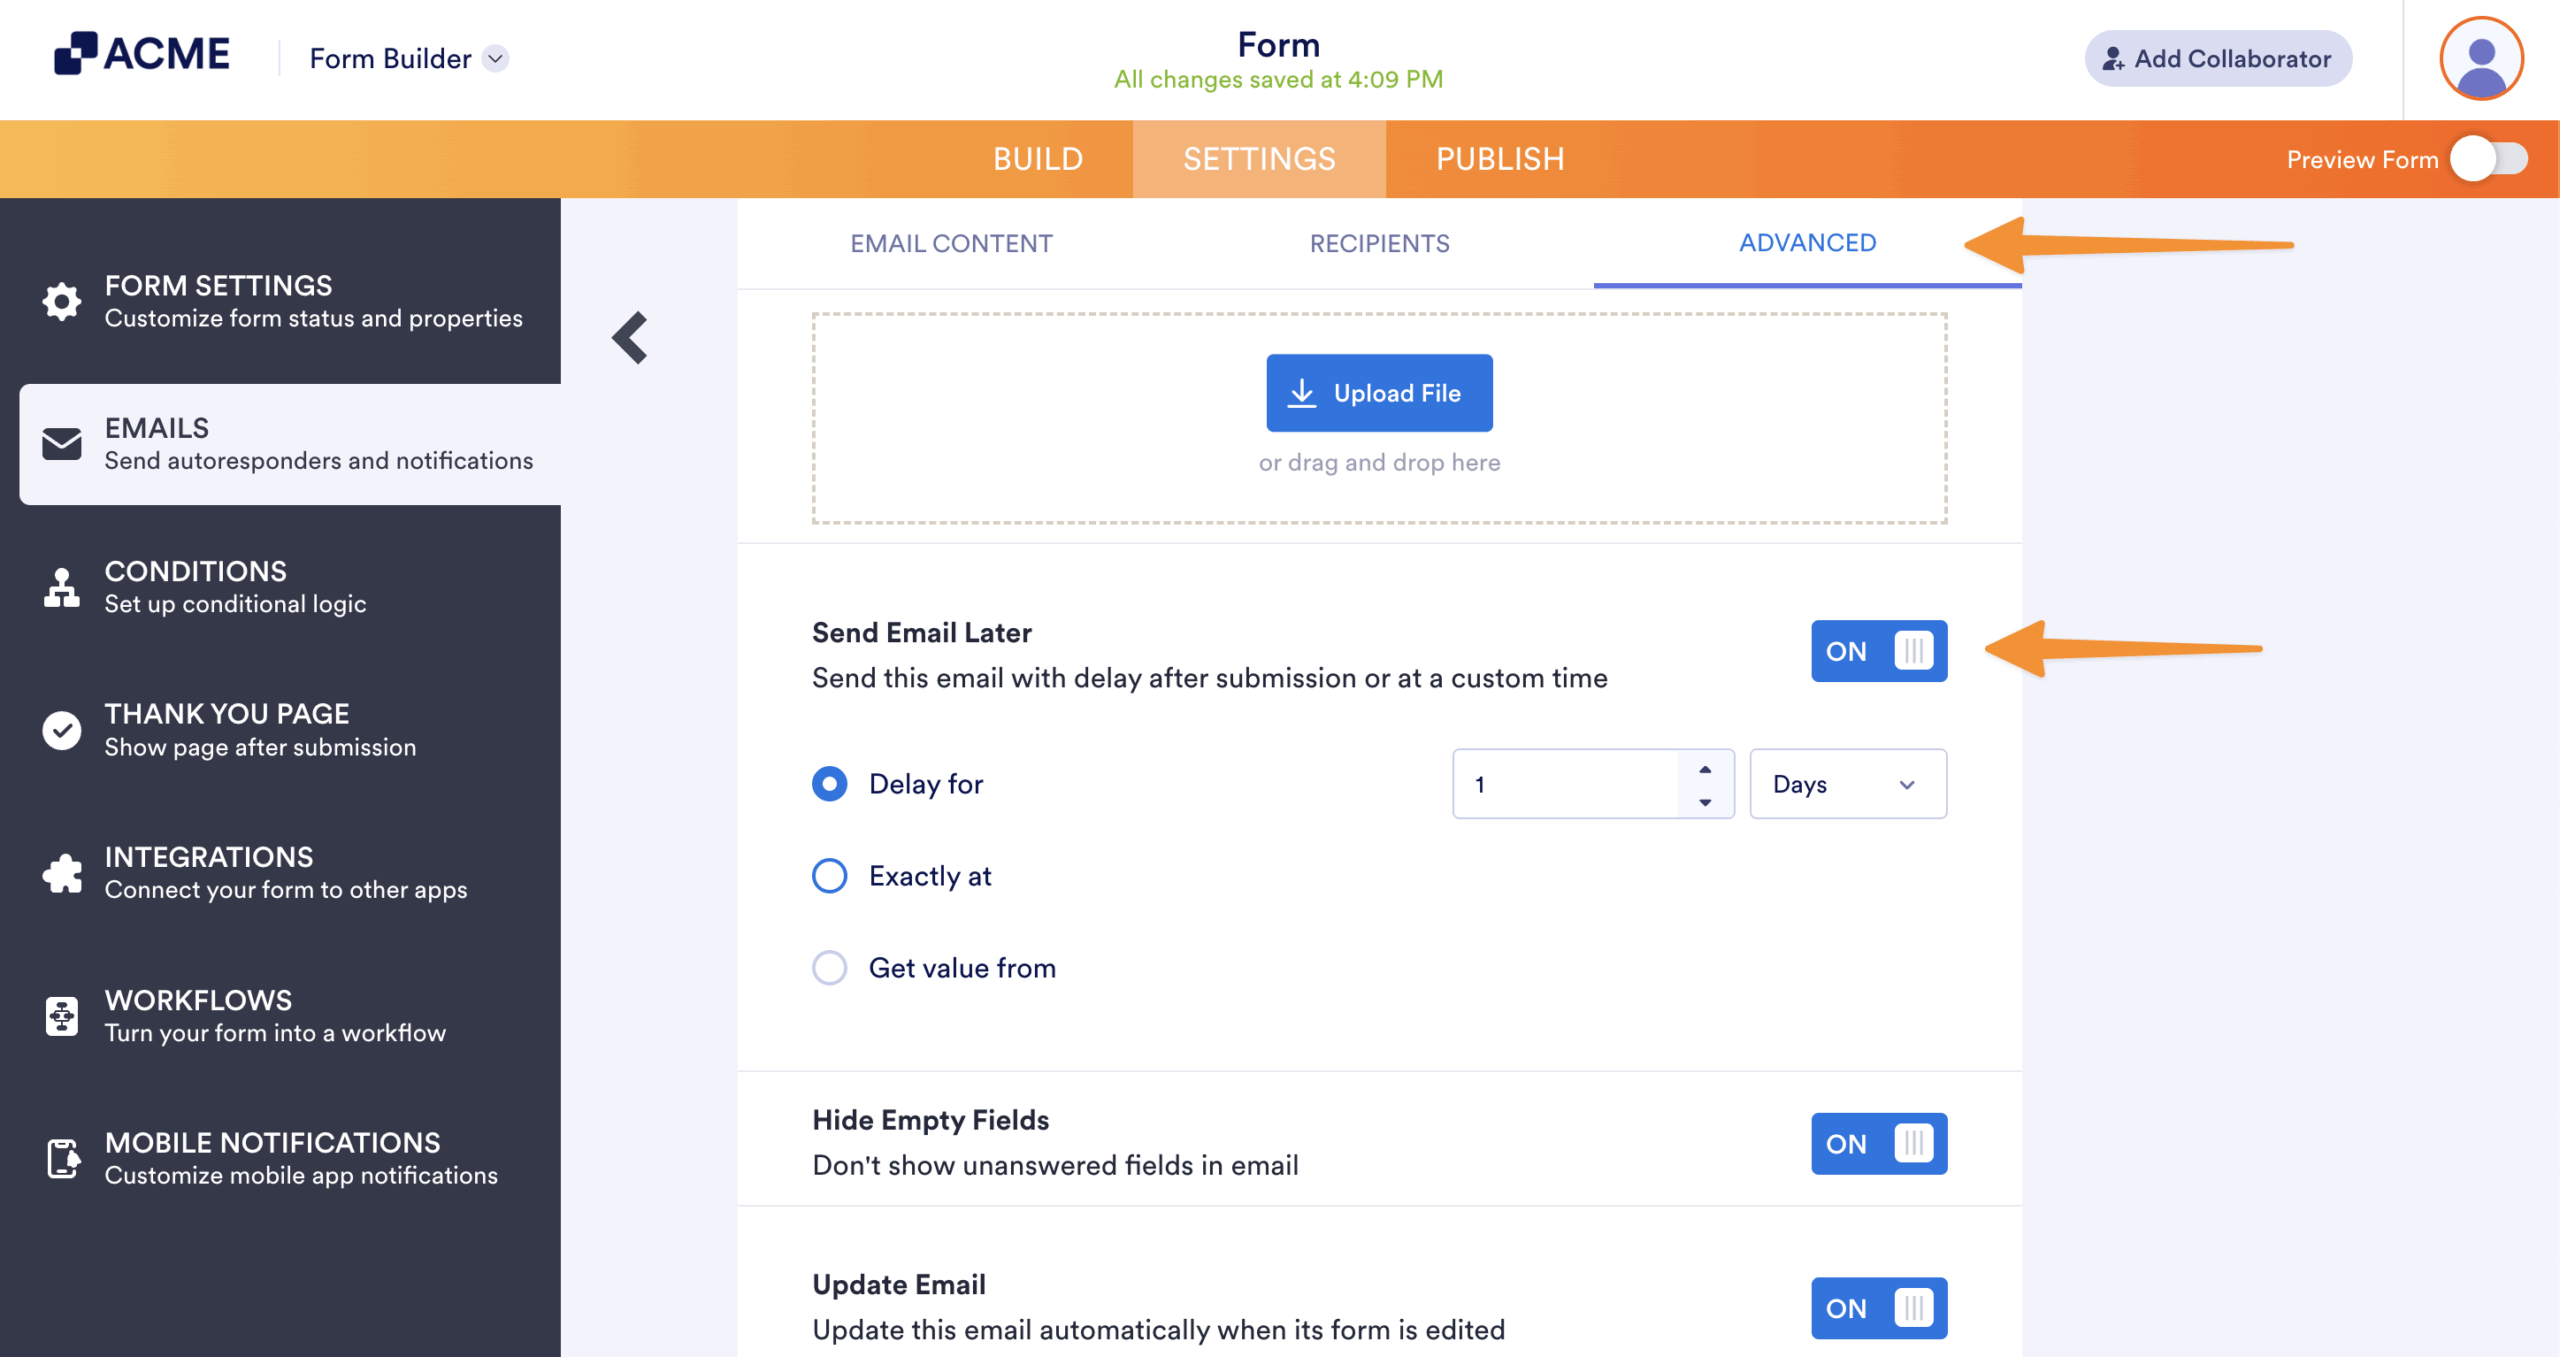
- Under the Advanced tab, set your desired schedule through the Send Emails Later option. In the list, you can choose from the following options:
- Delay for — The email will be delayed by {n} days or {n} hours.
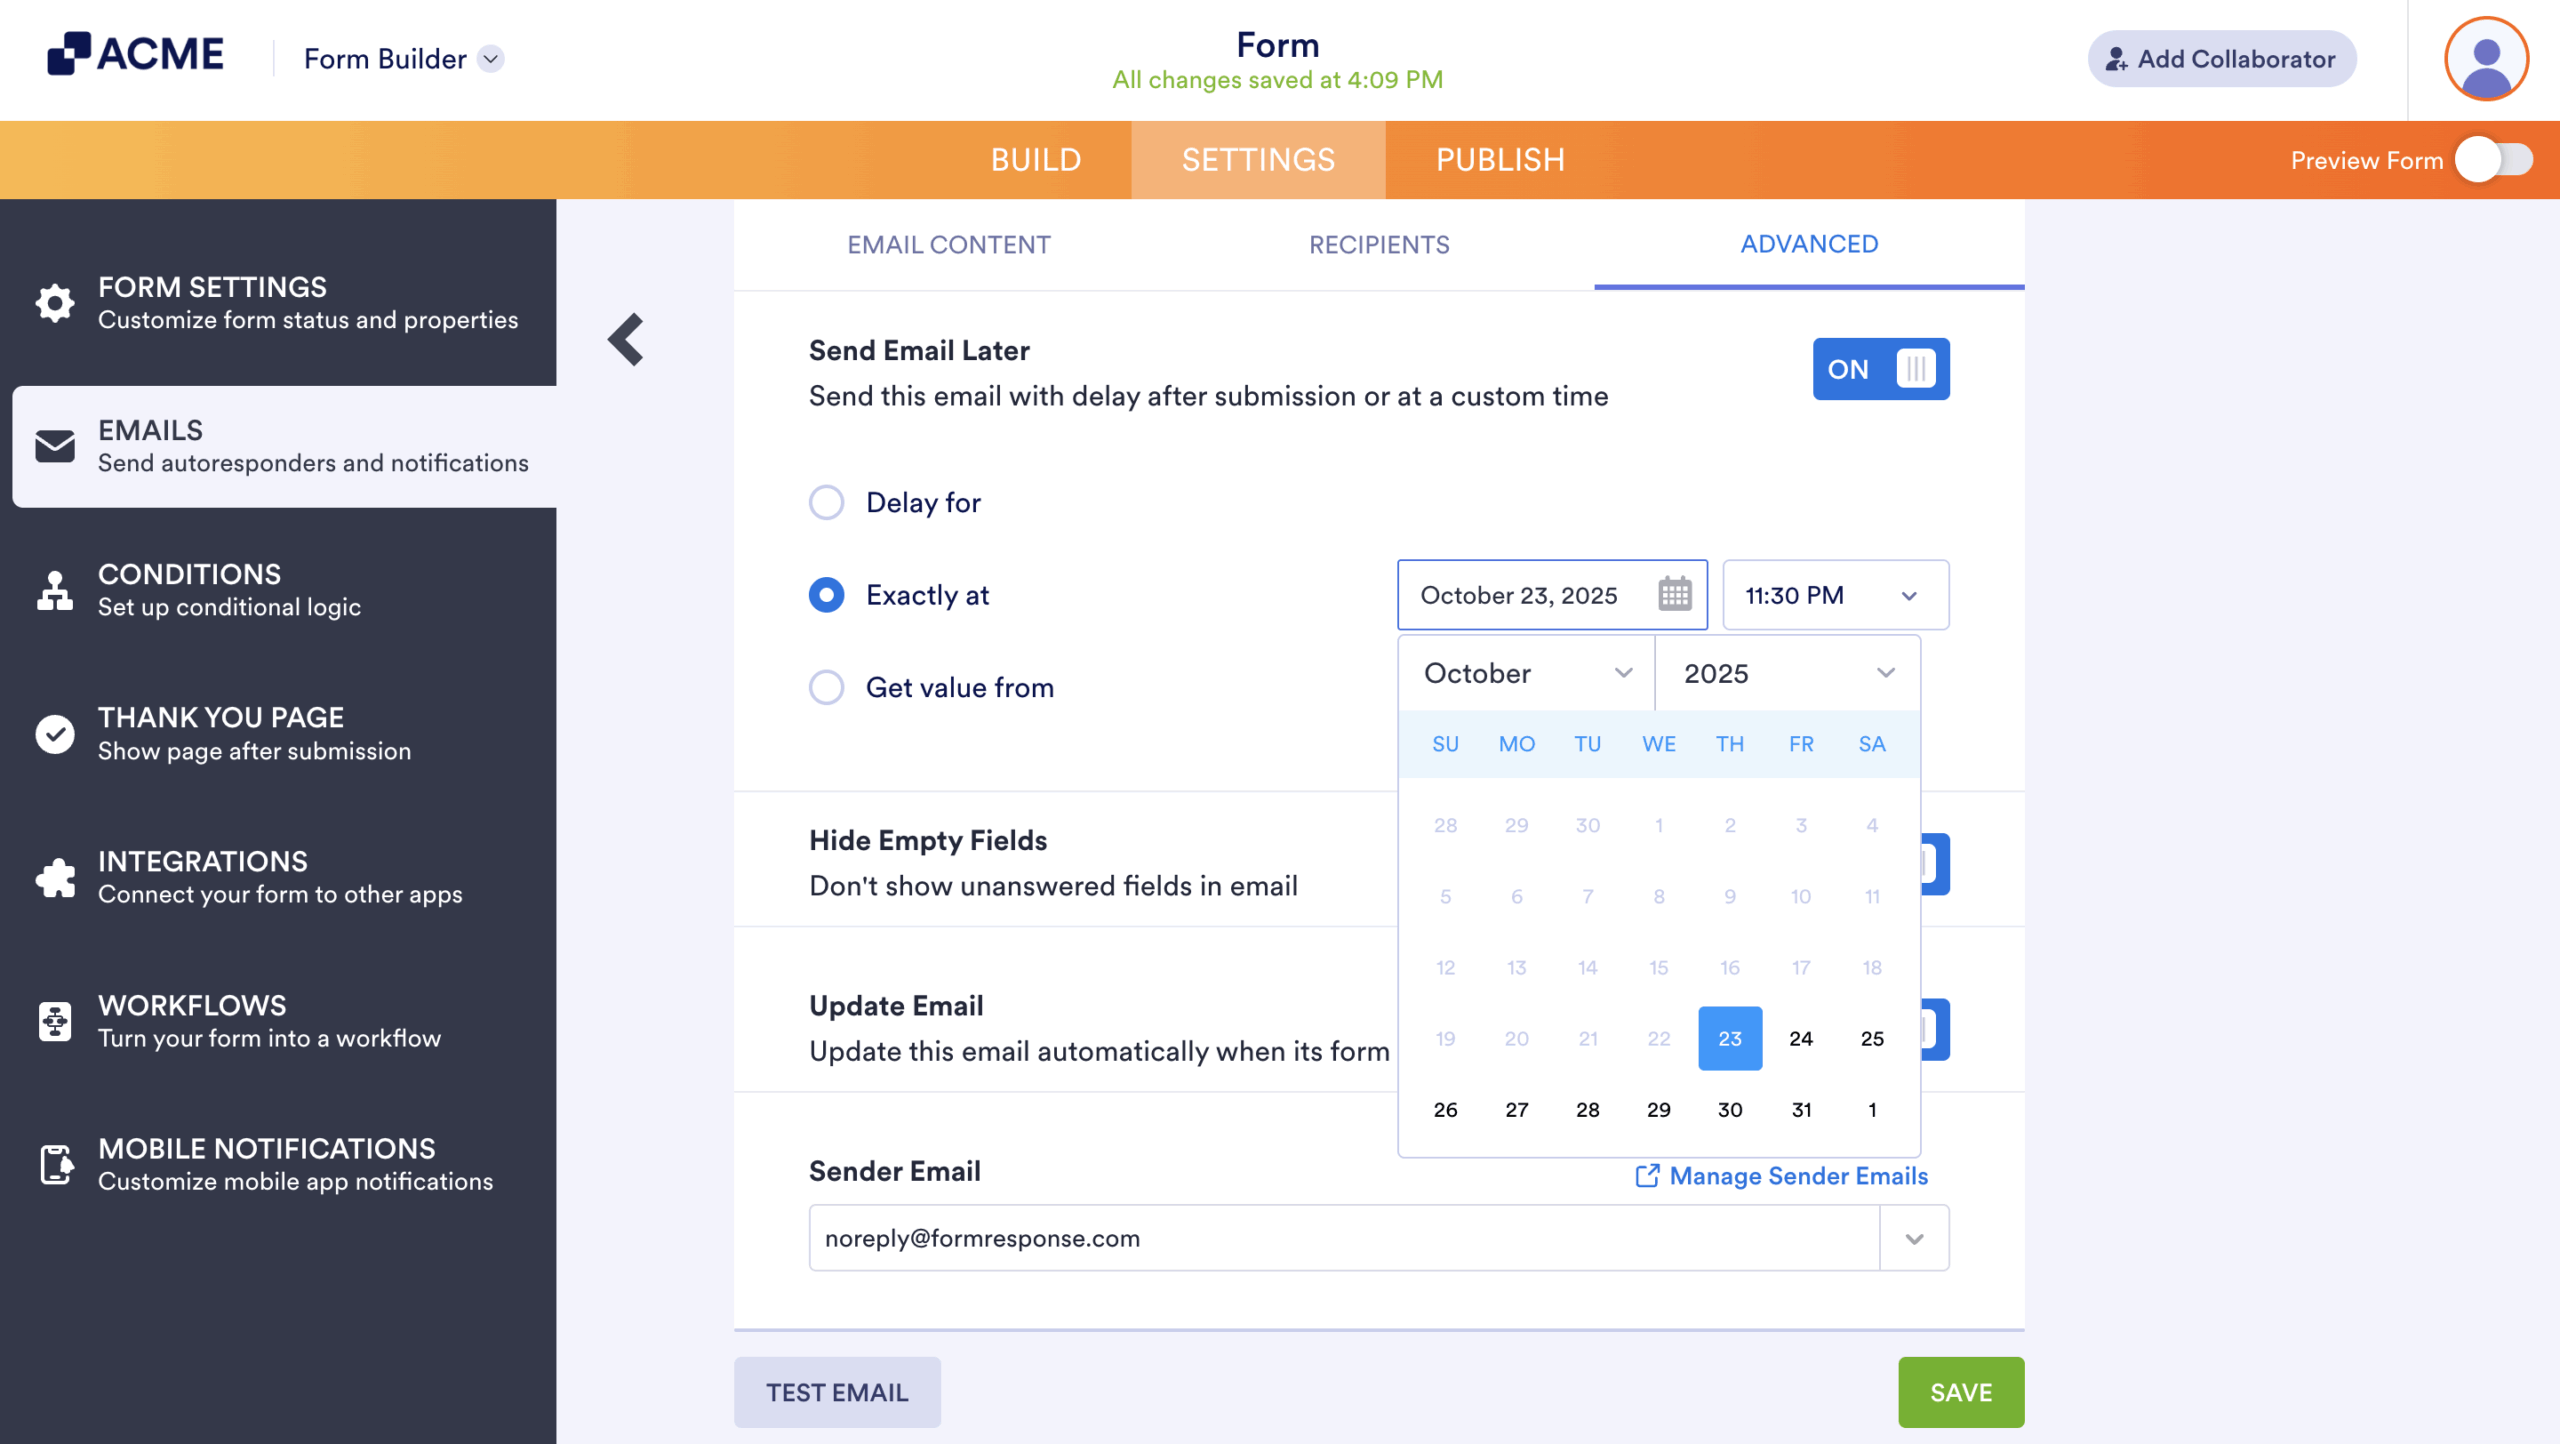
- Exactly at — The email will be sent exactly at the specified date and time.
- Get value from — The email will be sent on the date field on the form.
Note: You must add the Date Picker element for the Get value from option in the list.
As an example, if you will be sending an email right after submission, another email in seven days, and then another in 14 days, you would need a total of three separate Autoresponders with three different Send Emails Later selections.
If none of them will fit your requirements, you can send it at a specific later date.
If you want your form’s respondents to select the date they would like to receive the email, you can select a Date Picker element from the dropdown list. That way, the email will be sent on the date on the chosen date field.
Create Email Templates
Now, we’ll discuss how to enhance your Autoresponder emails by using the built-in Source code editor of the email template. First, you need to be familiar with editing your Autoresponder’s Email Content, and then a bit of knowledge in HTML/CSS. If you haven’t done this before, we suggest you take a look at the How to Edit the Email Template for Notifications and Autoresponders guide before proceeding.
Now, this is where the magic happens.
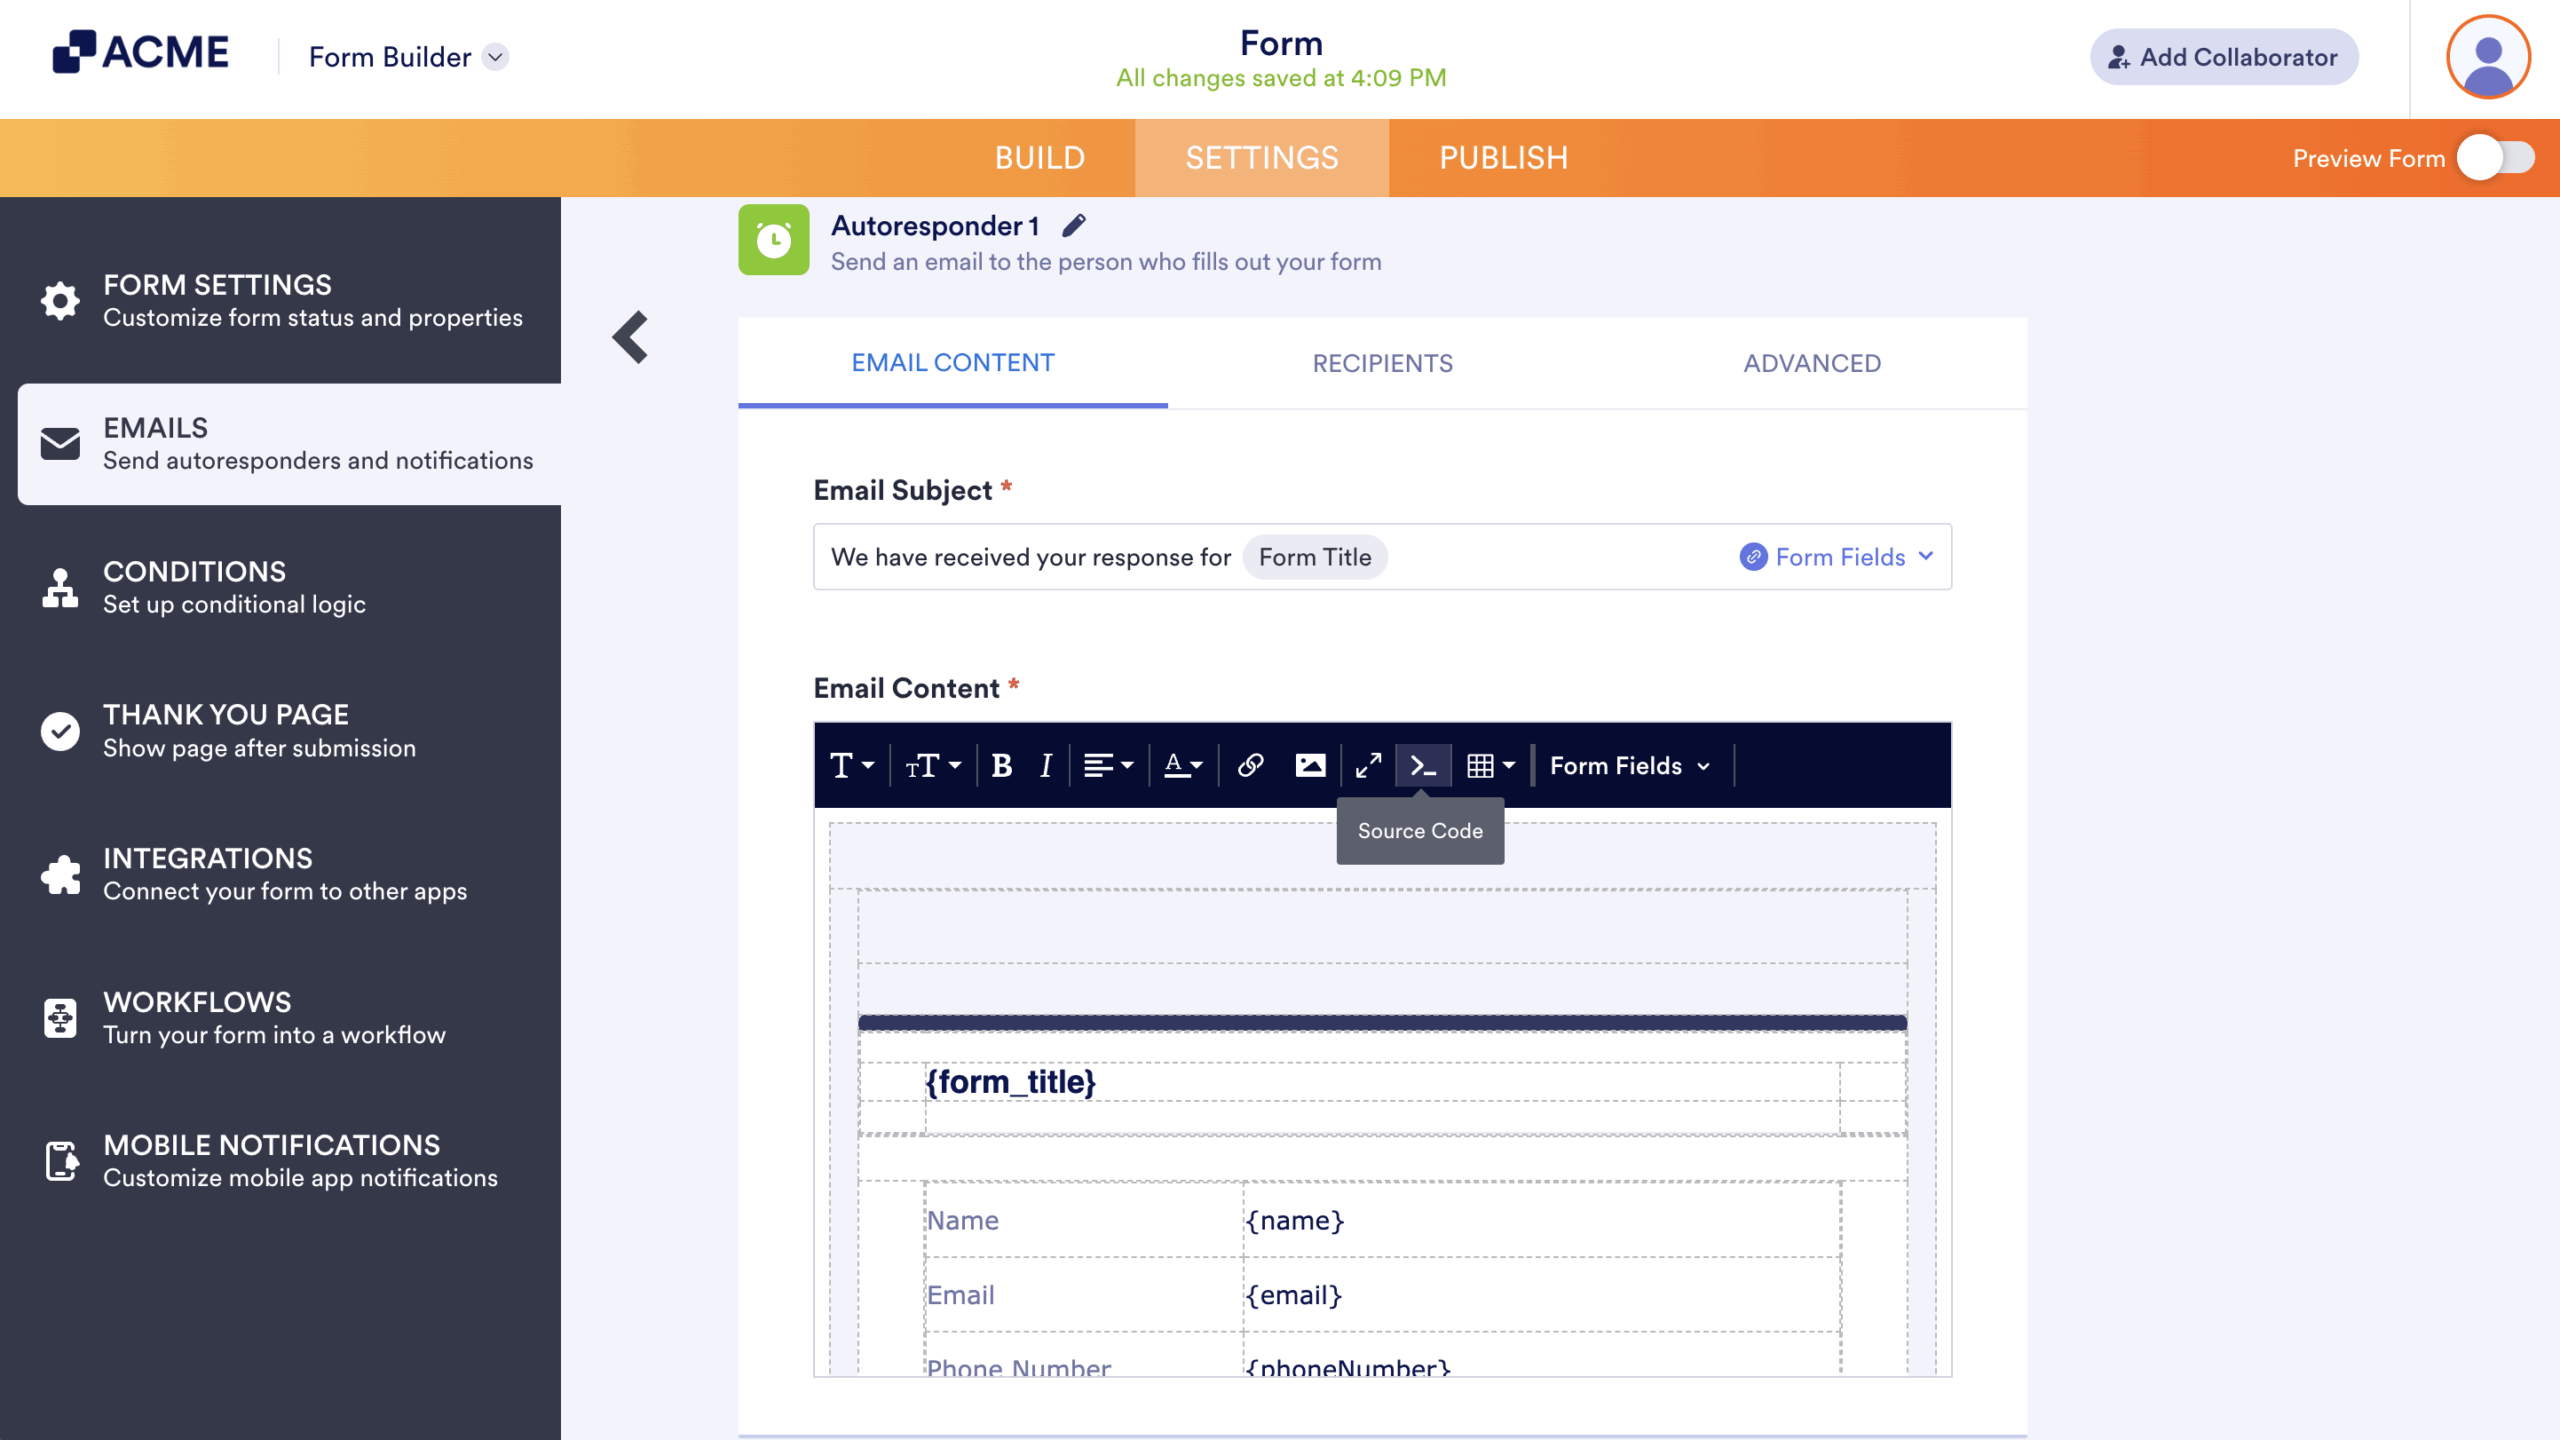
Once you click the Source code button, it will open a modal popup window where you can design your template using HTML/CSS. If you’re not well-versed in designing emails, you should probably leave this part to your developer or designer. But, what if you don’t have one? Well, we would recommend you stick with the Edit Toolbar shown above. Even without coding knowledge, you can still edit your template with basic formatting options.
To sum it up, your options for customization are as follows:
- Use the Edit Toolbar for basic formatting options if you don’t have a developer or designer and you don’t know HTML/CSS.
- If you have a developer or designer or you know how to design pages, use the Source code button and build the template from scratch using HTML/CSS.
- Or, use readily available email templates online.
For the last option above, here are some online resources where you can grab open source email templates. They usually come in HTML format but some are not using inline CSS, which our Source code editor only accepts. So, you would need to use an online CSS inliner service that automatically converts HTML files with declarations and convert them into inline CSS.
Basically, the idea is to:
- Look for an existing email template that is in HTML format. It can’t contain any sort of script and should be in plain HTML.
- If the email template you have uses inline CSS, you’re all good and you may skip step three.
- If not, use an online CSS inliner and dump the entire HTML codes there. Copy the converted codes afterwards.
- Paste it on your email template’s source code, save your changes, and that’s basically it.
Additionally, you may need to update some resources on the template you would use, like images, links and URLs pointing to your website, add form field values, and so on.
Feel free to look for other online resources that will fit your needs.

Send Comment: