Tags are like little labels you can attach to your contacts to keep everything neat, organized, and easy to find. They help you quickly sort through your list and group people based on shared details—like interests, roles, or how they interacted with your form.
There are two simple ways to tag contacts created through form submissions: Static and Dynamic. Static tags are preset labels you apply to every contact that comes through a specific form, while Dynamic tags automatically adjust based on the information users provide in their submissions. Together, they make managing and segmenting your contacts effortless and more personalized.
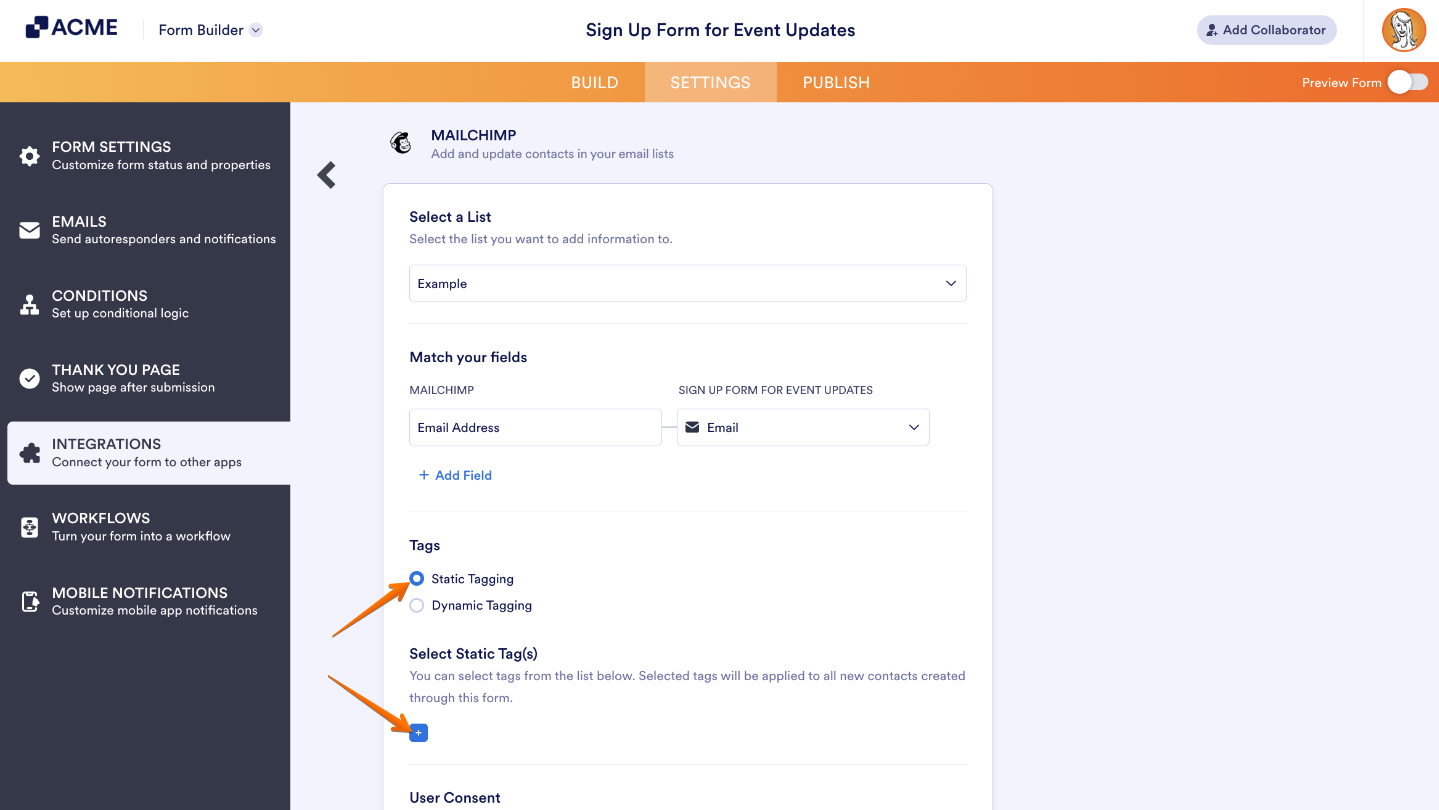
Static Tagging
Static tagging is just as simple as it sounds. When setting up your integration, you can choose the tags you want to automatically apply to every contact created through your form. It’s a quick and easy way to keep your contact list organized without any extra steps.
Note
For Static Tagging, the Tags option in the Mailchimp integration will only appear if you’ve already created tags in your Mailchimp audience settings. If you haven’t added any yet, don’t worry—it’s easy to do! You can check out this guide for more details on how to set them up before continuing.
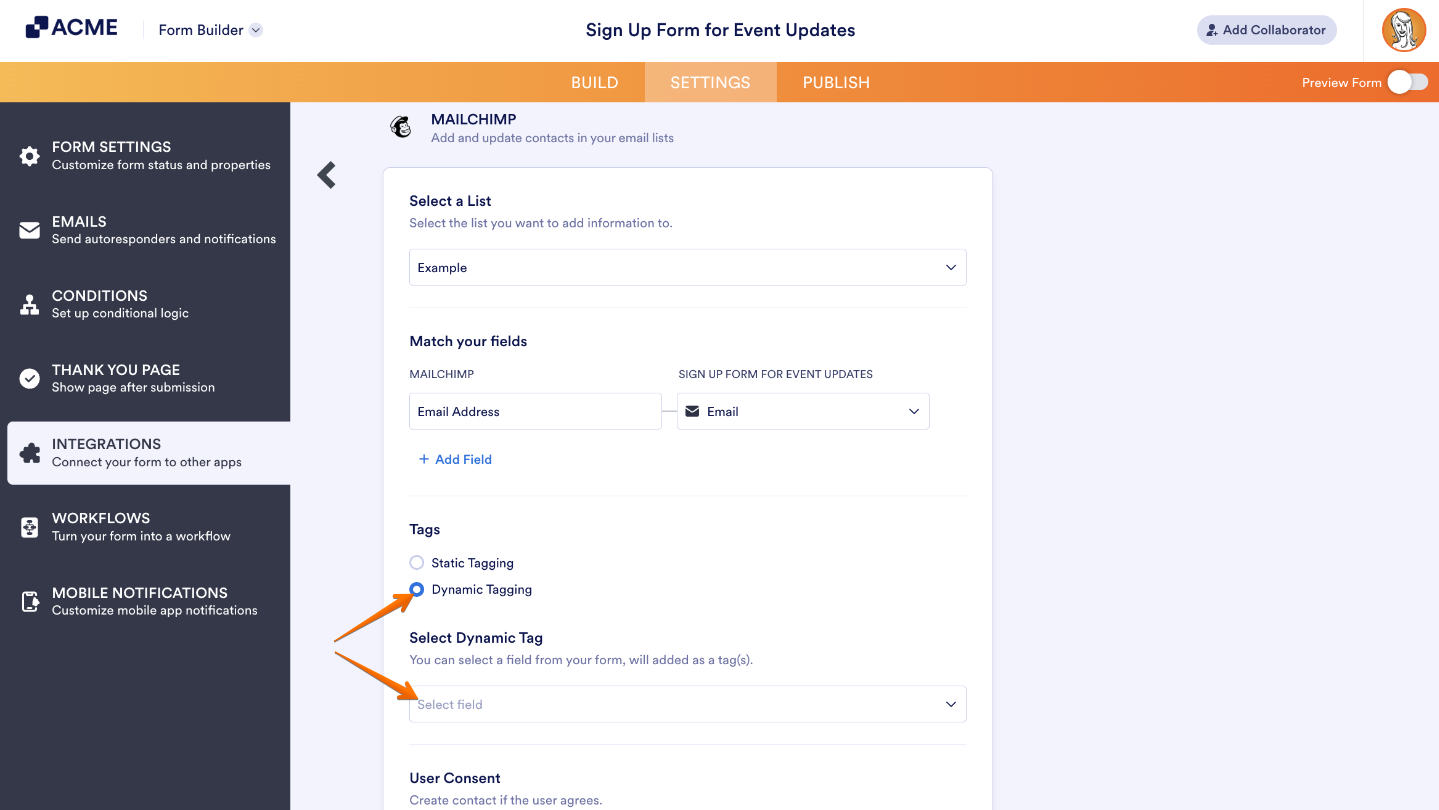
Dynamic Tagging
Dynamic tagging gives you a smarter way to organize your contacts by automatically applying tags based on the information people provide in your form.
You can use fields like Dropdown, Multiple Choice, Single Choice, Short Text Entry, or Long Text Entry to set up your dynamic tags. Among these, Multiple Choice is the most flexible since it allows multiple values—perfect if you want to apply more than one tag to a contact.
Once you choose Dynamic Tagging in the integration settings, a dropdown will appear where you can pick the specific form field you’d like to use for tagging. From there, the system takes care of the rest—automatically tagging each contact based on their responses.
If the value from your chosen field doesn’t match any existing tags in your list, don’t worry—the integration will automatically create a new tag for you. It’s a seamless way to keep your contact list organized without any extra work on your part.
Dynamic Tagging with Conditional Logic
With conditional logic, dynamic tagging becomes even more powerful. It lets you pull answers from multiple form fields and use them as tags automatically.
For example, imagine your form includes a Single Choice field for selecting a service type and a Multiple Choice field for choosing areas of interest. Using conditional logic, you can combine both responses into dynamic tags—giving you richer, more specific insights into each contact, all without any manual tagging.

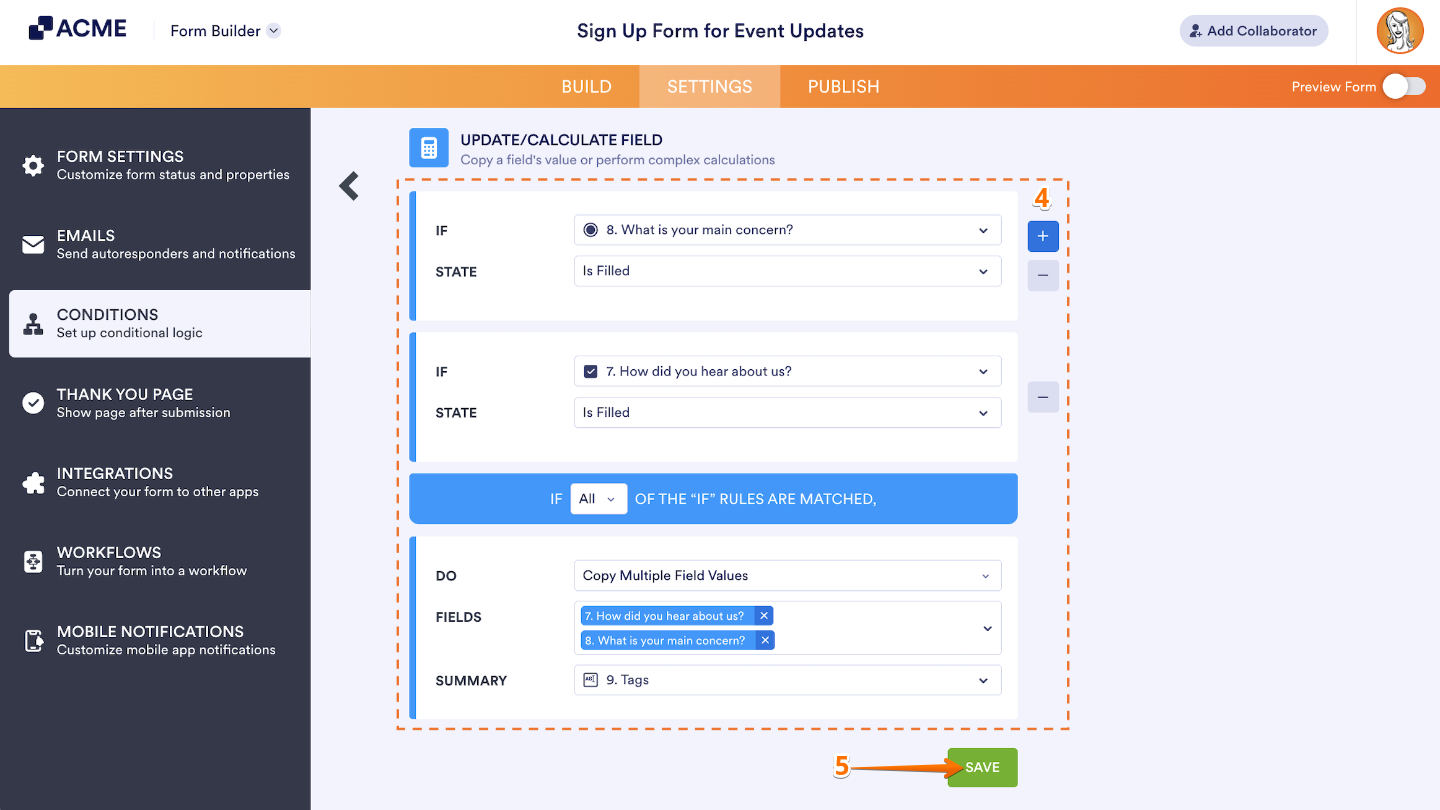
All you need to do is add a Short Text Entry field to your form, then use the Update/Calculate Field conditional logic to copy the values from both fields into that new text field. It’s a quick and easy way to combine your data for dynamic tagging.
To bring both fields together and make your tags even more dynamic, just follow these simple steps:
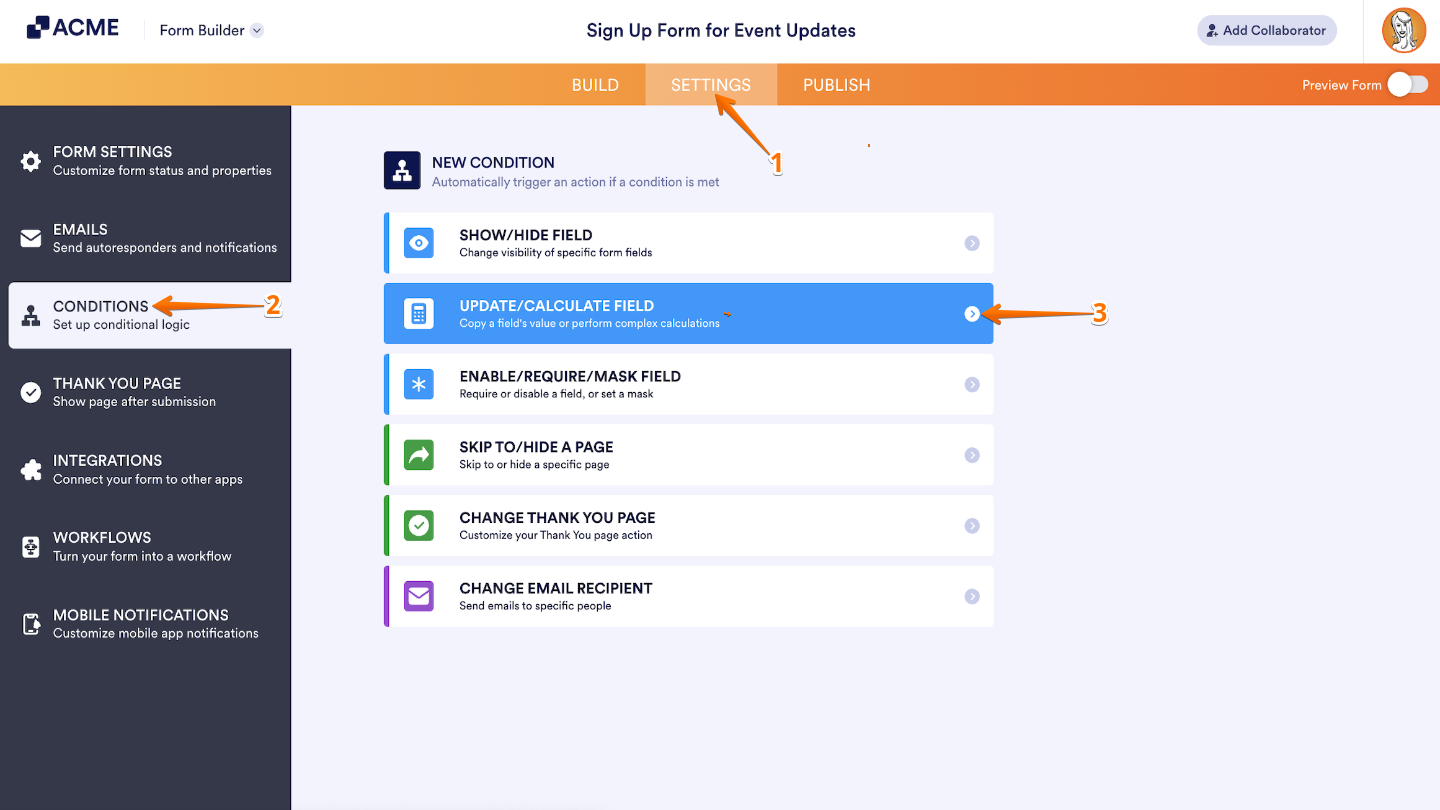
- In Form Builder, in the orange navigation bar at the top of the page, click on Settings.
- Then, in the menu on the left side of the page, click on Conditions.
- Then, in the New Condition menu, click on Enable/Require/Mask Field.
- Now, configure your condition rules, and then set Do to copy the single-choice and multiple-choice field values to the short text entry field.
- Once done, click on Save.
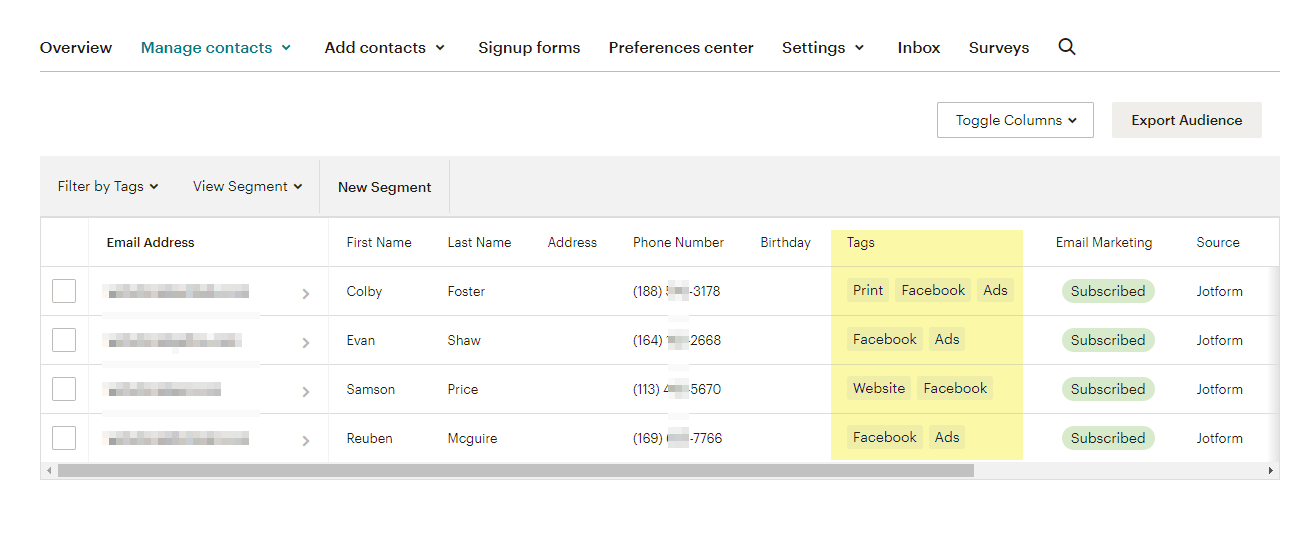
Here’s an example of how the tags appear for each contact who submits your form. These tags will be visible in your Mailchimp audience as long as you’ve set them up in your list or audience settings. It’s a great way to see your tagging in action and keep everything neatly organized.

Send Comment: