SendGrid is one of the world’s largest cloud-based email delivery platforms. They are responsible for sending billions of emails to some of the best and brightest companies in the world.
With SendGrid allows you to automatically synchronize contact information collected through your form to your SendGrid Recipient Lists. Please find the below steps to integrate SendGrid with your form:
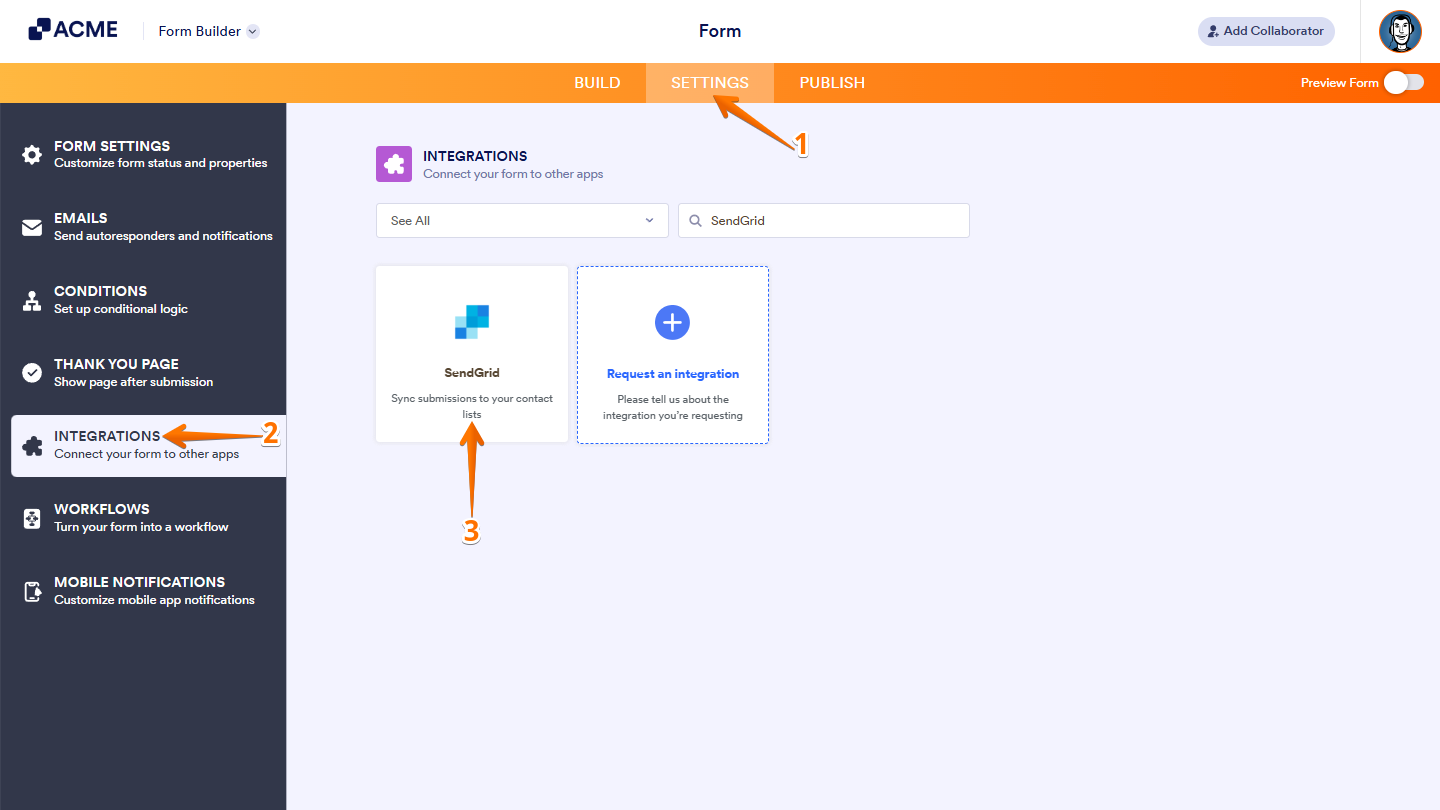
- In Form Builder, in the orange navigation bar at the top of the page, click on Settings.
- In the menu on the left side of the page, click on the Integrations tab.
- Then, search for SendGrid and click on it.
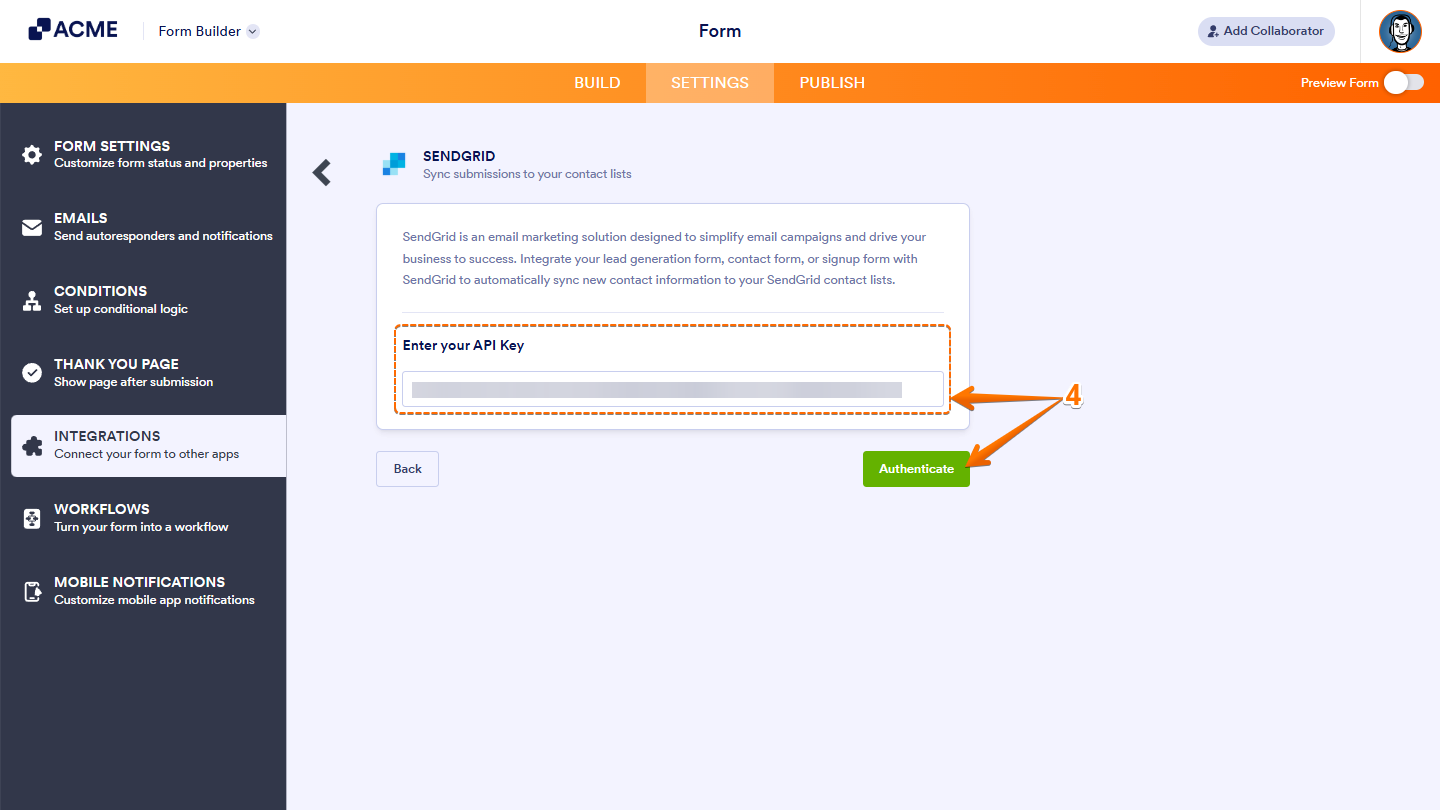
- Next, enter your API Key, and then click on Authenticate. Take a look at this guide about SendGrid—API Keys for more details.
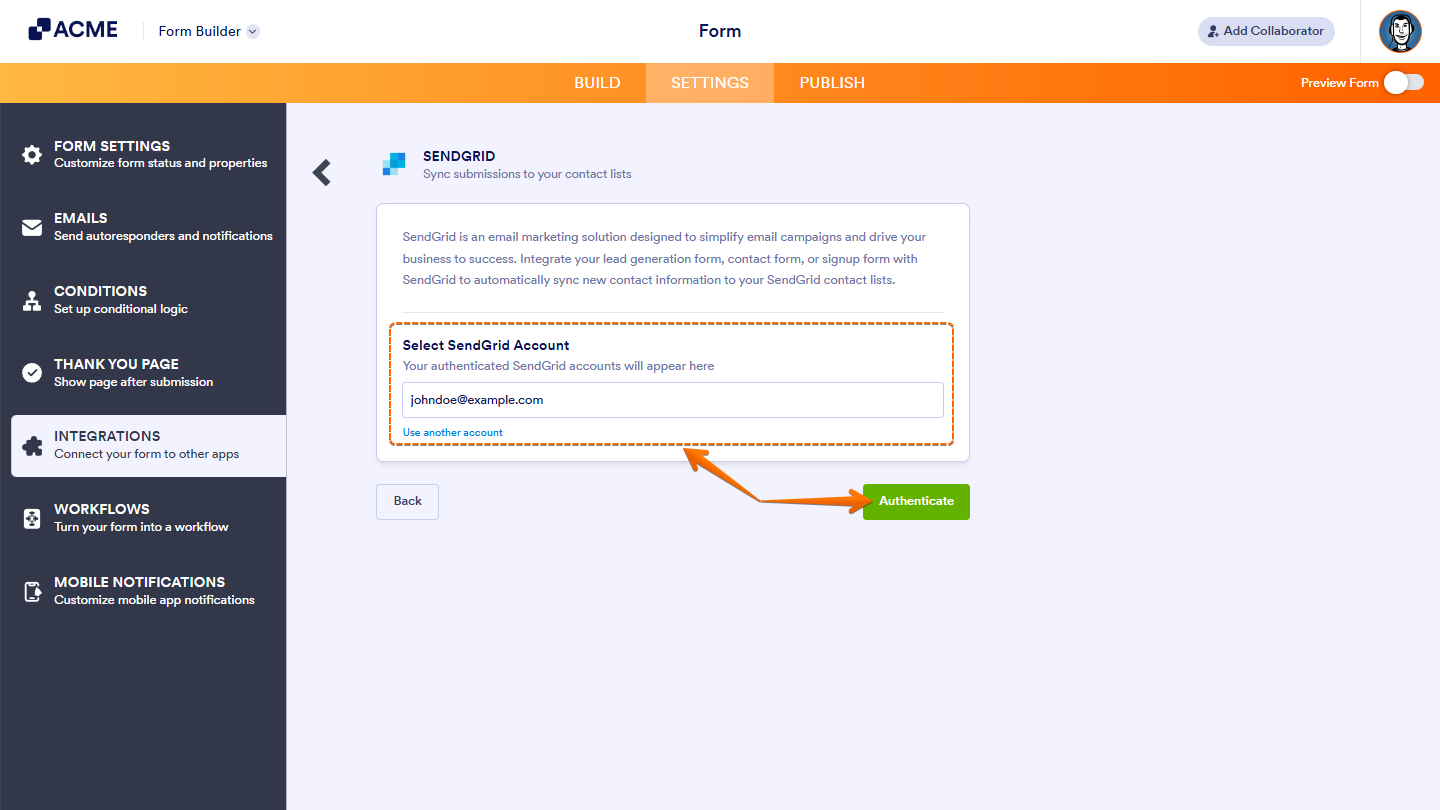
If you’ve logged in before, just pick your SendGrid account from the dropdown. To use a different one, click on Use another account.
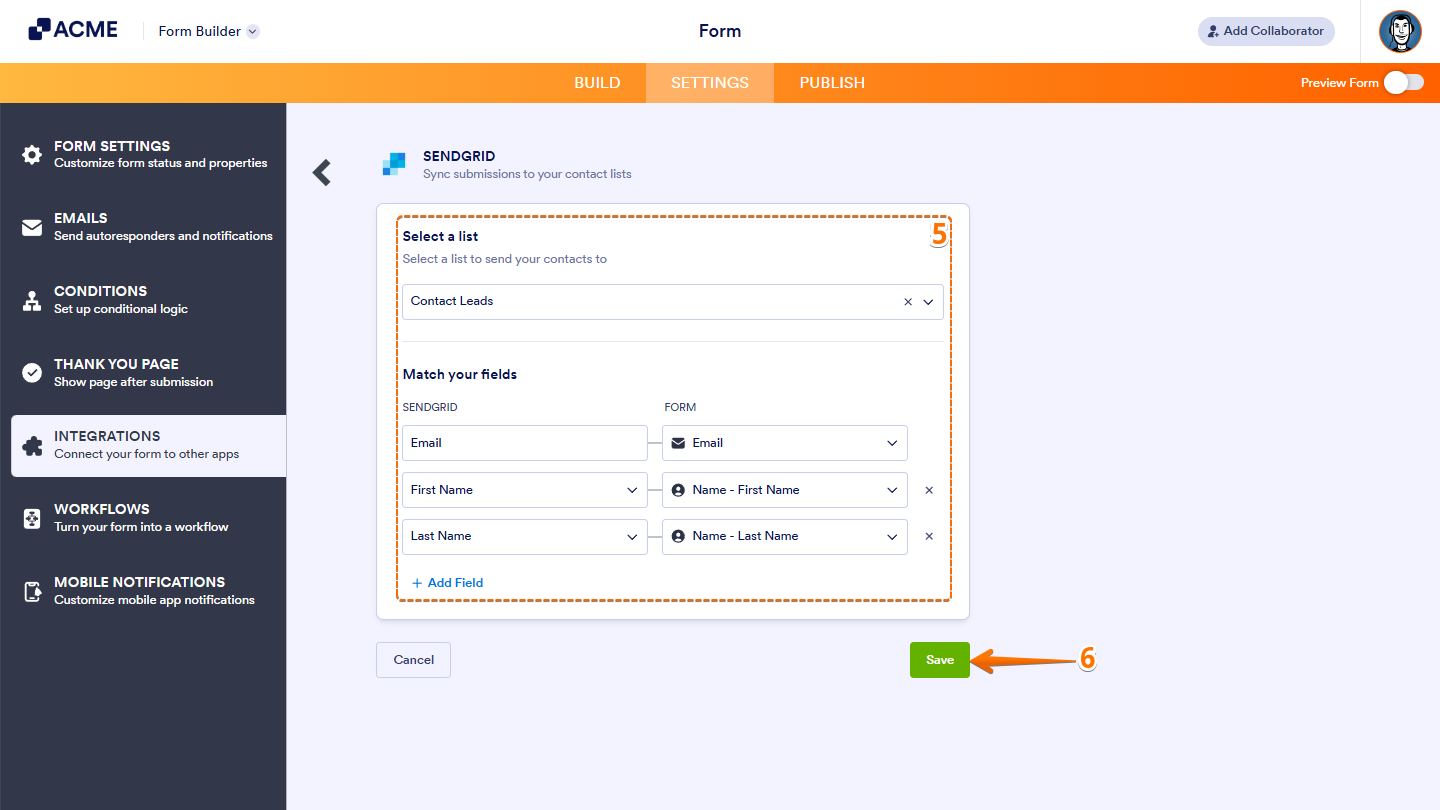
- Now, set up these things:
- Choose a List — Select the SendGrid list you want to sync your contacts to.
- Match Your Fields — Map your form fields to SendGrid fields like Email, First Name, or Last Name.
- Once you’re done, click on Save and you’re all set.
Managing SendGrid Action Logs
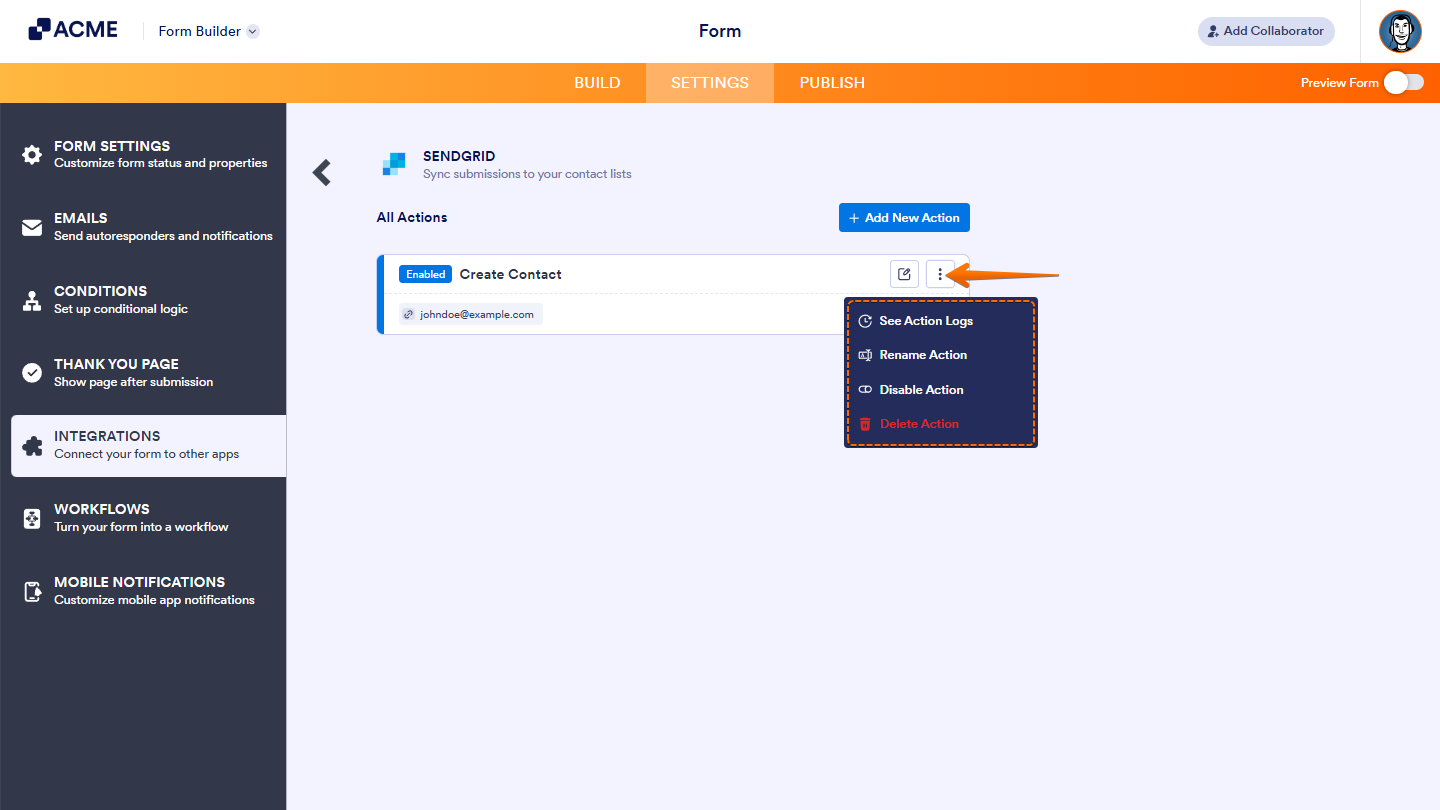
After saving the integration, you’ll see the list of actions you’ve set up and the Add New Action button on the main page. Hover your mouse over an action and click on the Three Dots icon next to it on the right side to access more options:
- See Action Logs — View successful and failed runs, helpful for troubleshooting.
- Rename Action — Change the action’s title.
- Disable Action — Temporarily stop the integration from sending data.
- Delete Action — Remove the action from your form.

Send Comment: