Collecting files from other people doesn’t have to be a hassle. With a Dropbox file request, anyone can send you documents, photos, videos, and other files — even if they don’t have a Dropbox account. Everything lands in a folder you choose, so your files stay in one place and are easy to find.
This setup works well for teams and individuals who deal with uploads from clients, students, applicants, or collaborators. It’s handy for gathering resumes, design assets, signed agreements, homework files, or any document you need from others. Files are organized automatically, making it easier to review, store, and manage submissions without chasing email attachments or sharing personal upload links.
Creating Your File Upload Form
Creating a file upload form gives people a simple way to send you documents, images, or other files without needing direct access to your storage. It keeps everything organized and saves time, especially when collecting files from multiple people. Getting started is simple — here’s what to do:
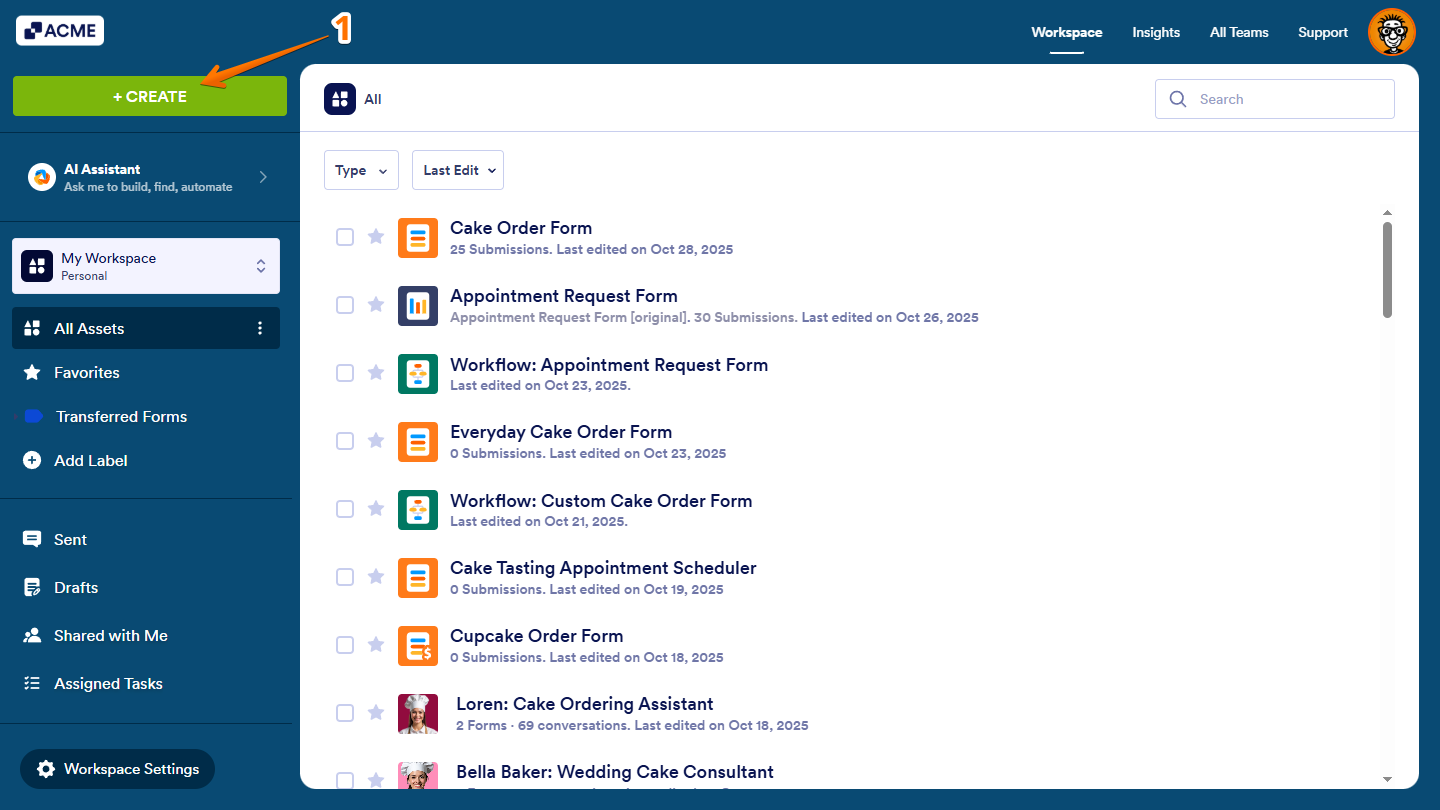
- On the top-left side of the Workspace page, click on Create.
- Then, in the window that opens up, click on Form.
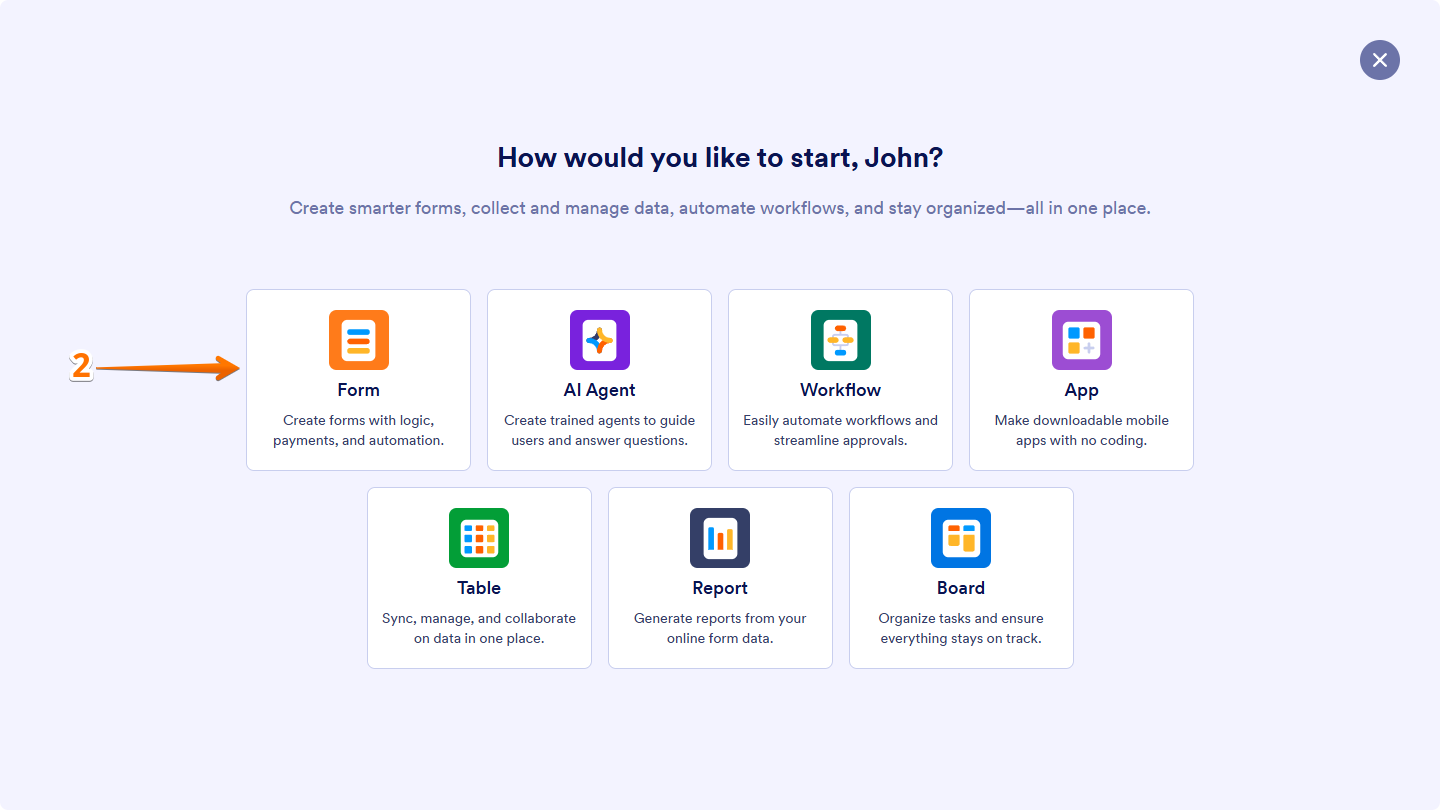
- Next, in the Create Form section, select one of the ways to build your form:
- Start From Scratch — Select a Classic layout to show all questions on one page or a Card layout to show one question per page, then build your form from the ground up.
- Use Template — Pick from thousands of ready-made forms and customize them to match your needs.
- Smart PDF Form — Upload your PDF and turn it into an online form that users can fill out and submit.
- Import Form — Enter the URL of the form you want to copy, or select a form from your account to clone, then turn it into a version you can edit and use.

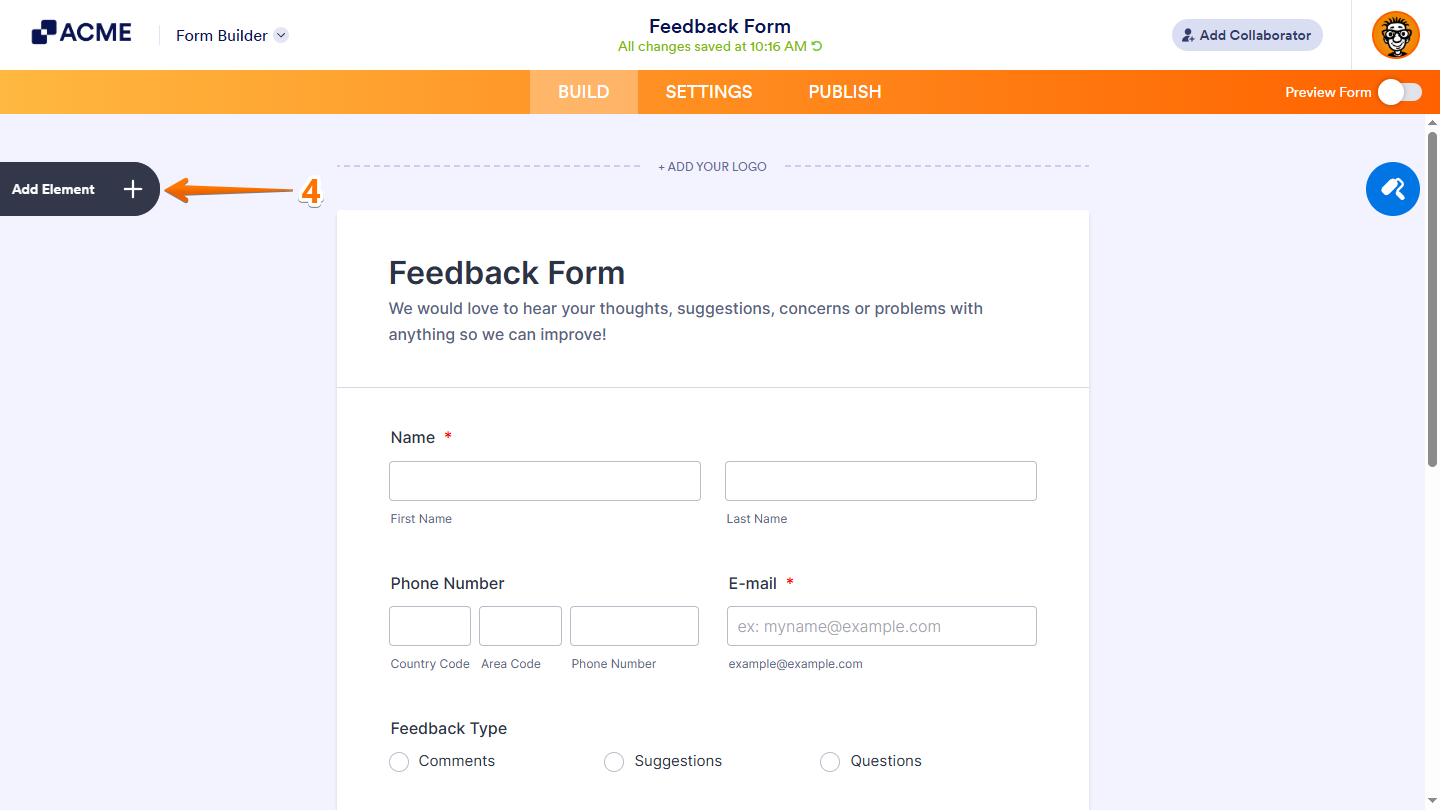
- Now, in Form Builder, click on Add Element on the left side of the page.
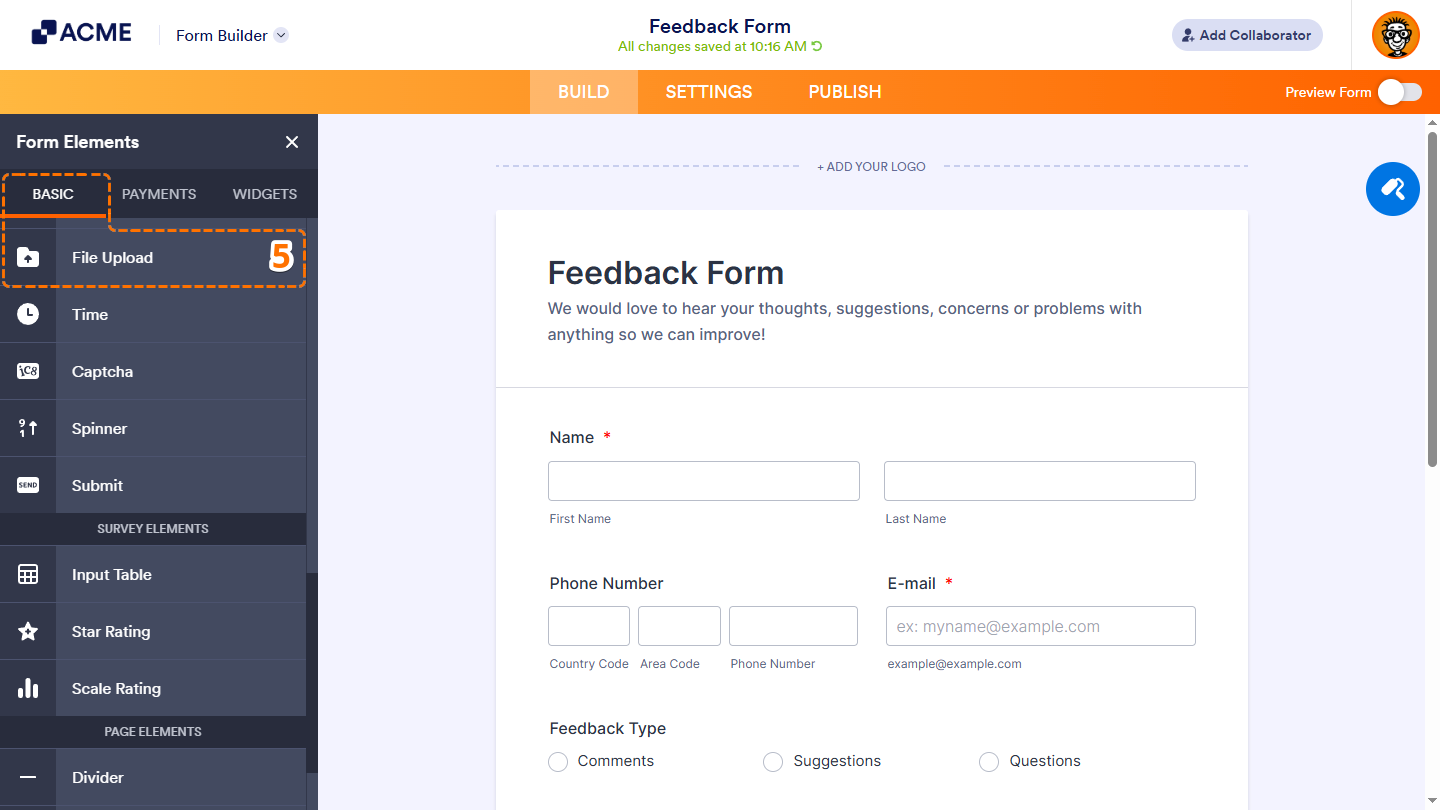
- Then, in the Form Elements menu, under the Basic tab, scroll down and click on File Upload. Or, just drag and then drop it to where you want it to be on your form.
- Next, on the right side of the File Upload field, click on the Gear icon.
- In the File Upload Properties window, under the Options tab, set the Upload File Size in the Limit File Size section and enter the File Formats you want to allow in the File Types section.

That’s it. You’ve successfully added a File Upload field to your form and can now start collecting files from users.
Integrating Your File Upload Form With Dropbox
Connecting your File Upload Form to Dropbox lets uploaded files go straight to your Dropbox account, so you can easily access and manage them alongside your other files. You can do it in just a few steps:
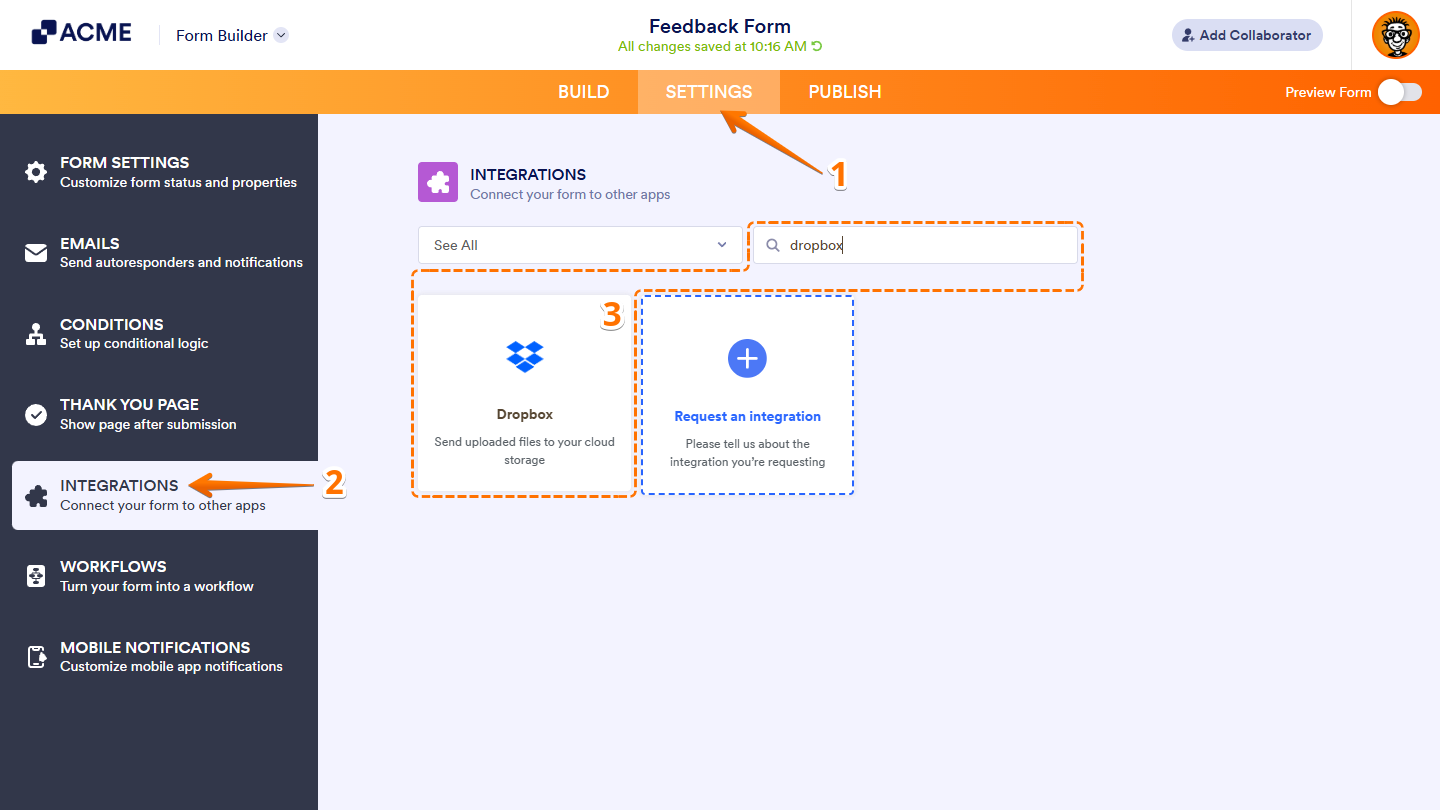
- In Form Builder, in the orange navigation bar at the top of the page, click on Settings.
- Then, in the menu on the left side of the page, click on Integrations.
- Now, in the Integrations section on the right, search for Dropbox and click on it.
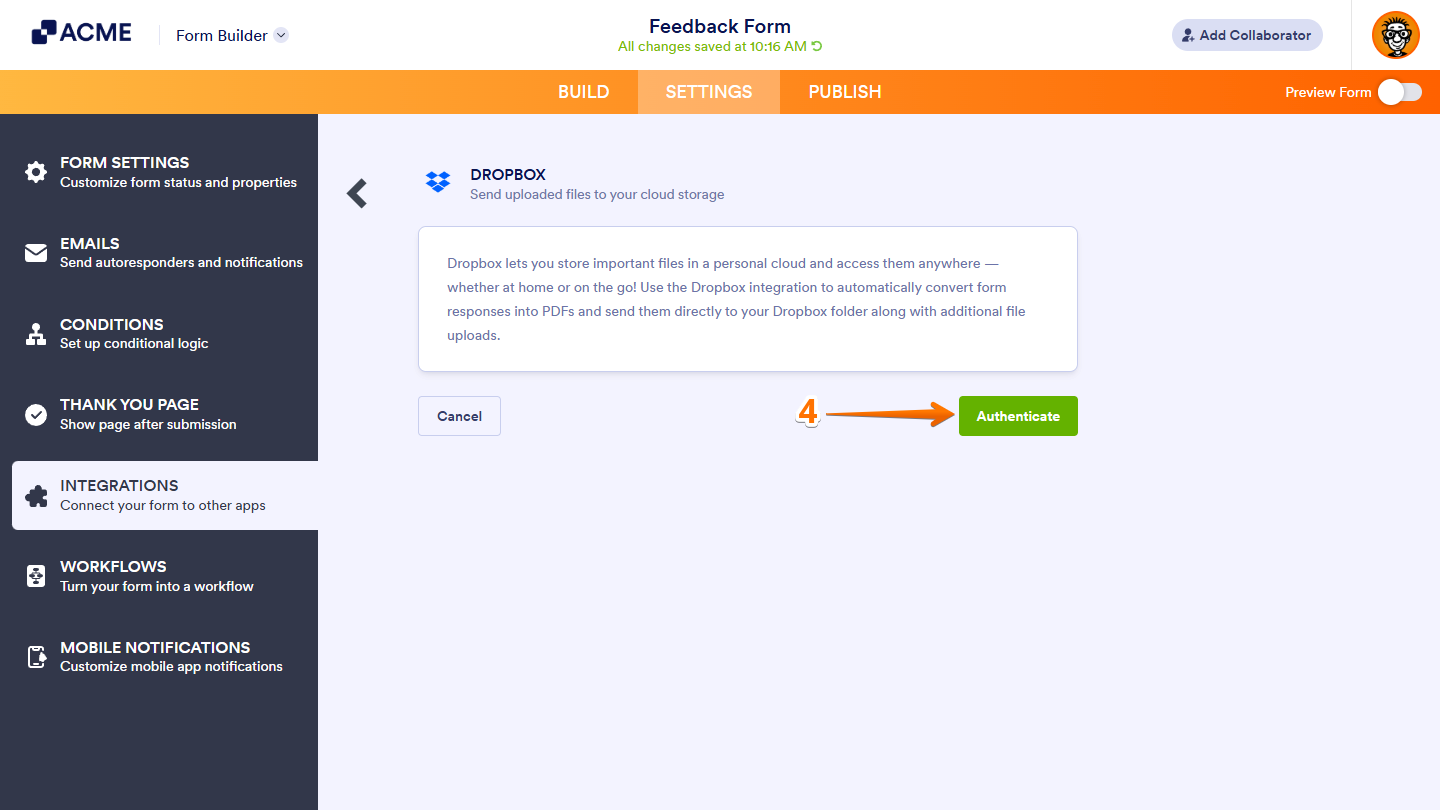
- Next, click on Authenticate. And then, in the pop-up window, log in and authorize access for the integration to your Dropbox account.
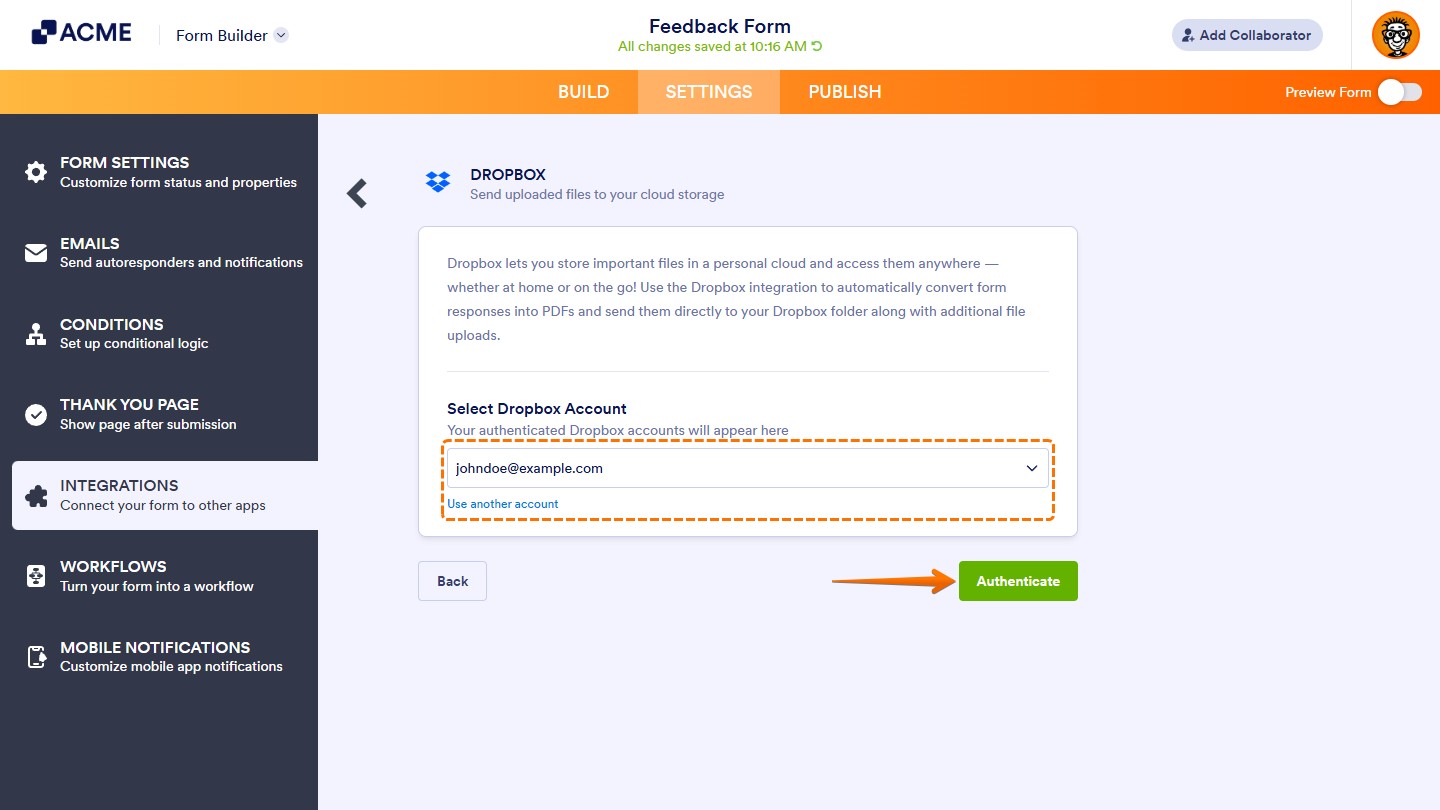
If there is a saved Dropbox account you’ve integrated any of your forms with before, you can choose its email address from the dropdown and click on the Authenticate button on the right to use it. Or, you can also click on Use Another Account below the dropdown to log in and authorize access for the integration to a different Dropbox account.
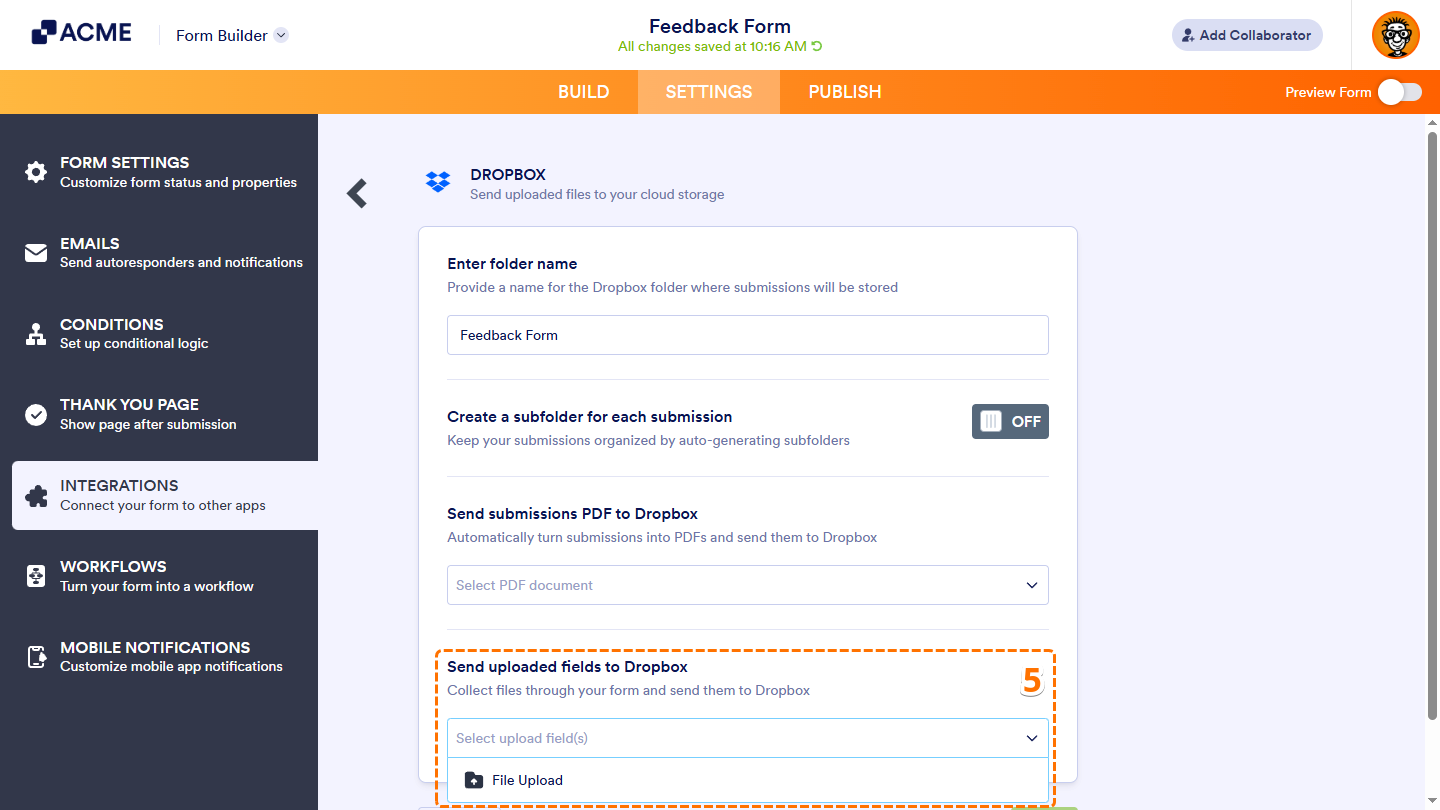
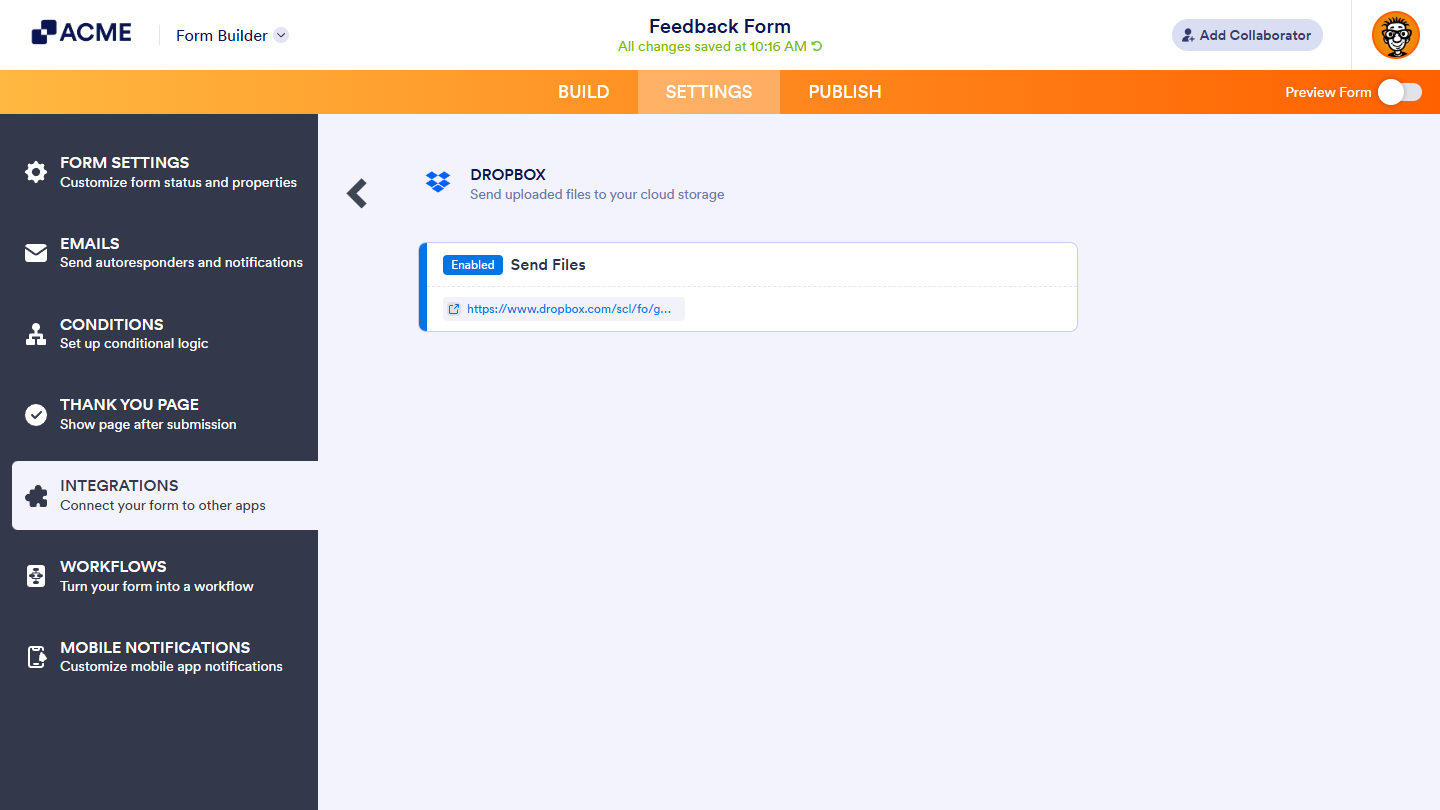
- Then, in the Integration Settings, click on the Send Uploaded Fields to Dropbox Dropdown menu, and select the File Upload field you added to your form.
To learn how to configure the rest of the settings, check out our guide on Upload to Dropbox With Your Form.
- Once everything is set, click on Save.

That’s it. You’ve successfully set up your Dropbox integration to send uploaded files from your form.
Sharing Your File Upload Form
Once you’ve connected your File Upload Form with your Dropbox account, the next step is to share it so others can start sending files your way. Sharing your form gives people an easy way to upload documents, images, or other files directly, helping you collect everything you need efficiently and in one location.
Copying the Form URL
You can copy the URL of your form in just a few steps. Here’s how to do it:
- In Form Builder, in the orange navigation bar at the top of the page, click on Publish.
- Then, under Share With Link, click on Copy Link.
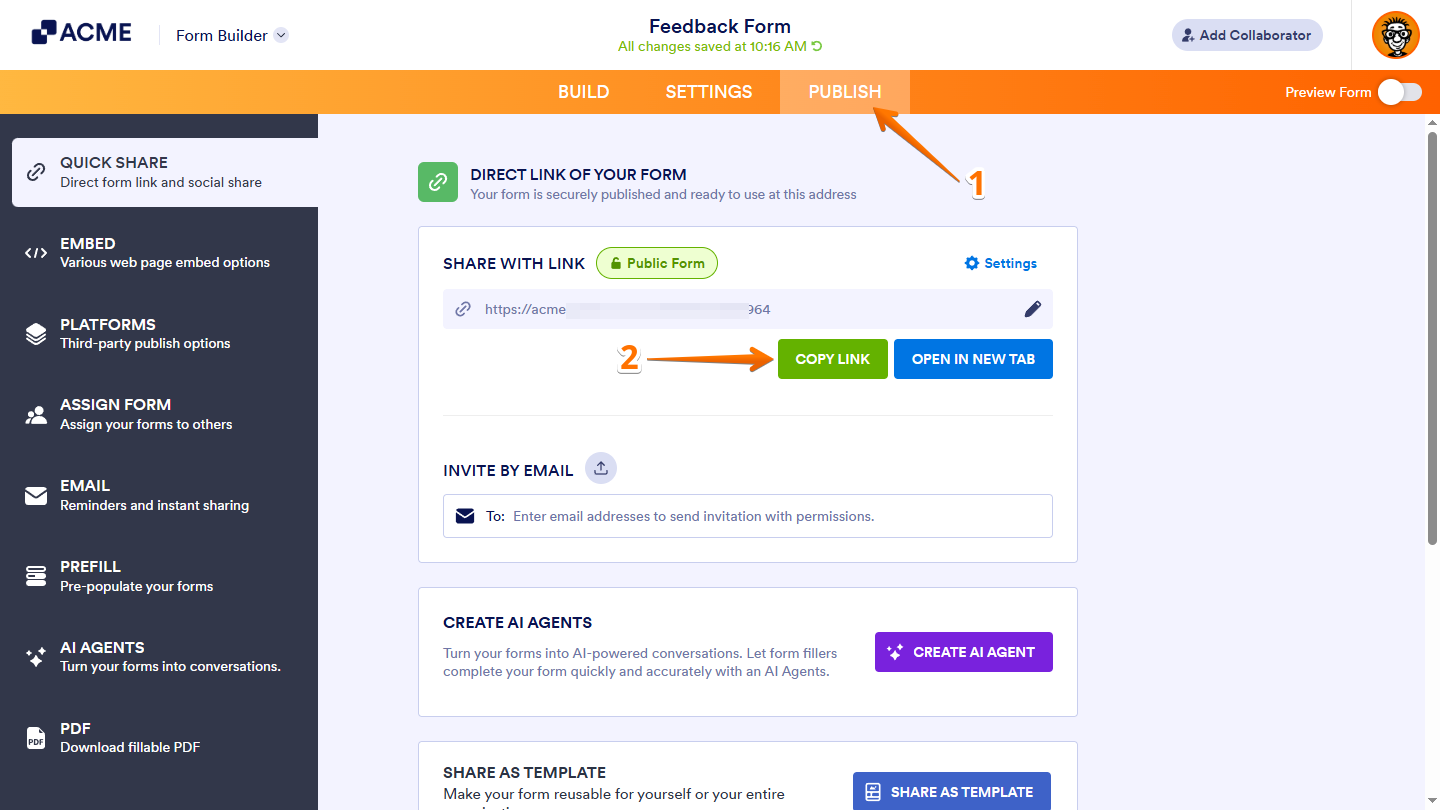
That’s it! You’ve copied your form’s URL, so you can easily share it through any external messaging or email platform and start collecting files right away.
Sending the Form via Email
You can also share the direct link to your form right from the Form Builder. You can do it in just a few steps:
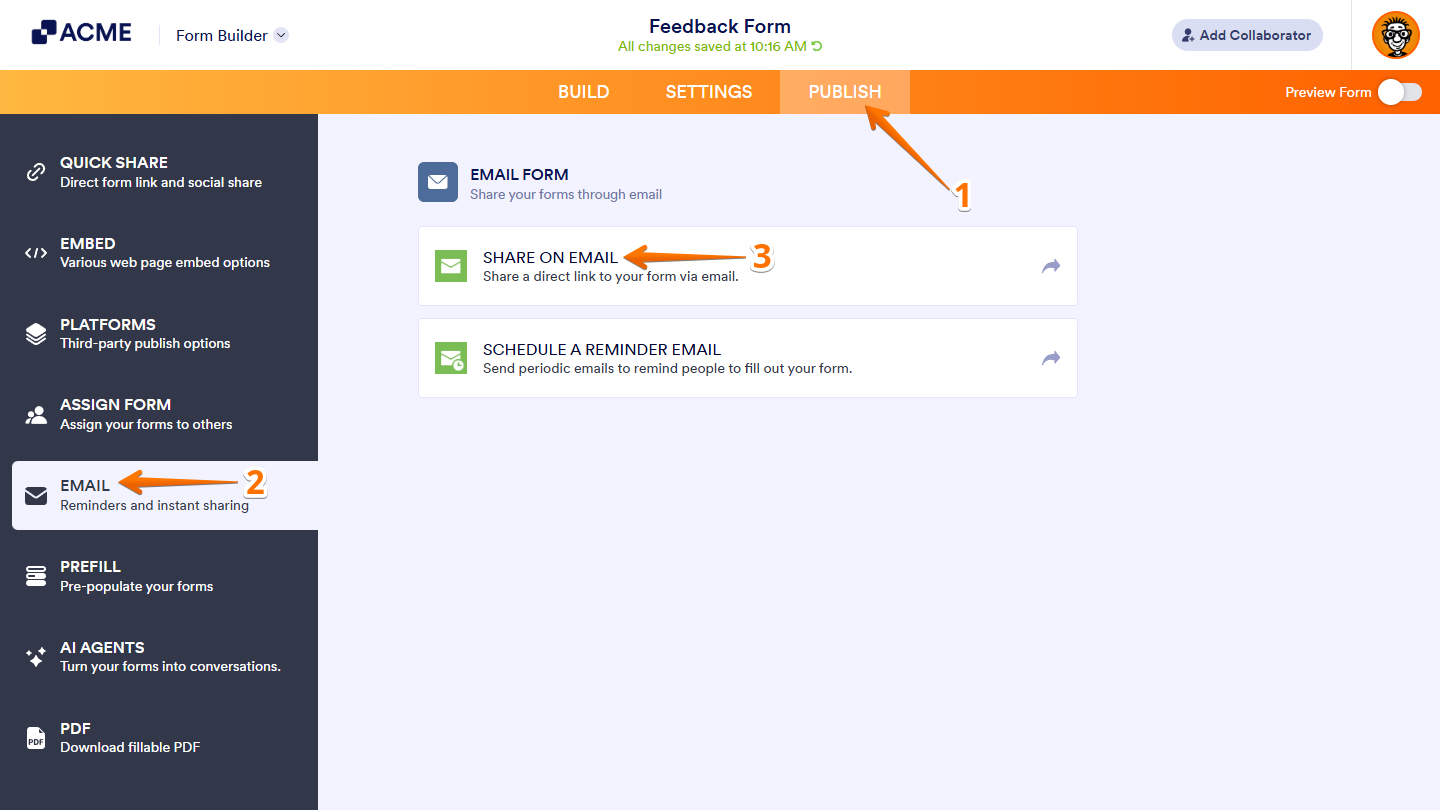
- In Form Builder, in the orange navigation bar at the top of the page, click on Publish.
- Then, in the menu on the left side of the page, click on Email.
- Now, in the Email Form section on the right, click on Share On Email.
- Next, in the Email section, under the Email tab, enter a subject and message for your email. The message includes your form’s direct link or Custom URL by default, but you can edit it and use the formatting tools in the text editor to personalize it for your recipients.
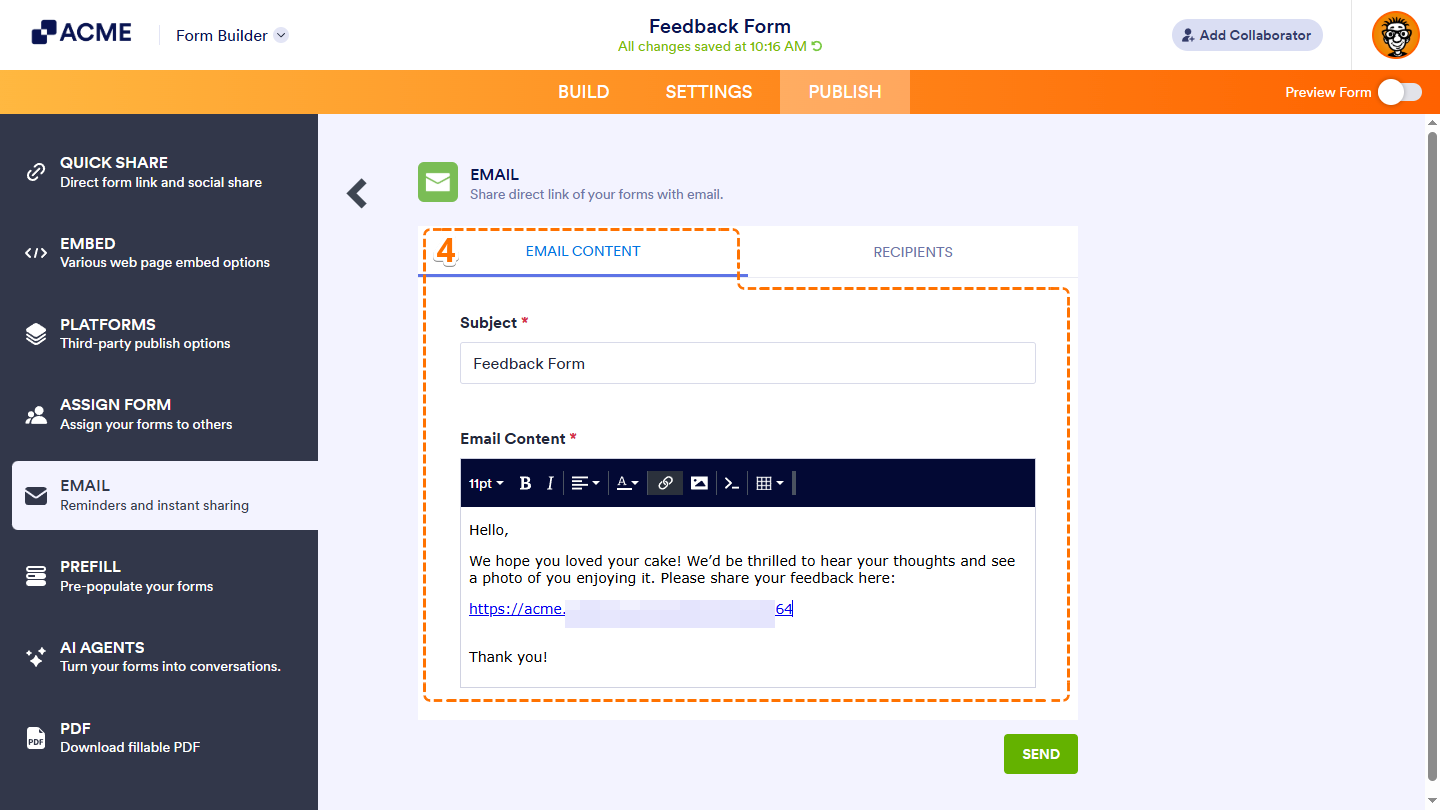
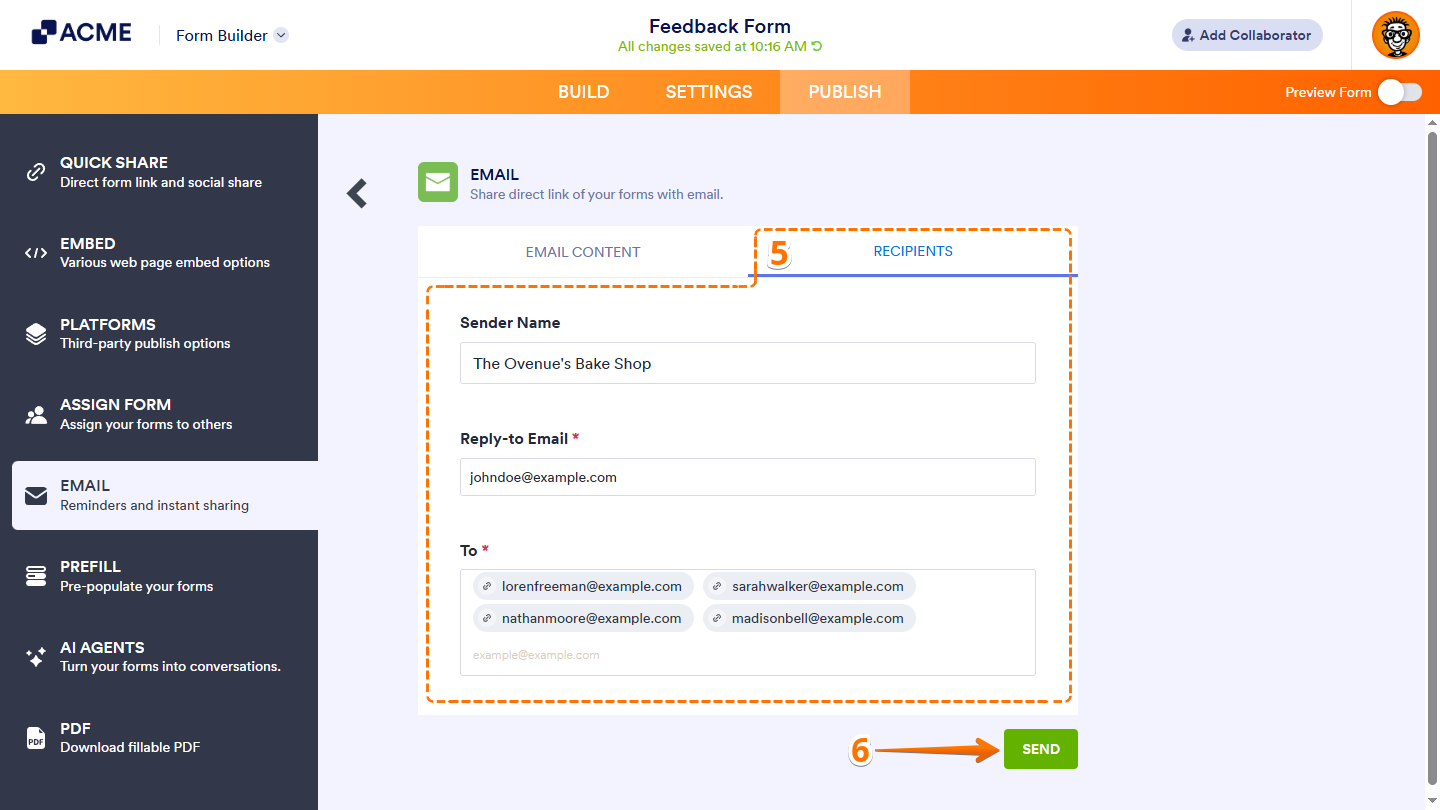
- Then, under the Recipients tab, set the details for the Sender Name, Reply-To Email, and To fields. You can customize the sender name, update the default reply-to email address, and add one or more recipient email addresses.
- Once everything is set, click on Send at the bottom.
That’s it! You’ve shared the direct link to your form, making it easy for others to access and upload their files.
Embedding Your Form
You can also embed your form directly into your website. Getting started is simple — here’s what to do:
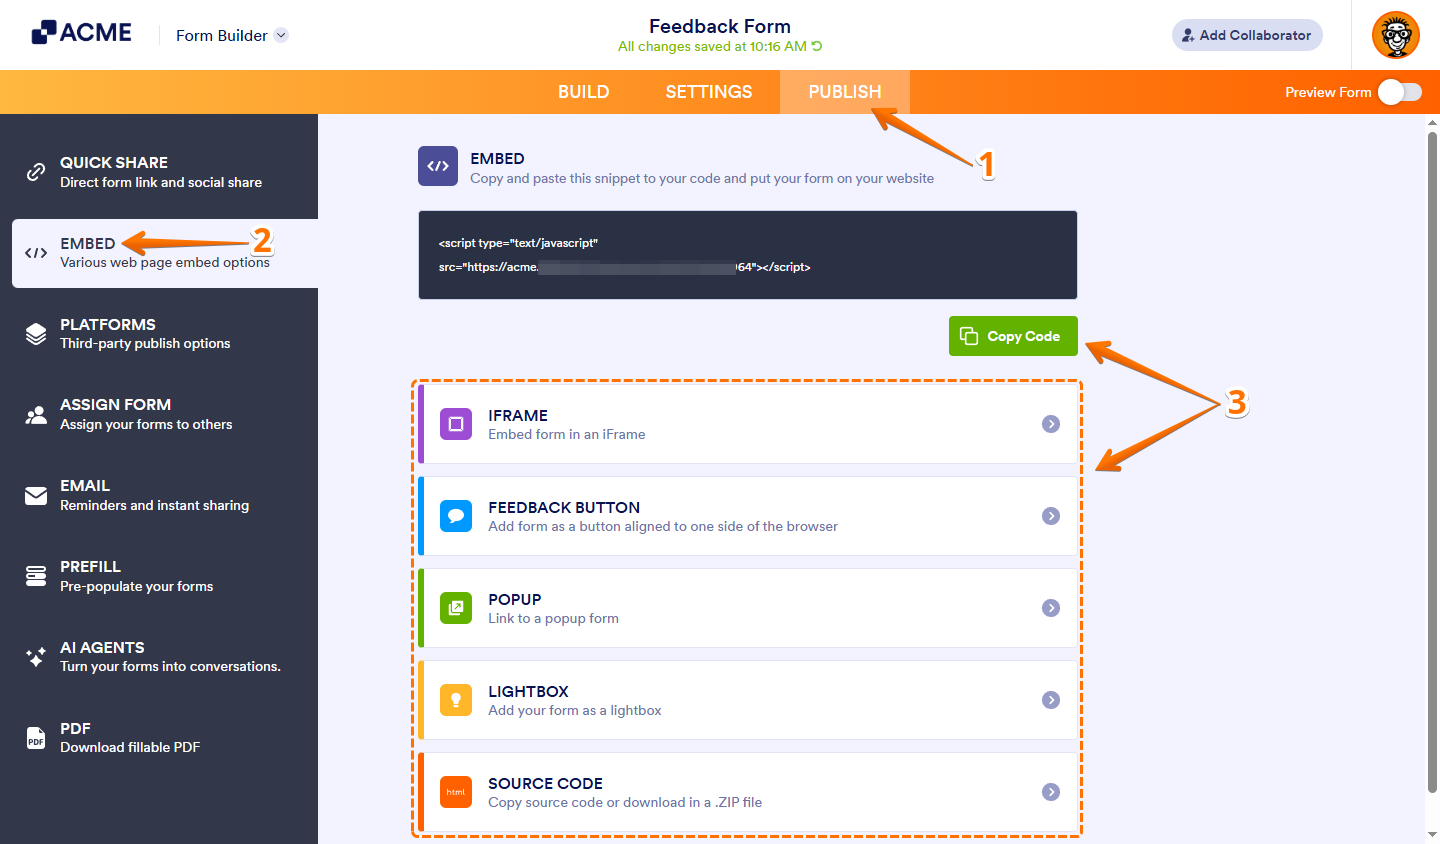
- In Form Builder, in the orange navigation bar at the top of the page, click on Publish.
- Then, in the menu on the left side of the page, click on Embed.
- Now, in the Embed section on the right, click on Copy Code. Or, click on the other embed options listed below to copy the code for embedding your form as an iFrame, feedback button, popup, or lightbox, or to download its source code.
That’s it. You can paste the code anywhere within your site’s HTML, typically inside the <body> tag, where you want the form to be shown. If you’re using a CMS like WordPress, Wix, or Squarespace, look for a block or widget that accepts custom HTML or code embeds. Paste the JavaScript code there, and your form will display directly on the page.

Send Comment: