Slack is a powerful and flexible collaboration tool that helps teams stay connected, organized, and on top of their projects.
By integrating your form with Slack, every submission is automatically sent straight to your workspace—keeping everyone in the loop without any extra effort. It’s a simple way to share updates instantly so your team can spend less time managing messages and more time getting things done.
Setting Up the Slack Integration
You can easily connect your form with Slack in just a few minutes—no coding required. Once set up, every new form submission will instantly appear in your chosen Slack channel or direct message, keeping your team informed and ready to act.
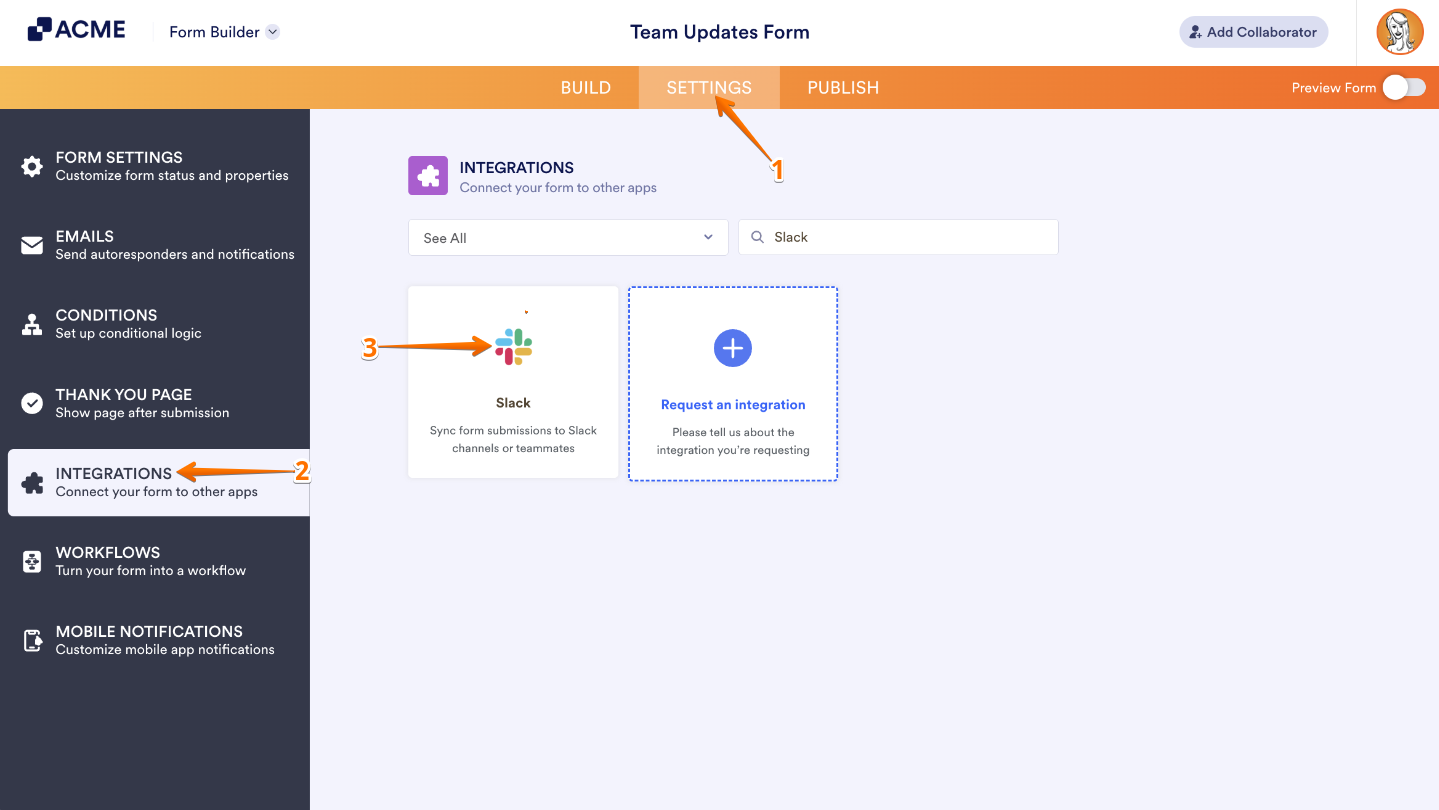
- In Form Builder, in the orange navigation bar at the top of the page, click on Settings.
- In the menu on the left, click on Integrations.
- Then, search for Slack and click on it.
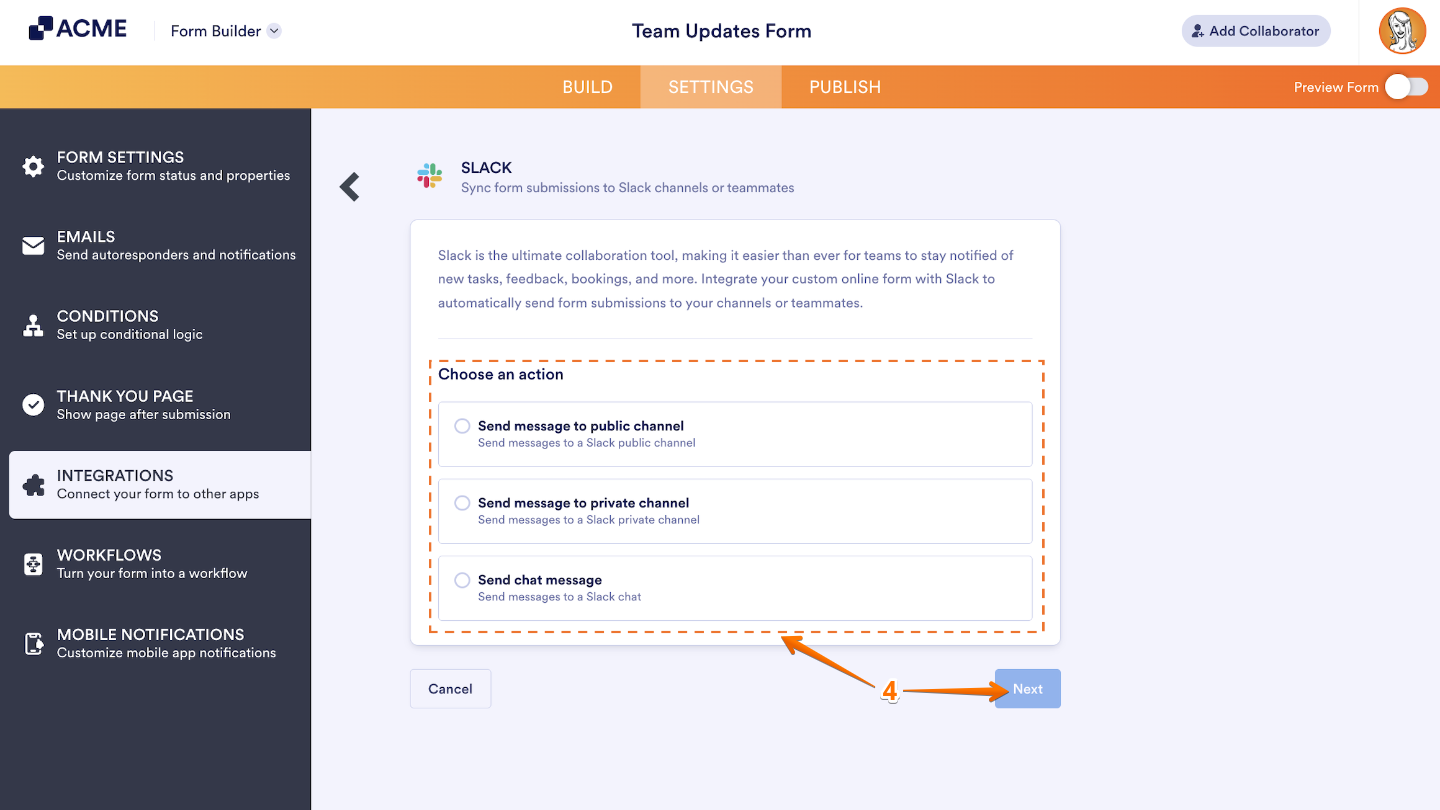
- Now, under the Choose an Action section on the right, select what you want to do, and then click on Next.
- Send Message to Public Channel — Automatically post your form submissions to a public Slack channel that anyone in your workspace can access. It’s perfect for team-wide updates, announcements, or project tracking where transparency matters.
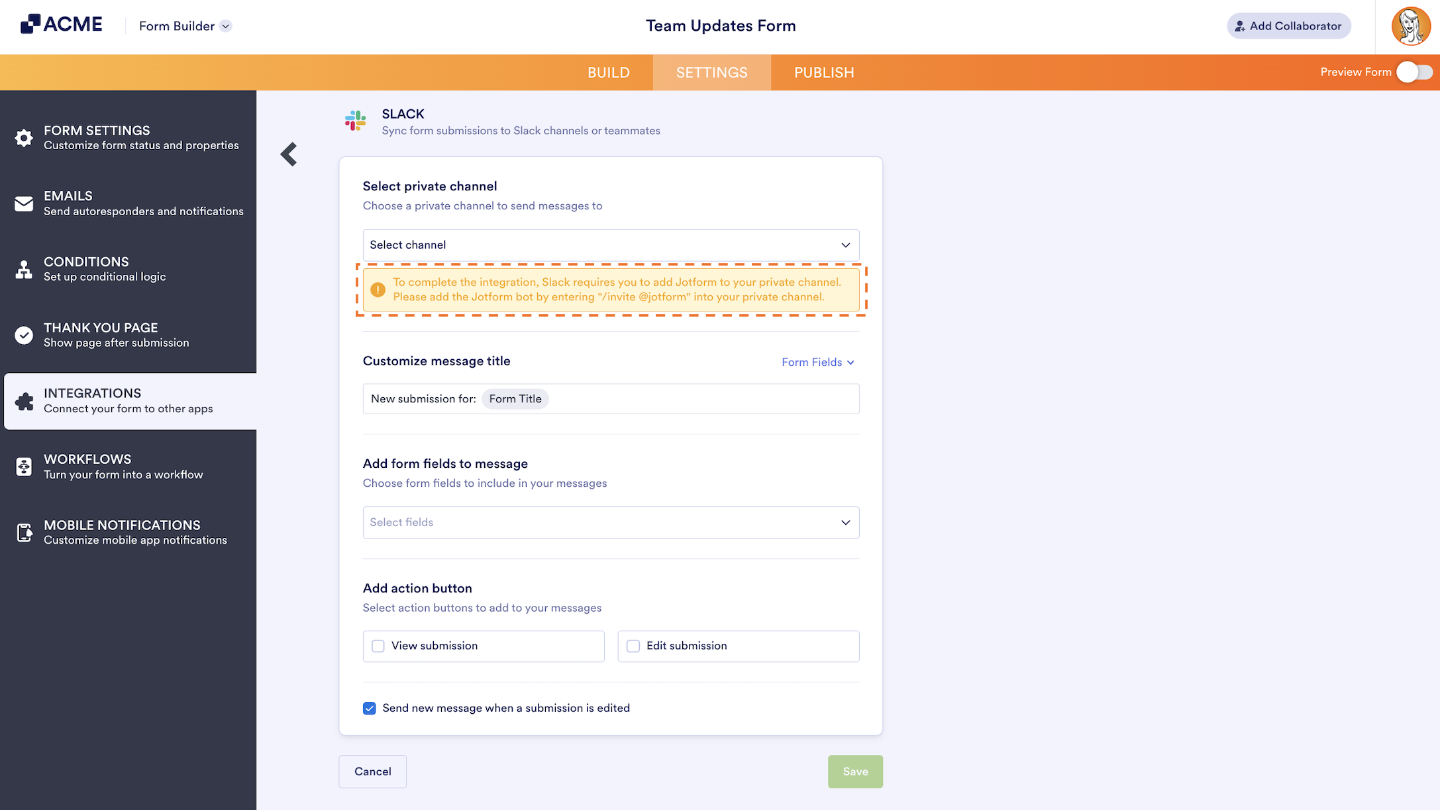
- Send Message to Private Channel — Send form submissions to a private Slack channel that’s only visible to selected members. This option is great for sharing sensitive data or updates meant for specific teams, like HR, finance, or management.
- Send Chat Message — Deliver a form submission directly as a private message to a specific Slack user. This is ideal when a submission needs personal attention or a quick response from one person.
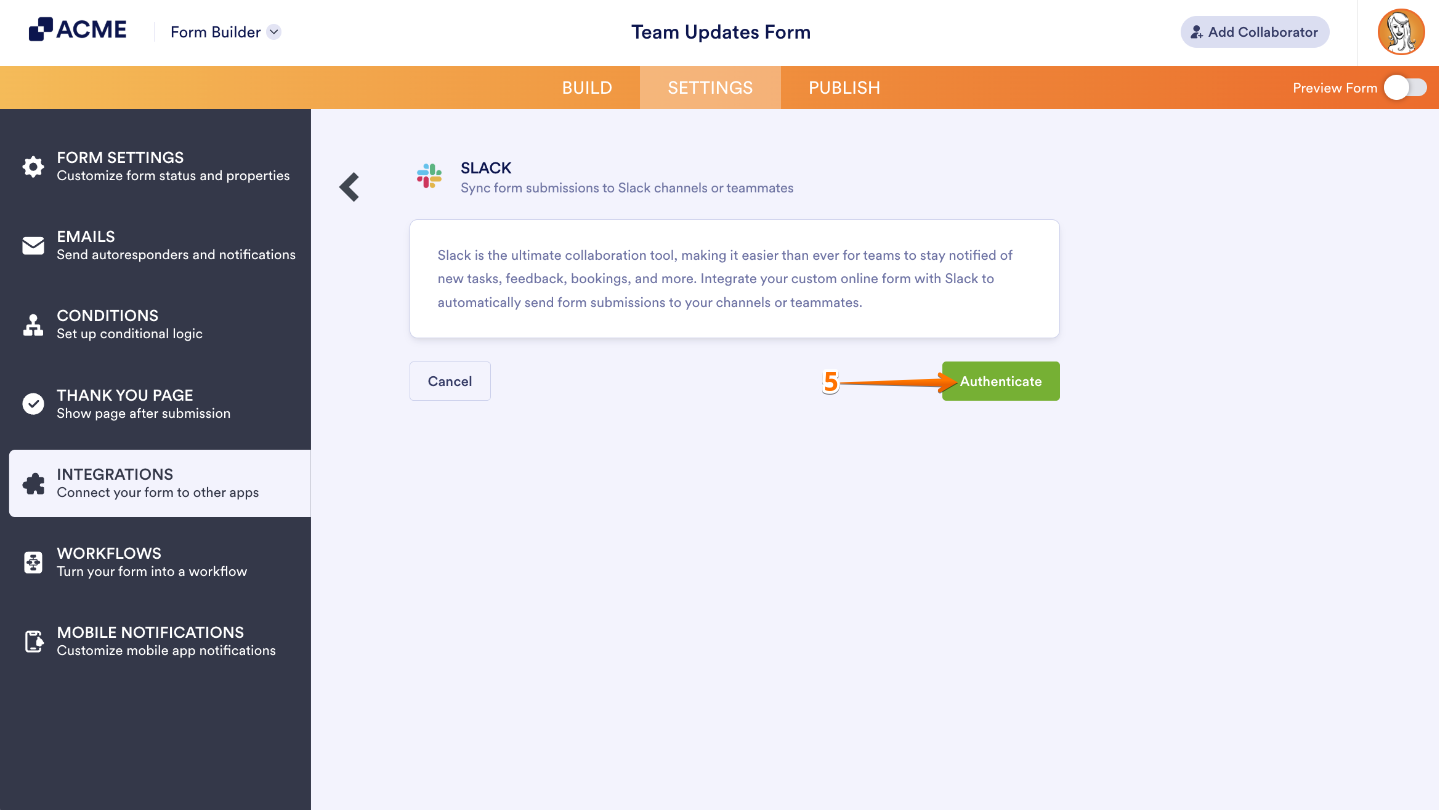
- Next, click on Authenticate and log in to your Slack account.
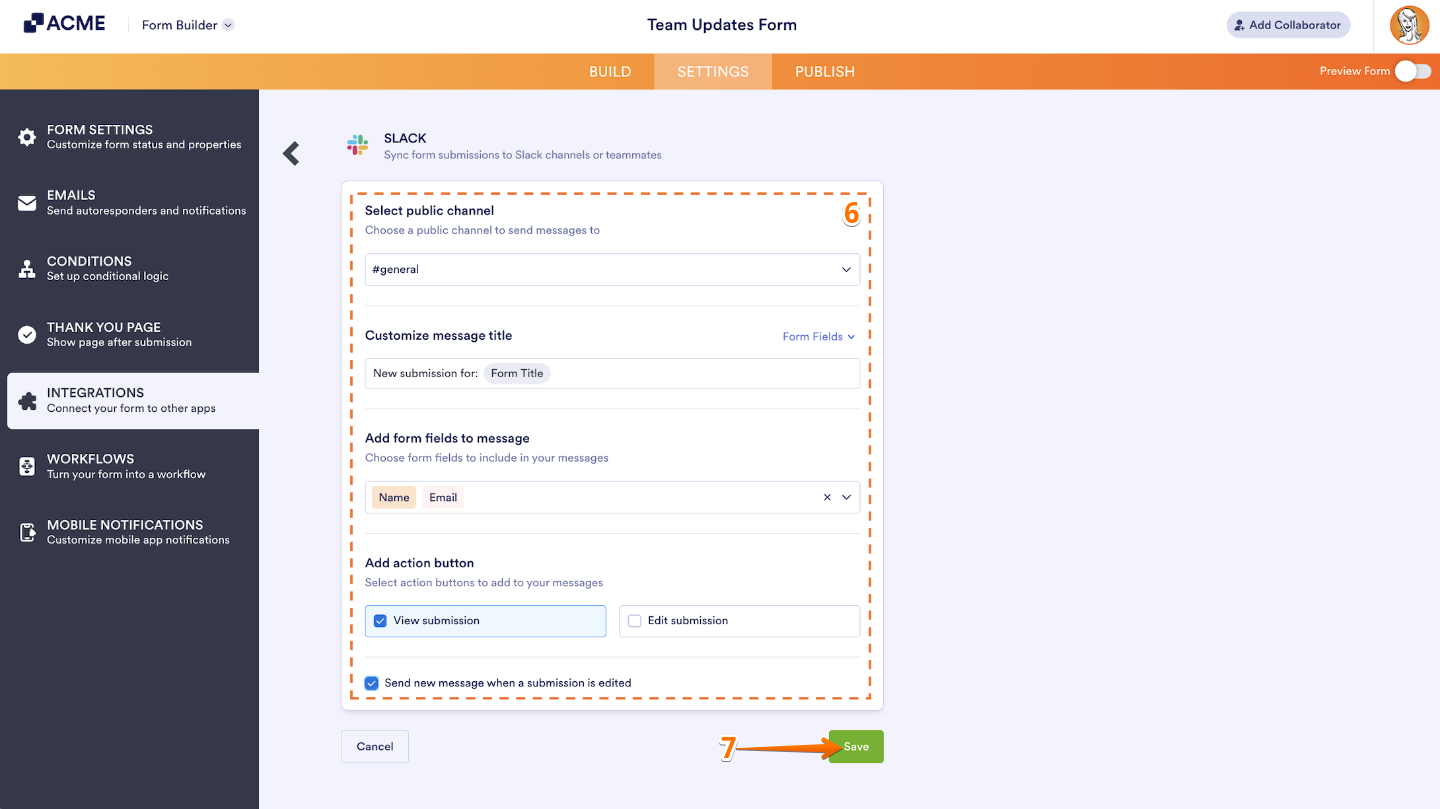
- After that, you can set up the available options based on the action you’ve chosen. For example, if you selected Send Message to a Public Channel, you’ll be asked to configure the following details:
- Select public channel — Pick the public Slack channel where you’d like your messages to be sent.
- Customize message title — Click Form Fields to personalize your message title with information from your form, or type in your own custom title to make it more meaningful.
- Add form fields to message — Include key form details right in your message so your team can see important info at a glance.
- Add action button — Add handy buttons like View Submission or Edit Submission so team members can quickly check or update the entry without leaving Slack.
- Send new message when a submission is edited — Turn this on if you’d like Slack to send a new message anytime a form submission gets updated.
- Once you’re done, click on Save.
The setup is pretty similar for the other action types. The only extra step comes when you’re sending a message to a private channel—you’ll need to invite the Jotform bot first. Just type /invite @jotform in that private channel, and you’re good to go.
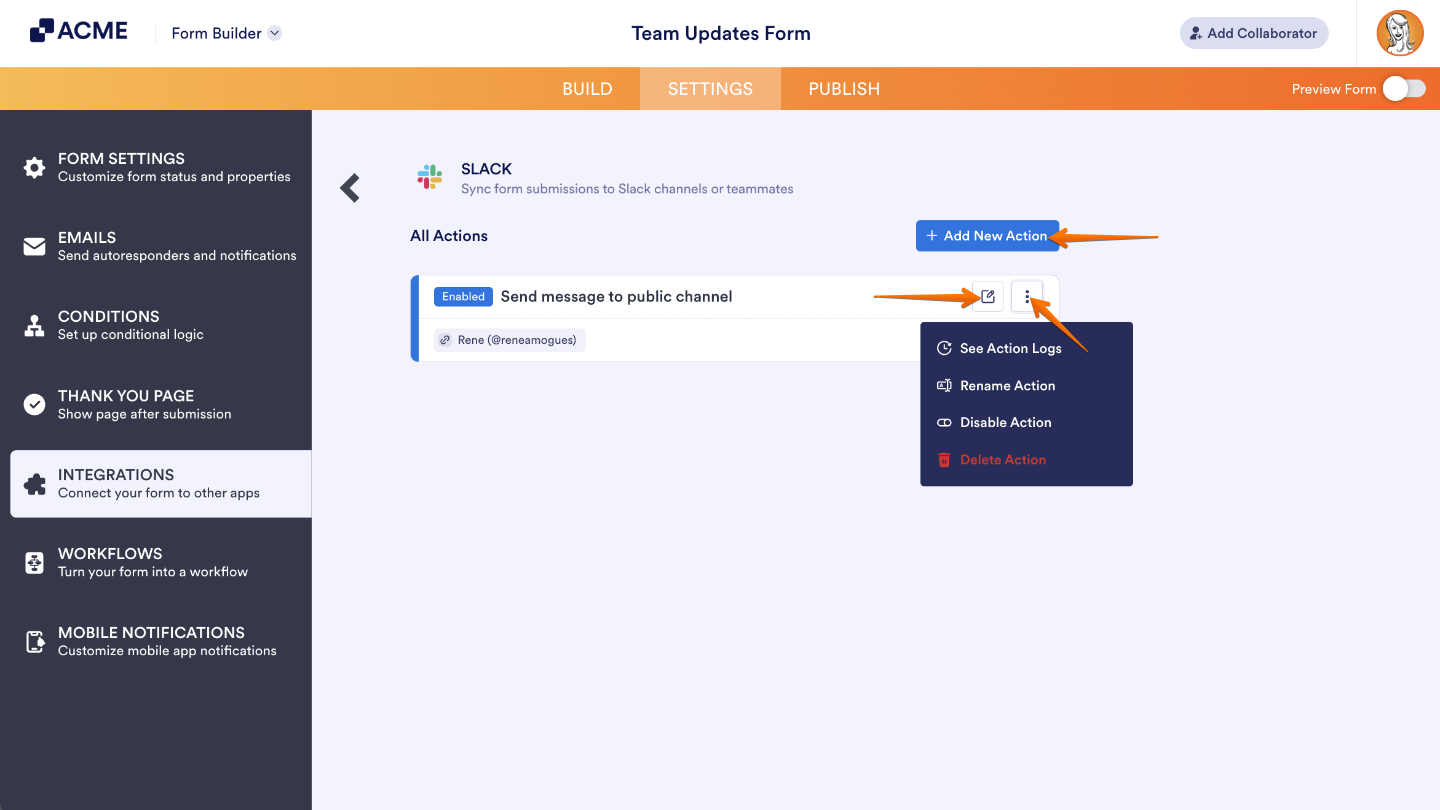
Adding New Action and Viewing Options
After you’ve finished setting up the integration, you’ll see all the actions you’ve created listed on the main screen. If you’d like to add another one, just click Add New Action—it’s that easy.
When you hover over any existing action, you’ll notice two icons appear on the right side: the Edit Action (Edit icon) and the More (Three Dots icon). The More menu gives you a few extra options to manage your actions—here’s what you’ll find there:
- See Action Logs — View a record of all your Slack actions, including both successful and failed ones. It’s a handy way to check what’s working and troubleshoot any issues that pop up.
- Rename Action — Want to give your action a more meaningful name? Use this option to personalize the title so it’s easier to recognize later.
- Disable Action — When you need to pause your integration for a bit, this option lets you temporarily stop the action without deleting it.
- Delete Action — If you no longer need this integration, choose this option to remove it from your form completely.
Sending Data to Slack
Once everything’s set up, your form takes care of the heavy lifting—automatically sending updates to Slack while your team focuses on getting things done. Here’s an example of what the data looks like when it arrives in Slack:


Send Comment: