The monday.com platform is a visual collaboration tool that helps transform how teams work together. It’s a simple but intuitive tool that enables people to manage work, meet deadlines, and build a collaborative culture.
With monday.com sends information from your form to your monday.com account as soon as someone fills out and submits a form.
When you add the monday.com integration to one of your forms, preselected data is exported to fill in key details for boards, groups, or items in your monday.com account. This exchange of information eliminates the need for manual data entry or a third-party software tool to connect your form and monday.com.
Connecting Your monday.com Account
Monday.com integration requires you to select an action first and connect/select your account. Here’s how:
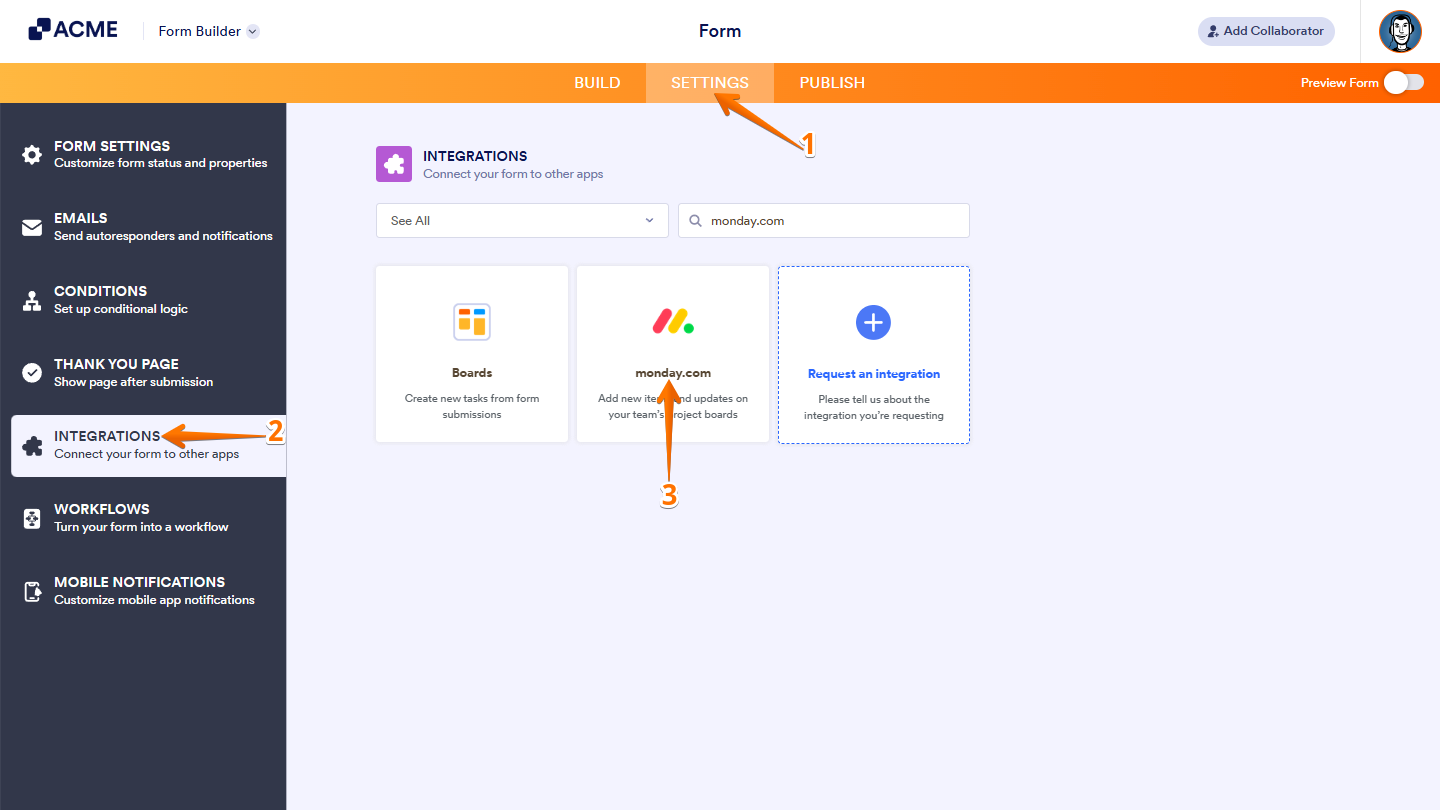
- In Form Builder, in the orange navigation bar at the top of the page, click on Settings.
- In the menu on the left, click on Integrations.
- Then, search for monday.com and click on it.
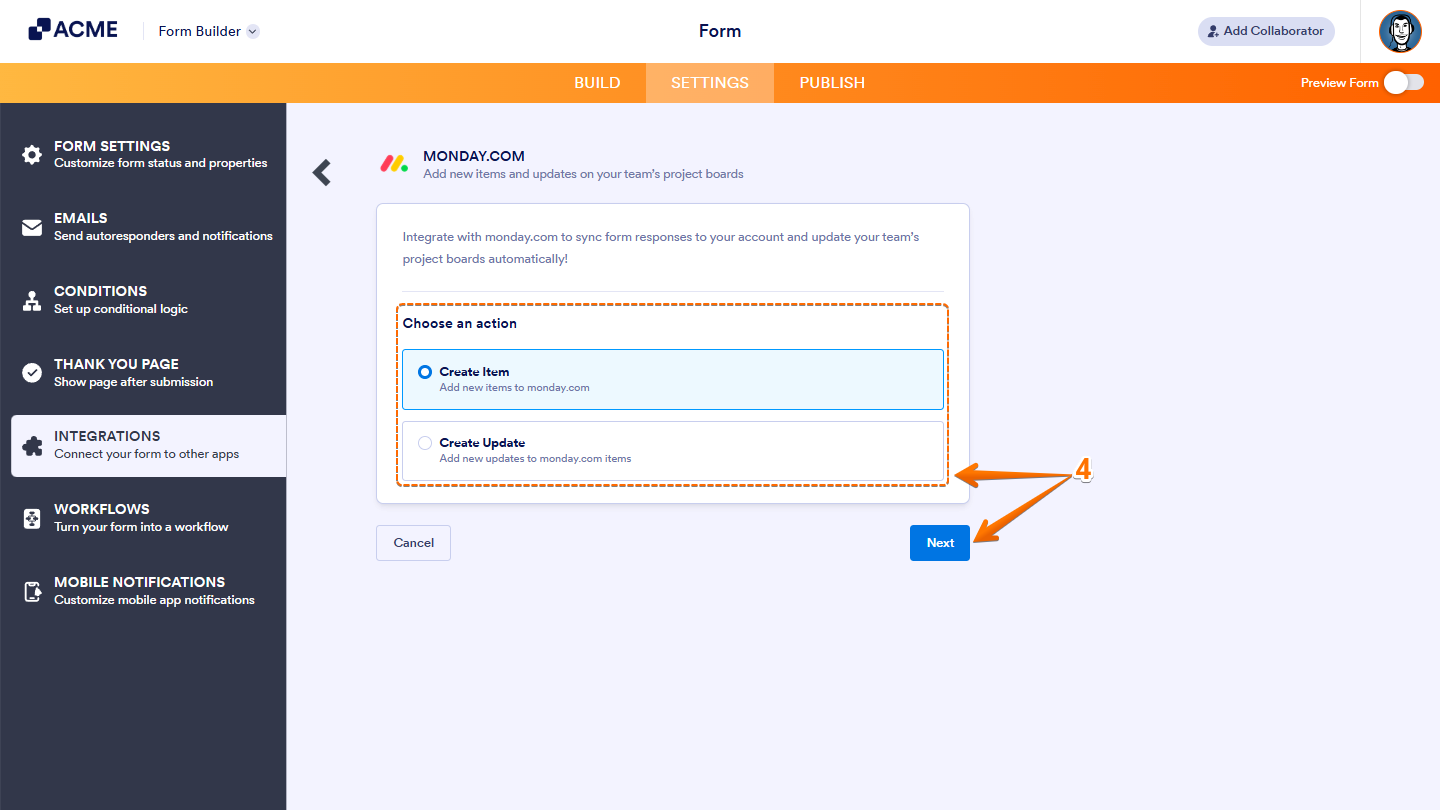
- Now, under the Choose an Action section on the right, select what you want to do, and then click on Next.
- Create Item — Select this to create an item on a board/group.
- Create Update — Select this to create an update to an item. The update is a term that monday.com uses to describe a feature that is similar to a comment.
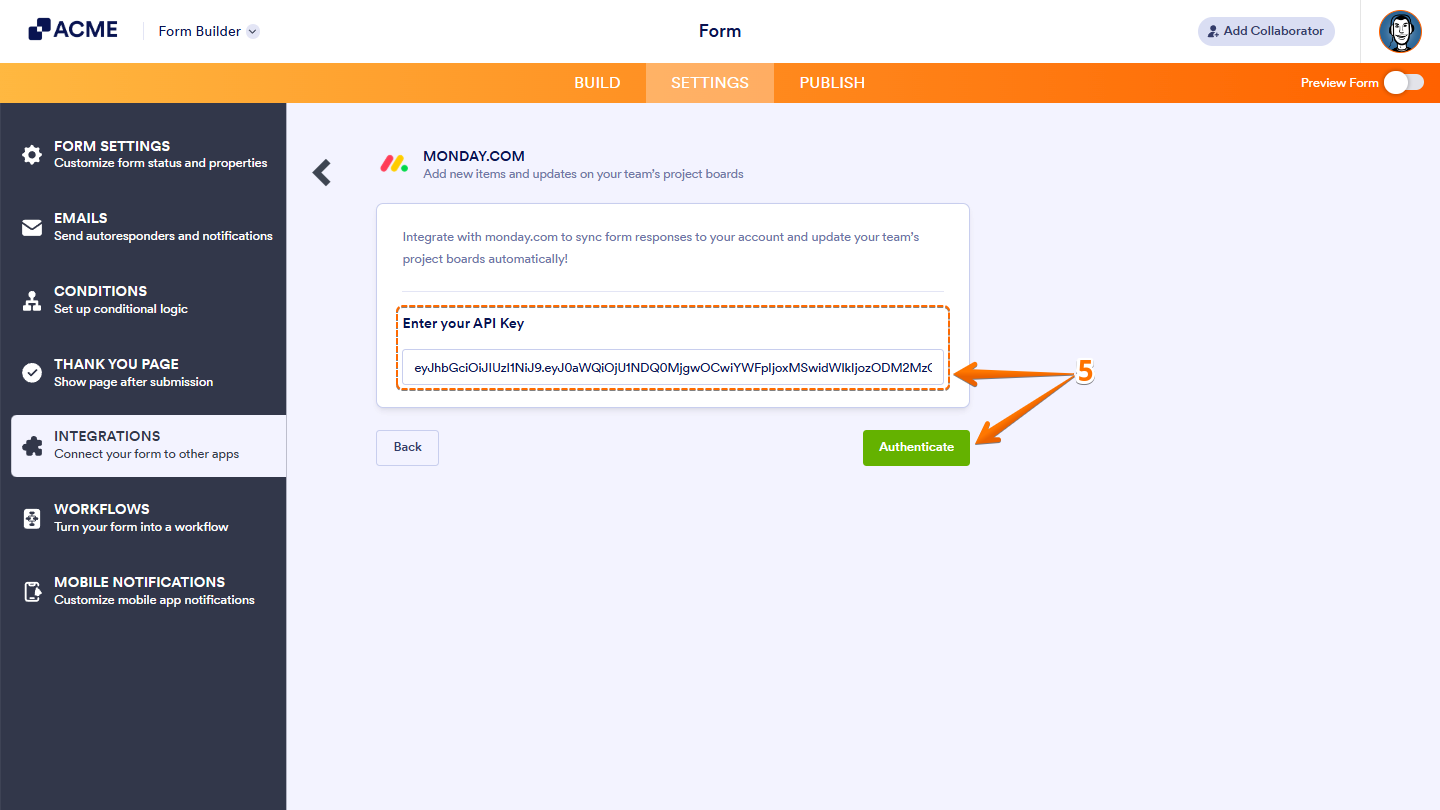
- Next, enter your monday.com API Key, and then click on Authenticate.
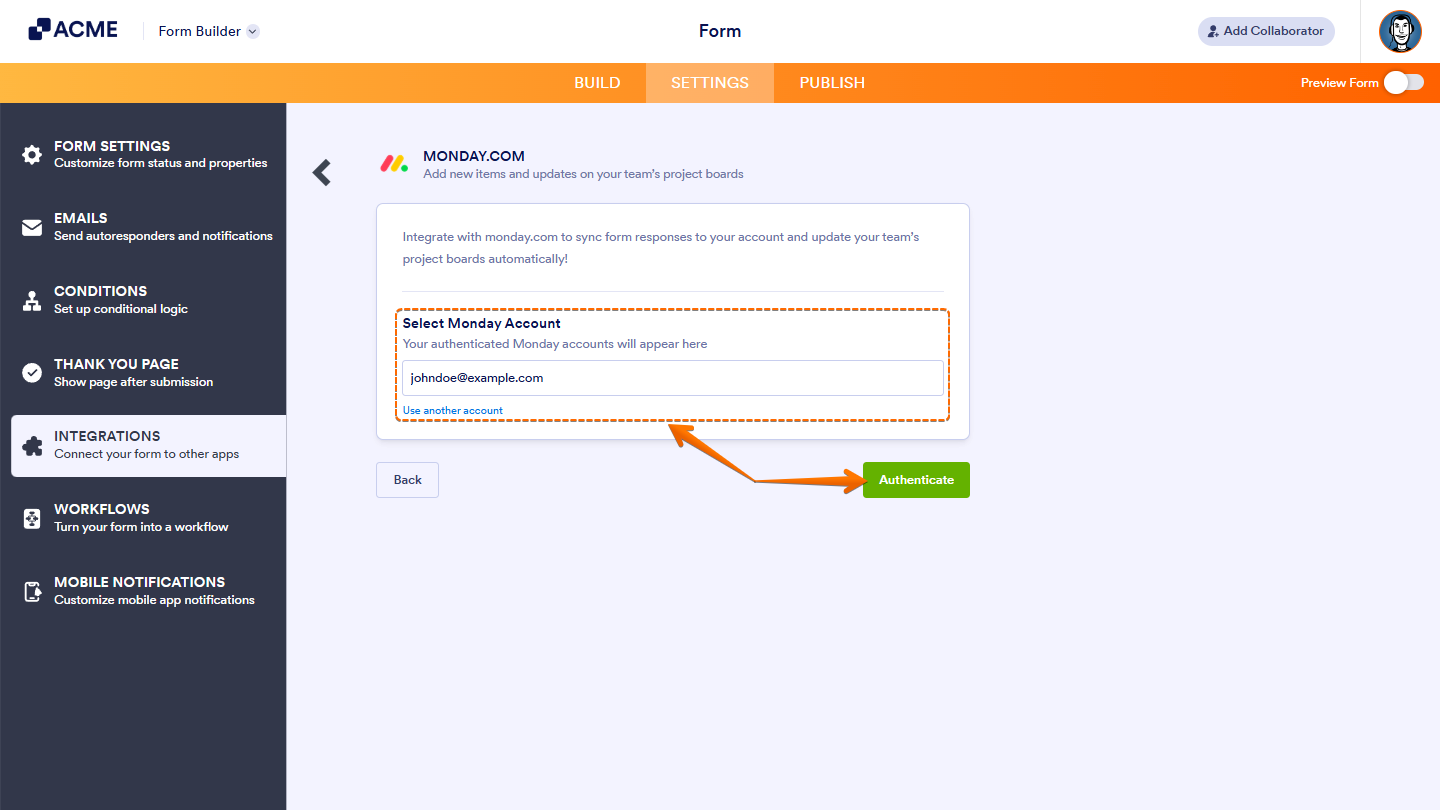
If you’ve logged in before, just pick your Monday account from the Dropdown menu, and click on Authenticate. To use a different one, click on Use Another Account Link.
Create Item
The Create Item option lets you automatically create an item in your monday.com as soon as someone submits your form. To get going, here’s what you’ll do:
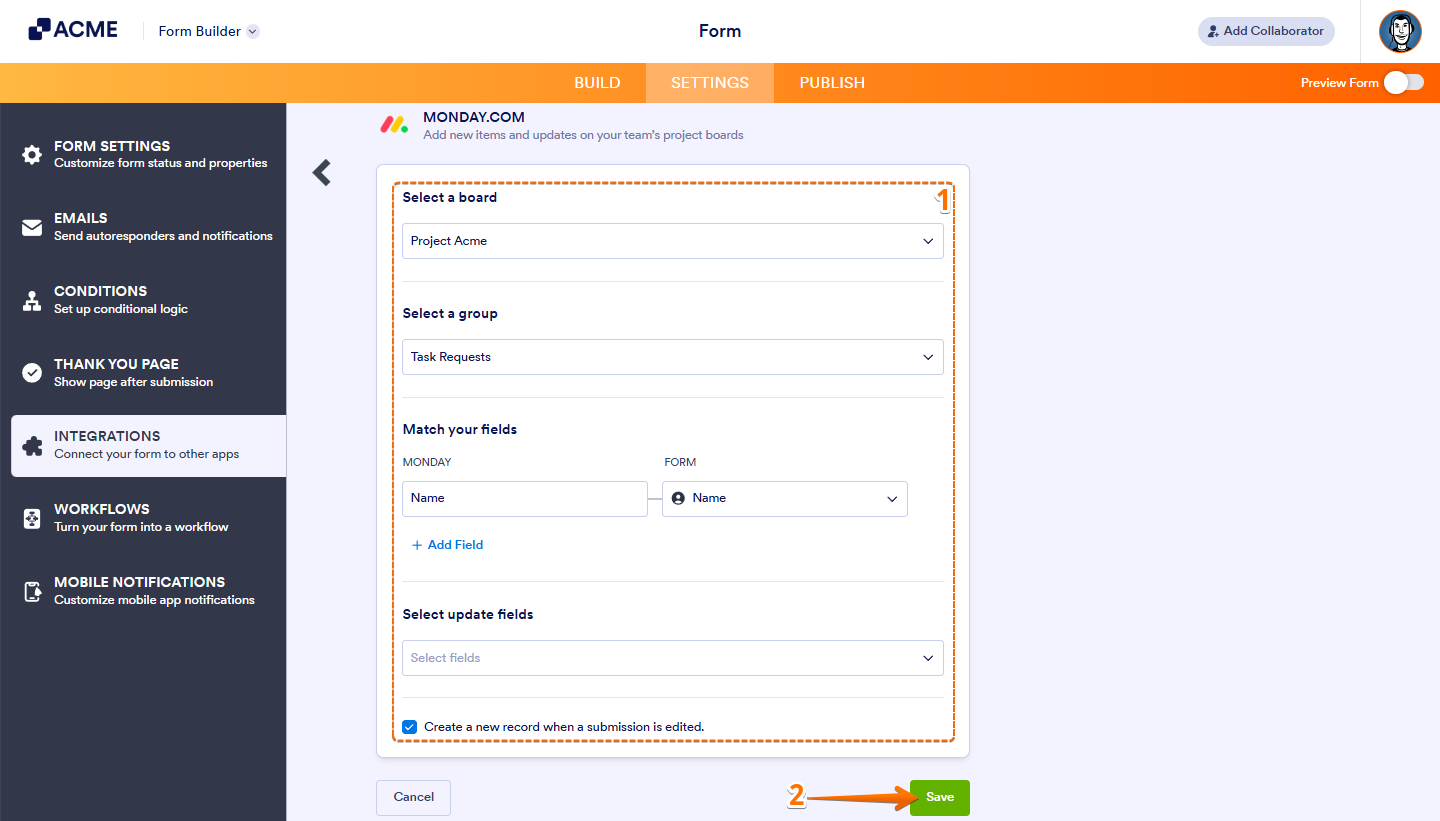
- In the next screen, after authenticating your account, setup these things:
- Select a Board — Choose the board where the new item will be created.
- Select a Group — Choose the group within that board where the item should appear.
- Match Your Fields — Map your form fields to the corresponding fields in monday.com.
- Select Update Fields — Choose which fields should be updated when a submission is edited. Take a look at this guide on monday.com – The Updates Section for more details.
- Create a New Record When Submission Is Edited — Enable this option if you want a new item to be created every time a submission is modified.
- Once you’re done, click on Save.
Note:
- If you’re matching a Phone Number field with monday.com, make sure the Country Code option is enabled and Input Masking is disabled, monday.com requires phone numbers to include a Country Code—without it, the integration won’t send any data to monday.com. To learn more, check out this guide about monday.com – The Phone Column.
- To add more fields when matching fields, click on + Add Field at the bottom of the section. To remove one, just click Remove Line Item next to the mapped fields on the right.
Create Update
With the Create an Update action, you can push an update to a specific item in your board/group. This is useful if you assign a specific item to someone, such as a prefill. Here’s how to do it:
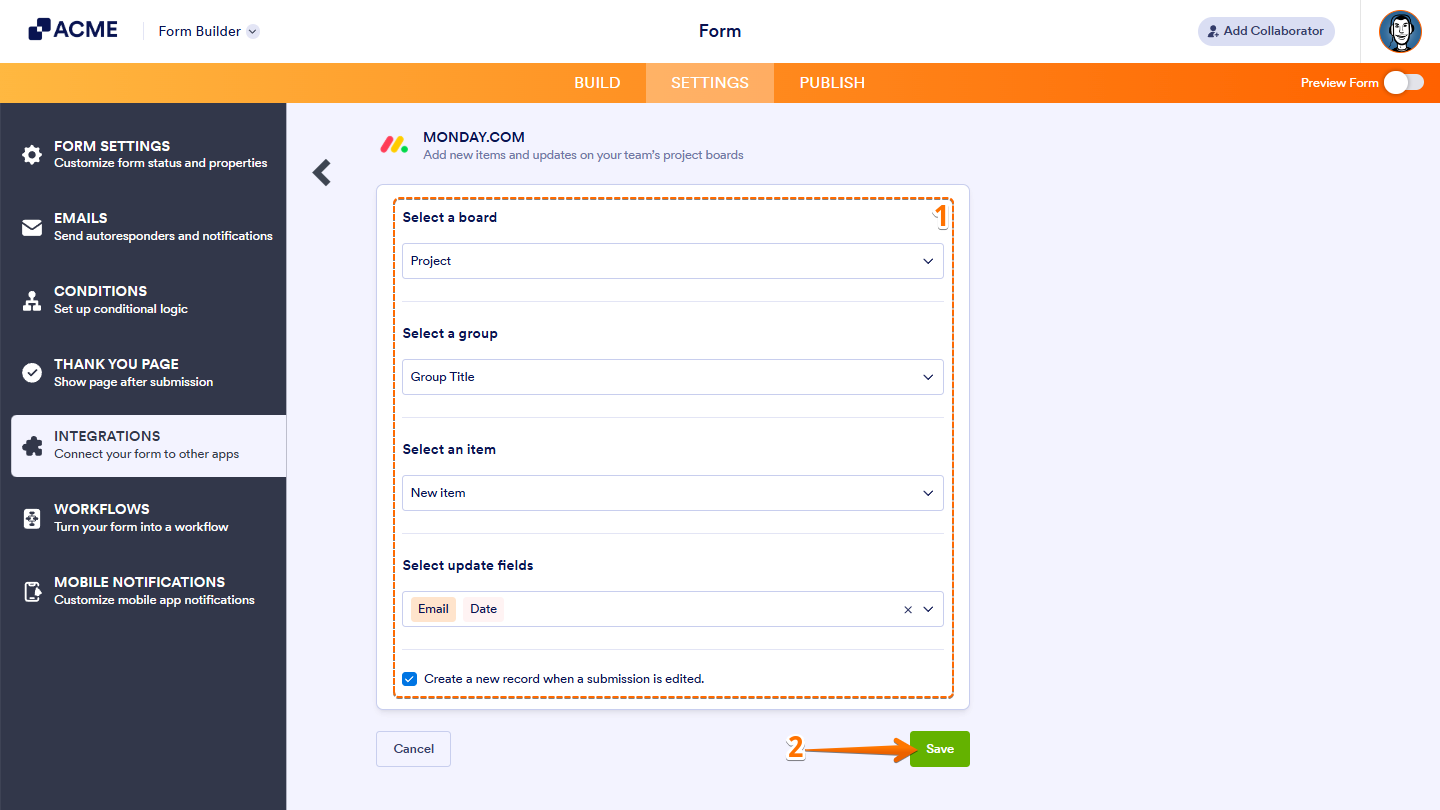
- In the next screen, after authenticating your account, setup these things:
- Select a Board — Choose the board where the new item will be created.
- Select a Group — Choose the group within that board where the item should appear.
- Select an Item — Choose an existing item if you’d like to update it instead of creating a new one.
- Select Update Fields — Choose which fields should be updated when a submission is edited. Take a look at this guide on monday.com – The Updates Section for more details.
- Create a New Record When Submission Is Edited — Enable this option if you want a new item to be created every time a submission is modified.
- Once you’re done, click on Save.
Managing monday.com Integration Actions
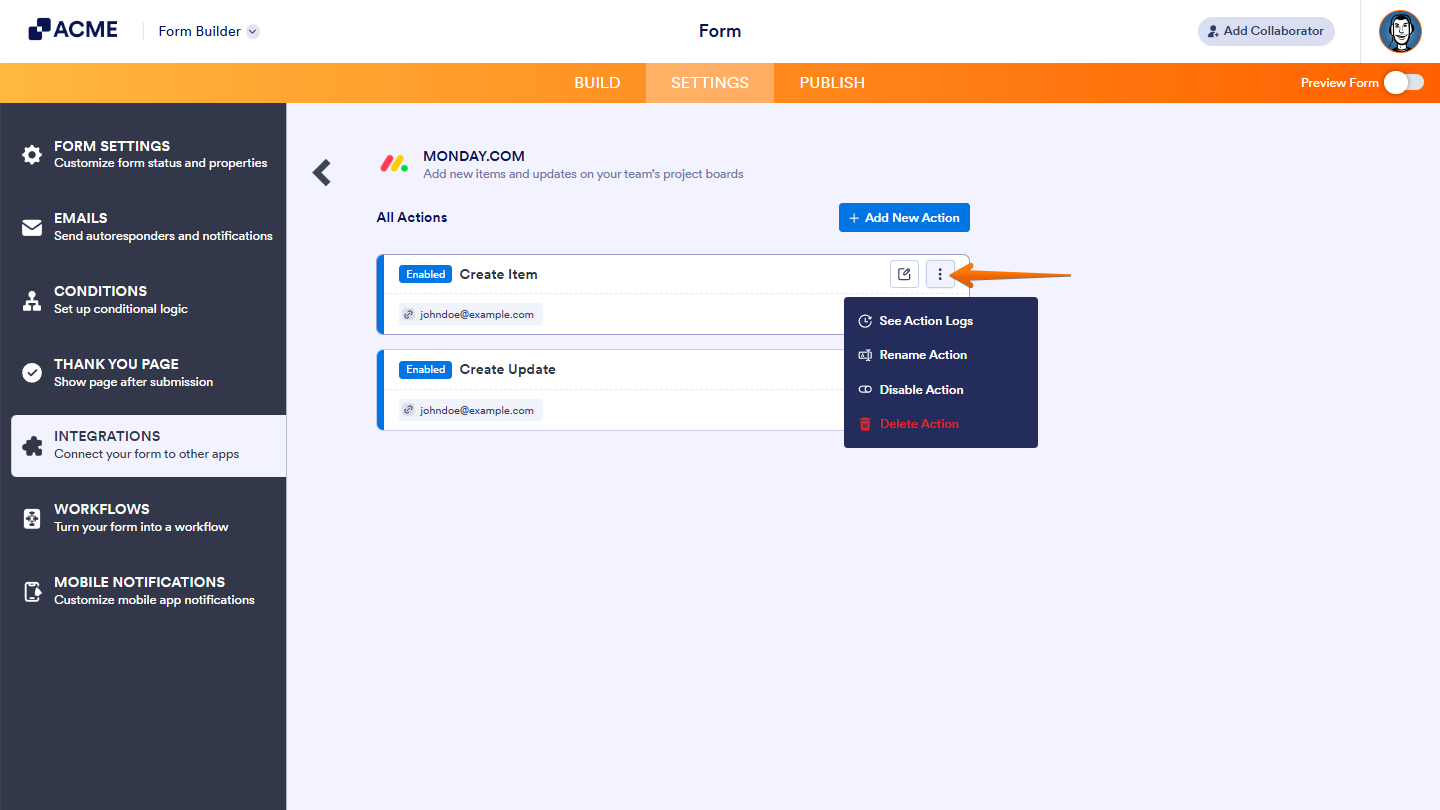
After saving the integration, you’ll see a list of the Zoom actions you’ve set up and the Add New Action button on the main page. Hover your mouse over an action and click on the Three Dots icon on the right side of it to access these options:
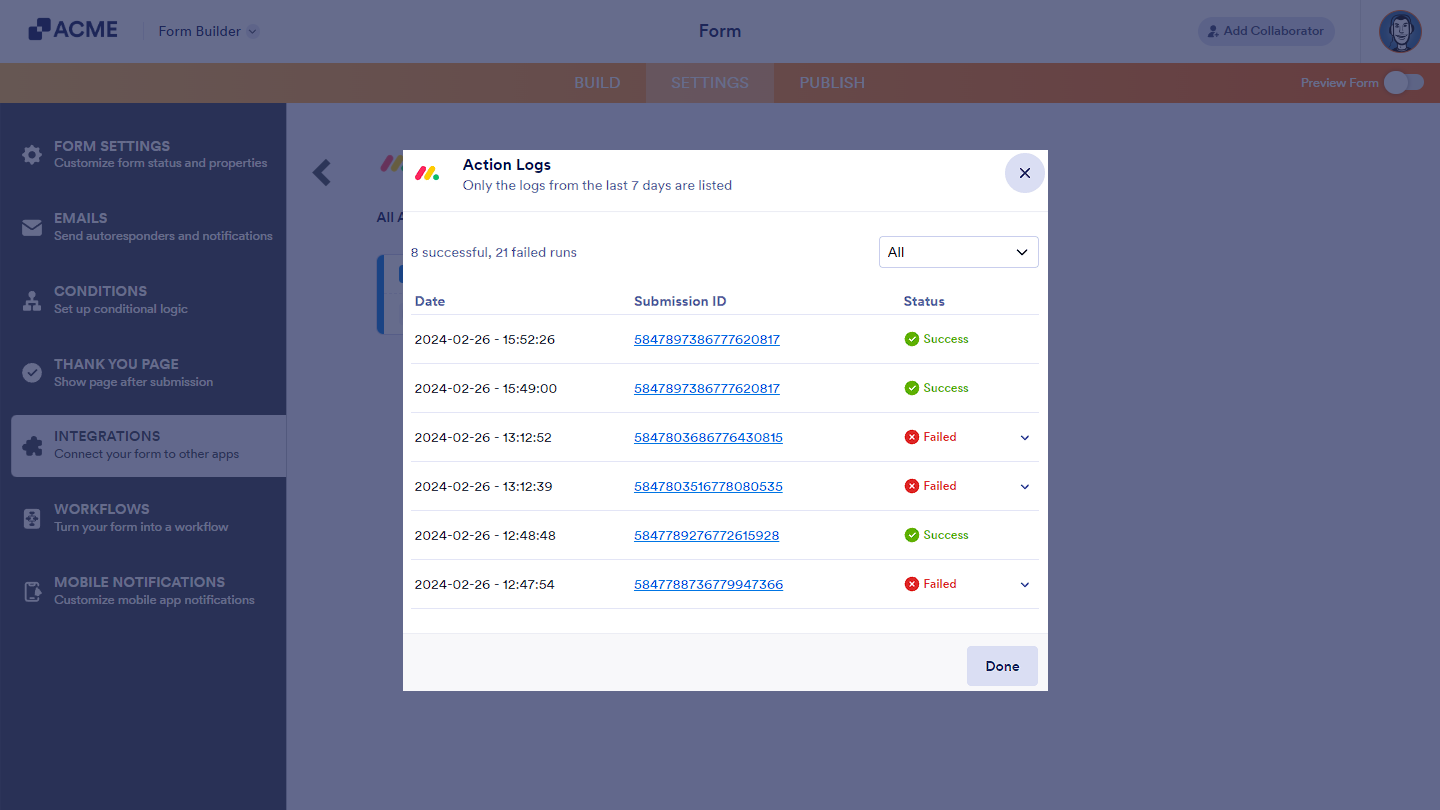
- See Action Logs — View successful and failed runs, helpful for troubleshooting.
- Rename Action — Change the action’s title.
- Disable Action — Temporarily stop the integration from sending data.
- Delete Action — Remove the action from your form.
The action logs window will look like the following:

Send Comment: