Date and time stamps are useful in many cases, but they aren’t included as default fields in email templates or thank you pages. But, you can add a date tag to your emails to display the submission date, making it easier to track entries, stay organized, and keep things looking professional. The date can also be customized to be shown in different formats, so you can choose what works best for you.
You can add a date to an Email Notification in a few easy steps. Here’s how to set it up:
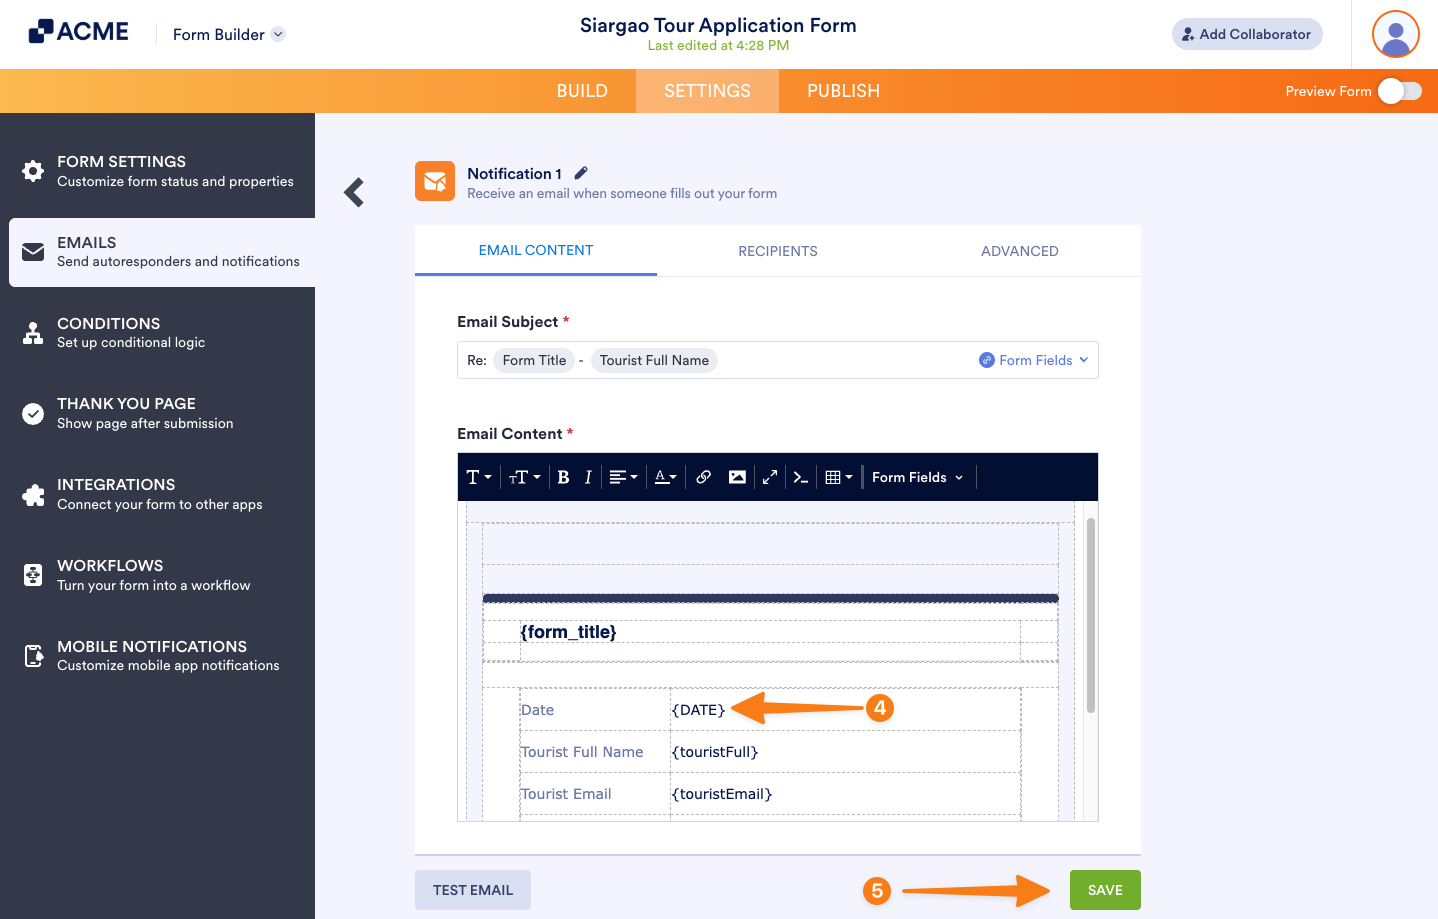
- In Form Builder, in the orange navigation bar at the top of the page, click on Settings.
- In the menu on the left side of the page, click on Emails.
- Hover your mouse over the Notification Email and click on the Pencil icon to edit it.

- Then, in the Email Content section, click on the cell you want to add the Date Tag to, and enter {DATE}.
- Now, click on Save at the bottom to save your changes.
That’s it. Here’s an example of how it’ll look:
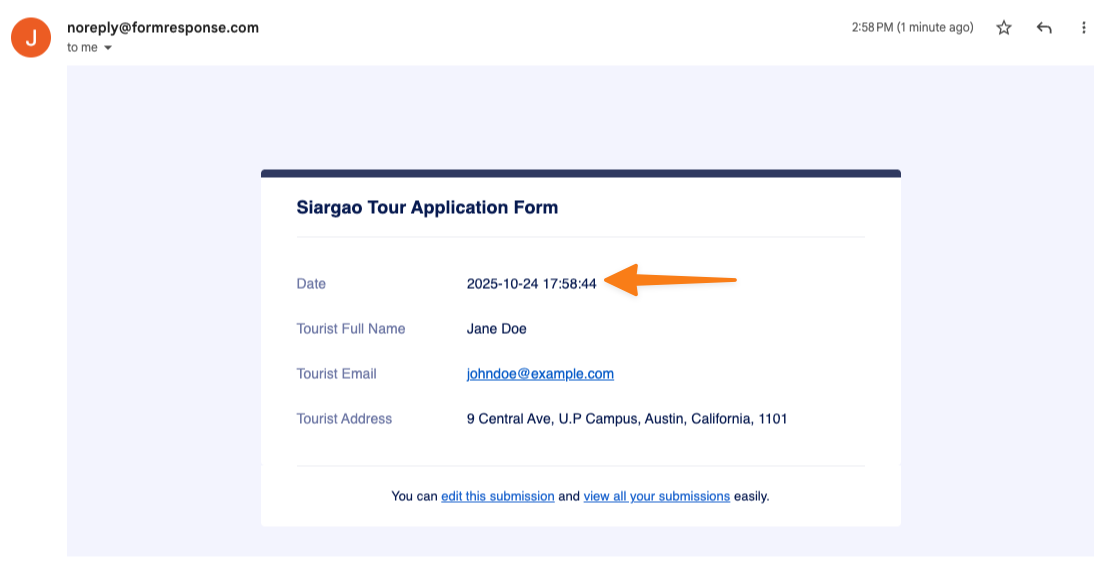
Note: If you use the {DATE} tag without a parameter in your templates, it will automatically be replaced with a standard date and time format: Year-Month-Day Hour:Minute:Second.
If you’d like to change how the date looks, you can add a parameter to the tag—we have several options that you can choose from:
| Tag | Output |
|---|---|
| {DATE} | 2011-02-07 05:17:05 |
| {DATE:Date-US} | Feb 7, 2011 |
| {DATE:Date-EU} | 7 Feb, 2011 |
| {DATE:Time-US} | 5:17:05 AM |
| {DATE:Time-EU} | 5:17:05 |
| {DATE:Full-US} | Feb 7, 2011 at 5:17:05 AM |
| {DATE:Full-EU} | 7 Feb, 2011 at 5:17:05 |
| {DATE:l, jS of F Y at g:i A} | Monday, 7th of February 2011 at 5:17 AM |
You can customize the date further using Standard PHP Date Formatting.

Send Comment: