Dropbox is a trusted cloud storage service that makes file sharing and teamwork effortless. It lets you securely store, organize, and access your files from anywhere, whether you’re working from your computer, tablet, or phone. With Dropbox, collaboration becomes much smoother—everyone on your team can easily share updates, review documents, and keep projects moving without missing a beat.
By integrating your form with Dropbox, you can take things one step further. Every time someone submits a form, the uploaded files—along with a PDF copy of their submission data—are automatically sent straight to your Dropbox account. No more manual downloading or sorting through emails! It’s a simple yet powerful way to streamline your workflow, keep your files organized, and make sure everything you need is safely stored in one place.
Setting Up Dropbox Integration
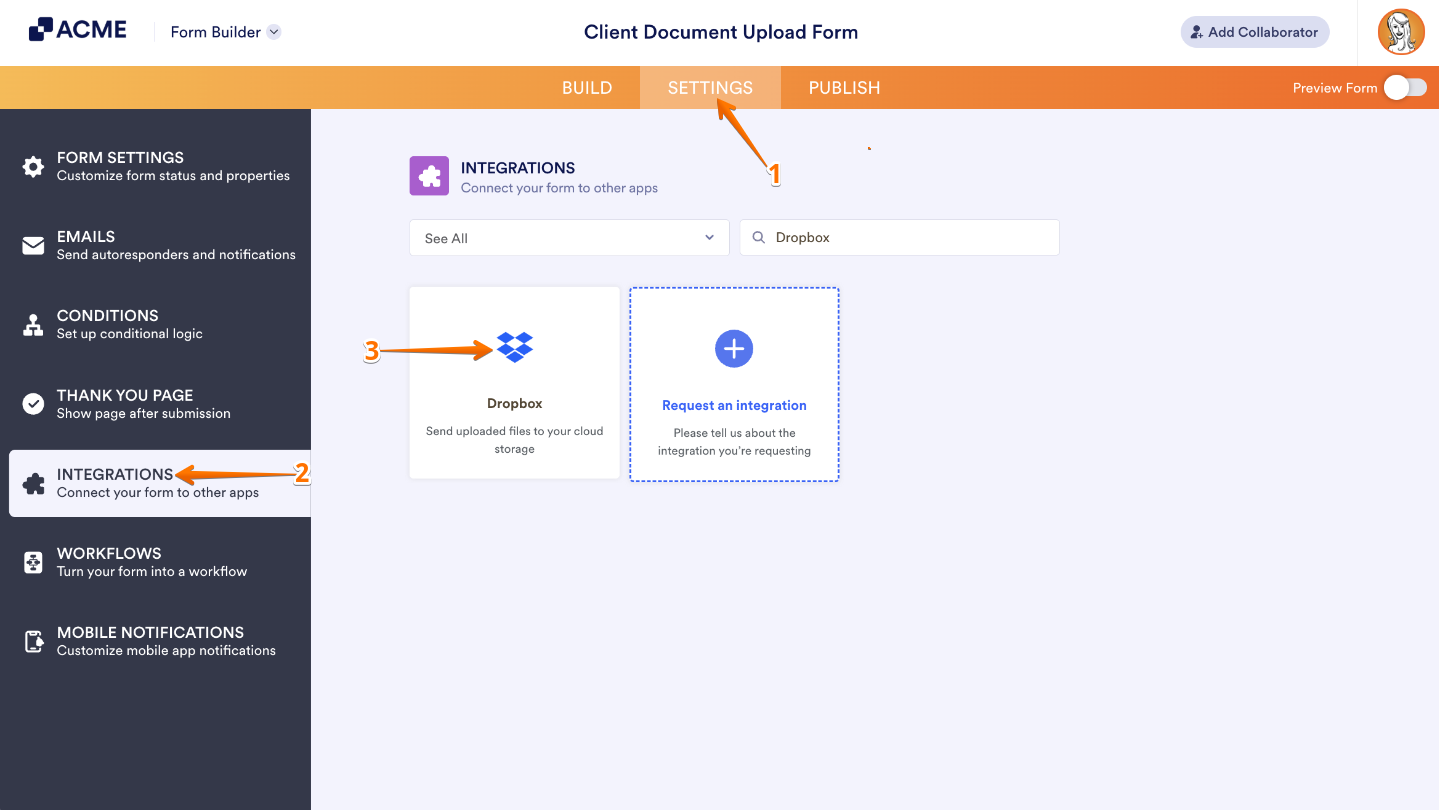
- In Form Builder, in the orange navigation bar at the top of the page, click on Settings.
- In the menu on the left, click on Integrations.
- Then, search for Dropbox and click on it.
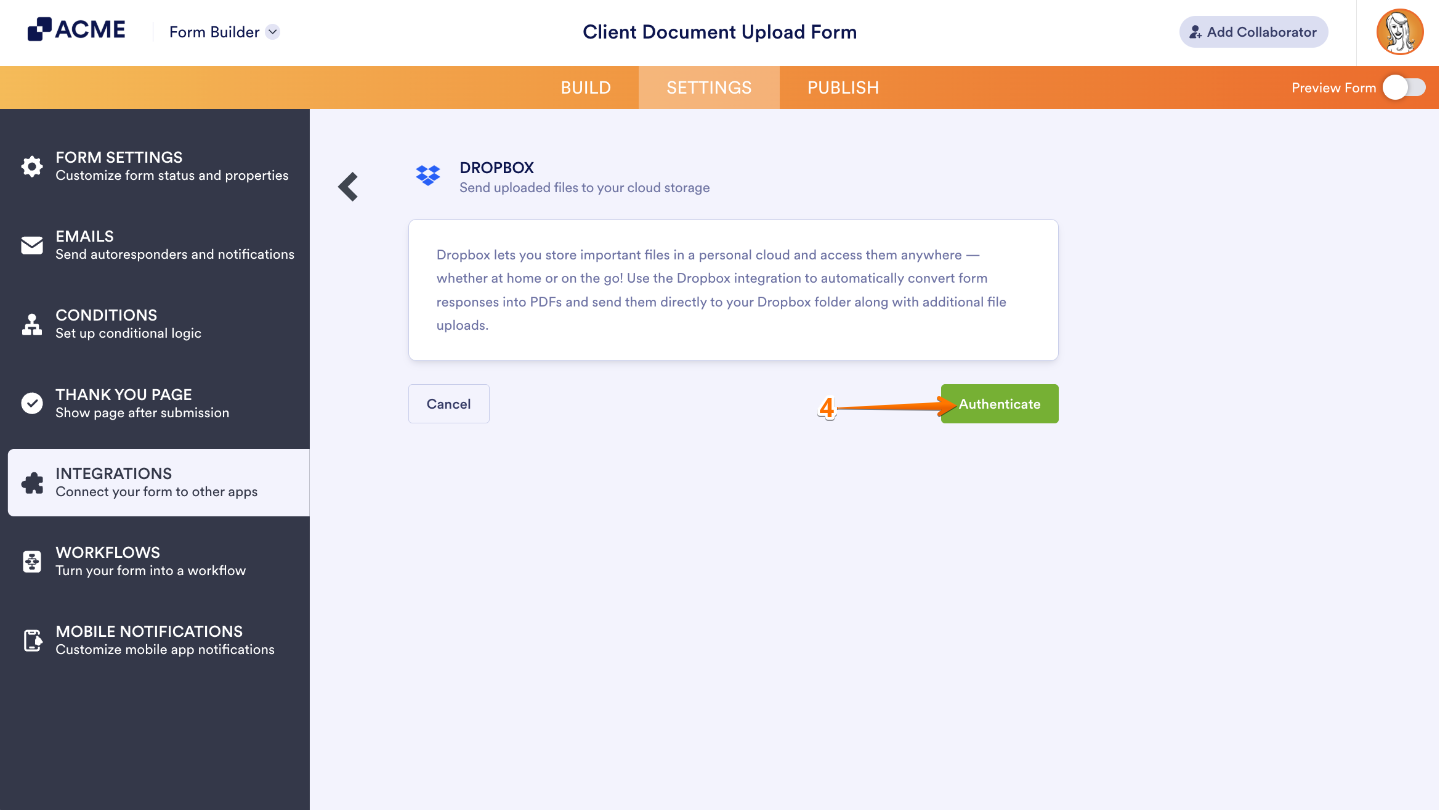
- Next, click on Authenticate and log in to your Dropbox account.
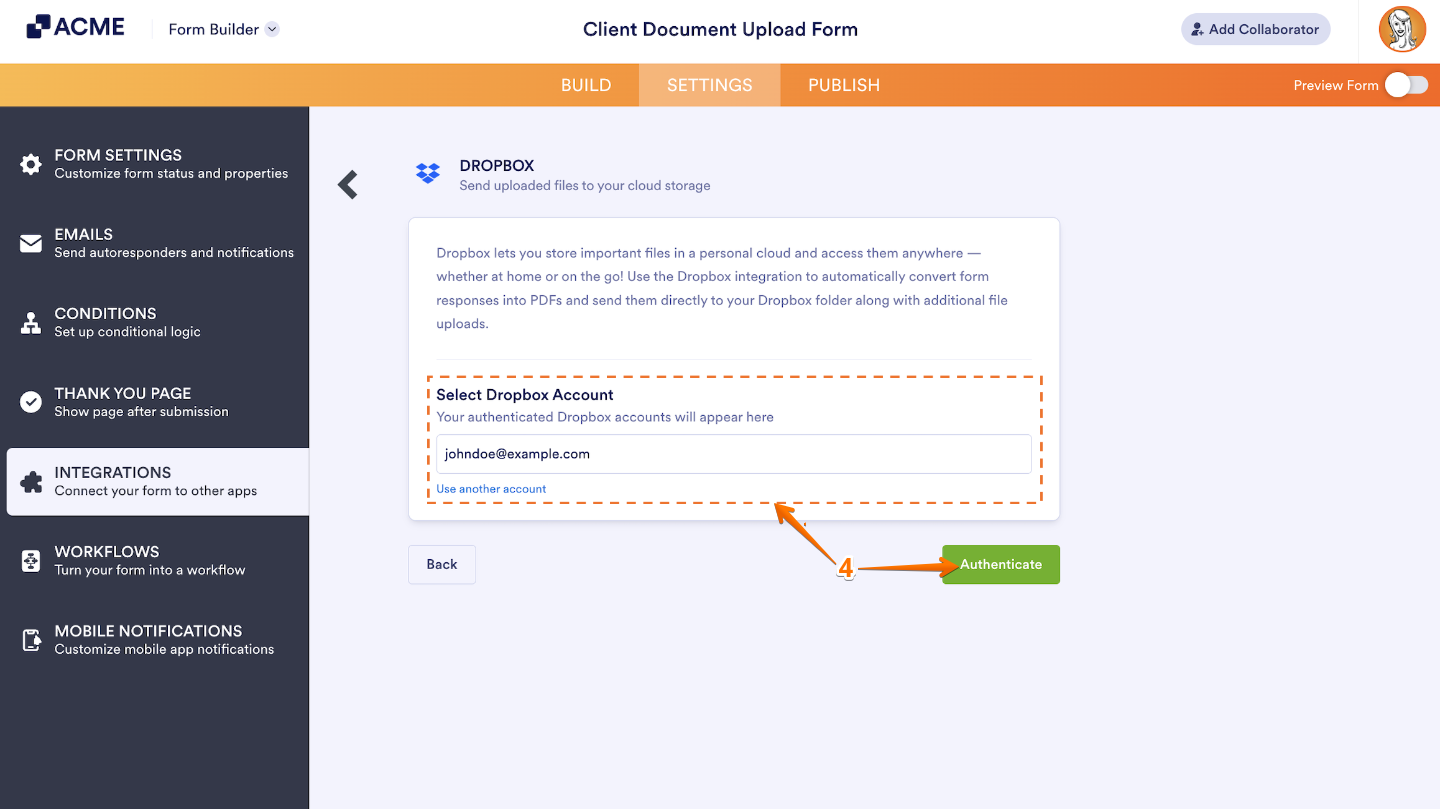
If there is a saved Dropbox account you’ve integrated any of your forms with before, you can choose its email address from the dropdown and click on the Authenticate button on the right to use it. Or, you can also click on Use Another Account below the dropdown to log in and authorize access for the integration to a different Dropbox account.
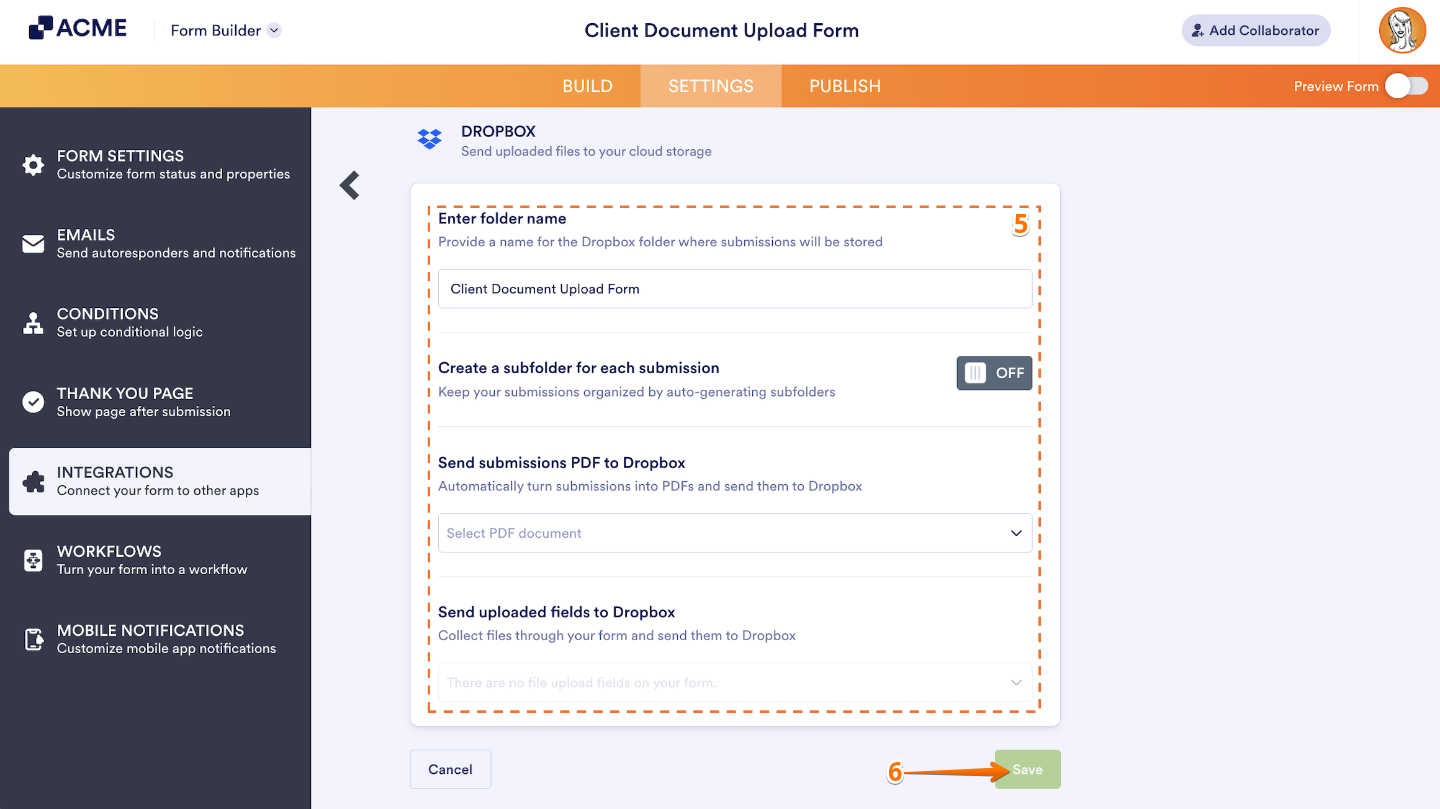
- Now, in Integration Settings, you’ll see this list of settings you can configure:
- Enter folder name — This will be your main Dropbox folder where all your submission files are stored. Choose a name that helps you easily recognize what’s inside.
- Create a subfolder for each submission — Turn this on if you’d like every submission to have its own folder inside the main Dropbox folder. You can type in a custom Folder Name or let it generate automatically based on your form fields.
- Send submissions PDF to Dropbox — Choose which PDF version of your submission you’d like to send to Dropbox. If you haven’t created a custom PDF yet, you’ll see Default. Tip: You can rename your PDF anytime—check out the guide on assigning a custom file name to your PDF report.
- Send uploaded files to Dropbox — Decide which file upload fields from your form should send files to Dropbox. You can even select multiple upload fields if you want to include all attachments.
- Once you’re done, click on Save.
Once everything’s set up, you’ll see a link to your main Dropbox folder—you can click it anytime to open and view your uploaded files.
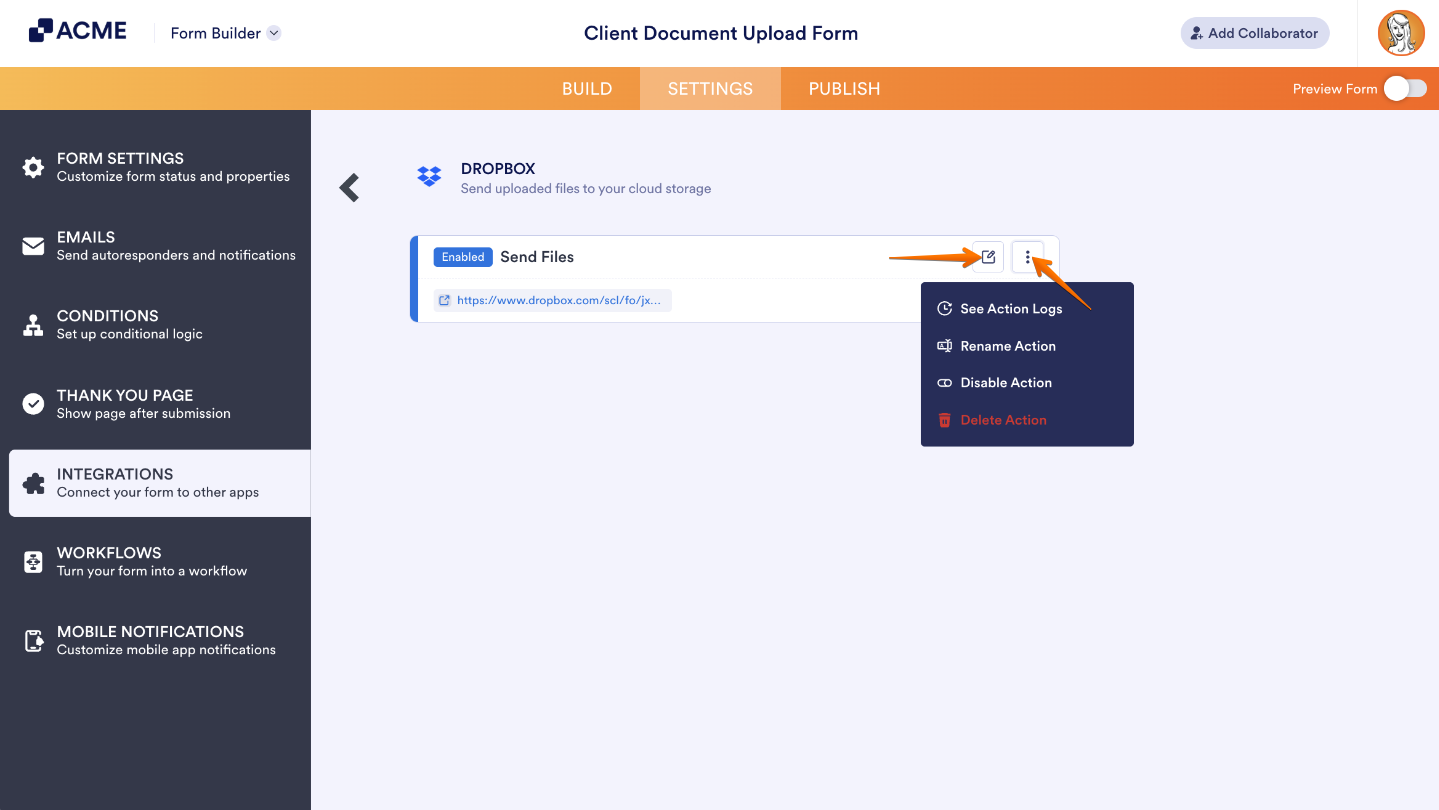
If you hover over the action you created, a few handy icons will appear on the right: the Edit Action (Pencil icon) icon and the More (Three Dots icon). The More menu gives you extra options to manage your integration—here’s what you can do from there:
- See Action Logs — Here, you can view all the successful and failed runs of your Dropbox integration. It’s a helpful spot to check if something didn’t go as planned or to make sure everything’s running smoothly.
- Rename Action — Want to keep things organized? You can easily change the action’s title to something that fits your setup better.
- Disable Action — Need to pause things for a bit? Use this option to temporarily stop the integration from sending files—you can always turn it back on later.
- Delete Action — If you no longer need the integration, you can remove it from your form completely with just one click.

Send Comment: