A clock widget is a simple way to display the current time on your website, helping visitors stay informed at a glance. Whether you’re showing your local time, highlighting a different time zone for global audiences, or adding a stylish time display to your site, a clock widget is both practical and visually appealing.
With Jotform’s Clock Widget, you can customize the clock’s appearance to match your website and choose the time zone you want to display. In this guide, you’ll learn how to set up the widget and embed it on your website in just a few simple steps.
Creating Your Clock Widget
Before you can add the Clock Widget to your website, you’ll first need to customize how it looks and choose the time and time zone you want to display. Here’s how to create your Clock Widget:
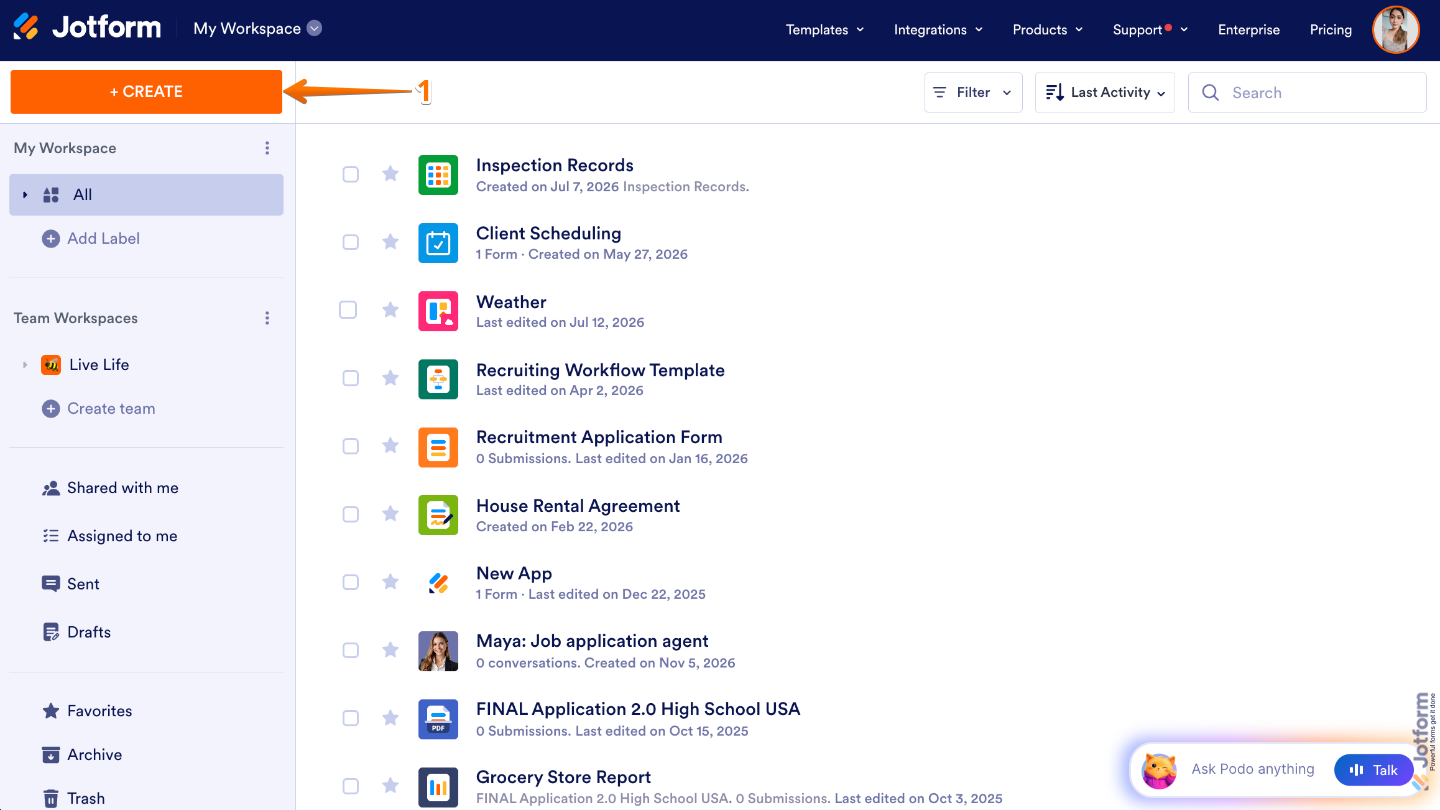
- On your Workspace page, click on Create on the top-left side of the screen.
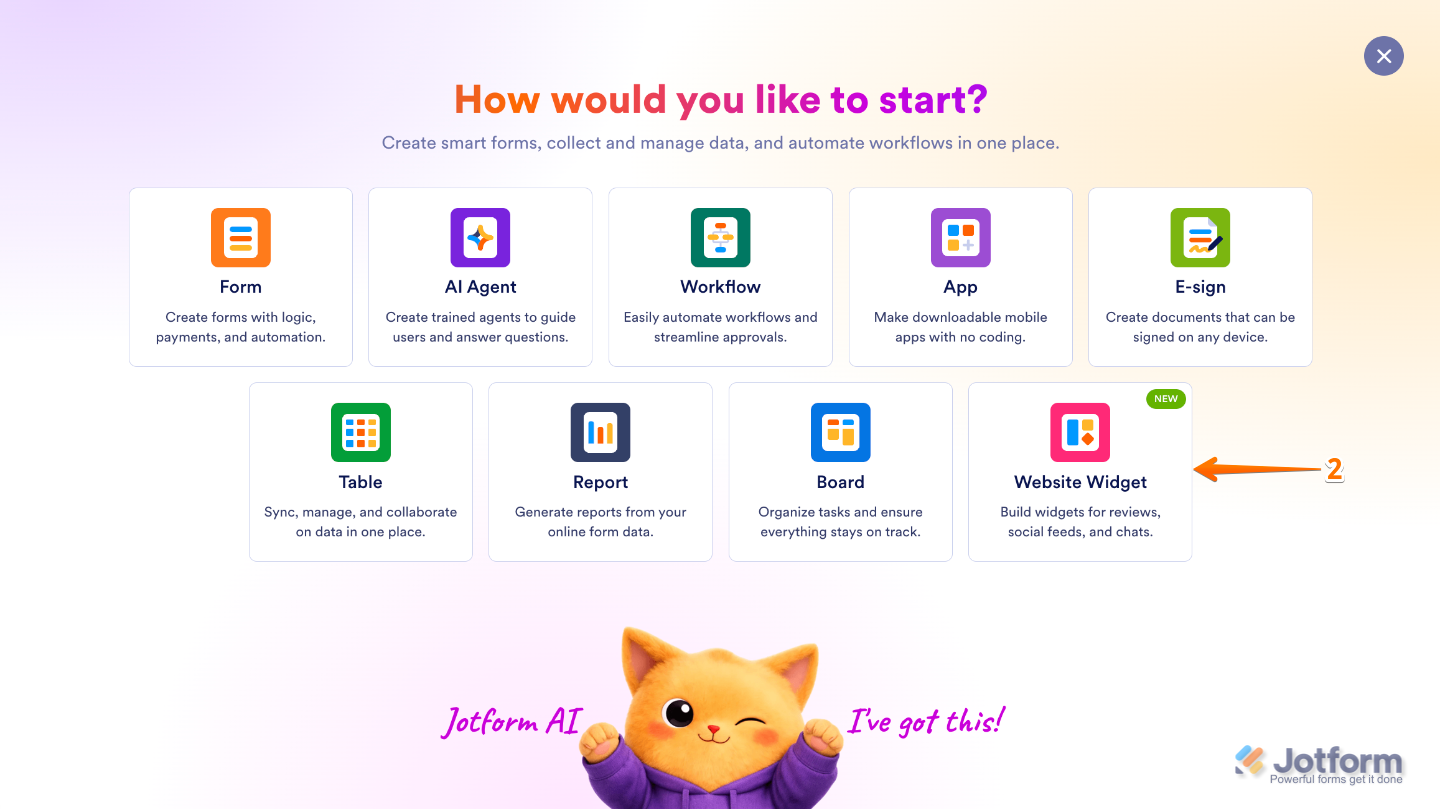
- In the menu that opens up, click on Website Widget.
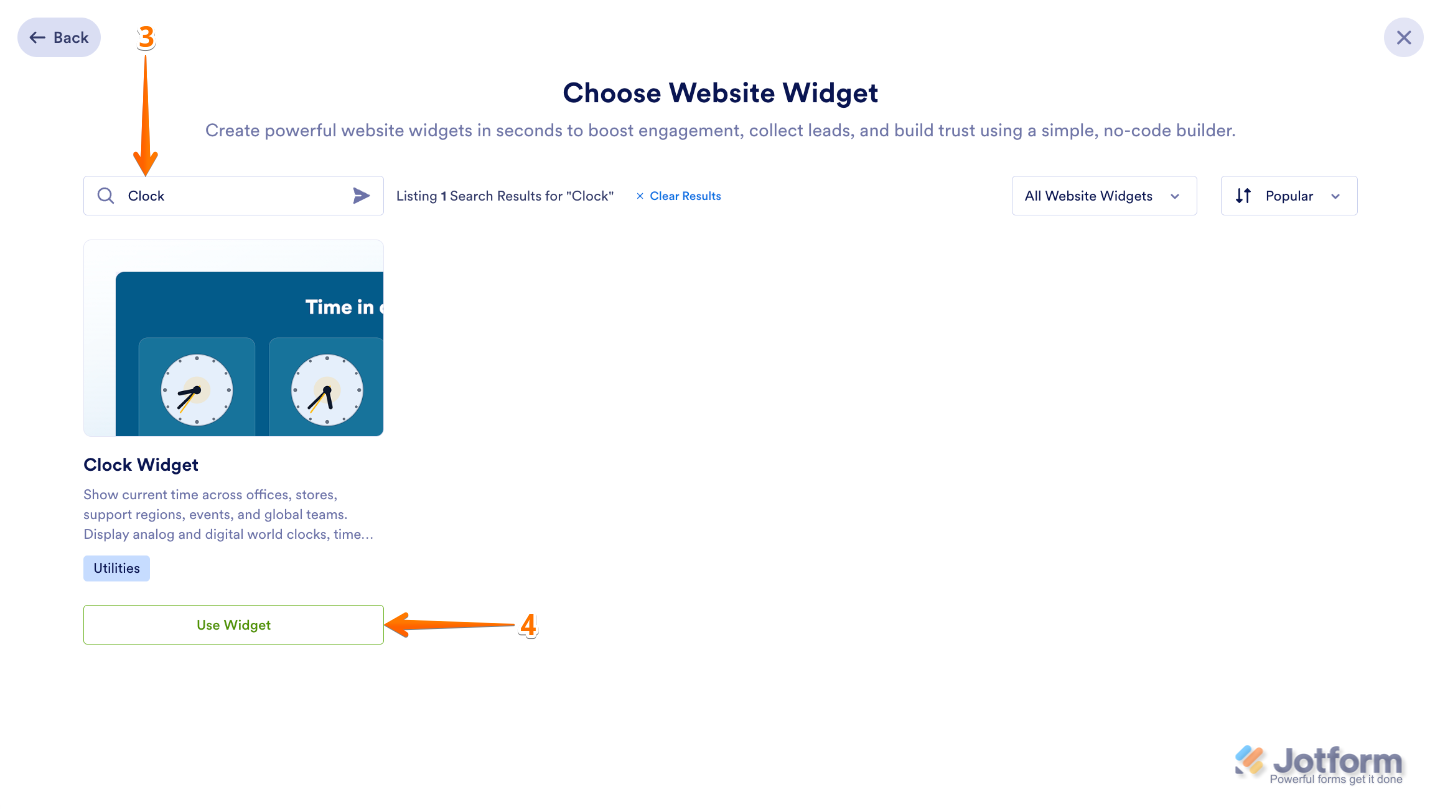
- Next, in the Search bar in the upper-left corner of Choose Website Widget, enter Clock.
- Then, in the search results, click on Use Widget.
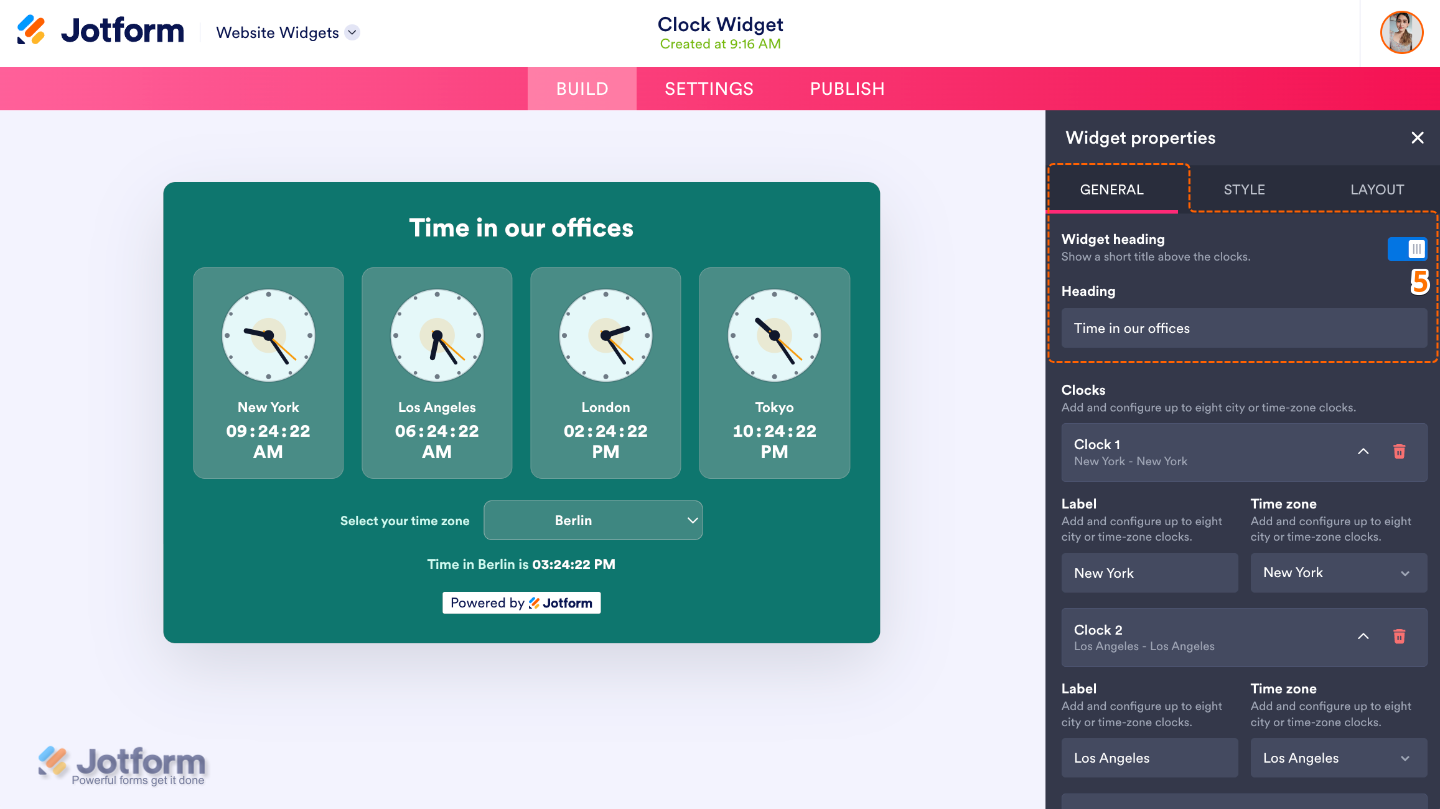
- Now, in Website Widgets, under the General tab in the Widget Properties panel on the right side of the page, configure the following options:
- Widget Heading — Show or hide the heading section displayed at the top of the widget.
- Heading — Add a title to introduce the clock widget or describe the time zones being displayed.
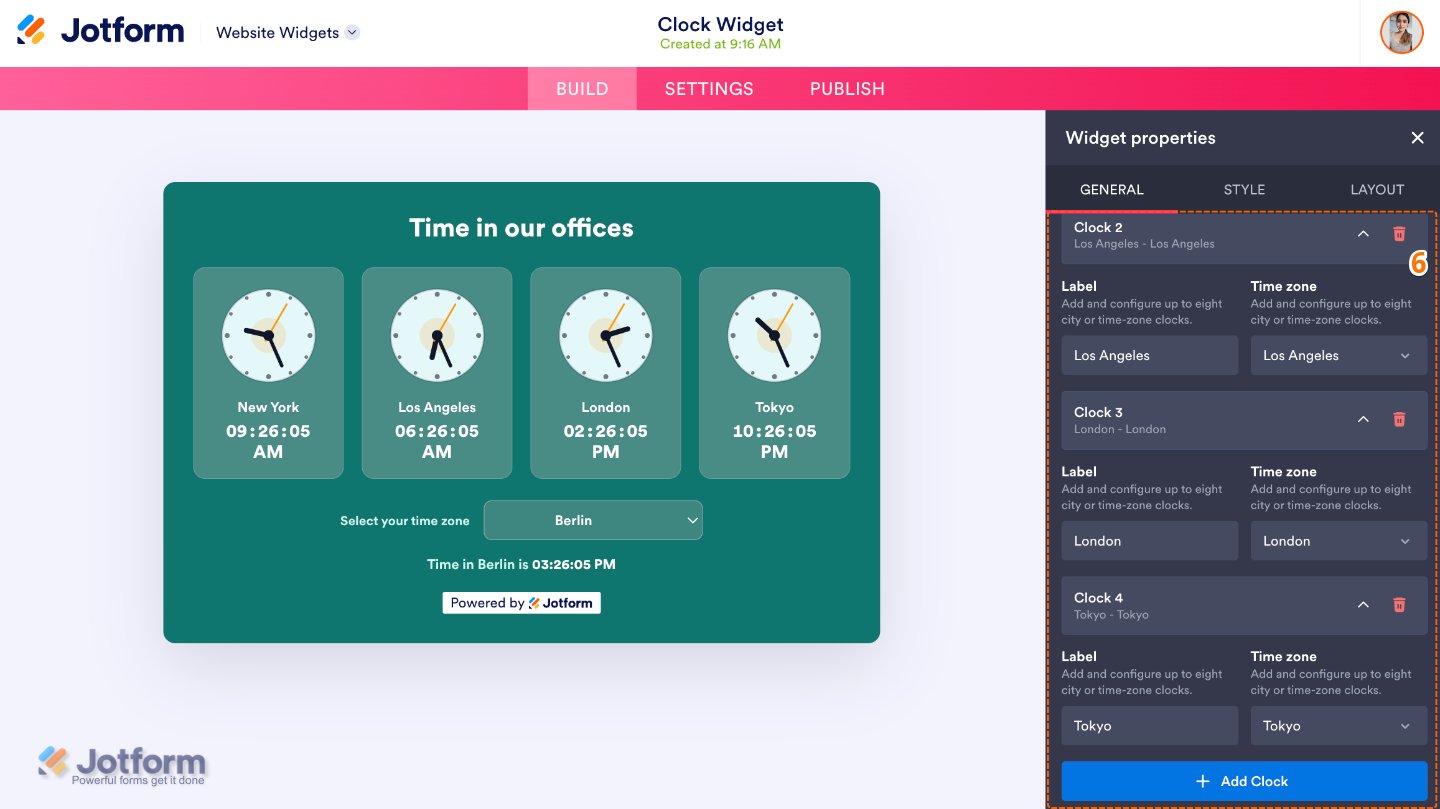
- Then, scroll down and configure each Clock’s settings:
- Label — Add a custom label for each clock, such as a city, office location, or time zone name.
- Time Zone — Choose the time zone that each clock will display.
- Delete (Trash Can Icon) — Use this to remove a clock from the widget.
- Add Clock — Add another clock to display additional time zones in the same widget.
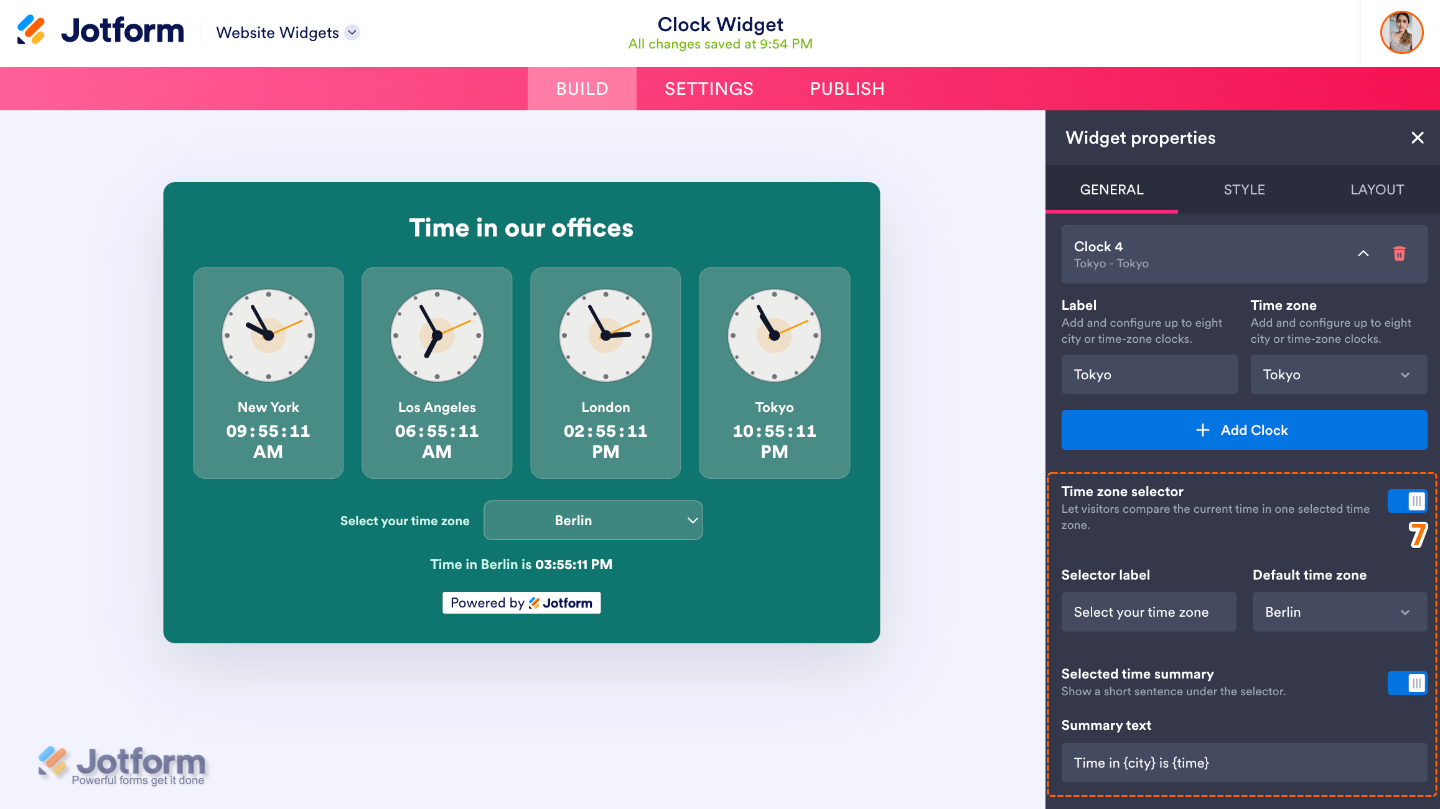
- After that, scroll down to the bottom and set up these things:
- Time Zone Selector — Allow visitors to choose a different time zone to view.
- Selector Label — Customize the text displayed above the time zone selector.
- Default Time Zone — Choose the time zone that is selected when the widget first loads.
- Selected Time Summary — Show a summary of the currently selected time zone.
- Summary Text — Customize the text displayed alongside the selected time zone summary.
- Time Zone Selector — Allow visitors to choose a different time zone to view.
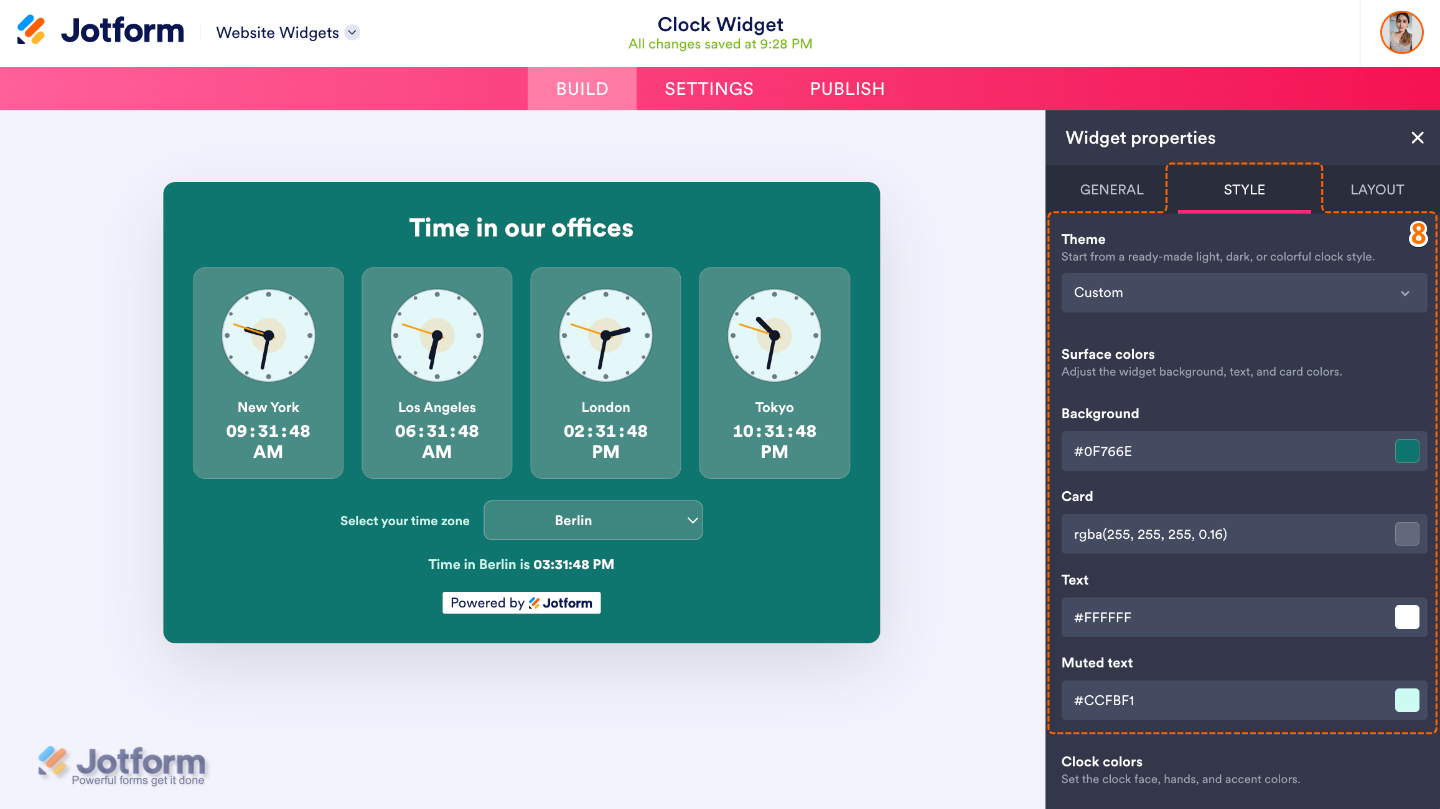
- Once you’re done, switch to the Styles tab and manage the following options:
- Theme — Choose a pre-designed theme to quickly change the overall appearance of the clock widget.
- Surface Colors
- Background — Choose the background color of the widget.
- Card — Set the background color of each clock card.
- Text — Choose the primary text color used throughout the widget.
- Muted Text — Set the color of secondary text, such as labels or supporting information.
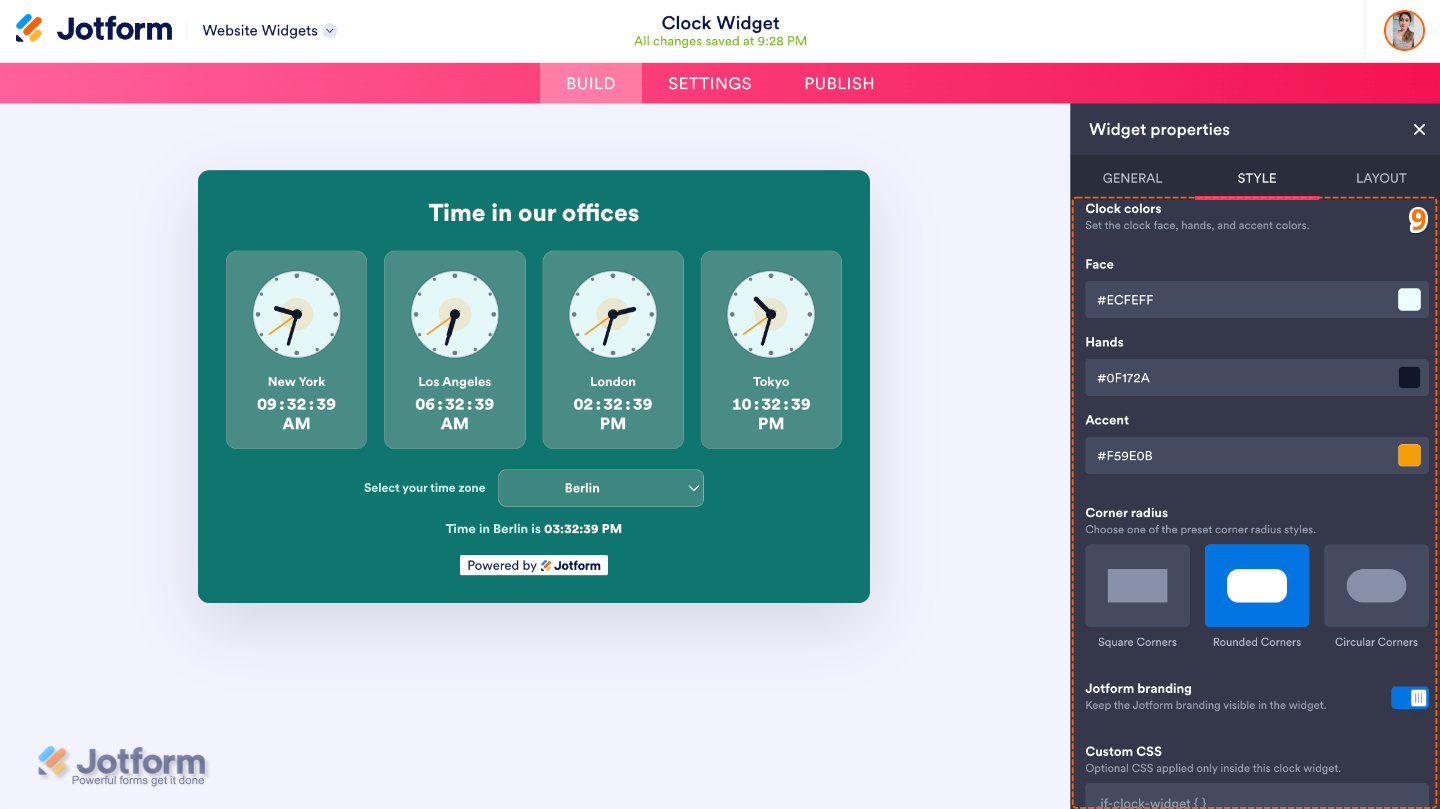
- Next, scroll down to the bottom and set up these other options:
- Clock Colors
- Face — Choose the color of the clock face to match your website’s design or create better contrast with the clock hands and other elements.
- Hands — Choose the color of the clock hands on analog clocks.
- Accent — Set the accent color used for highlights and decorative elements.
- Corner Radius — Control how rounded the corners of the clock cards appear.
- Jotform Branding — Show or hide Jotform branding on the widget, depending on your plan and preferences.
- Custom CSS — Apply your own CSS styles for advanced customization beyond the built-in settings.
- Clock Colors
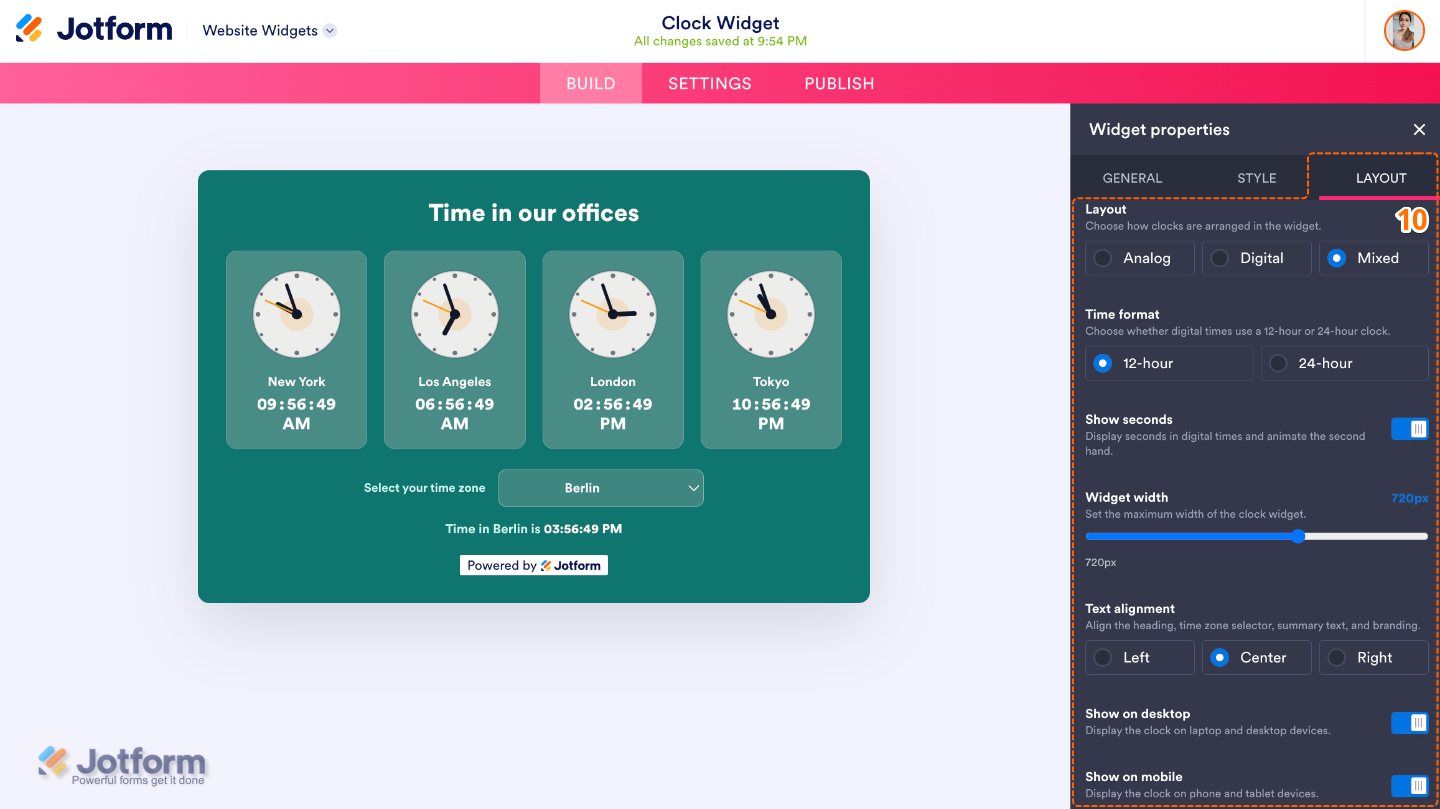
- Following that, switch to the Layout tab and configure the following options:
- Layout — Choose how multiple clocks are arranged within the widget.
- Time Format — Select whether the time is displayed in a 12-hour or 24-hour format.
- Show Seconds — Choose whether seconds are displayed on the clock.
- Widget Width — Adjust the overall width of the widget to fit your website’s layout.
- Text Alignment — Choose how text is aligned within the widget, such as left, center, or right.
- Show on Desktop — Choose whether the widget is displayed on desktop devices.
- Show on Mobile — Choose whether the widget is displayed on mobile devices.
That’s it. Your Clock Widget is now set up and ready. Next, you’ll copy its embed code so you can add it to your website.
Getting Your Clock Widget Embed Code
Once you’ve finished customizing your Clock Widget, you’re ready to get its embed code. It’s easier than you think:
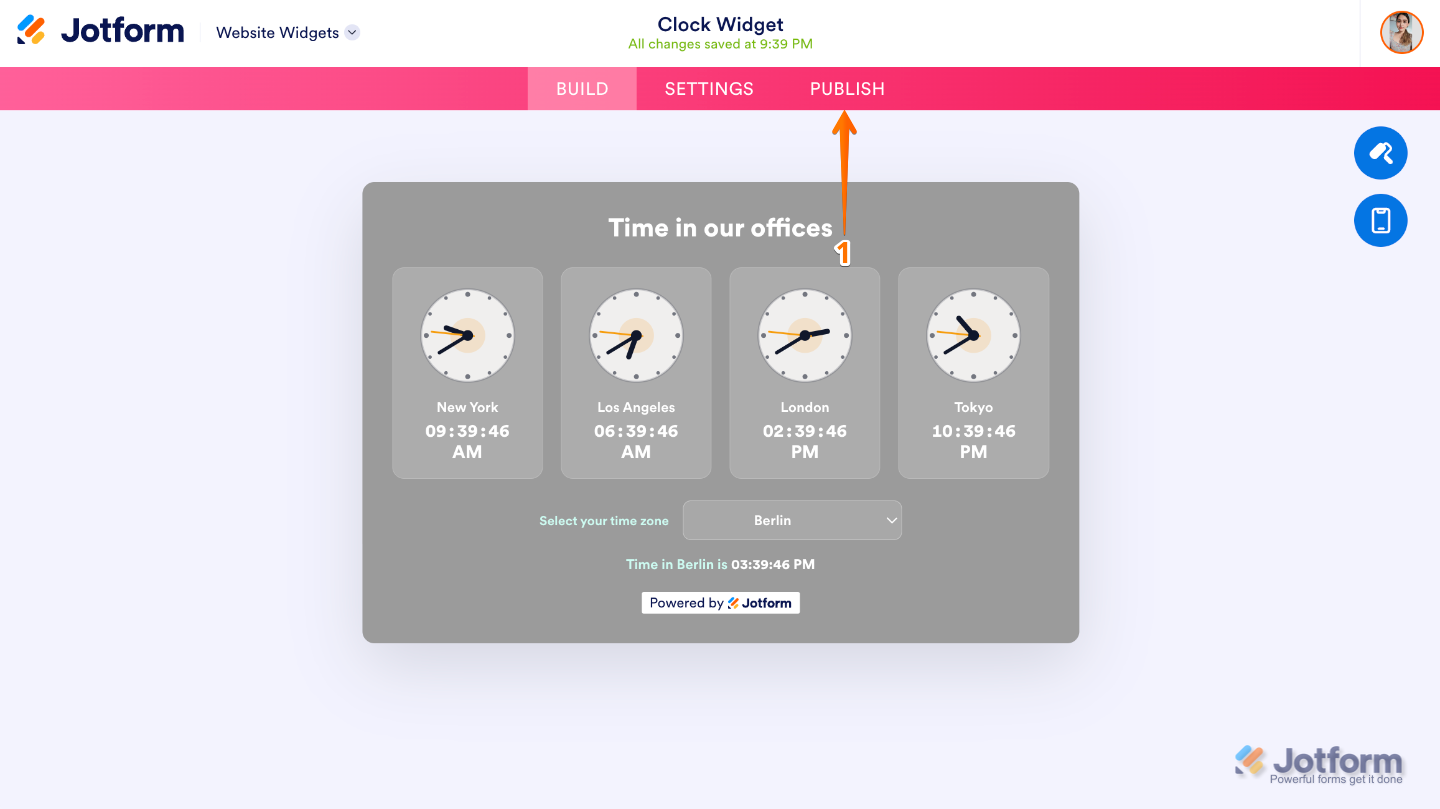
- In Website Widgets, in the pink navigation bar at the top of the page, click on Publish.
Note
If you’re not logged in, you’ll be asked to log in to your Jotform account or sign up for a Jotform account before you can continue using your widgets.
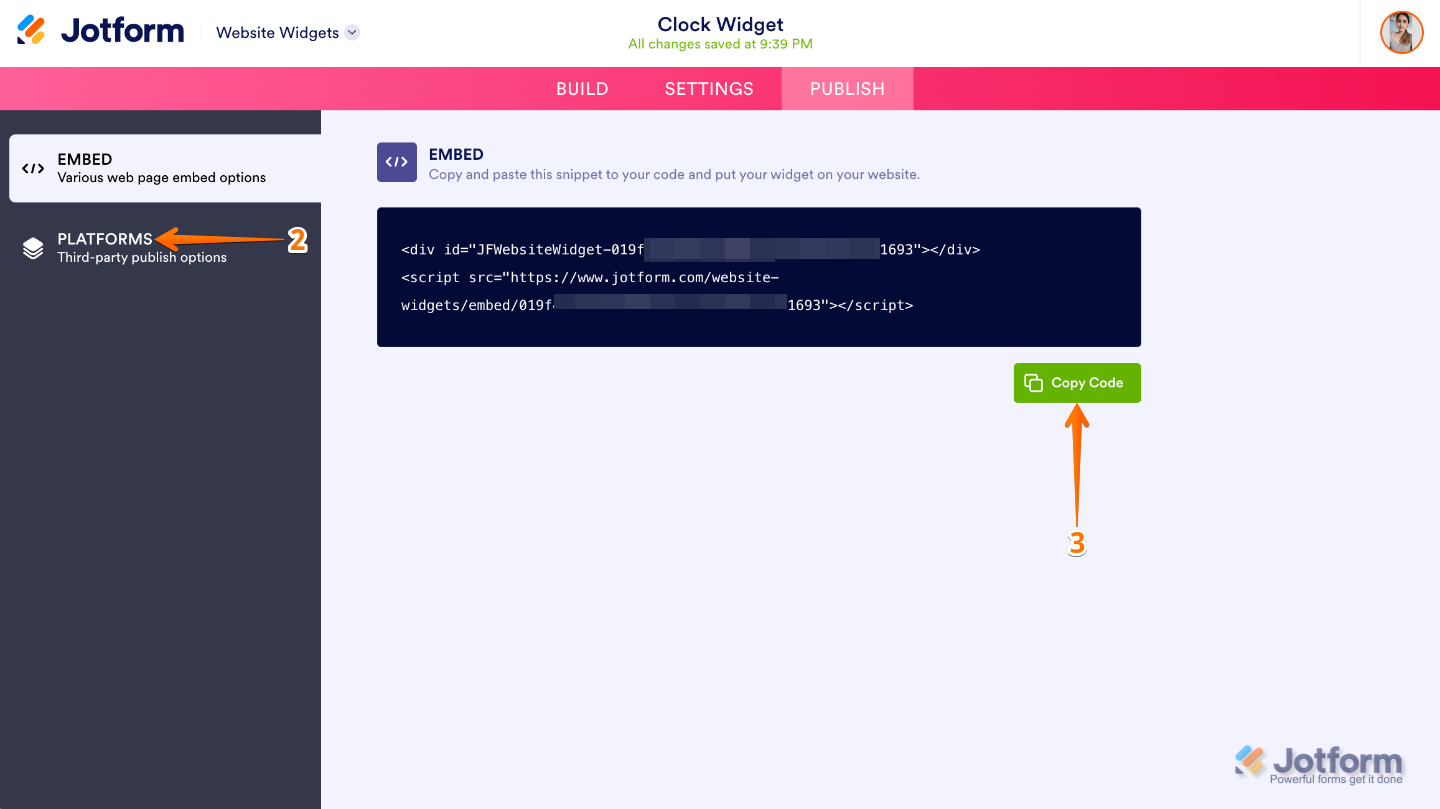
- Then, click on Copy Code.
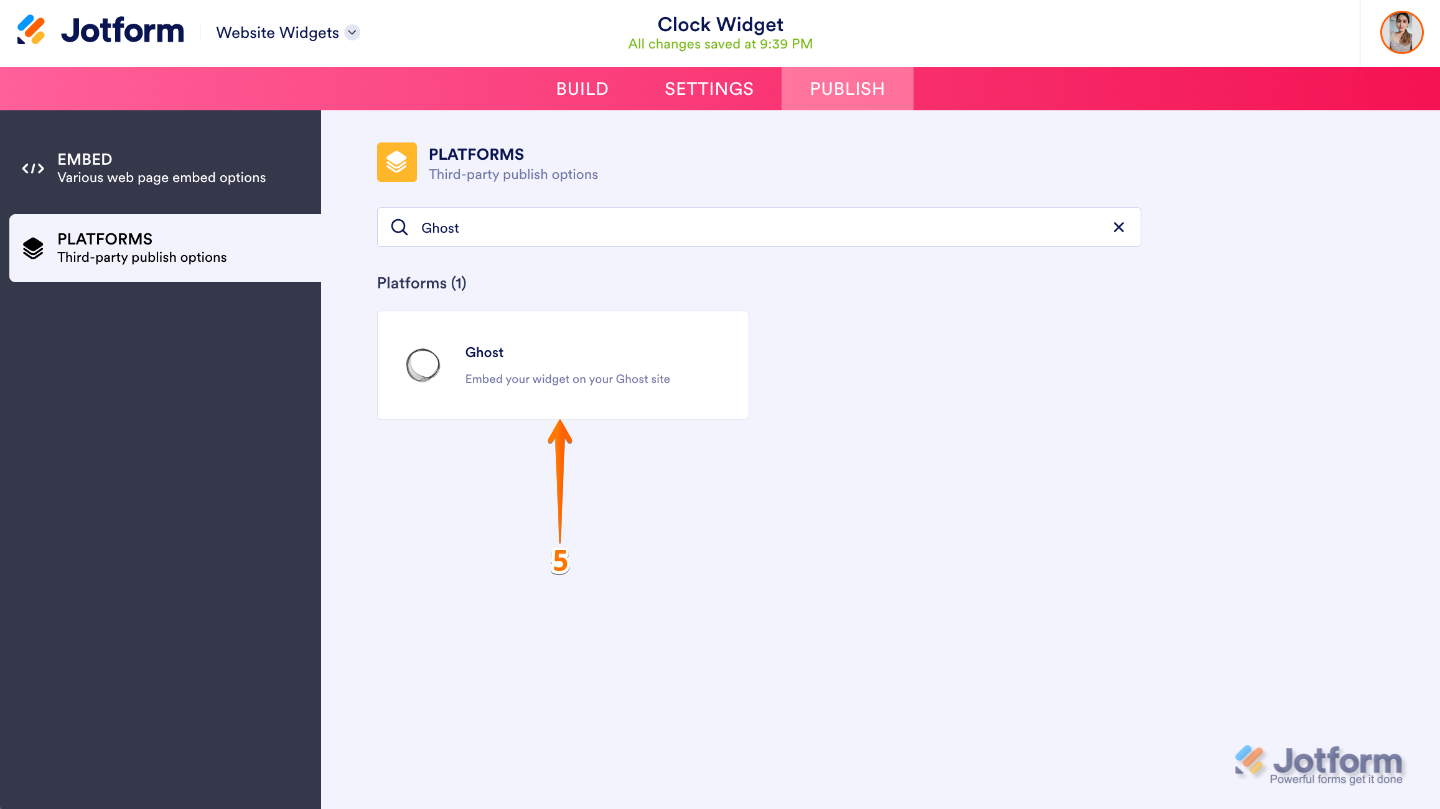
- Or, if your website is built on a supported platform, click on Platforms in the menu on the left.
- Next, in the Search bar at the top of the Platforms page, search for the specific platform.
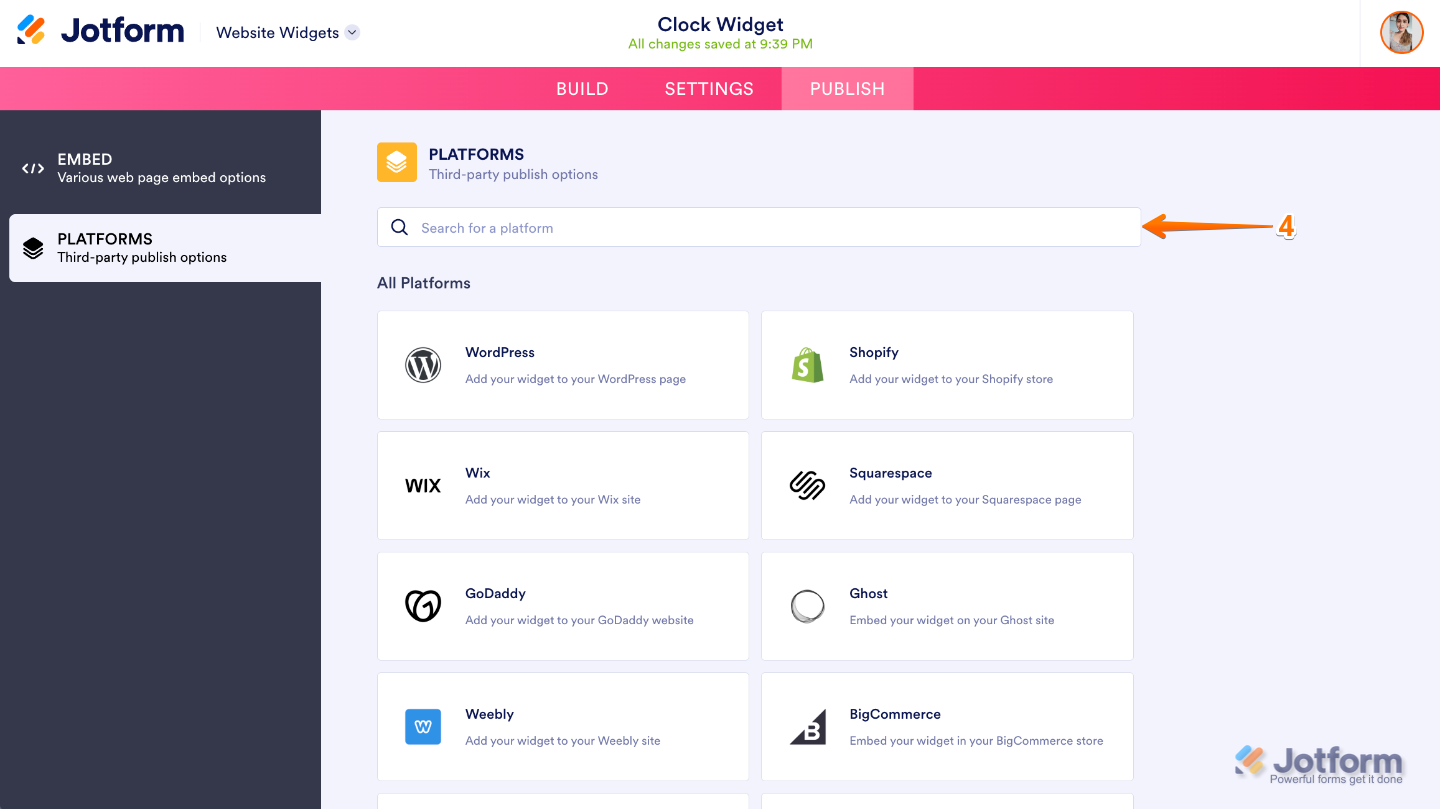
- For this example, we’ll use the Ghost platform. Click on its icon.
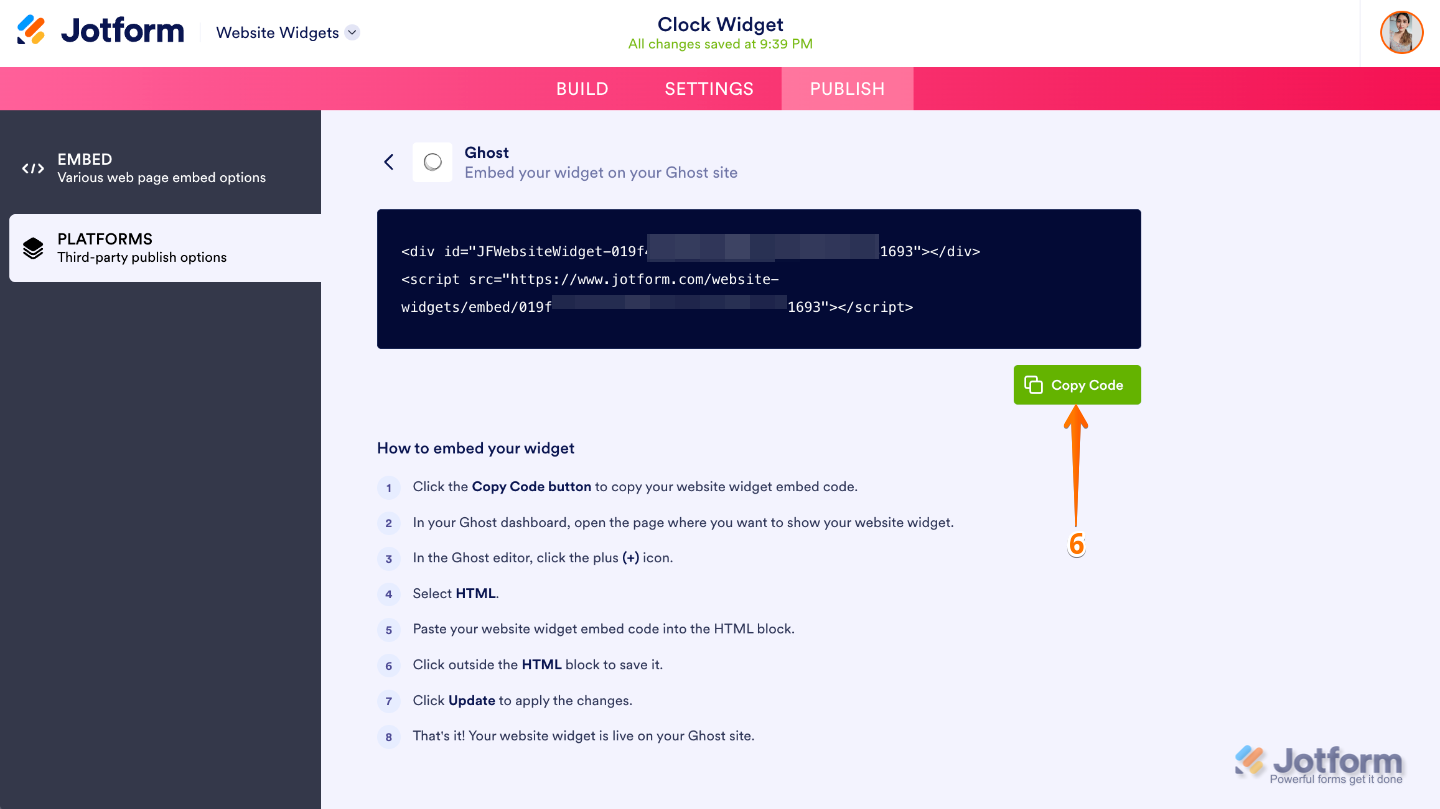
- Finally, click on Copy Code, and you’re done.
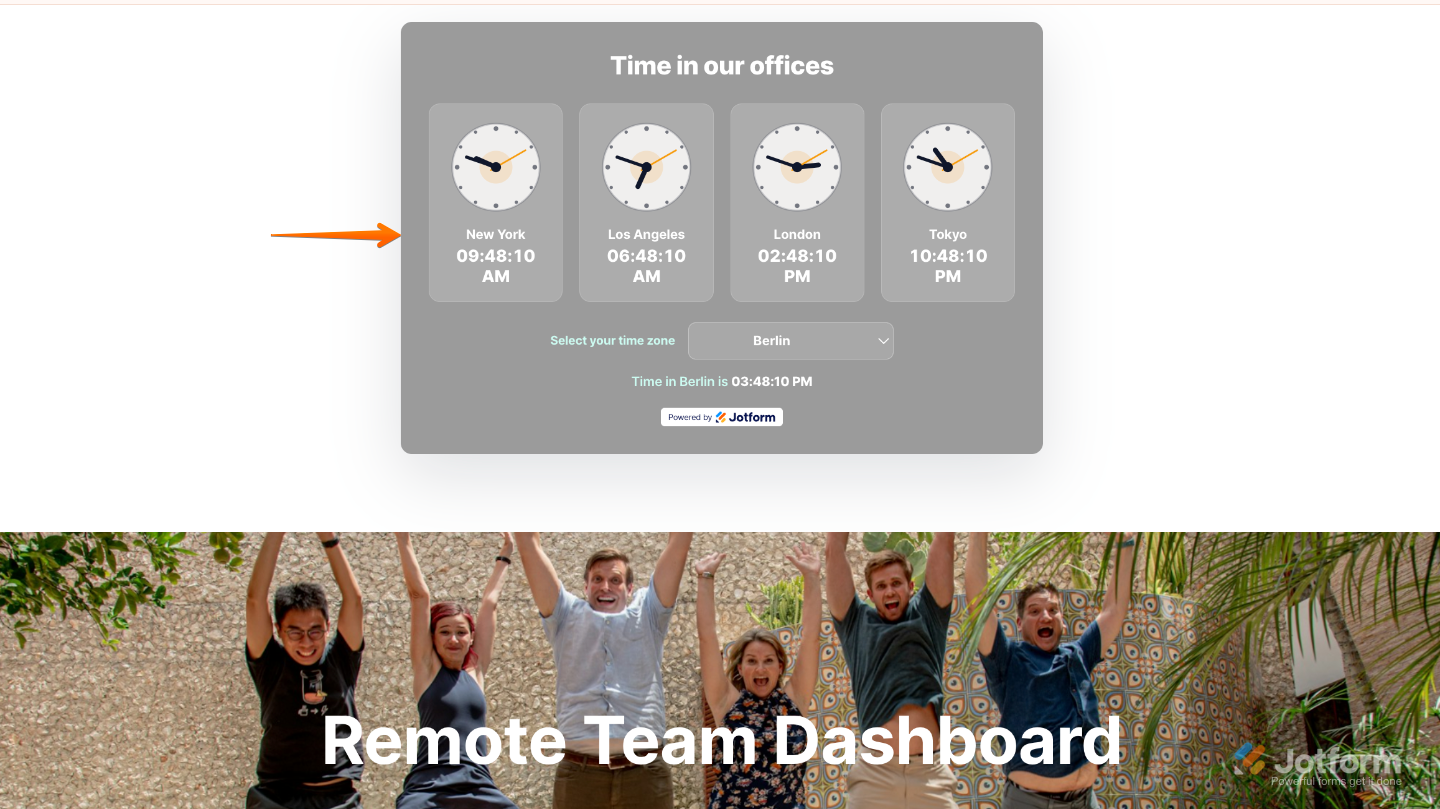
That’s it. Simply paste the embed code into your website, and the widget will automatically display the current time for your visitors. Take a look at the screenshot below to see how it appears on a sample website.
Note
You can manage your widget anytime from the My Widgets page. For a step-by-step guide on how to do it, check out our full tutorial on How to Manage Website Widgets.
Pro Tips
- If your business serves customers around the world, add multiple clocks to display the time in your most important locations.
- Label each clock with a city, office location, or region so visitors can quickly identify the time being displayed.


Send Comment: