With Jotform’s Poll Widget, you can easily create interactive polls to gather opinions, feedback, or preferences directly from your website visitors. Simply add your question, customize the answer choices and design, then embed the widget on your website in just a few steps.
Polls are a great way to engage your audience while collecting valuable insights. Whether you’re asking visitors to vote on a favorite product, share their opinions, or participate in a quick survey, an interactive poll encourages participation and helps you better understand your audience.
Creating Your Poll Widget and Getting the Embed Code for it
Before you can add the Poll Widget to your website, you’ll first need to create your poll, customize its appearance, and copy its embed code. Here’s how to do it:
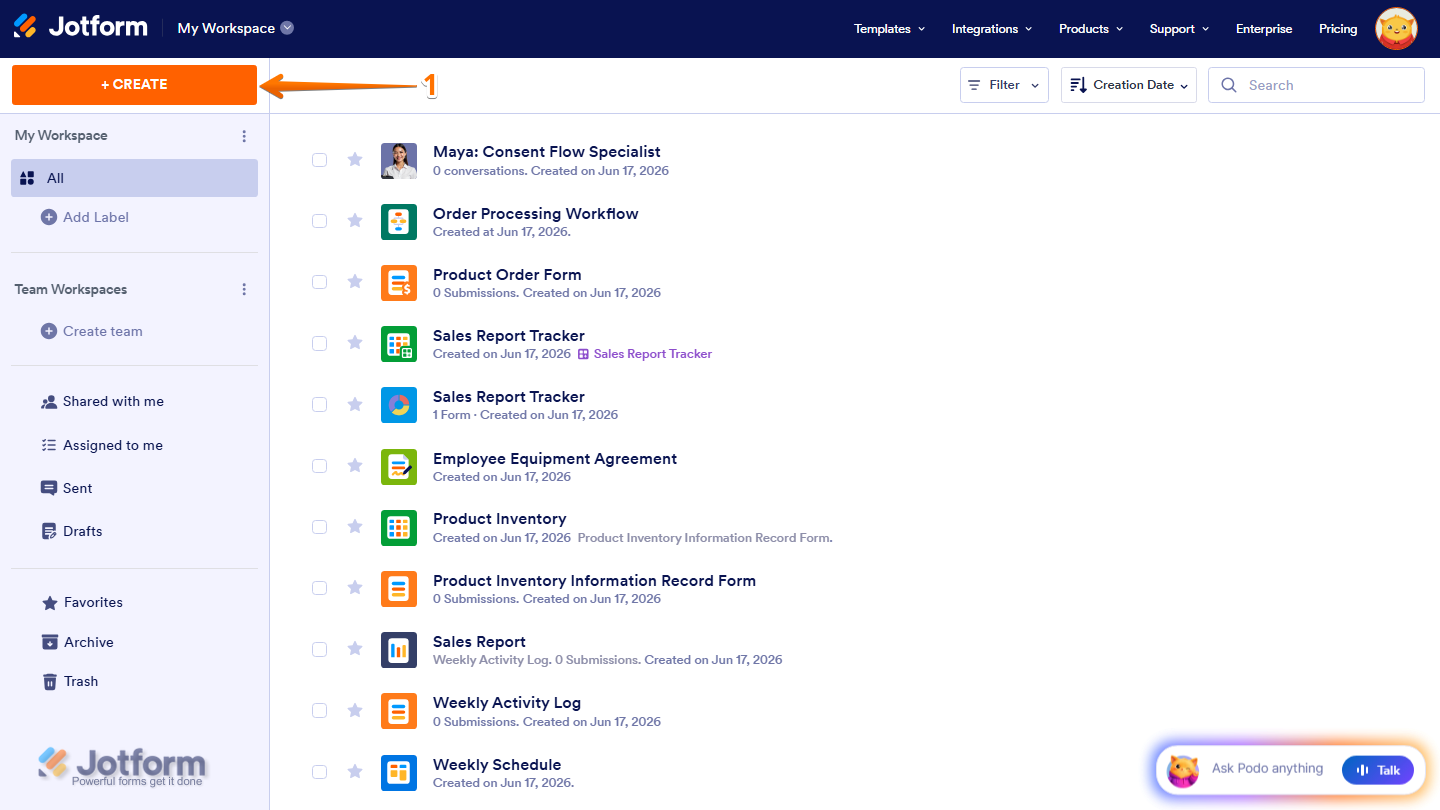
- On the top-left side of your Workspace page, click on Create.
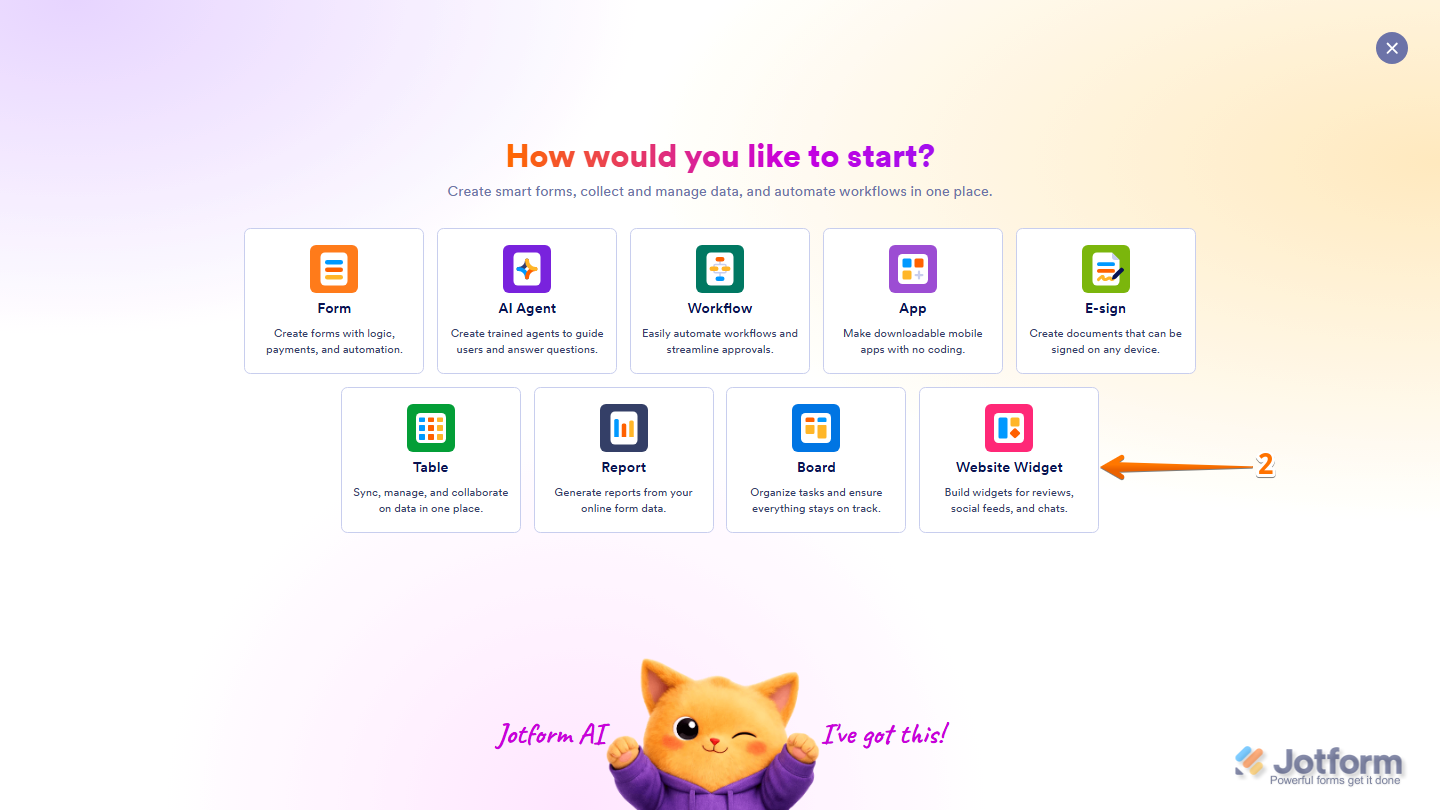
- Then, in the menu that opens up, select Website Widget.
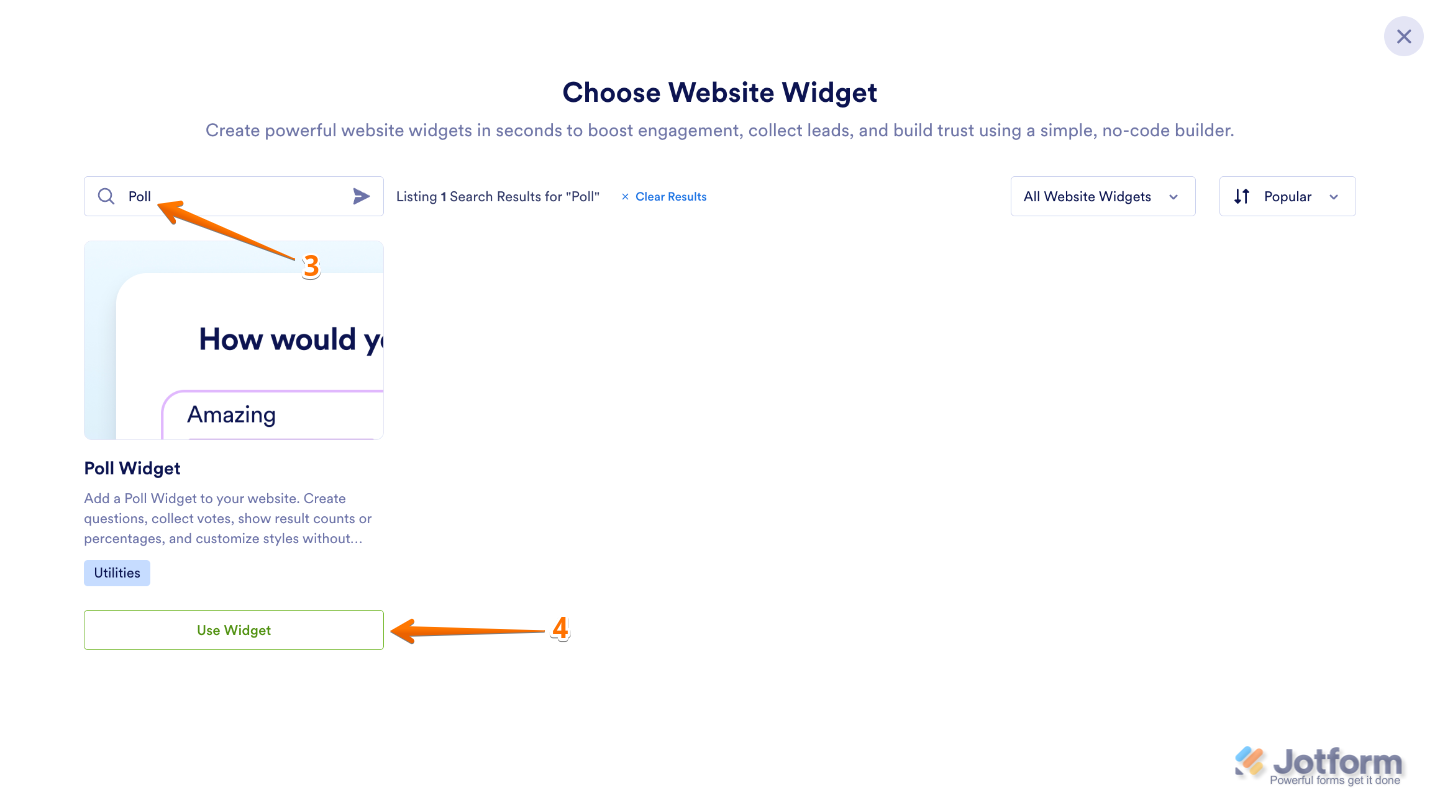
- Next, in the Search bar in the upper-left corner of the Choose Website Widget menu, enter Poll.
- Then, at the bottom of the search results, click on Use Widget.
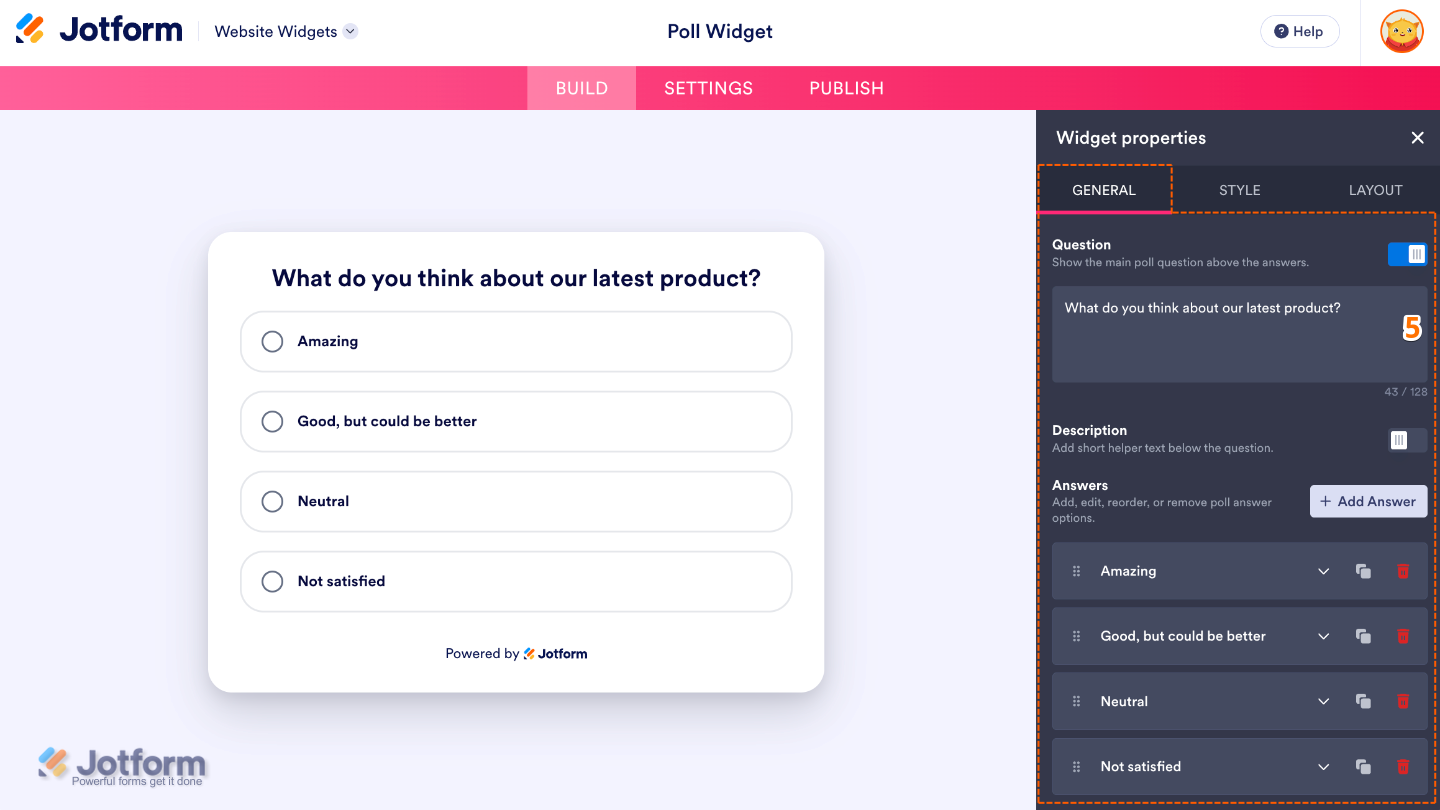
- Now, in the Widget Properties menu that opens on the right side of Website Widgets, under the General tab, set up these properties:
- Question — Enter the question you want visitors to answer in your poll.
- Description — Add a short description or additional context to help visitors better understand your poll.
- Answers
- Add Answer — Add a new answer choice that visitors can vote for.
- Downward Arrow Icon — Expand and edit the selected answer choice.
- Duplicate Answer (Duplicate Icon) — Create a copy of an existing answer choice, making it easier to create similar options.
- Delete Station (Trash Can Icon) — Remove the selected answer choice from the poll.
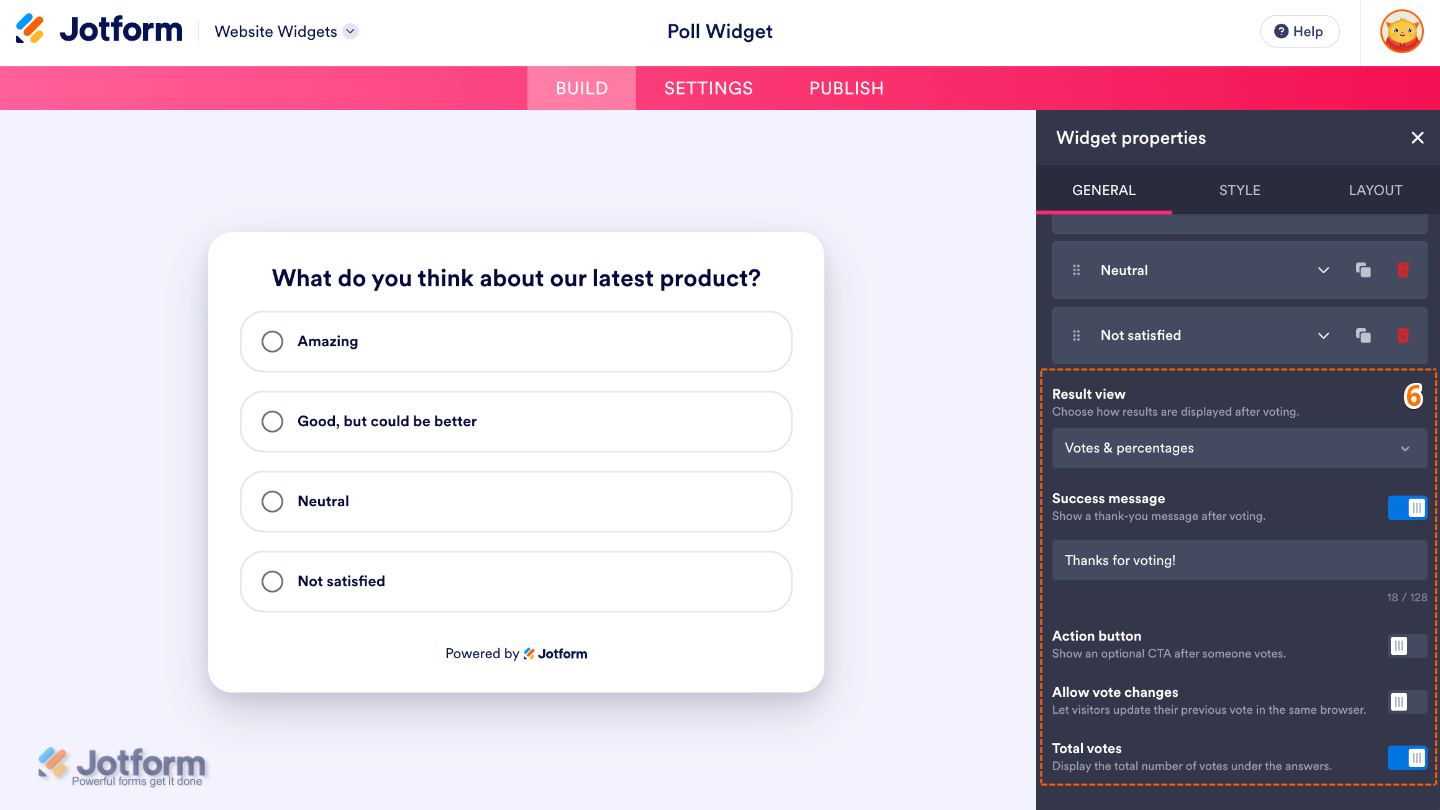
- Next, scroll down and adjust these settings:
- Result View — Choose how poll results are displayed to visitors after they submit their vote.
- Success Message — Customize the message displayed after a visitor successfully submits their vote.
- Action Button — Show or hide a button that allows visitors to perform a follow-up action after voting, such as visiting a webpage.
- Allow Vote Changes — Allow visitors to change their vote after it has been submitted.
- Total Votes — Show or hide the total number of votes received by the poll.
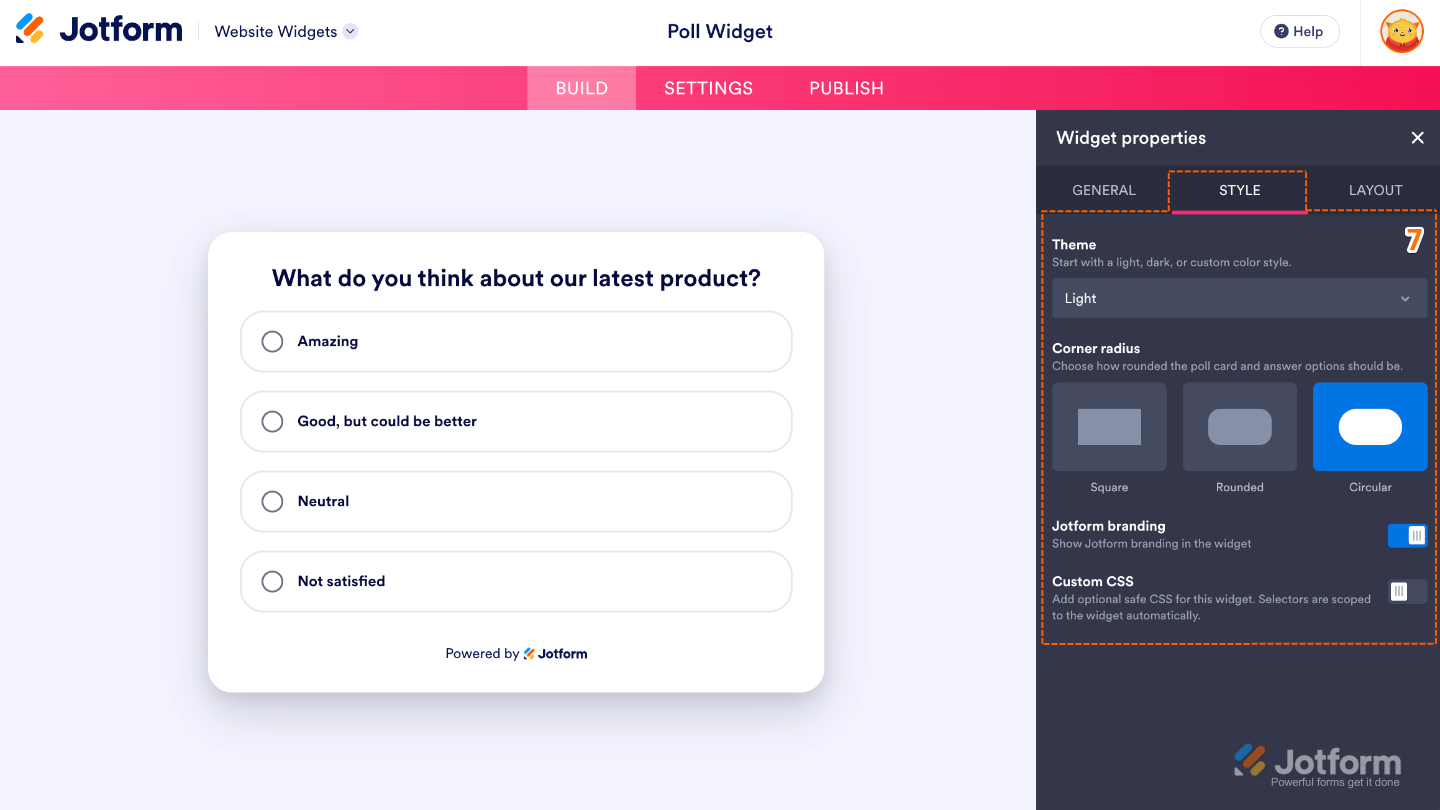
- Next, under the Styles tab, customize these properties:
- Theme — Choose a visual theme that matches your website’s design and branding.
- Corner Radius — Adjust how rounded the corners of the poll widget appear.
- Jotform Branding — Show or hide Jotform branding on the widget.
- Custom CSS — Apply your own CSS code for advanced styling beyond the built-in settings.
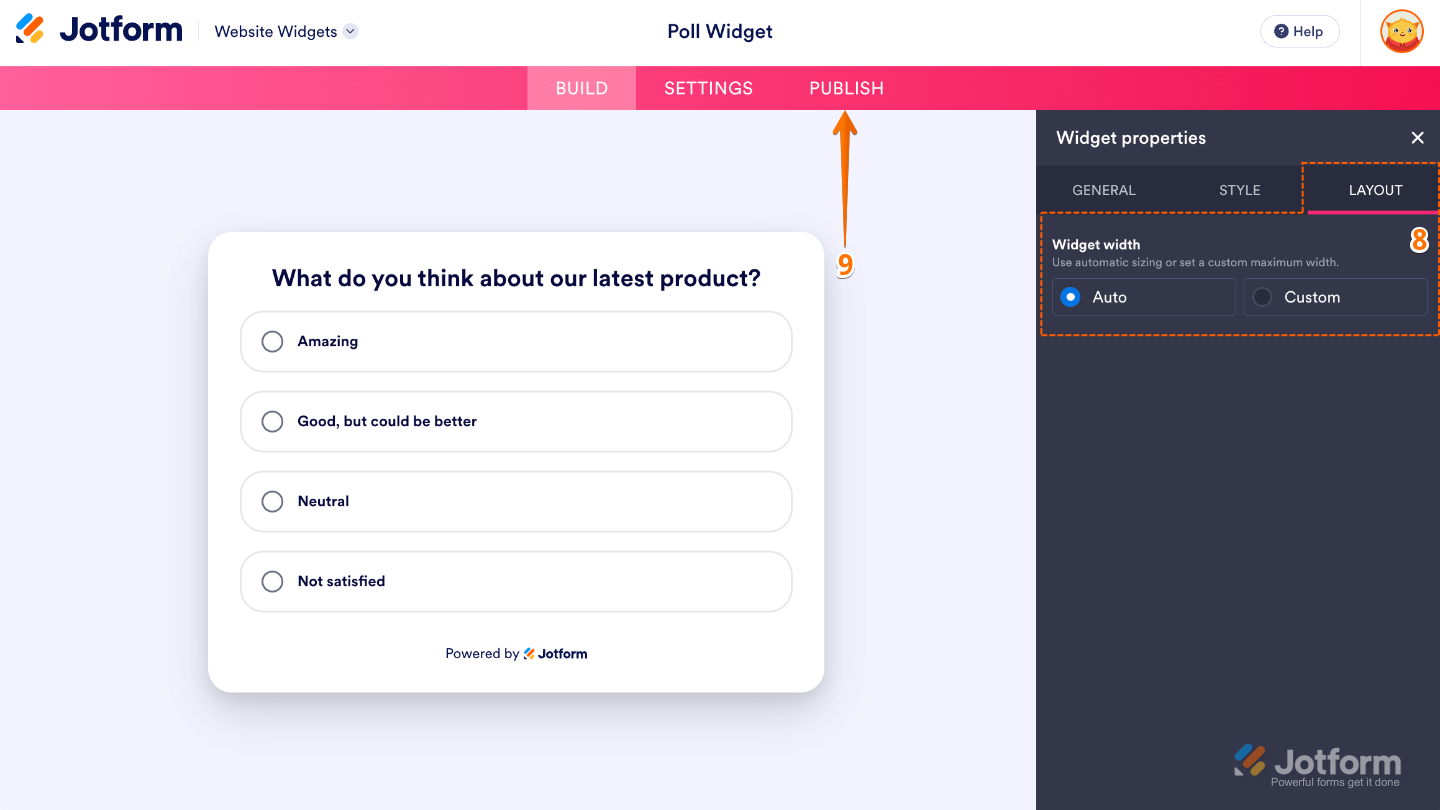
- Now, under the Layout tab, configure the Widget Width to adjust the width of the poll widget to better fit your website’s layout.
- Once you’ve finished configuring the widget, in the pink navigation bar at the top of the page, click on Publish.
Note
You’ll be asked to log in to your Jotform account or sign up for one. Once you’ve done that, you’ll be able to get the embed code for your widget.
- Then, in the Embed section, click on Copy Code, and, if you already know how, paste that into the Embed section on your platform, and you’re good to go.
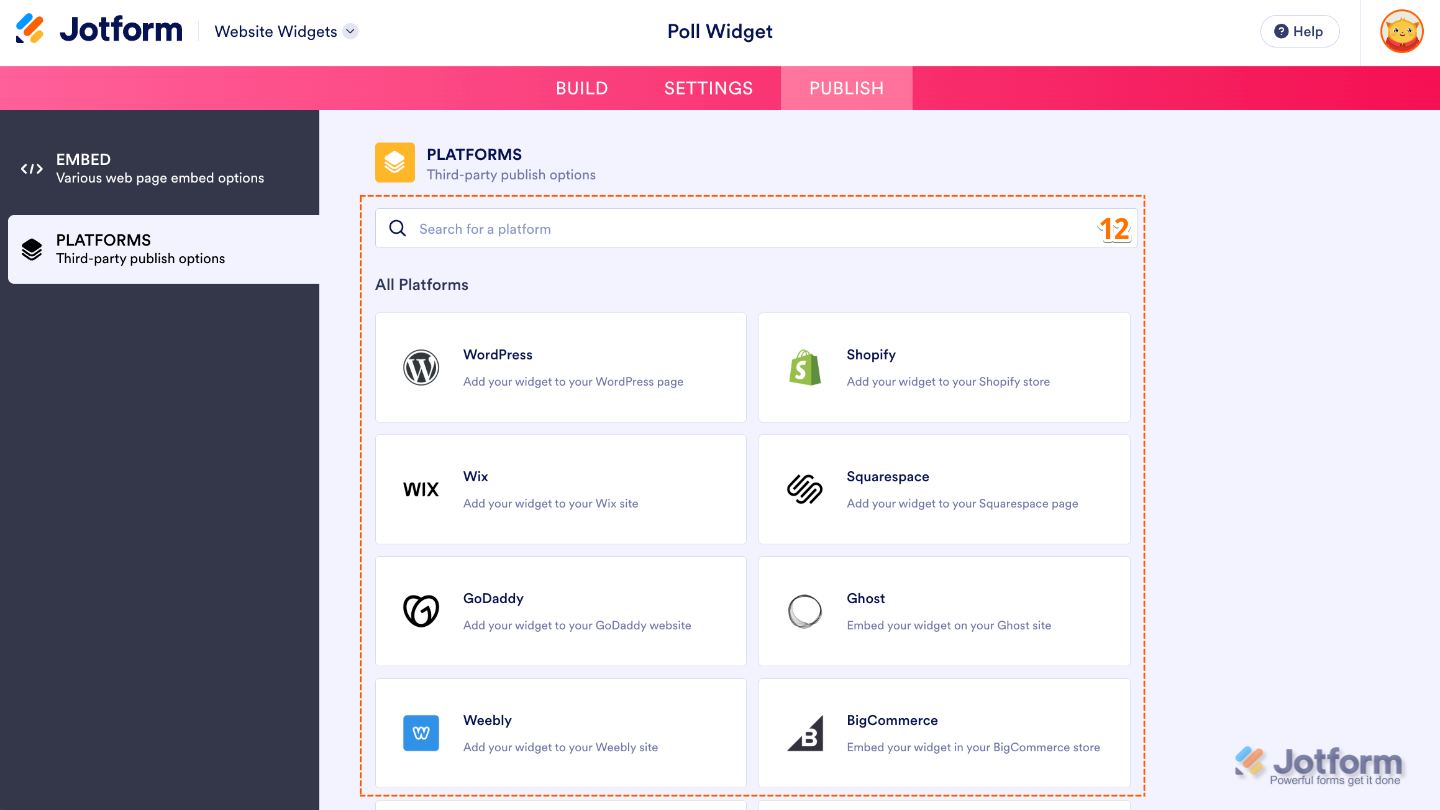
- To view embedding instructions for your widget, click on Platforms in the menu on the left side of the page.
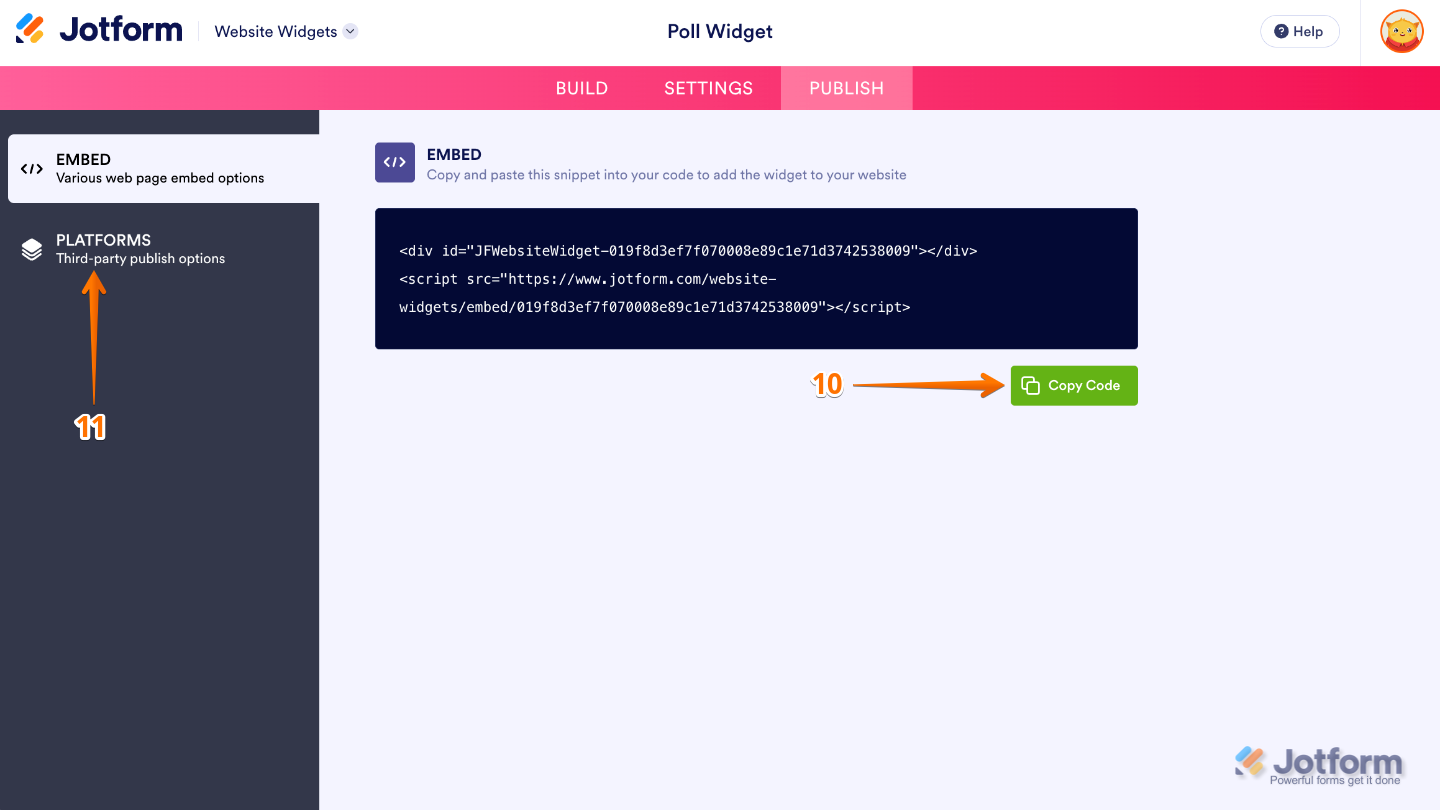
- Next, in the Platforms section on the right, select the platform you want to view embedding instructions for. Or, use the Search bar at the top of the section to find it easily.
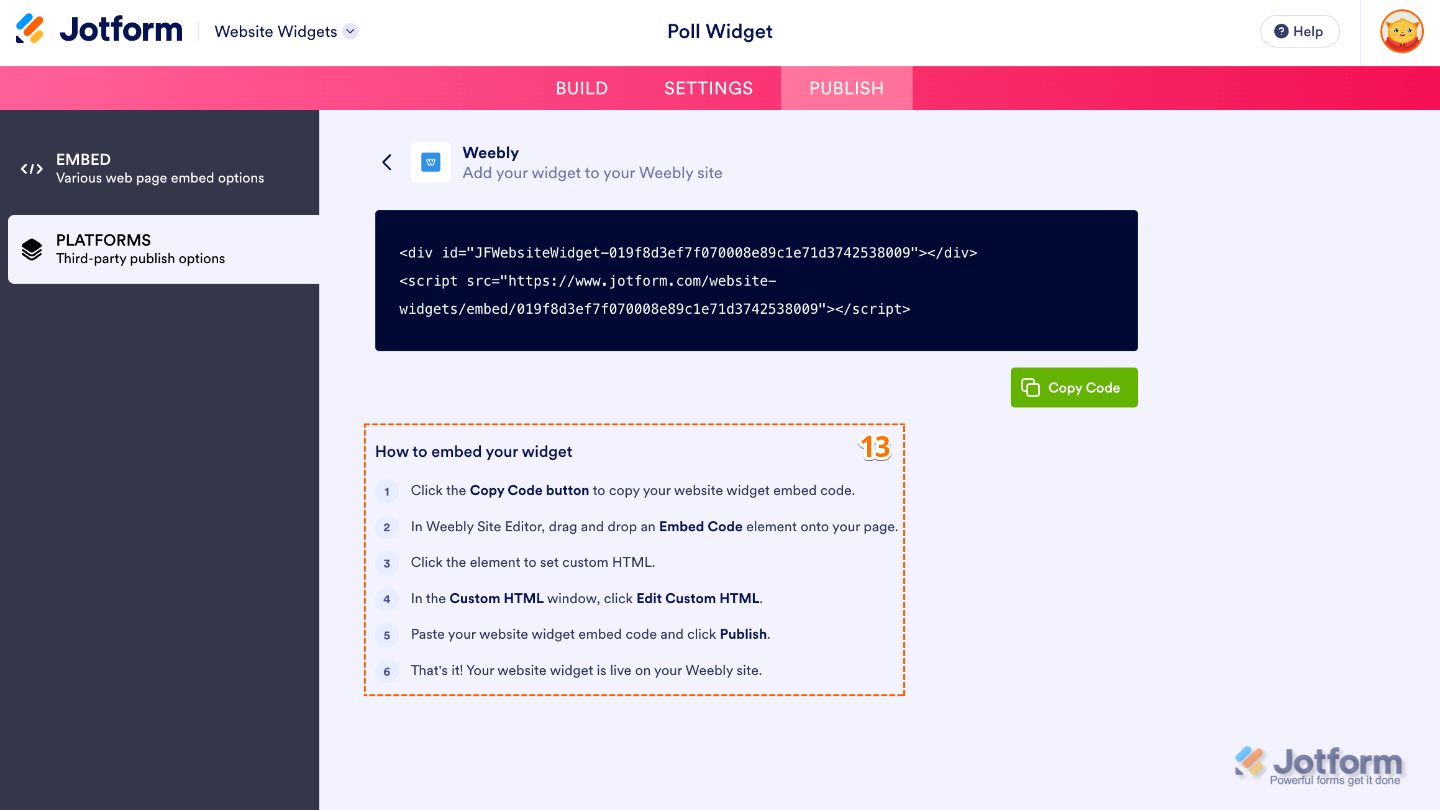
- Then, follow the steps in the How to Embed Your Widget section to add it to your website.
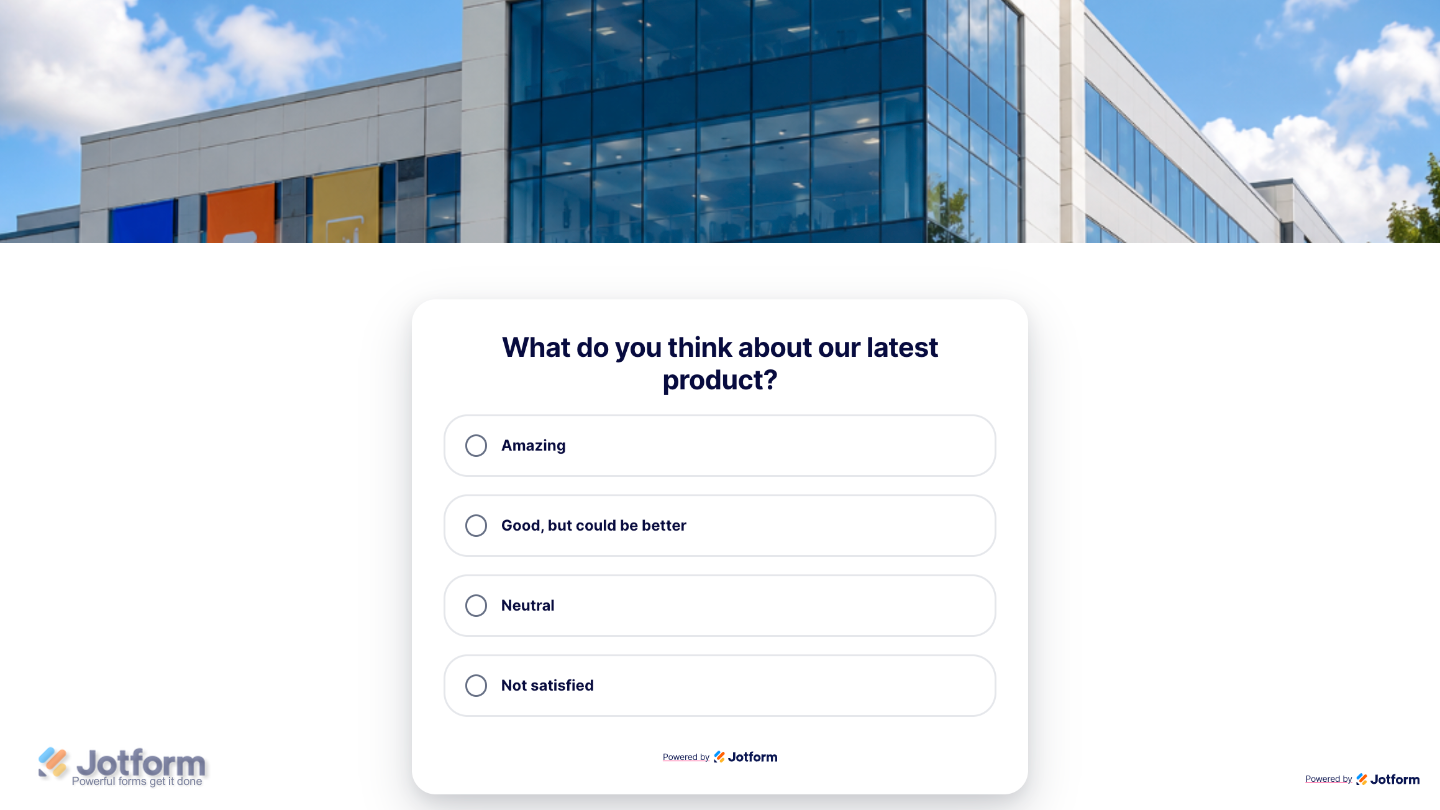
That’s it! Your Poll widget will now appear on your website with the question, design, and settings you selected, allowing visitors to cast their votes and interact with your poll. See the screenshot below for an example of how it looks on a website.
Note
You can manage the website widgets you’ve created at any time from your account. For a full breakdown of how to do it, head over to our guide on How to Manage Website Widgets.
Pro Tips
- Customize the poll’s colors and styling to match your website’s branding for a more seamless and professional appearance.
- Place your poll in a highly visible area, such as your homepage, blog sidebar, or landing page, to encourage more visitors to participate.


Send Comment: