Jotform’s Quotes widget lets you display inspiring, motivational, or thought-provoking quotes directly on your website. Whether you’re highlighting famous sayings, company values, testimonials, or custom messages, it provides a simple way to add meaningful text that captures visitors’ attention and enhances the look of your page.
A well-placed quote can reinforce your brand, encourage visitors, or create a more memorable browsing experience. Use the Quote widget on homepages, landing pages, blogs, portfolios, or event websites to add personality, break up sections of content, or emphasize ideas that resonate with your audience, all without writing a single line of code.
Creating and Getting the Embed Code of Your Quotes Widget
To embed a scoreboard on your website, you’ll first need to configure the Scoreboard widget and copy the embed code for it. Here’s how to get going:
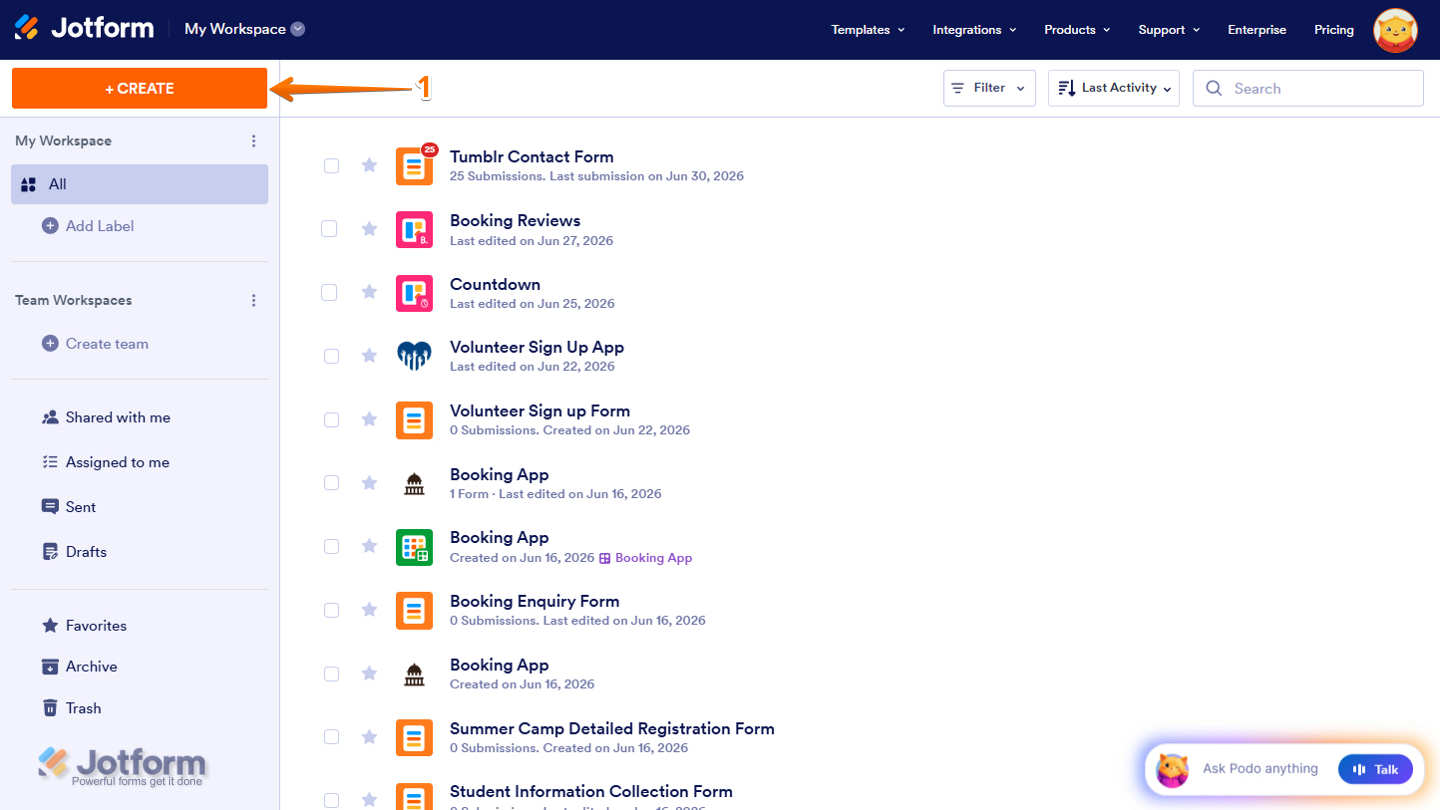
- On the top-left side of your Workspace page, click on Create.
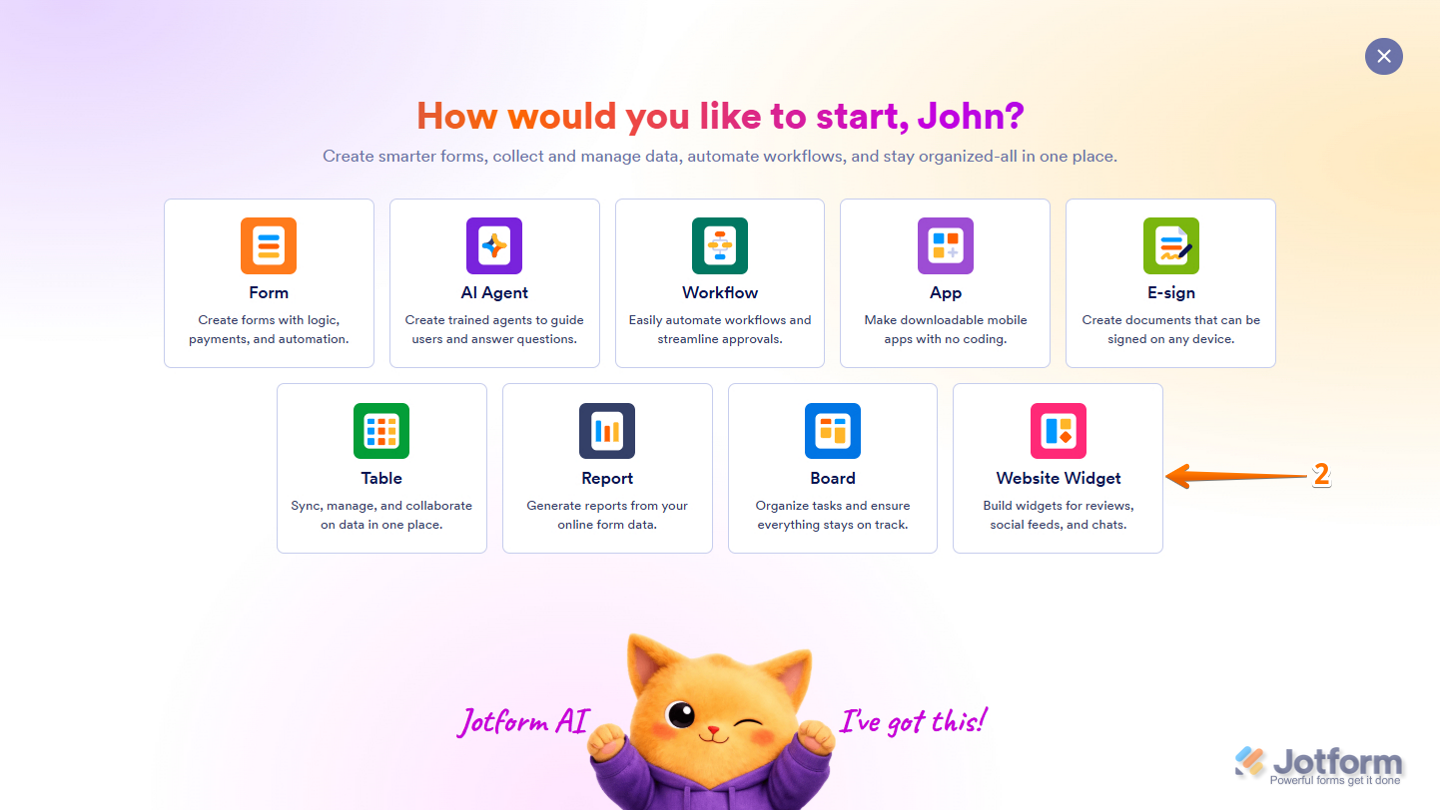
- Then, in the menu that opens up, select Website Widget from the assets.
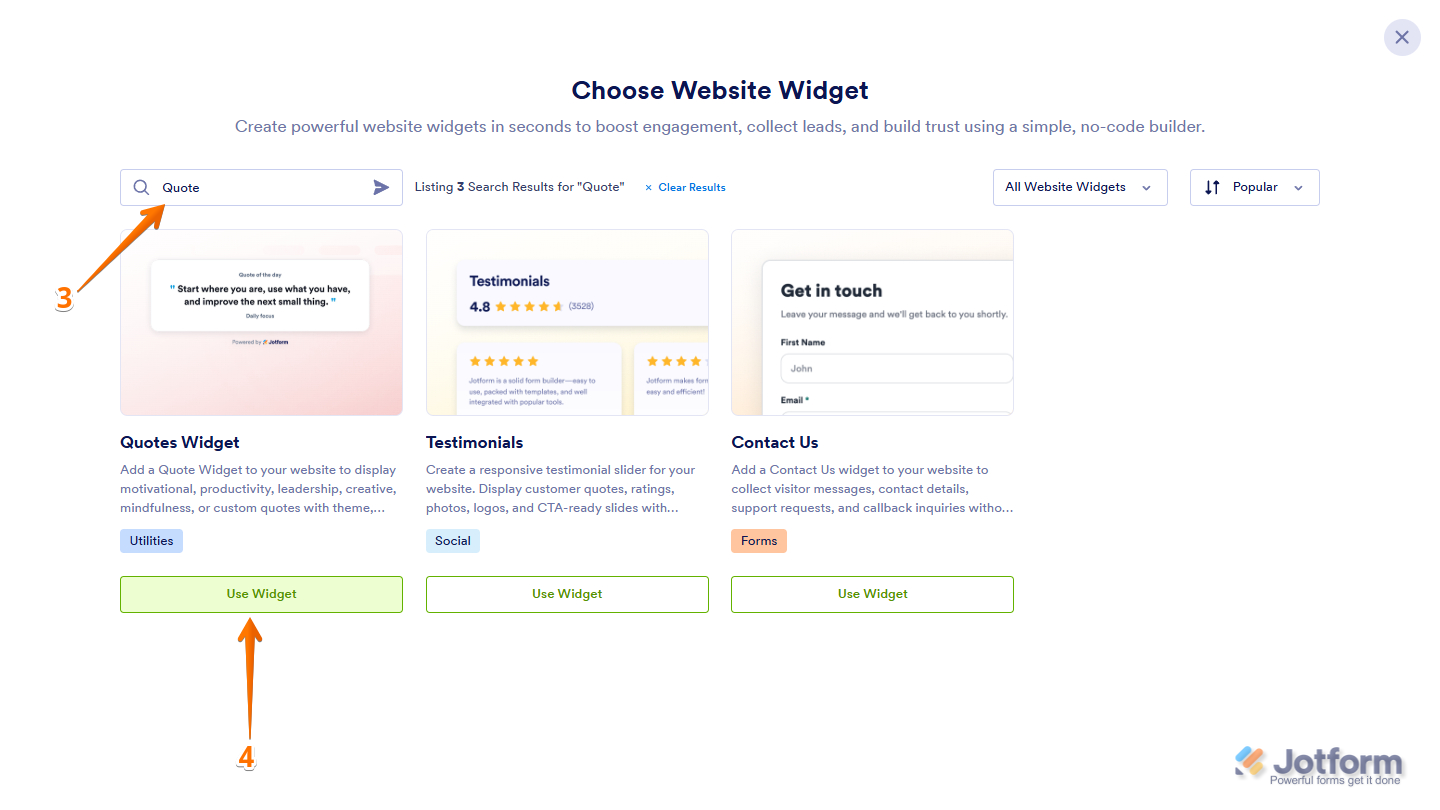
- Next, in the Search bar in the upper-left corner of the Choose Website Widget menu, enter Quotes or Quotes Widget.
- Then, at the bottom of the Quotes Widget in the Choose Website Widget menu, click on Use Widget.
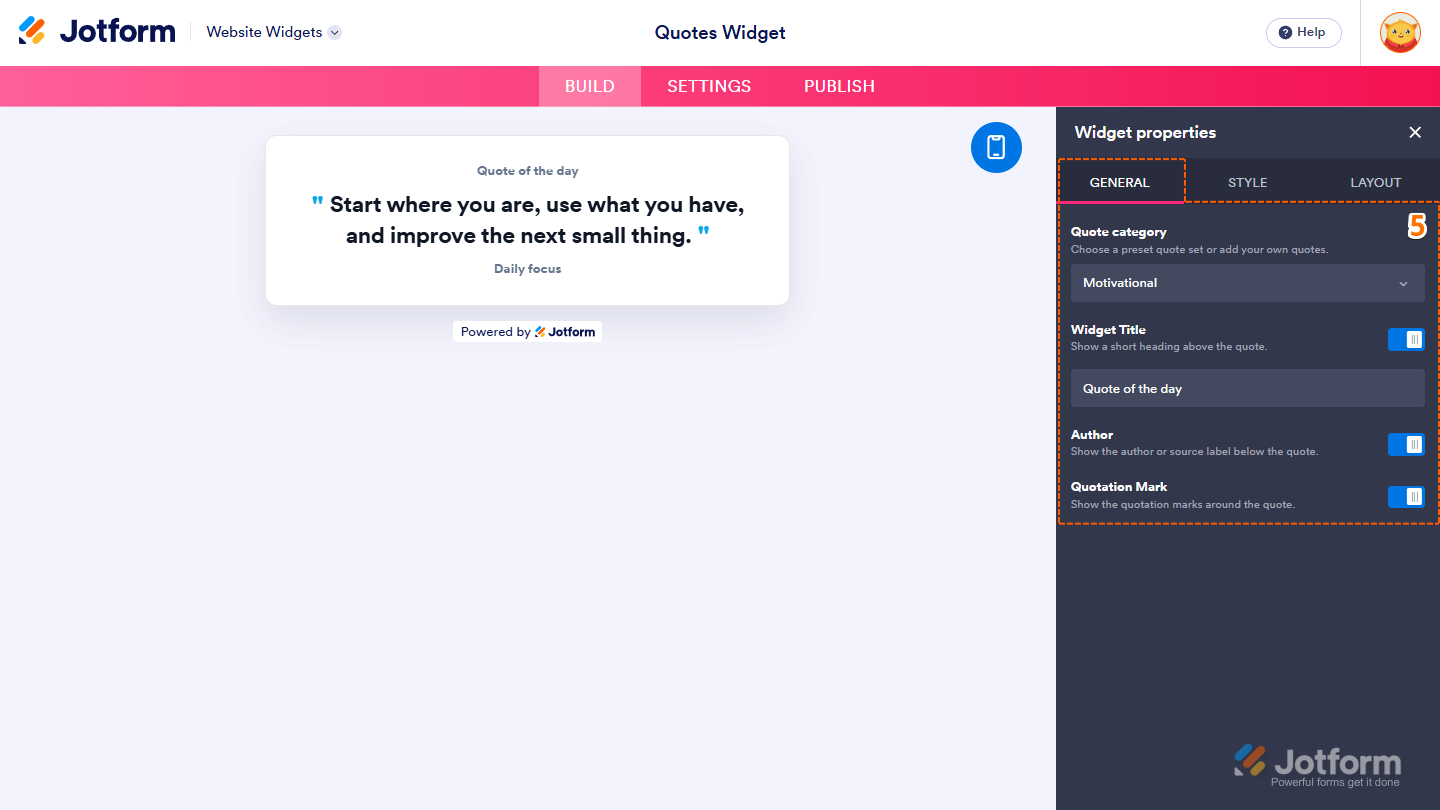
- Now, in the Widget Properties menu that opens on the right side of Website Widgets, under the General tab, set up these properties:
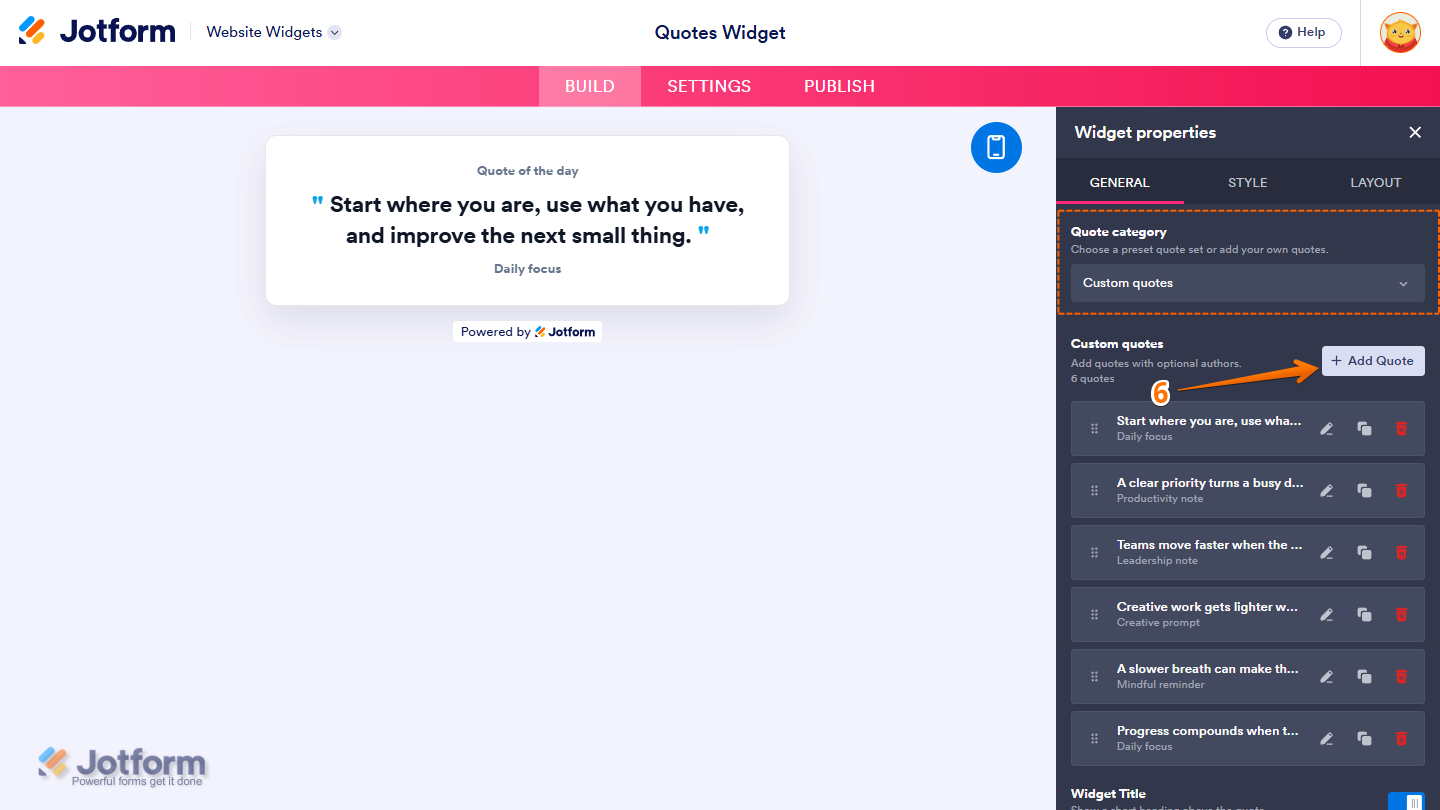
- Quote Category — Click on the Dropdown menu and select Motivational, Productivity, Leadership, Creativity, Mindfulness, or Custom Quotes.
- Widget Title — Keep this toggled on to display a title at the top of the quotes. Enter a new title in the input box below to customize it.
- Author — Keep this on to display the author below each quote.
- Quotation Mark — Keep this toggled on to show the quotation marks that enclose each quote.
- When you select Custom Quotes from the Quote Category dropdown menu, click on Add Quote to add a new quote to the list.
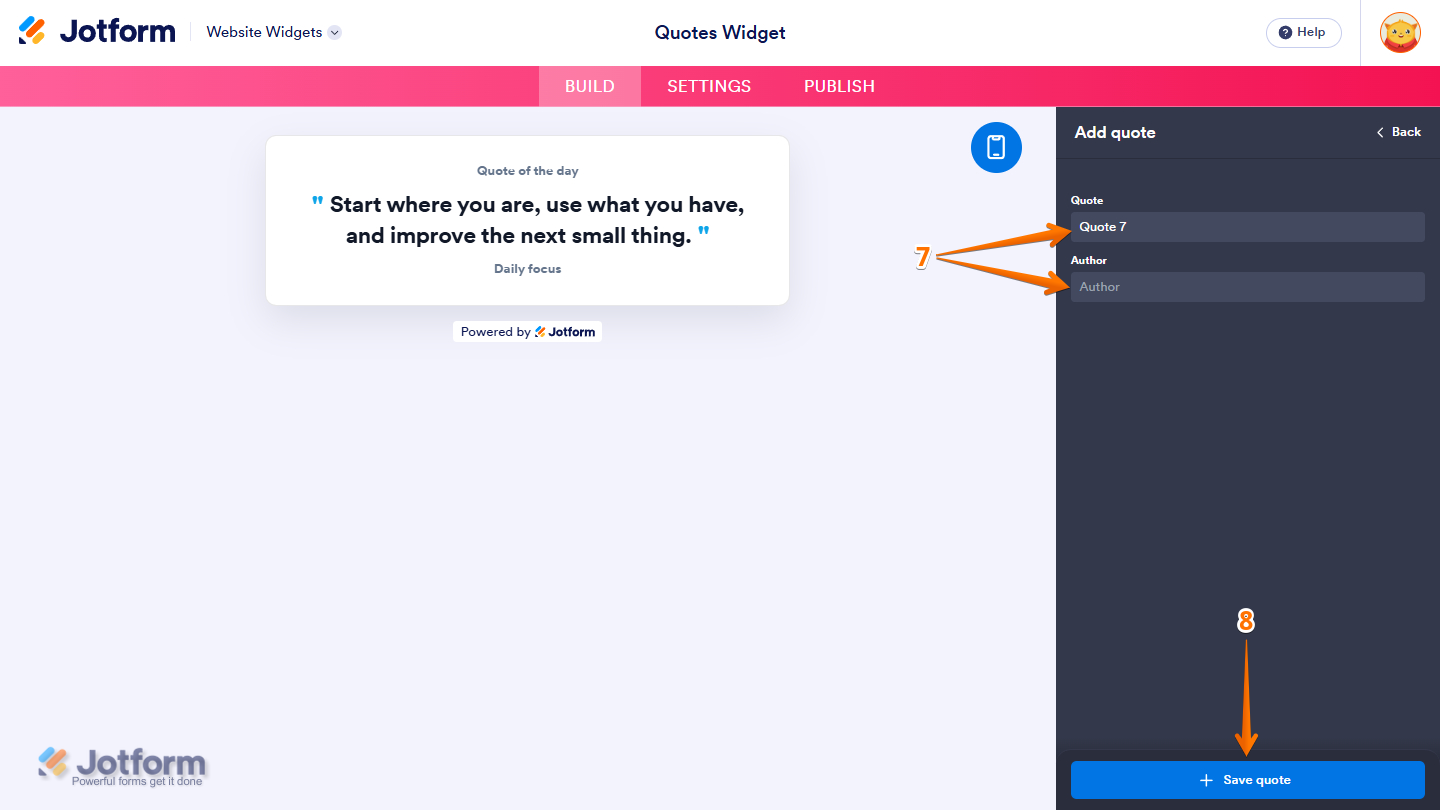
- Then, on the Add Quote menu, enter the following details:
- Quote — Enter the quote you want to display in the widget.
- Author — Enter the name of the person the quote is attributed to. Leave this blank if you don’t want to display an author.
- Next, click on Save Quote at the bottom to save it.
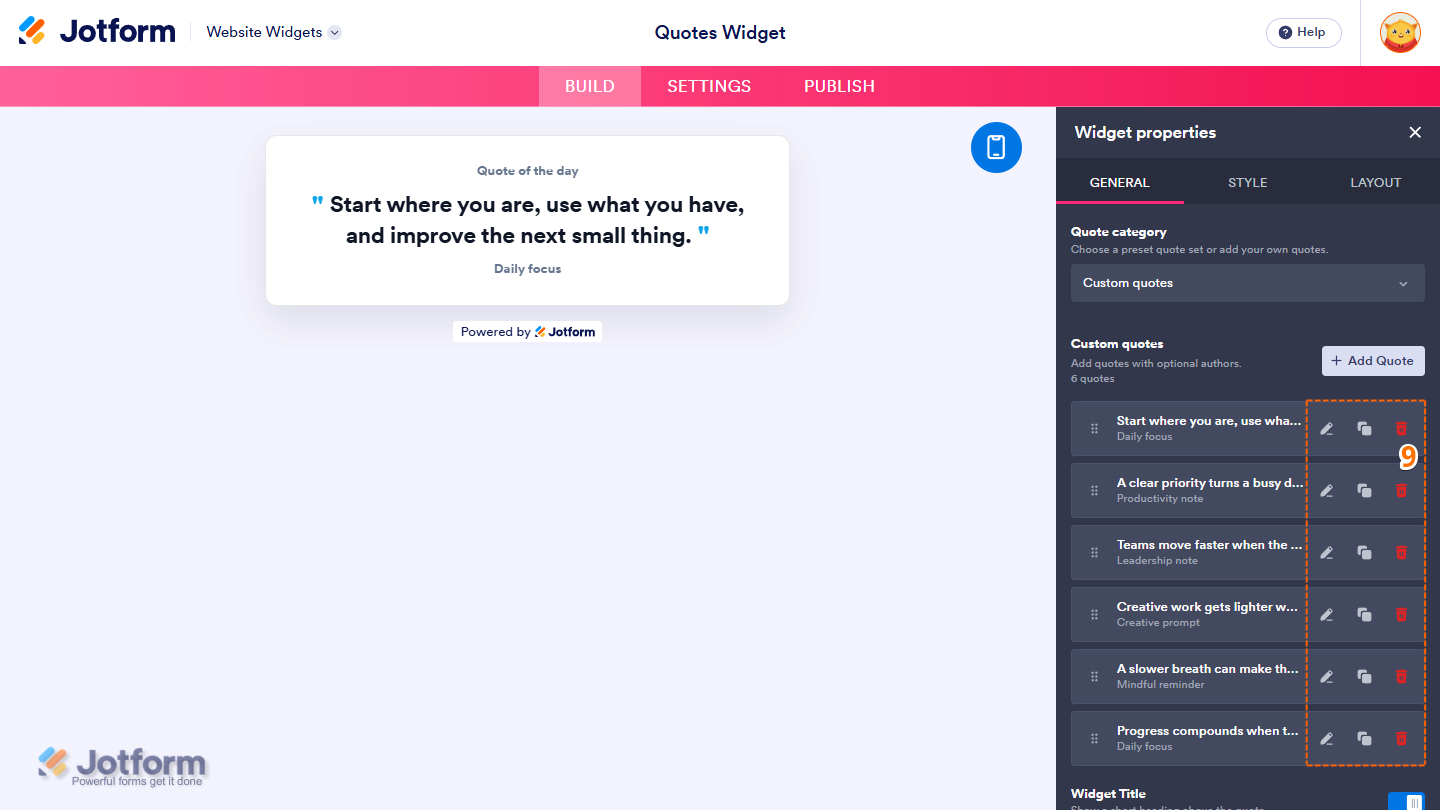
- Now, manage the Custom Quotes by clicking the following icons:
- Pencil Icon — Click this icon to edit the current custom quote.
- Duplicate Icon — Click this icon to duplicate the custom quote.
- Trash Can Icon — Click this icon to permanently delete the custom quote from the list
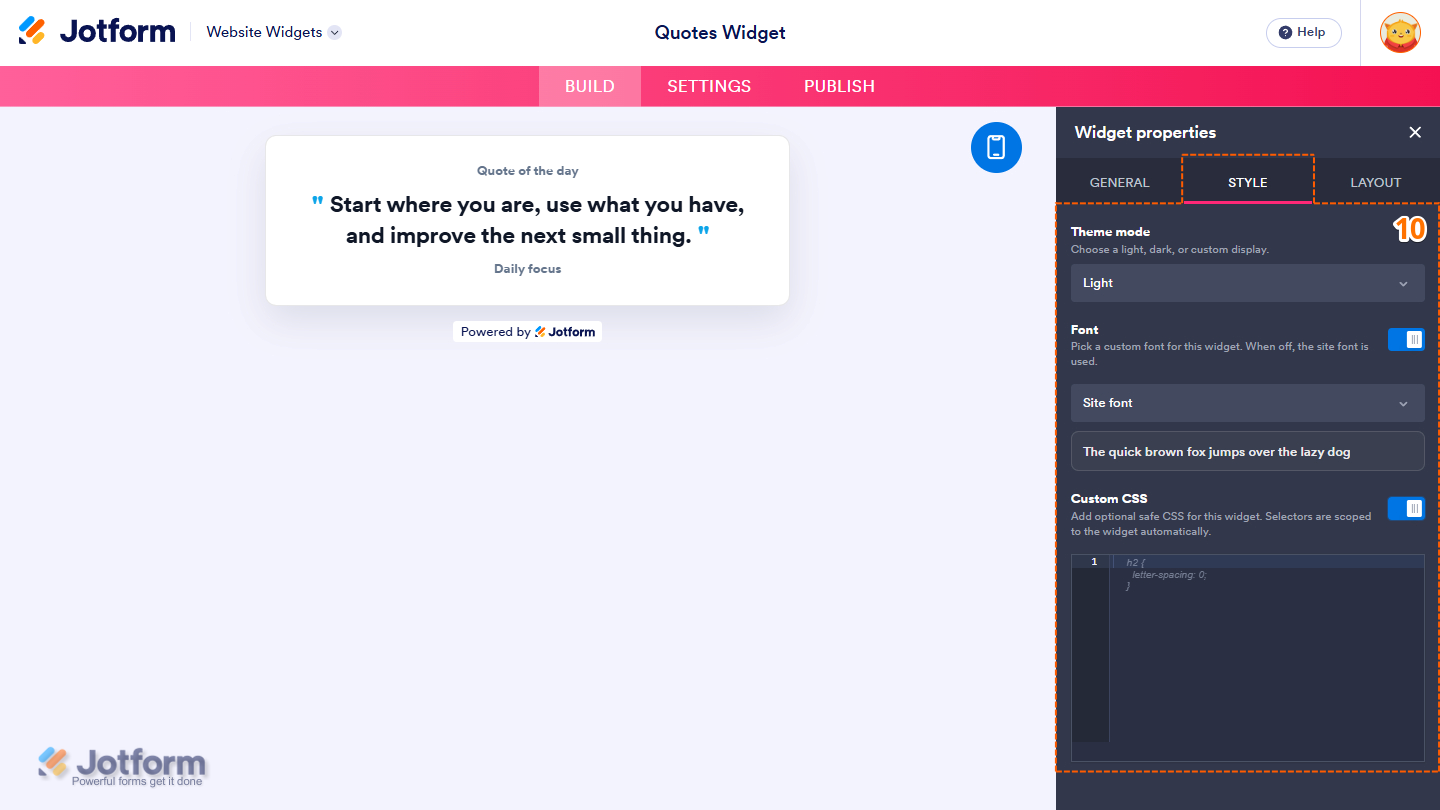
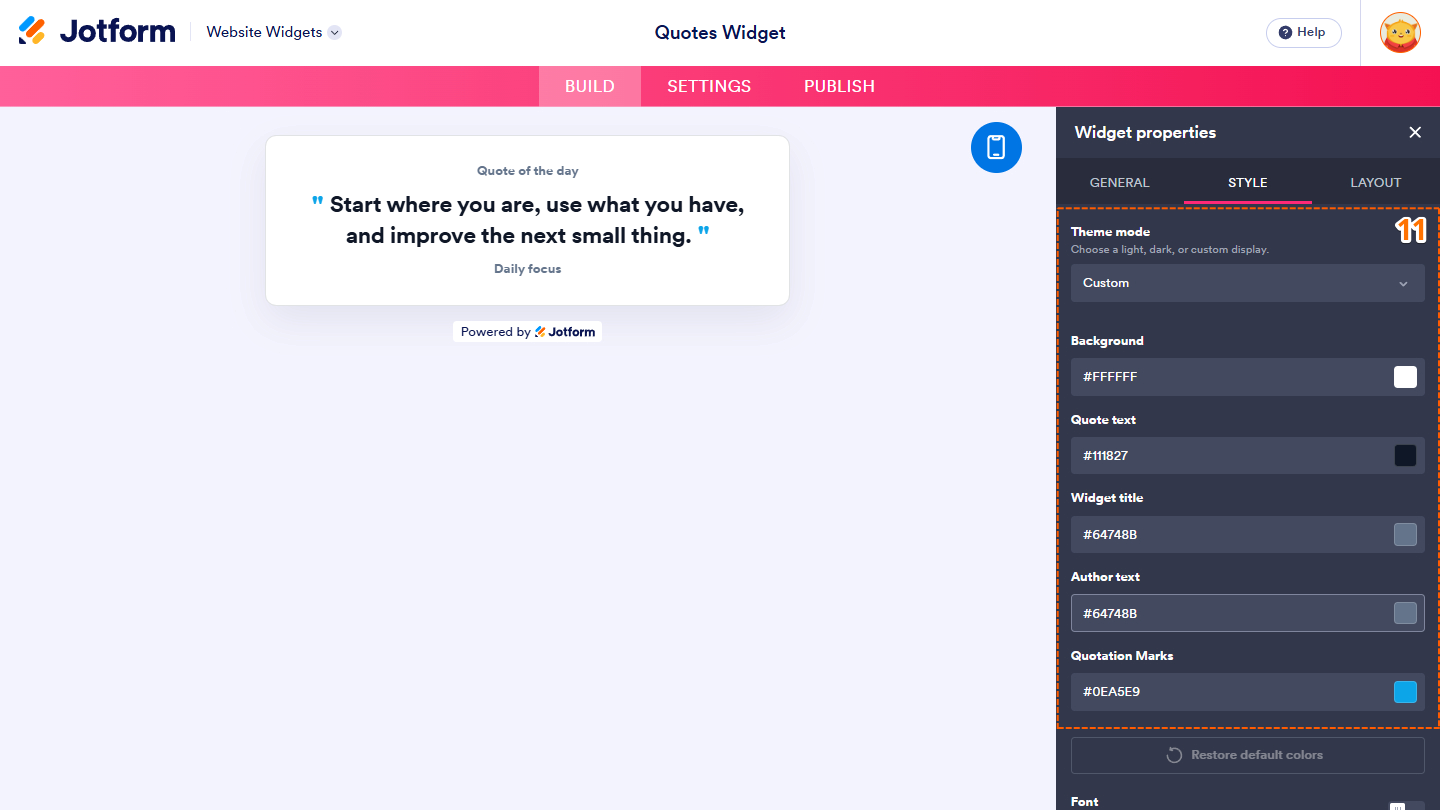
- Next, under the Style tab, customize these properties:
- Theme Mode — Click on the Dropdown menu and select Light, Dark, or Custom.
- Font — Toggle this on, then in the Dropdown menu that appears below it, keep Site Font selected to match the font used on your website, select System to use the font from each visitor’s device, or select another available font. Leave this off to continue using your website’s font.
- Custom CSS — Toggle this on, then in the code editor that appears below it, enter custom CSS to apply advanced styling to your widget
- When you select Custom Theme, configure the following color properties:
- Background — Enter the name, hex code, or RGB value in the input box to change the background color of the quote box.
- Quote Text — Keep the default, or enter the name, hex code, or RGB value in the input box to change the quote text color.
- Widget Title — Enter the name, hex code, or RGB value in the input box to change the color of the widget title.
- Author Text — Keep the default, or enter the name, hex code, or RGB value in the input box to change the text color of the Author’s name.
- Quotation Marks — Enter the name, hex code, or RGB value in the input box to change the color of the quotation marks.
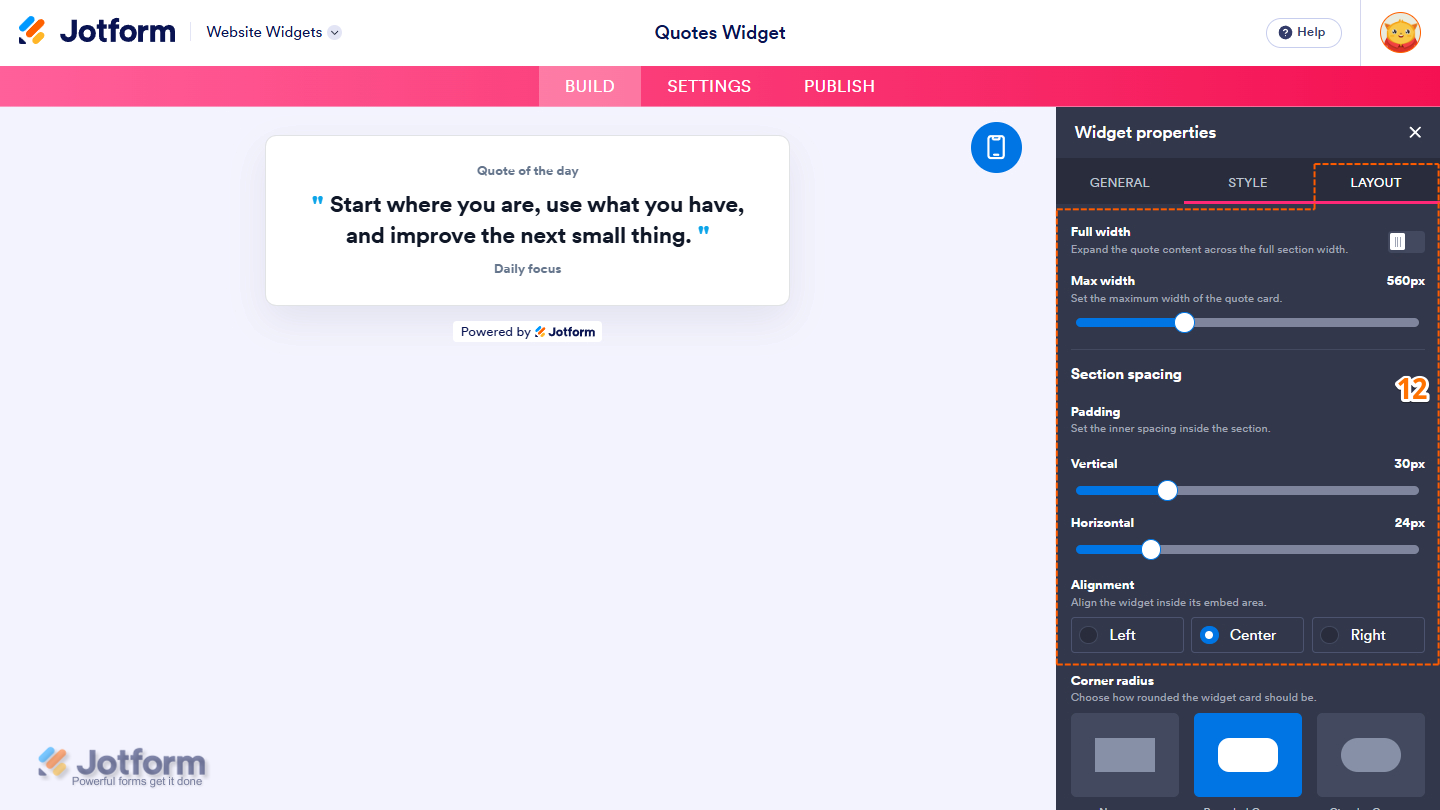
- Then, under the Layout tab, configure these properties:
- Full Width — Toggle this on to expand the quote content across the full section width. Keep this toggled off to set the Max Width.
- Max Width — Click and hold the slider handle, then drag it to adjust the quote card’s maximum width.
- Padding — Click and hold the slider handle for the Vertical and Horizontal options, then drag it to set the inner spacing inside the section.
- Alignment — Keep the default Center to center the quote card, or select Left to align it to the left, or select Right to align it to the right.
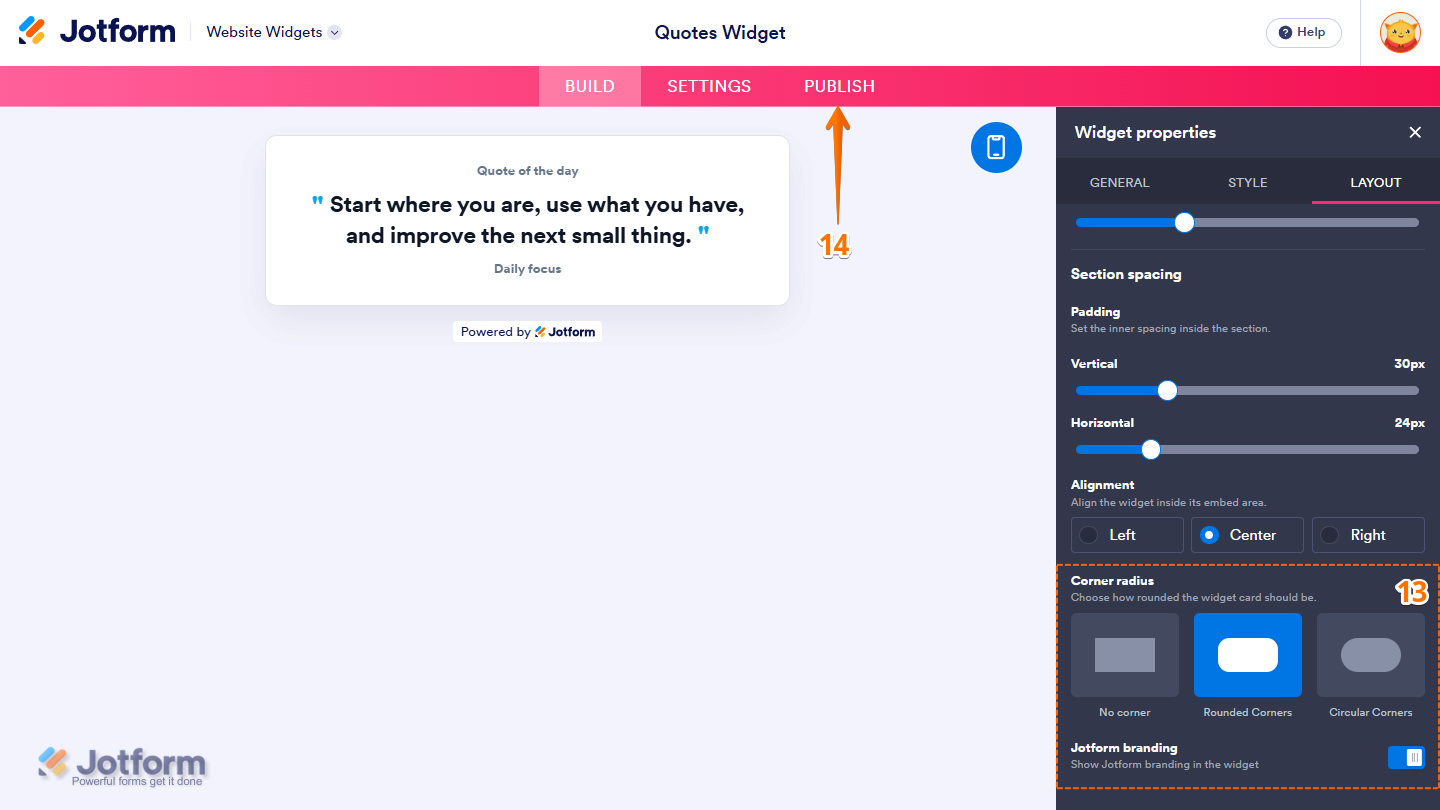
- Next, scroll down and complete these things:
- Corner Radius — Keep the default Rounded corner or change it to No Corner or Circular.
- Jotform Branding — Keep this on to display Powered by Jotform in your widget, or toggle it off to hide it.
- Once everything’s set, in the pink navigation bar at the top of the page, click on Publish.
Note
If you’re not logged in, you’ll be asked to log in to your Jotform account or sign up for one. Once you’ve done that, you’ll be able to get the embed code for your widget.
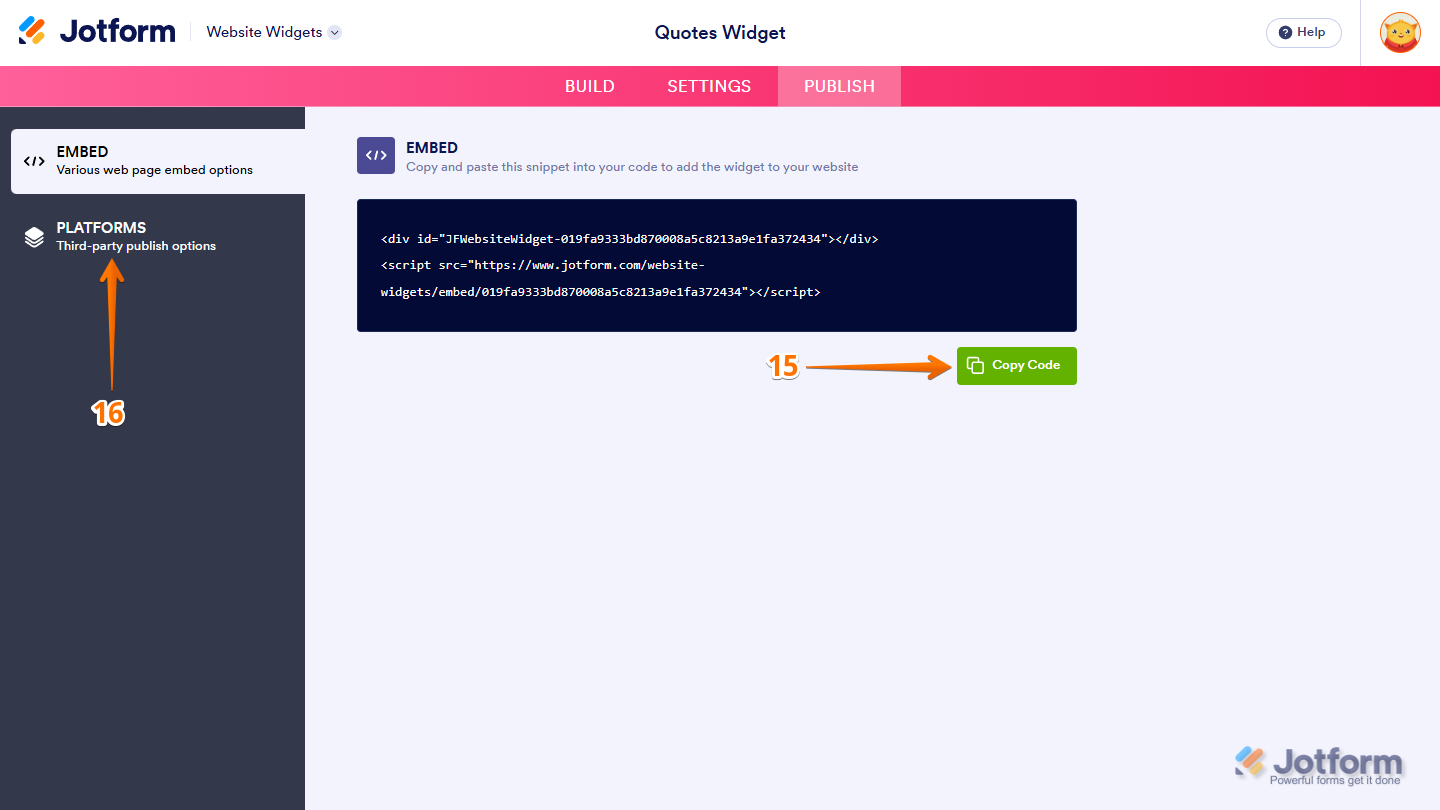
- Then, in the Embed section, click on Copy Code, and, if you already know how, paste that into the Embed section on your platform.
- To view embedding instructions for your widget, click on Platforms in the menu on the left side of the page.
- Next, in the Platforms section on the right, select the platform you want to view embedding instructions for. Or, use the Search bar at the top of the section to find it easily.
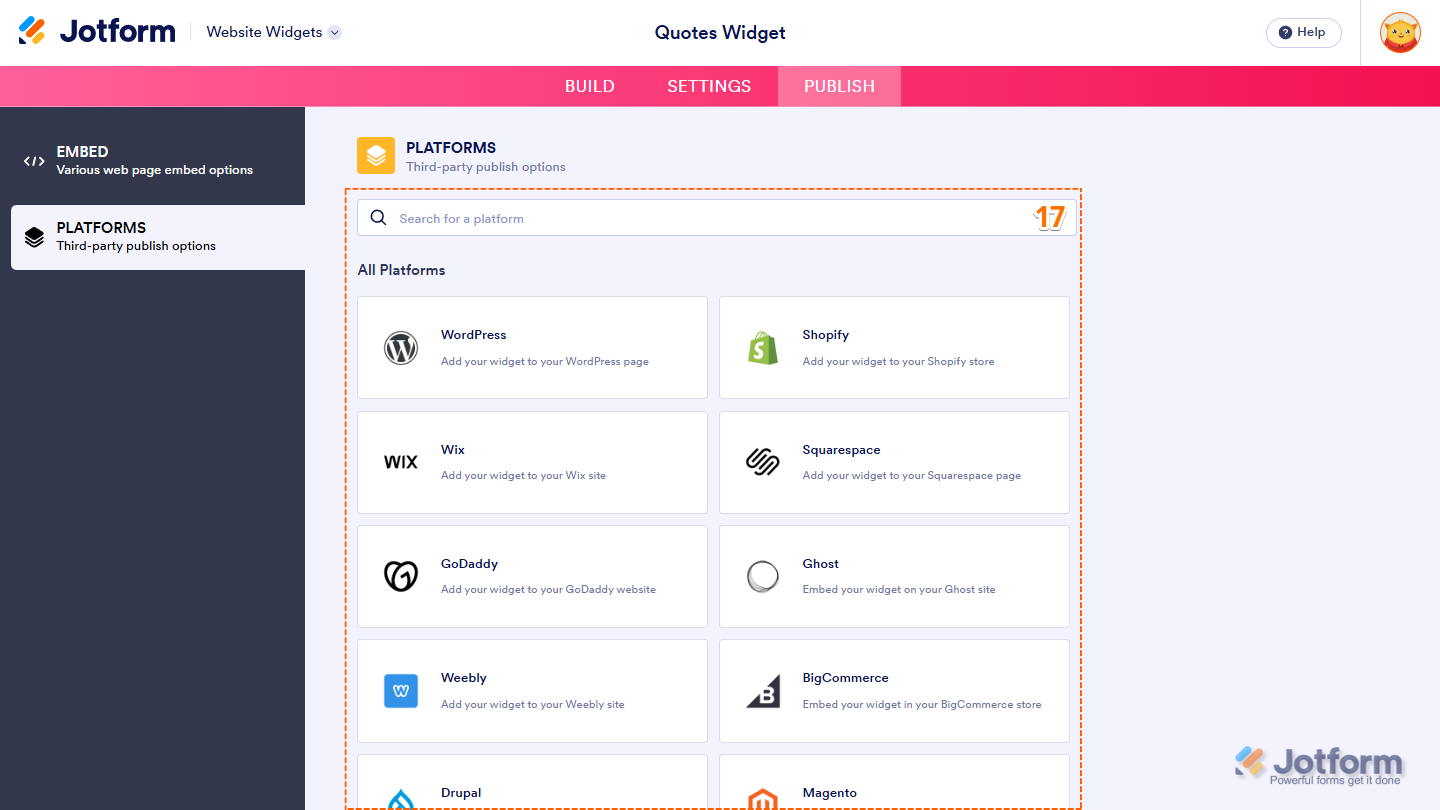
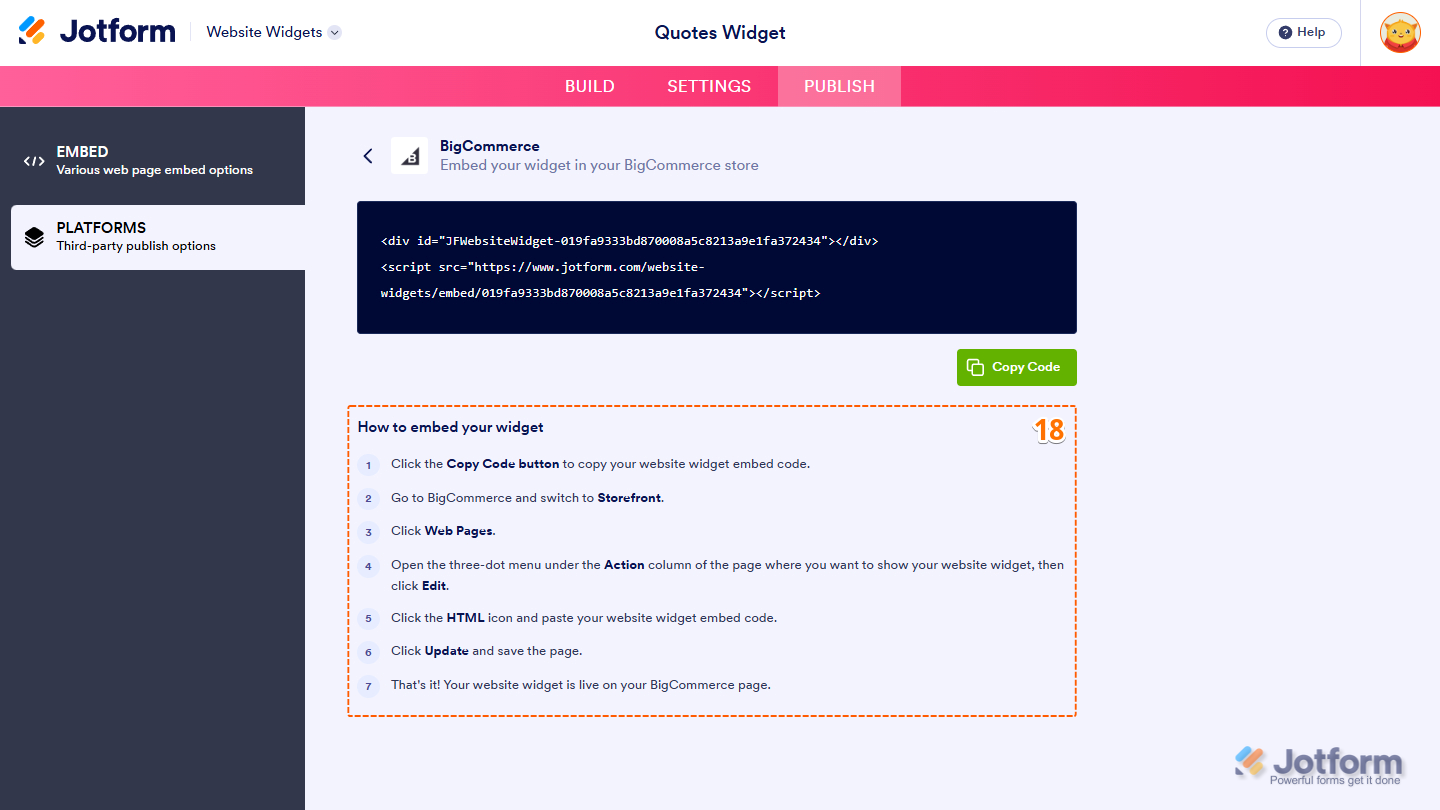
- Then, follow the steps in the How to Embed Your Widget section to add it to your website.
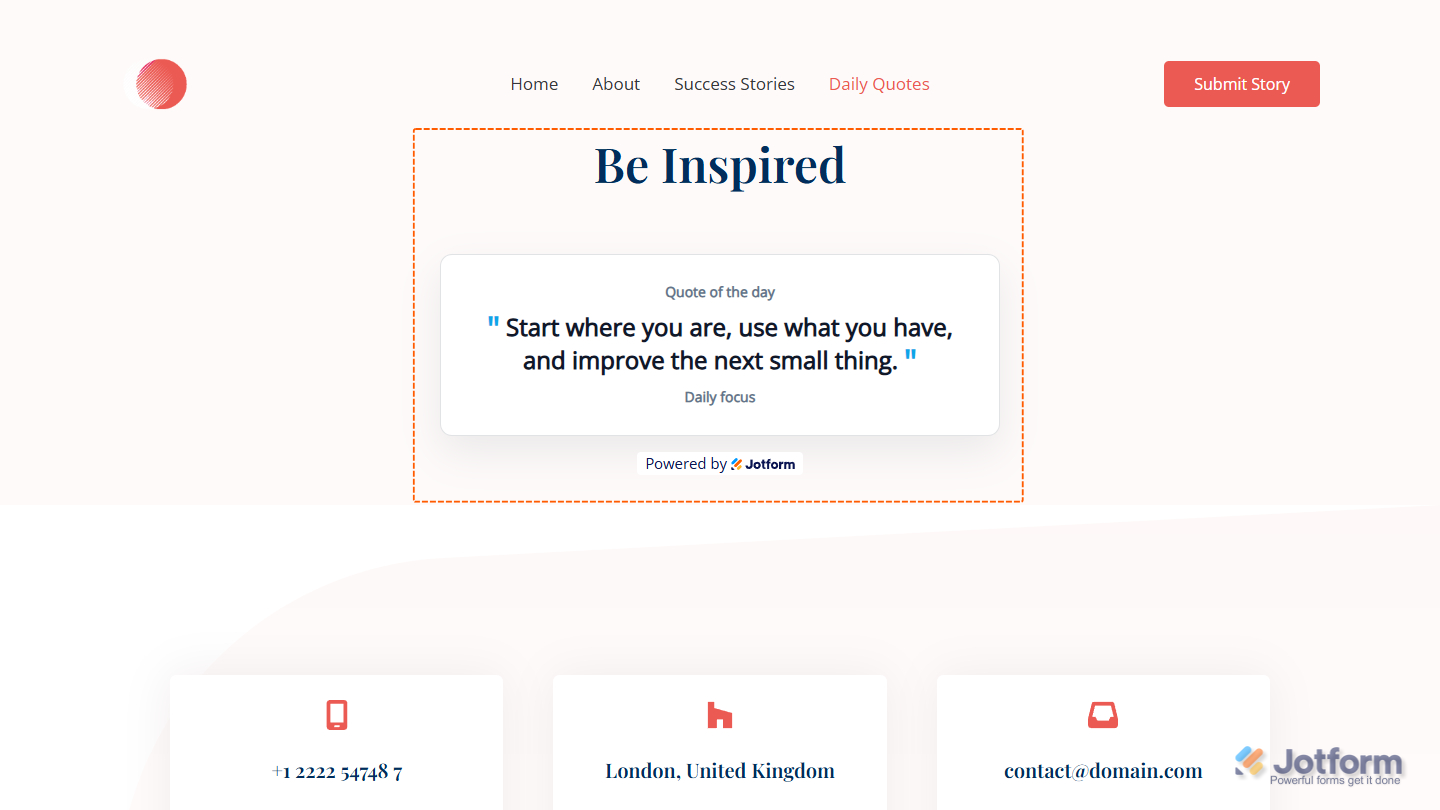
That’s it! Your Quotes widget will appear on your website just as you customized it. Take a look at the screenshot below to see how it looks on a website.
Note
You can manage the website widgets you’ve created at any time from your account. For a full breakdown of how to do it, head over to our guide on How to Manage Website Widgets.


Send Comment: