With Jotform’s Radio Player Widget, you can embed an online radio station directly on your website, allowing visitors to listen without leaving your page. Simply add your radio stream, customize the player’s appearance, and embed it into your website in just a few steps.
Whether you’re streaming music, podcasts, live broadcasts, or community radio, adding a radio player helps keep visitors engaged while they explore your website. It’s a simple way to enhance the user experience and share your audio content with your audience.
Note
Make sure your radio stream URL is active and publicly accessible. If the stream is unavailable, the player won’t be able to play your audio.
Creating Your Radio Player Widget and Getting the Embed Code for it
Before you can add the Radio Player Widget to your website, you’ll first need to add your radio stream, customize the player’s appearance, and copy its embed code. You’ll just need to do this:
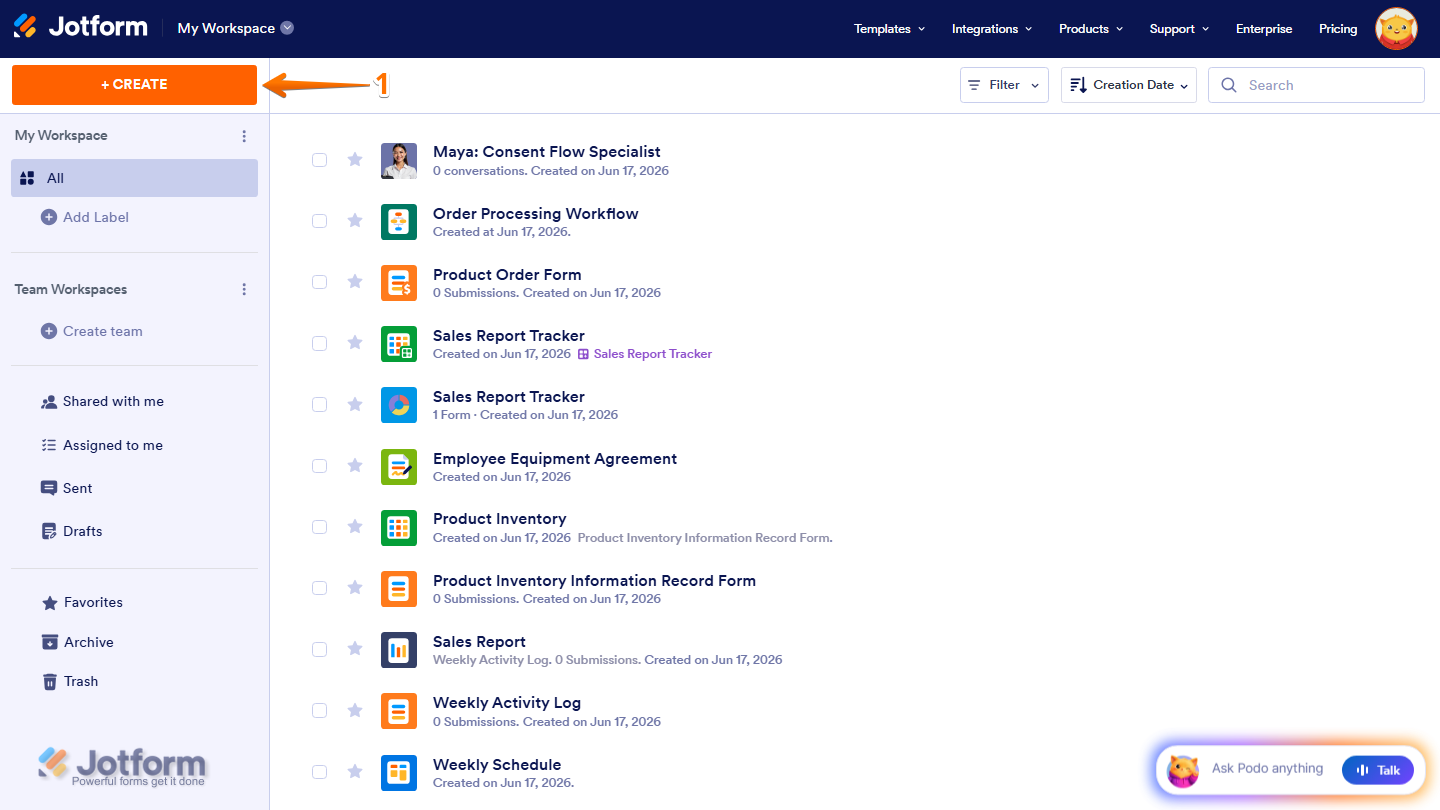
- On the top-left side of your Workspace page, click on Create.
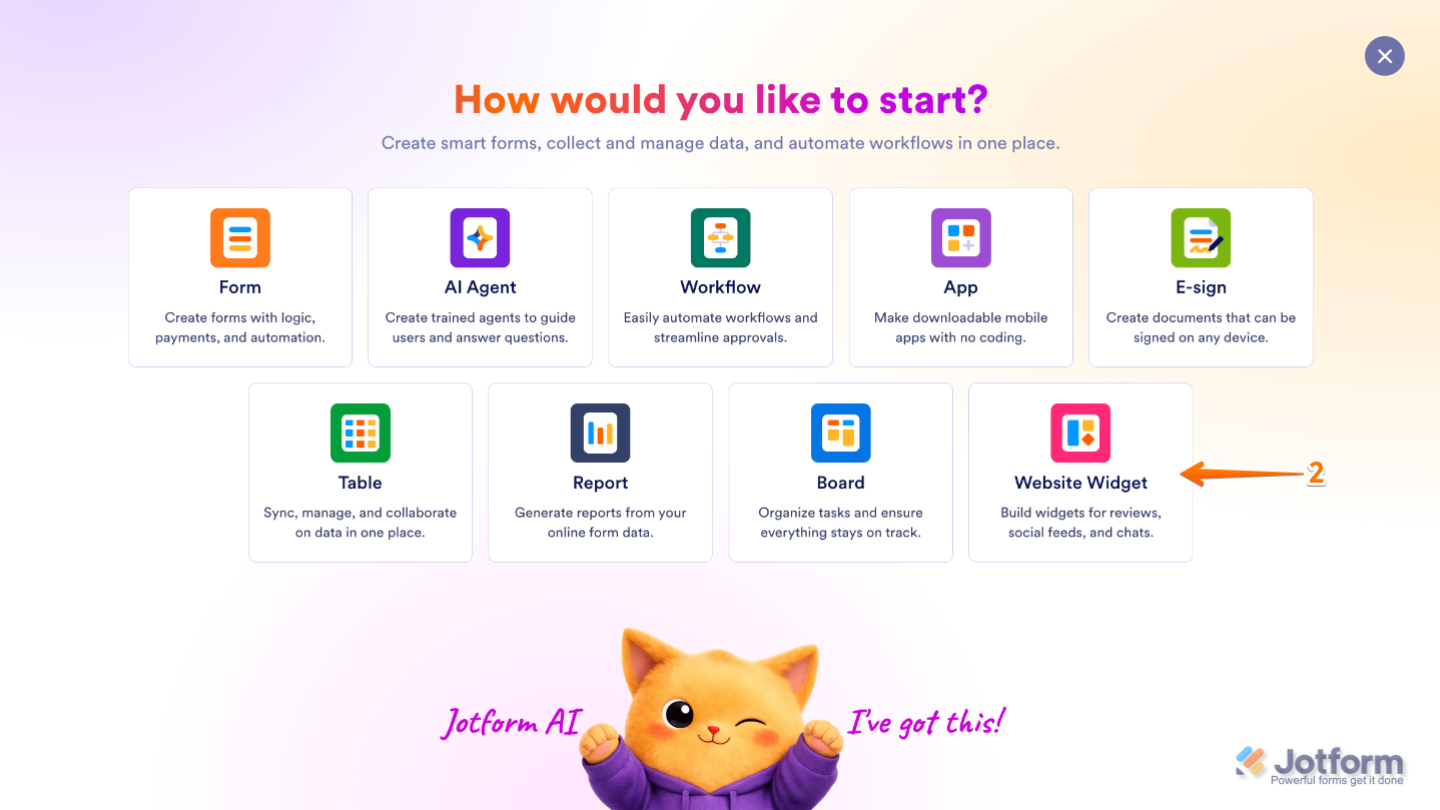
- Then, in the menu that opens up, select Website Widget.
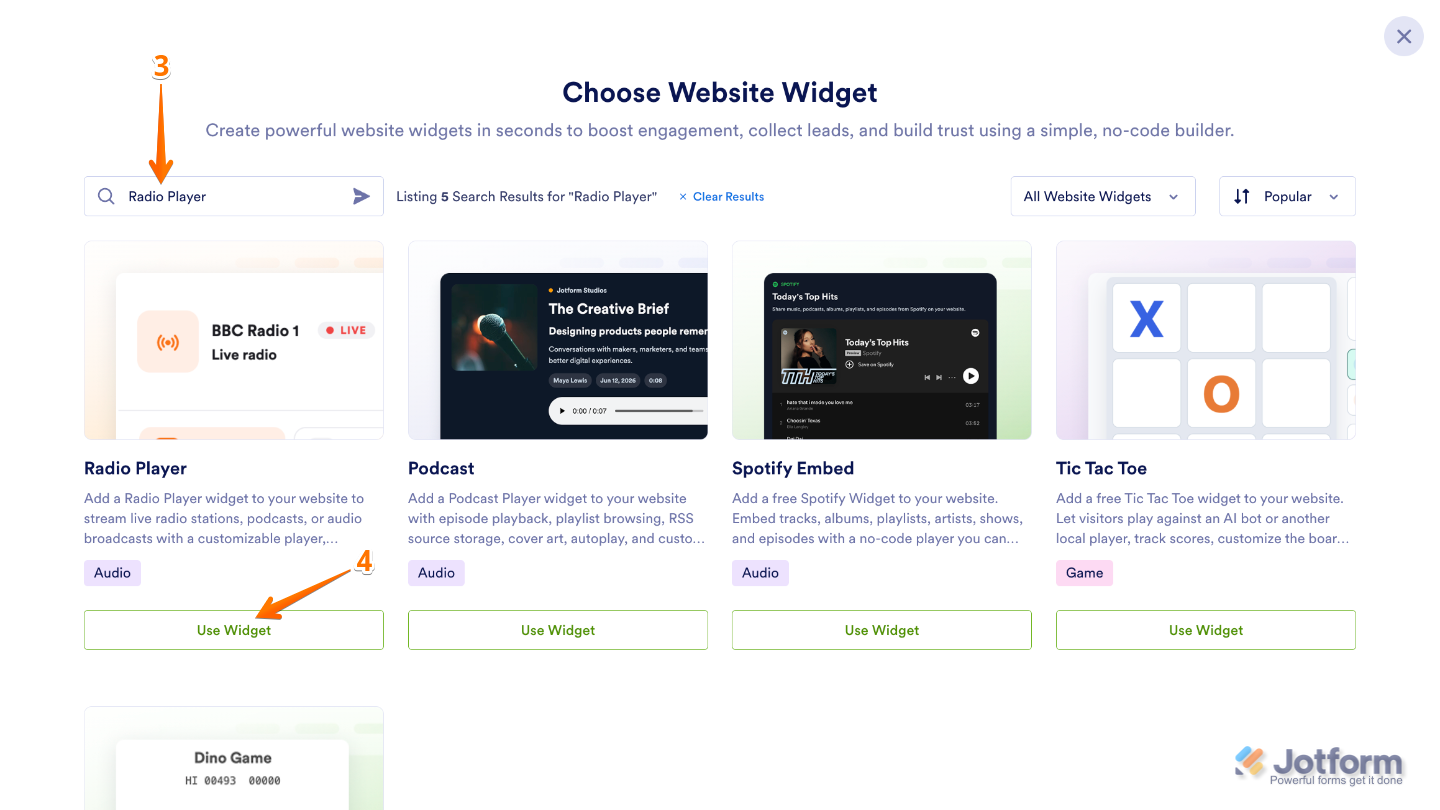
- Next, in the Search bar in the upper-left corner of the Choose Website Widget menu, enter Radio Player.
- Then, at the bottom of the search results, click on Use Widget.
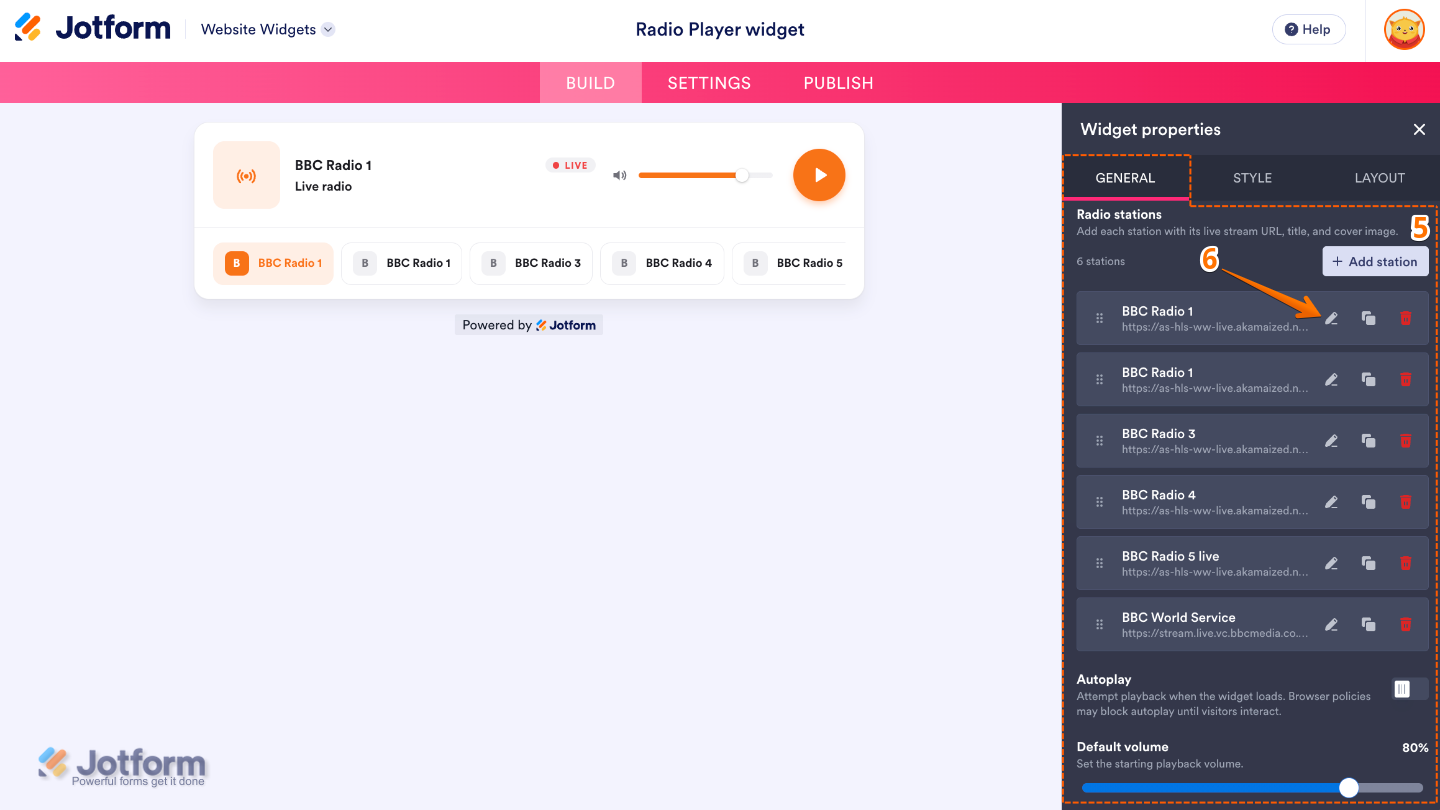
- Now, in the Widget Properties menu that opens on the right side of Website Widgets, under the General tab, set up these properties:
- Radio Stations
- Add Station — Use this to add a new radio station or audio stream to the widget.
- Edit Station (Pencil Icon) — Updates the selected station’s information, stream URL, or cover image.
- Duplicate Station (Duplicate Icon) — Creates a copy of an existing station and its settings, making it easier to add similar stations.
- Delete Station (Trash Can Icon) — Removes the selected station from the widget.
- Autoplay — Automatically starts playing the default radio station when the widget loads, depending on the visitor’s browser settings.
- Default Volume — Set the initial playback volume when visitors start listening to the radio player.
- Radio Stations
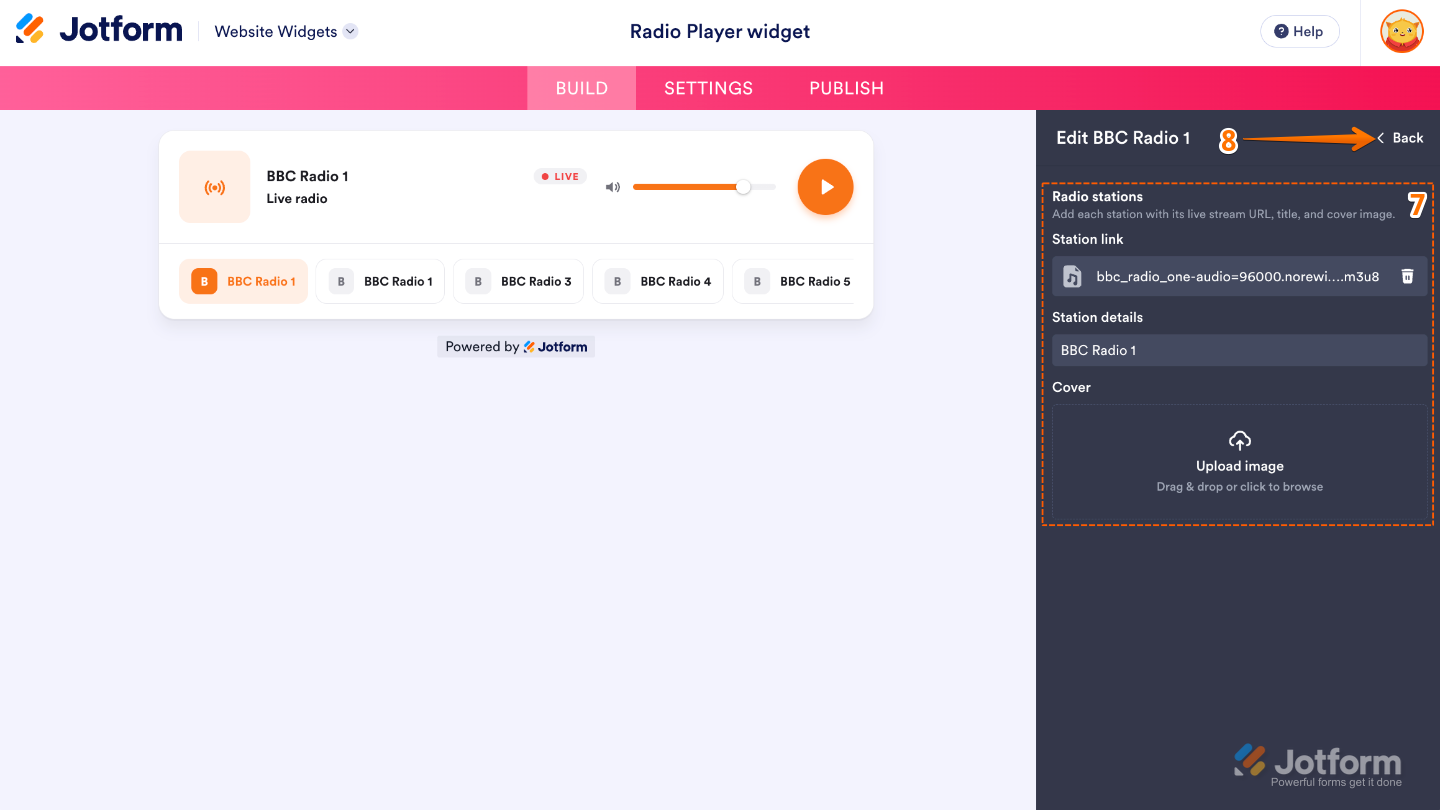
- To show you an example, click on the Pencil icon to edit the BBC Radio 1 settings.
- Then, configure the radio station settings below:
- Station Link — Enter the streaming URL for the radio station you want the widget to play.
- Station Details — Provide information about the station, such as its name or description, to help visitors identify what they’re listening to.
- Cover — Upload or select an image to represent the radio station, such as its logo or album artwork.
- Once everything’s set, in the upper-right corner of the Edit Station menu, click on Back.
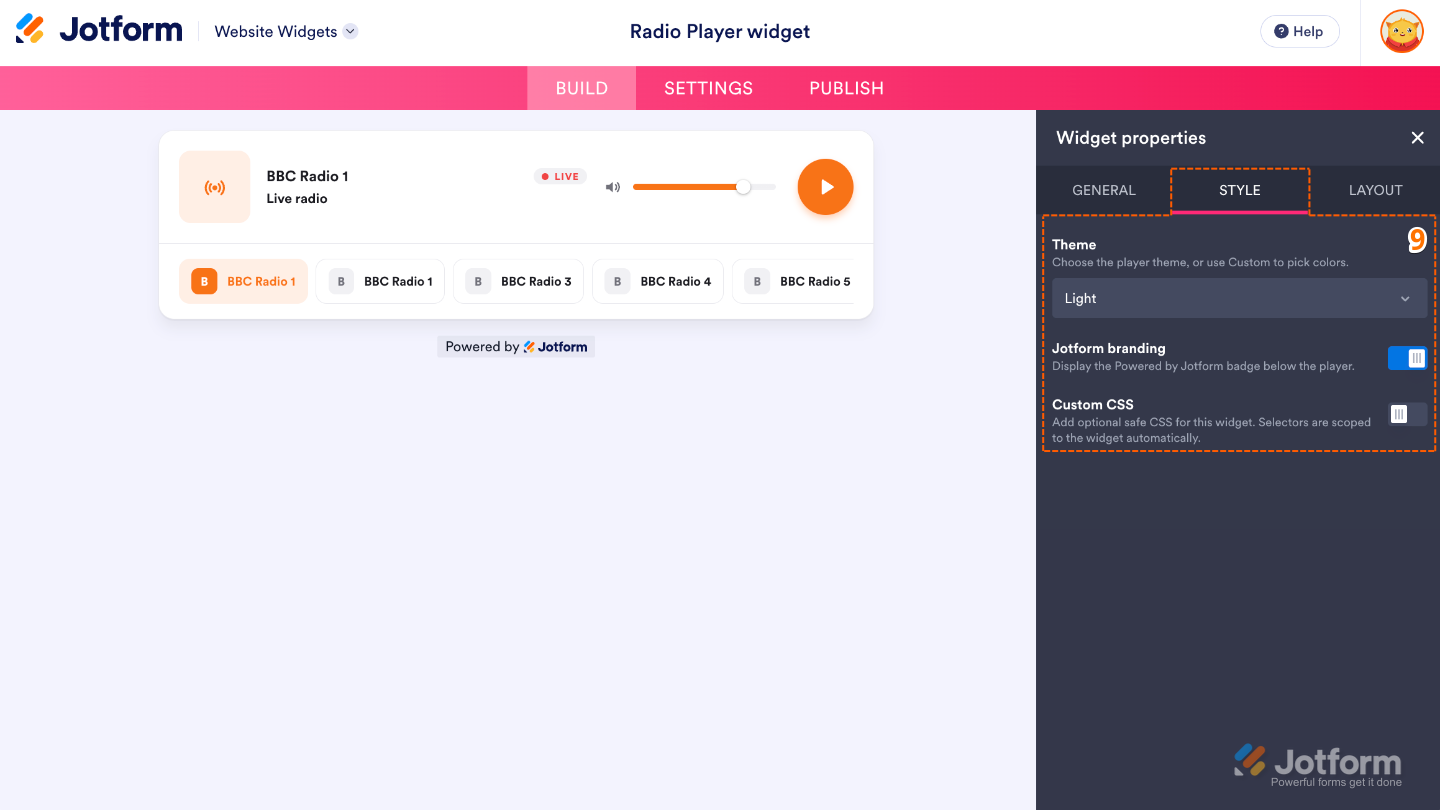
- Next, under the Styles tab, customize these properties:
- Theme — Choose a visual theme that matches the design and branding of your website.
- Jotform Branding — Show or hide Jotform branding on the widget.
- Custom CSS — Apply your own CSS code for advanced styling beyond the built-in settings.
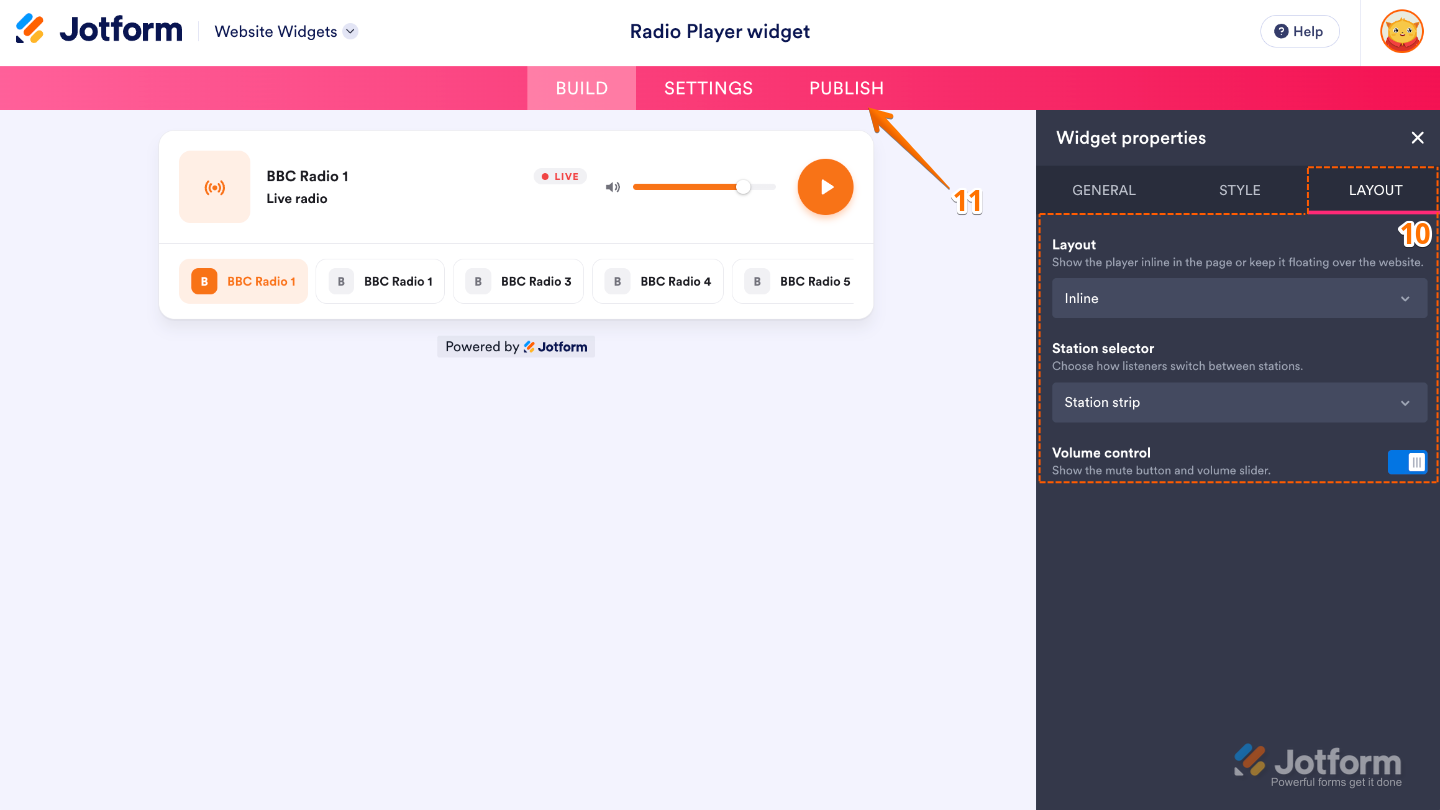
- Now, under the Layout tab, configure these properties:
- Layout — Choose how the radio player and its information are arranged within the widget.
- Station Selector — Show or hide the station selector, allowing visitors to switch between multiple radio stations.
- Volume Control — Show or hide the volume control so visitors can adjust the playback volume directly from the player.
- Once you’ve finished configuring the widget, in the pink navigation bar at the top of the page, click on Publish.
Note
You’ll be asked to log in to your Jotform account or sign up for one. Once you’ve done that, you’ll be able to get the embed code for your widget.
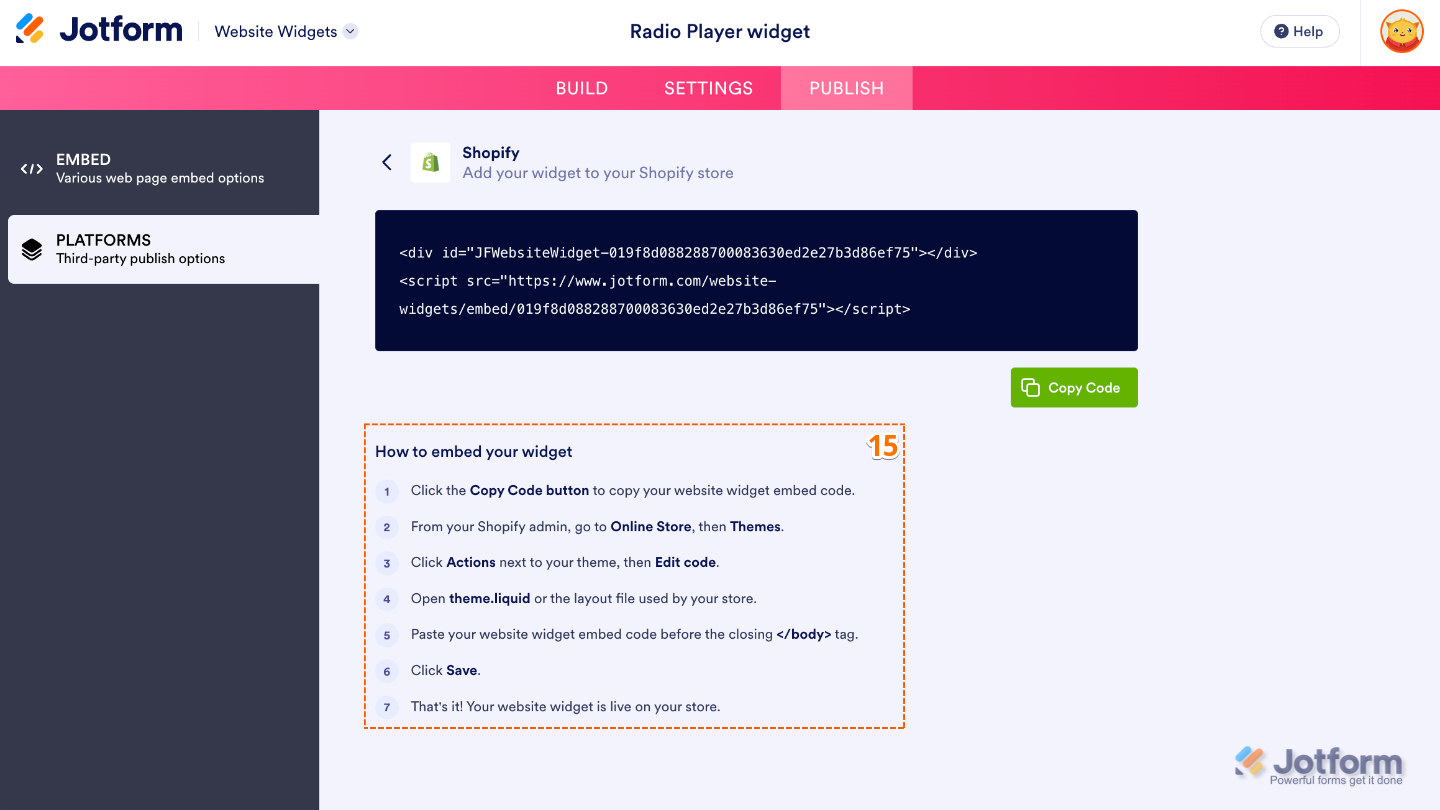
- Then, in the Embed section, click on Copy Code, and, if you already know how, paste that into the Embed section on your platform, and you’re good to go.
- To view embedding instructions for your widget, click on Platforms in the menu on the left side of the page.
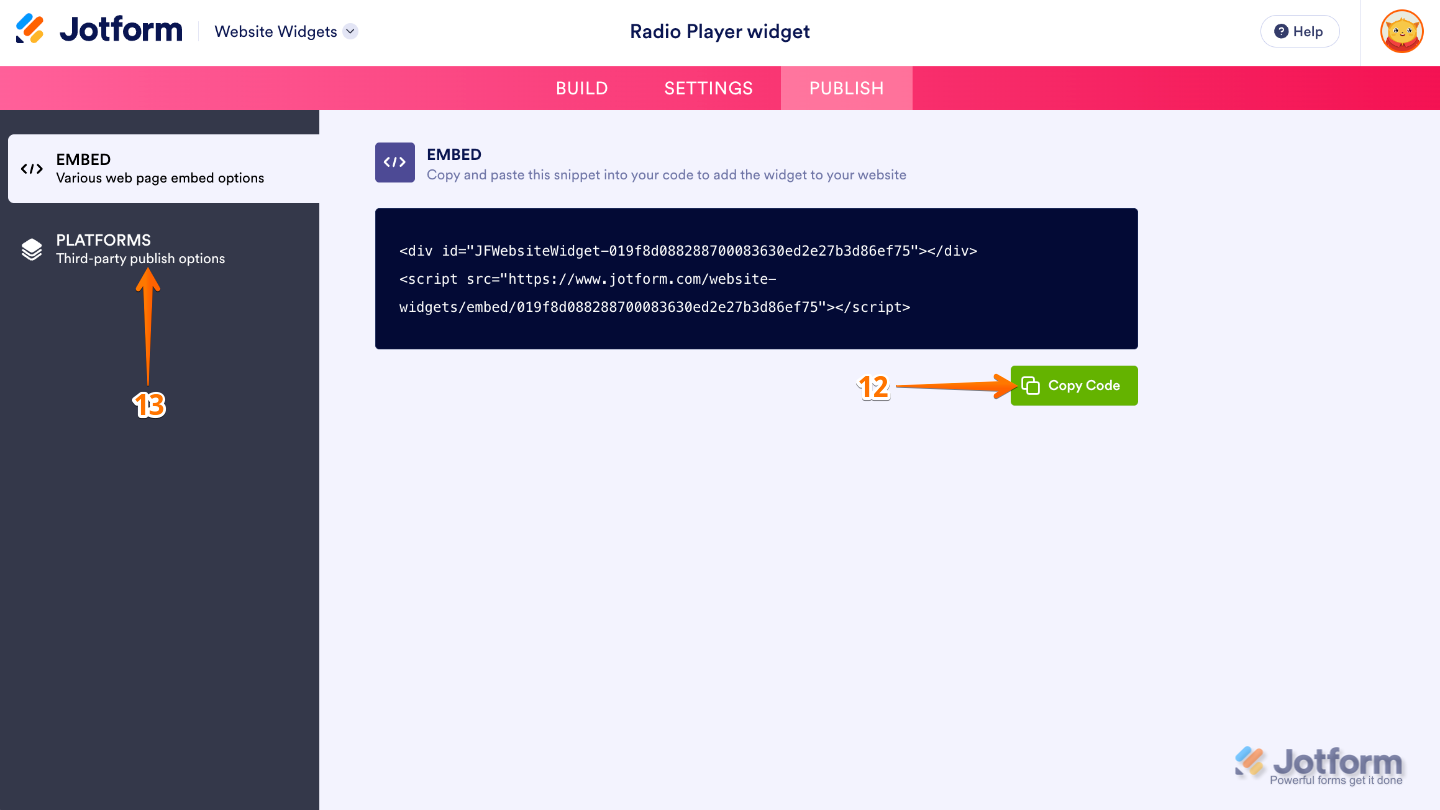
- Next, in the Platforms section on the right, select the platform you want to view embedding instructions for. Or, use the Search bar at the top of the section to find it easily.
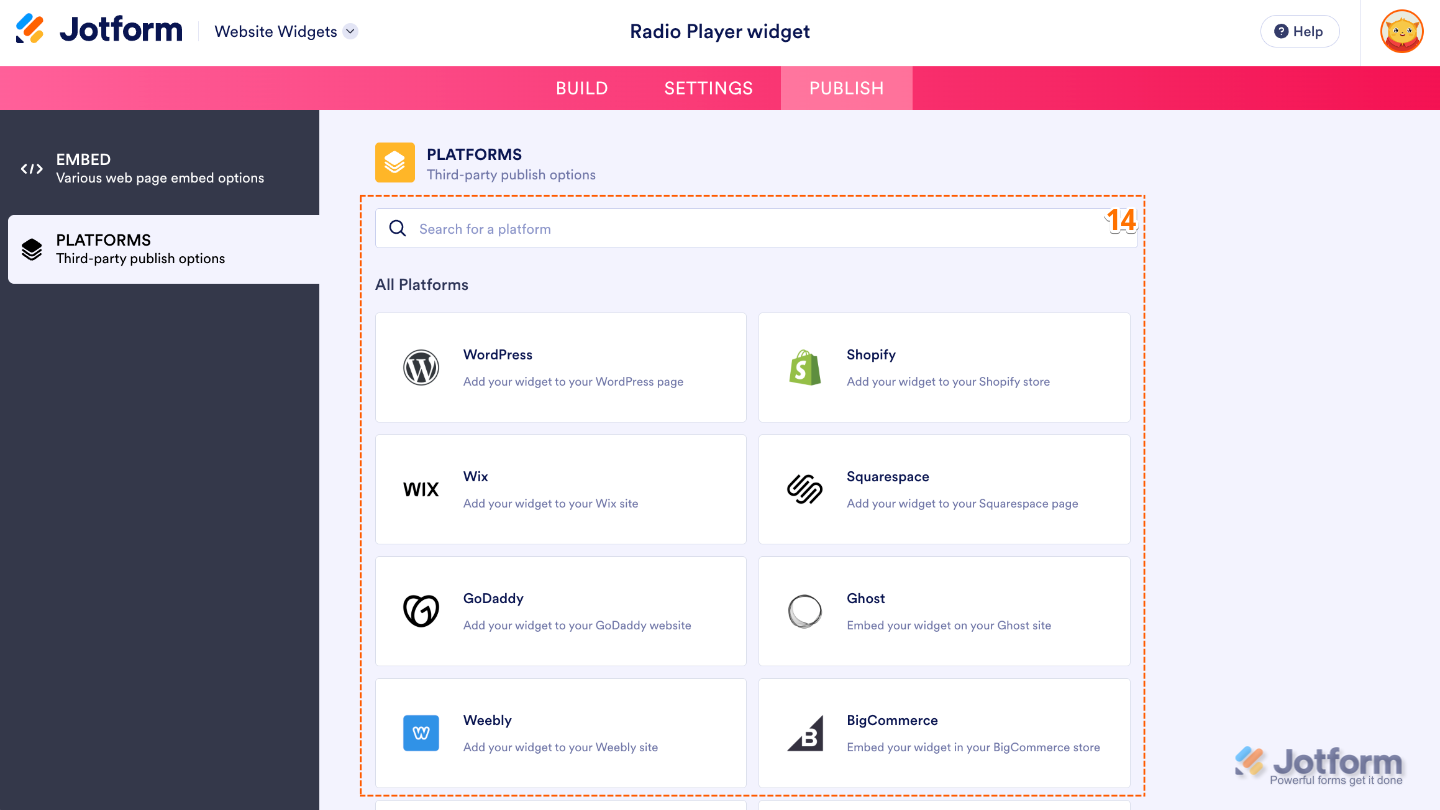
- Then, follow the steps in the How to Embed Your Widget section to add it to your website.
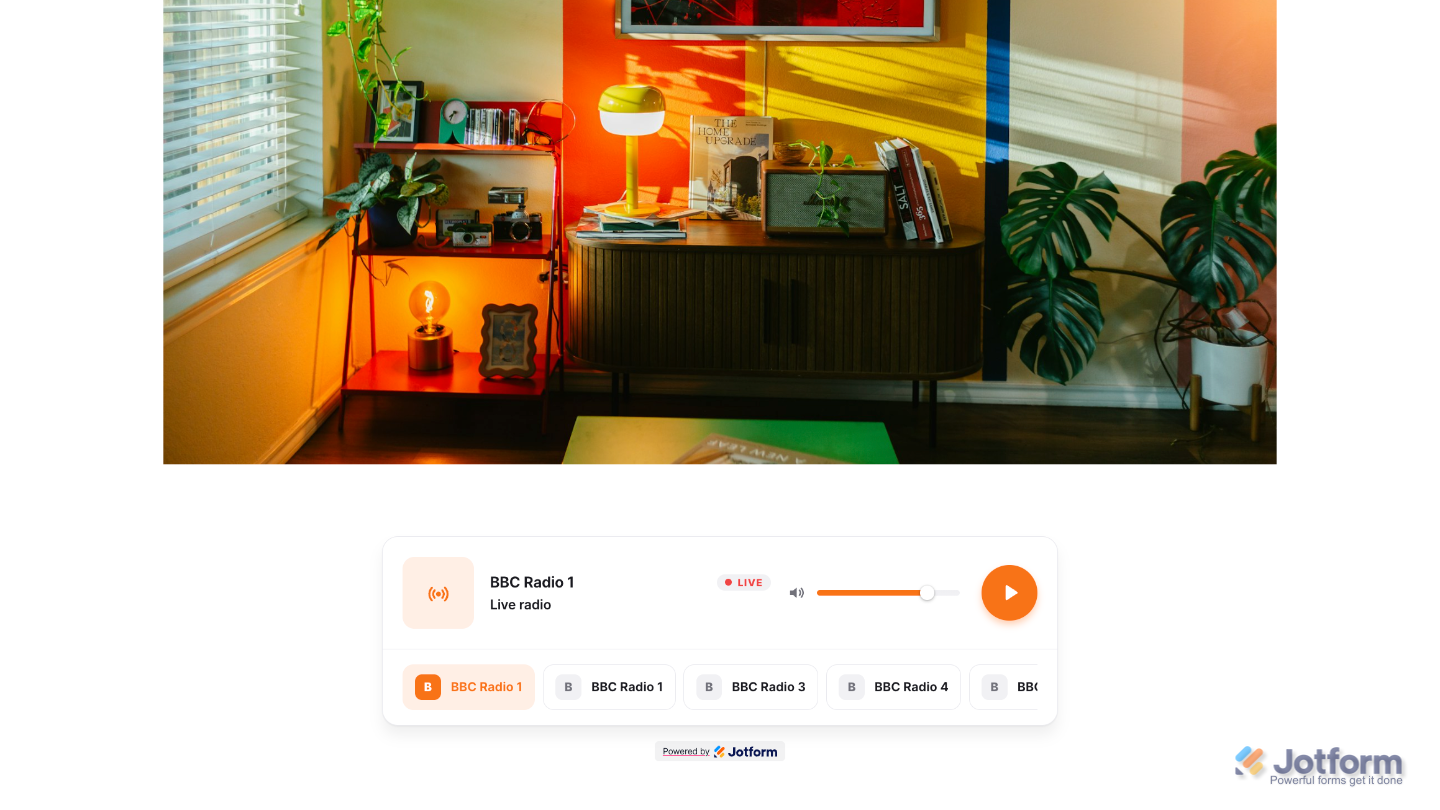
That’s it! Your Radio Player widget will now appear on your website with the stream, design, and settings you selected, allowing visitors to listen directly from your page. See the screenshot below for an example of how it looks on a website.
Note
You can manage the website widgets you’ve created at any time from your account. For a full breakdown of how to do it, head over to our guide on How to Manage Website Widgets.
Pro Tips
- Test your radio stream before publishing the widget to ensure it plays smoothly and provides a good listening experience for your visitors.
- If your audience accesses your website from different devices, preview the widget on both desktop and mobile to make sure the player looks and works as expected.


Send Comment: