Add an interactive scoreboard to your website with the Scoreboard widget. Whether you’re keeping score during a friendly game, tracking points in a classroom activity, or creating a simple competition, the widget lets visitors update and view scores directly within their own session through an intuitive and easy-to-use interface.
The Scoreboard widget provides a fun way to make activities more engaging without requiring any setup or coding. It’s ideal for games, quizzes, educational exercises, team-building activities, or any scenario where visitors can keep track of scores while interacting with your website.
Creating and Getting the Embed Code of Your Scoreboard Widget
To embed a scoreboard on your website, you’ll first need to configure the Scoreboard widget and copy the embed code for it. Here’s how to get going:
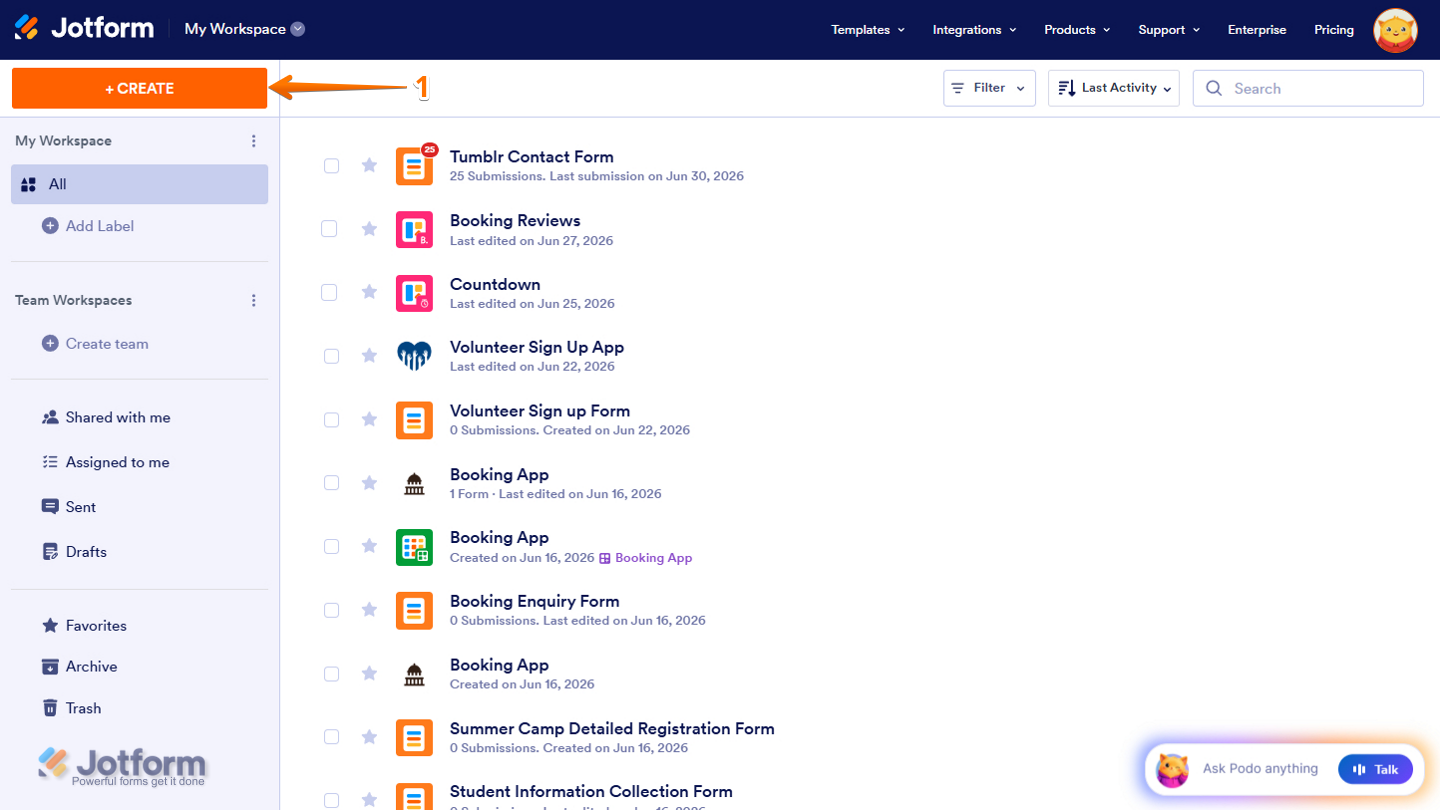
- On the top-left side of your Workspace page, click on Create.
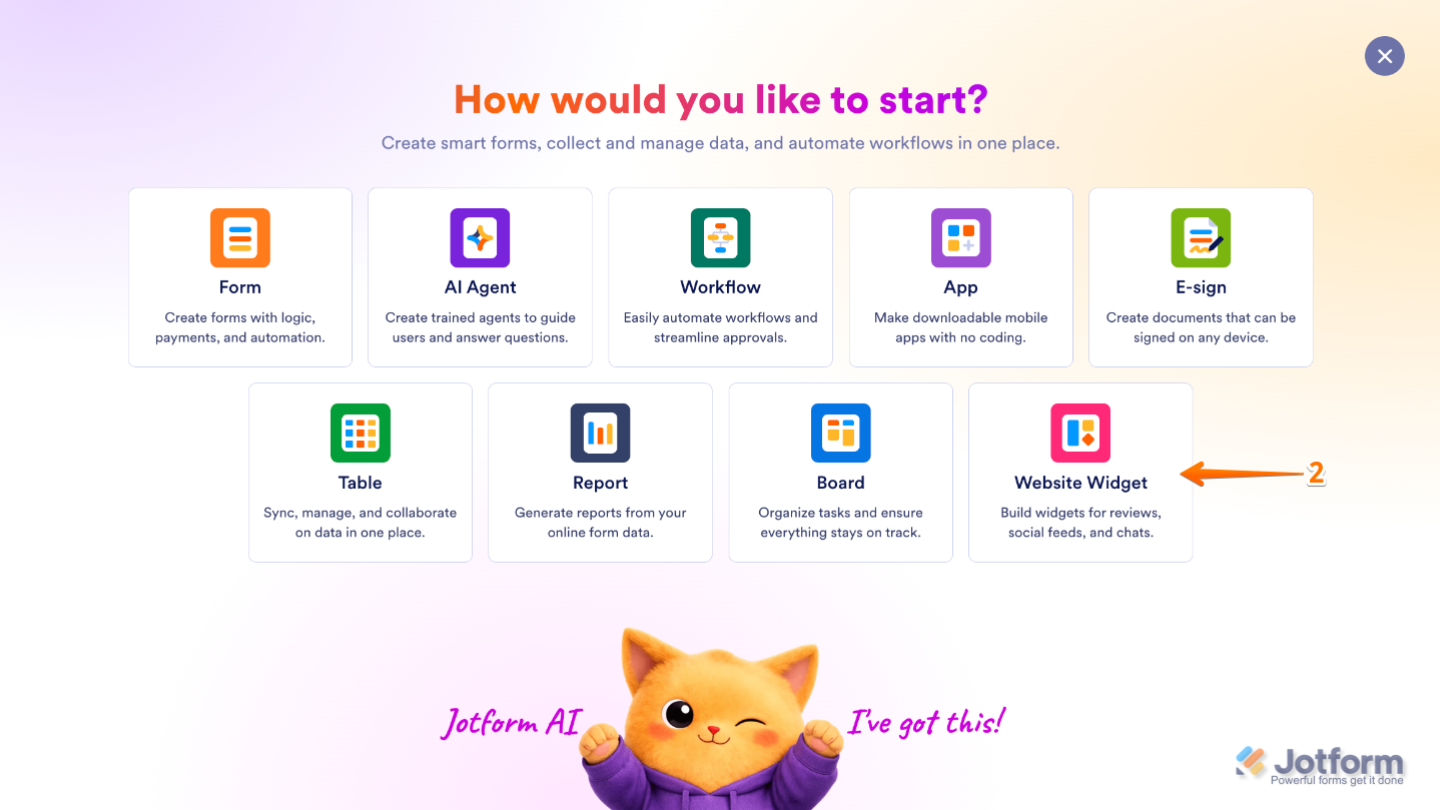
- Then, in the menu that opens up, select Website Widget from the assets.
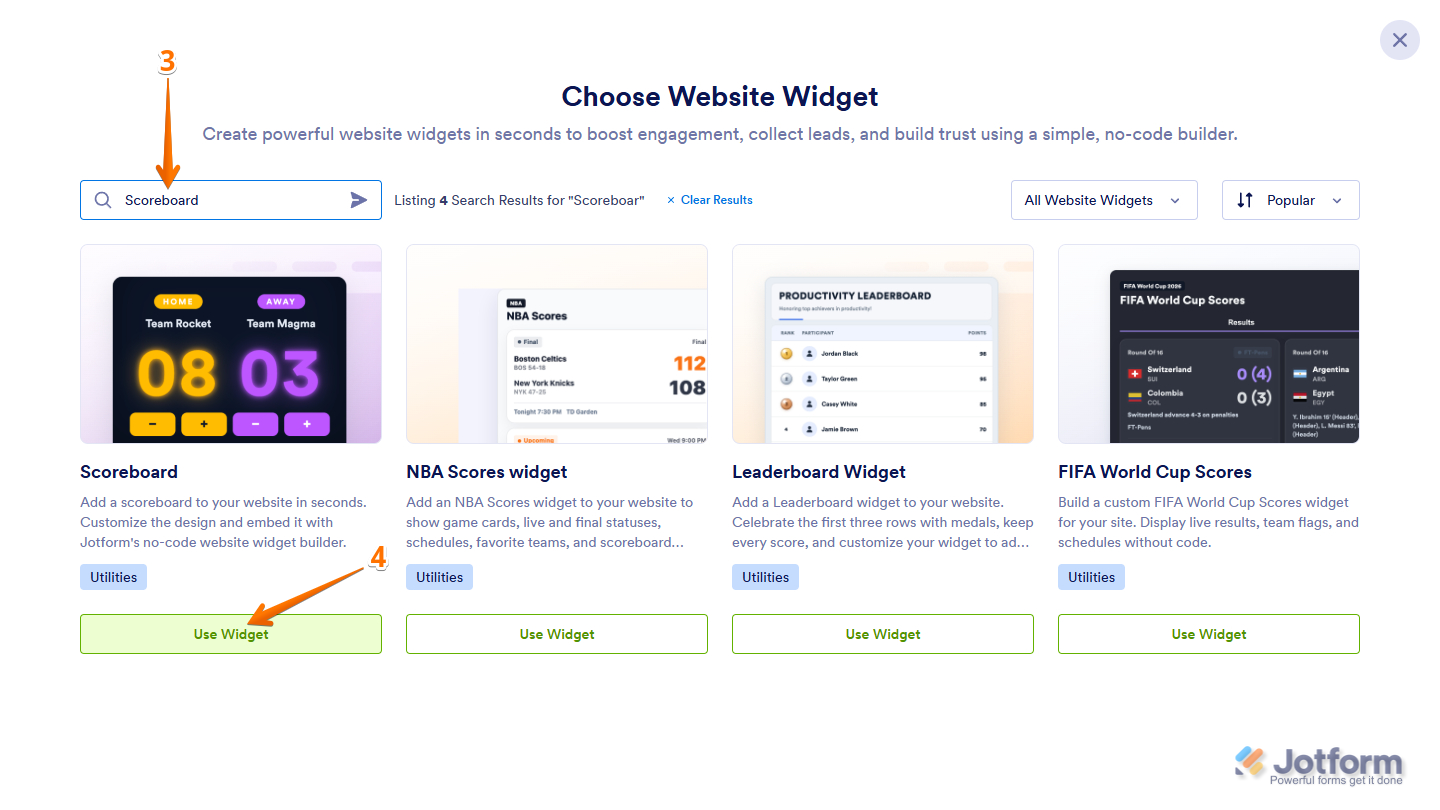
- Next, in the Search bar in the upper-left corner of the Choose Website Widget menu, enter Calorie Calculator.
- Then, at the bottom of the Calorie Calculator in the Choose Website Widget menu, click on Use Widget.
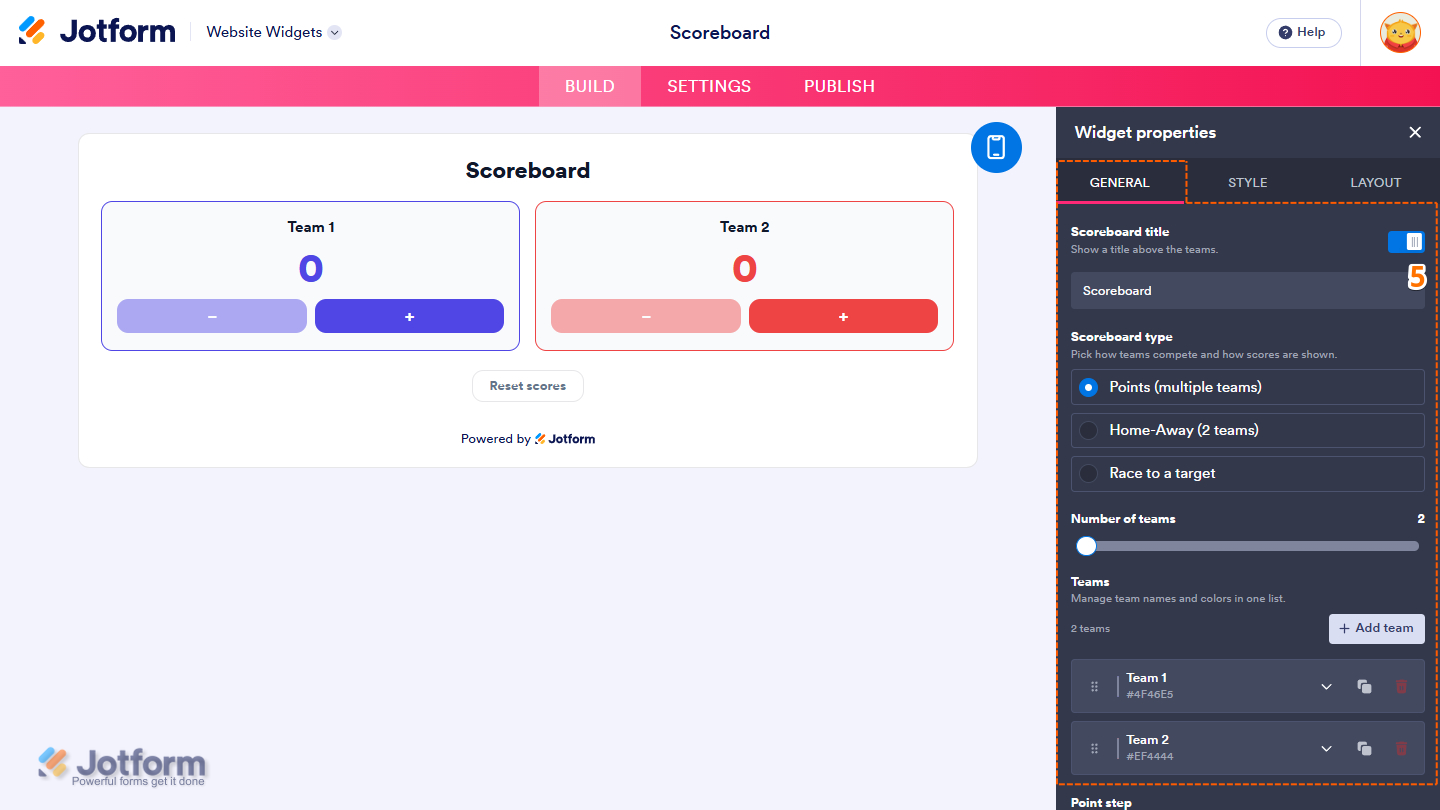
- Now, in the Widget Properties menu that opens on the right side of Website Widgets, under the General tab, set up these properties:
- Scoreboard Title — Keep the default or enter a new one in the input box to customize your title above the scoreboard.
- Scoreboard Type — Select one of the following options on how teams compete and how scores are tracked on the scoreboard:
- Points (Multiple Teams) — Select this option to create a scoreboard with no score limit, allowing scores to increase as needed until the game ends.
- Home-Away (2 Teams) — Similar to the Points option, but designed specifically for two teams with Home and Away labels.
- Race to Target — Select this option to create a race-to-target scoreboard. The first team to reach the target score wins.
- Number of Teams — Click and hold the slider handle, then drag it to adjust the number of teams on the scoreboard. This option is available only when Points (Multiple Teams) or Race to Target is selected as the Scoreboard Type, and supports up to 8 teams.
- Teams — Click on Add Team to add more teams to the scoreboard. Adding more teams is available only when Points (Multiple Teams) or Race to Target is selected as the Scoreboard Type.
- Next, scroll down to the bottom and complete these things:
- Point Step — Click on the Dropdown menu and select 1, 5, 10, 15, or 25 to set how many points are added or subtracted each time the + or − button is clicked or tapped.
- Race Target — Only available when Race to Target is selected as Scoreboard Type. Click on and hold the slider handle, then drag it to adjust the points a team must reach to win the race. You can slide it up to 200 points.
- Race Marker — Only available when Race to Target is selected as Scoreboard Type. Click on the Dropdown menu and select Progress Bar, Rocket, Heart, or Star to change the appearance of the icon that moves toward the finish line.
- Score Controls — Keep this toggled on to let visitors increase or decrease scores using the + and − buttons. Turn it off to display the scoreboard without score controls.
- Reset Button — Keep this on to display a Reset button that restores all team scores to their starting values.
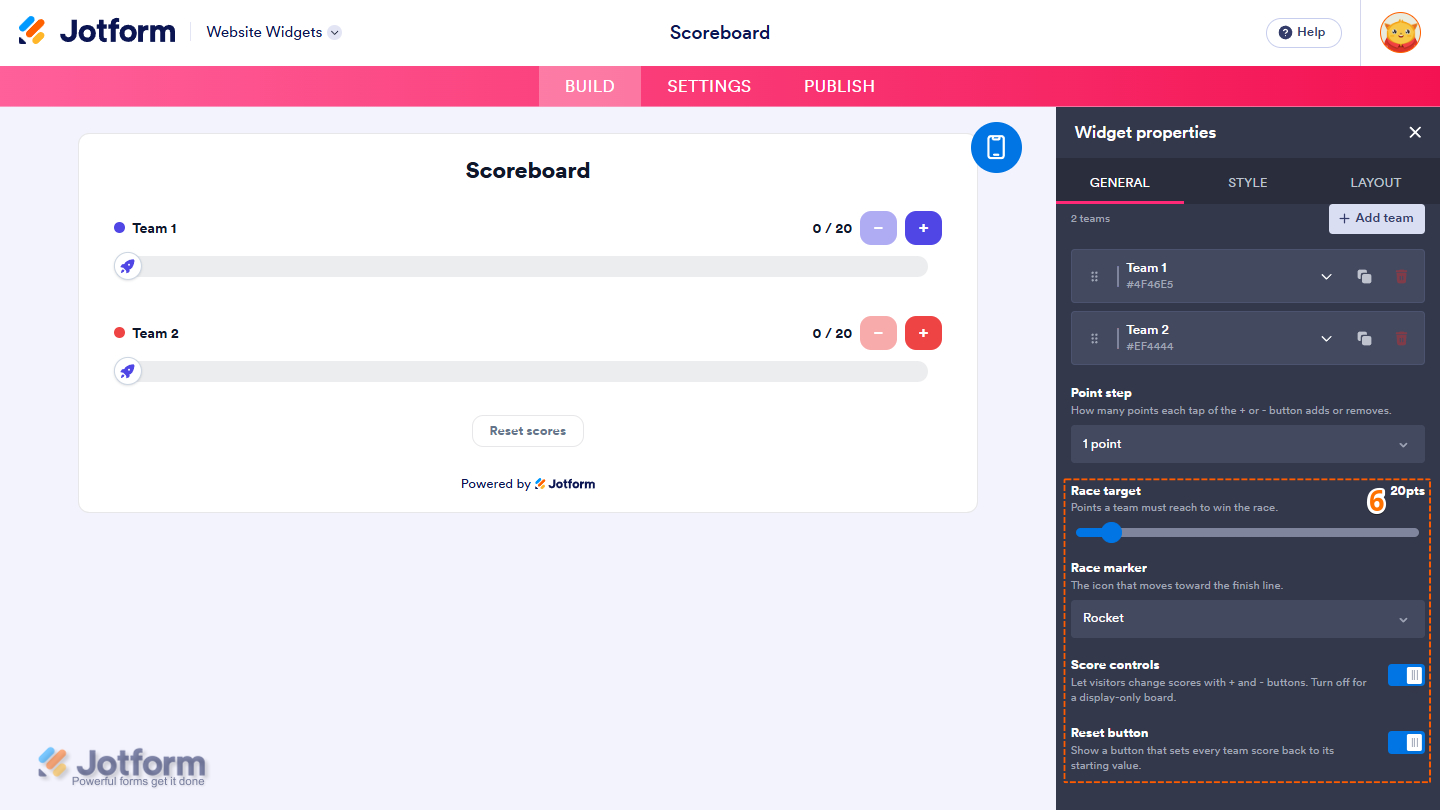
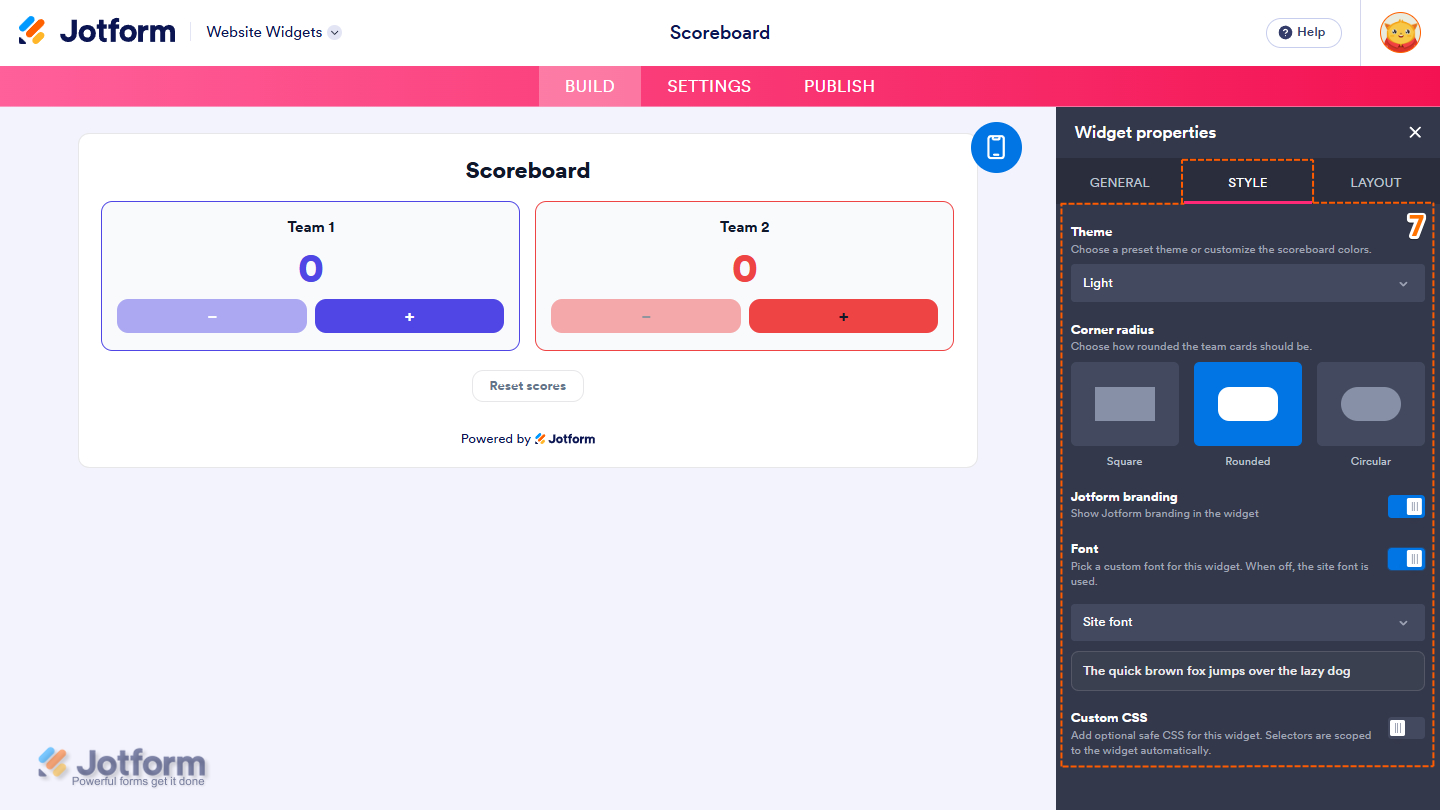
- Then, under the Style tab, customize these properties:
- Theme — Click on the Dropdown menu and select Light, Dark, or Custom to change the color of your Scoreboard.
- Corner Radius — Keep the default Rounded corner or change it to Square or Circular.
- Jotform Branding — Keep this on to display the Powered by Jotform badge below the calculator.
- Font — Toggle this on, then click on the button that appears to select a custom font for the website widget. When this option is off, the website’s font is used.
- Custom CSS — Toggle this on, then enter your custom CSS in the input box that appears to apply advanced styling to the website widget.
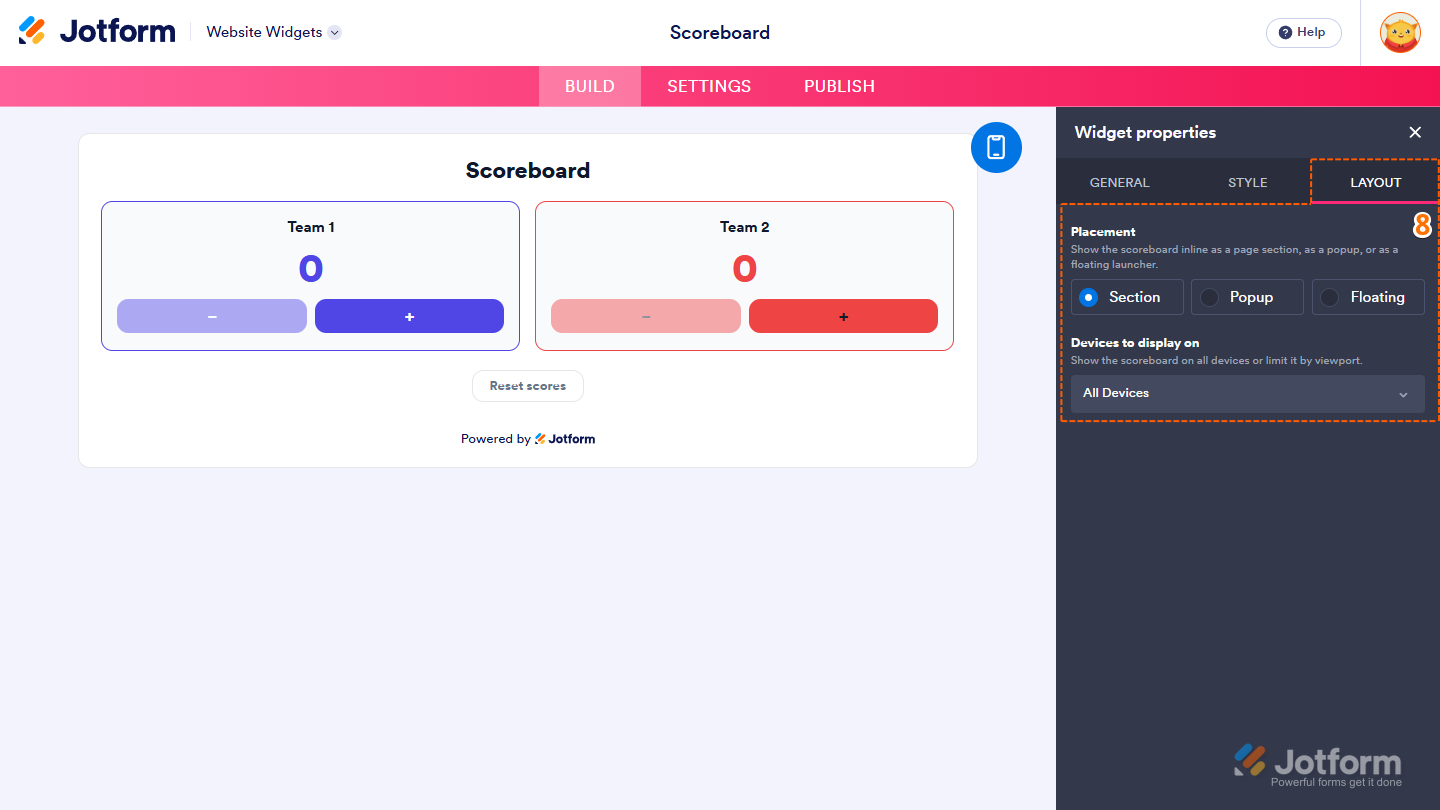
- Now, under the Layout tab, configure these properties:
- Placement — Keep the default Section option selected to display the Scoreboard as a page section, or select Popup to display the Scoreboard as a popup by clicking a button or select Floating to float the Scoreboard on the right or left of your page.
- Devices to Display On — Click on the Dropdown menu and select All Devices to display the calculator on both desktop and mobile devices, Desktop Only to display it only on desktop screens, or Mobile Only to display it only on mobile and tablet devices.
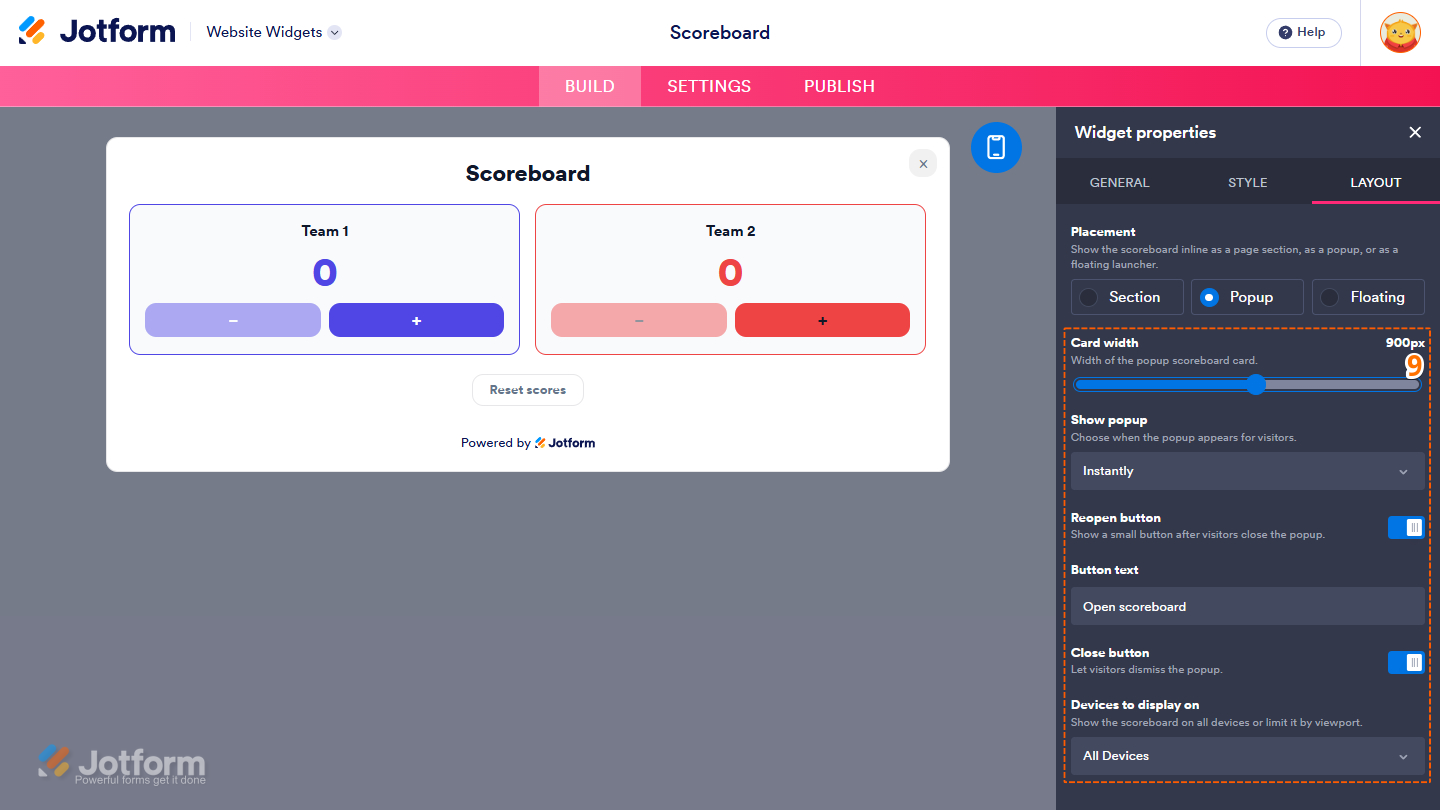
- When you select Popup from the Placement section, you can set up the following things:
- Card Width — Click on and hold the slider handle, then drag it to change the width of the Scoreboard.
- Show Popup — Click on the Dropdown menu and select when the popup appears for visitors: Instantly, After Delay, On Scroll, or On Exit Intent.
- Reopen Button — Keep this on to show a small button after visitors close the popup.
- Button Text — Keep the default text or enter a new one in the input box to change the text of the button that triggers the popup to open.
- Close Button — Keep this on to let visitors dismiss the popup.
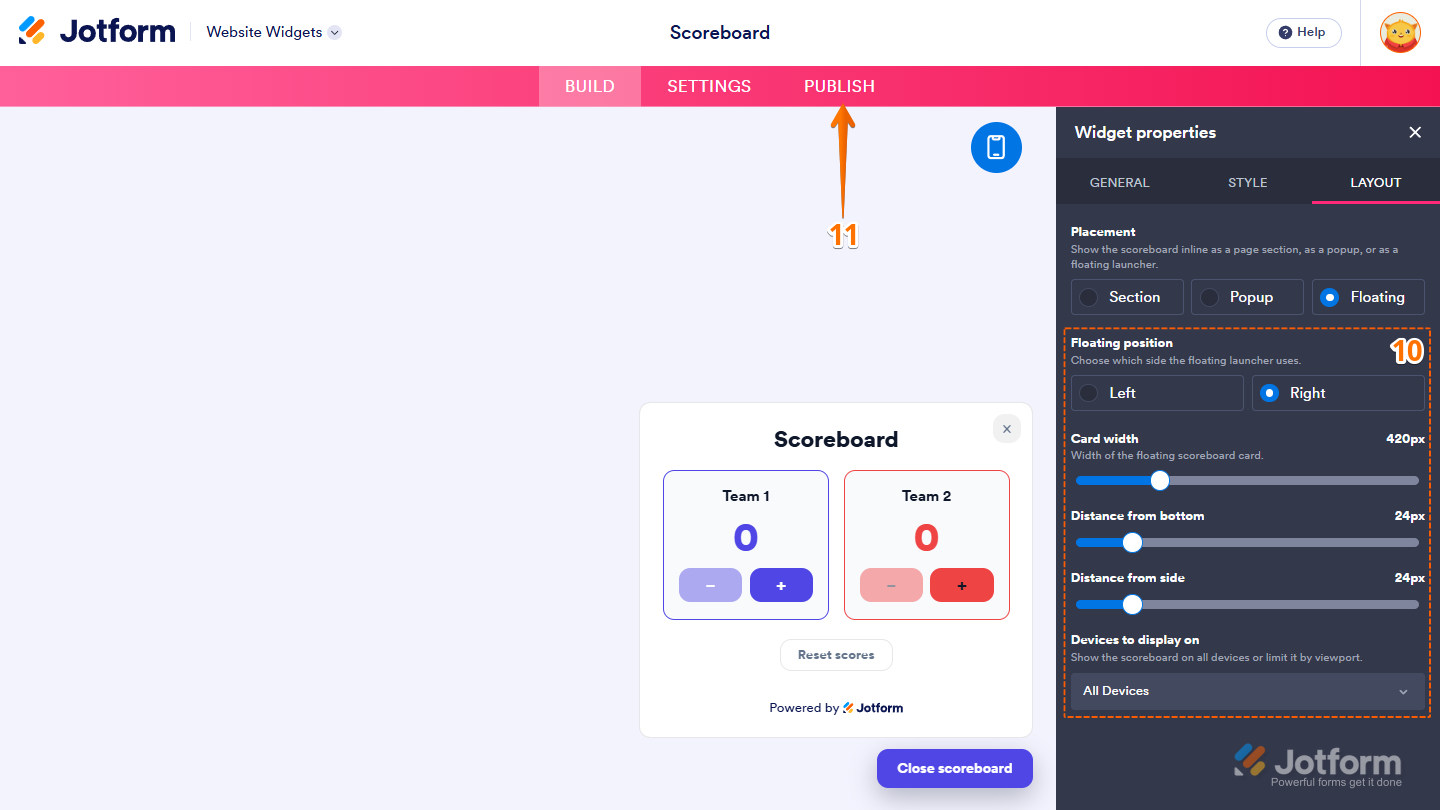
- When you select Floating from the Placement section, you can also set up the following things:
- Floating Position — Keep the default Right option selected to display the Scoreboard to the right of the page, or select Left to display it to the left.
- Card Width — Click on and hold the slider handle, then drag it to change the width of the floating scoreboard card.
- Distance from Bottom — Click on and hold the slider handle, then drag it to change the distance of the scoreboard from the bottom of the page.
- Distance from Side — Click on and hold the slider handle, then drag it to change the distance of the scoreboard from the left or right side of the page.
- Once everything’s set, in the pink navigation bar at the top of the page, click on Publish.
Note
If you’re not logged in, you’ll be asked to log in to your Jotform account or sign up for one. Once you’ve done that, you’ll be able to get the embed code for your widget.
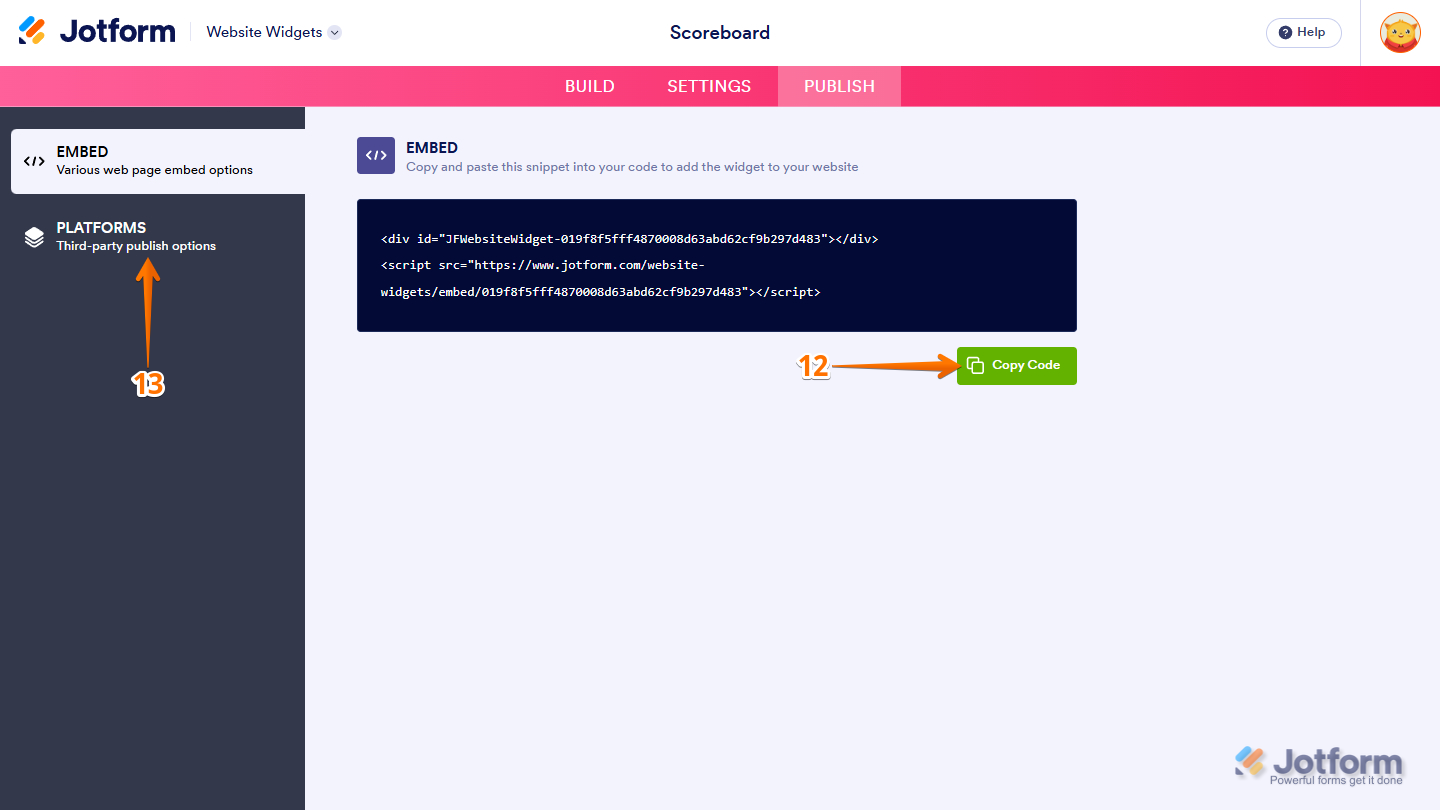
- Then, in the Embed section, click on Copy Code, and, if you already know how, paste that into the Embed section on your platform.
- To view embedding instructions for your widget, click on Platforms in the menu on the left side of the page.
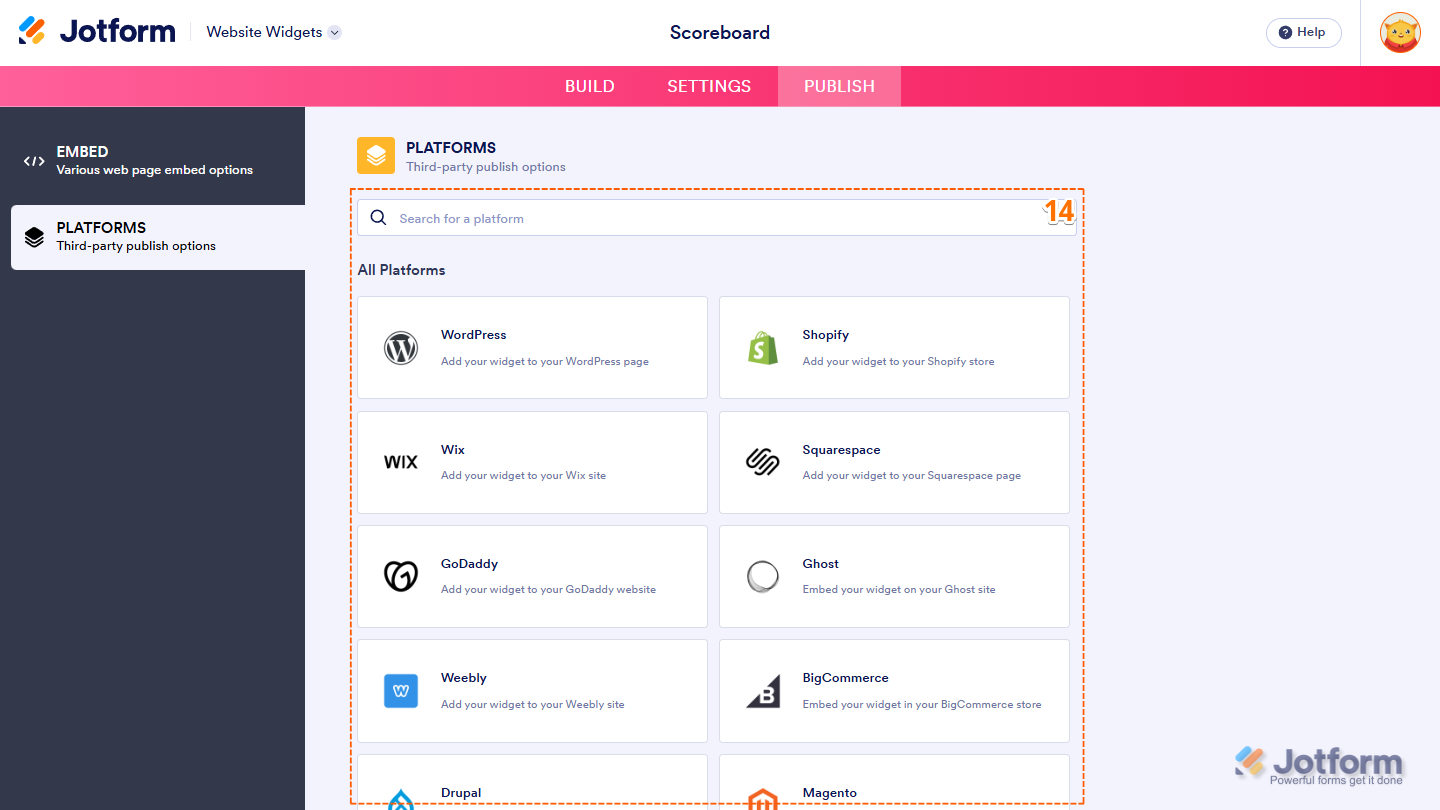
- Next, in the Platforms section on the right, select the platform you want to view embedding instructions for. Or, use the Search bar at the top of the section to find it easily.
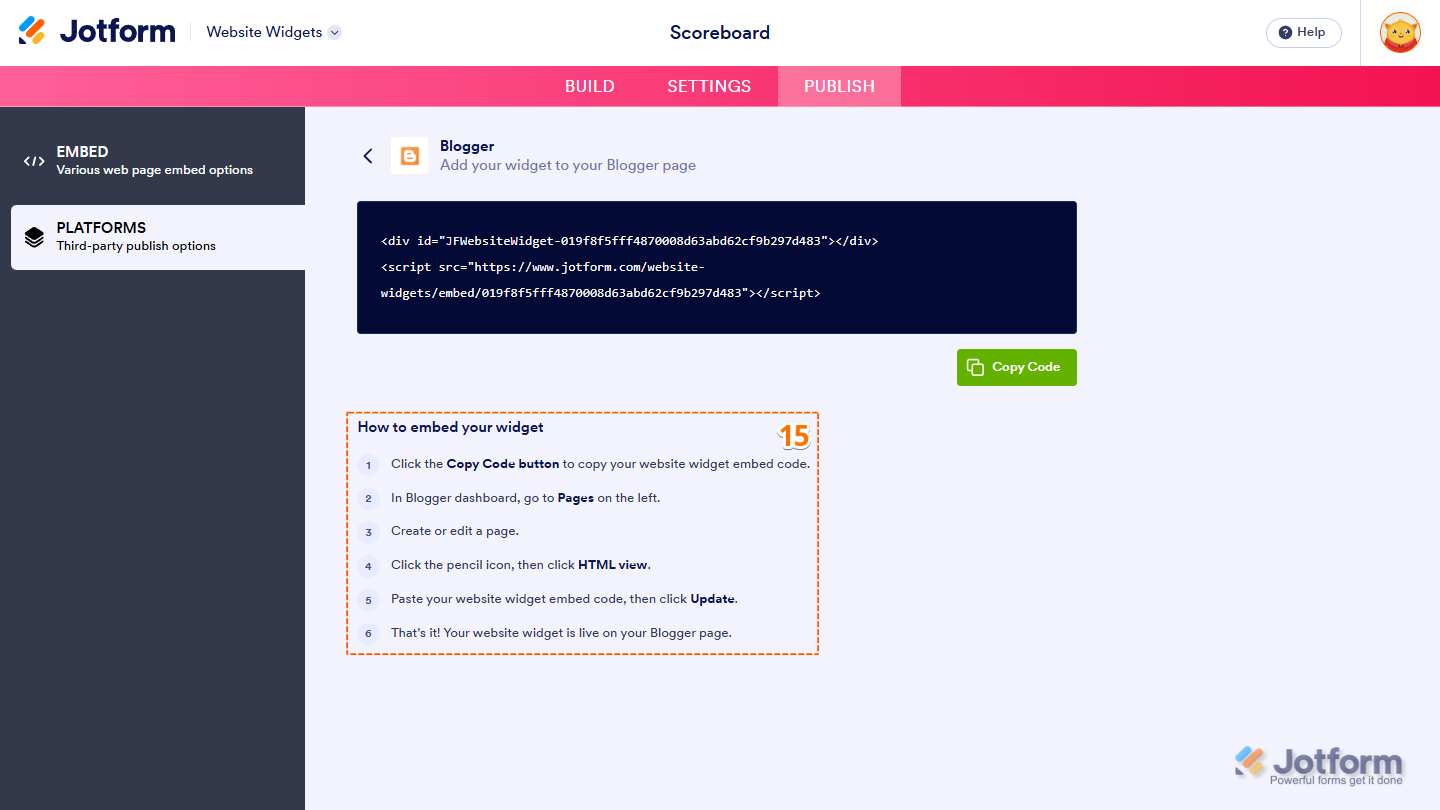
- Then, follow the steps in the How to Embed Your Widget section to add it to your website.
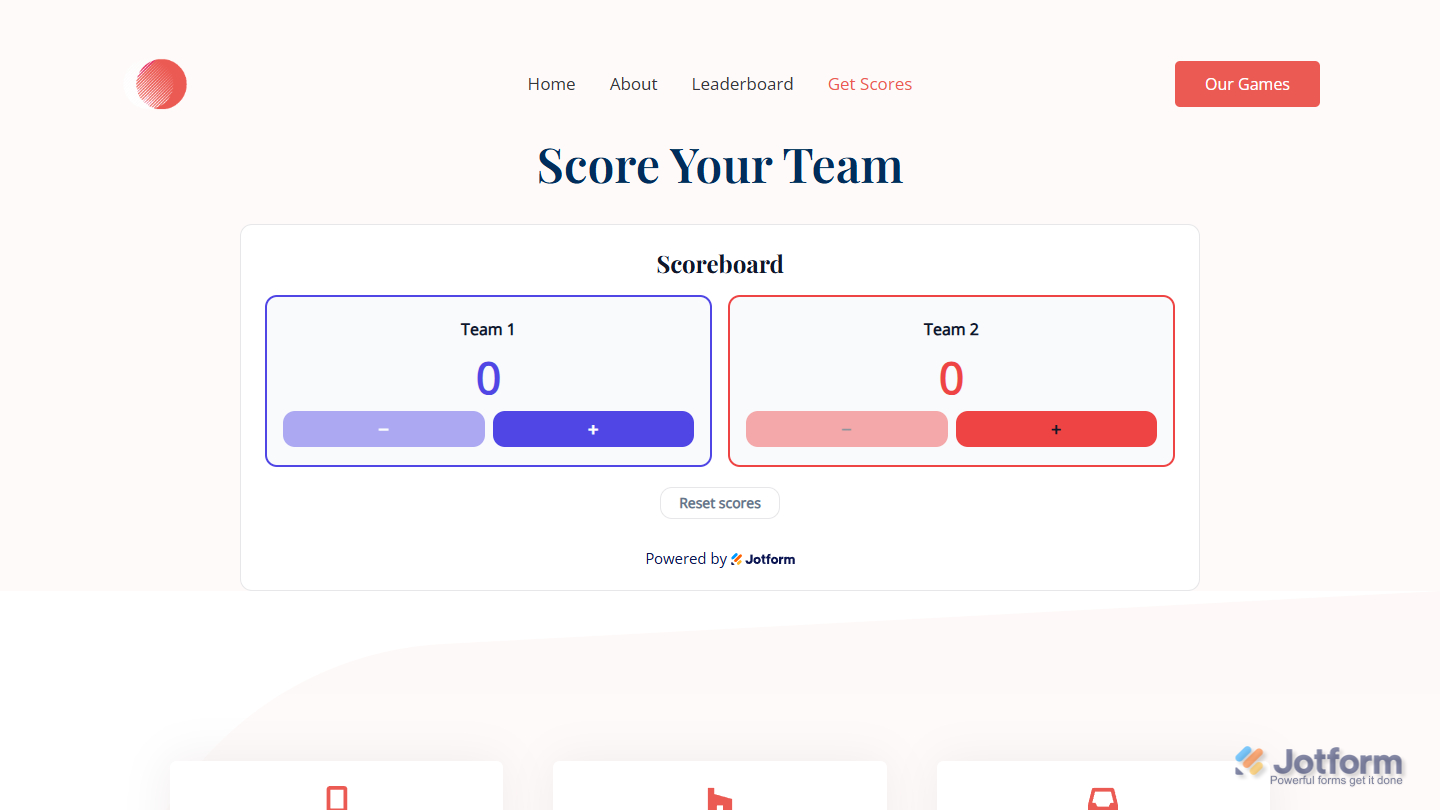
That’s it! Your Scoreboard widget will appear on your website just as you customized it. Take a look at the screenshot below to see how it looks on a website.
Updating Your Scoreboard Widget
You can make changes to the RSS Feed widget at any time to update its content, appearance, or layout. Here’s how:
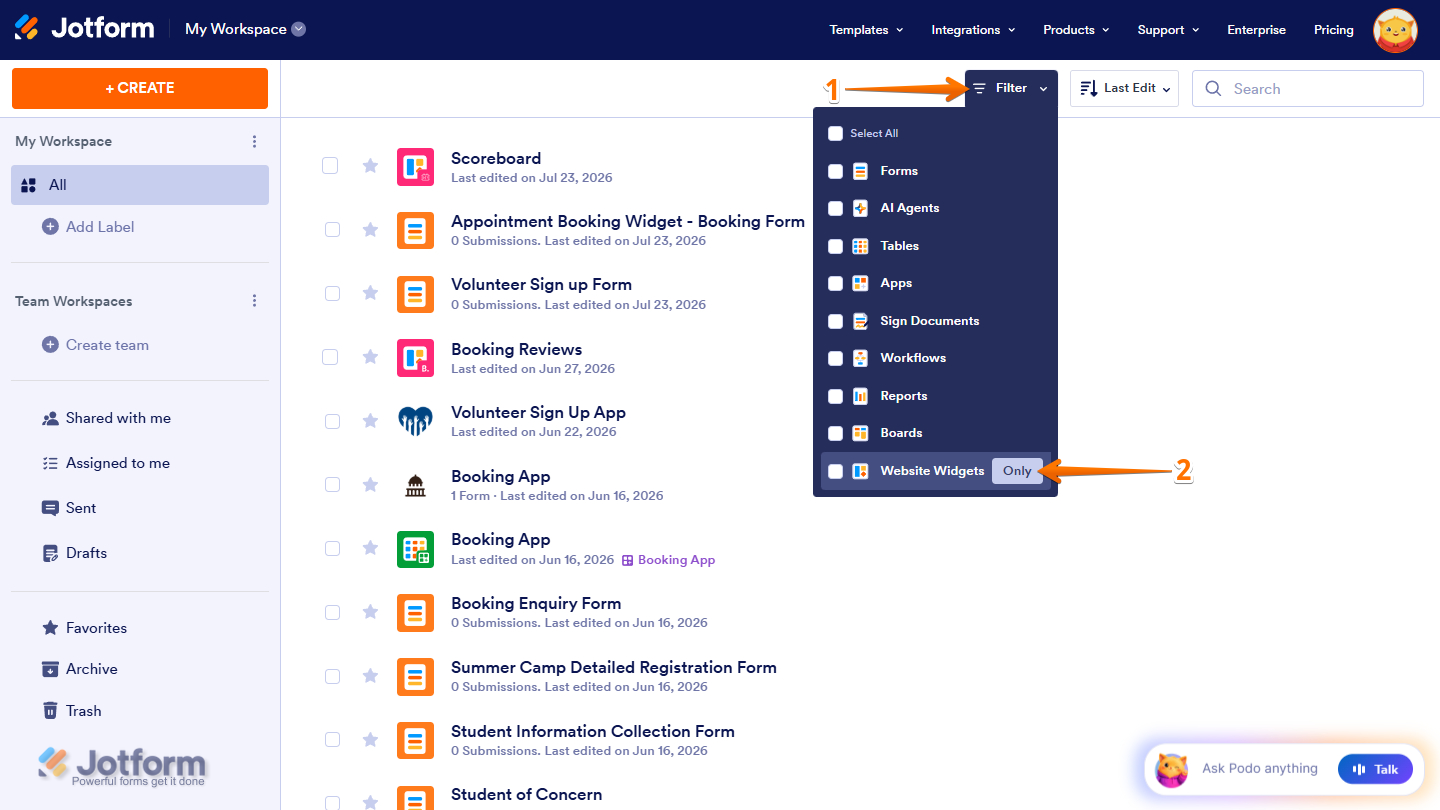
- At the top of your Workspace page, click on Filter.
- Then, in the Dropdown menu that opens, hover your mouse over Website Widgets, and on the right side of it, click on Only.
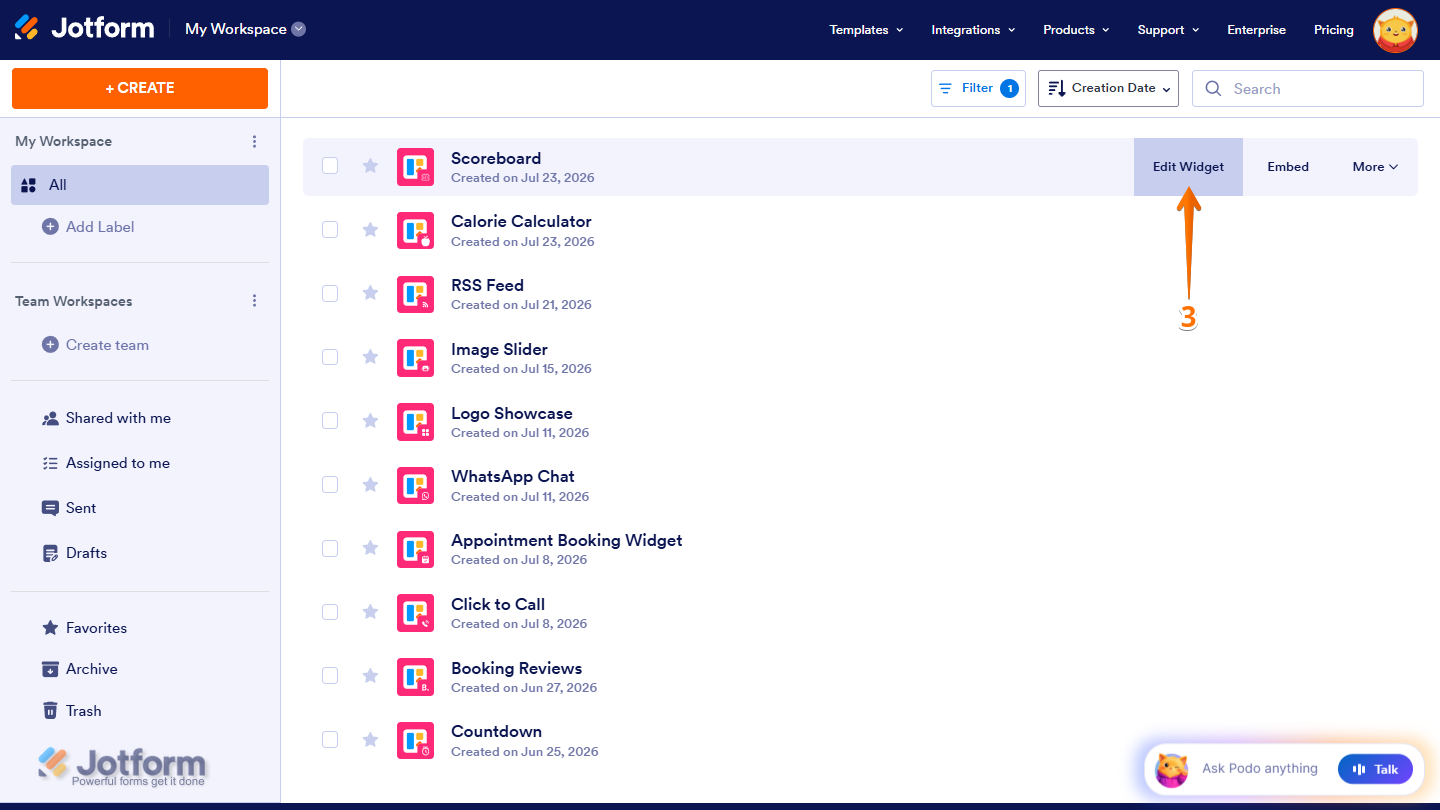
- Next, hover your mouse over the Scoreboard widget you want to update, then click on Edit Widget on the right side of the page.
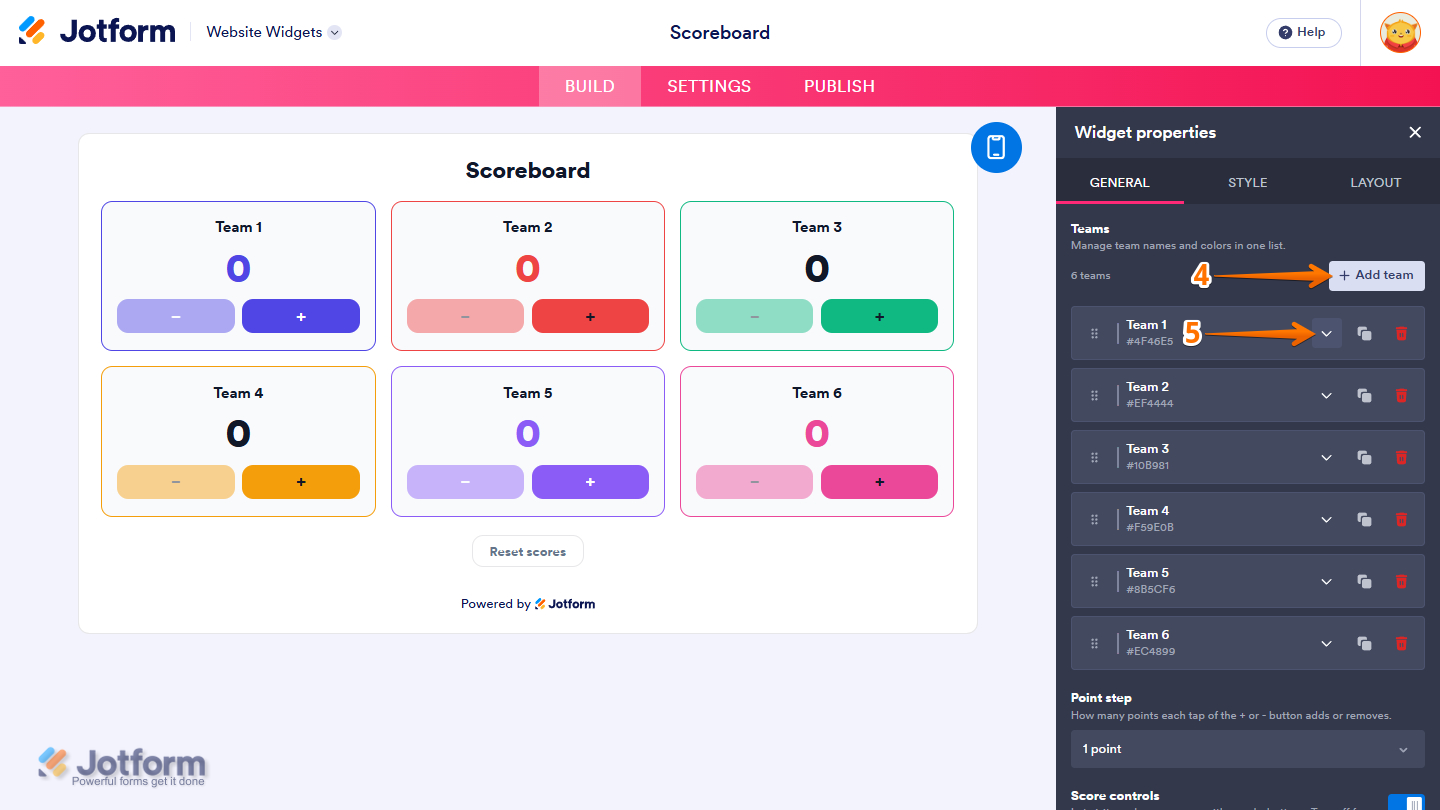
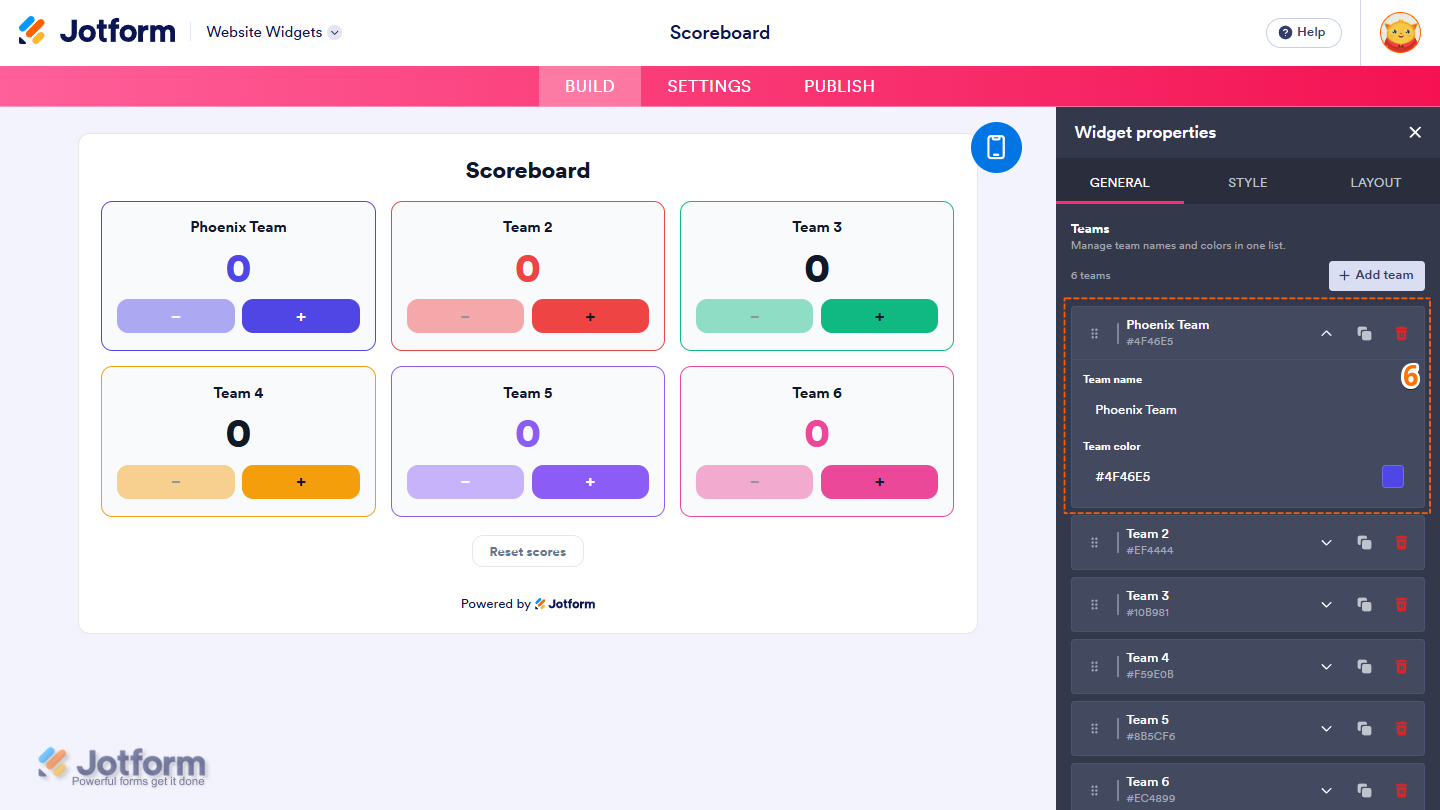
- Now, in the Widget Properties menu that opens on the right side of Website Widgets, under the General tab, click on Add Team to add a new team to the scoreboard.
- To manage a team, click on the Downward arrow icon.
- Next, configure the following things:
- Team Name — Keep the default generic team name or enter a new one in the input box to give the team a proper name.
- Team Color — Keep the default color, or enter the name, hex code, or RGB value for a new one in the input box to change the color of the team.
- Duplicate Icon — Click on this icon to duplicate the current team.
- Trash Bin Icon — Click on this to permanently delete the team from the list.
That’s it. You’ve successfully updated your Scoreboard widget.
Note
Any changes you make in the Widget Properties menu are automatically saved and reflected in the Scoreboard widget on your website.


Send Comment: