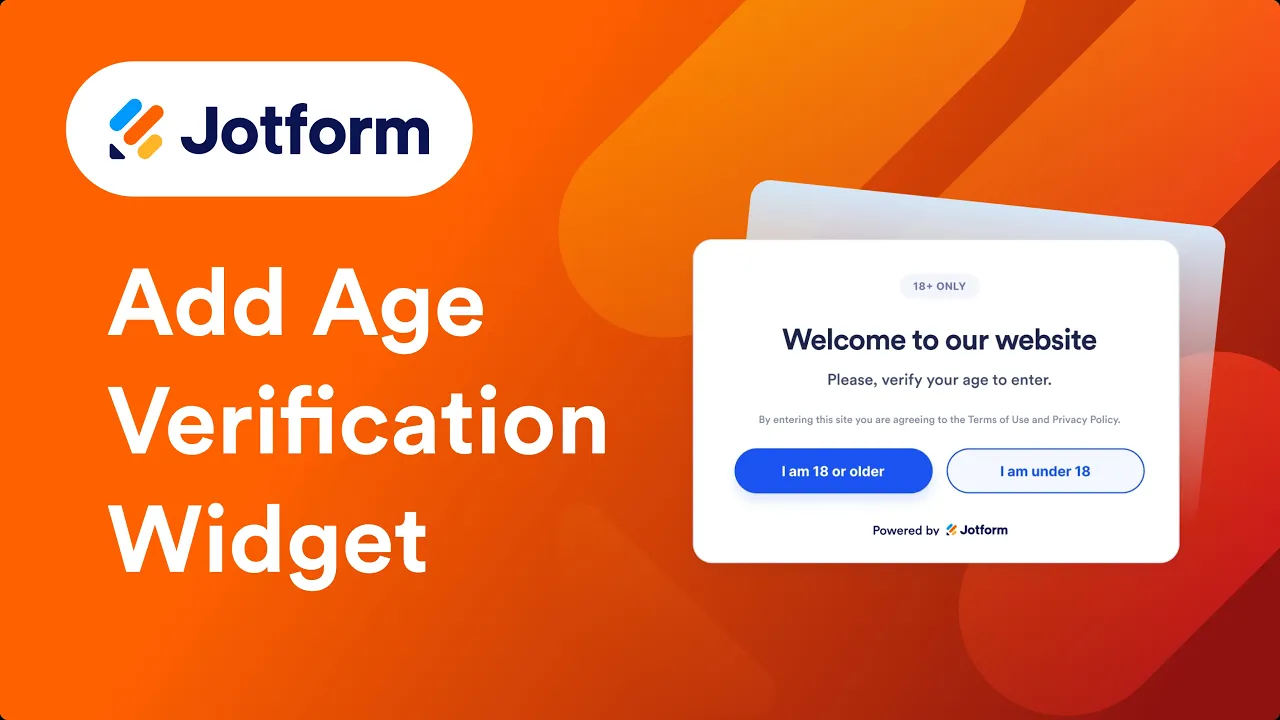
With Jotform’s Age Verification Widget, you can restrict access to your website or specific content by asking visitors to confirm that they meet your minimum age requirement. You can choose the verification method, customize the widget’s appearance, and embed it on your site in just a few steps.
It’s especially useful for websites that offer age-restricted products, content, or services, such as alcoholic beverages, vaping products, or gaming.
Note
The widget relies on information provided by the visitor and should not be considered a legally binding form of age verification.
Creating Your Age Verification Widget and Getting the Embed Code for it
Before you can add the Age Verification Widget to your website, you’ll first need to configure the age verification settings, customize the widget’s appearance, and copy the embed code for it. Here’s a quick how-to:
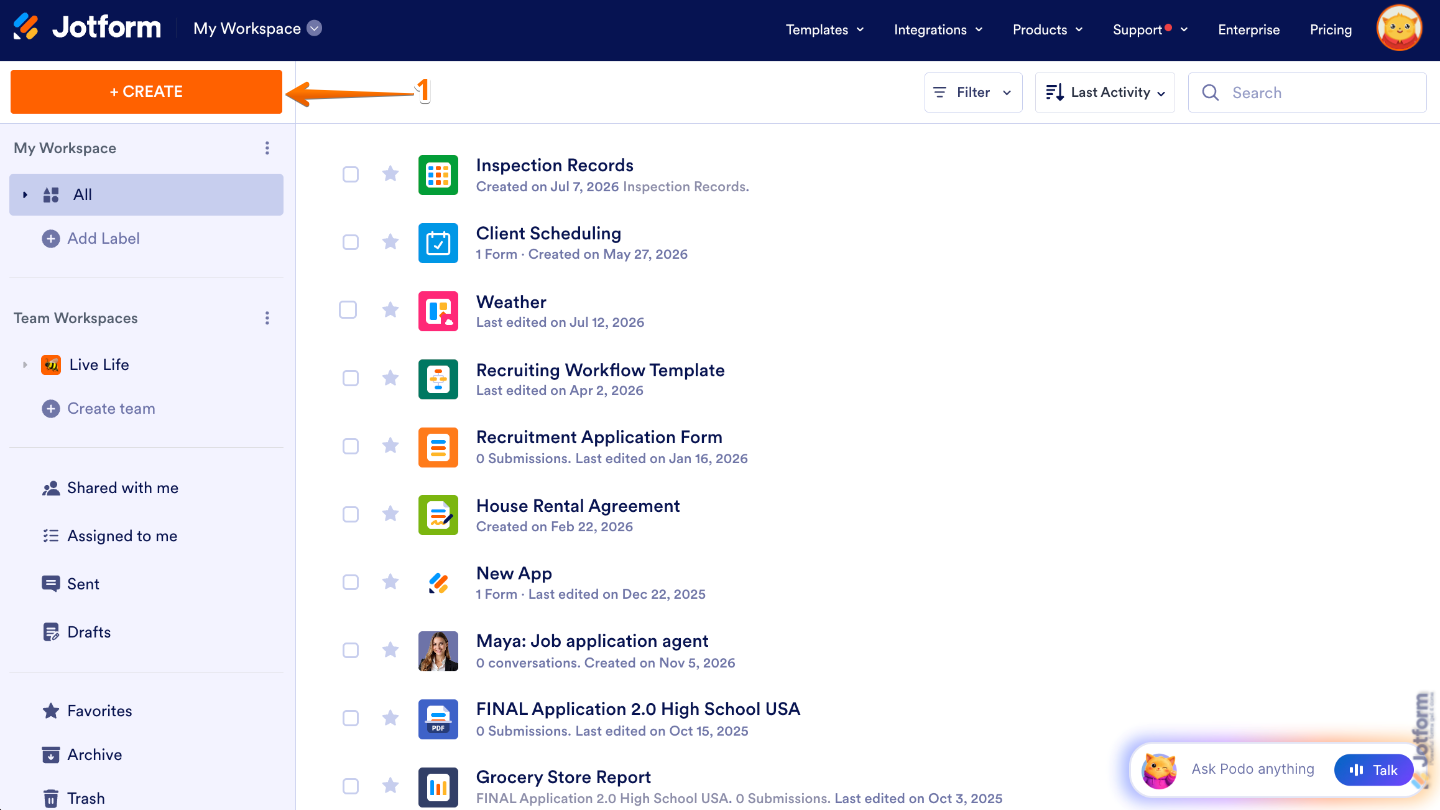
- On the top-left side of your Workspace page, click on Create.
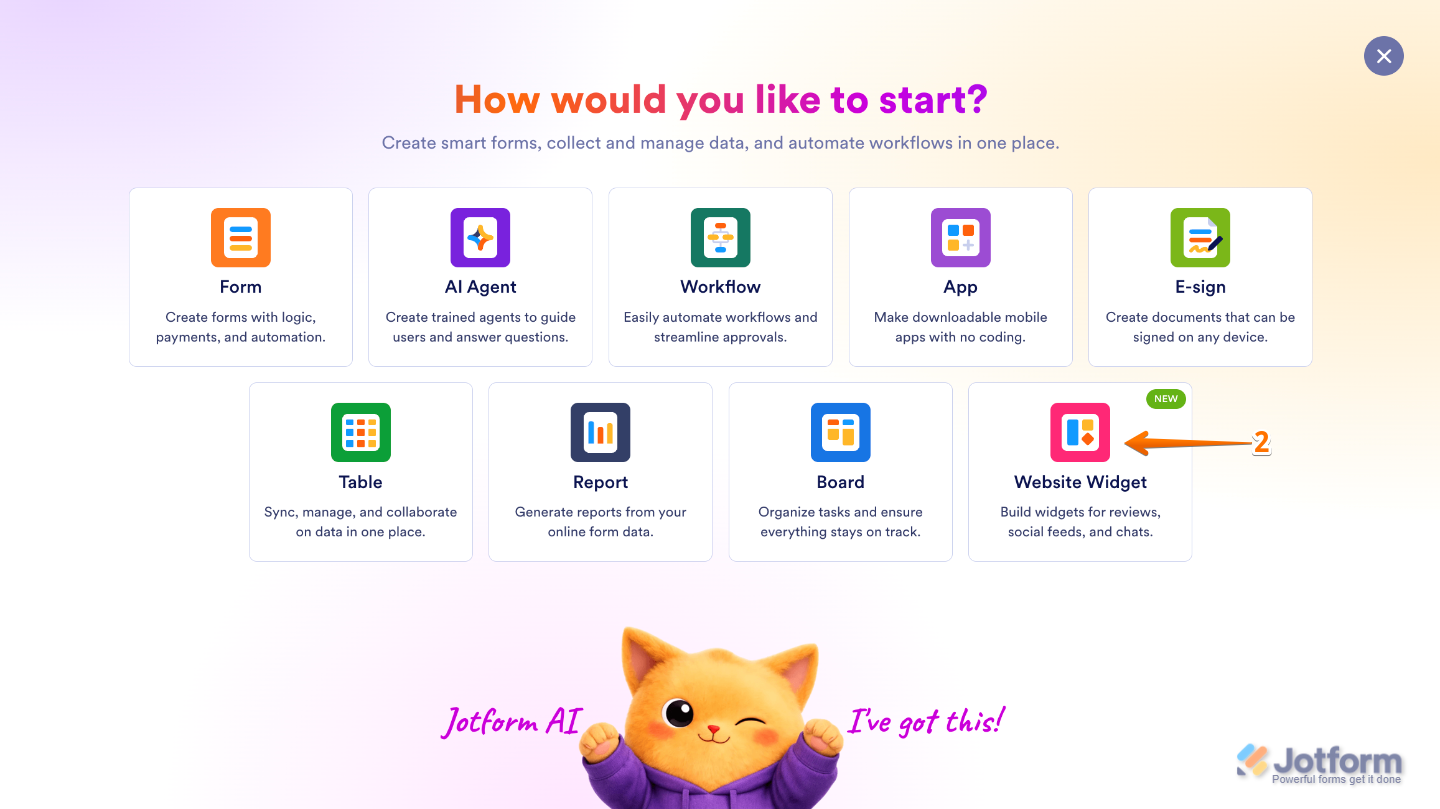
- Then, in the menu that opens up, select Website Widget.
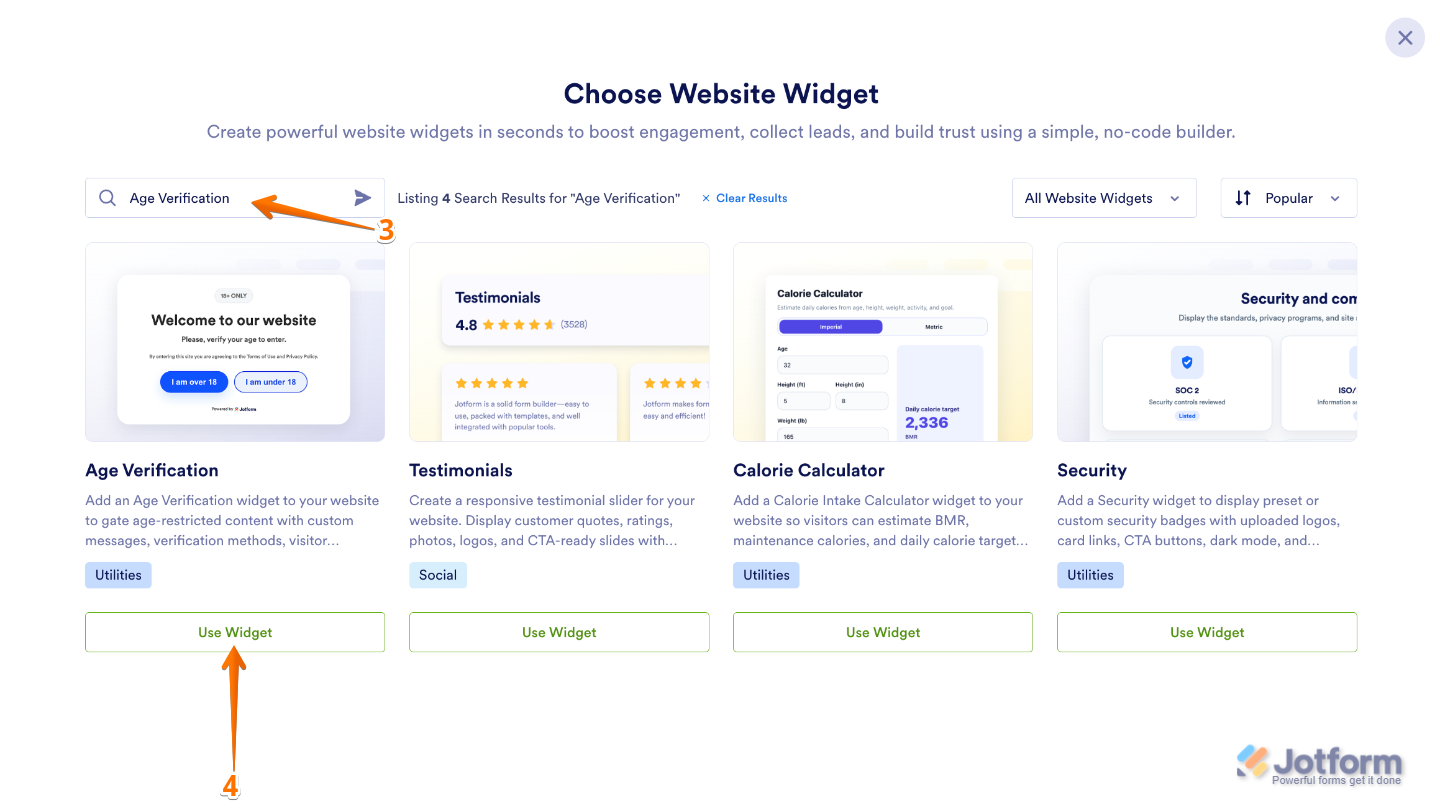
- Next, in the Search bar in the upper-left corner of the Choose Website Widget page, enter Age Verification.
- Then, at the bottom of the search results, click on Use Widget.
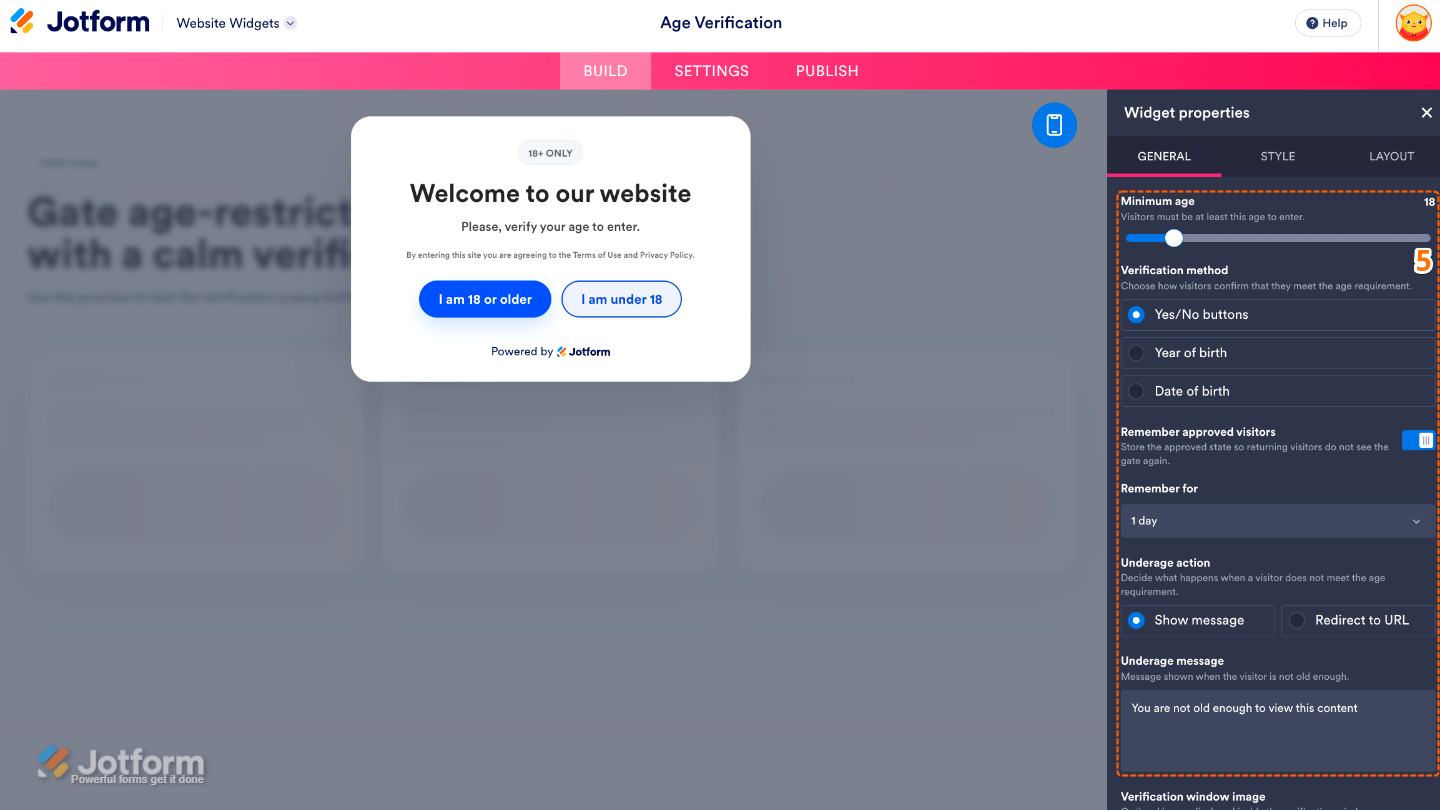
- Now, in the Widget Properties menu that opens on the right side of Website Widgets, set up these properties:
- Minimum Age — Set the minimum age visitors must be to access your website or its content.
- Verification Method — Choose how visitors verify their age, such as by confirming their age or entering their date of birth.
- Remember Approved Visitors — Keep approved visitors from seeing the age verification popup again.
- Remember For — Choose how long approved visitors remain verified before they need to confirm their age again.
- Underage Action — Choose what happens when a visitor doesn’t meet the minimum age requirement, such as showing a message or redirecting them to another webpage.
- Underage Message — Customize the message displayed to visitors who don’t meet the minimum age requirement.
- Then, scroll down and adjust these settings:
- Verification Window Image — Upload an image to display in the Age Verification popup for a more personalized look.
- Message — Enter the main message displayed in the Age Verification popup.
- Caption — Add a short caption beneath the main message to provide additional context.
- Additional Info — Include extra information, instructions, or legal notices for your visitors.
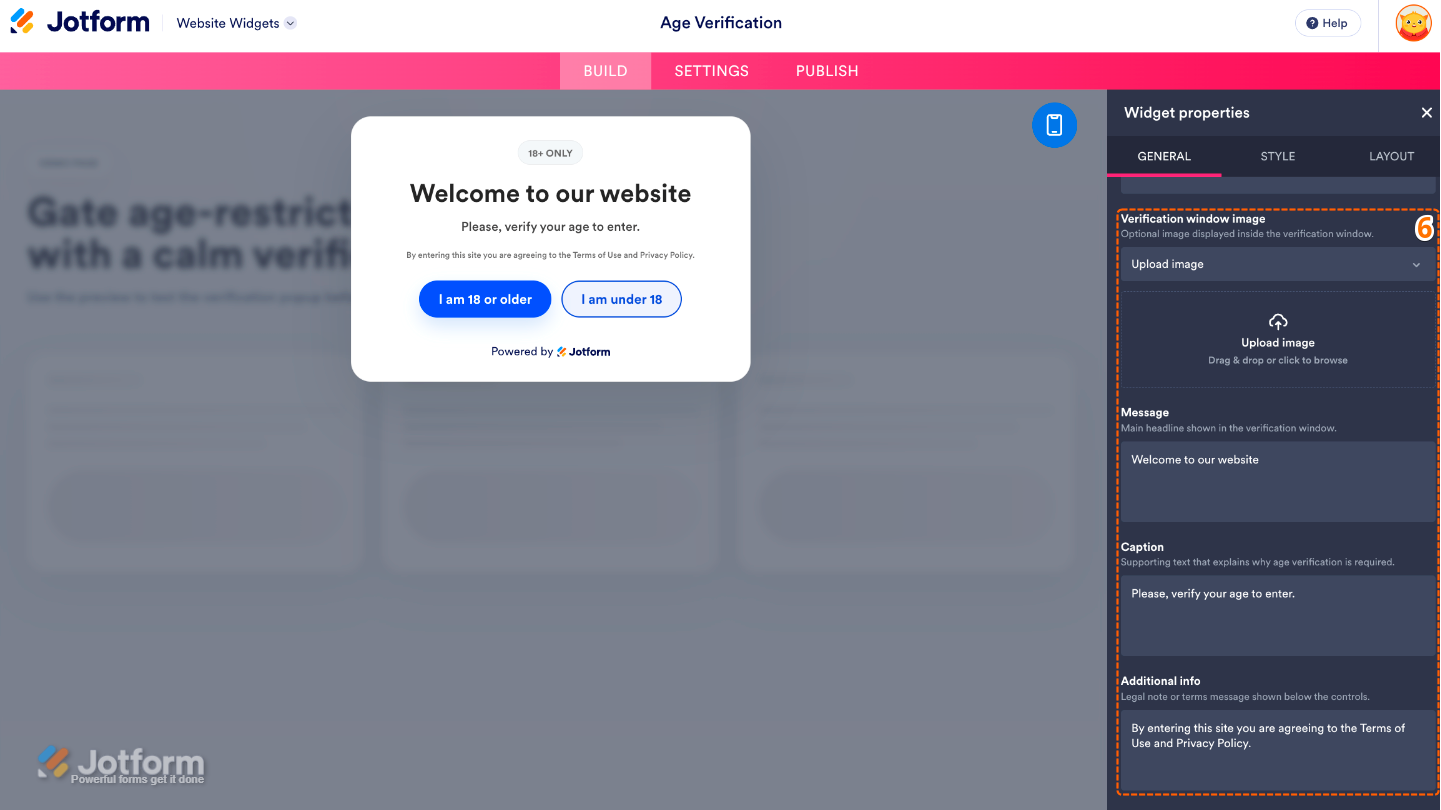
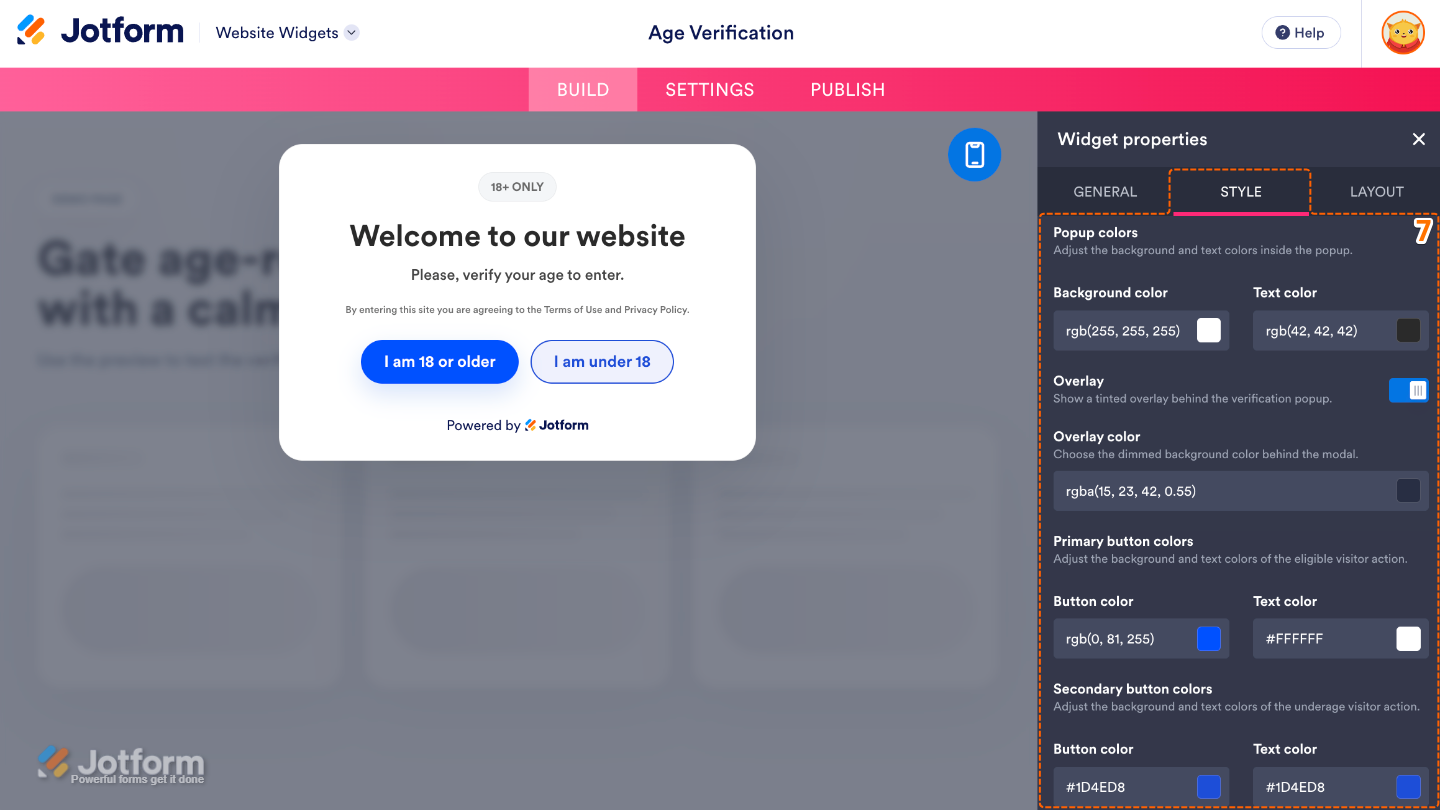
- Next, under the Styles tab, customize these properties:
- Popup Colors
- Background Color — Choose the background color of the verification popup.
- Text Color — Set the color of the text displayed inside the popup.
- Overlay — Show or hide the page overlay behind the verification popup.
- Overlay Color — Choose the color of the overlay displayed behind the popup.
- Primary Button Colors
- Button Color — Choose the background color of the primary action button.
- Text Color — Set the text color of the primary action button.
- Secondary Button Colors
- Button Color — Choose the background color of the secondary action button.
- Text Color — Set the text color of the secondary action button.
- Popup Colors
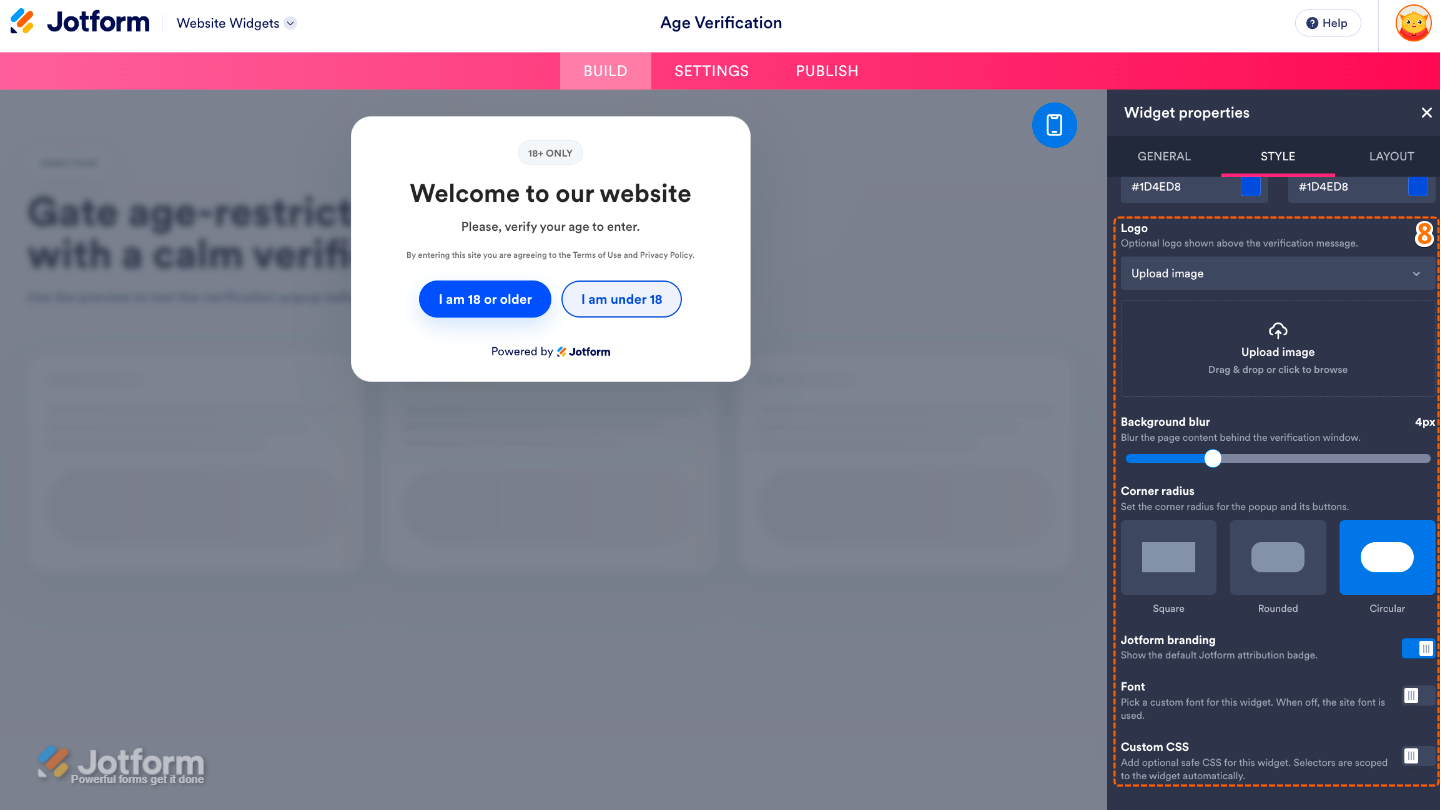
- Then, scroll down and adjust these settings:
- Logo — Upload or display a logo in the verification popup to match your branding.
- Background Blur — Blur the webpage behind the popup to help keep visitors focused on the verification window.
- Corner Radius — Adjust how rounded the corners of the popup appear.
- Jotform Branding — Show or hide Jotform branding on the widget.
- Font — Choose the font used throughout the verification popup.
- Custom CSS — Apply your own CSS code for advanced styling beyond the built-in settings.
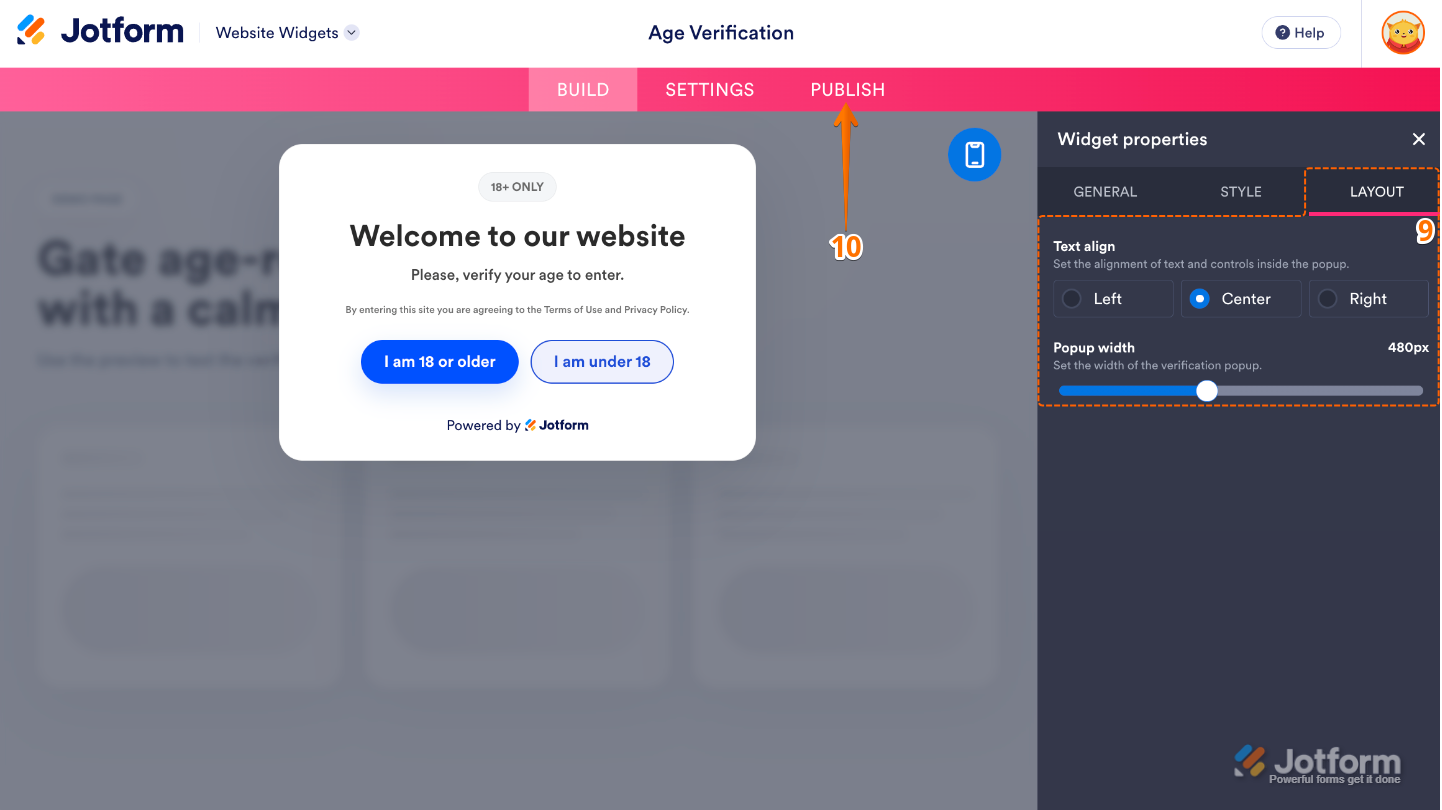
- Now, under the Layout tab, configure these properties:
- Text Align — Choose how the text is aligned within the verification popup.
- Popup Width — Adjust the width of the verification popup to fit the layout you selected.
- Once you’ve finished configuring the widget, in the pink navigation bar at the top of the page, click on Publish.
Note
You’ll be asked to log in to your Jotform account, if you’re not already, or sign up for one. Once you’ve done that, you’ll be able to get the embed code for your widget.
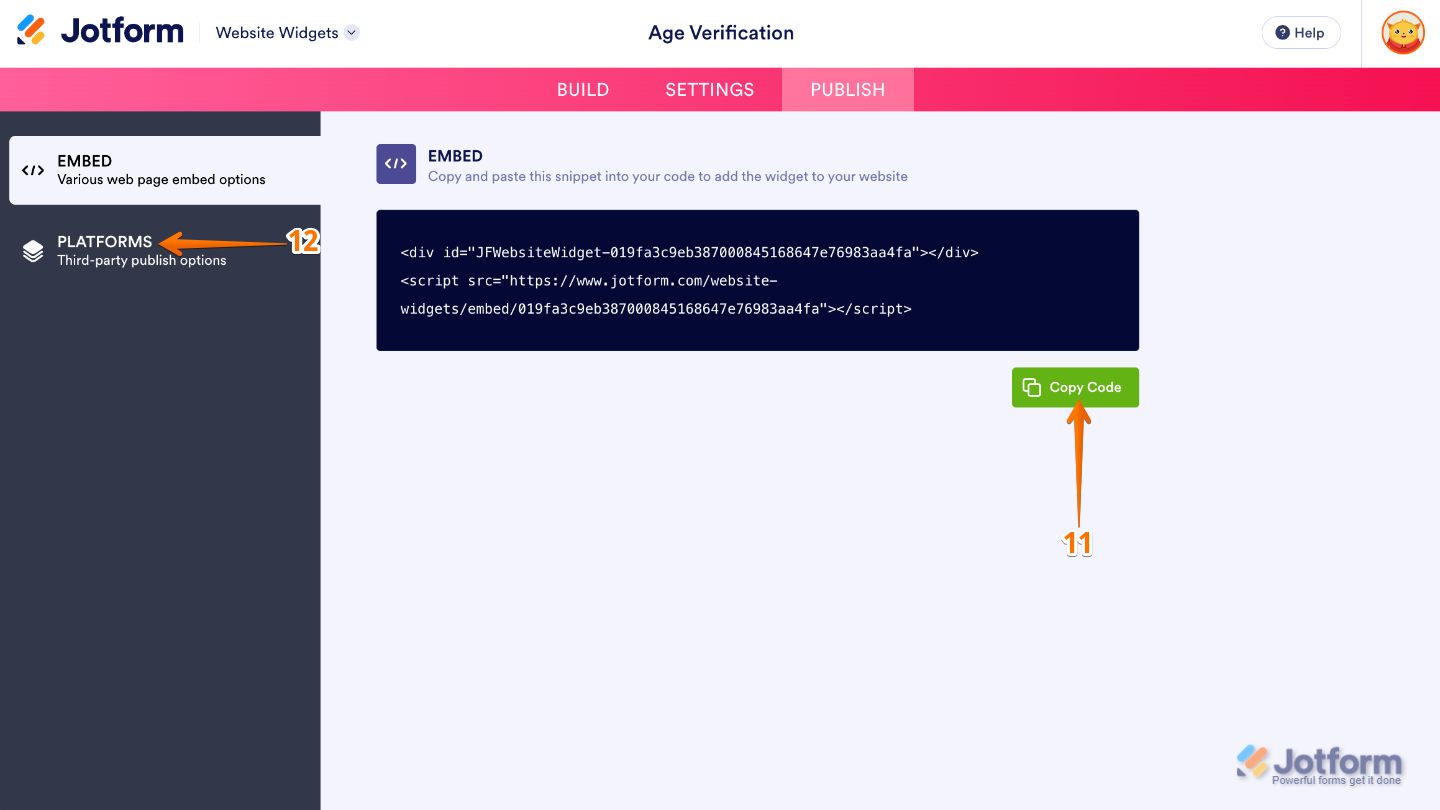
- Then, in the Embed section, click on Copy Code, and, if you already know how, paste that into the Embed section on your platform, and you’re good to go.
- To view embedding instructions for your widget, click on Platforms in the menu on the left side of the page.
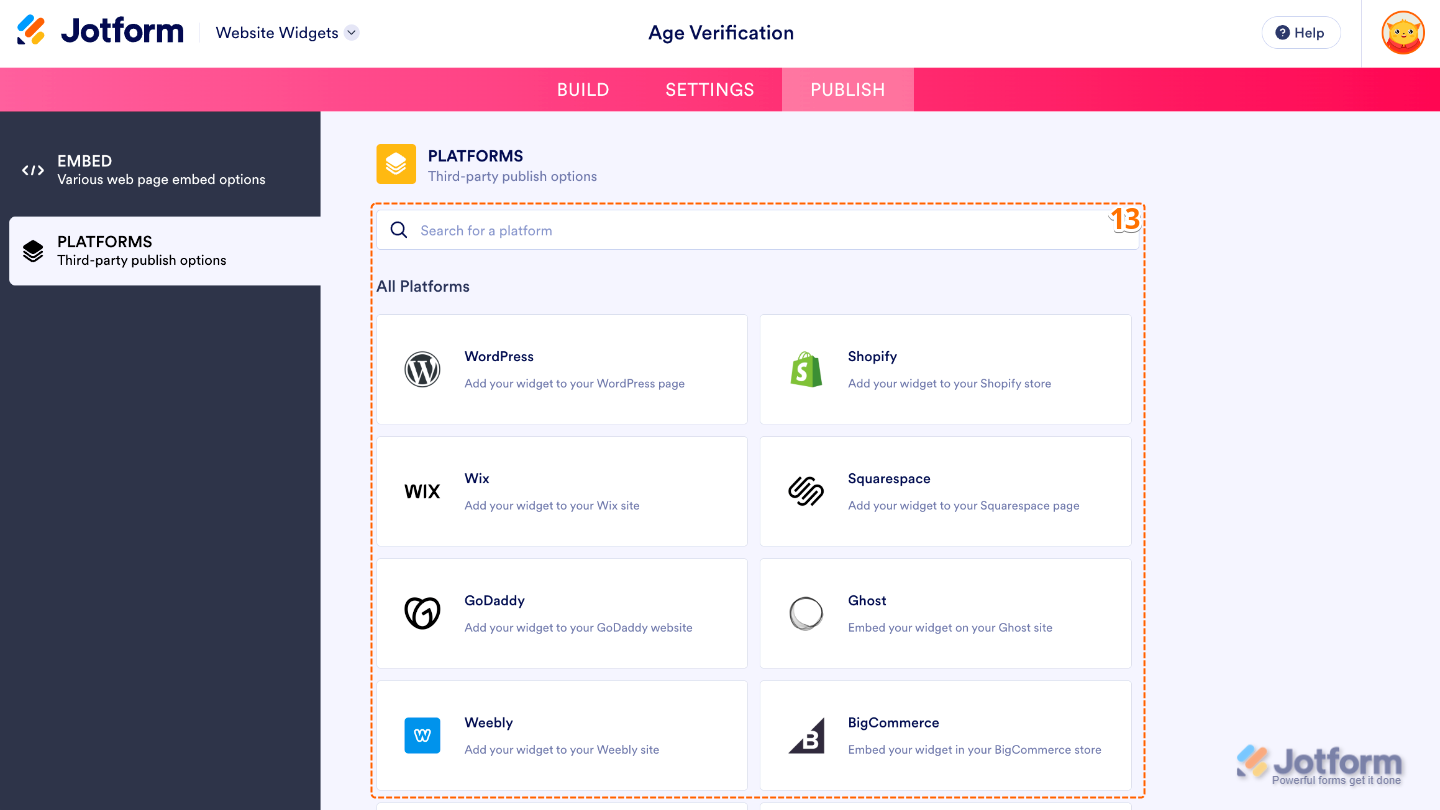
- Next, in the Platforms section on the right, select the platform you want to view embedding instructions for. Or, use the Search bar at the top of the section to find it easily.
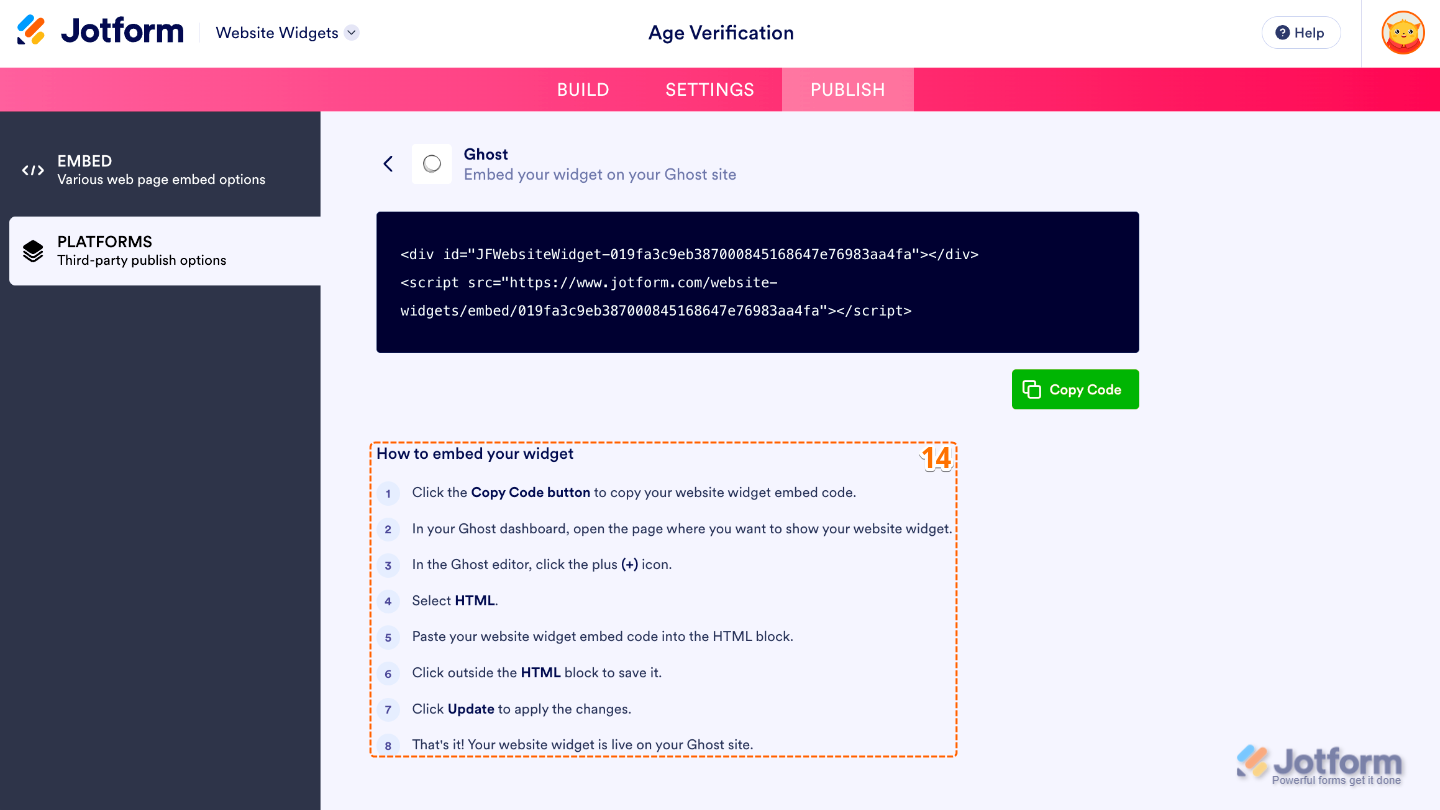
- Then, follow the steps in the How to Embed Your Widget section to add it to your website.
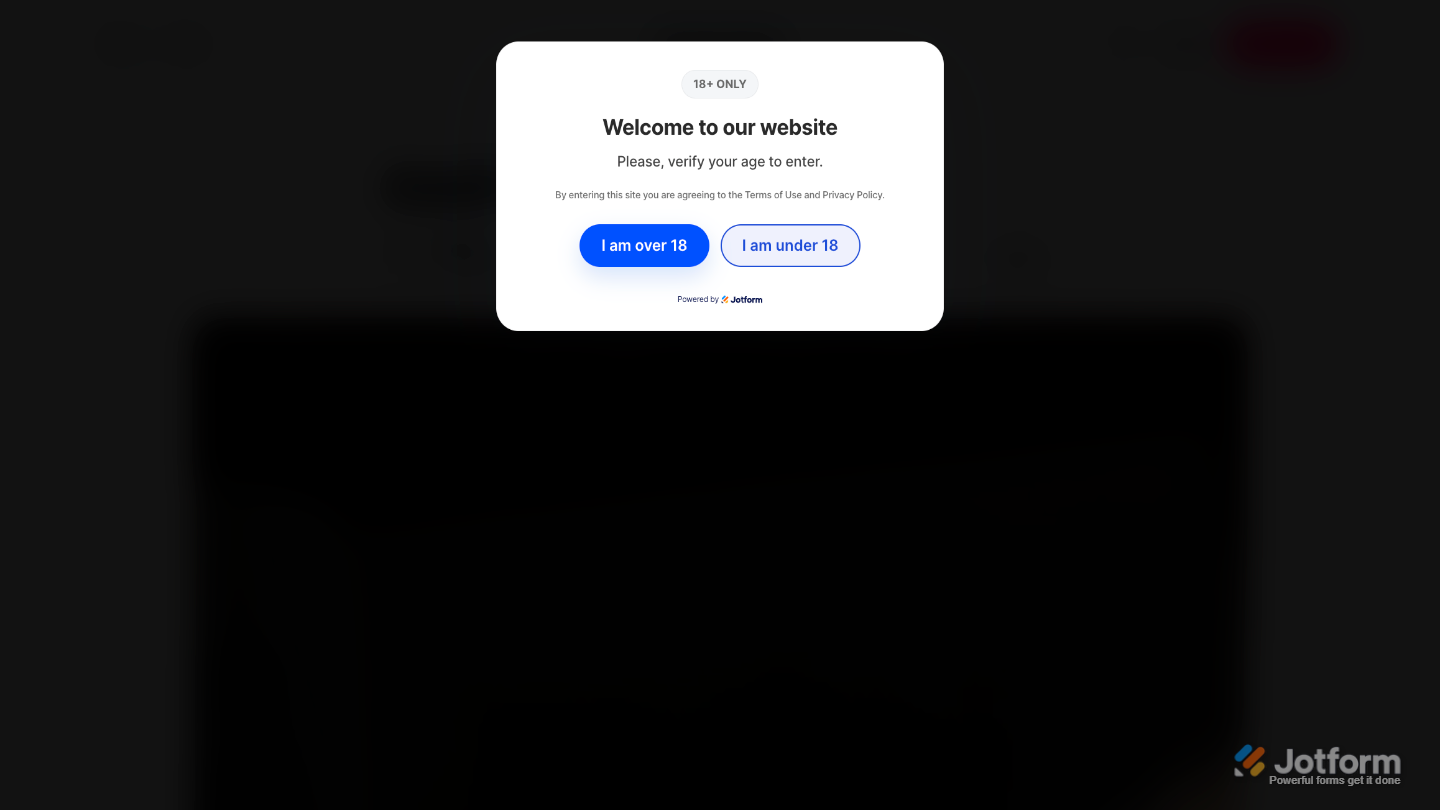
That’s it! Your Age Verification widget will appear on your site based on how you set it up. The example below shows how it’ll look when embedded on a website.
Note
You can manage the website widgets you’ve created at any time from your account. For a full breakdown of how to do it, head over to our guide on How to Manage Website Widgets.
Pro Tips
- Use a clear and informative Underage Message to explain why access is restricted and, if appropriate, provide alternative resources or contact information.
- If your website contains age-restricted content throughout the site, enable Remember Approved Visitors to reduce friction for returning visitors.



Send Comment: