With Jotform’s Back-to-Top Button Widget you can add a convenient button that lets visitors instantly go back to the top of your webpage with a single click. Simply customize the button’s appearance and behavior, and then embed it on your website in just a few steps.
A Back-to-Top button improves navigation, especially on pages with long content. It helps visitors move around your website more comfortably, creating a smoother browsing experience without the need to scroll all the way back to the top.
Notes
- The widget works independently of your website content, so you can put the embed code anywhere on your site and it’ll function across all pages..
- Display settings may behave differently on mobile devices depending on screen size and browser behavior.
Creating Your Back-to-Top Button Widget and Getting the Embed Code for it
Before you can add the Back-to-Top Button Widget to your website, you’ll first need to customize the button’s appearance and behavior and then copy the embed code for it. Here’s a quick how-to:
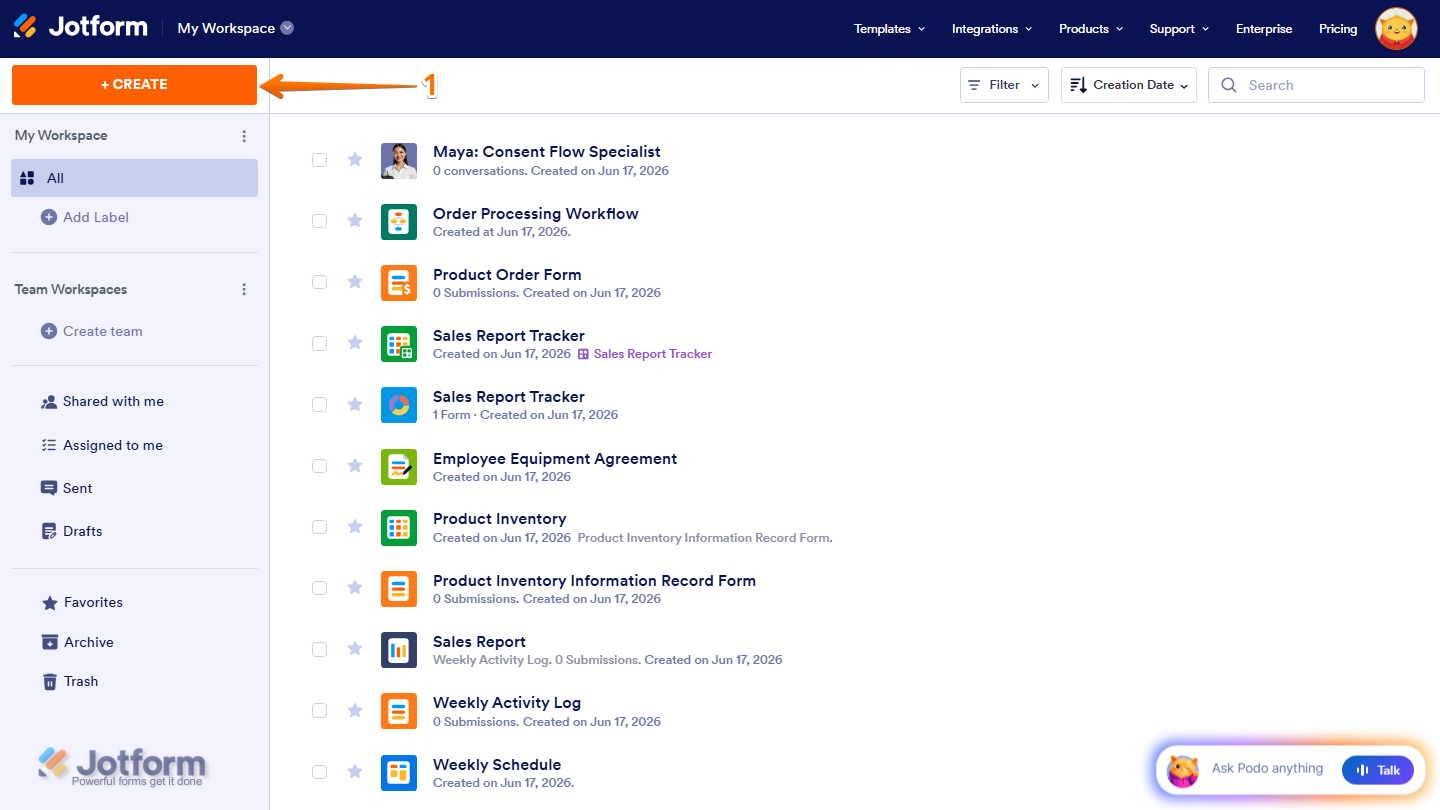
- On the top-left side of your Workspace page, click on Create.
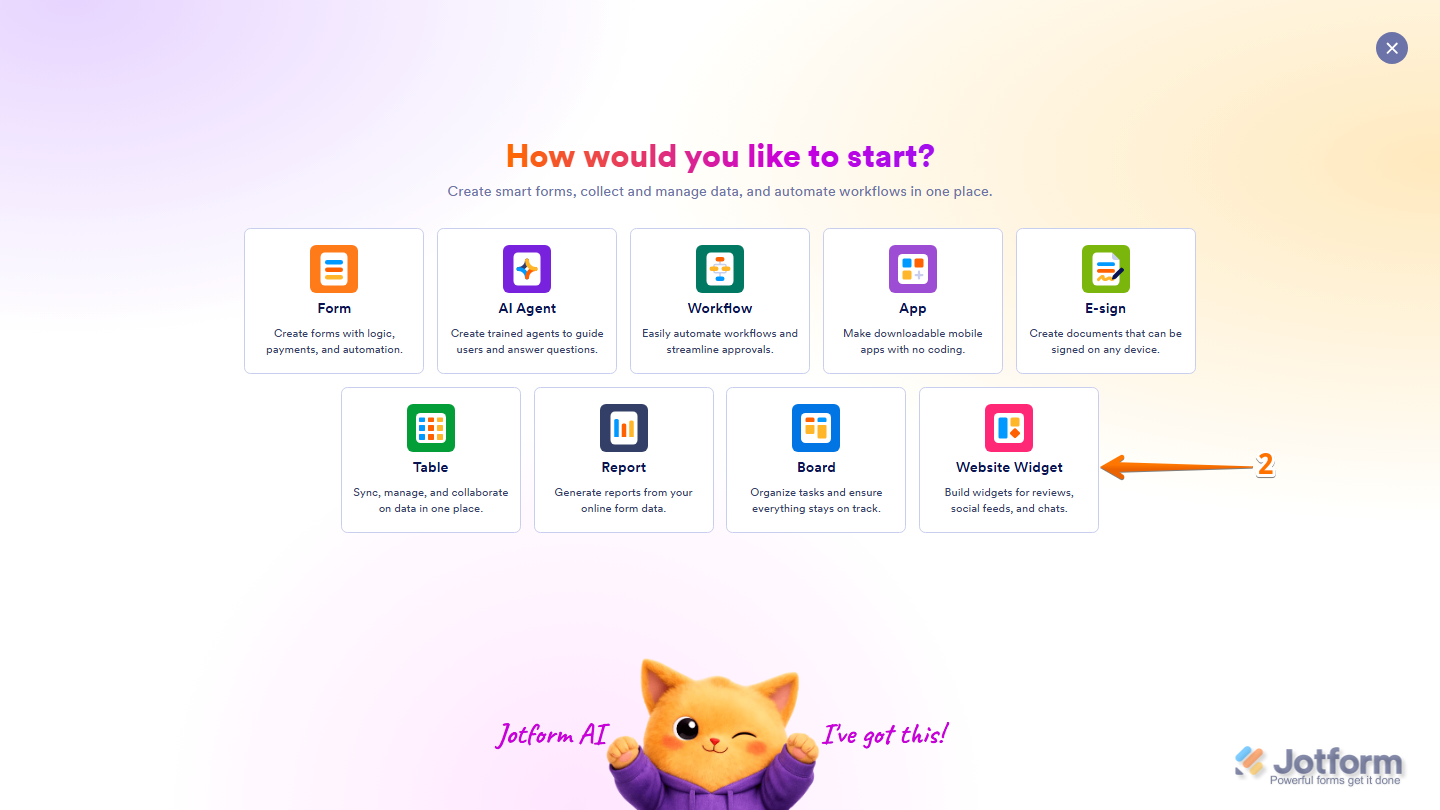
- Then, in the menu that opens up, select Website Widget.
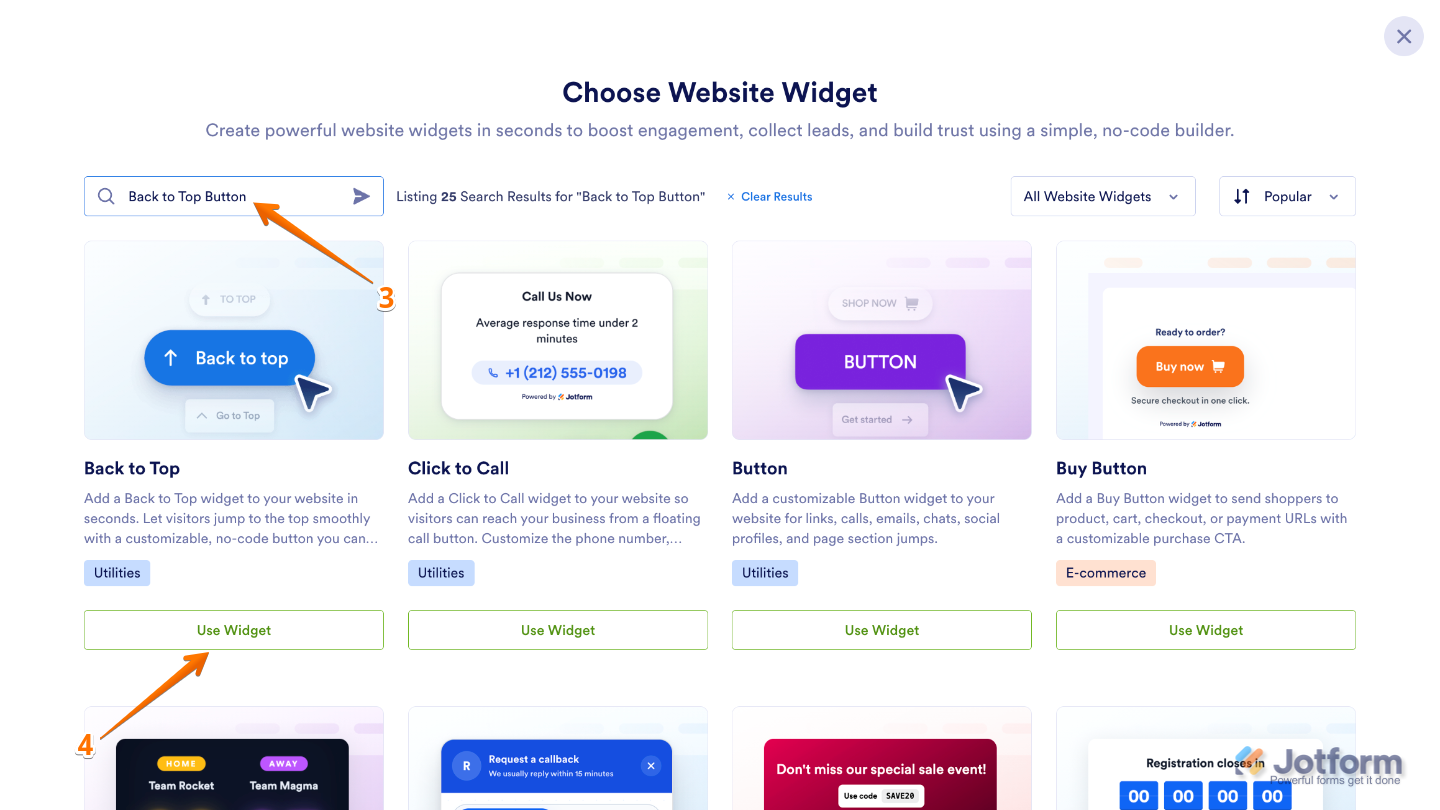
- Next, in the Search bar in the upper-left corner of the Choose Website Widget menu, enter Back to Top Button.
- Then, at the bottom of the search results, click on Use Widget.
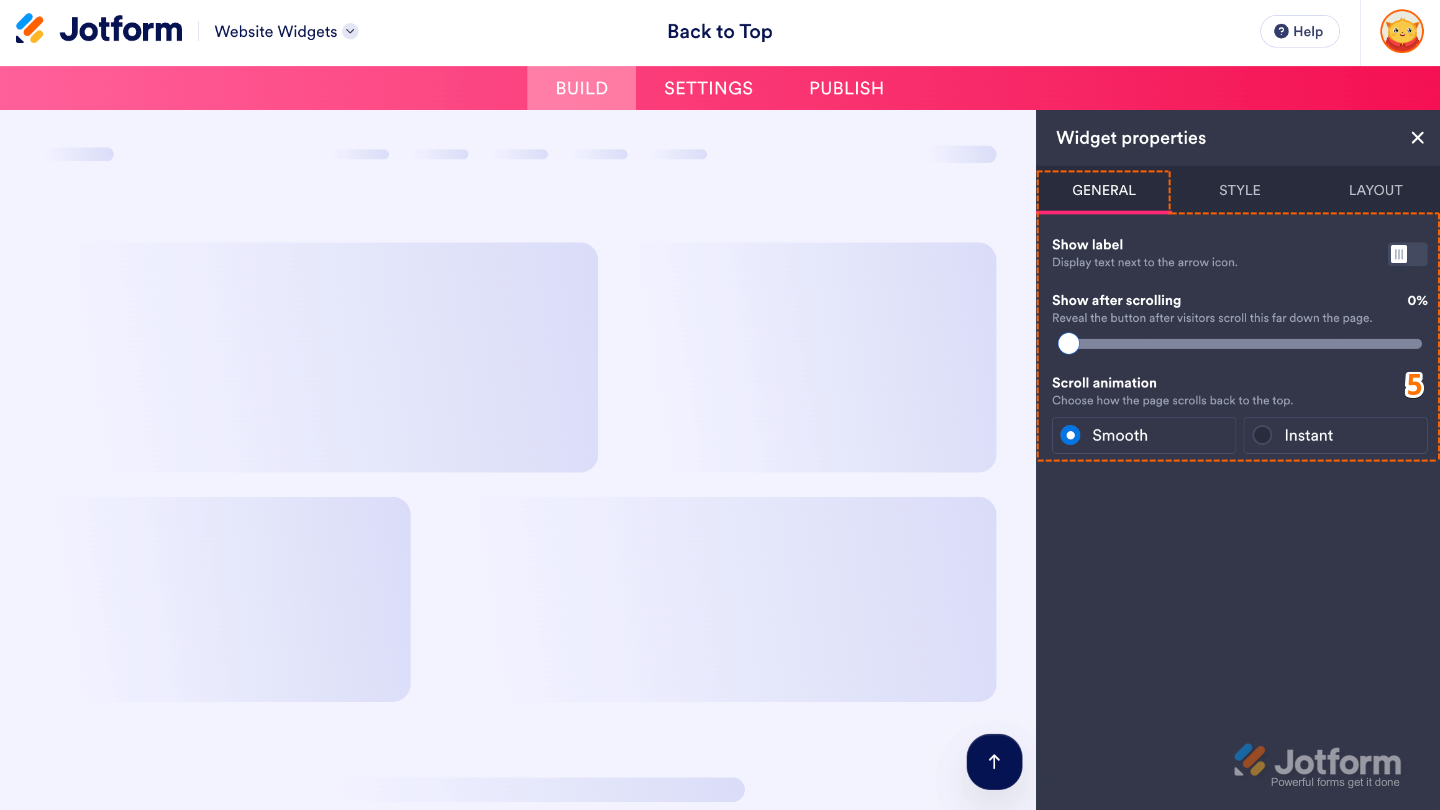
- Now, in the Widget Properties menu that opens on the right side of Website Widgets, under the General tab, set up these properties:
- Show Label — Show or hide the Text label on the button so visitors can see what it does.
- Show After Scrolling — Set how far visitors need to scroll before the button appears on the page.
- Scroll Animation — Choose how the page moves when visitors click the button to return to the top.
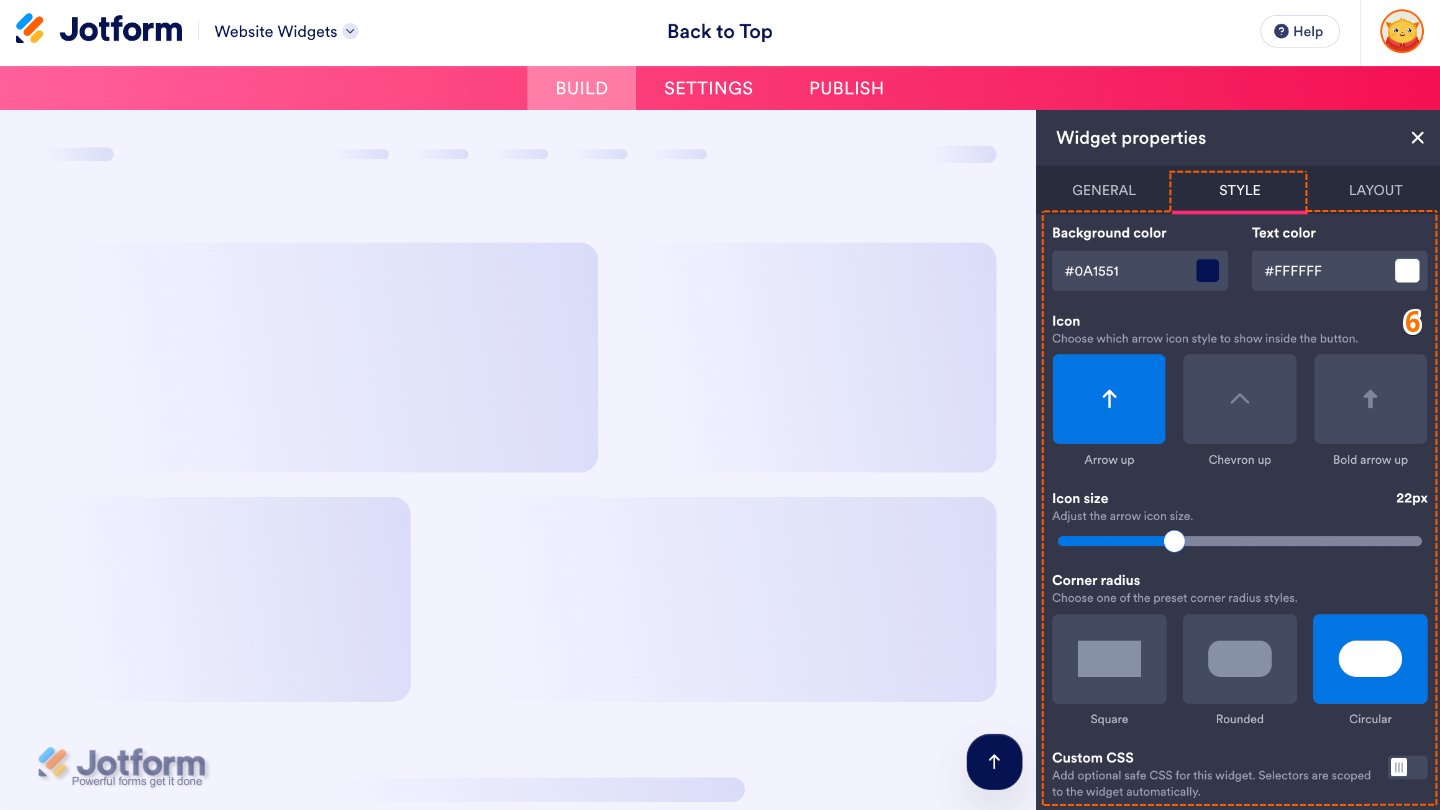
- Next, under the Styles tab, customize these properties:
- Background Color — Choose a background color for the widget.
- Text Color — Pick a primary text color to use throughout the widget.
- Icon — Choose the icon shown on the button.
- Icon Size — Adjust the size of the icon so it fits your page design.
- Corner Radius — Control how rounded the button’s corners are.
- Custom CSS — Apply your own CSS code for advanced styling beyond the built-in settings.
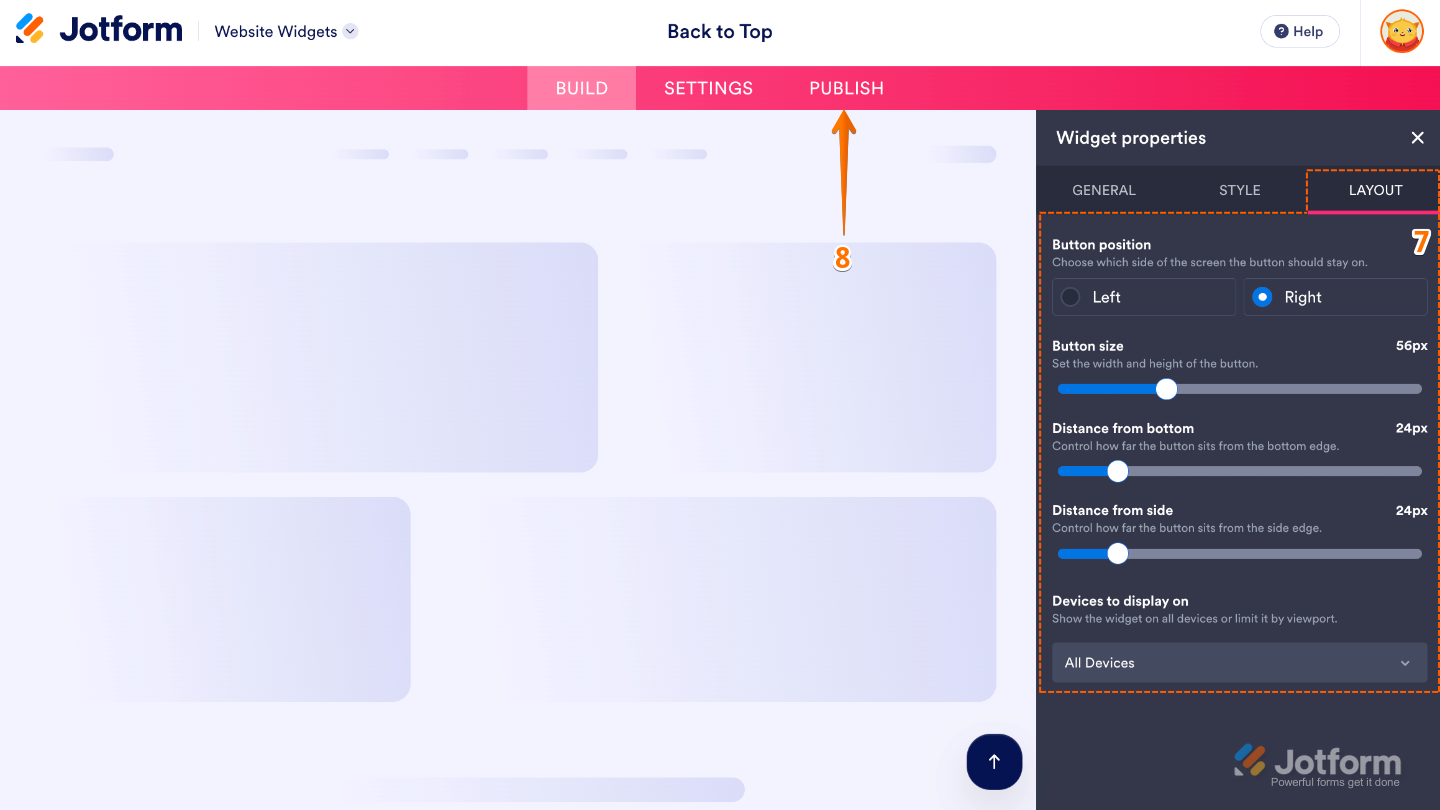
- Now, under the Layout tab, configure these properties:
- Button Position — Place the button on the left or right side of the page.
- Button Size — Adjust the overall size of the button.
- Distance from Button — Adjust the spacing around the button so it does not feel too close to nearby content.
- Distance from Side — Set how far the button sits from the left or right edge of the page.
- Devices to Display On — Choose whether the button appears on desktop devices, mobile devices, or both.
- Once you’ve finished configuring the widget, in the pink navigation bar at the top of the page, click on Publish.
Note
You’ll be asked to log in to your Jotform account or sign up for one. Once you’ve done that, you’ll be able to get the embed code for your widget.
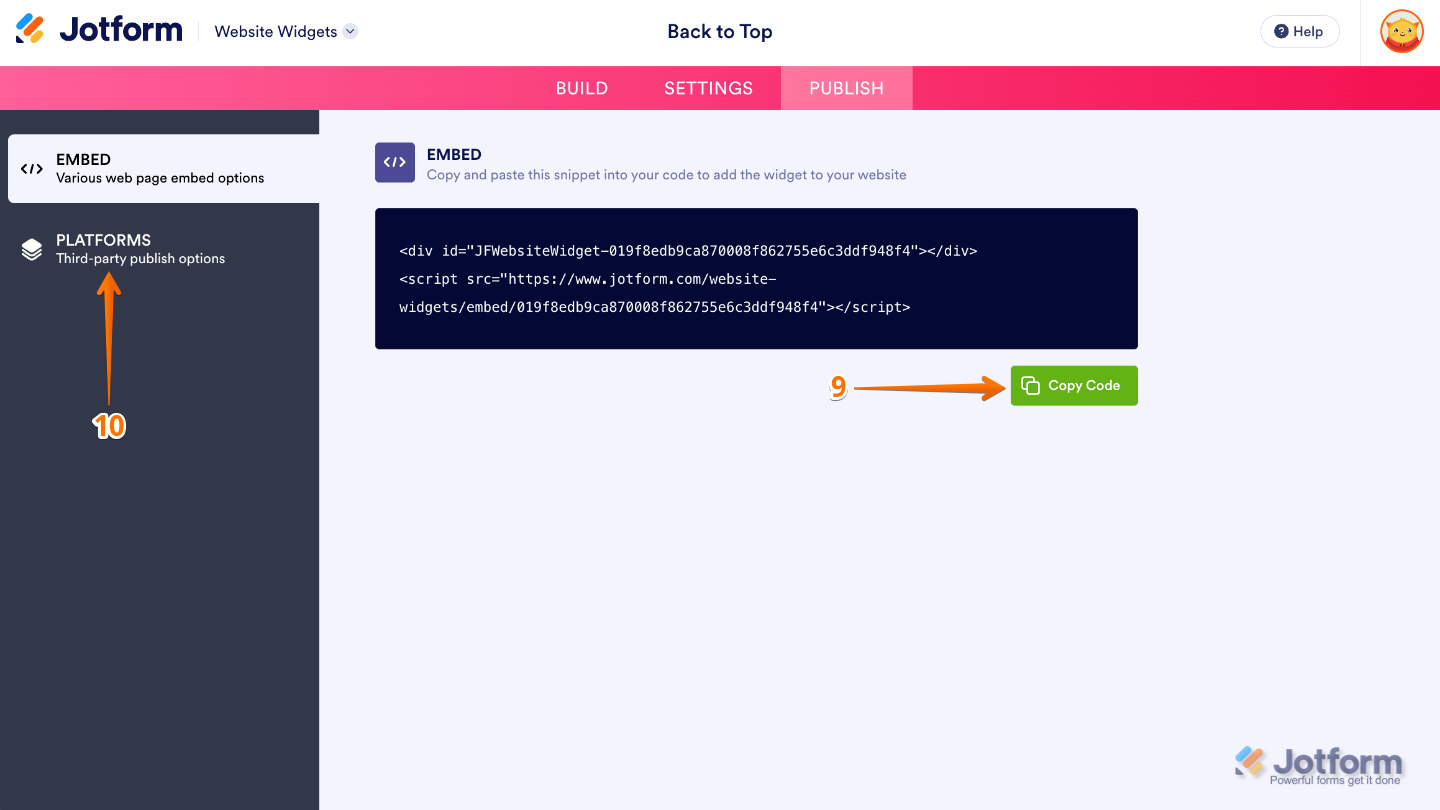
- Then, in the Embed section, click on Copy Code, and, if you already know how, paste that into the Embed section on your platform, and you’re good to go.
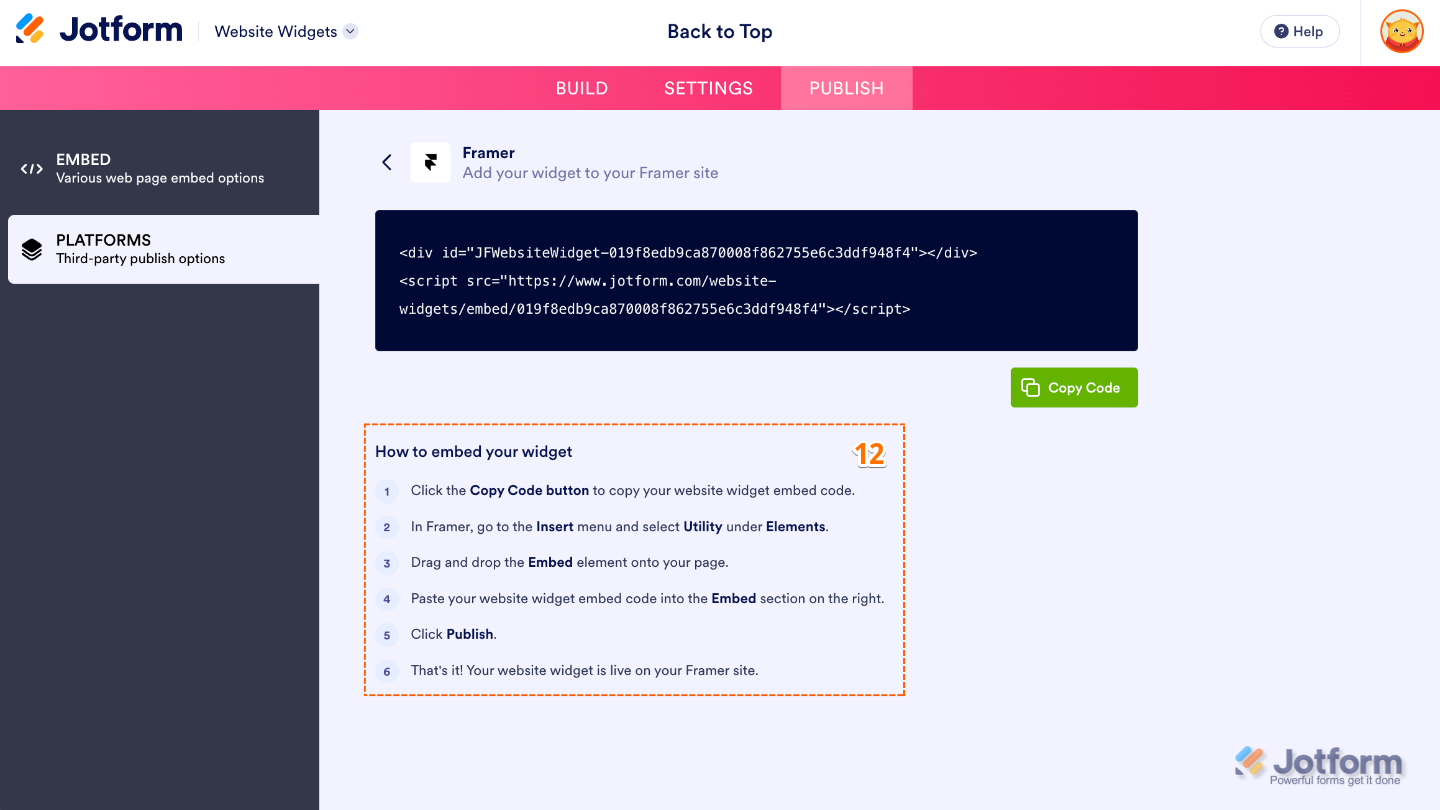
- To view embedding instructions for your widget, click on Platforms in the menu on the left side of the page.
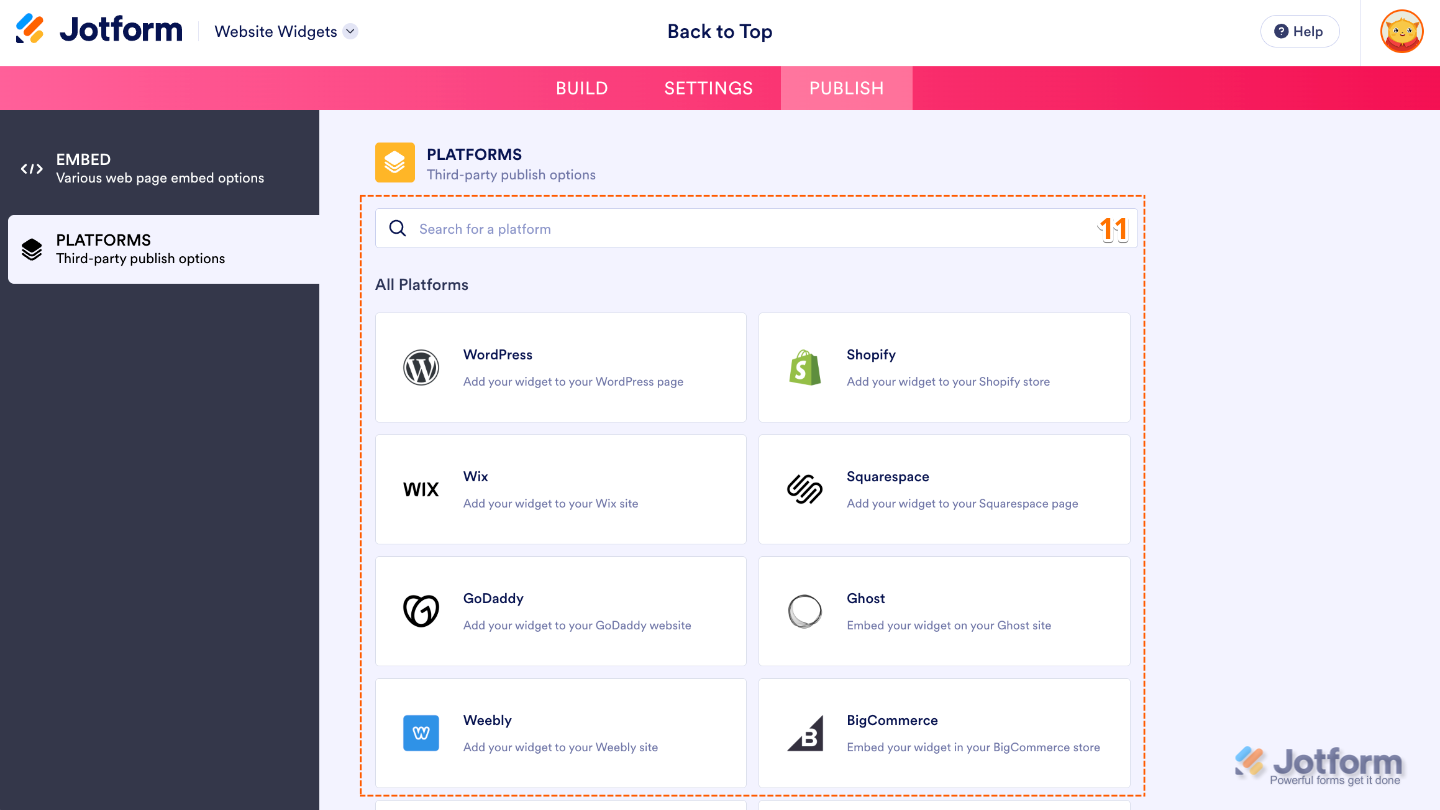
- Next, in the Platforms section on the right, select the platform you want to view embedding instructions for. Or, use the Search bar at the top of the section to find it easily.
- Then, follow the steps in the How to Embed Your Widget section to add it to your website.
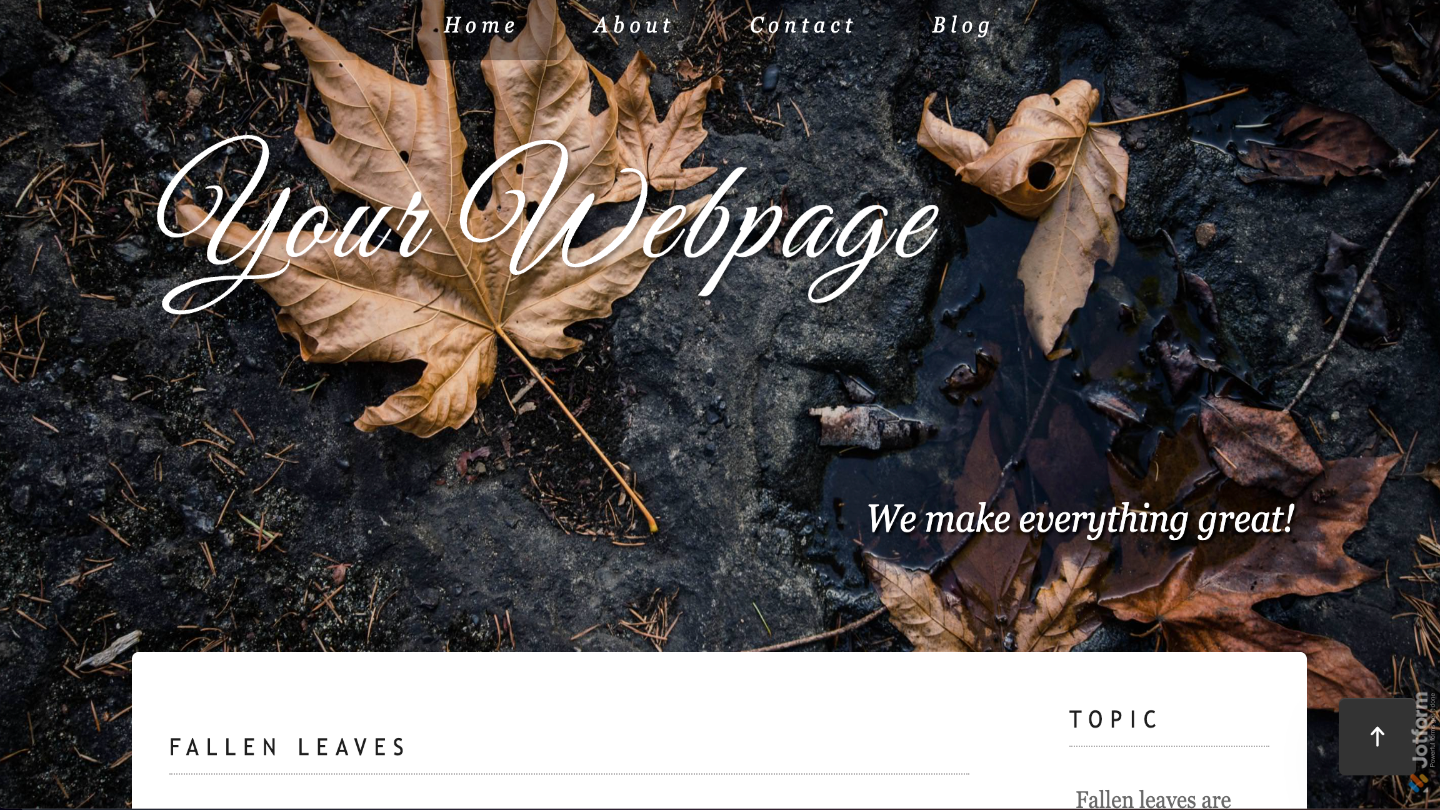
That’s it! Your Graphs and Charts widget will appear on your website with the design and settings you selected for it. See the screenshot below for an example of how it looks on a website.
Note
You can manage the website widgets you’ve created at any time from your account. For a full breakdown of how to do it, head over to our guide on How to Manage Website Widgets.
Pro Tips
- Keep the button size small and use subtle colors so it stays helpful without distracting users from your main content.
- Test the button on both desktop and mobile views to make sure it appears at the right scroll distance and position.
- Place the button closer to the bottom-right corner, as this is where most users naturally expect it.


Send Comment: