With Jotform’s Before & After Slider widget, you can create interactive image comparisons that let visitors see changes by dragging a slider between two images. It’s a great way to showcase transformations, progress, or side-by-side comparisons in a clear and engaging format.
Whether you’re highlighting home renovations, product improvements, design projects, or before-and-after results, you can customize the widget’s appearance and slider settings to match your website. Once you’re happy with the setup, simply copy the embed code and add the widget to your website.
Adding Before and After Slider features to your website only takes a few steps. Here’s how to set it up:
- On the top-left side of your Workspace page, click on Create.
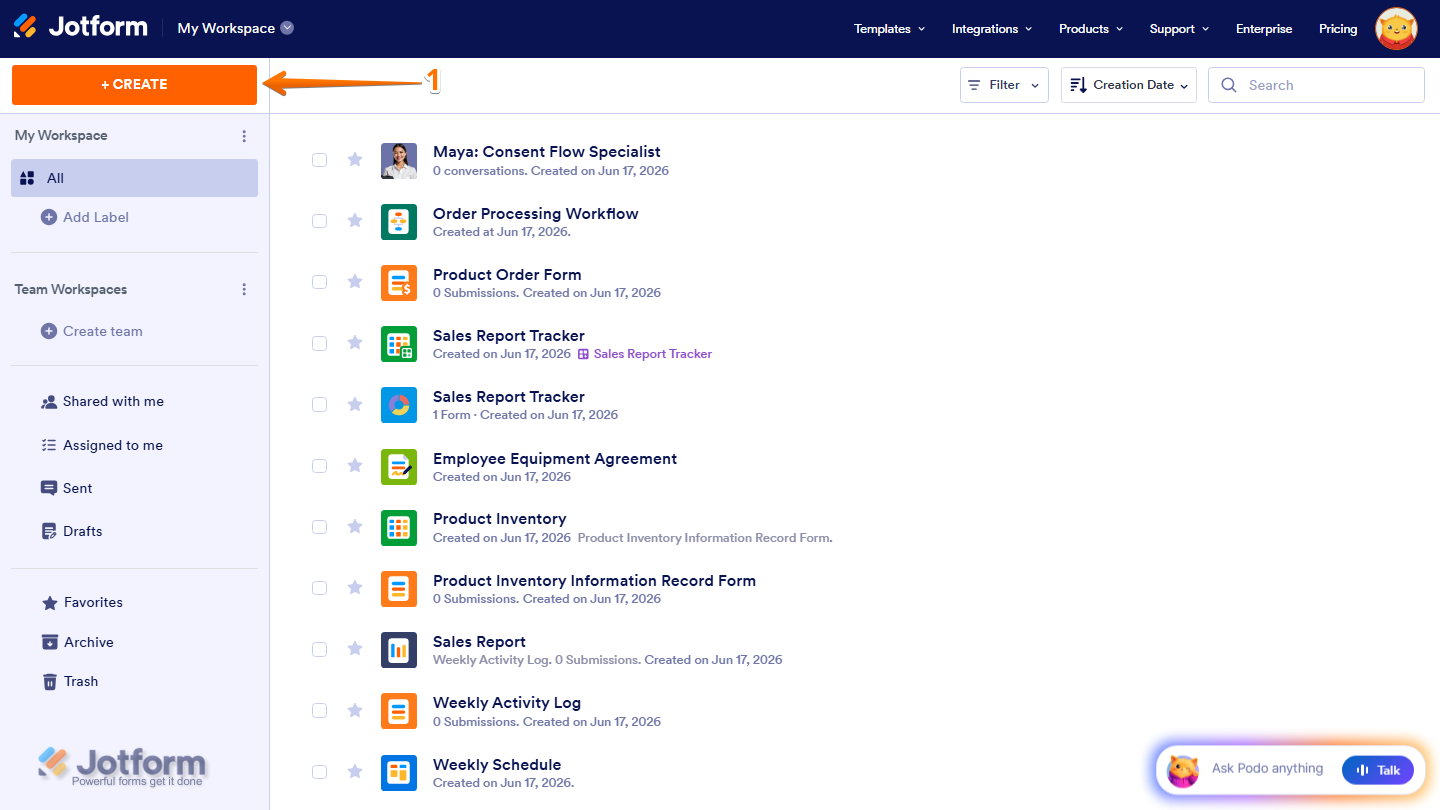
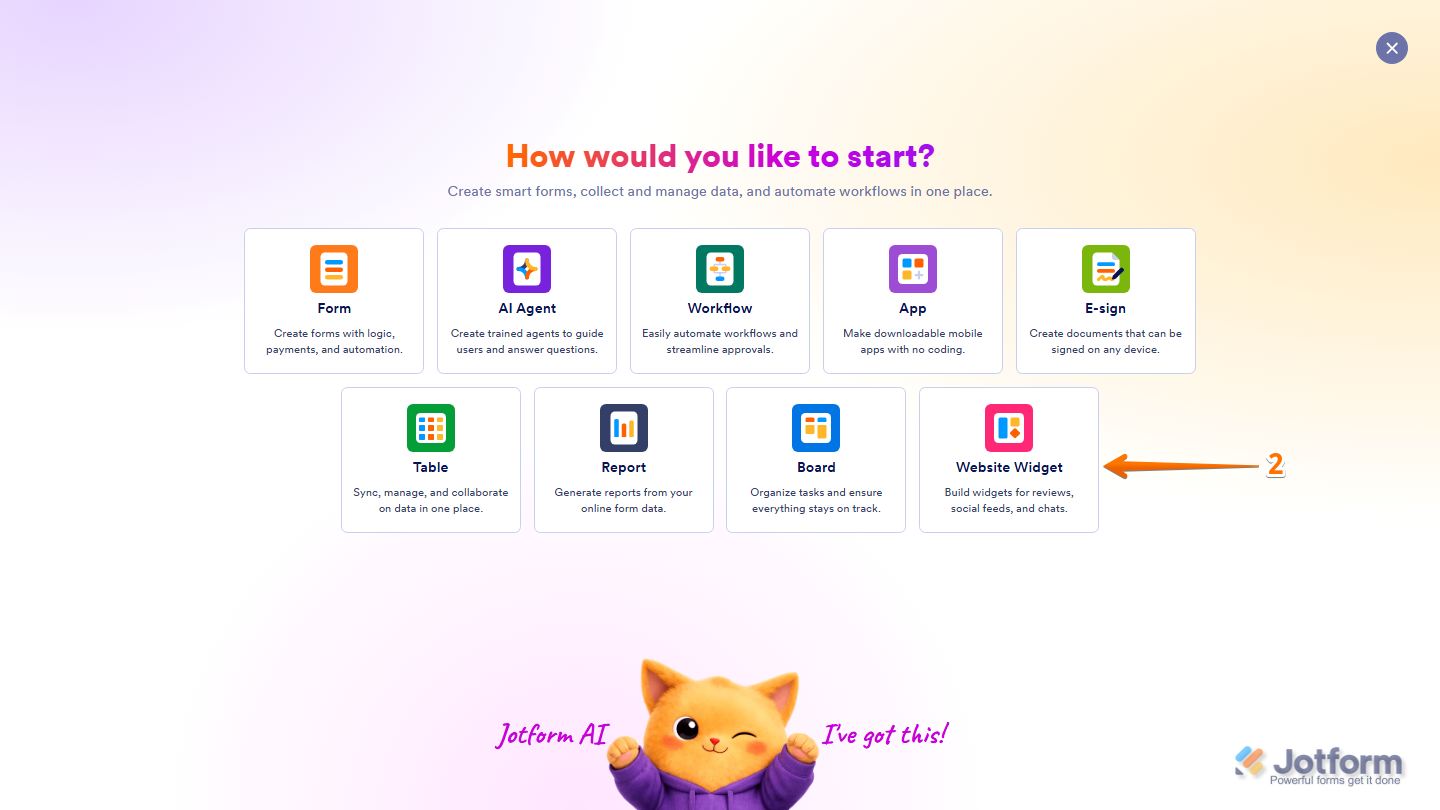
- Then, in the menu that opens up, select Website Widget.
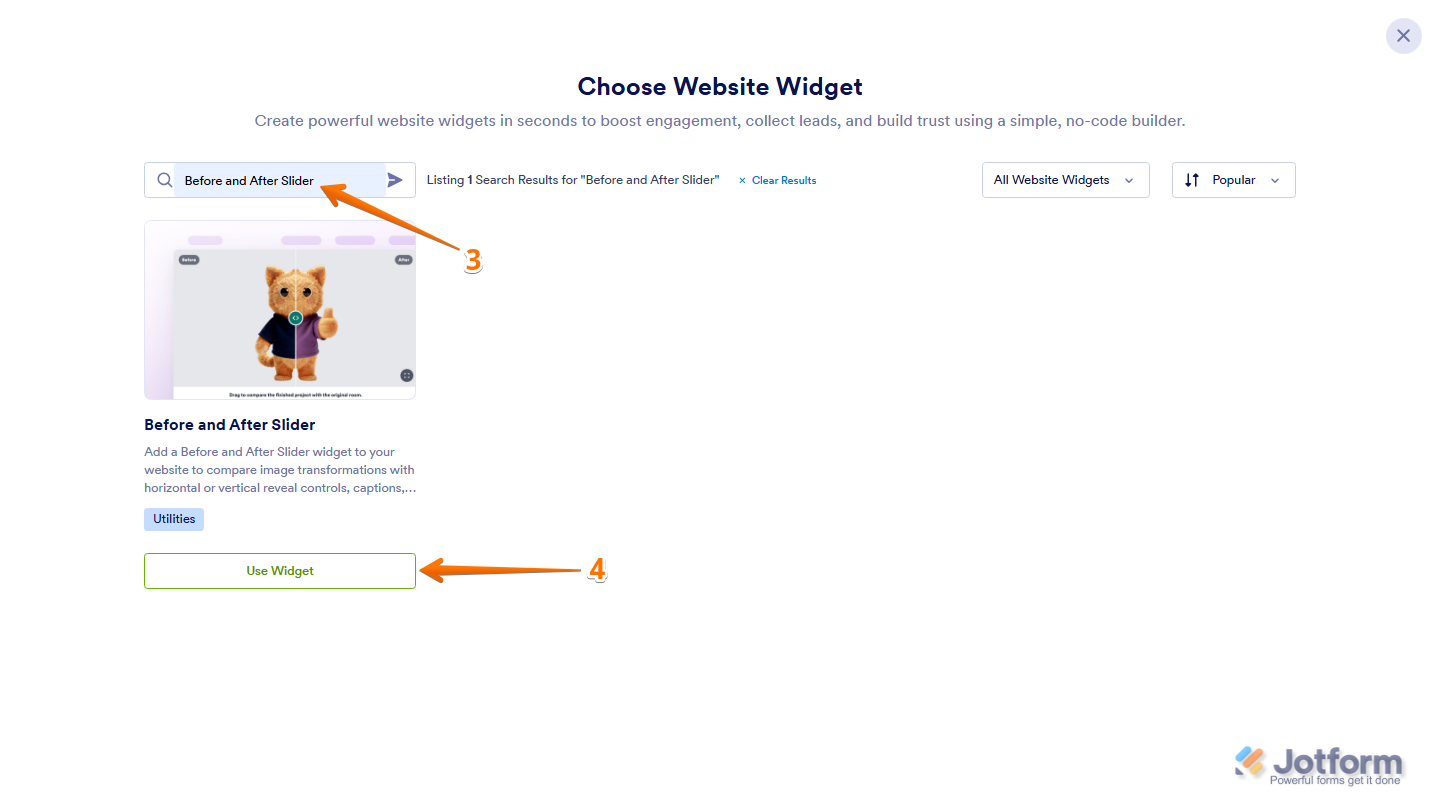
- Next, in the Search bar in the upper-left corner of the Choose Website Widget menu, enter Before and After Slider.
- Then, at the bottom of the search results, click on Use Widget.
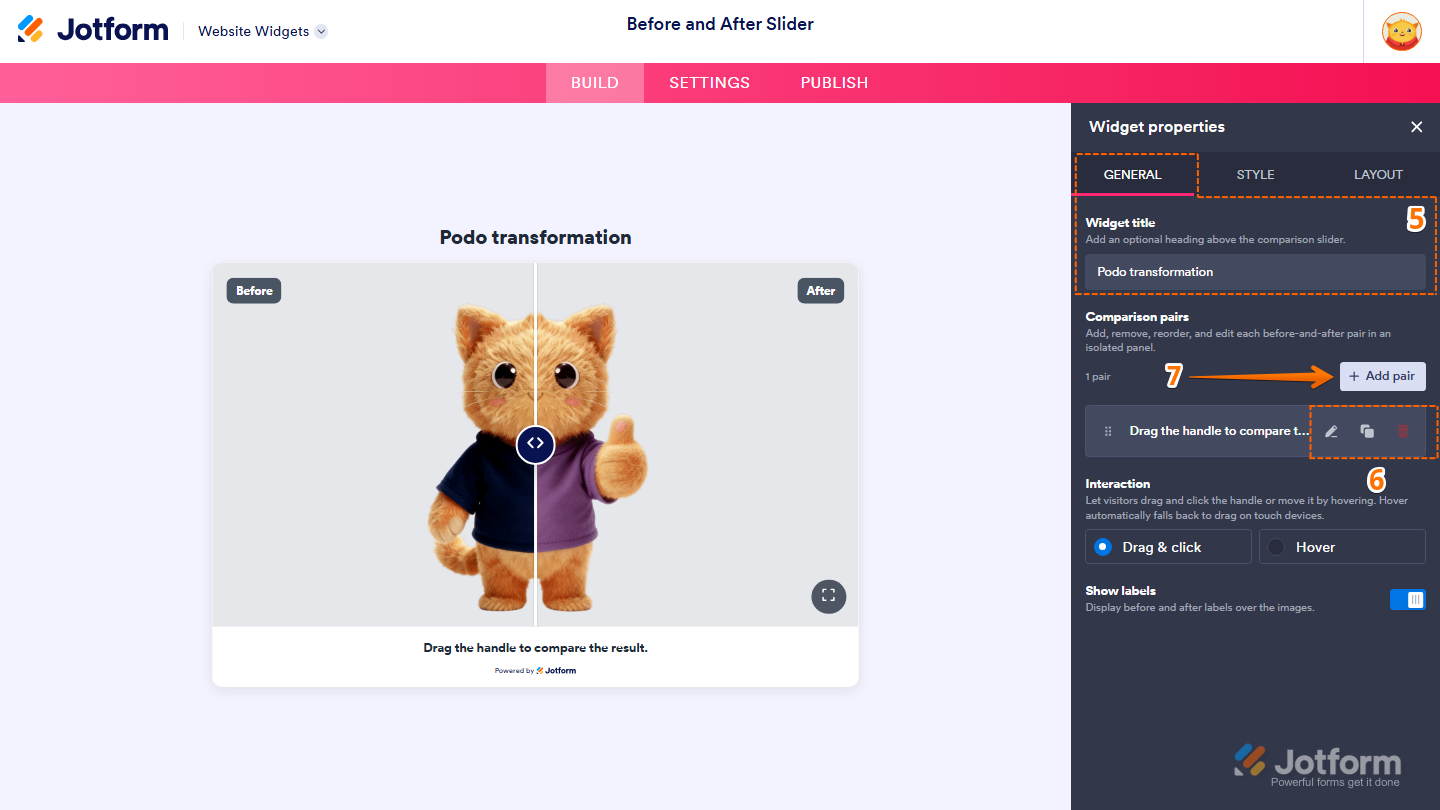
- Now, in the Widget Properties menu that opens on the right side of Website Widgets, under the General tab, in the Widget Title input box, enter the title you want to display above the comparison slider.
- Then, under the Comparison Pairs section, you’ll find a sample comparison pair that you can manage using the available action icons:
- Pencil icon — Click on it to edit the comparison pair.
- Duplicate icon — Click on it to create a copy of the comparison pair.
- Trash Can icon — Click on it to delete the comparison pair.
- To add another comparison pair, click on Add Pair.
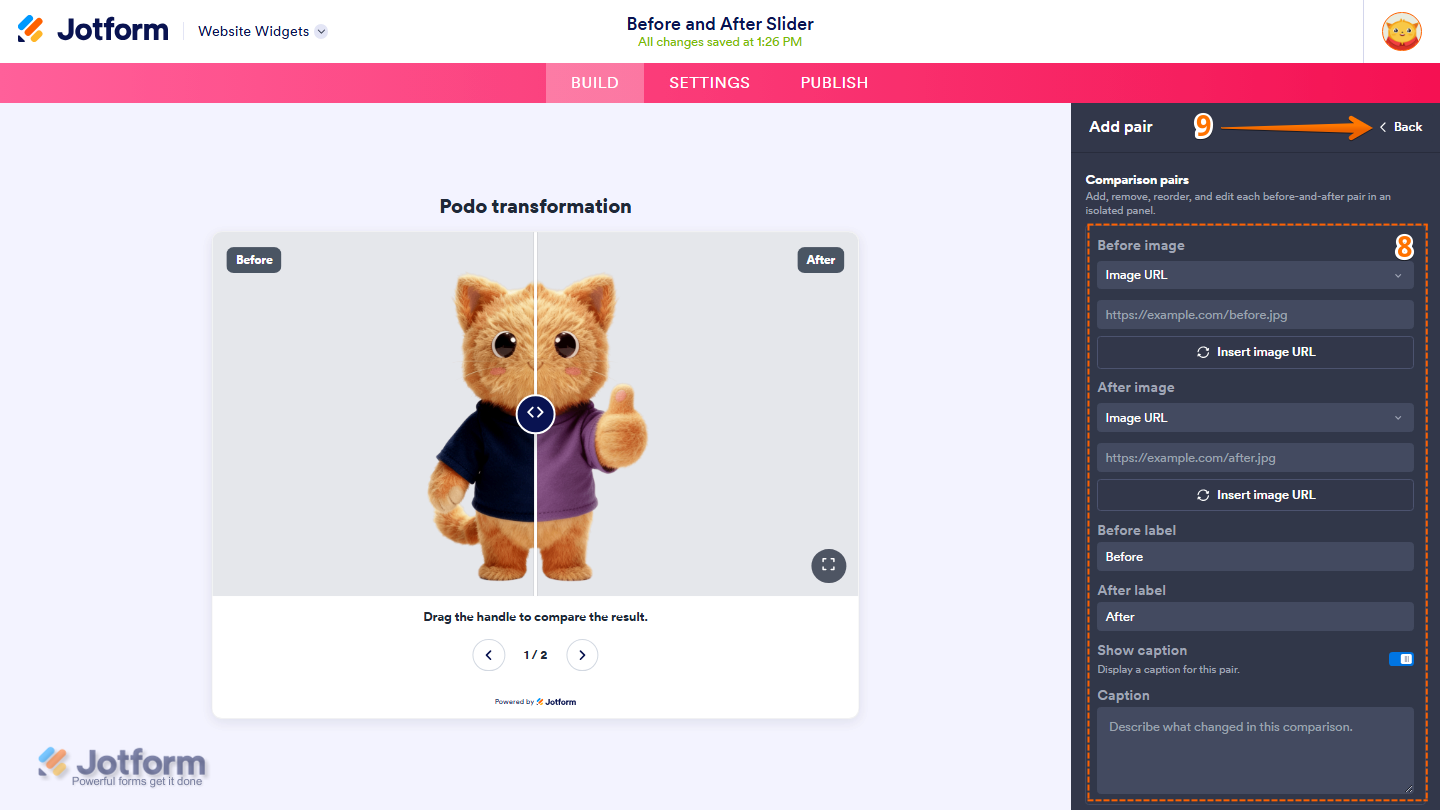
- Now, in the Add Pair menu that opens, fill in these details:
- Before Image — Select whether to add the before image using an Image URL or by uploading an image, then provide the image.
- After Image — Select whether to add the after image using an Image URL or by uploading an image, then provide the image.
- Before Label — Delete the default label in the input box and enter the text you want to display on the before image.
- After Label — Delete the default label in the input box and enter the text you want to display on the after image.
- Show Caption — Leave this enabled to display a caption for the comparison pair, or toggle it off to hide it.
- Caption — This is only available when Show Caption is enabled. Enter a description of the changes shown in the comparison.
- Once you’re done, in the upper-right corner, click on Back to return to the Widget Properties menu under the General tab.
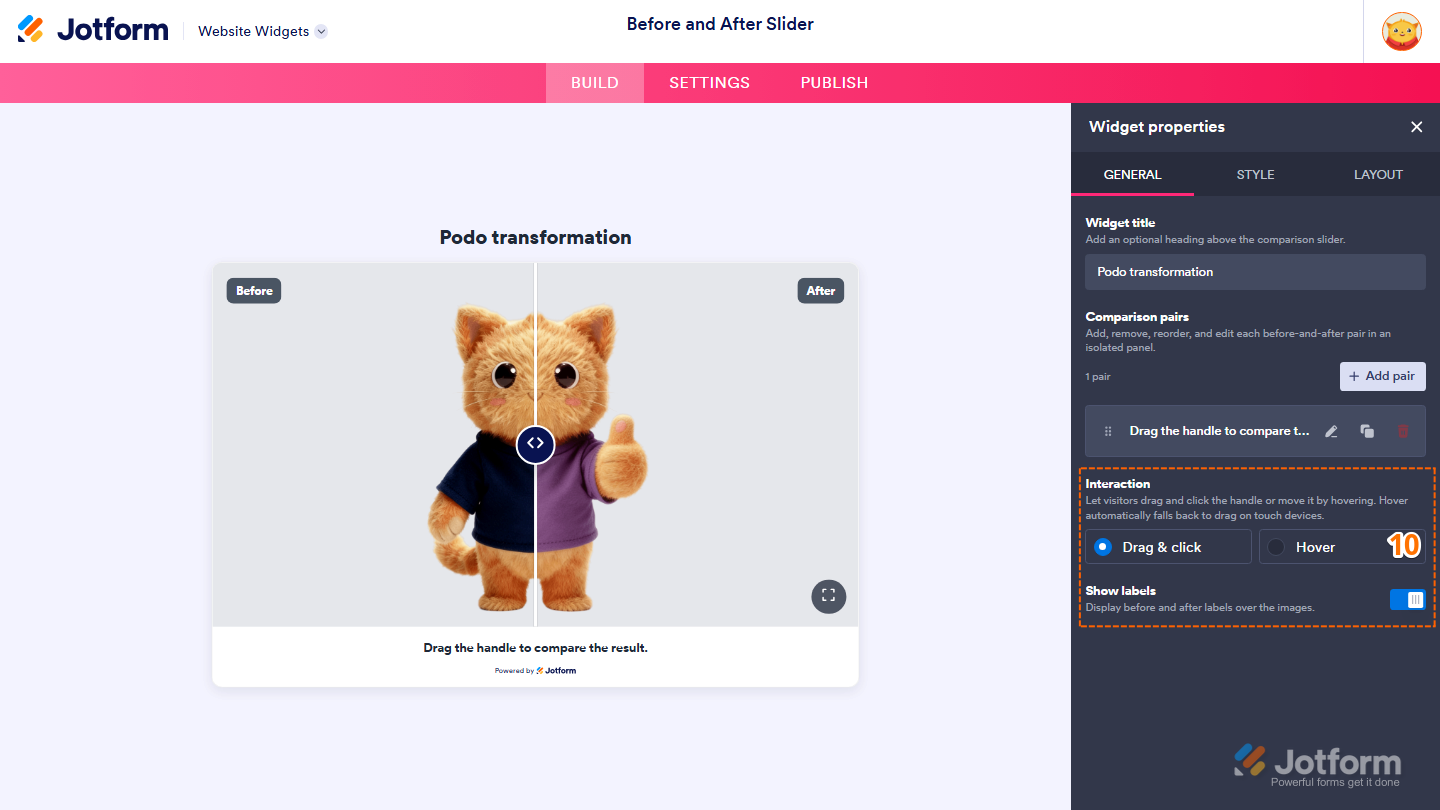
- Then, set up these things:
- Interaction — Select Drag & Click or Hover to choose how visitors compare the images.
- Show Labels — Toggle this setting on or off to show or hide the Before and After labels on the images.
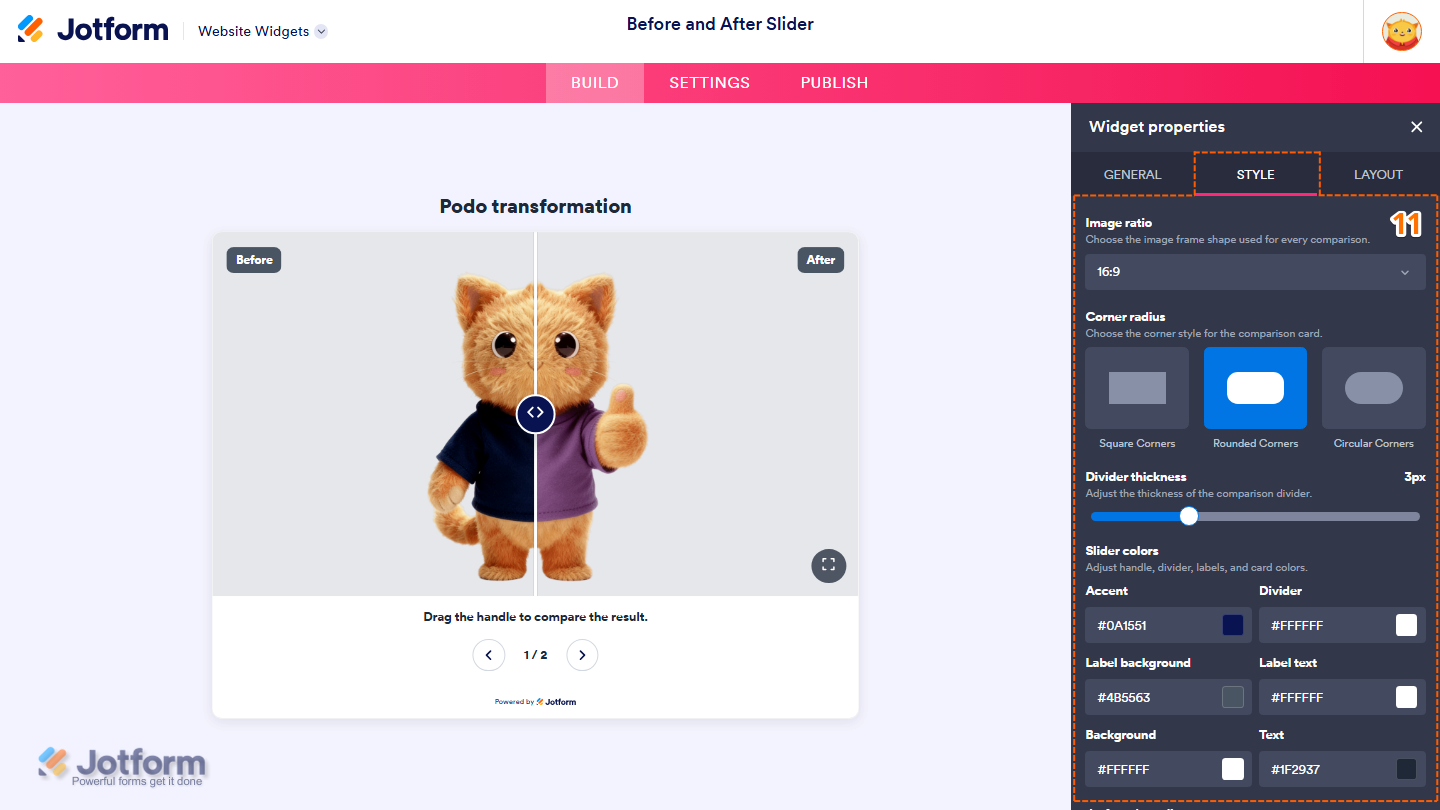
- Now, under the Style tab, customize these properties:
- Image Ratio — Select the aspect ratio used for images from the Dropdown menu.
- Corner Radius — Select one of the following options to choose the corner style of the comparison card:
- Square Corners — Displays the comparison card with square corners.
- Rounded Corners — Displays the comparison card with rounded corners.
- Circular Corners — Displays the comparison card with fully rounded corners.
- Divider Thickness — Click on and hold the slider handle, then drag it to adjust the thickness of the comparison divider.
- Accent — Customize the color of the slider handle by entering a hex code in the input box or selecting one from the color box.
- Divider — Change the color of the comparison divider by entering a hex code in the input box or selecting one from the color box.
- Label Background — Use the input box or color box to customize the background color of the before and after labels.
- Label Text — Customize the color of the label text by entering a hex code in the input box or selecting one from the color box.
- Background — Change the widget background color by entering a hex code in the input box or selecting one from the color box.
- Text — Use the input box or color box to customize the text color throughout the widget.
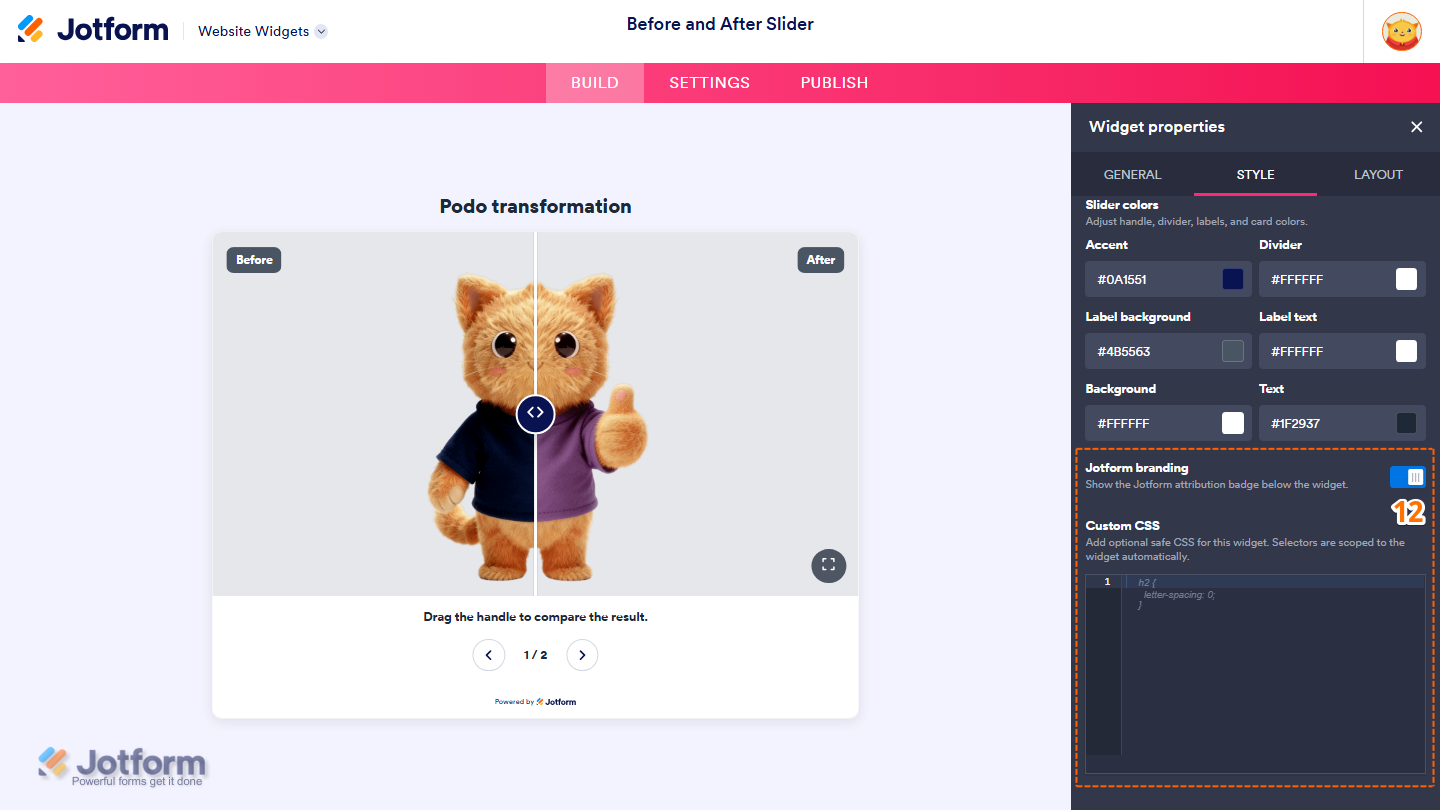
- Then, scroll down and continue to customize these properties:
- Jotform branding — Leave this enabled to display the Powered by Jotform badge below the widget, or toggle it off to hide it.
- Custom CSS — Enter custom CSS to further customize the widget’s appearance.
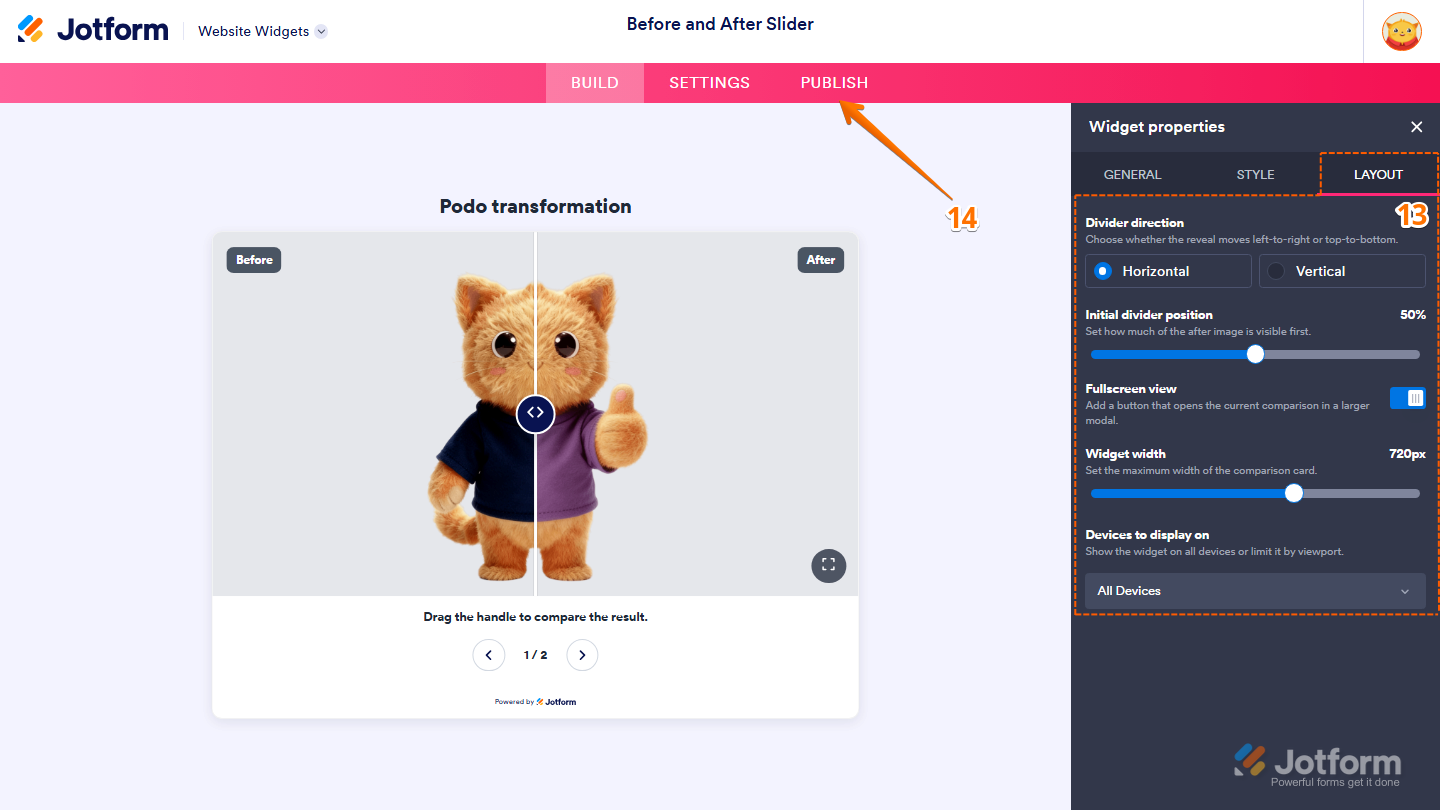
- Next, under the Layout tab, configure these properties:
- Divider Direction — Select one of the following options to choose the direction of the comparison divider:
- Horizontal — Displays the comparison with a left-to-right reveal.
- Vertical — Displays the comparison with a top-to-bottom reveal.
- Initial Divider Position — Click on and hold the slider handle, then drag it to set how much of the after image is visible when the comparison first loads.
- Fullscreen View — Leave this enabled to display a fullscreen button on the comparison card, or toggle it off to hide it.
- Widget Width — Click on and hold the slider handle, then drag it to adjust the maximum width of the comparison card.
- Devices to Display On — Select the devices on which the widget will be displayed from the Dropdown menu.
- Divider Direction — Select one of the following options to choose the direction of the comparison divider:
- Once you’ve finished configuring the widget, in the pink navigation bar at the top of the page, click on Publish.
Note
You’ll be asked to log in to your Jotform account or sign up for one before you can continue using your widgets.
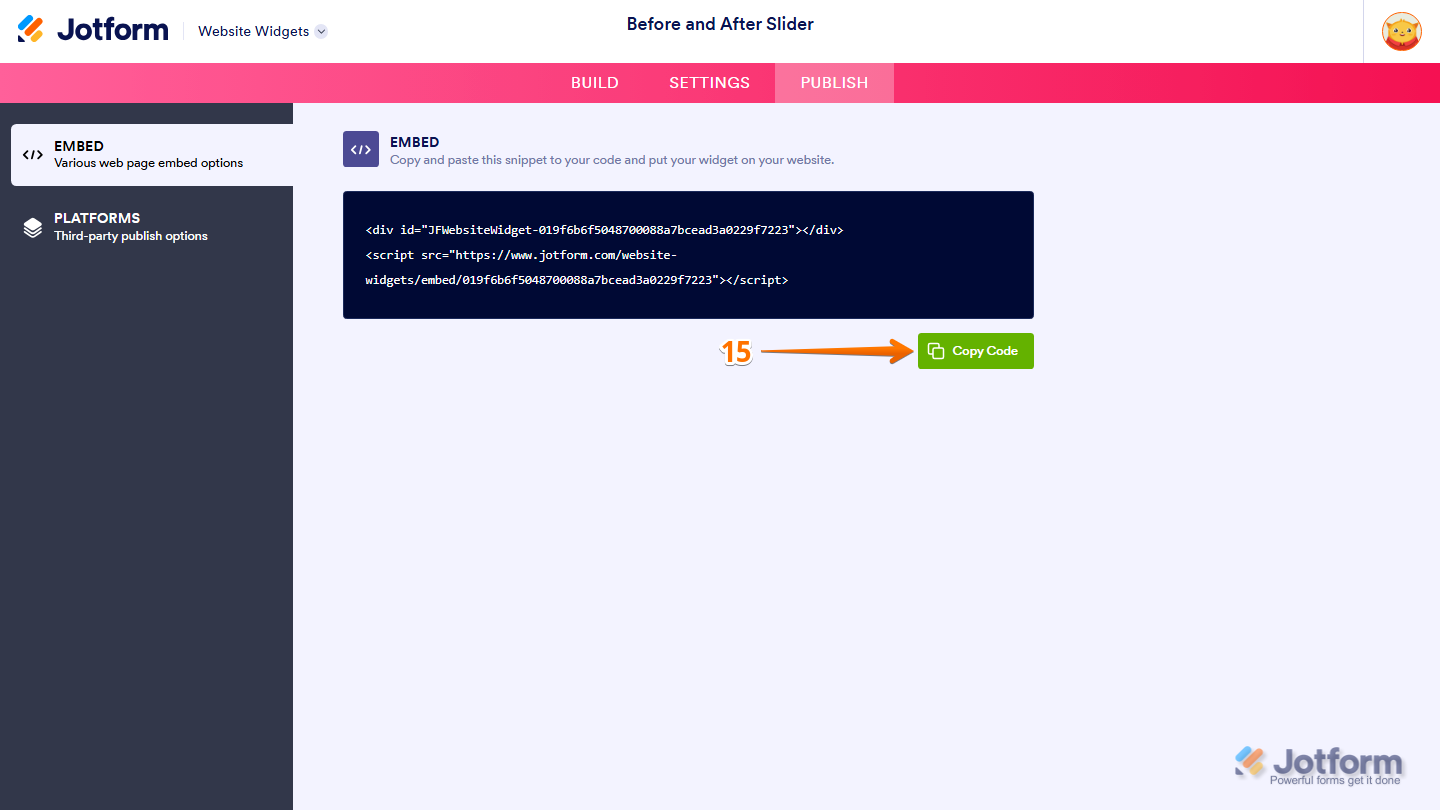
- Then, in the Embed section, click on Copy Code.
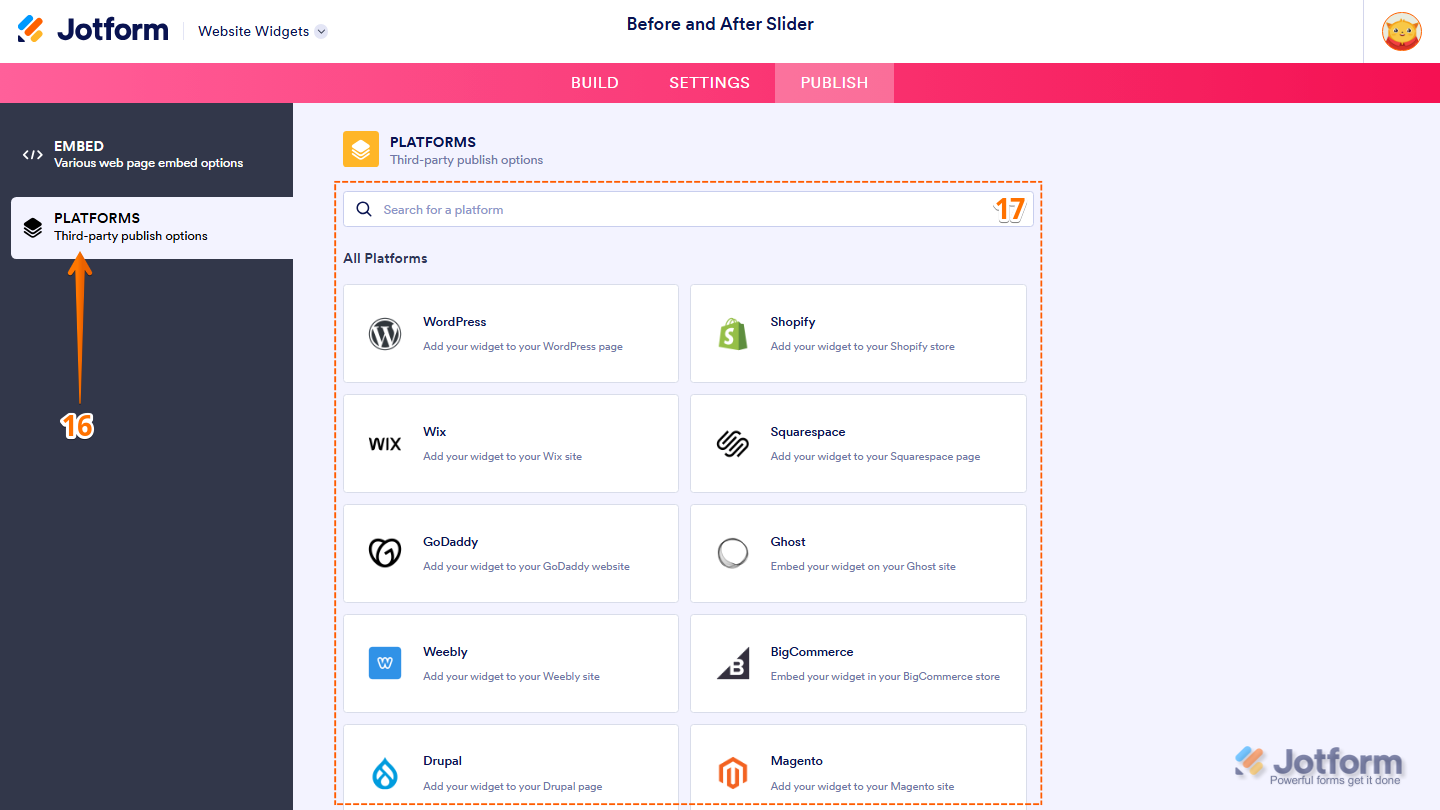
- To view embedding instructions for your widget, click on Platforms in the menu on the left side of the page.
- Next, in the Platforms section on the right, select the platform you want to view embedding instructions for. Or, use the Search bar at the top of the section to find it easily.
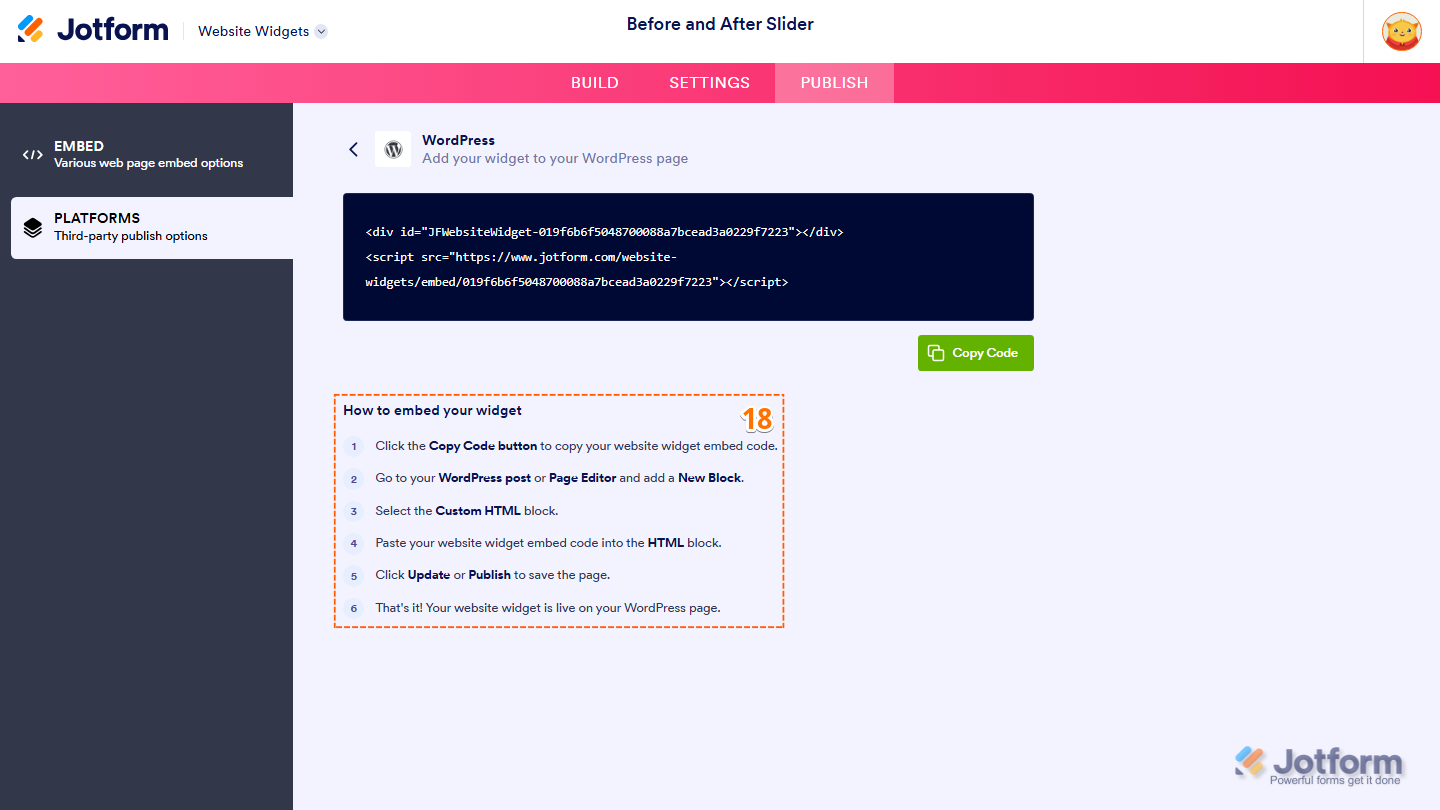
- Then, follow the steps in the How to Embed Your Widget section to add it to your website.
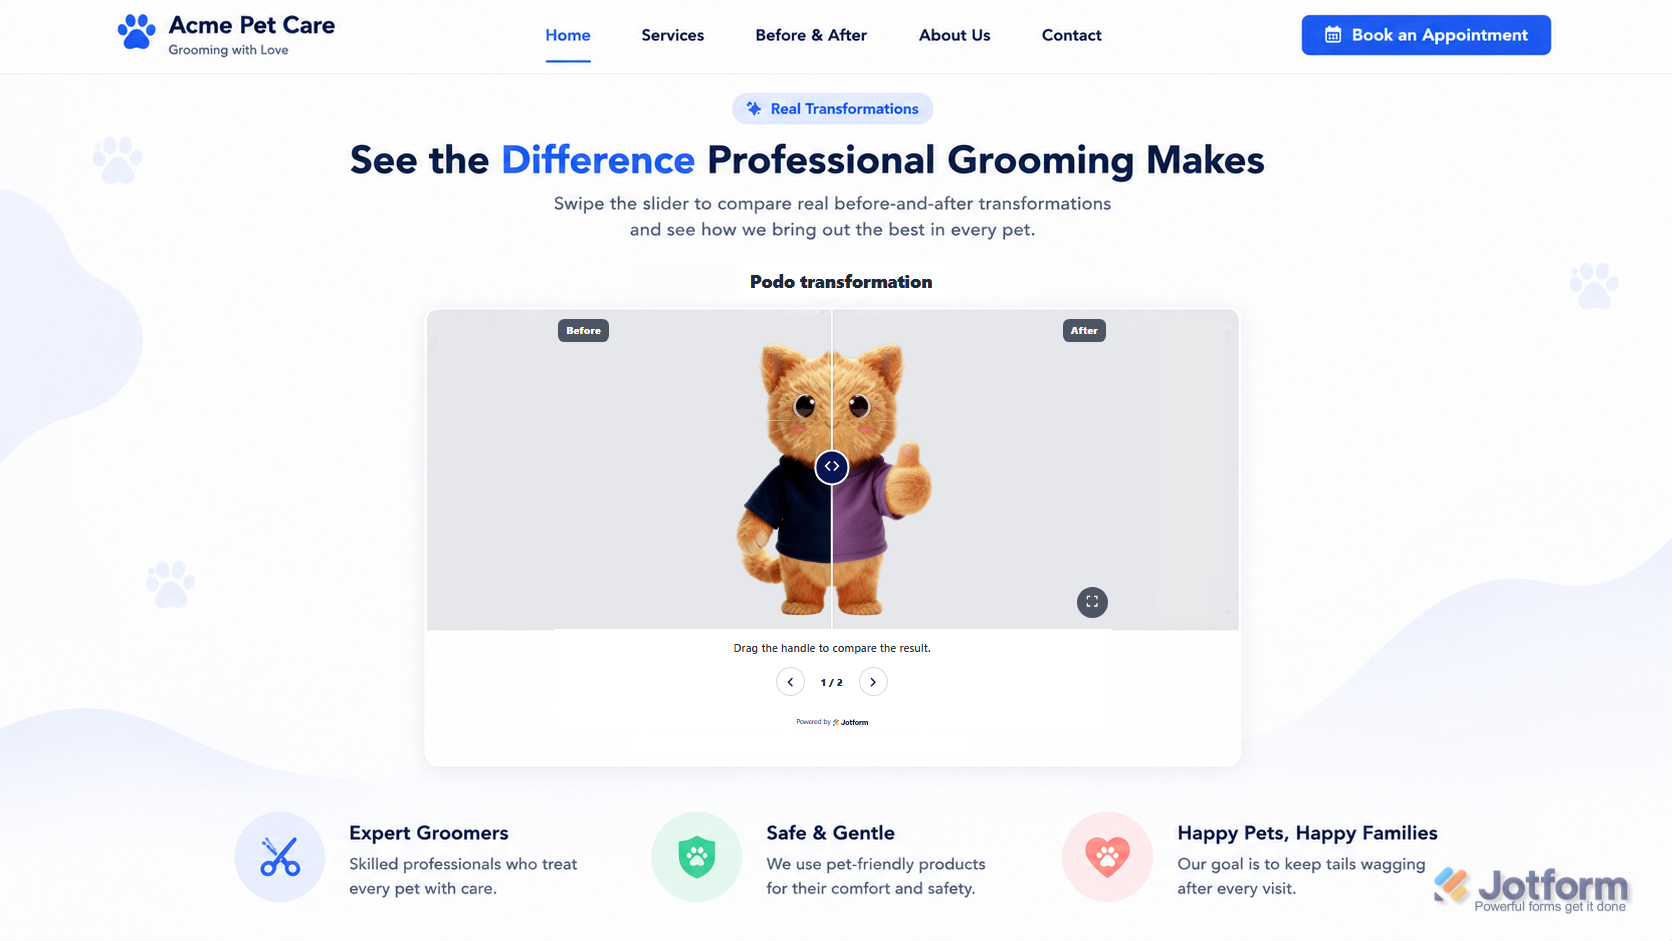
That’s it! Your Before and After Slider widget will appear on your website just as you set it up. The screenshot below shows how it looks on a website.
Note
You can manage the website widgets you’ve created at any time from your account. For a full breakdown of how to do it, head over to our guide on How to Manage Website Widgets.


Send Comment: