The Time field allows users to enter a valid time format in the form. It will display the time based on timezone and time format in your account settings.
Note
The new Default Theme requires users to enter the time. It is optimized to display a numeric keyboard on mobile devices. However, the other Form Themes will display a dropdown selector.
Adding the Time Field
You can add a Time field to your form by following the steps below:
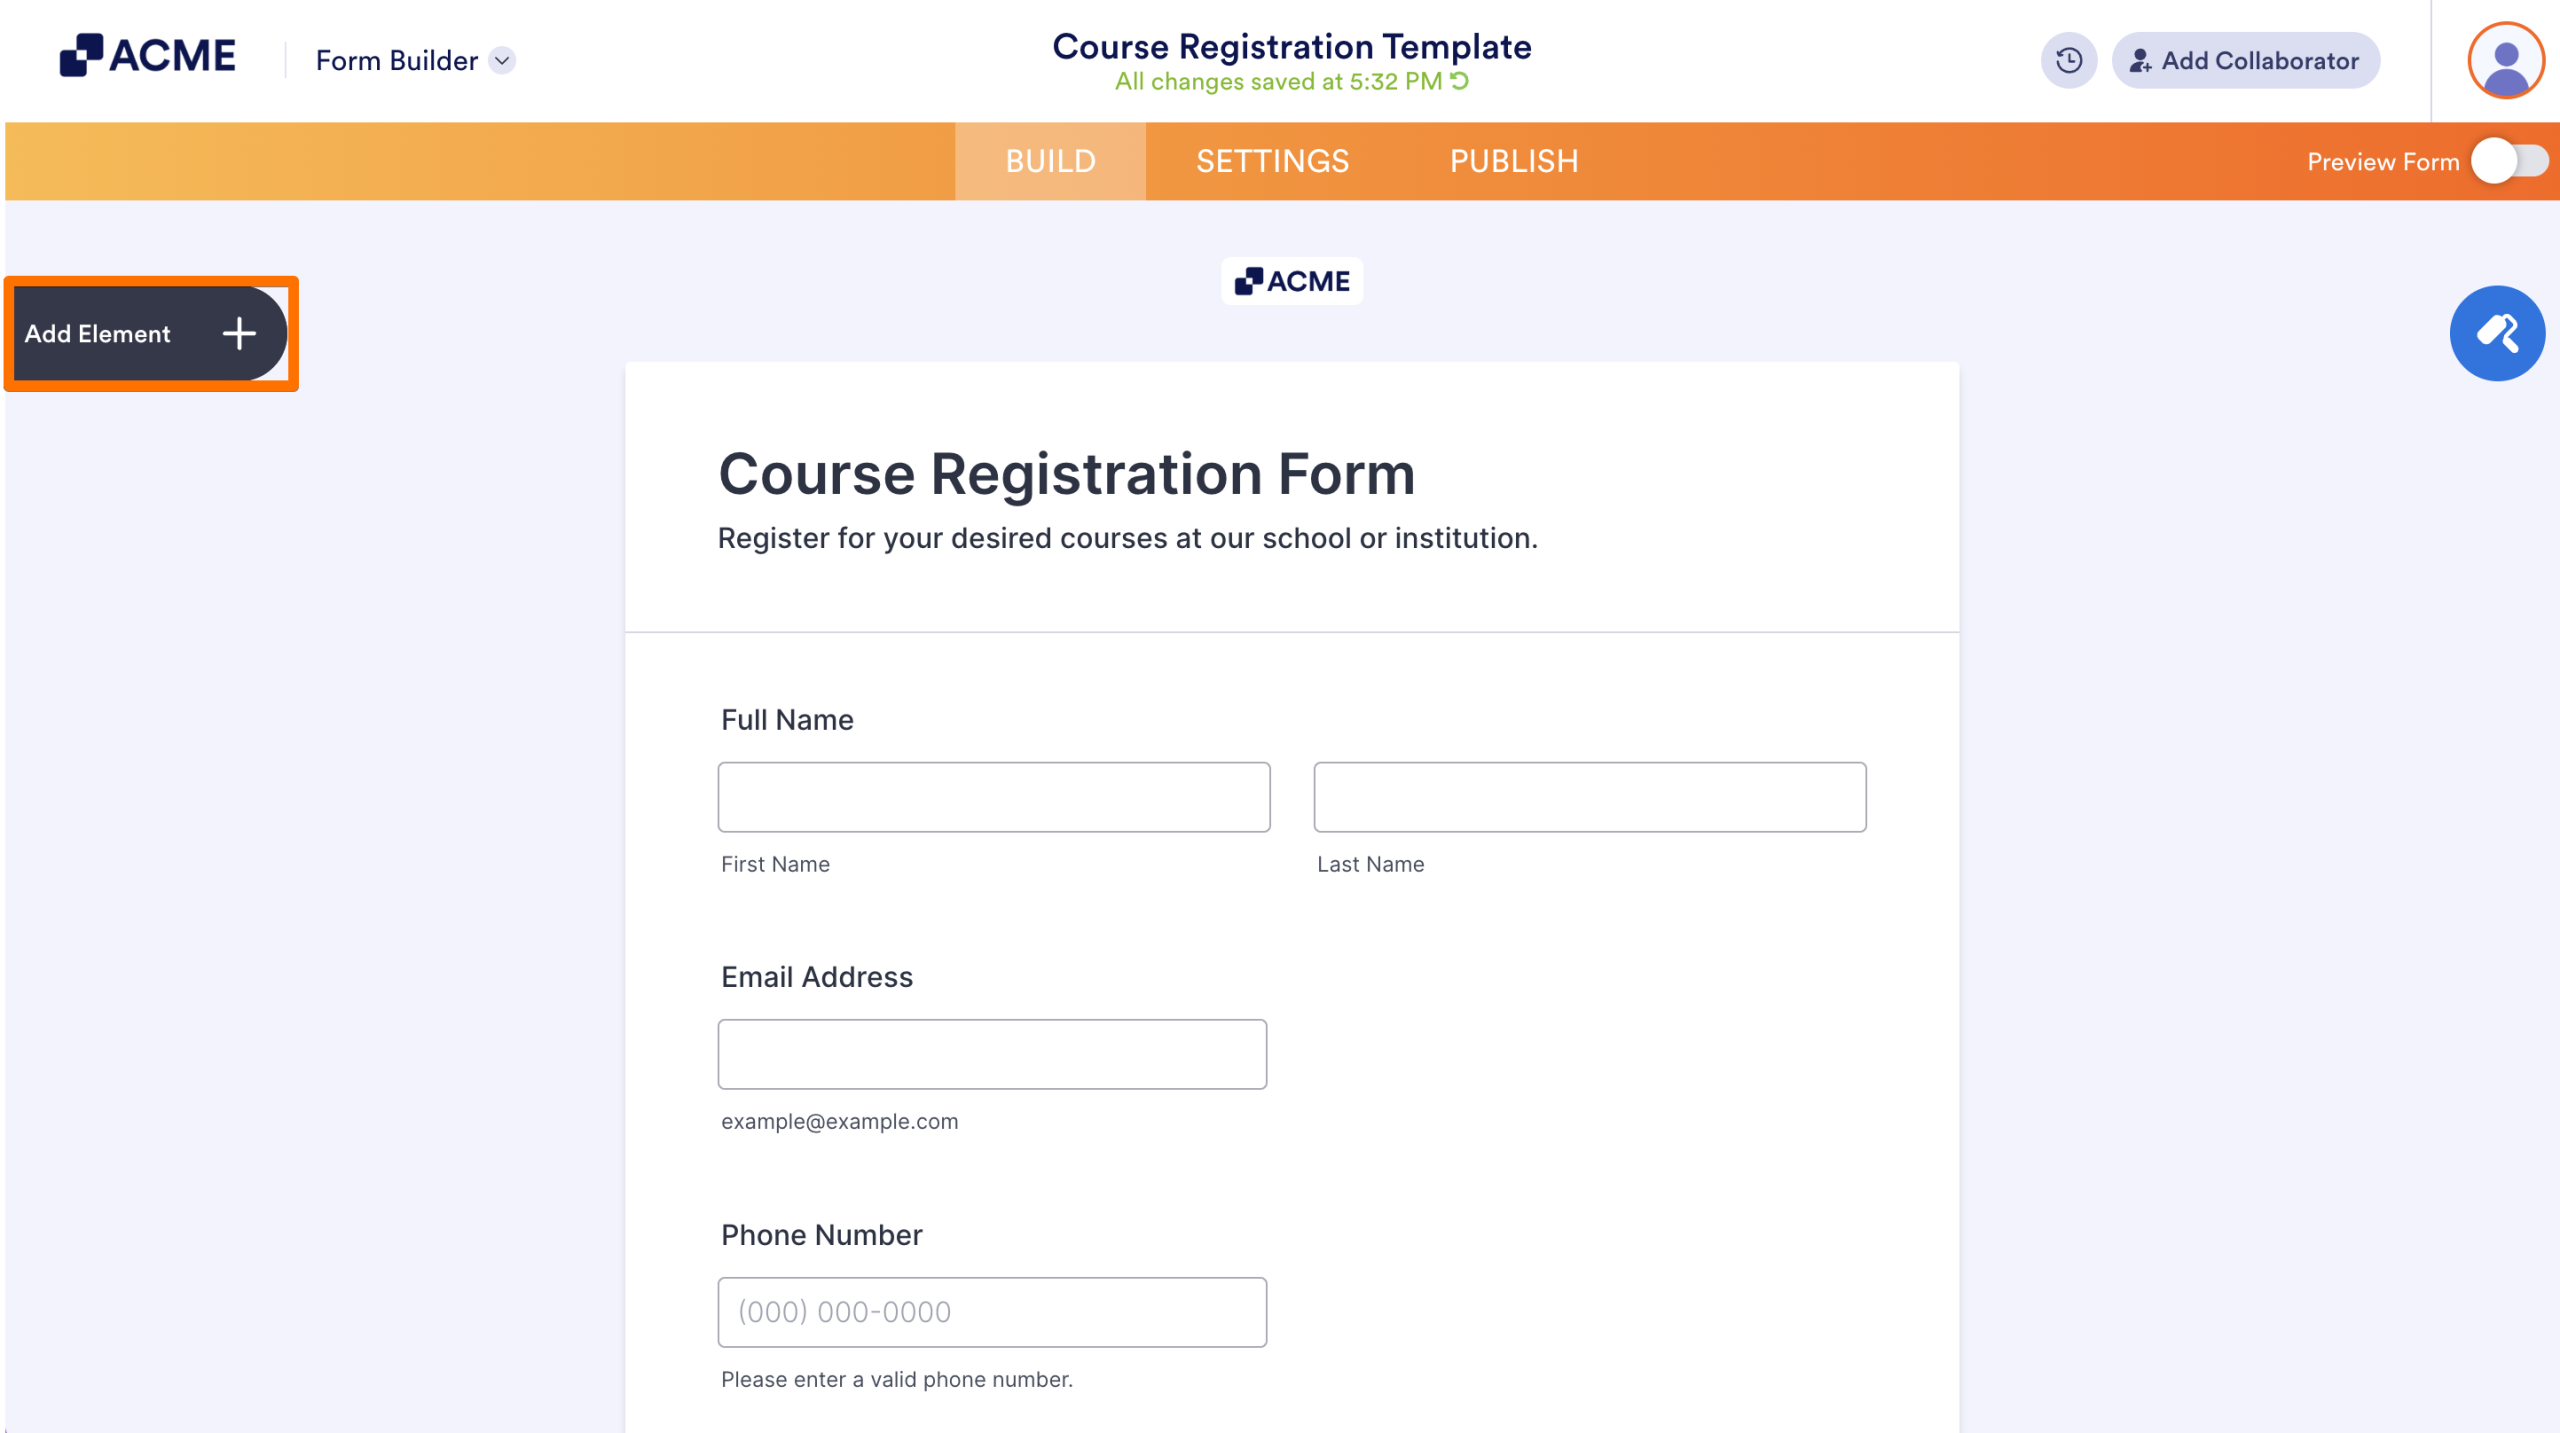
- In Form Builder, click on Add Element on the left side of the screen.
- Under the Basic tab, drag and drop or click the Time field to add it to your form.
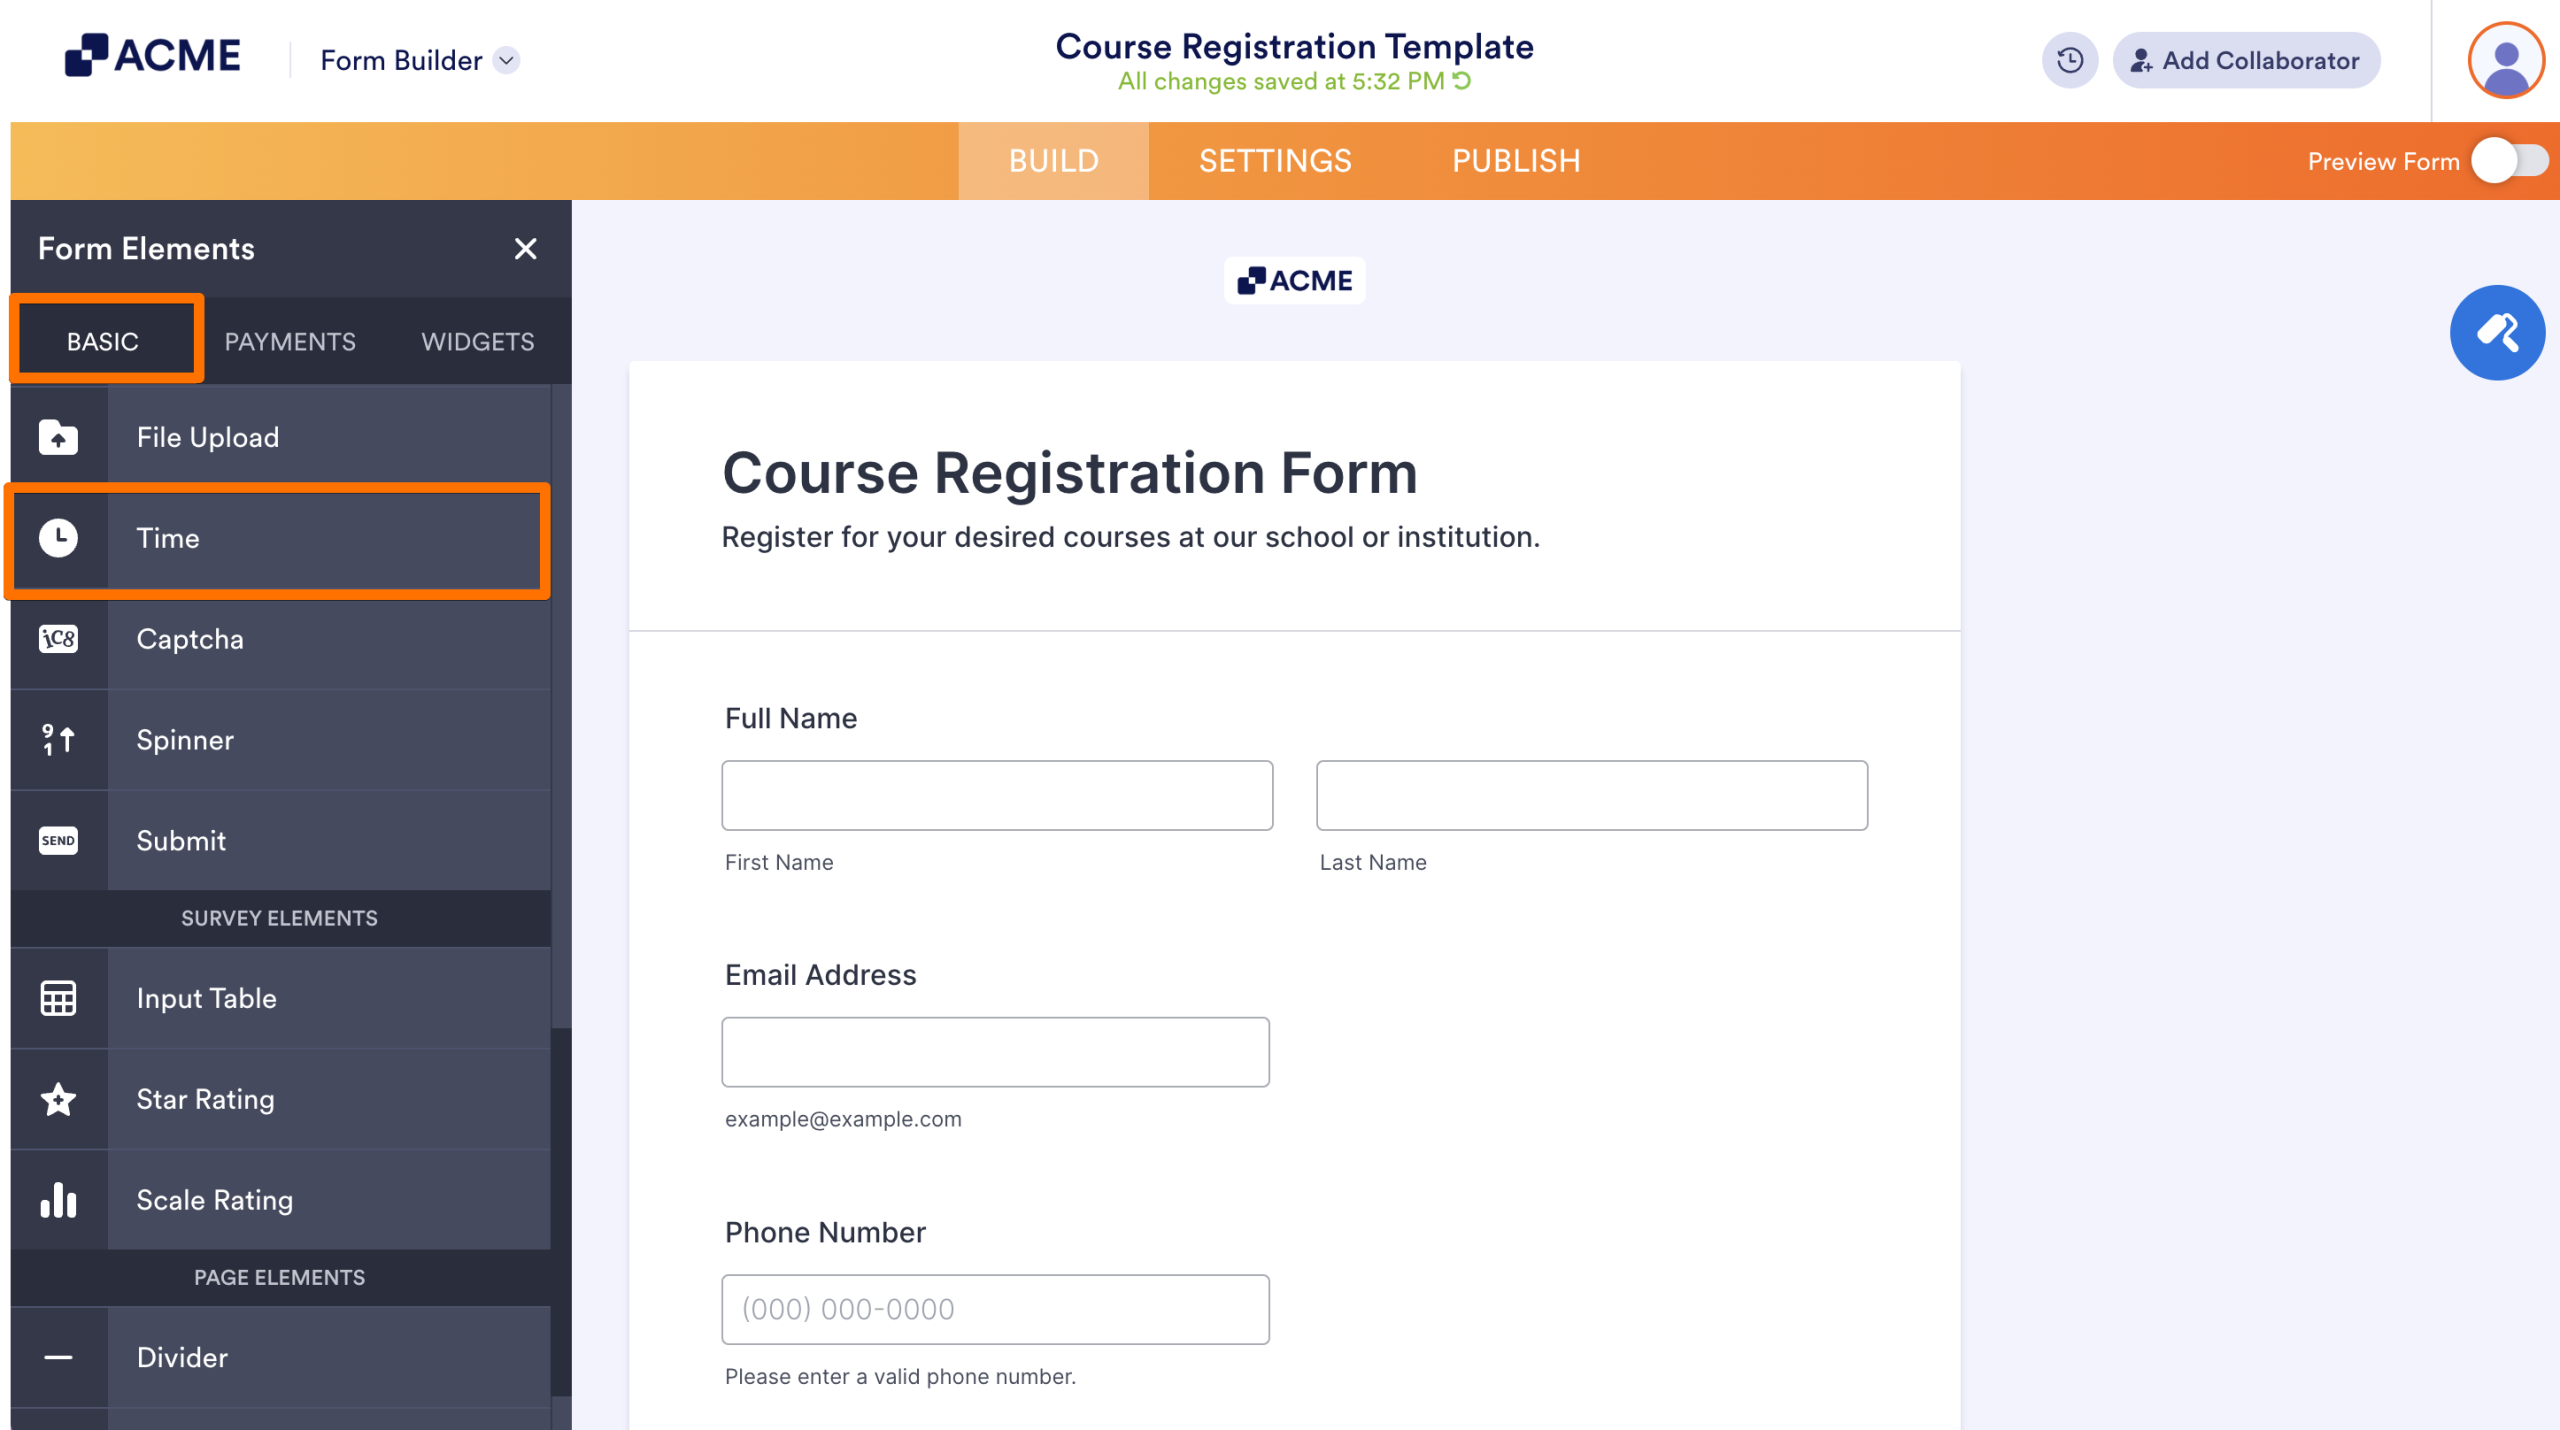
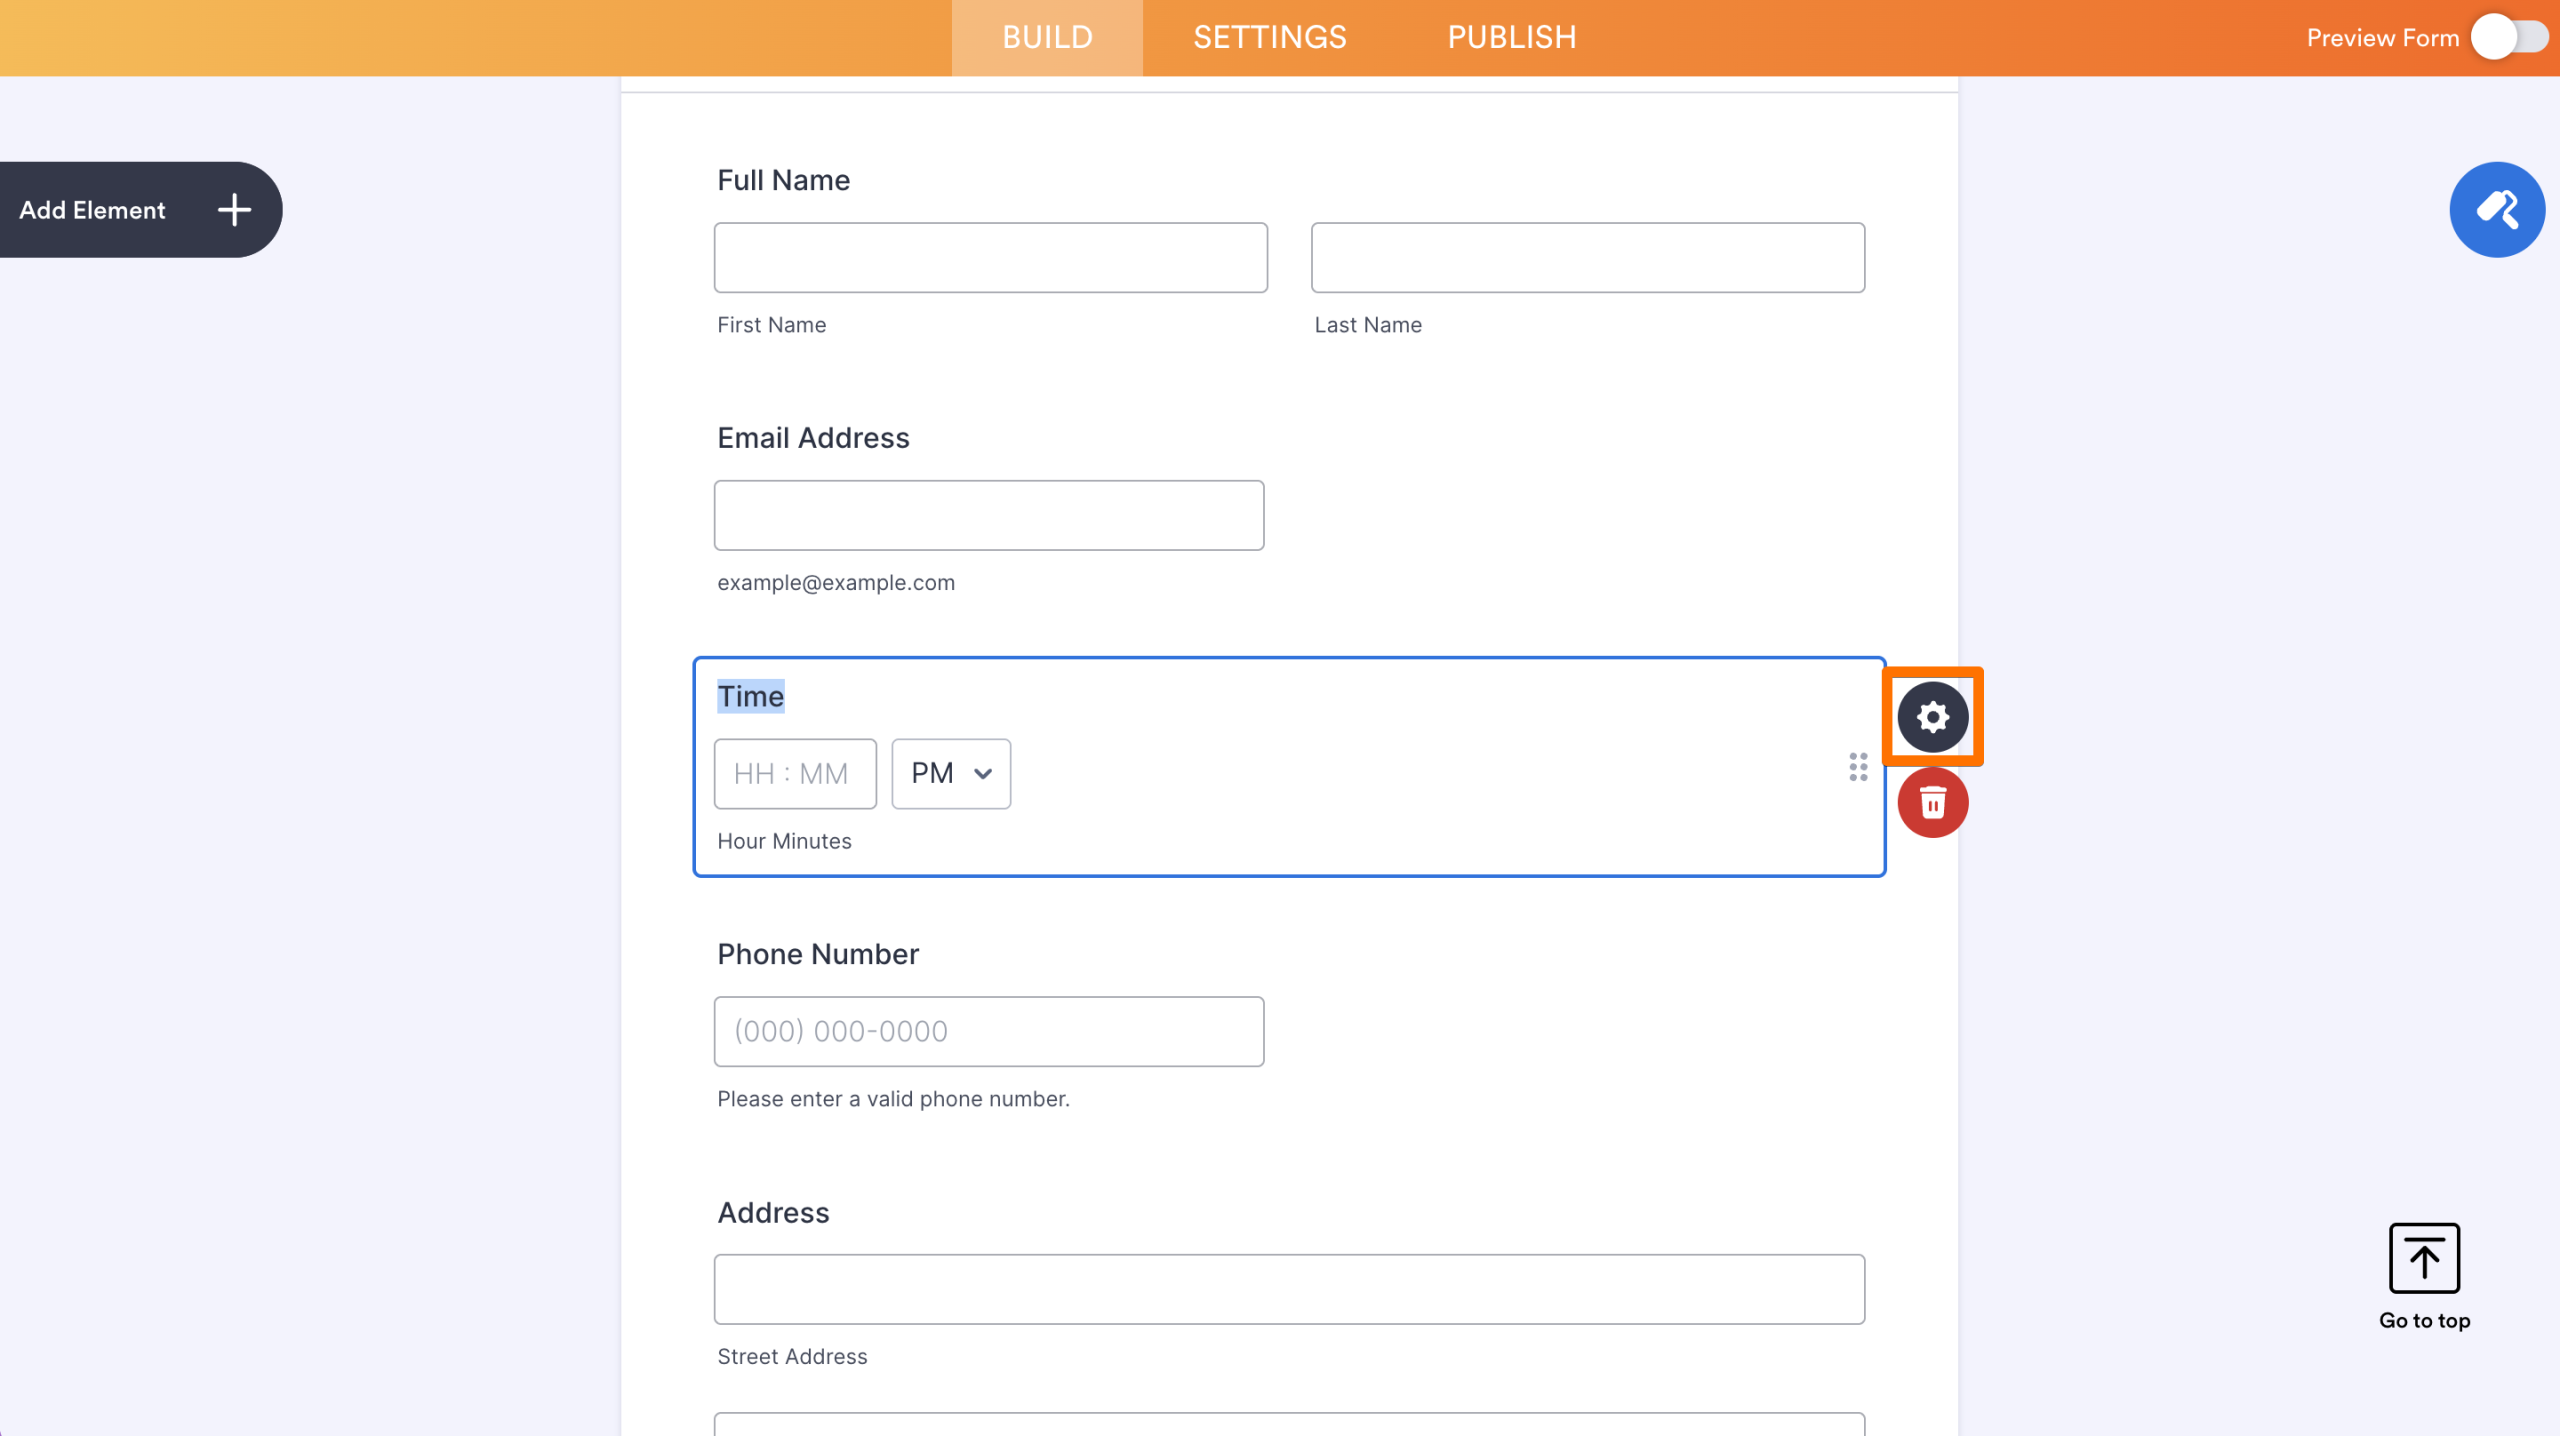
- Then, click on the Gear icon to open the Time properties.

Setting up the Time Field Properties
Clicking the gear icon on the right side of the Time field opens its properties. There, you’ll find several tabs: General, Options, Range, and Advance.
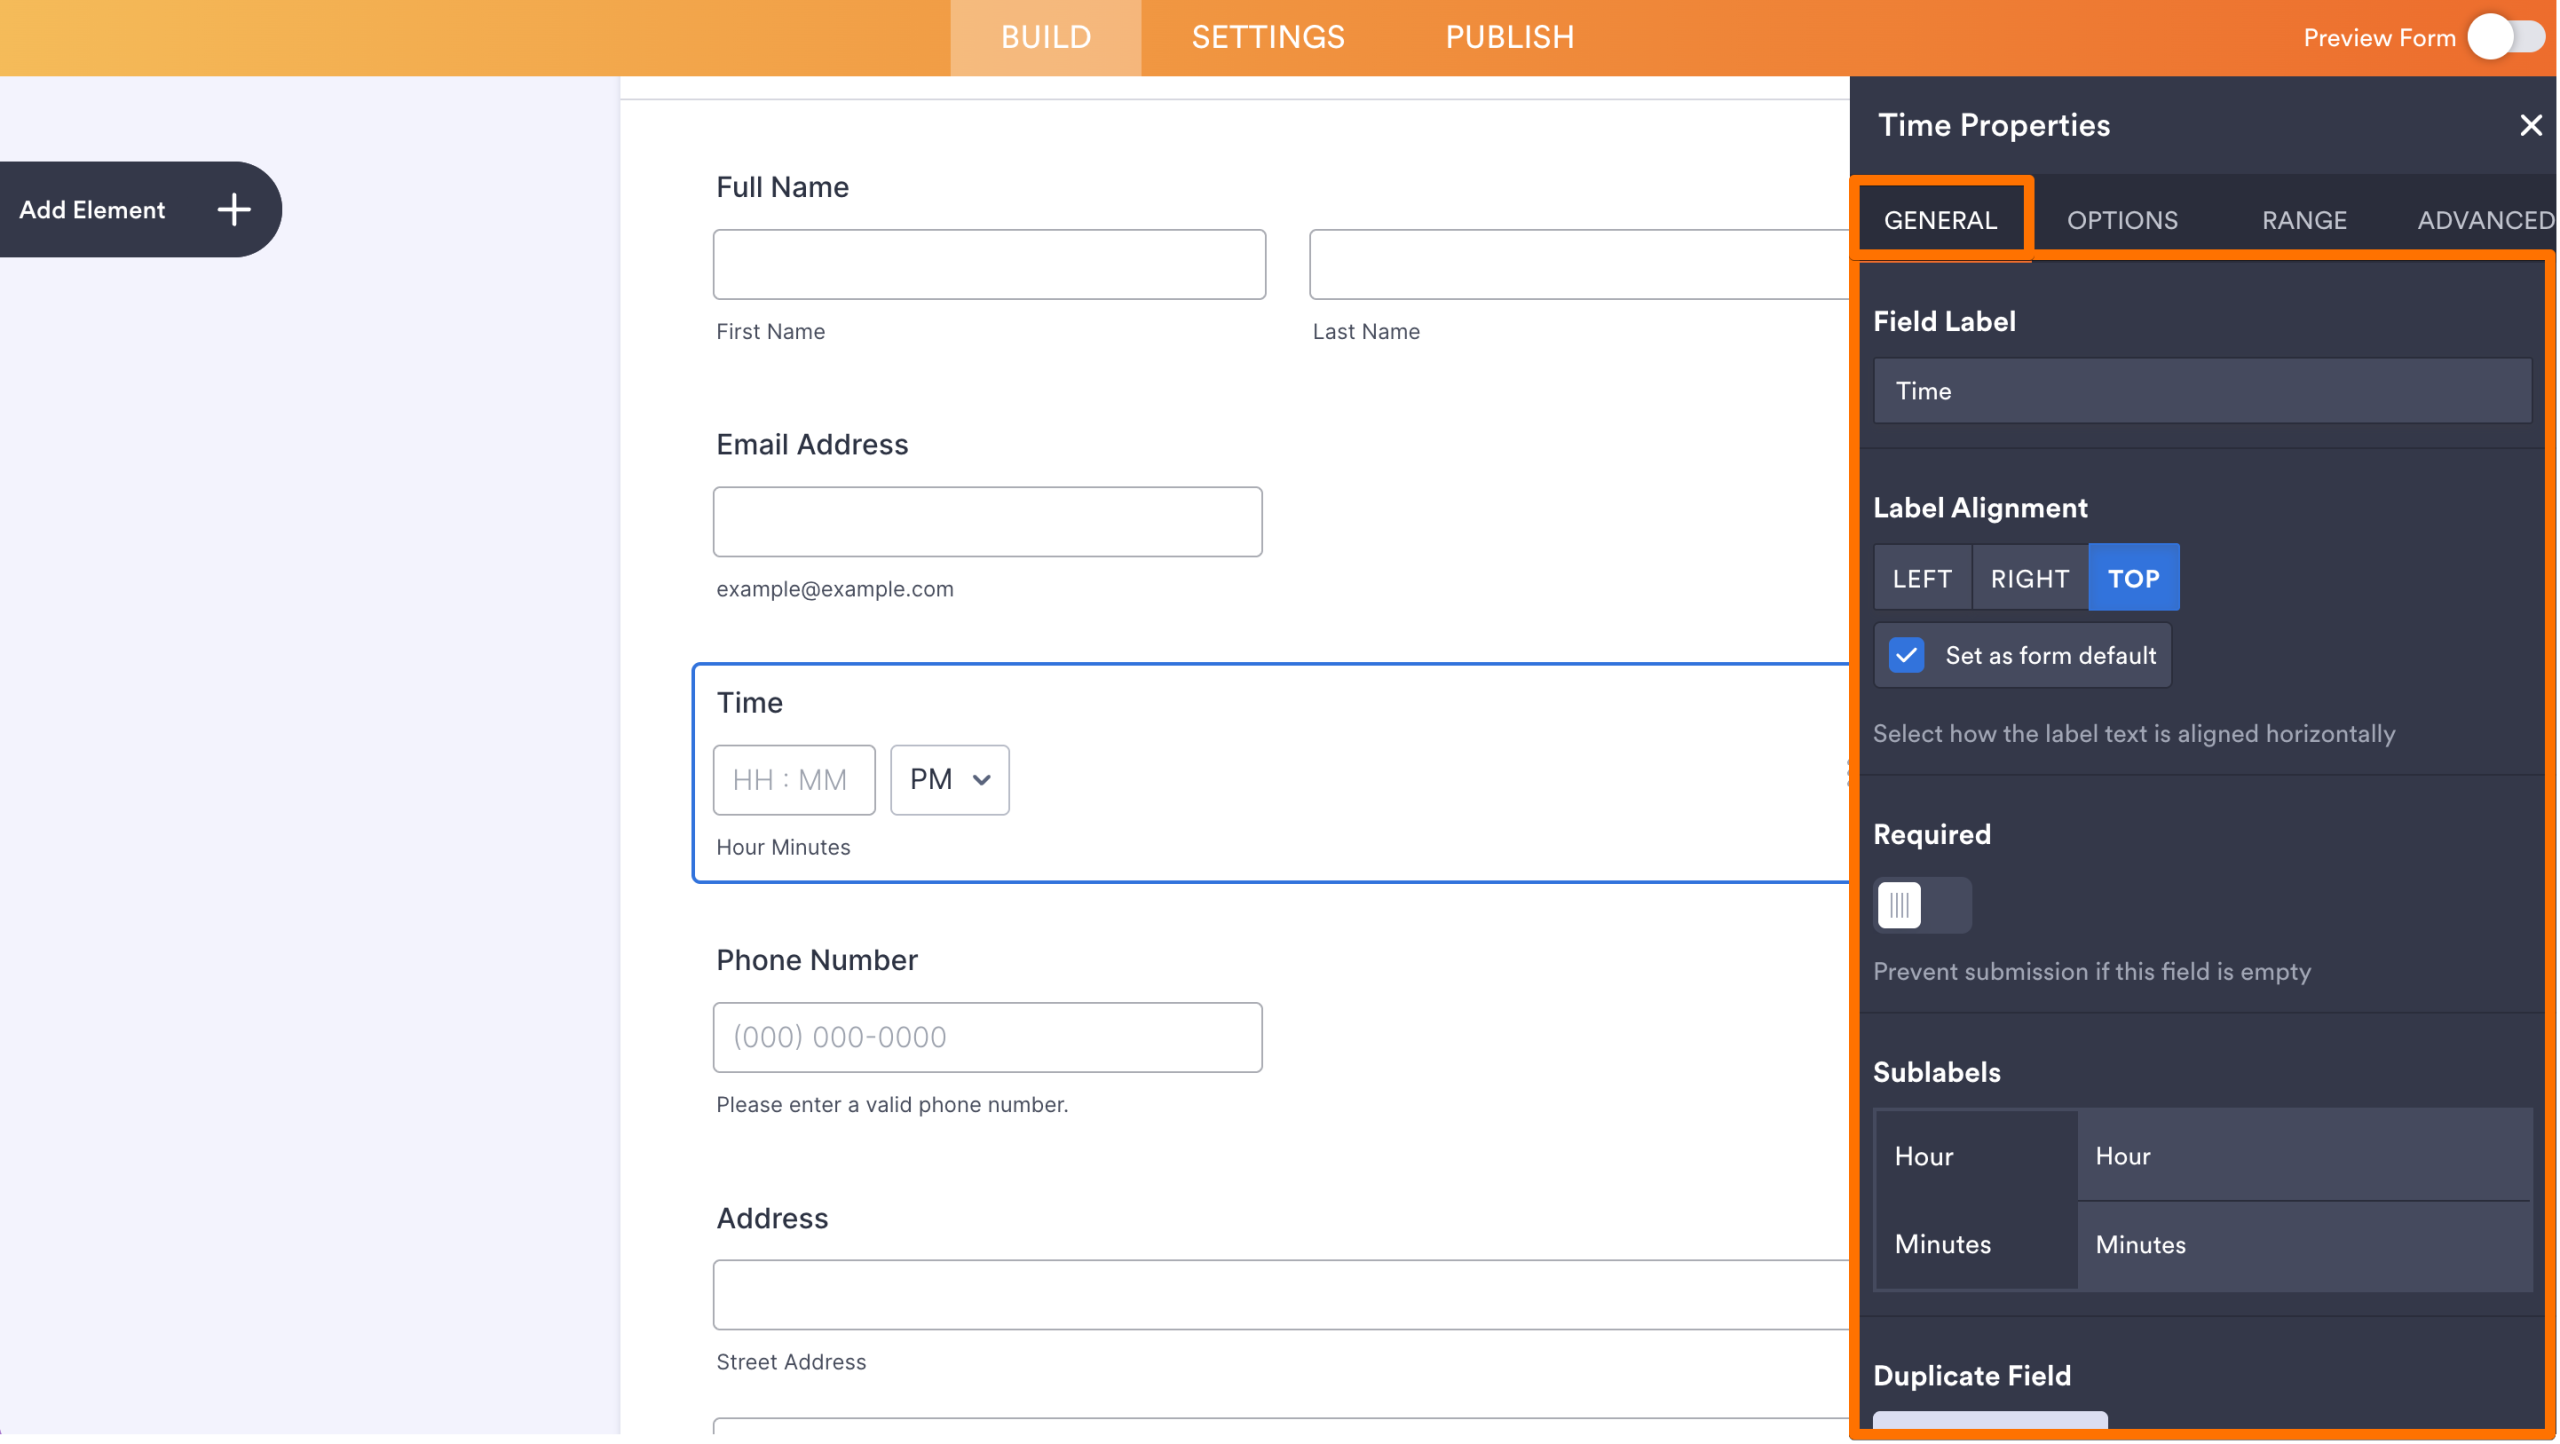
General
In the General tab, you will find the following options:
- Field Label — This will be the label of the time field.
- Label Alignment — You can align the label to the left, right, and top. Check the “Set as form default” to apply this alignment to all other fields
- Required — Toggle this to On to make the time field required.
- Sublabels — Change the sublabels or remove them.
- Duplicate Field — Click the Duplicate button to duplicate the field with all its settings.
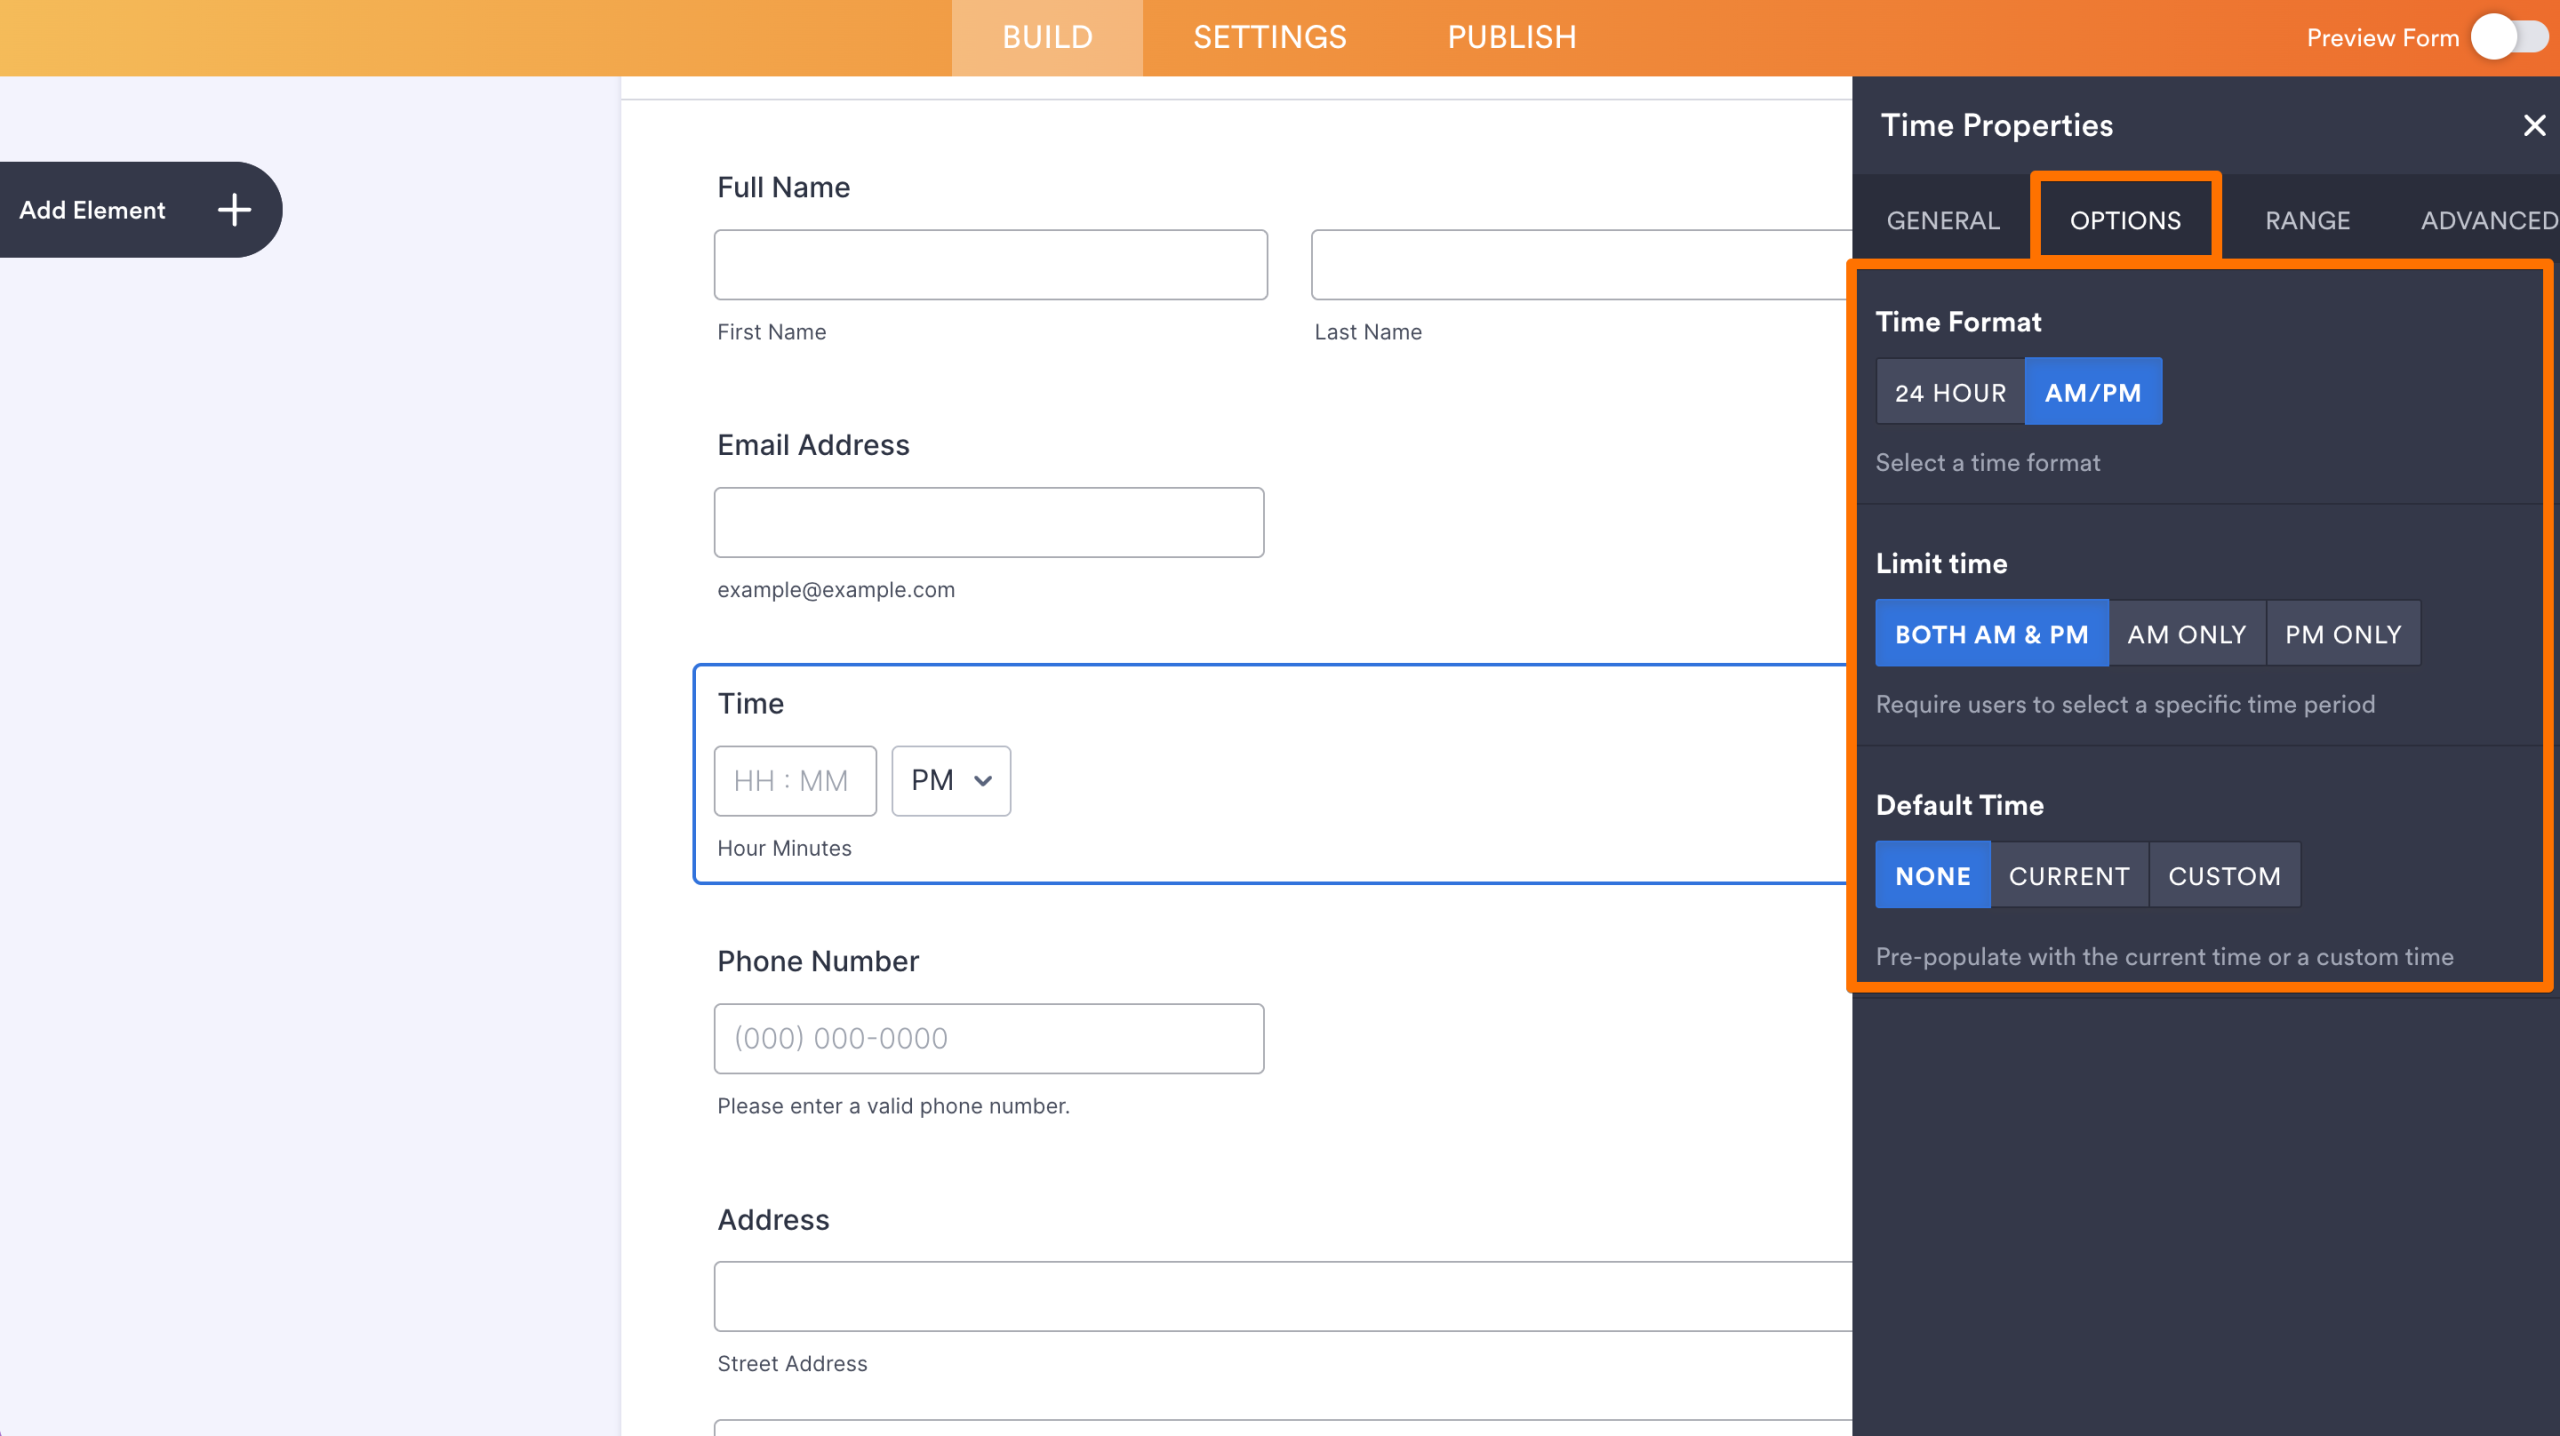
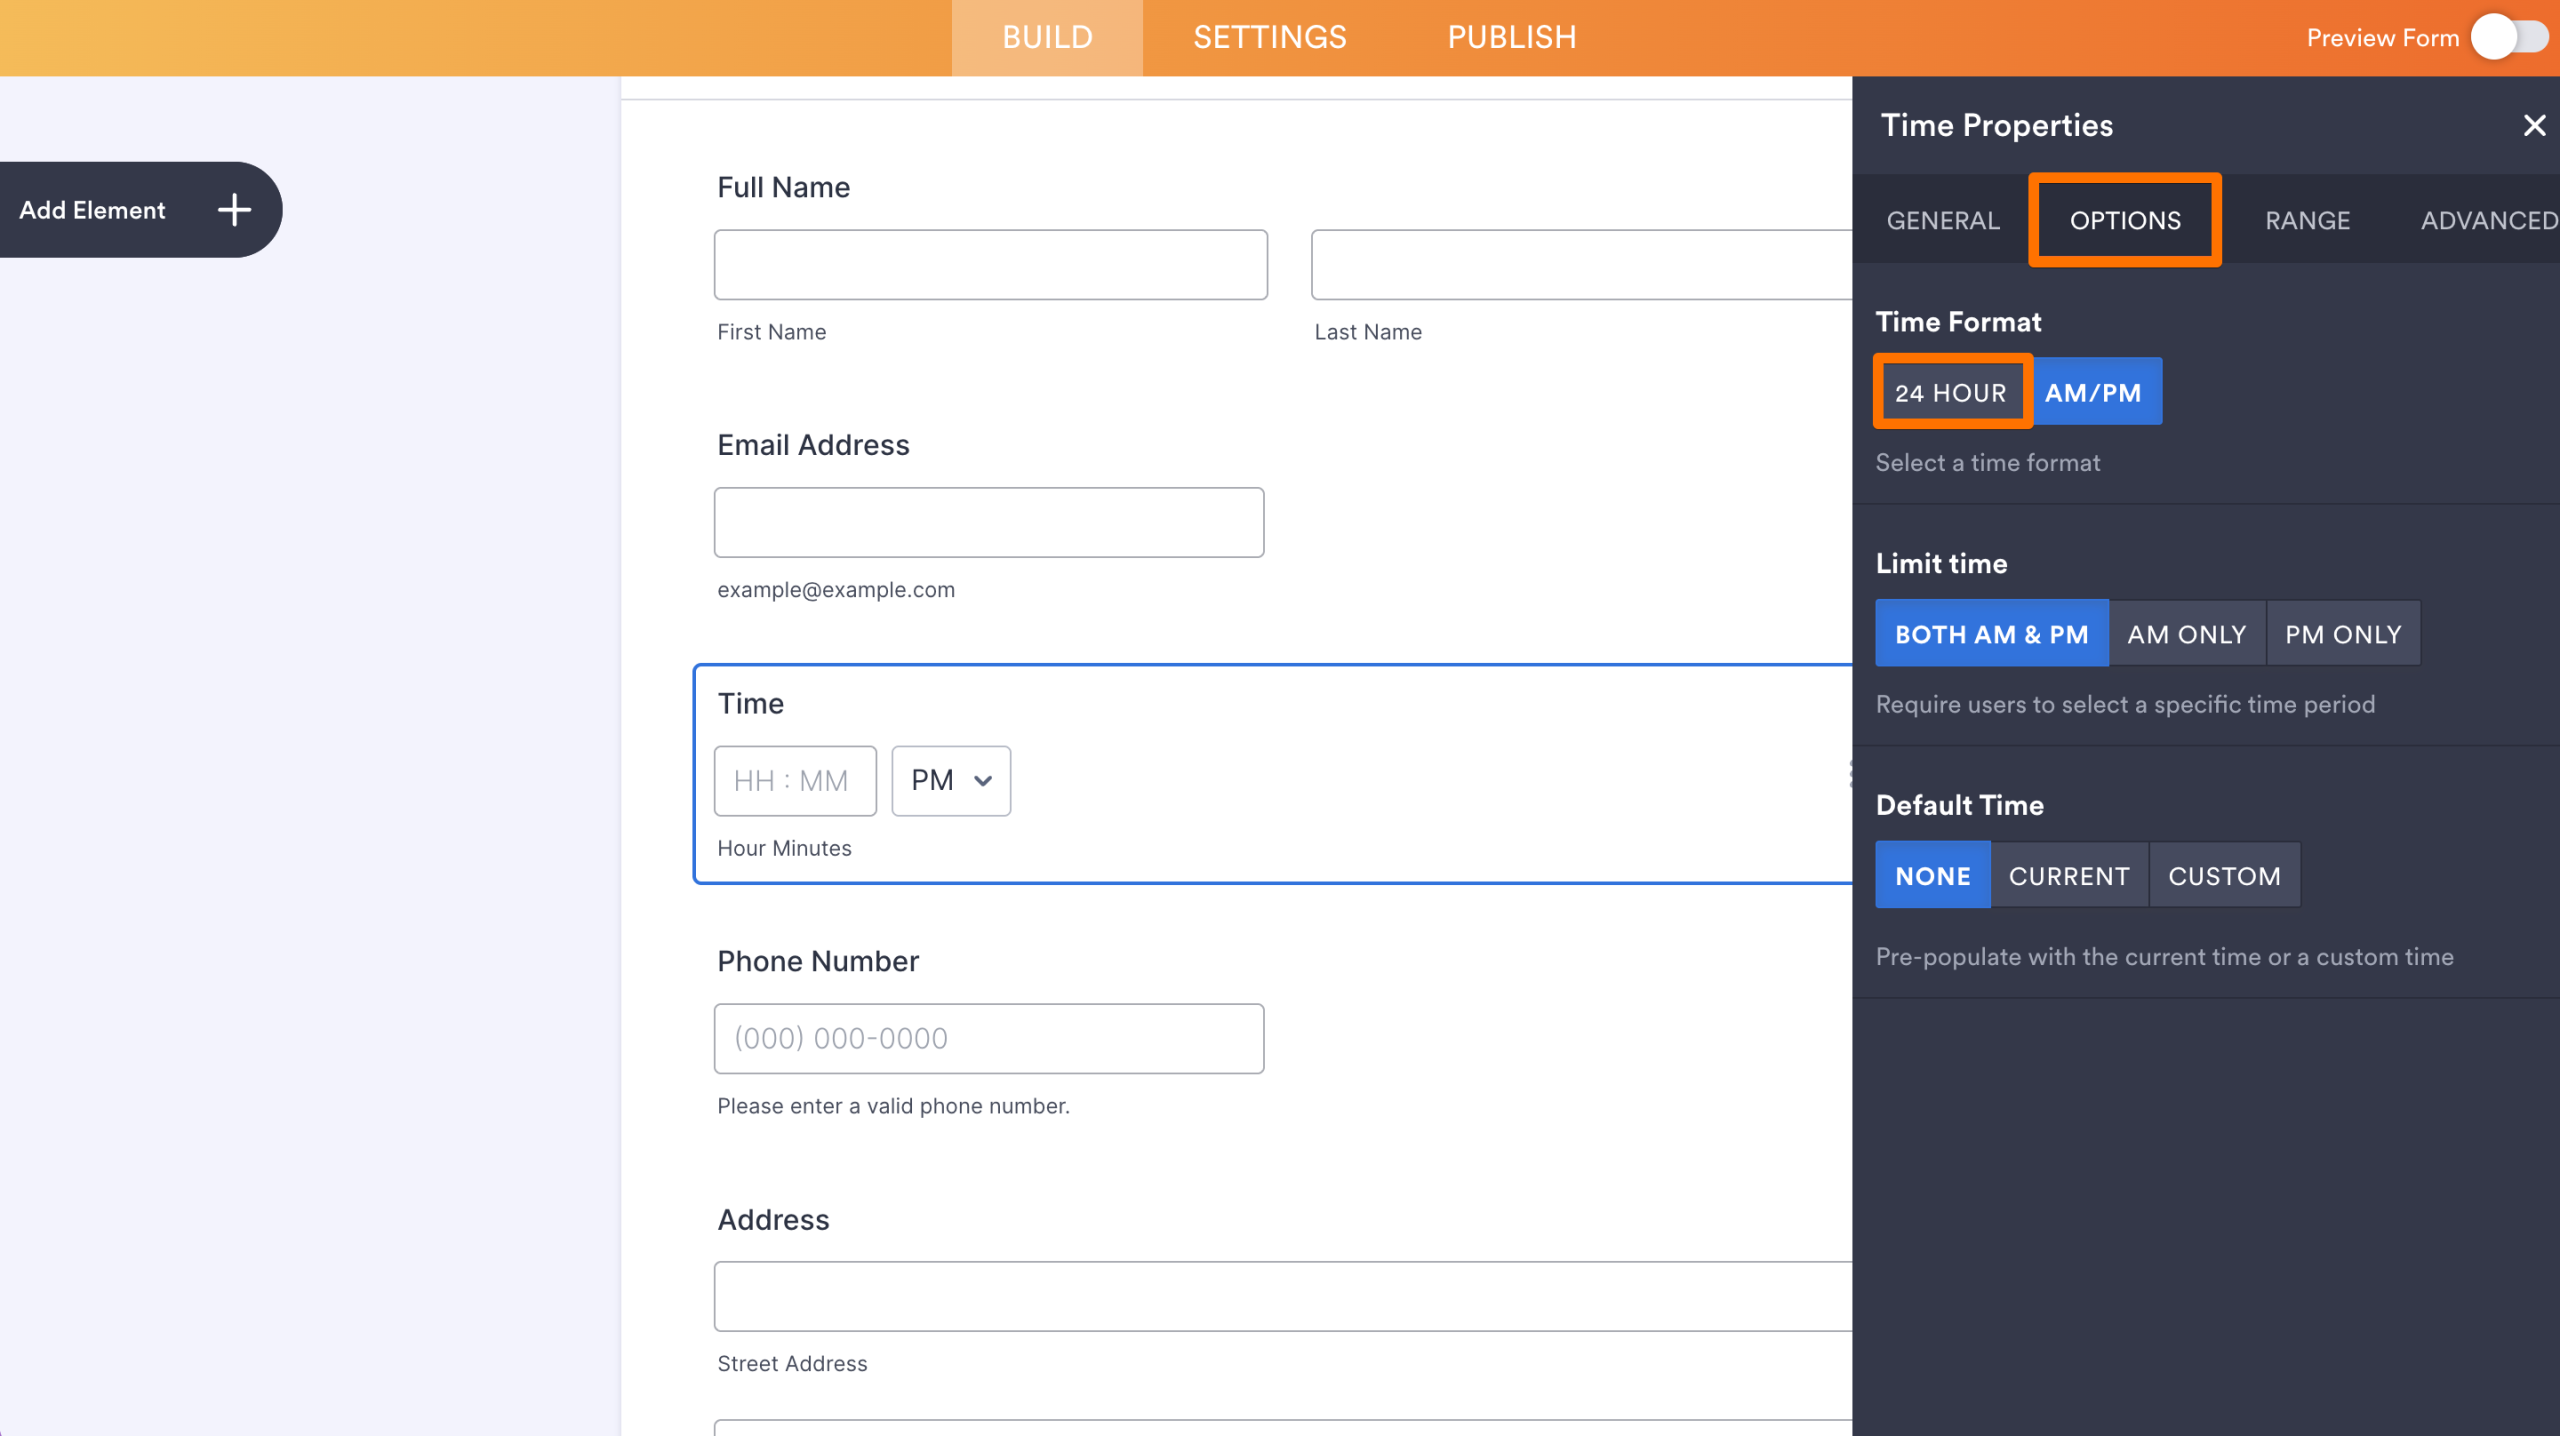
Options
In the Options tab, you can set the following:
- Time Format — You can select a 24-hour or AM/PM format.
- Limit Time — You can restrict users to select hours from AM or PM periods.
- Default Time — You can select to display the Current time or set a Custom time. The Current time option fills the form with the time the user opens the form. Enabling or Disabling the form based on time is one use-case for selecting the Current time.
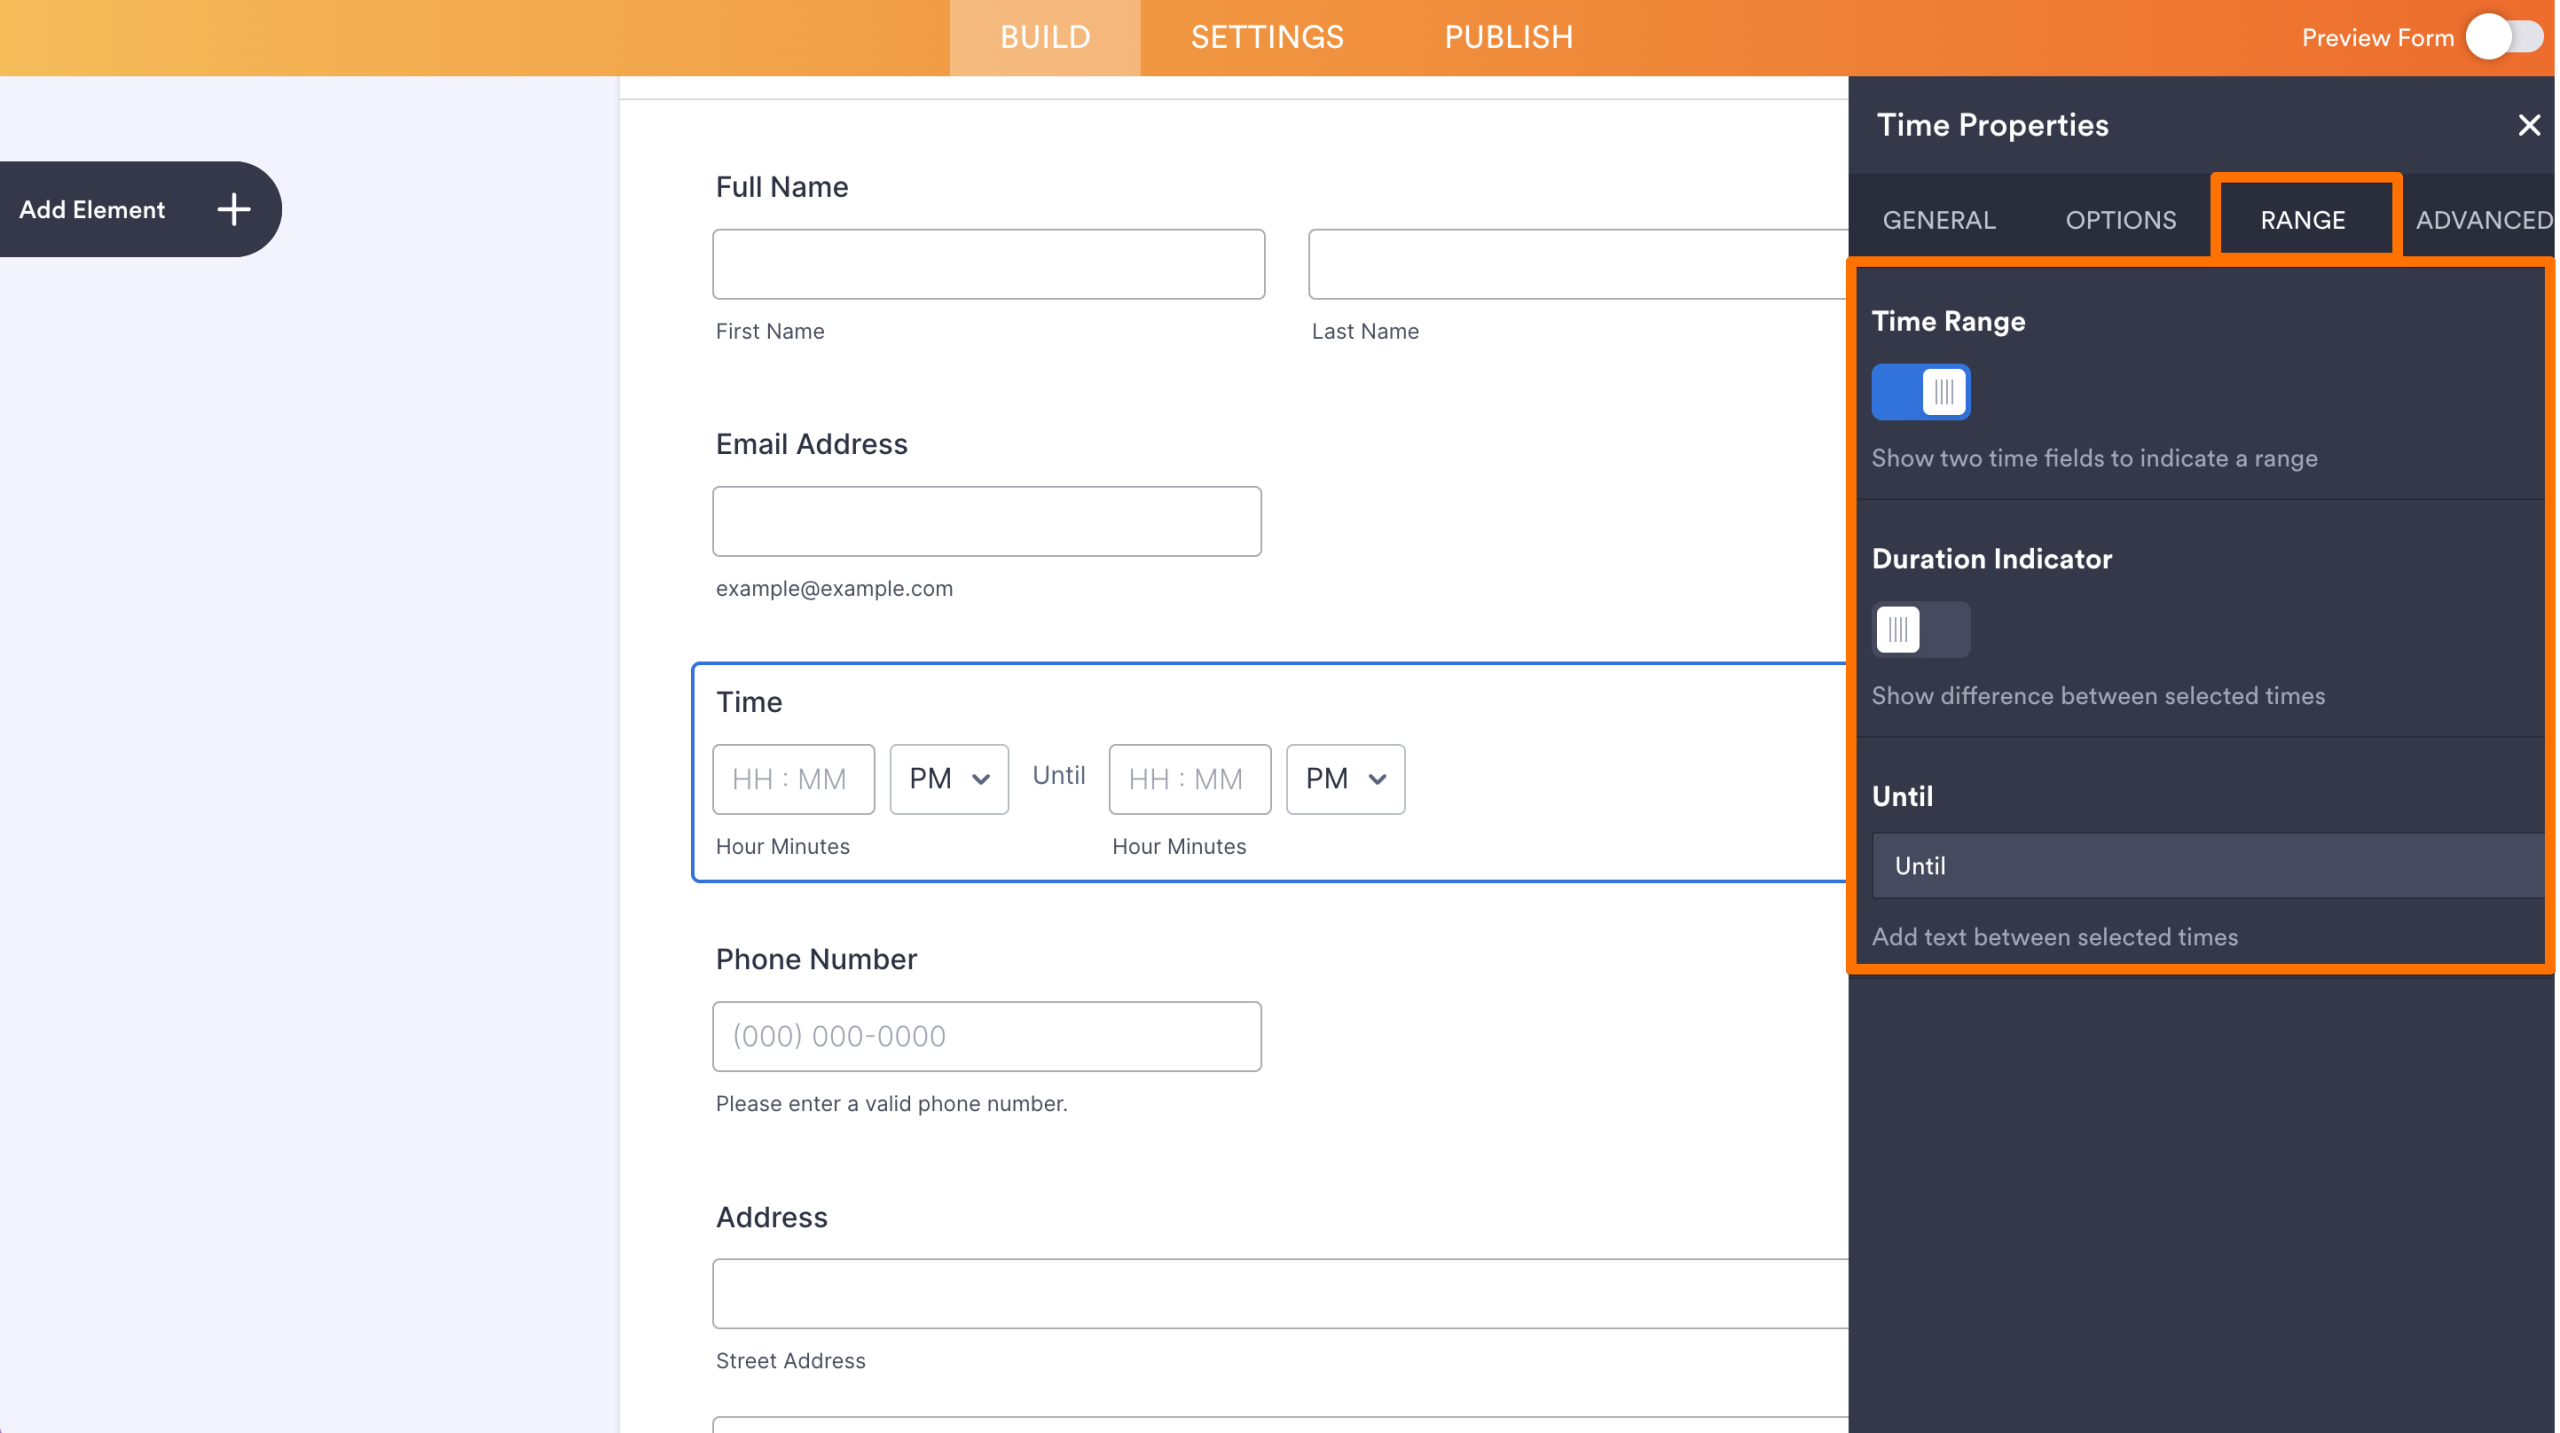
Range
The options from the Range tab are all disabled by default. You’ll have to toggle the first option to display the others.
- Time Range — Enabling this option will display two time fields to indicate a range.
- Duration Indicator — Toggle this to show the difference between the selected times from the range.
- Until — This is the separator text between the time range.
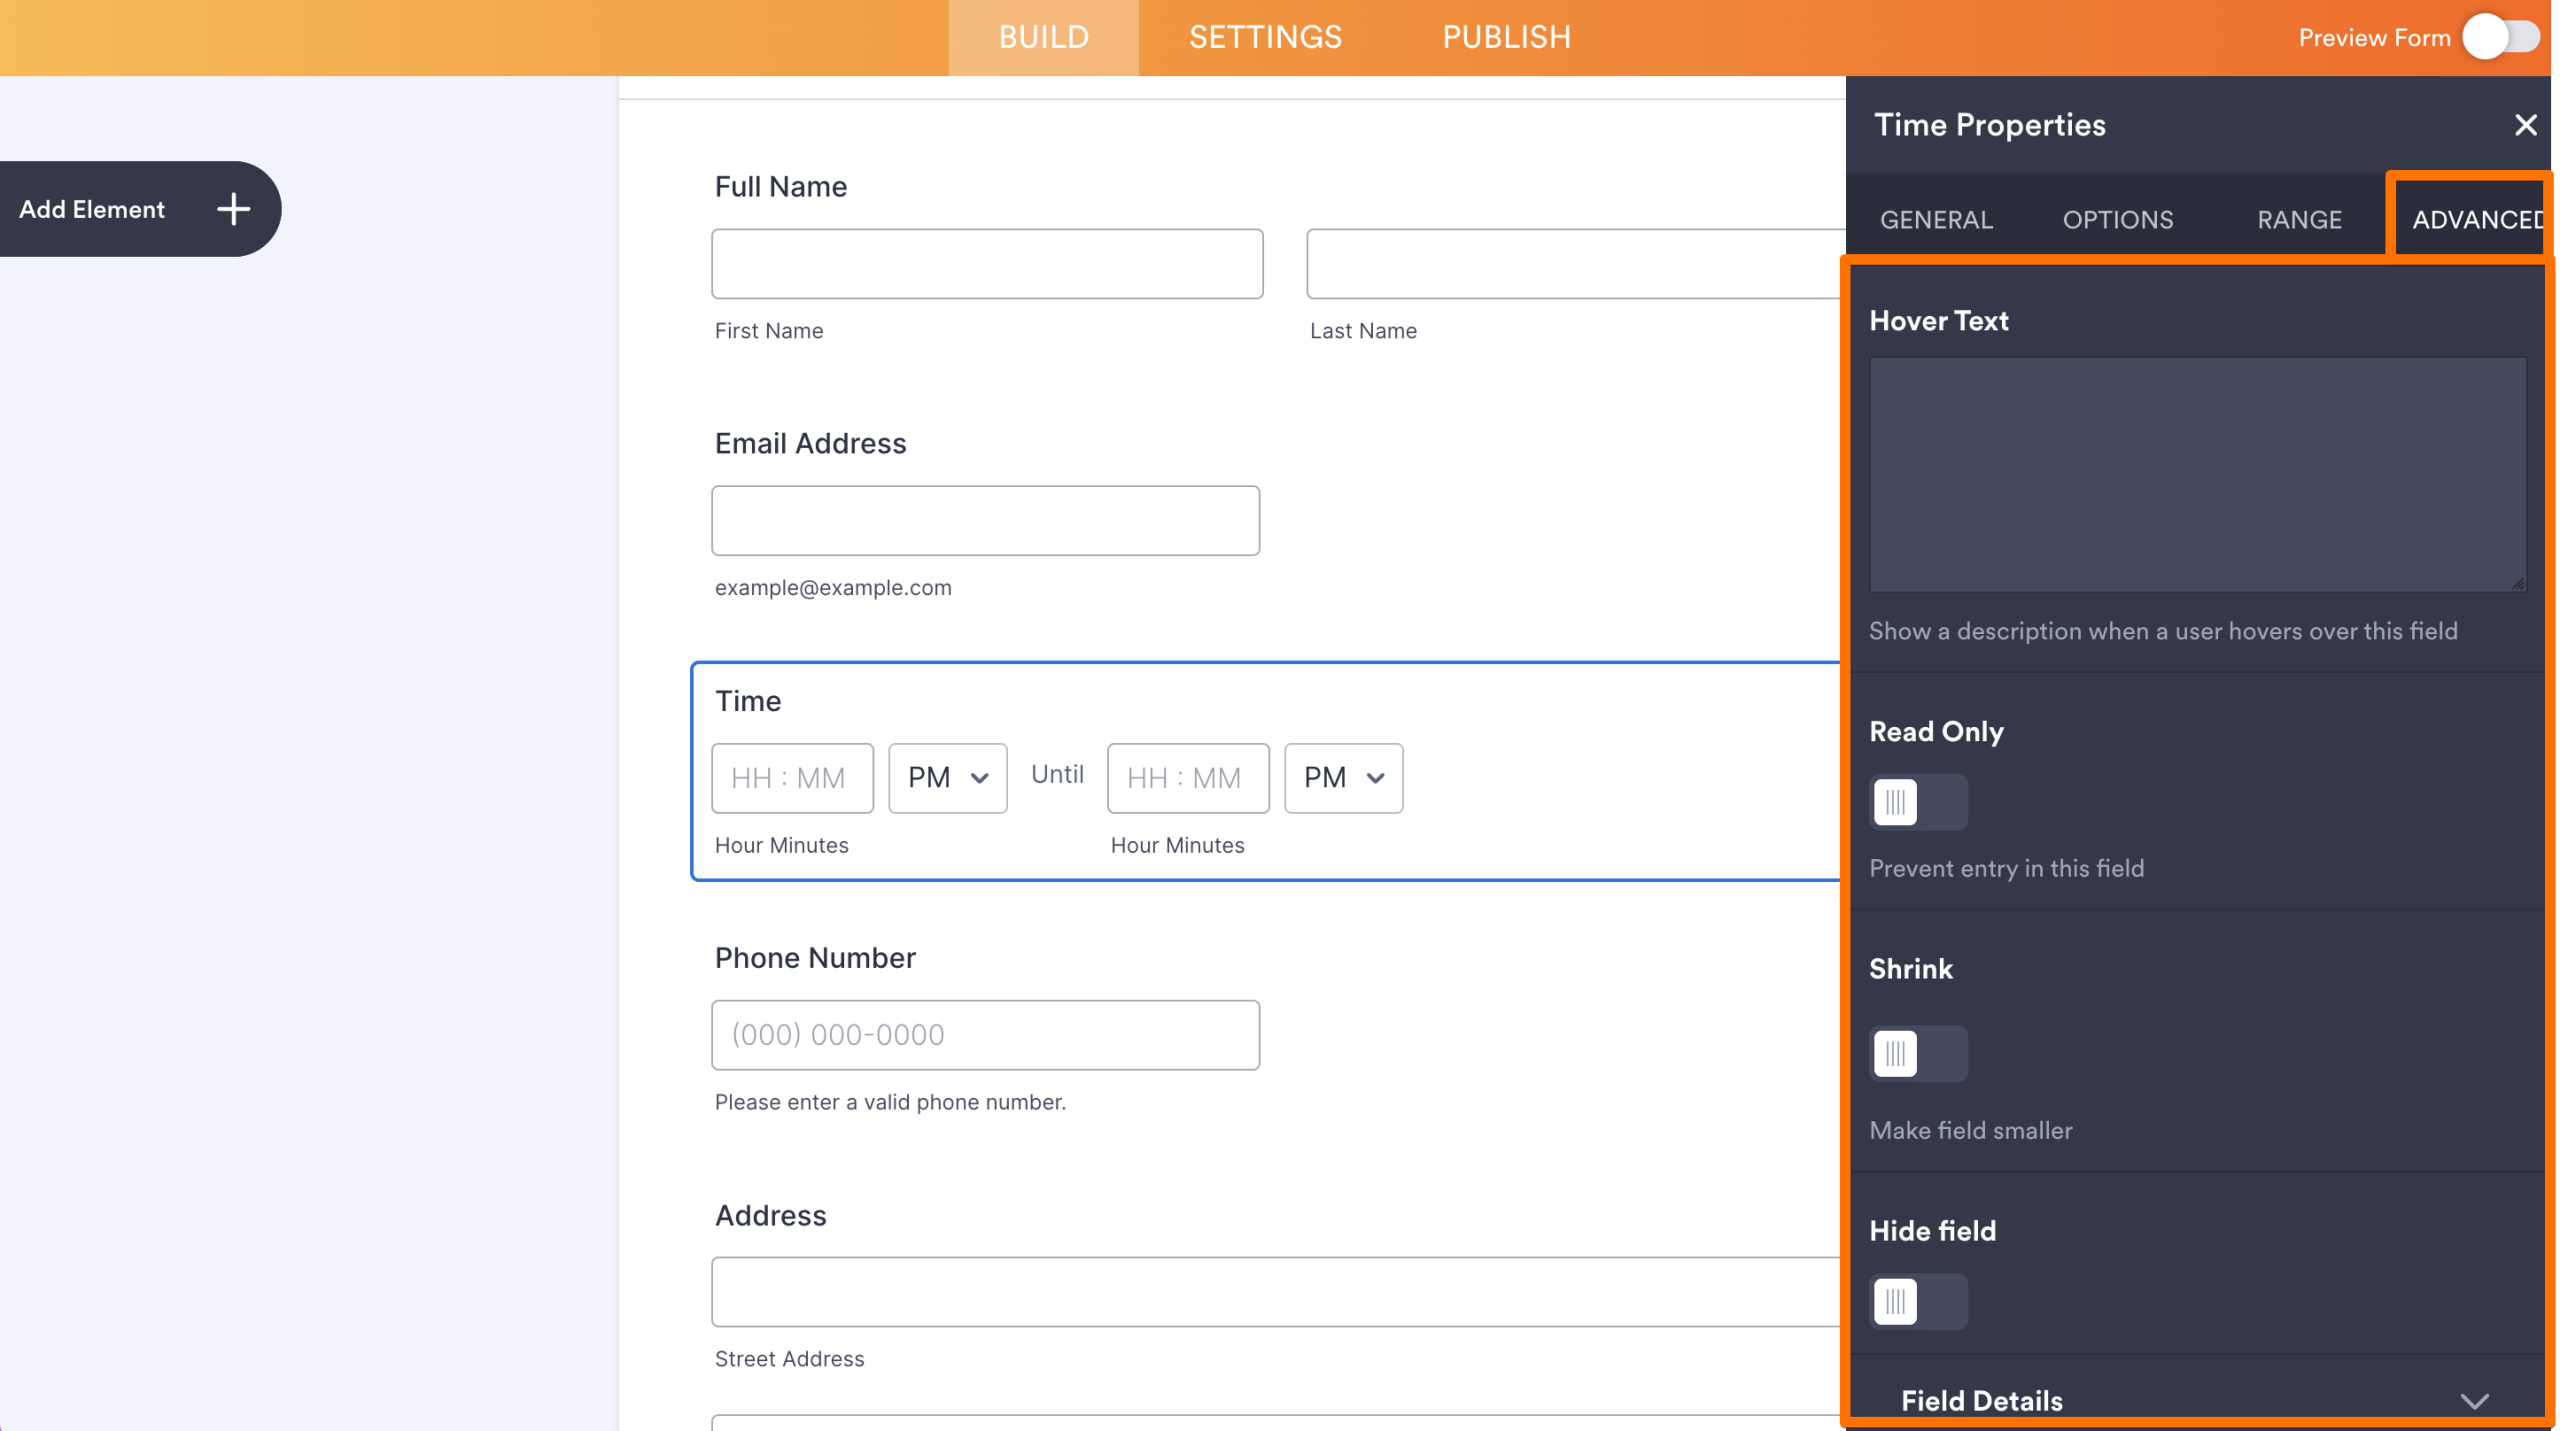
Advanced
The Advanced tab is where you can set the following:
- Hover Text — Use this to display information when you hover your mouse to the field.
- Read Only — This makes the field non-editable when you view the form.
- Shrink — This shrink down the field. It’s useful for aligning two elements in one row.
- Hide Field — Toggle this to hide the field from your form.
- Field Details — This is where you’ll find the Unique Name and IDs of the field. For more information, see How to Find Field IDs and Unique Names.
Removing the AM/PM Option From the Time Field
Removing the AM/PM option from the Time field is possible if you want a military time format. Here’s how:
- Open the Time Properties by clicking the Gear icon on the Time field.
- Go to the Options tab.
- Click 24 Hour from the Time Format section, and that’s it.

Send Comment: