The Jotform’s Visitor Counter widget makes it easy to display visitor statistics on your website. You can customize how visitor data is tracked and displayed, helping you showcase site activity and engagement to your visitors.
The widget offers several customization options, including different layouts, visitor metrics, display settings, and styling controls. Once you’re finished setting it up, you can copy the embed code and add the widget to your website.
Setting up your Visitor Counter widget is quick and easy, so you can start displaying visitor statistics on your website right away. Here’s how to set it up:
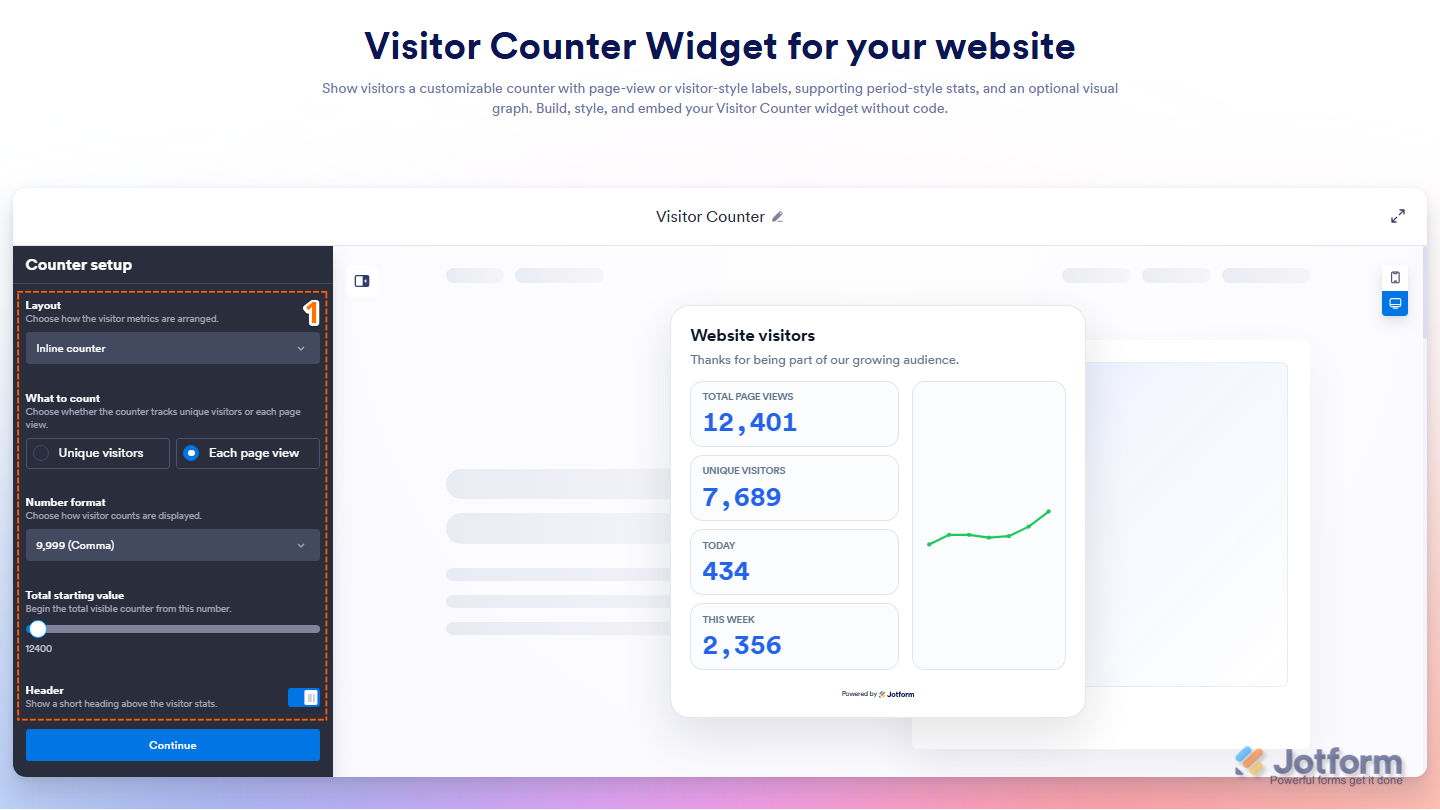
- Go to the Add Visitor Counter Widget page and in the Counter Setup menu on the left, set up these things:
- Layout — Choose how the visitor metrics are displayed.
- What to Count — Select whether to track Unique Visitors or Each Page View.
- Number Format — Choose how visitor counts are displayed.
- Total Starting Value — Set the starting number displayed by the counter.
- Header — Enter a title to display above the visitor statistics. This option is toggled on by default.
- Then, scroll down to the bottom and continue to set up this thing:
- Message — Enter a description to display below the header. This option is toggled on by default.
- Now, click on Continue.

- Next, in the Metrics menu, configure these things:
- Info to Display — Choose which visitor count period will be displayed as the primary metric.
- Page Views — Show or hide the total number of page visits.
- Unique Visitors — Show or hide the number of unique visitors.
- Today — Show or hide today’s visitor count.
- This Week — Show or hide the visitor count for the current week.
- Graph — Show or hide the activity graph.
- Then, click on Continue.

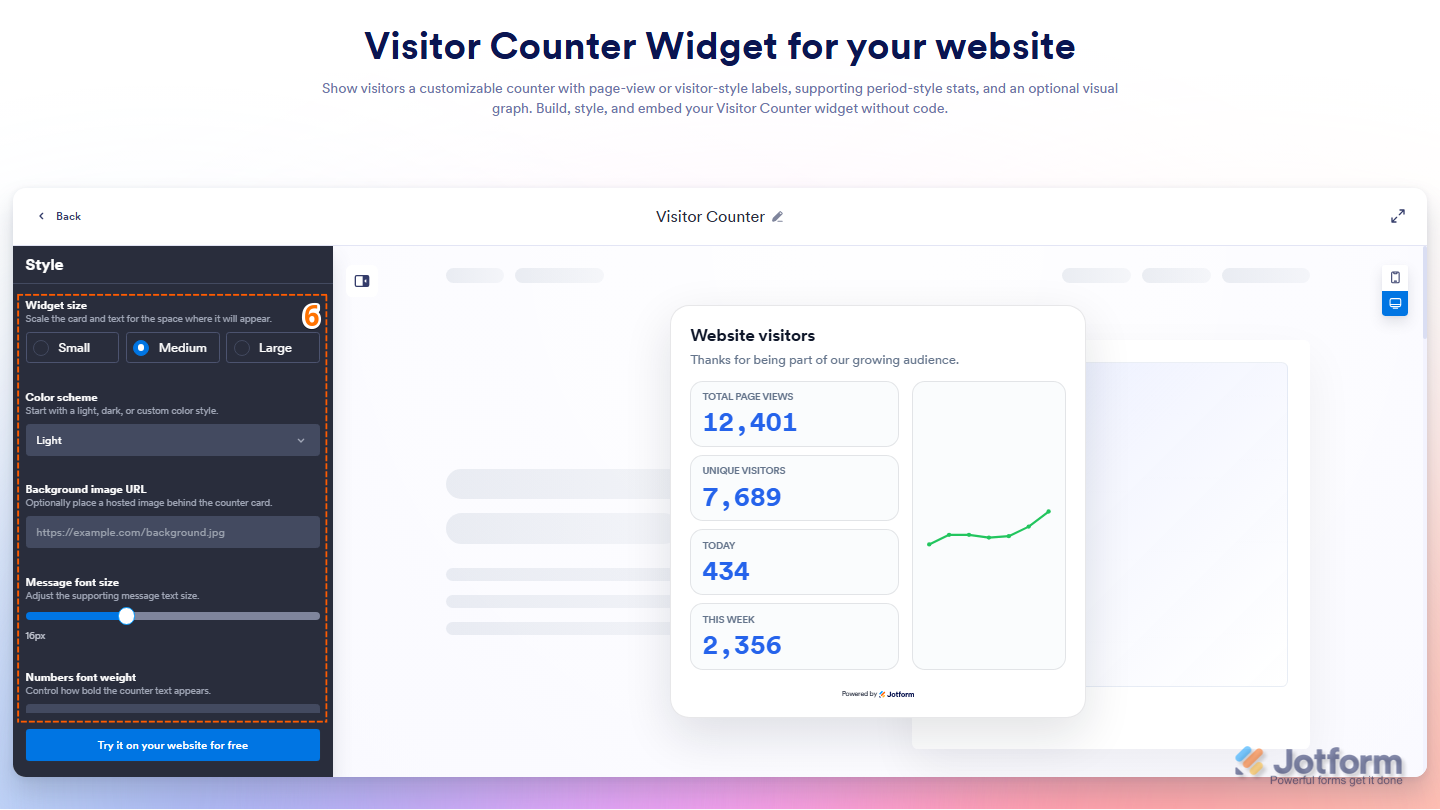
- Next, in the Style menu, customize the appearance of your Visitor Counter widget using the following options:
- Widget Size — Choose between Small, Medium, or Large to control the overall size of the widget.
- Color Scheme — Select a predefined color theme for the widget.
- Background Image URL — Enter the URL of an image to display as the widget background.
- Message Font Size — Adjust the size of the supporting message text.
- Numbers Font Weight — Choose how bold the visitor count numbers appear.
- Then, scroll down to the bottom and continue to set up this thing:
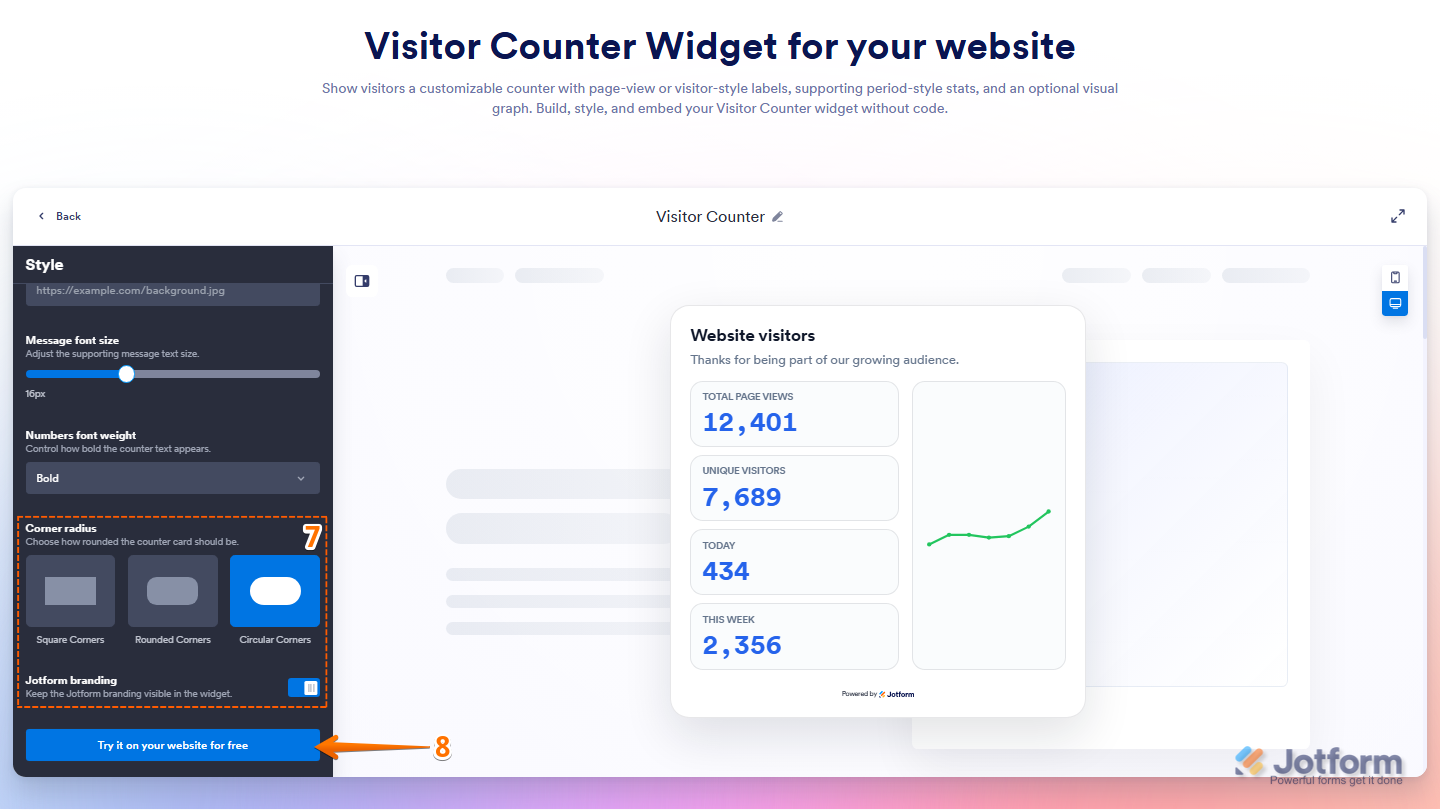
- Corner Radius — Select between Square, rounded, or circular corners for the widget cards.
- Jotform Branding — Show or hide Jotform branding within the widget.
- Once everything’s set, click on Try it on Your Website for Free.
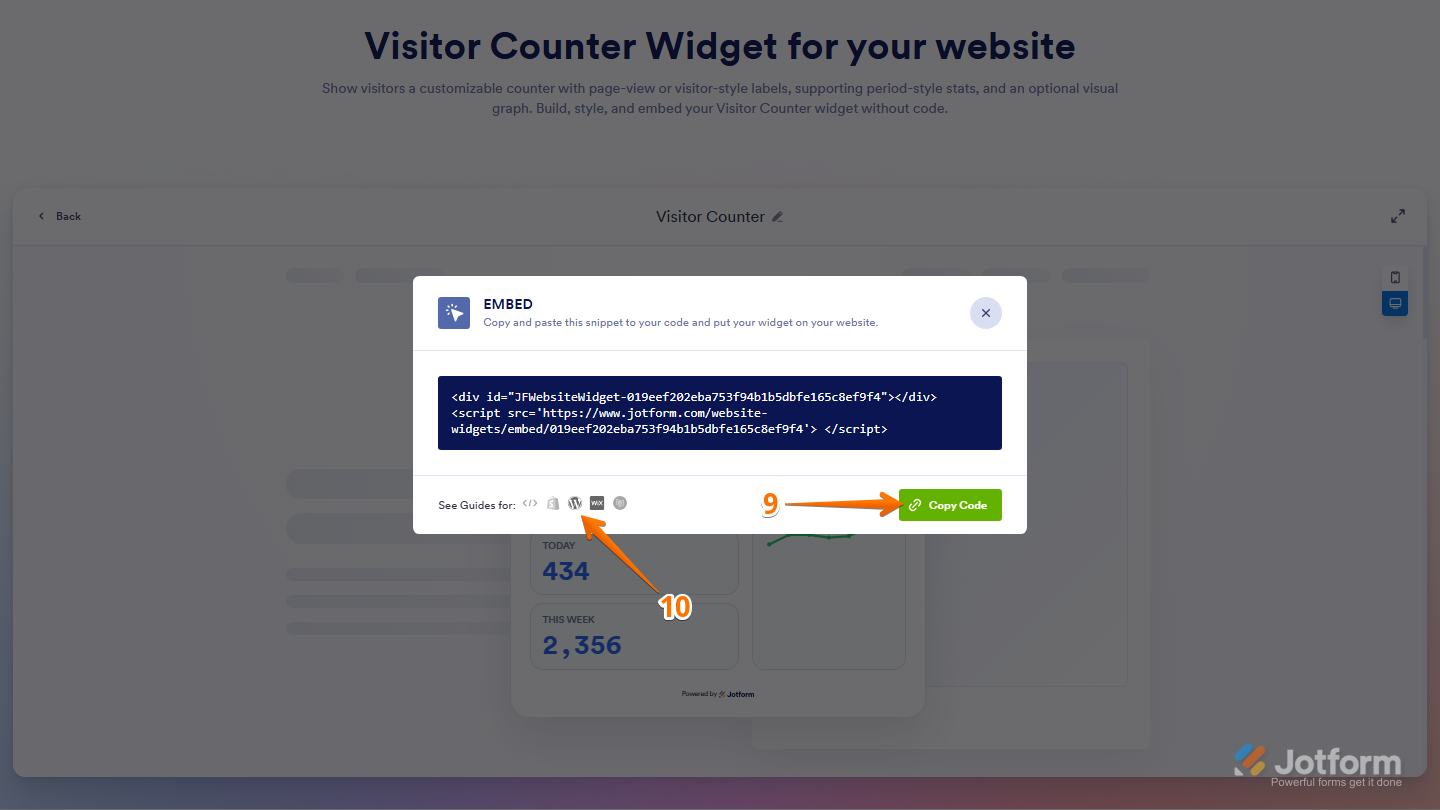
- Finally, in the Embed window that opens, click on Copy Code.
- Or, if your website is built on a supported platform, click on its icon in the bottom-left corner of the Embed window to view platform-specific embedding instructions.
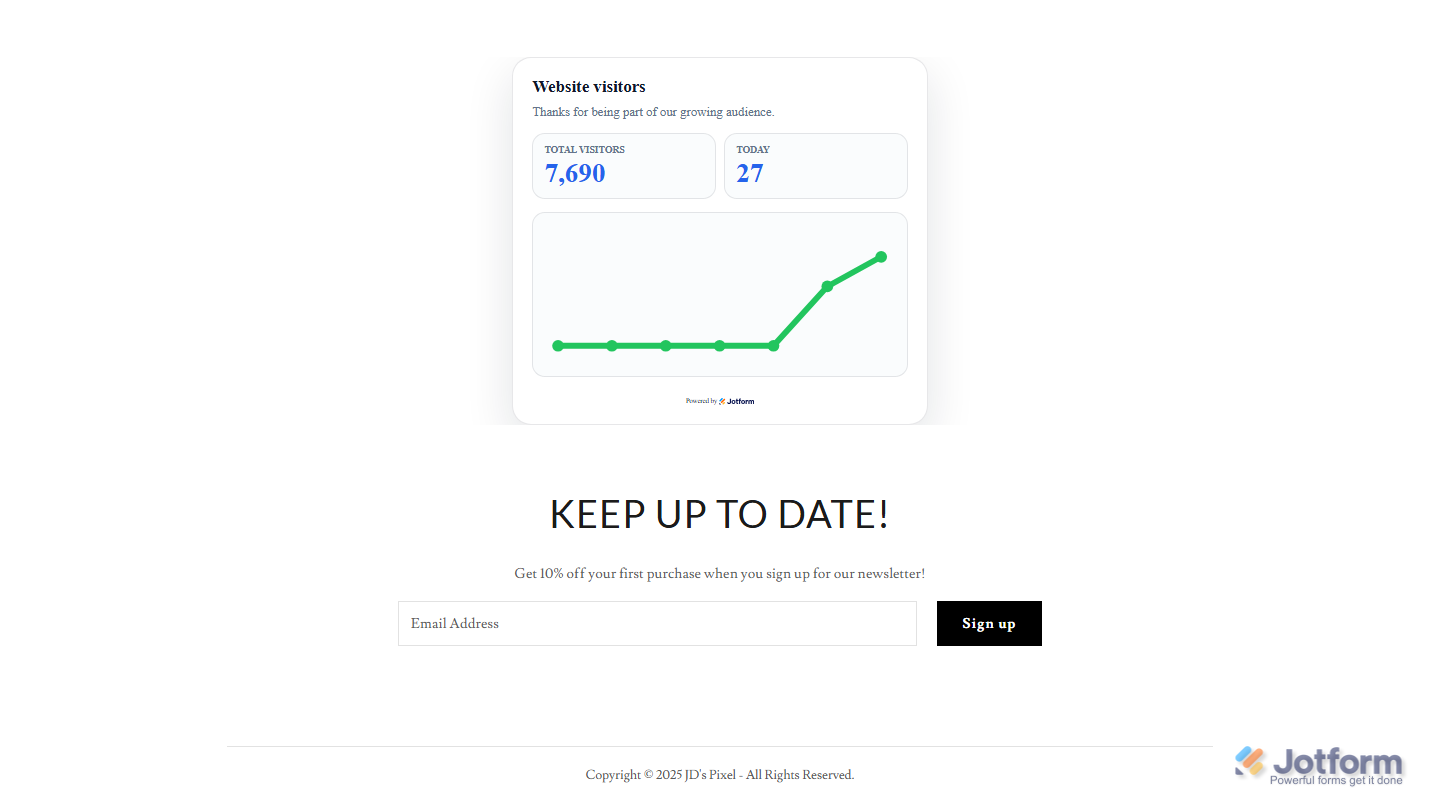
That’s it! You can now paste the copied embed code into your website or follow the platform-specific instructions to add the widget to your site. The screenshot below shows an example of how the widget will look when embedded:
You can also manage your widget anytime from the My Widgets page. For a full breakdown of how to do it, head over to our guide on How to Manage Website Widgets.

Send Comment: