Integrating your form with QuickBooks helps you simplify invoicing and accounting in just a few clicks. Each time someone submits a form, a new customer record is automatically added to your QuickBooks Online account—perfect for handling orders, registrations, or onboarding with ease. It’s an ideal setup for small and medium-sized businesses that want to save time, reduce manual data entry, and keep everything accurate and up to date. With this integration, you can focus less on paperwork and more on what really matters—running and growing your business.
Creating a Customer with QuickBooks Integration
Whether you’re building a brand-new form or updating one you already have, connecting it with QuickBooks to automatically create customer records is quick and simple. To get going, here’s what you’ll do:
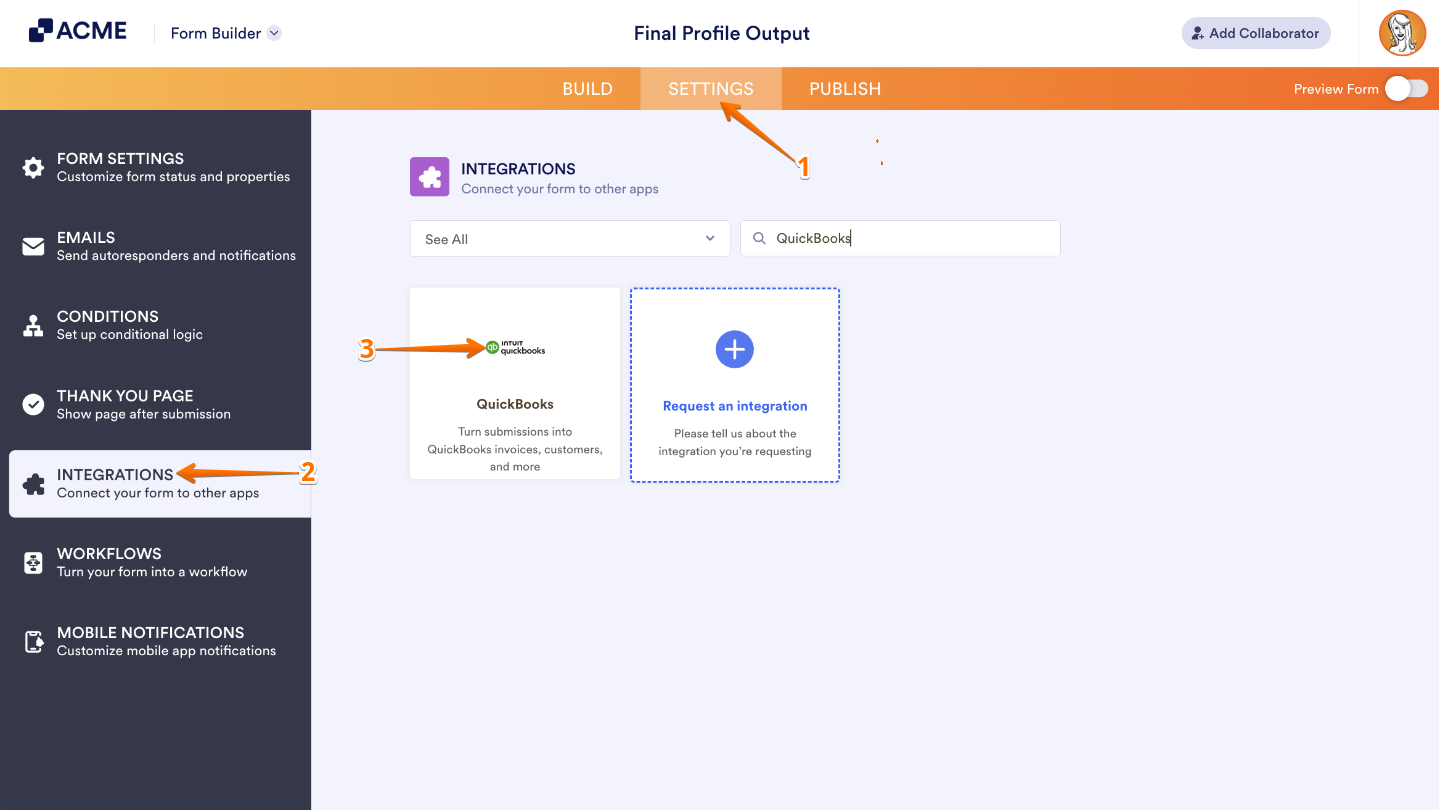
- In Form Builder, in the orange navigation bar at the top of the page, click on Settings.
- In the menu on the left, click on Integrations.
- Then, search for QuickBooks and click on it.
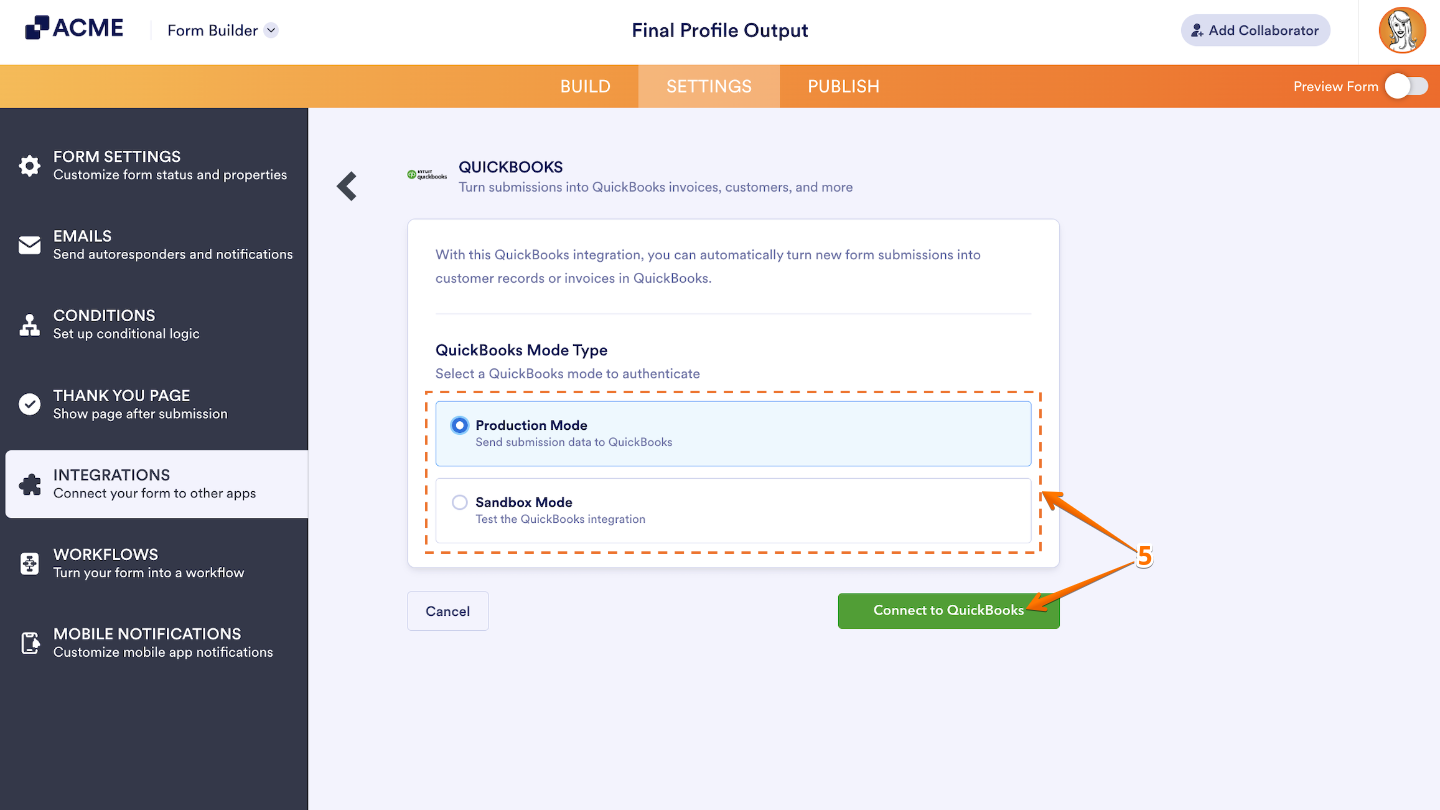
- Now, under the Choose an Action section on the right, select Create Customer and then click on Next.

- Next, under the QuickBooks Mode Type, choose either Production or Sandbox Mode, and then click on Connect to QuickBooks.
Note
Production Mode connects your form to your live QuickBooks account—meaning all the data you send goes straight to your real company records. On the other hand, Sandbox Mode is there for testing purposes, so you can safely experiment with the integration without affecting your actual data. If you’d like to learn more about using Sandbox, check out QuickBooks’ guide on Creating and Testing with a Sandbox Company.
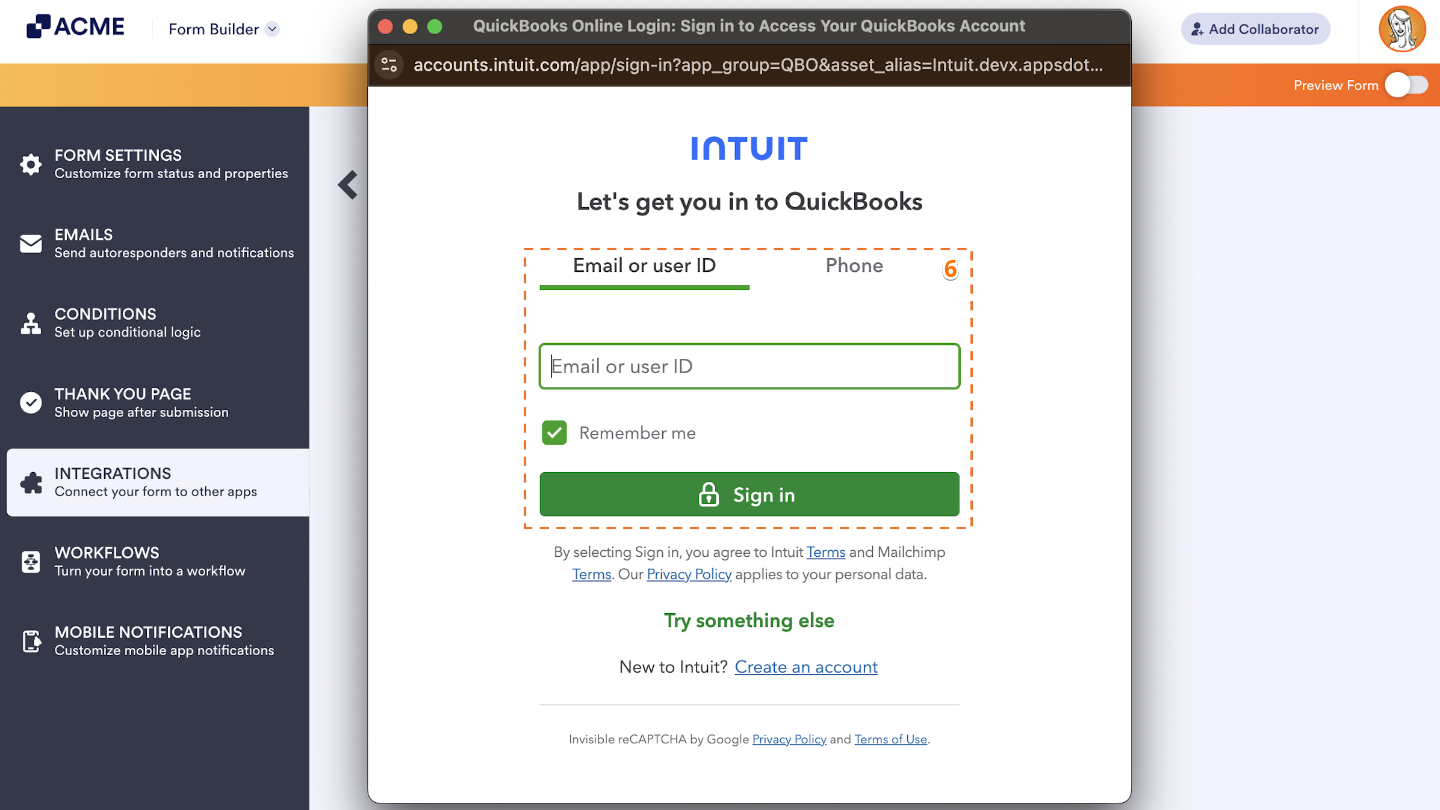
- In the new browser window that opens, log in with your Email or User ID or by Phone.
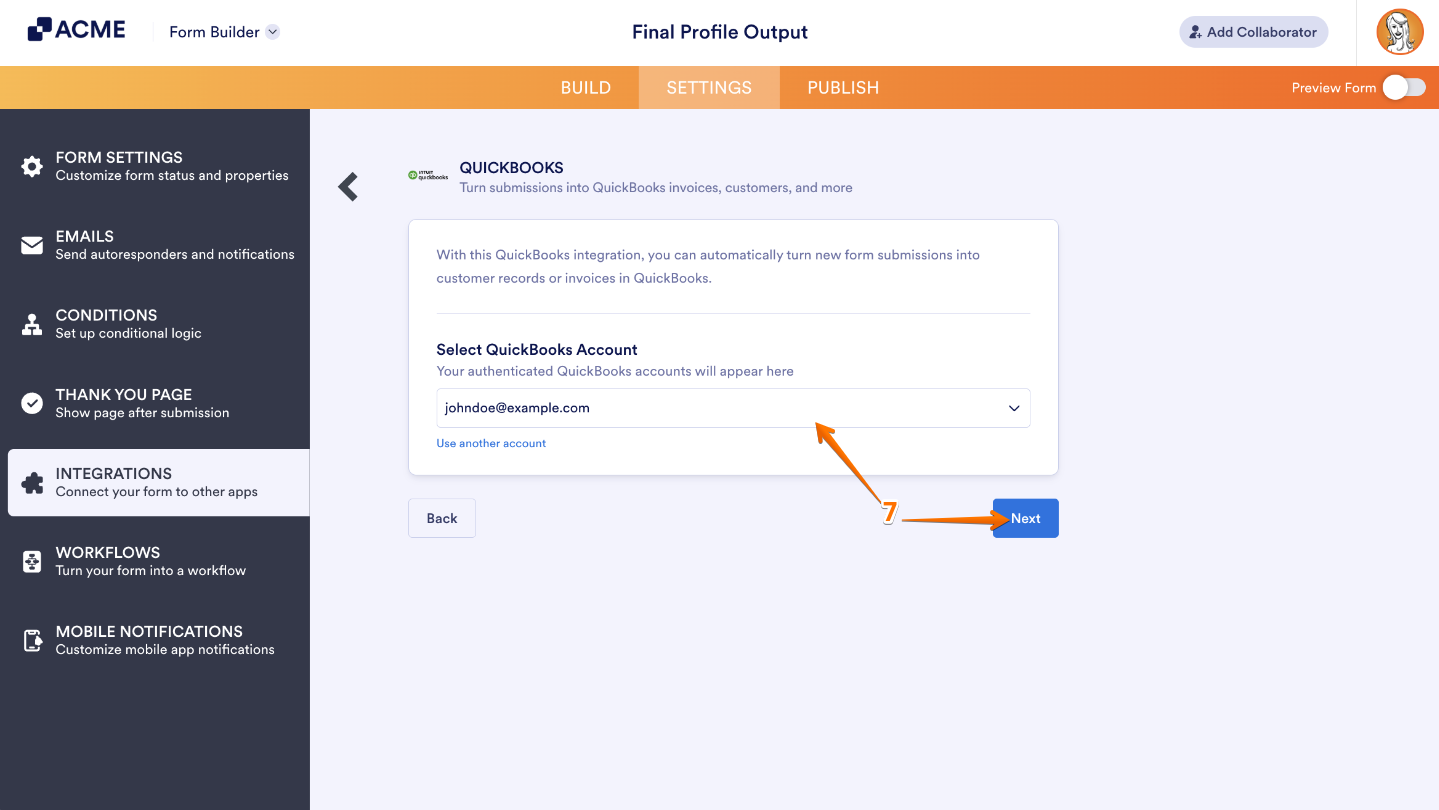
- Select a company from your QuickBooks account that you want to connect, and then click on Next.
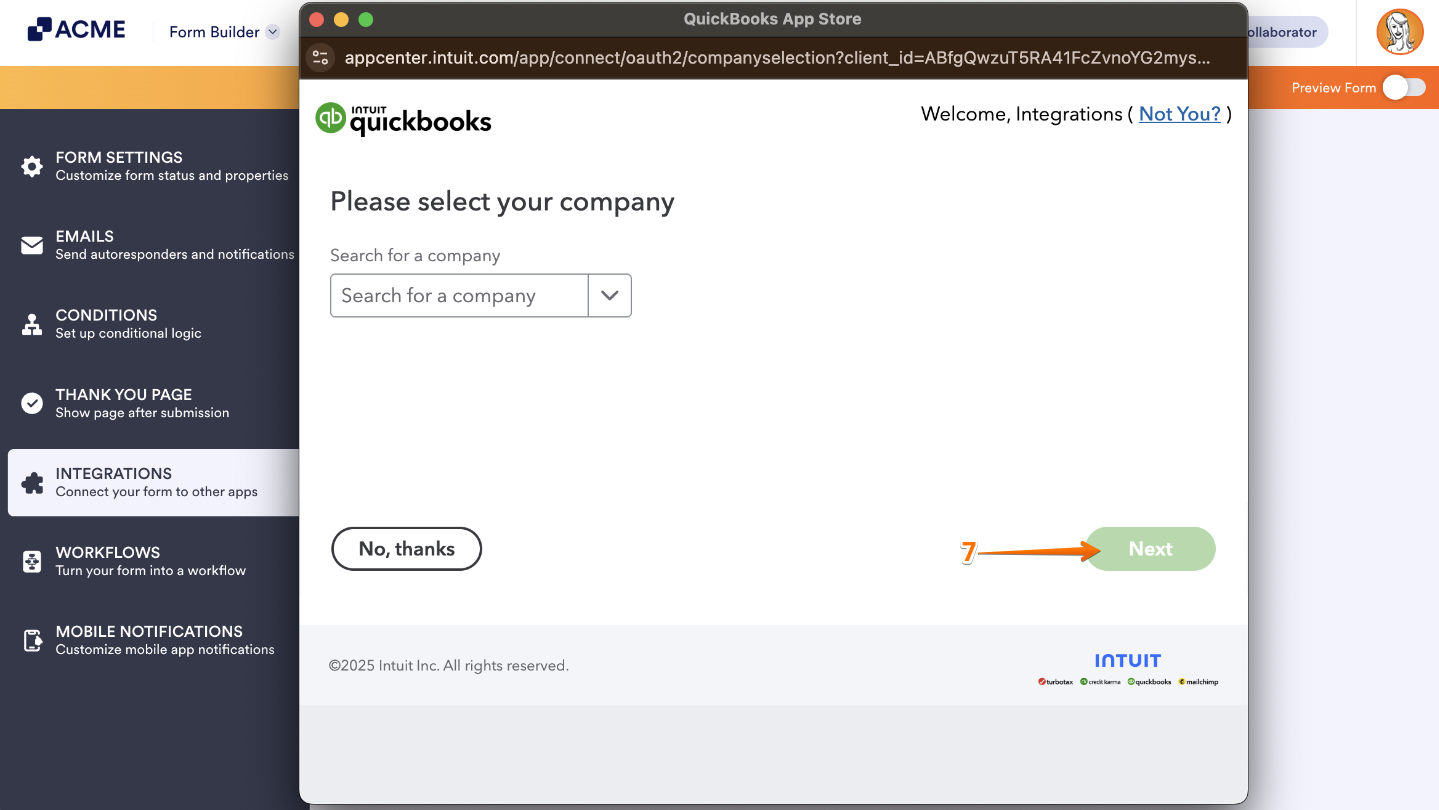
If you’ve logged in before, just pick your QuickBooks account from the Dropdown menu, and then click on Next. To use a different one, click on the Use Another Account link.
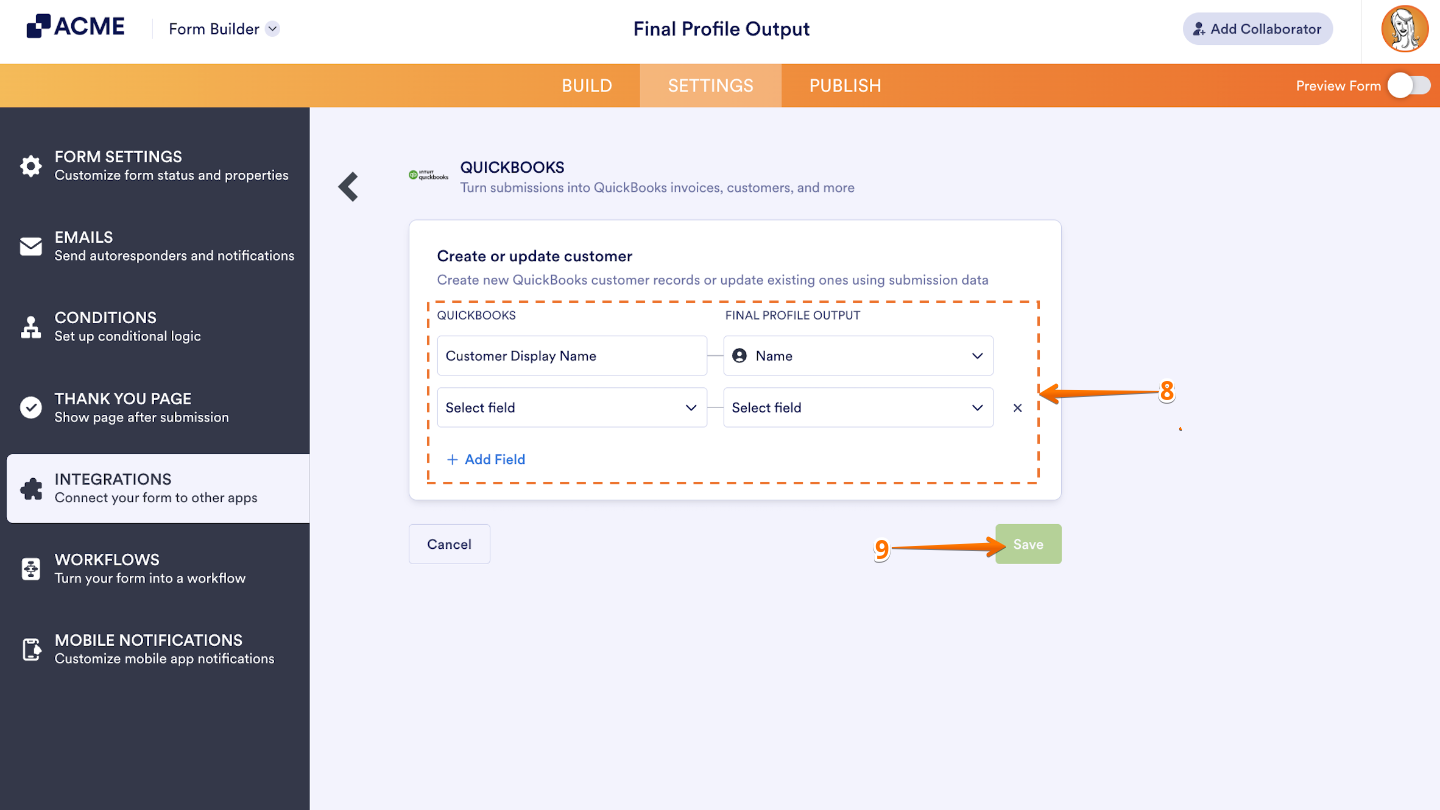
- Finally, in the Create or Update Customer section, select your QuickBooks fields in the first column and your Form fields in the second to map them accordingly.
Note
To map more fields, just click on + Add Field at the bottom of the section. If you need to remove a mapped field, click the X icon on the right side of the field.
- Once you’re done, click on Save.
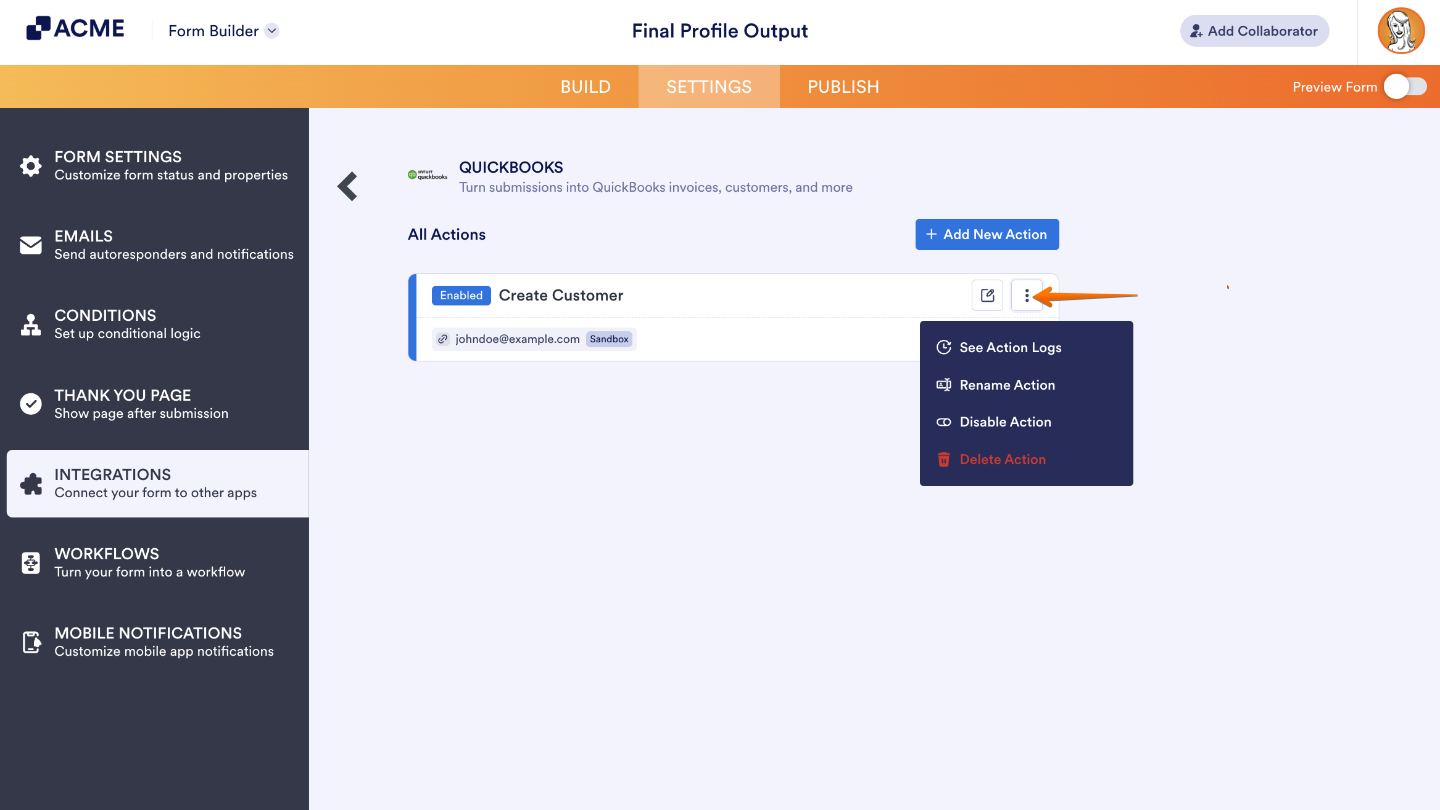
That’s it. Once you’ve saved your integration, you’ll see all the actions you’ve set up listed on the main page, along with an Add New Action button if you’d like to create more.
To make changes or explore more options, simply hover over any action and click the three dots icon on its right. From there, you can easily edit, duplicate, or remove an action—whatever fits your workflow best.
- See Action Logs — Take a look at all successful and failed runs. This is super handy if you ever need to troubleshoot or double-check that everything’s working smoothly.
- Rename Action —Update the action’s title to keep things clear and organized.
- Disable Action — Pause the action for now if you don’t want it sending data—you can always turn it back on later.
- Delete Action — Permanently remove the action from your form if you no longer need it.

Send Comment: