Jotform Sign lets you create, send, and manage documents for signing directly through Claude. Using natural language, you can create documents, send them for signature, and manage your signing workflow without leaving the Claude environment.
Connecting Jotform Sign to Claude
Before you can create and manage Sign documents through Claude, you’ll need to add the Jotform Sign connector to your Claude account. Just follow these steps to get started:
- In Claude, open a new chat, and then click on the Plus icon in the bottom-left corner of the Claude Chat box.
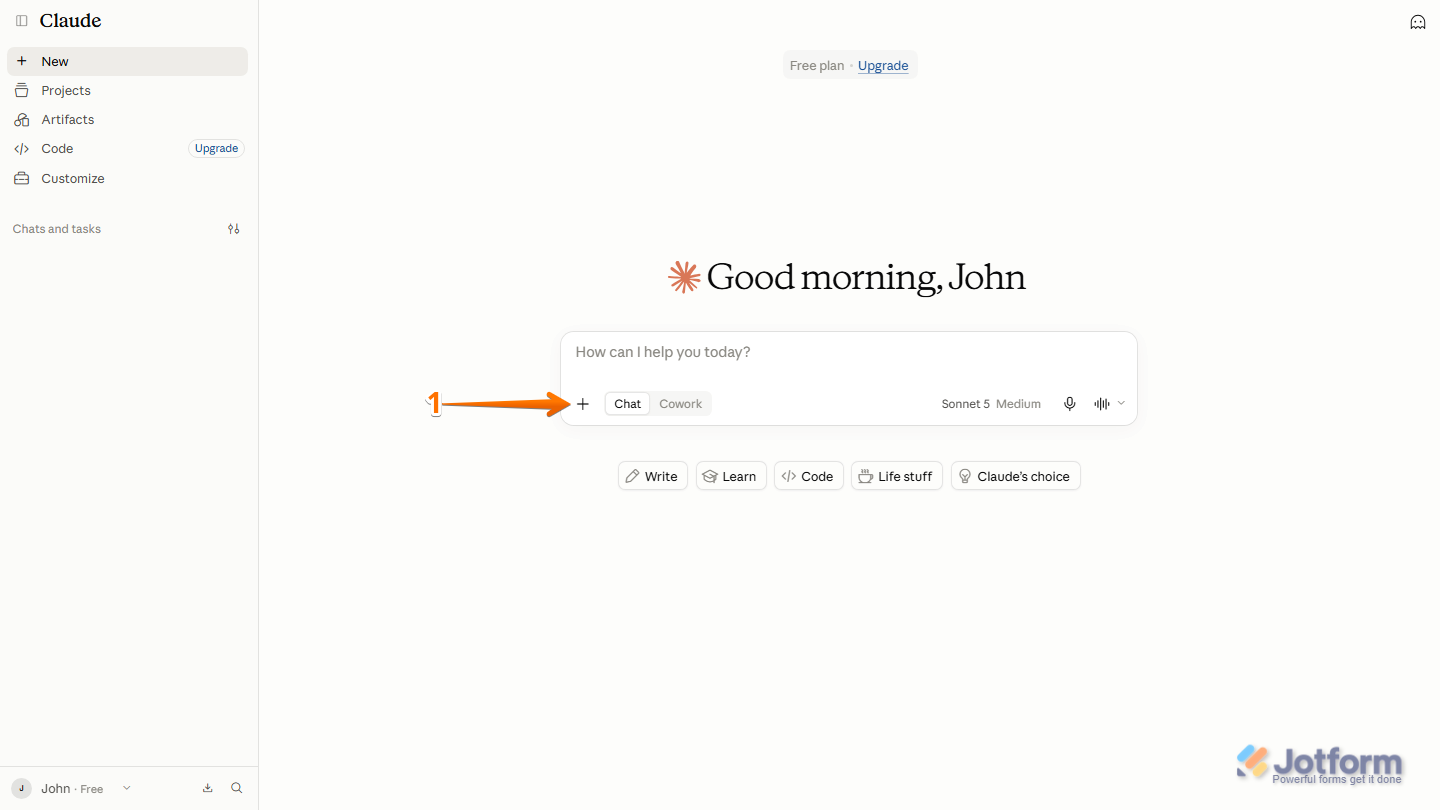
- Next, in the menu that opens, hover your mouse over Add Connector, and then select Browse Connectors.
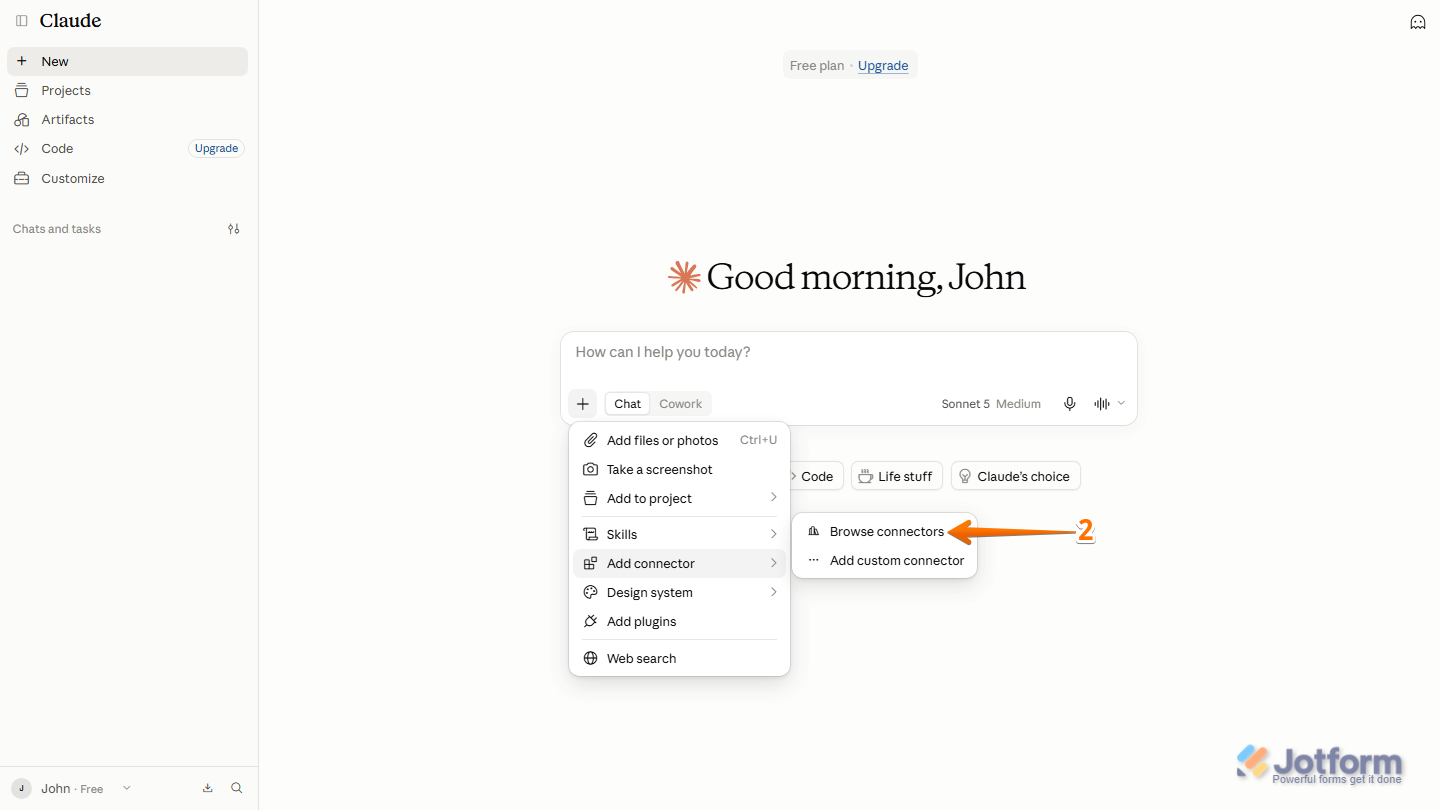
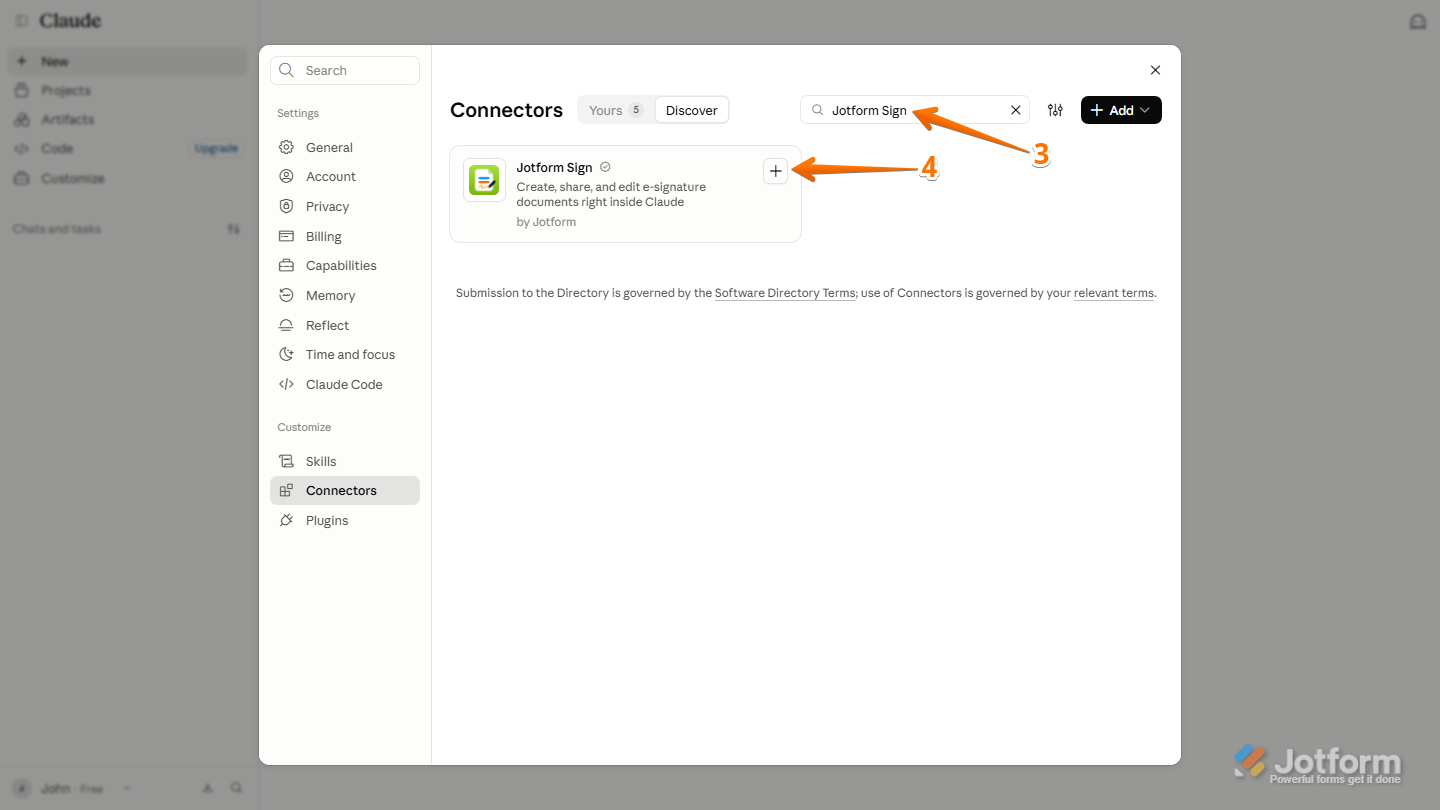
- Now, in the Search bar at the top of the Connectors window, enter Jotform Sign.
- Then, click on the Plus icon next to Jotform Sign to add the connector.
Note
If you’re not already signed in to your Jotform account, you’ll be asked to log in or sign up for one before continuing.
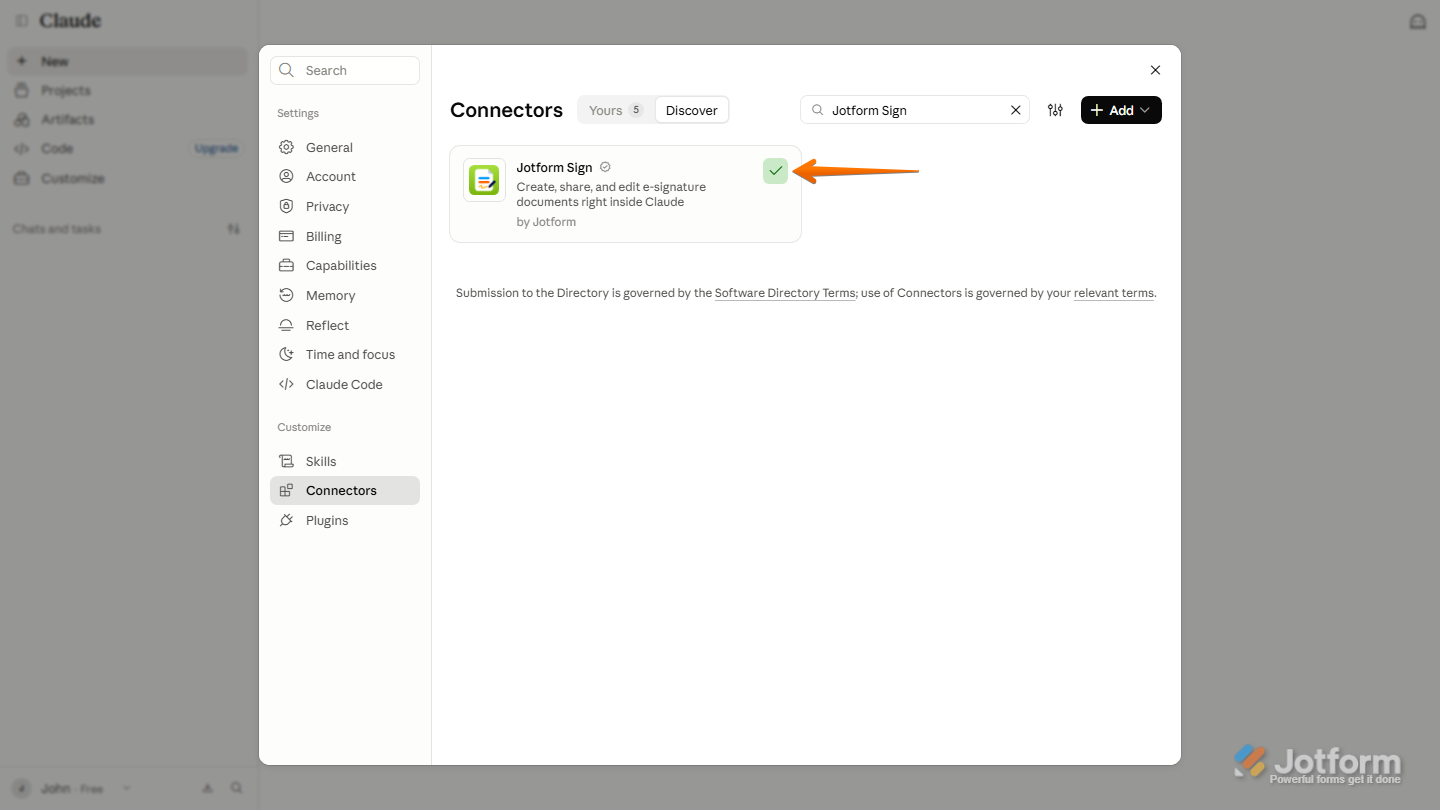
The Jotform Sign connector will display a green checkmark to confirm that it’s been added.
Creating a Signable Document
Once Jotform Sign is connected to Claude, you can simply describe what you need in the Claude Chat box, and it will create the Sign Document signable document for you. Here’s how:
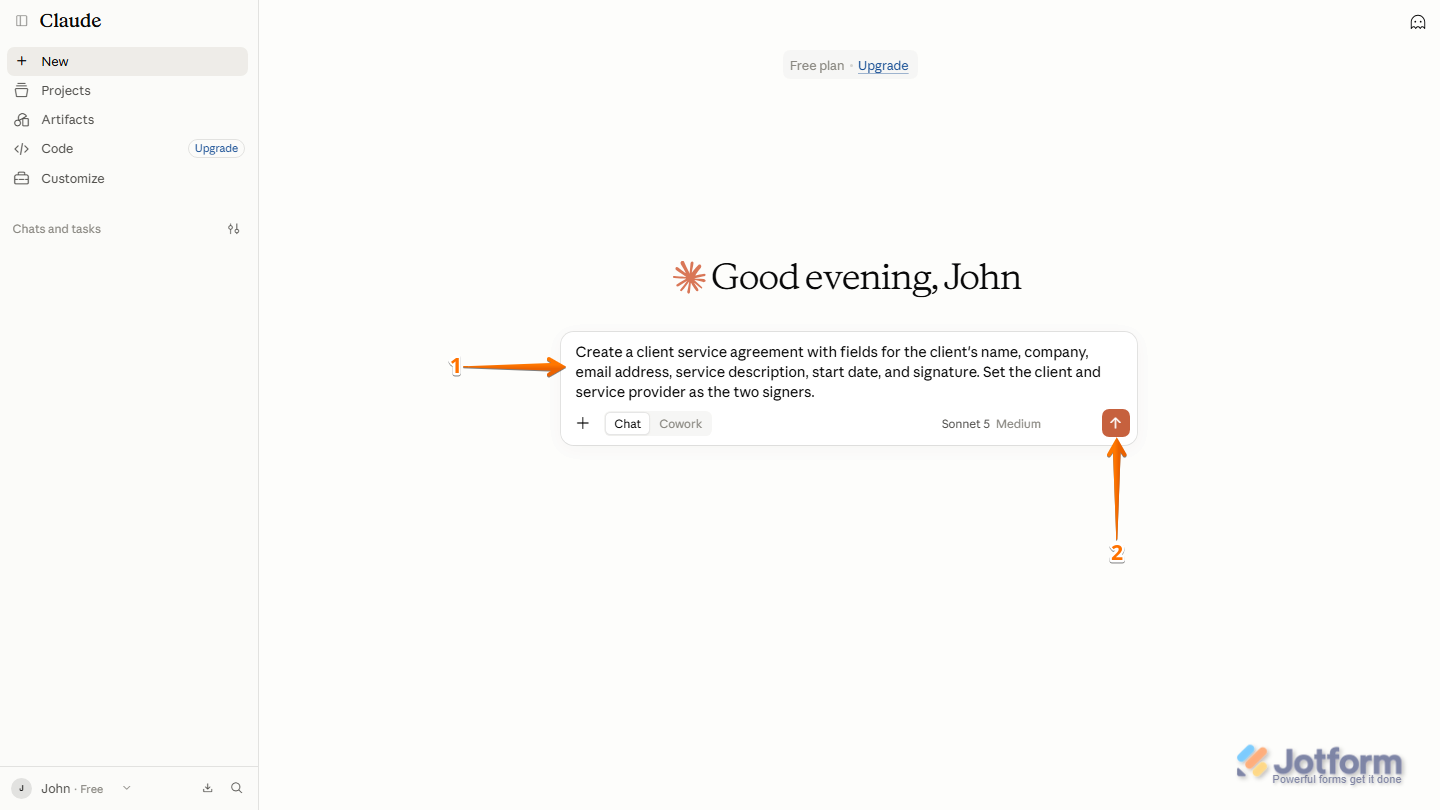
- In the Claude Chat box, enter a request describing the Sign Document you want to create. For example: “Create a client service agreement with fields for the client’s name, company, email address, service description, start date, and signature. Set the client and service provider as the two signers.”
- Now, press the Enter key on your keyboard or click on the Upward Arrow icon on the right side of the Claude Chat box.
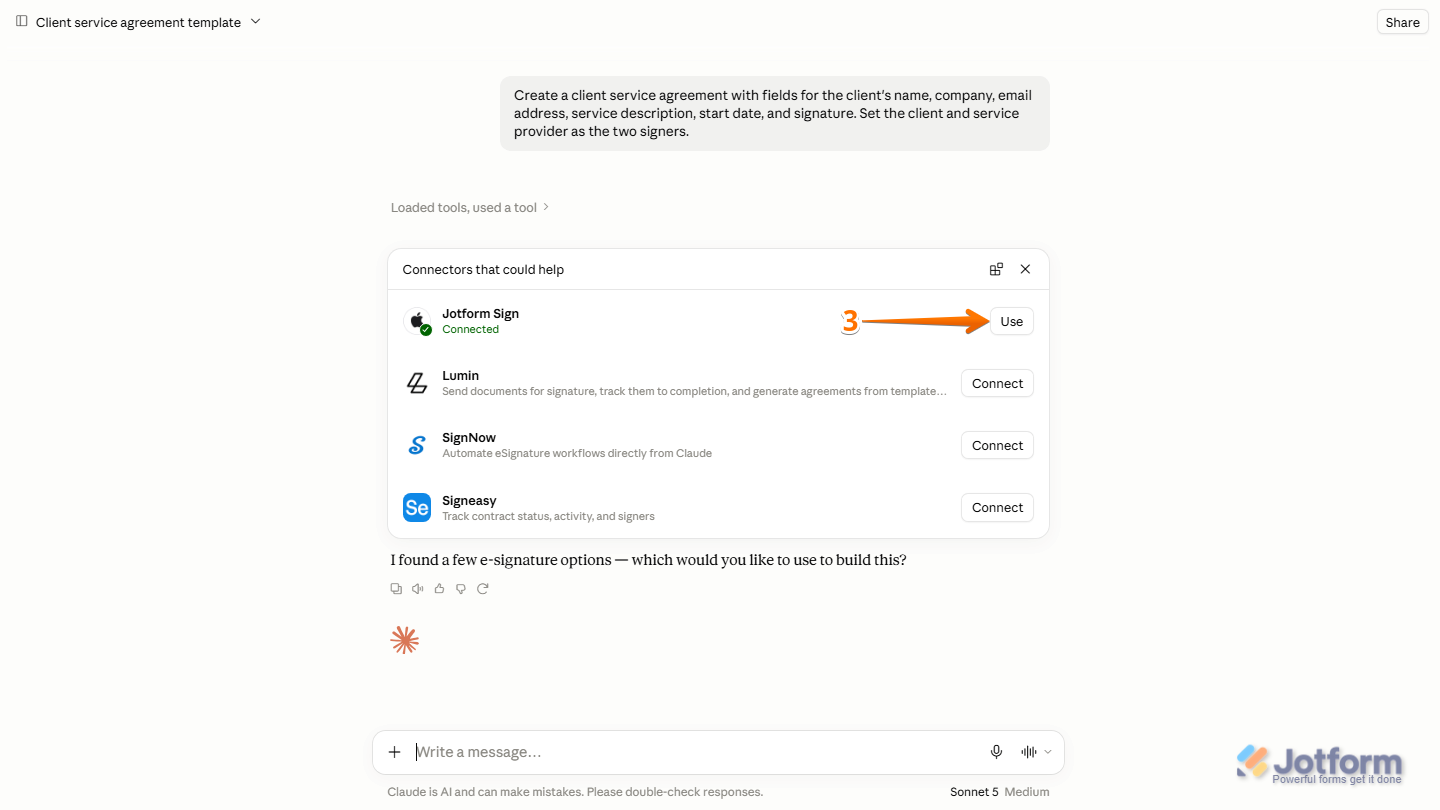
- Next, in the Connectors That Could Help List that comes up, click on Use on the right side of Jotform Sign.
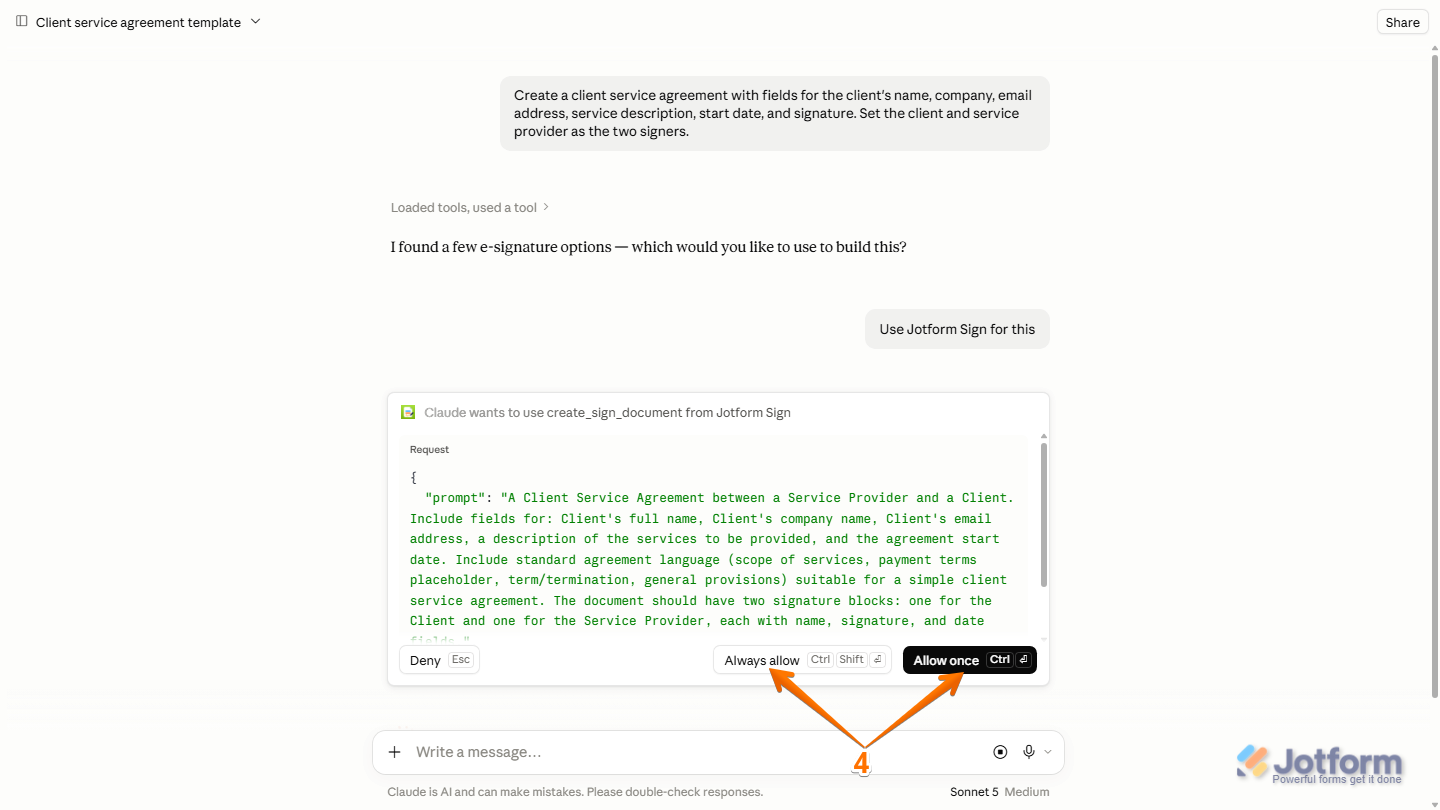
- Then, in the Permission prompt that appears, click on Allow Once or Always Allow to let Claude use Jotform Sign.
Note
If you select Always Allow, Claude won’t ask for permission the next time you use Jotform Sign.
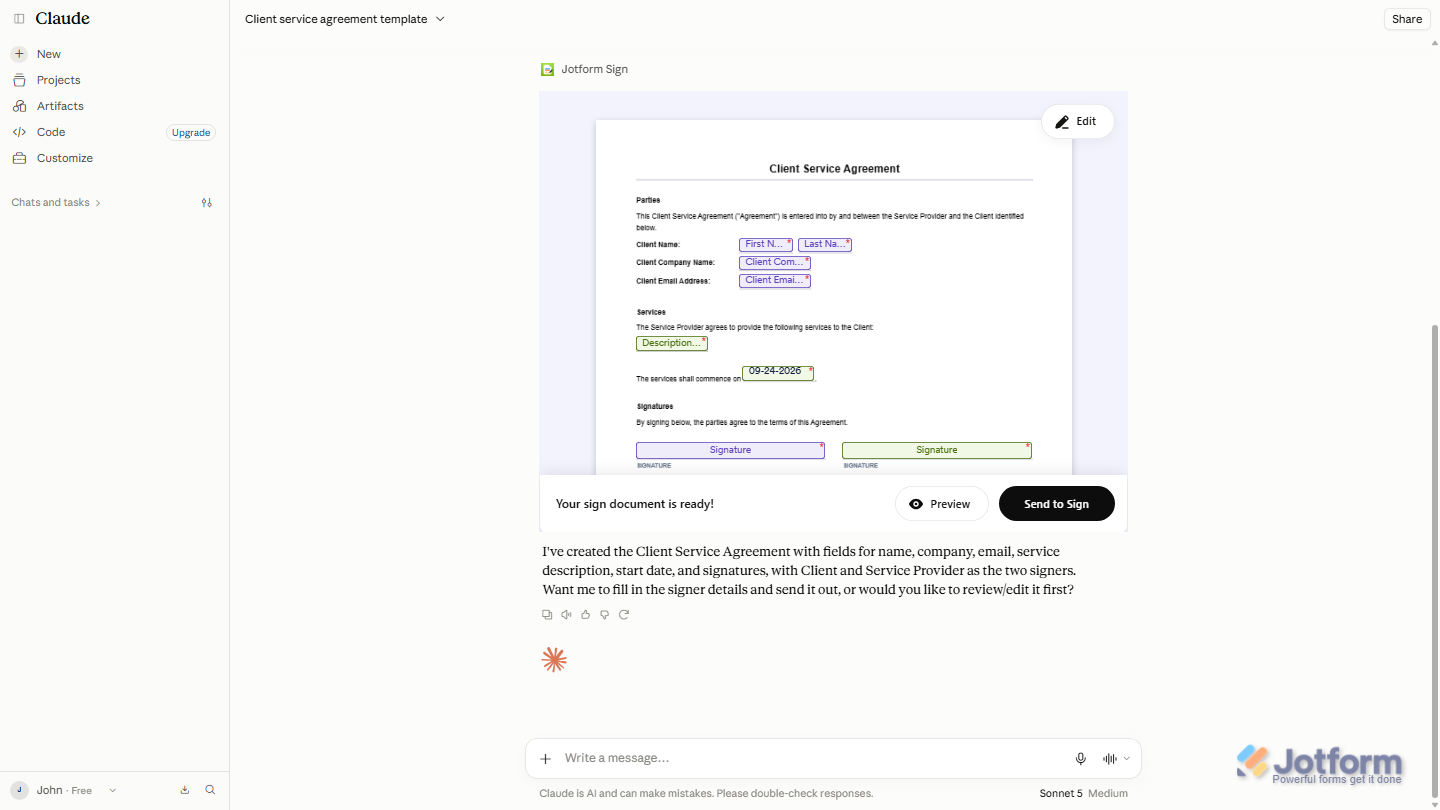
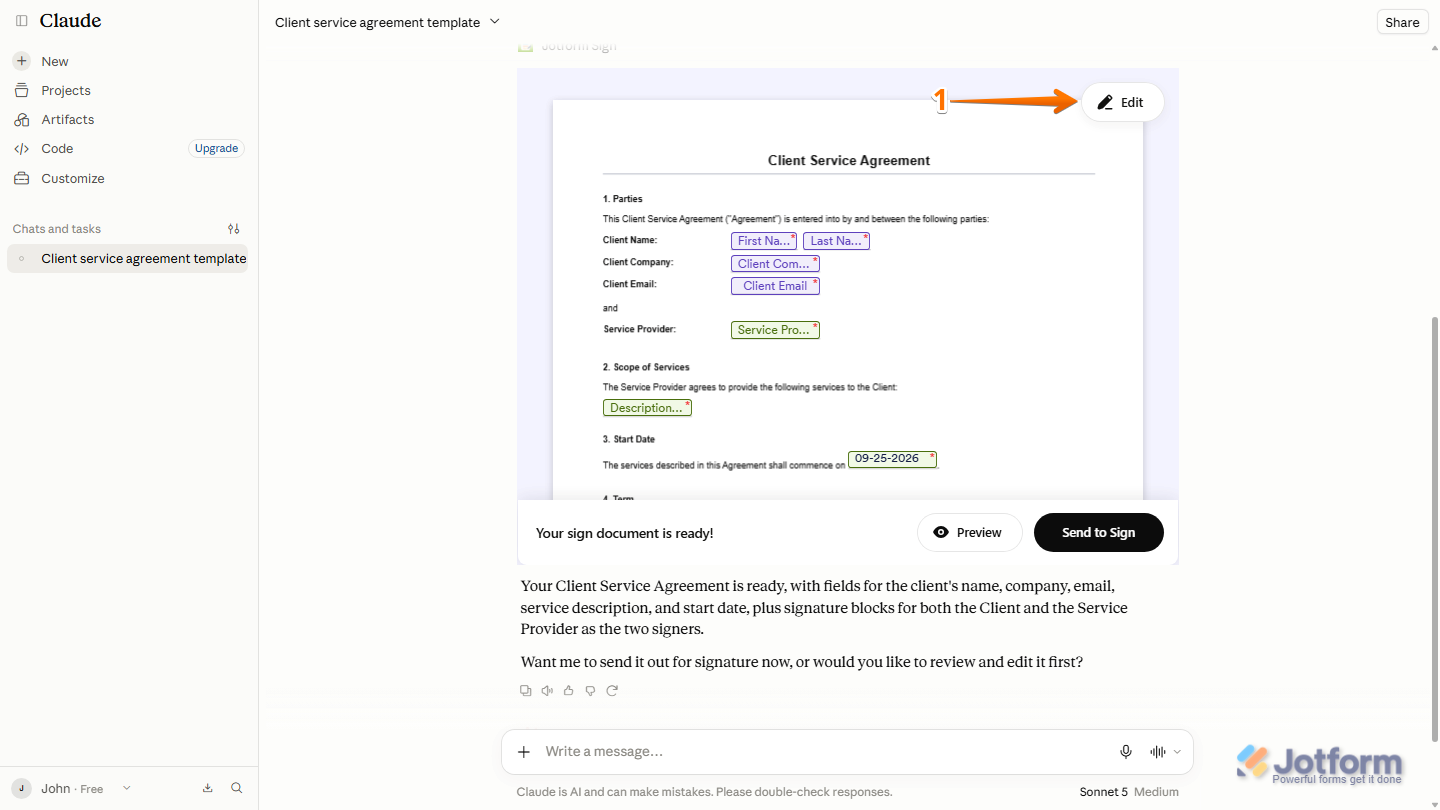
And that’s it. The Sign document’s been generated and is ready for review. You can preview or edit it, and then send it to the signers when you’re ready.
Adding or Managing Elements
After creating your Sign document, you can use Claude to add or manage elements based on what you need. This is how it’s done:
- In the top-right corner of the Sign Document, click on Edit.
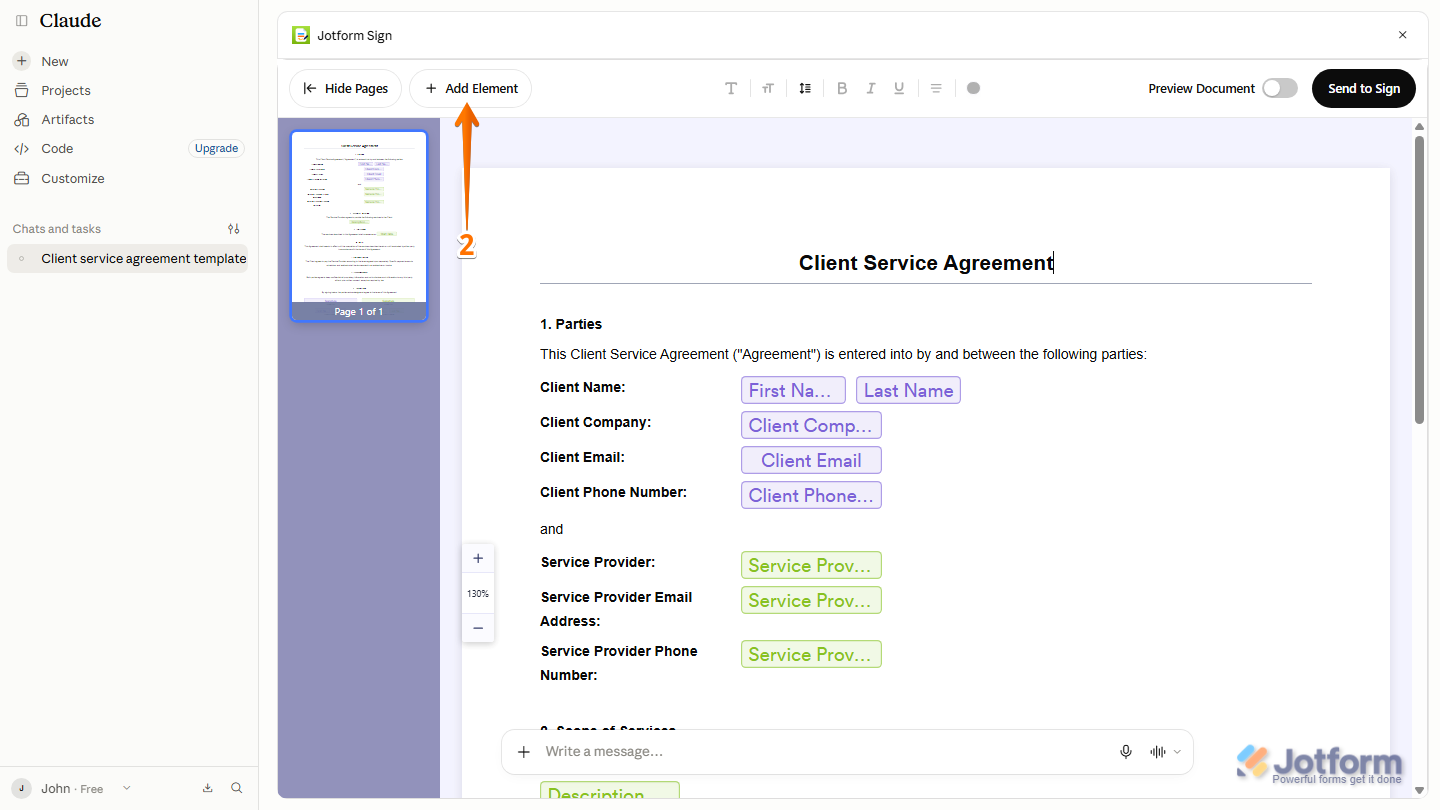
- Now, on the upper-left side of Jotform Sign Editor, click on Add Element.
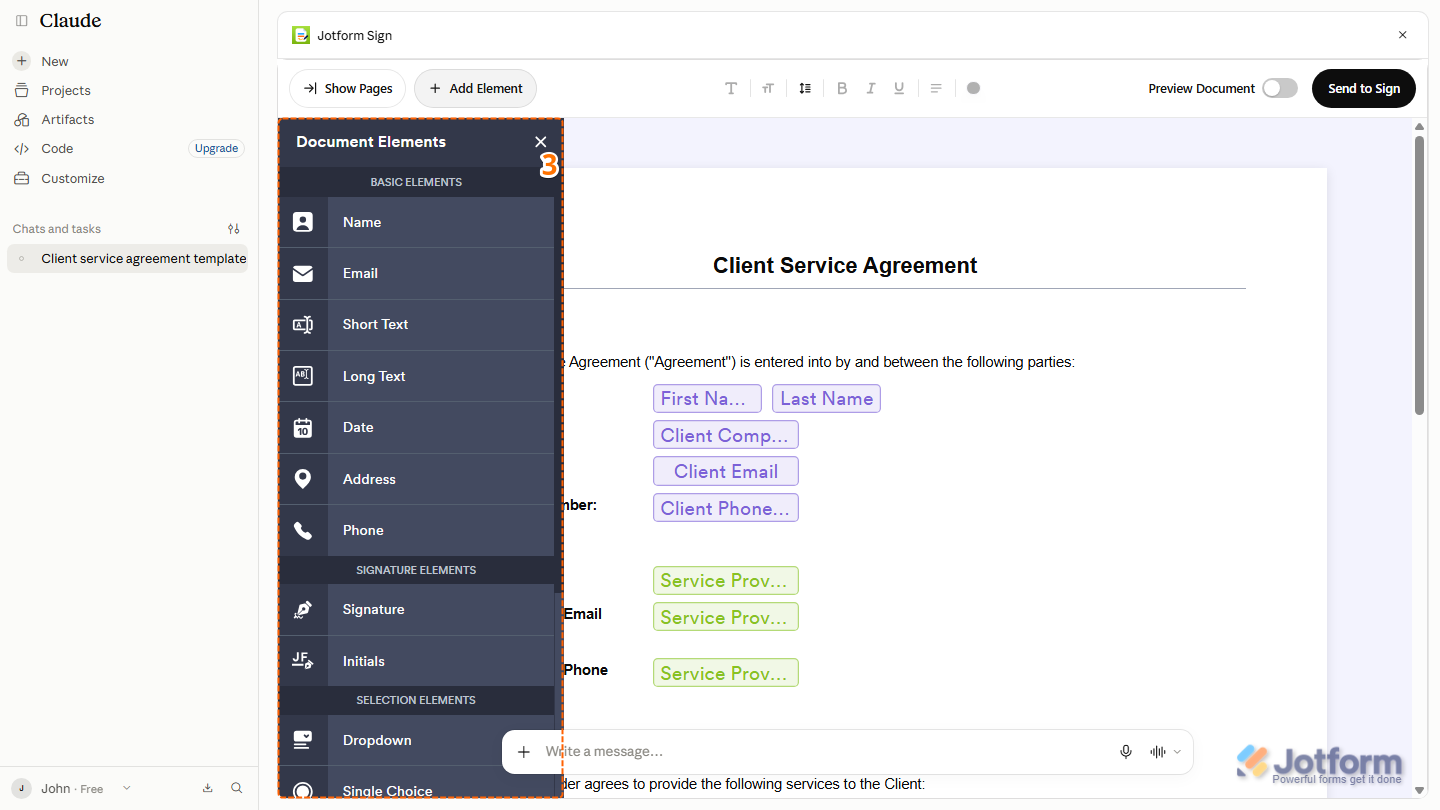
- Then, in the Document Elements window that opens, click on or drag and drop the type of field you want to add to the document and you’re done.
Note
You can also enter a request in the chat box asking Claude to add or modify elements in the document.
Updating the Sign Document
You can also use the Edit option to make changes to your Sign document. Here’s what to do:
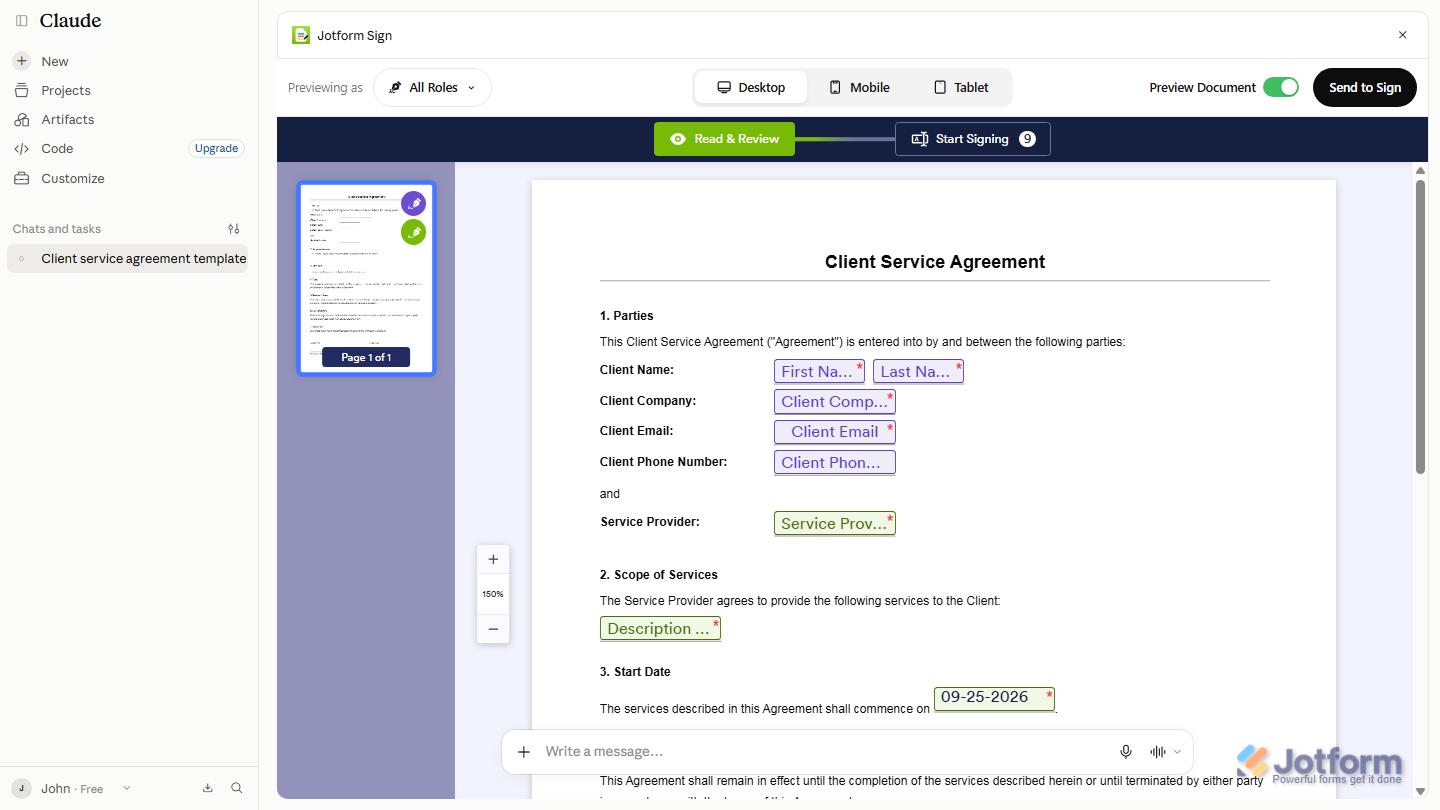
- At the bottom of Jotform Sign Editor, enter a prompt in the Claude Chat box describing the fields you want to update. For example: “Update the document and add a phone number field below the client’s email address.”
- Then, press the Enter key on your keyboard or click on the Backward-Turning Arrow icon on the right side of it to submit it.
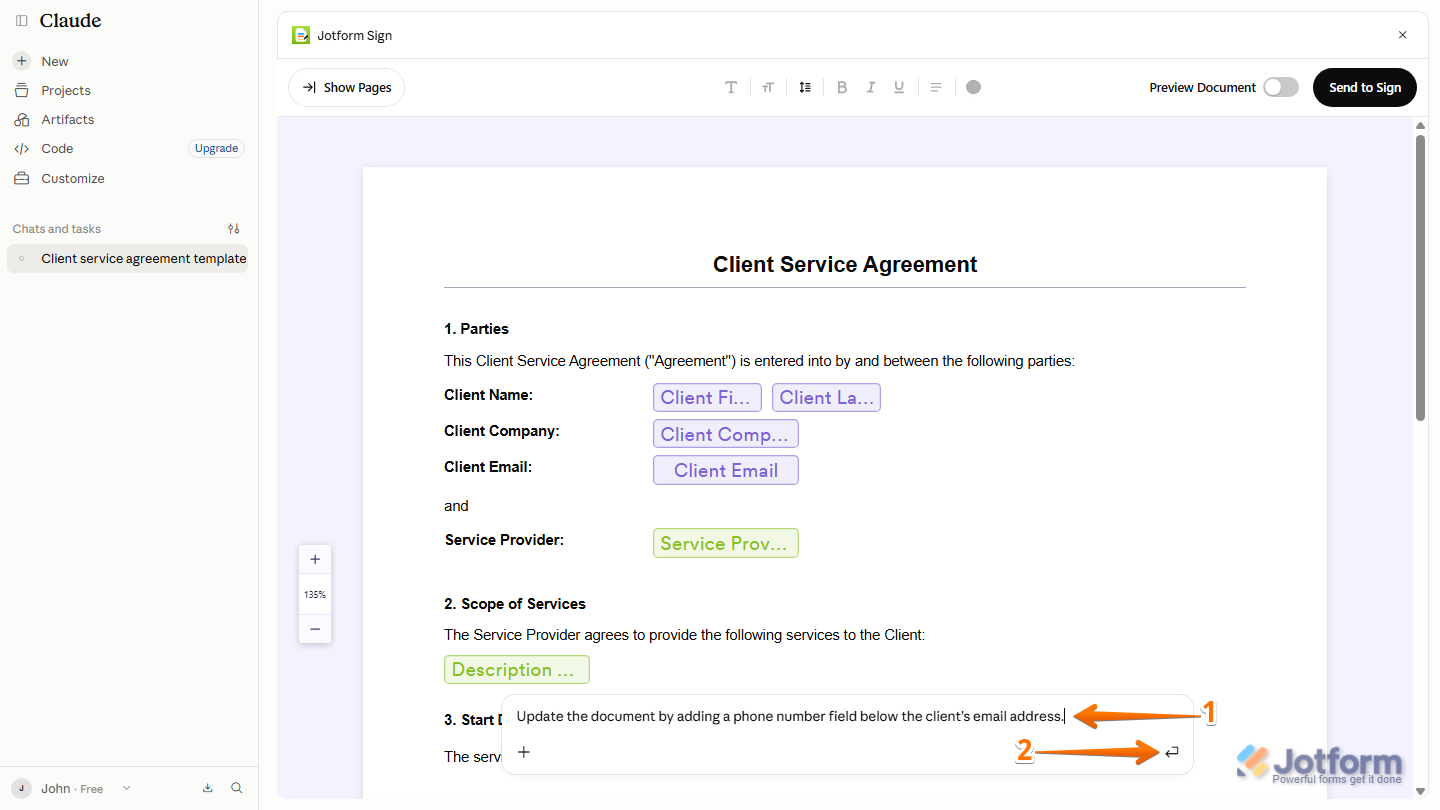
The Sign document’s been updated with the changes you asked for.
Adding or Updating Signers
If you need to add or change the people who will sign the document, you can manage the signers directly through the Claude Chat box. Here’s how:
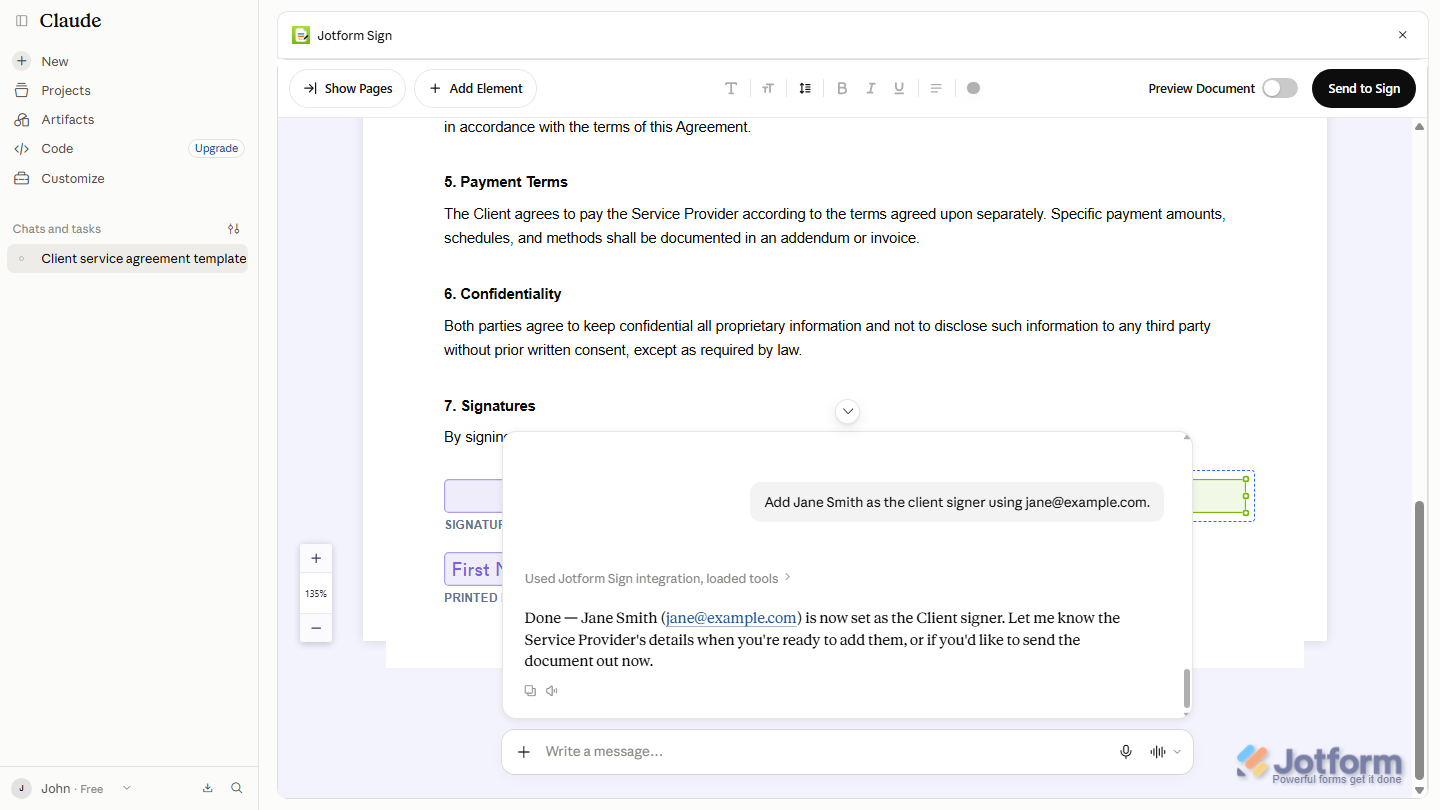
- At the bottom of Jotform Sign Editor, enter a prompt in the Claude Chat box describing the signers you want to add or update. For example: “Add Jane Smith as the client signer using jane@example.com.”
- Then, press the Enter key on your keyboard or click on the Backward-Turning Arrow icon on the right side of it to submit it.

The signer information’s been updated. Review the signers to make sure their names and email addresses are correct.
Previewing the Sign Document
Before sending the Sign document for signature, you can preview it to check how the content, fields, and signer information appear. Here’s how to get going:
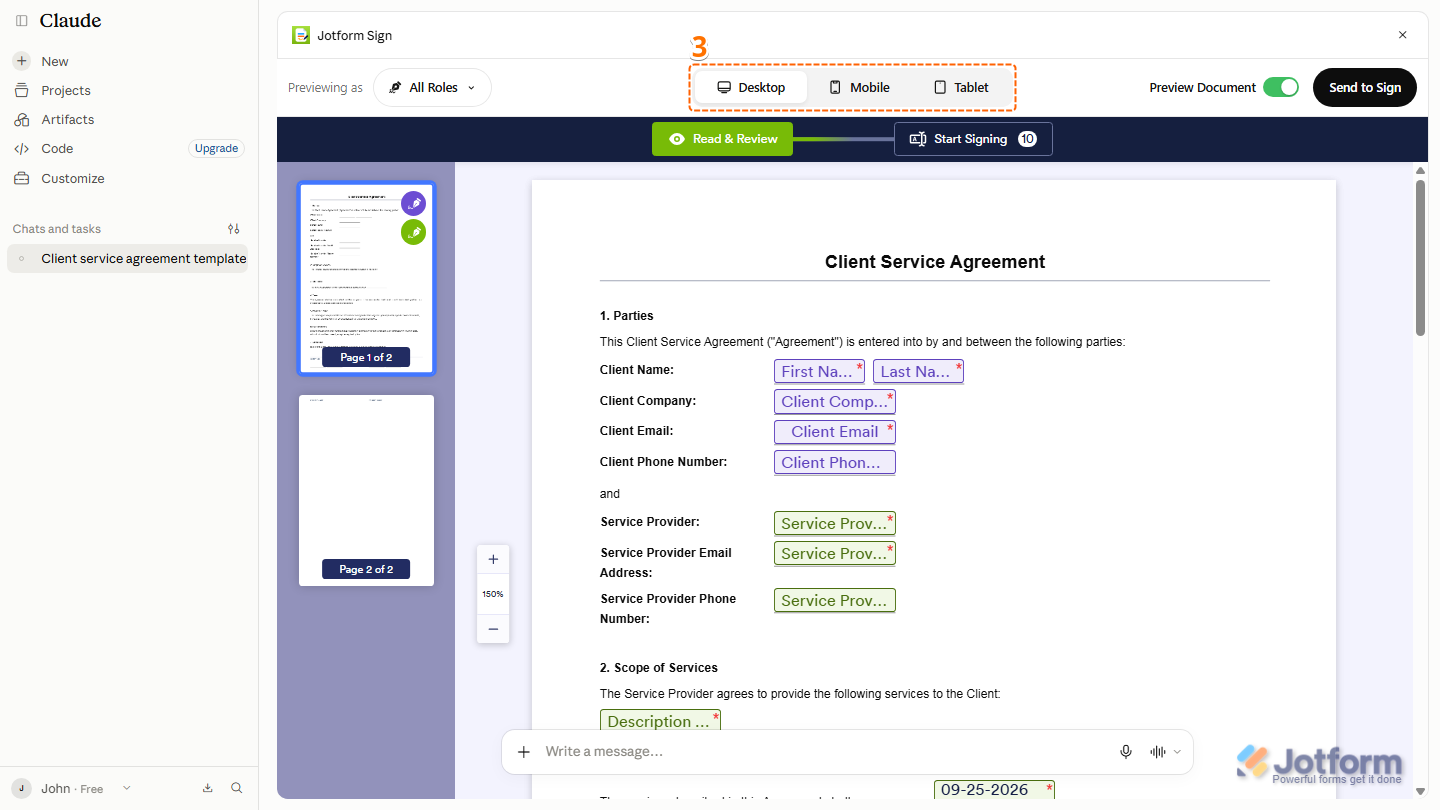
- In the top-right corner of Jotform Sign Editor, toggle on Preview Document.
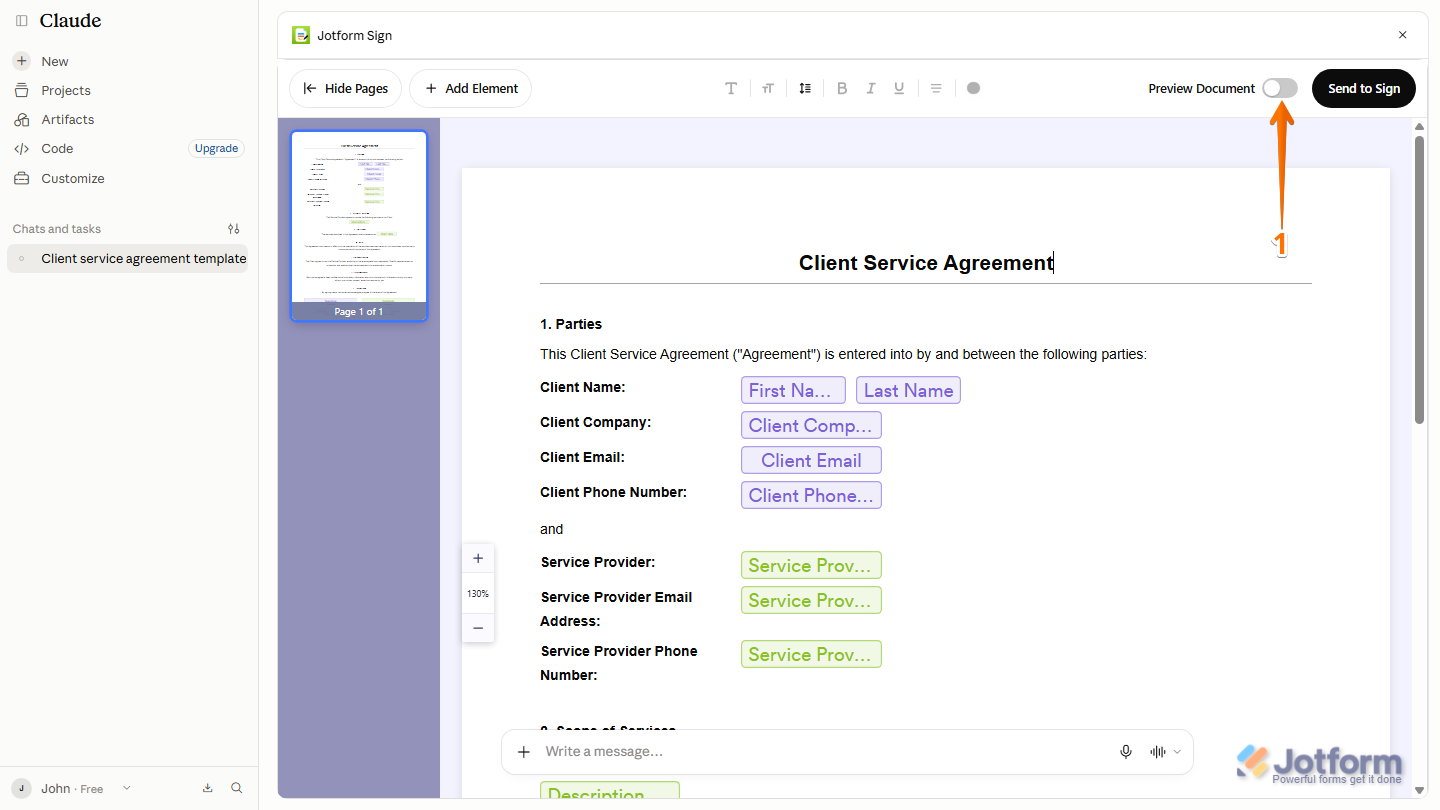
- Now, in the top-left corner of the Preview Page, in the Previewing As section, click on the Downward Arrow icon and select the role you want to preview the document as.
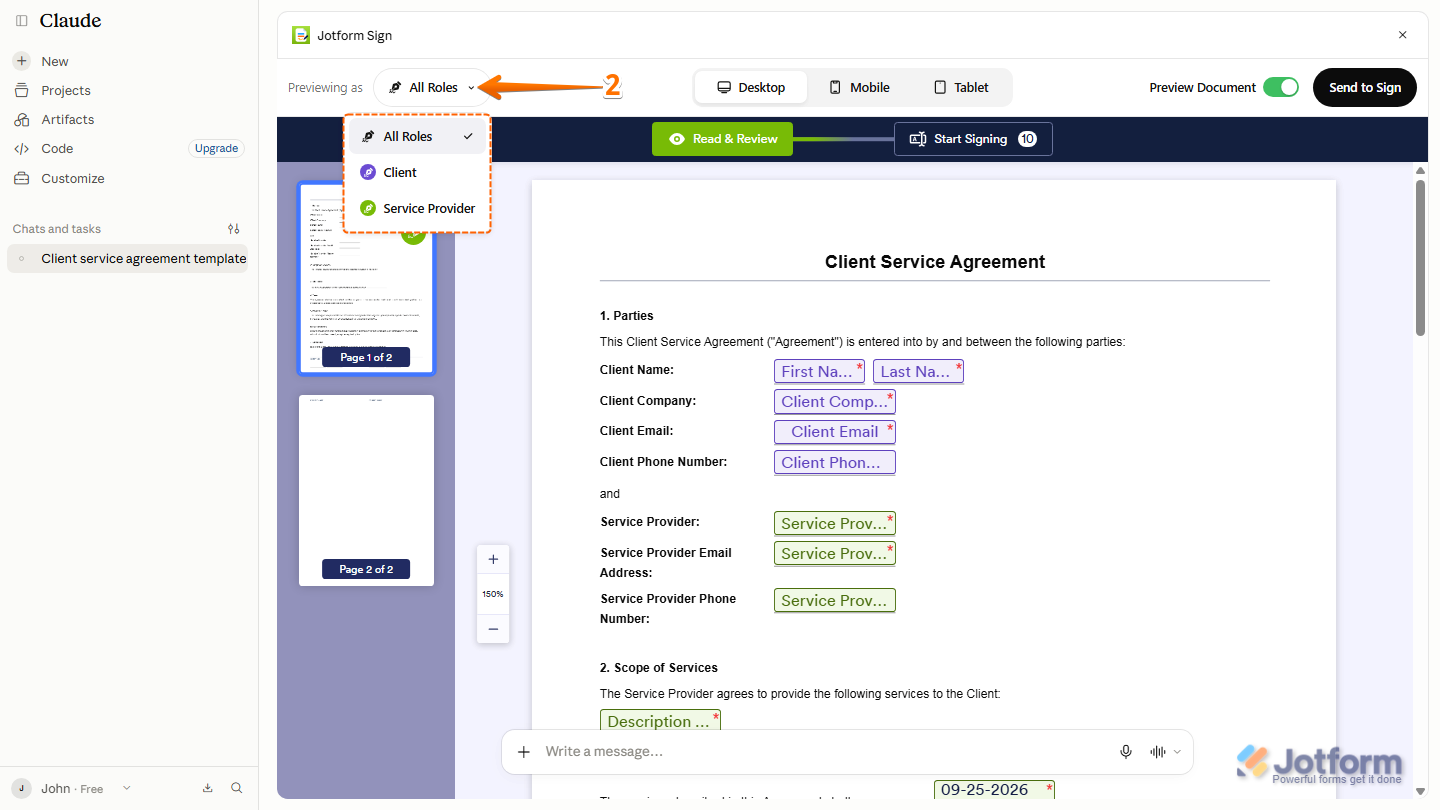
- Then, at the top of the Preview Page, choose Desktop, Mobile, or Tablet to preview how the document appears on different devices, and you’re done.
Signing the Sign Document Yourself
If you want to sign the document yourself, you can send it directly to your registered Jotform account email address. Here’s how:
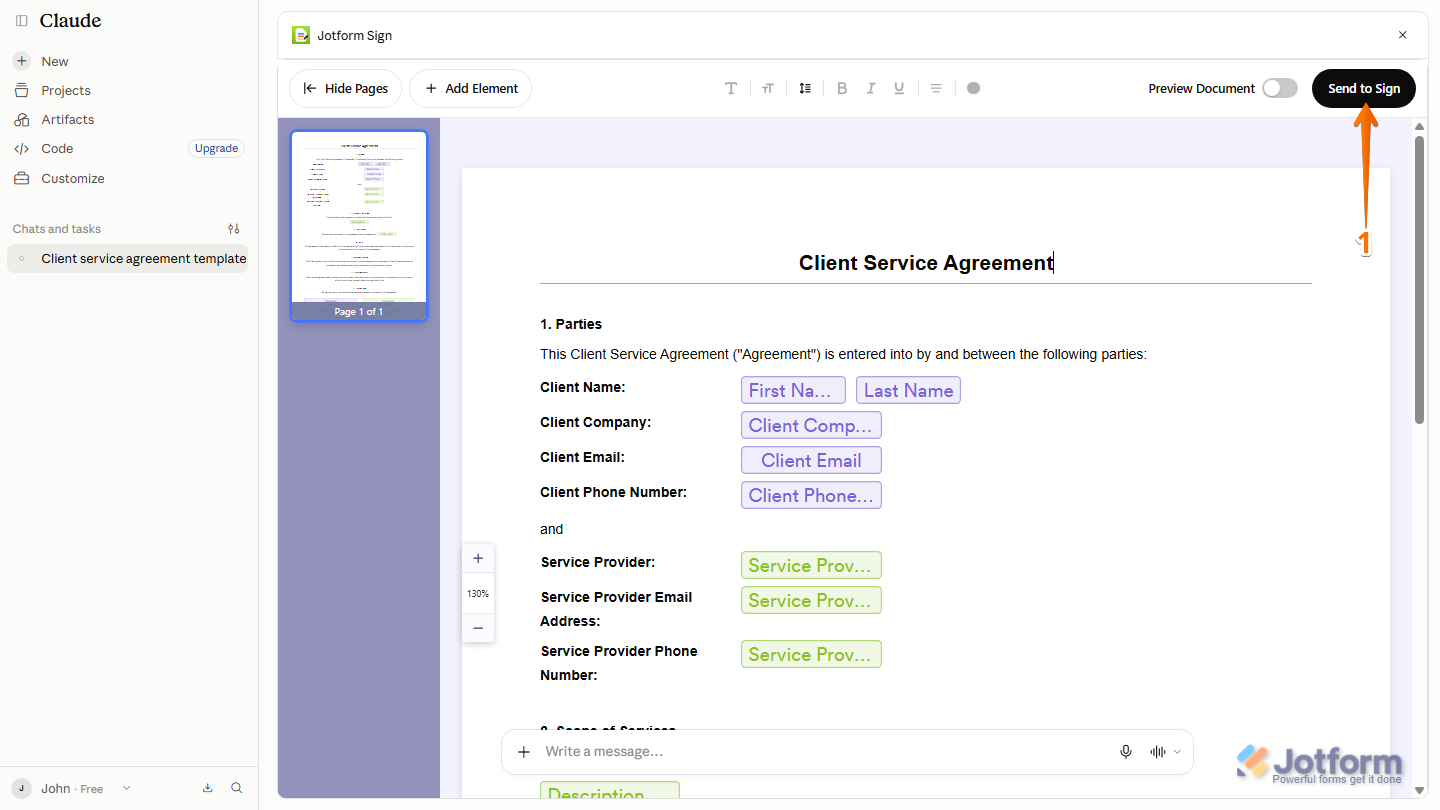
- In the top-right corner of Jotform Sign Editor, click on Send to Sign.
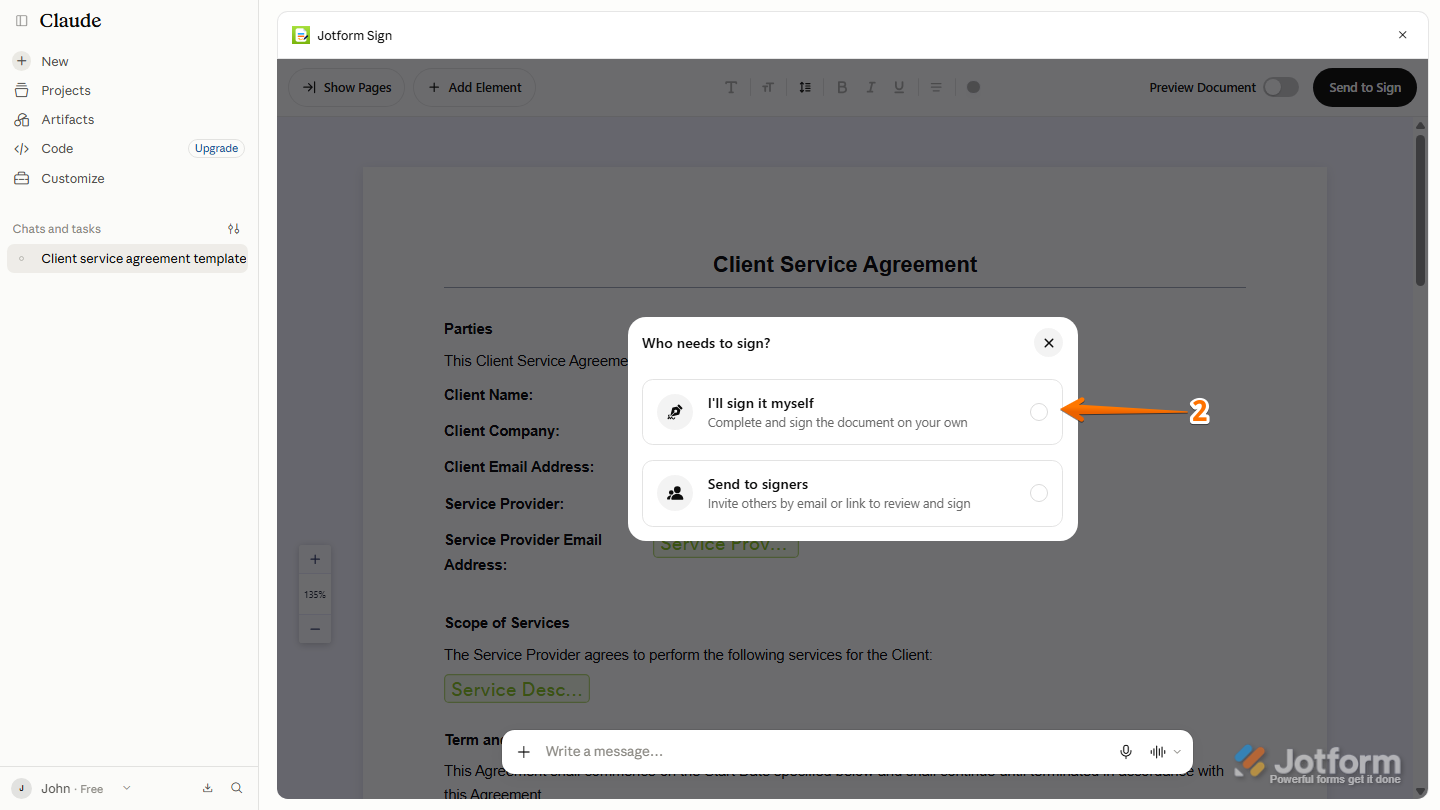
- Then, in the Who Needs to Sign? window that opens, select I’ll Sign it Myself.
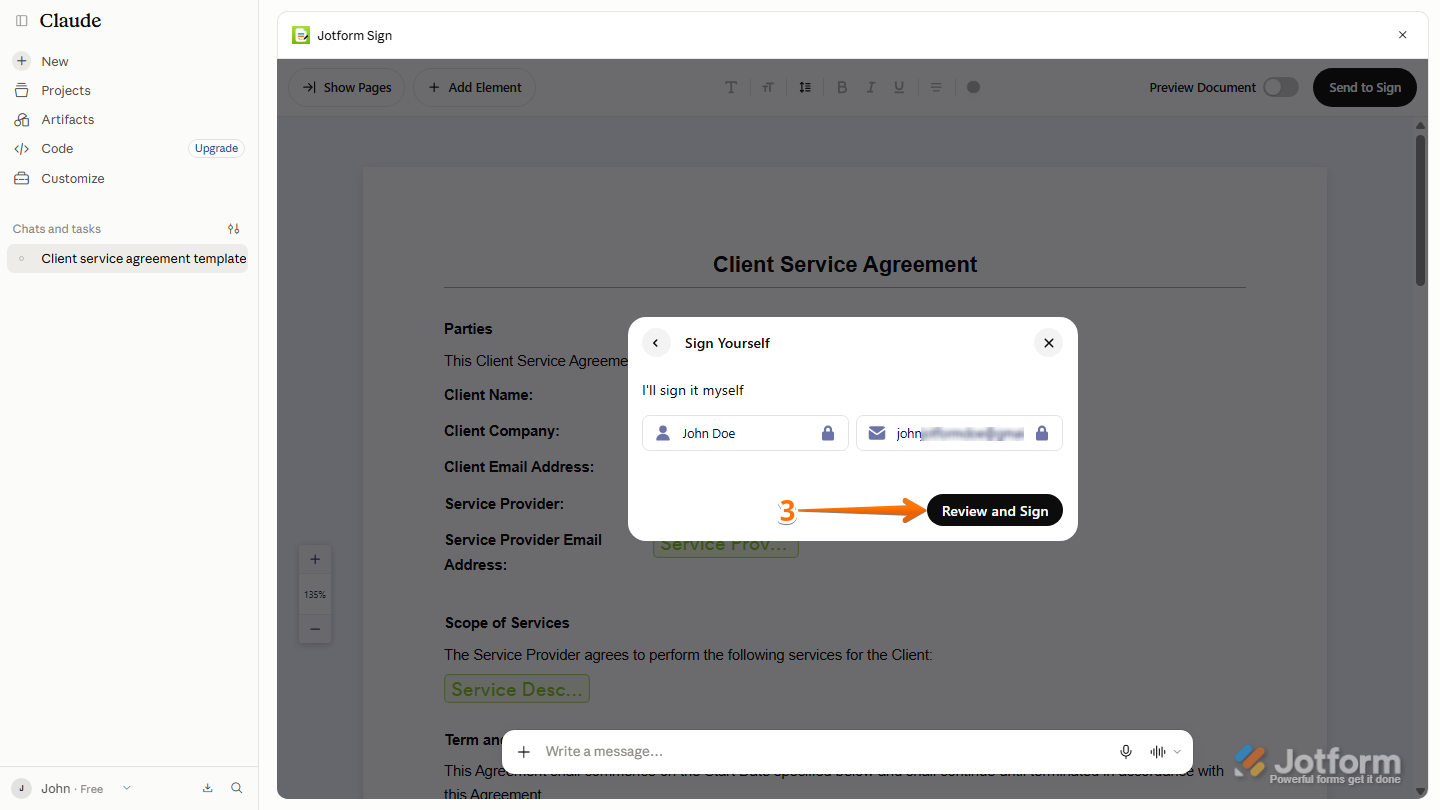
- Next, in the Sign Yourself window, click on Review and Sign to move on to signing the document.
Note
he name and email address are locked and can’t be edited. The document will be sent to the email address linked to your Jotform account.
- Now, click on Start Signing.
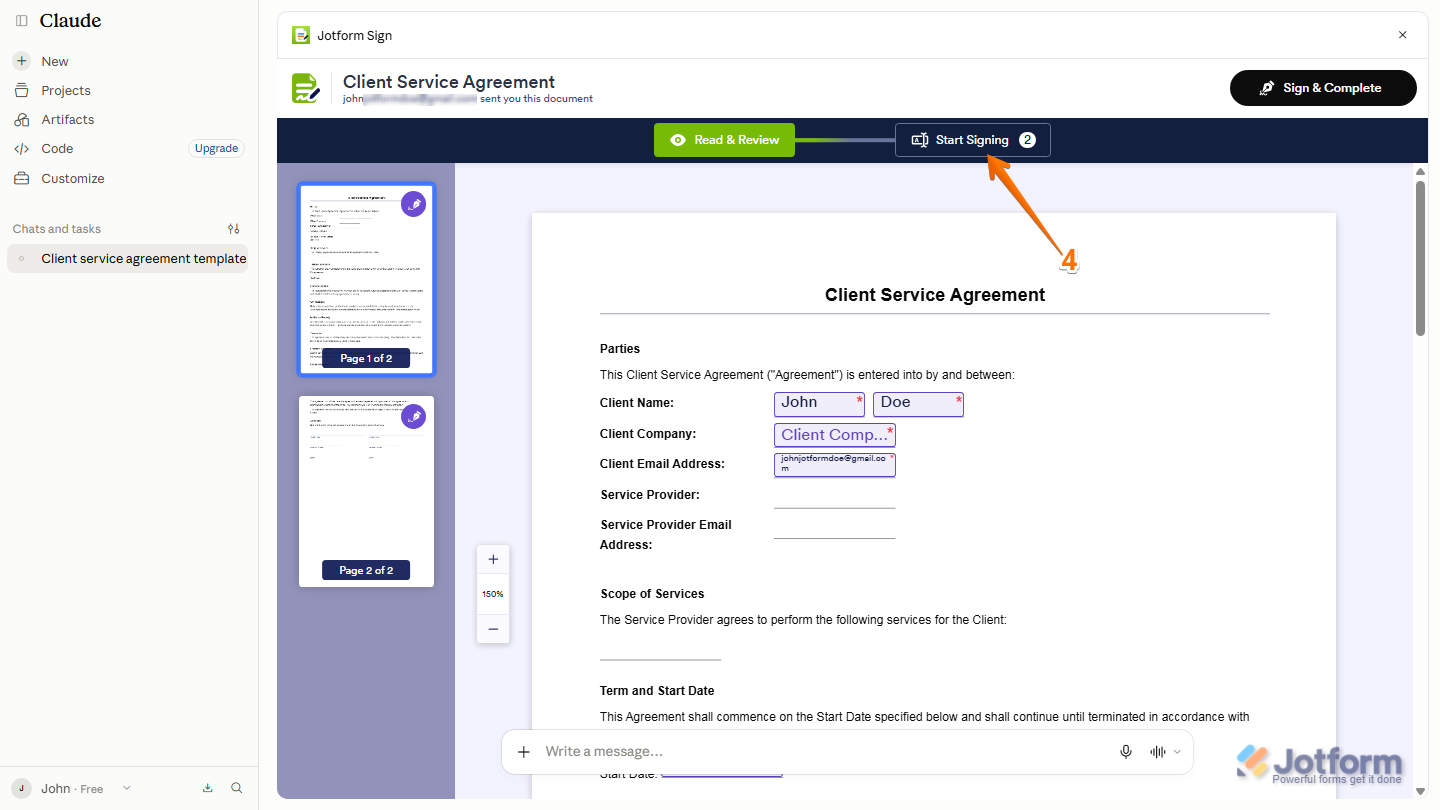
- Then, fill in the required fields and click on Next.
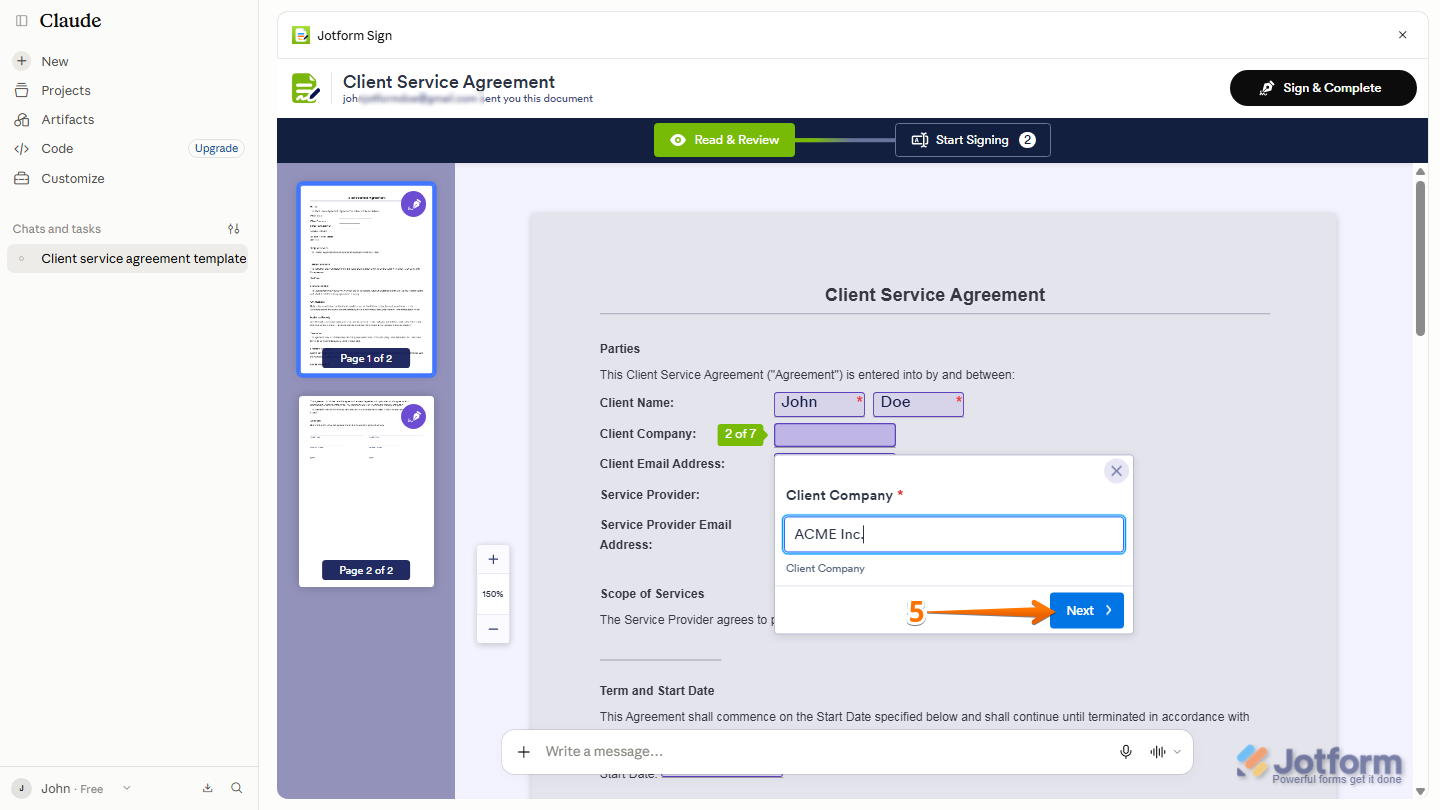
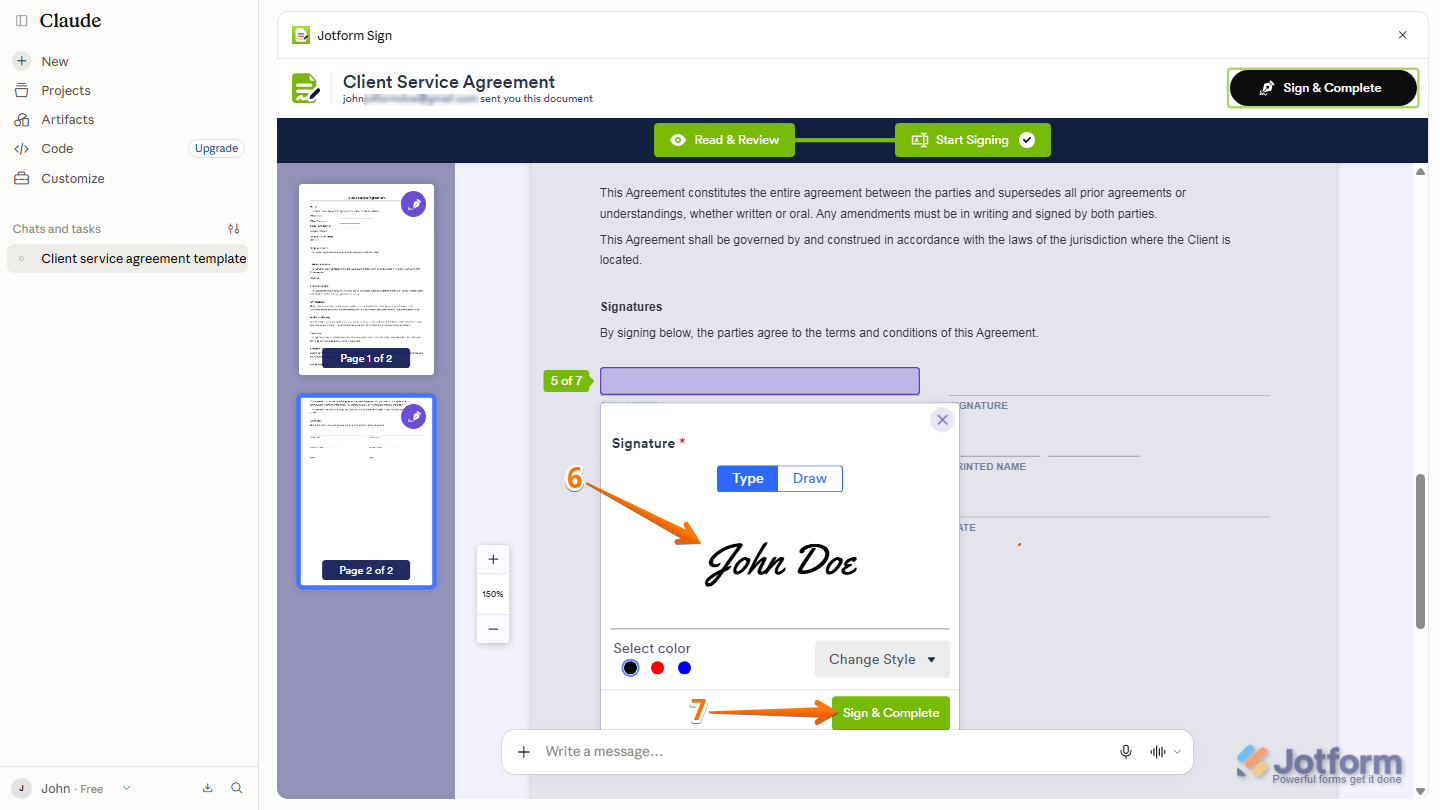
- In the Signature field, type or draw your signature.
- Now, in the Change Style Dropdown menu, click on Sign & Complete.
- Finally, in the Sign Document window that opens, click on Accept and Sign.
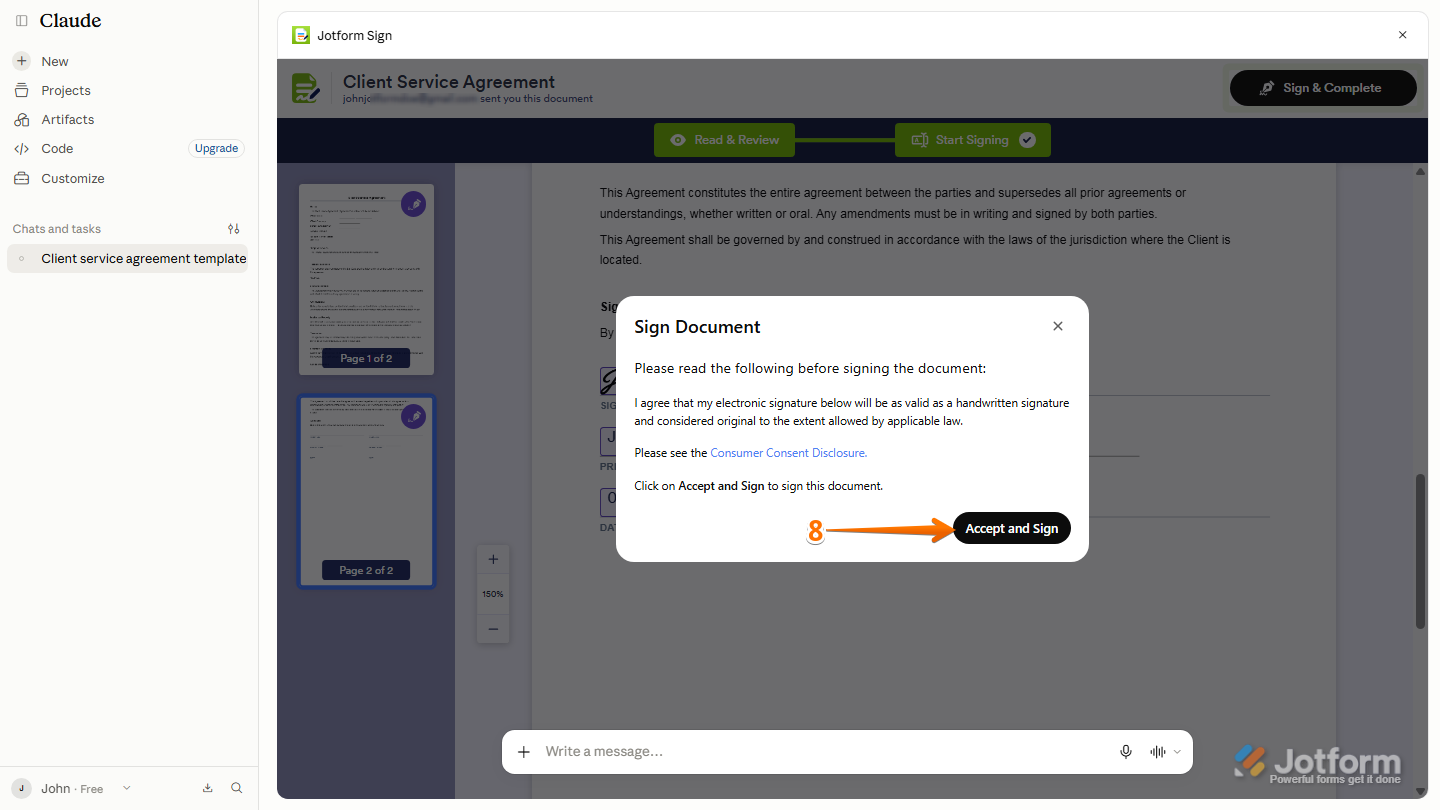
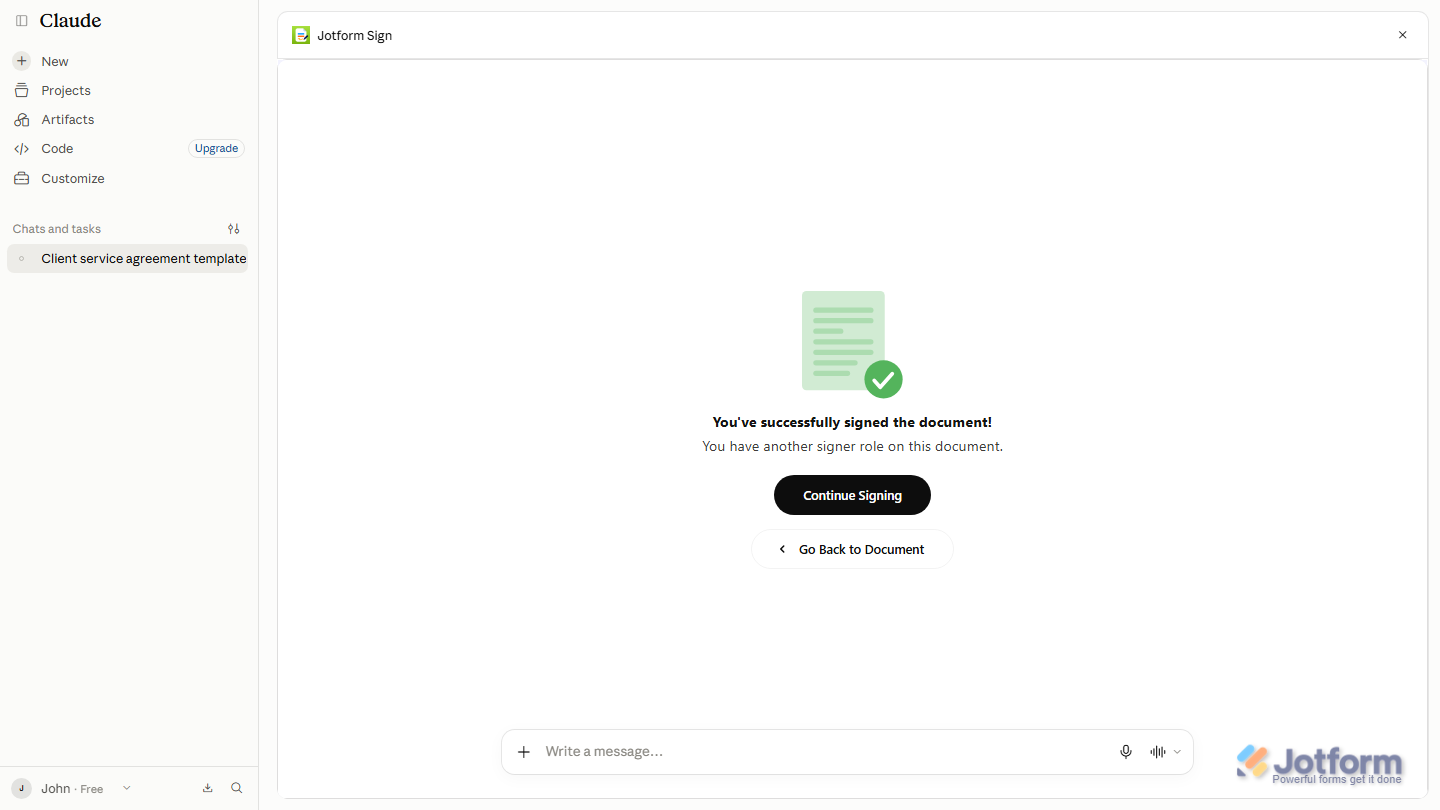
The document’s been signed and completed in your Jotform account.
Sending the Sign Document through Email
If you need other people to sign the document, you can send it directly to their email addresses. Here’s how:
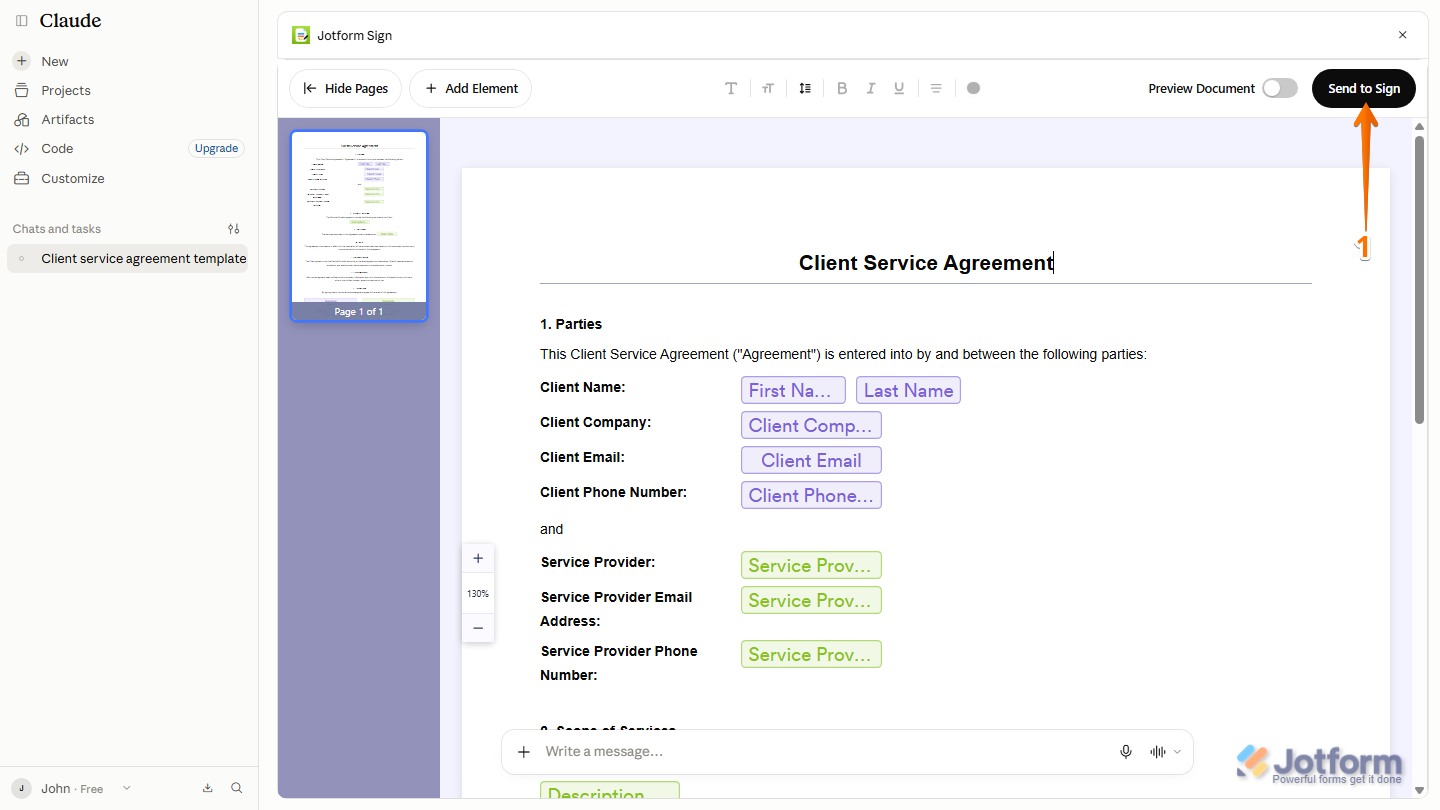
- In the top-right corner of Jotform Sign Editor, click on Send to Sign.
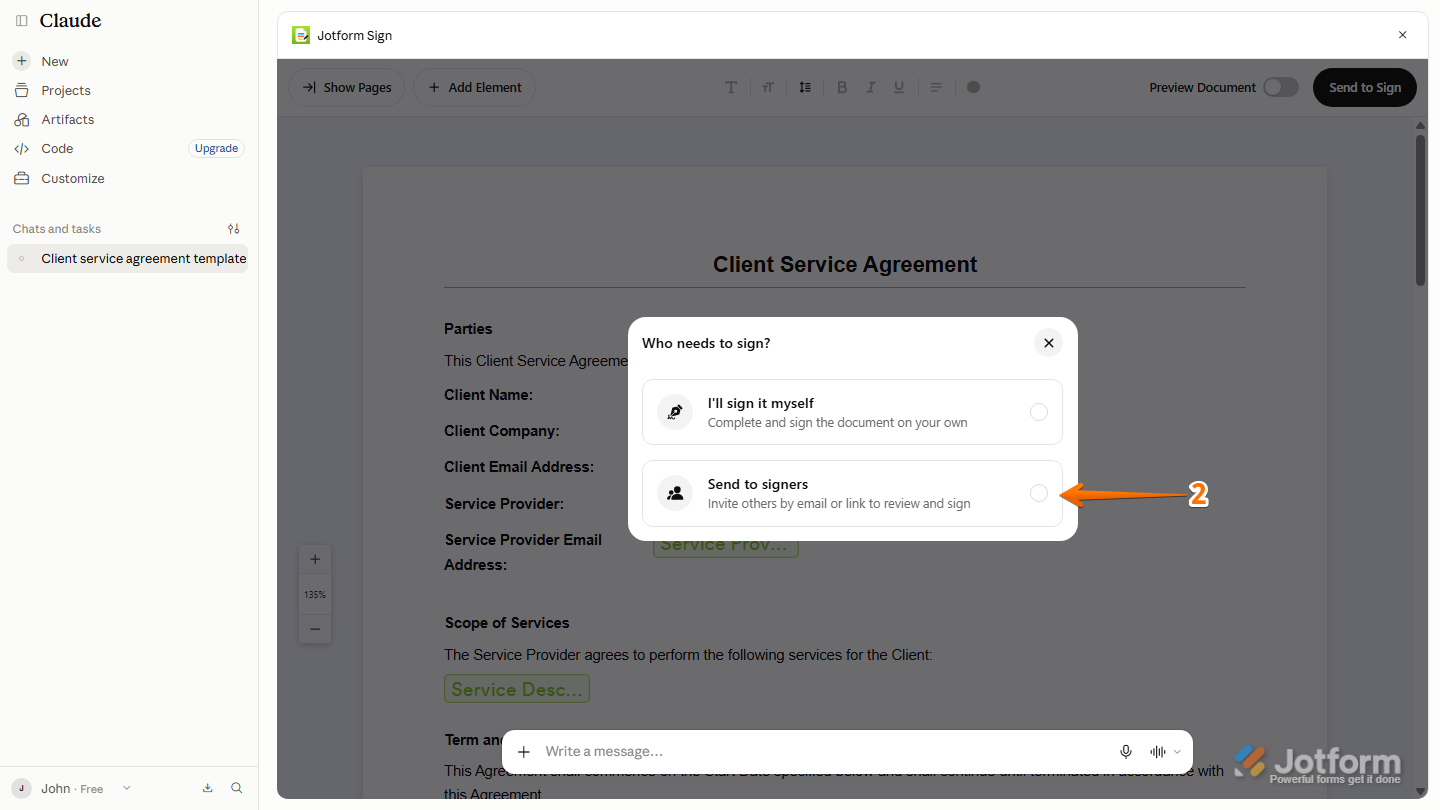
- Then, in the Who Needs to Sign? window that opens, select Send to Signers.
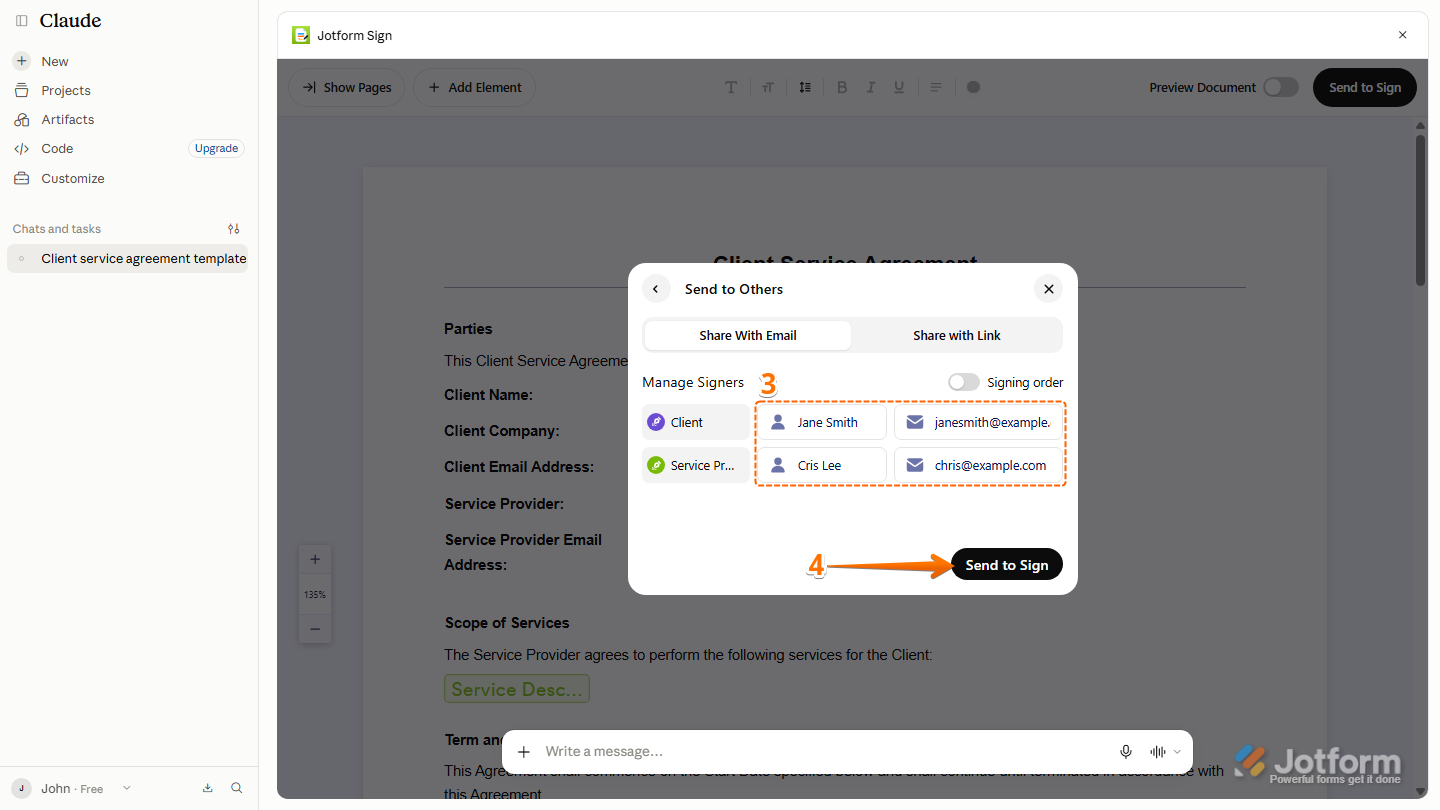
- Next, in the Send to Others window, under Manage Signers, enter the Full Name and Email Address of each signer.
- Then, click on Send to Sign.
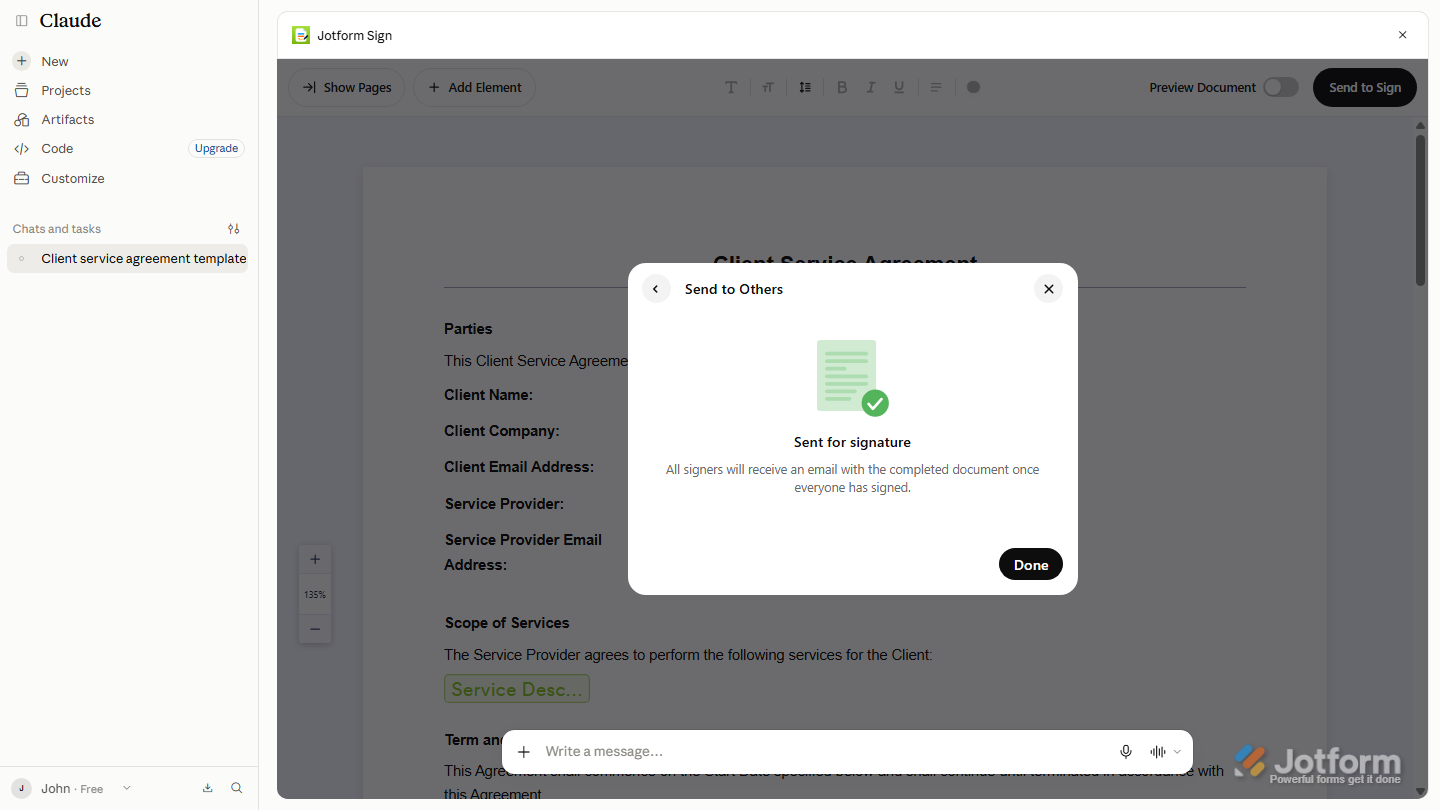
That’s it, The document’s been sent to the signers so they can complete it.
Sharing the Sign Document through a Link
You can also share the Sign Document using a link, allowing signers to access and sign it without sending it individually by email. Here’s how:
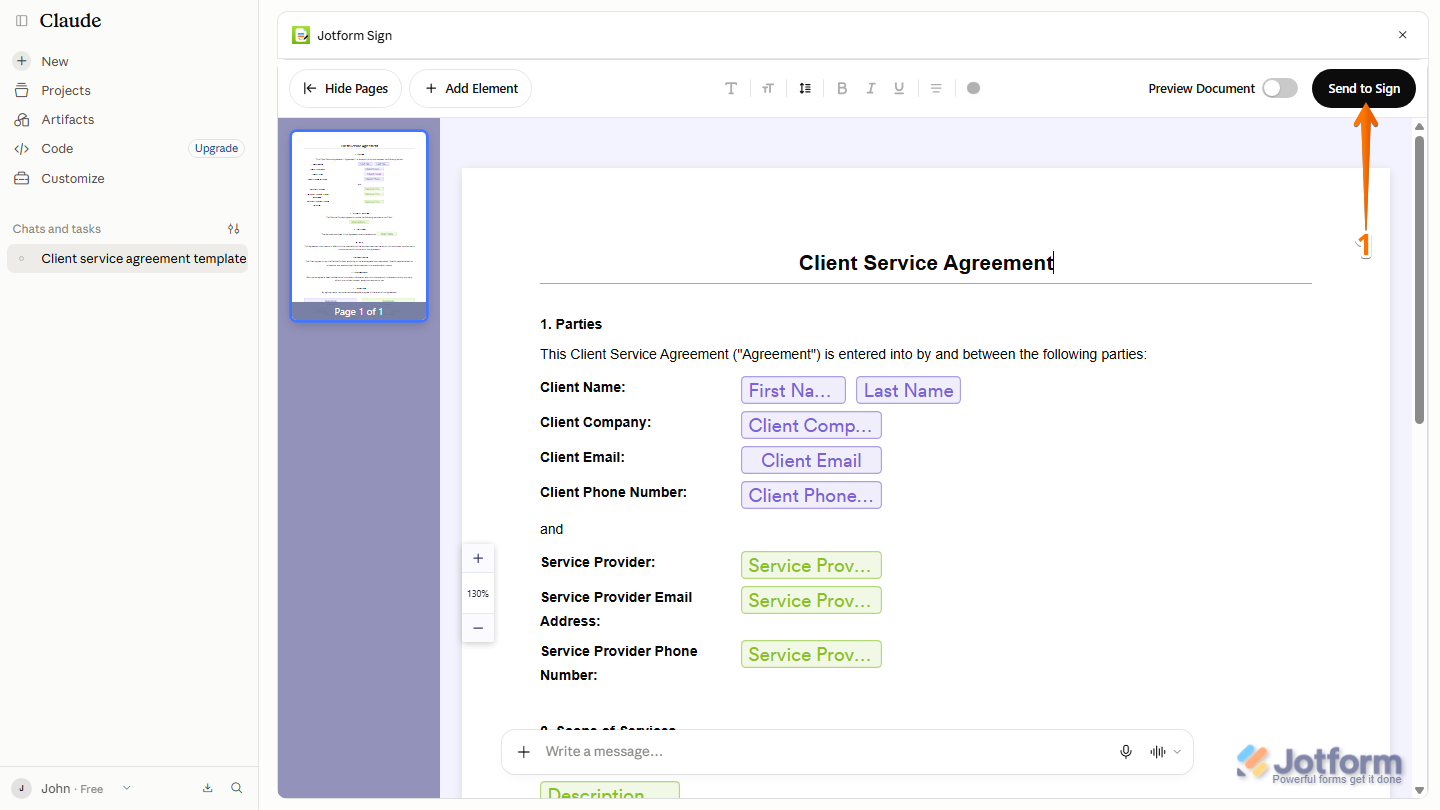
- In the top-right corner of Jotform Sign Editor, click on Send to Sign.
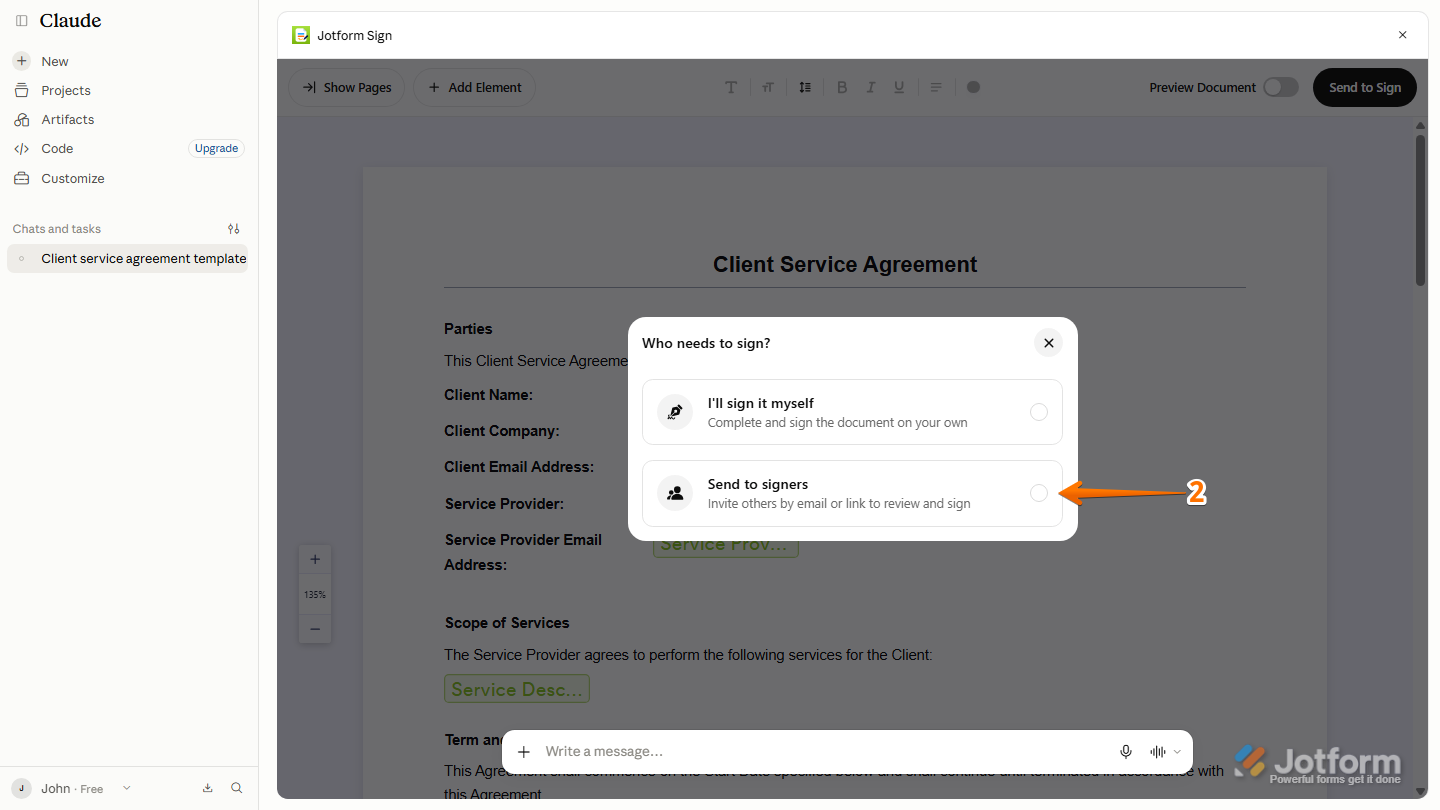
- Then, in the Who Needs to Sign? window that opens, select Send to Signers.
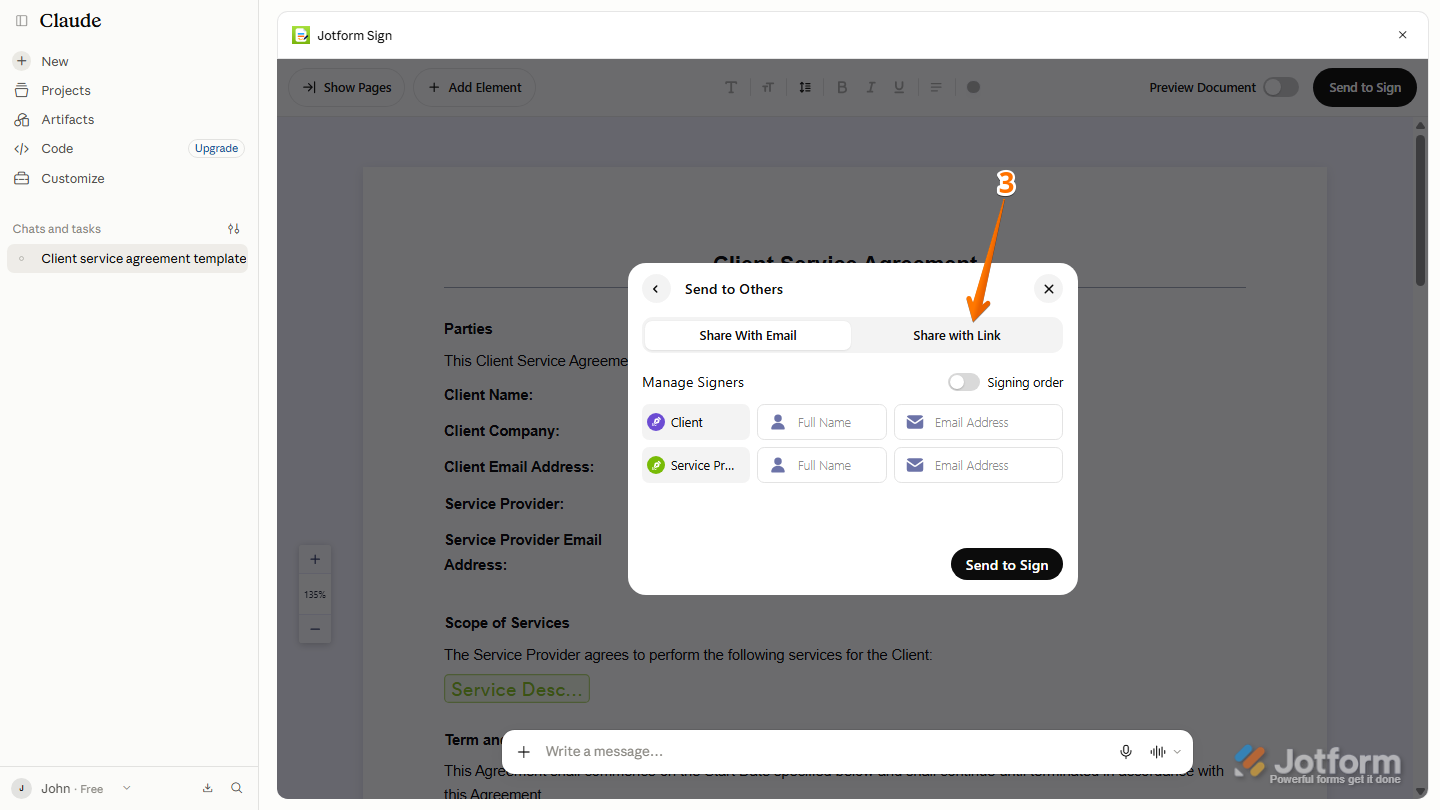
- Next, in the Send to Others window, click on Share with Link.
- Now, under Step 1: Who Are You Creating This Link For?, click on the Downward arrow icon and select the signer who’ll get the signing link.
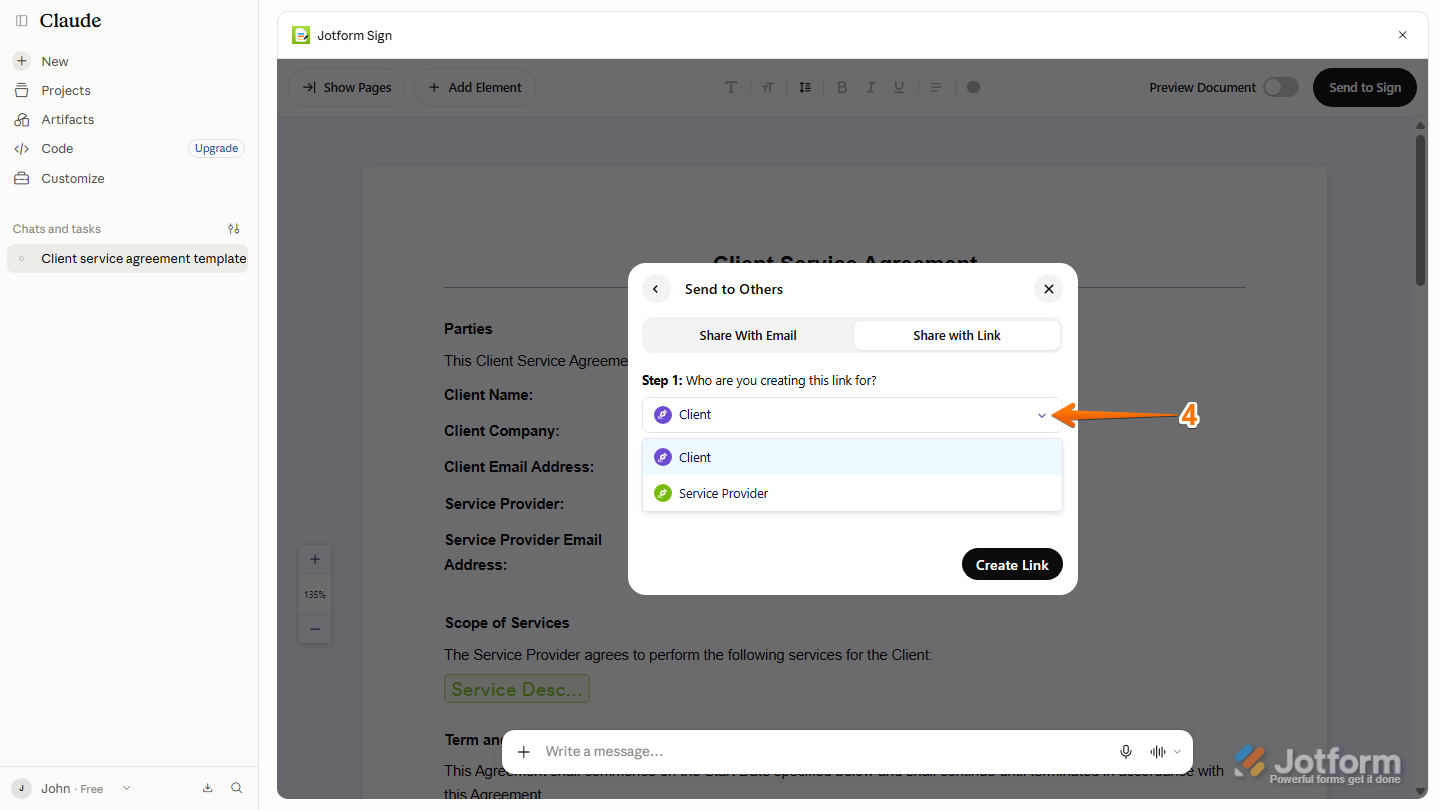
- Then, under Step 2: Specify Other Signers, enter the Full Name and Email Address of the additional signers.
- Next, click on Create Link.

- Once the link is generated, click on the Copy icon to copy the link and you’re done.
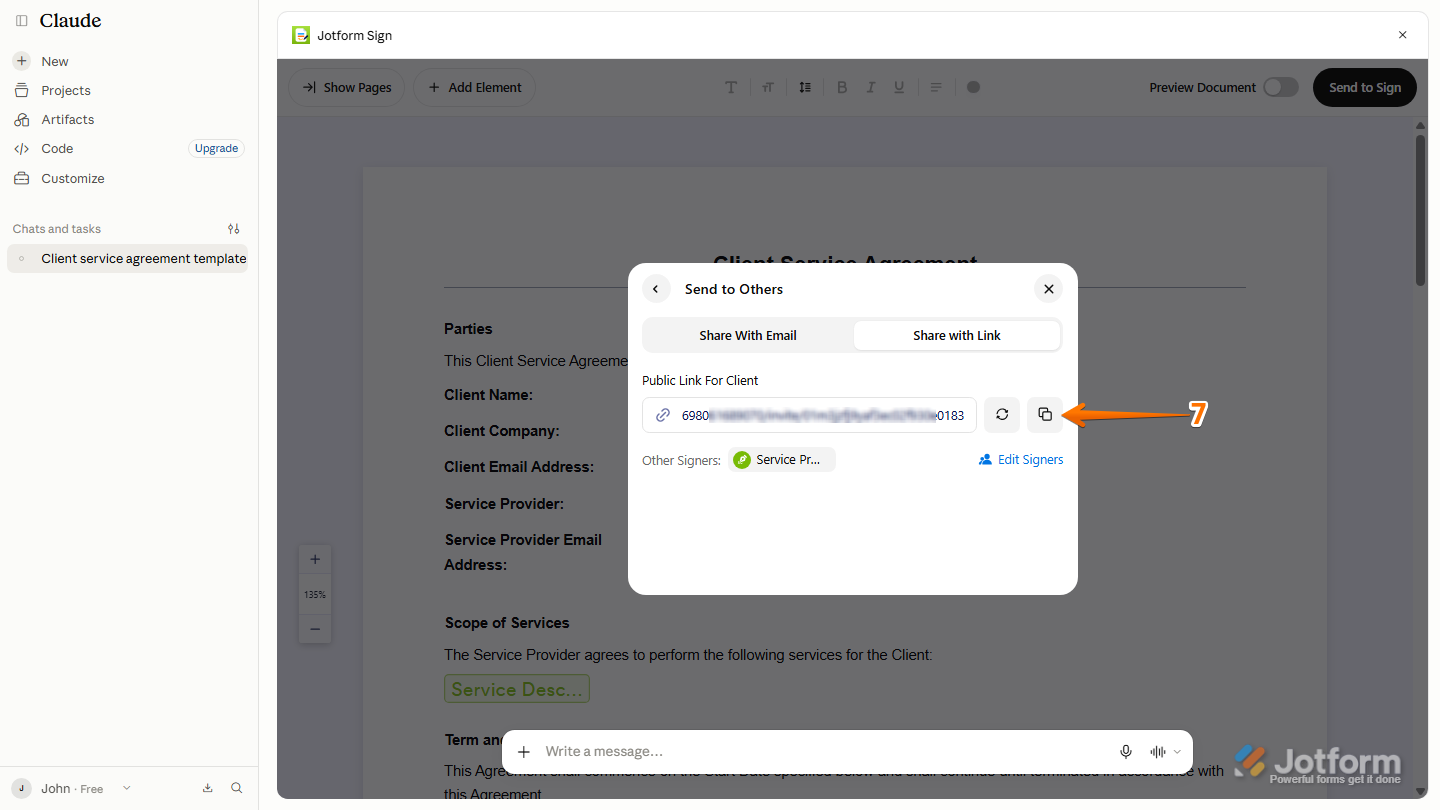
The Sing Document link is now ready to be shared with the signer.



Send Comment: