With Jotform’s Weather Widget, you can display real-time weather information for any location directly on your website. Simply choose the location, customize the widget’s appearance, and embed it on your website to keep visitors informed about current weather conditions and forecasts.
Adding a Weather Widget is a great way to provide useful, up-to-date information for your audience. Whether you run a travel website, local business, event page, or community portal, displaying the weather can enhance the visitor experience and help users plan their day.
Note
The widget displays weather information based on the location you select in the Widget Settings. Checking that the location details are accurate ensures visitors see the correct forecast.
Creating Your Weather Widget and Getting the Embed Code for it
Before you can add the Weather Widget to your website, you’ll first need to choose the location, customize how the weather information is displayed, and copy the embed code for it. Here’s a quick walkthrough:
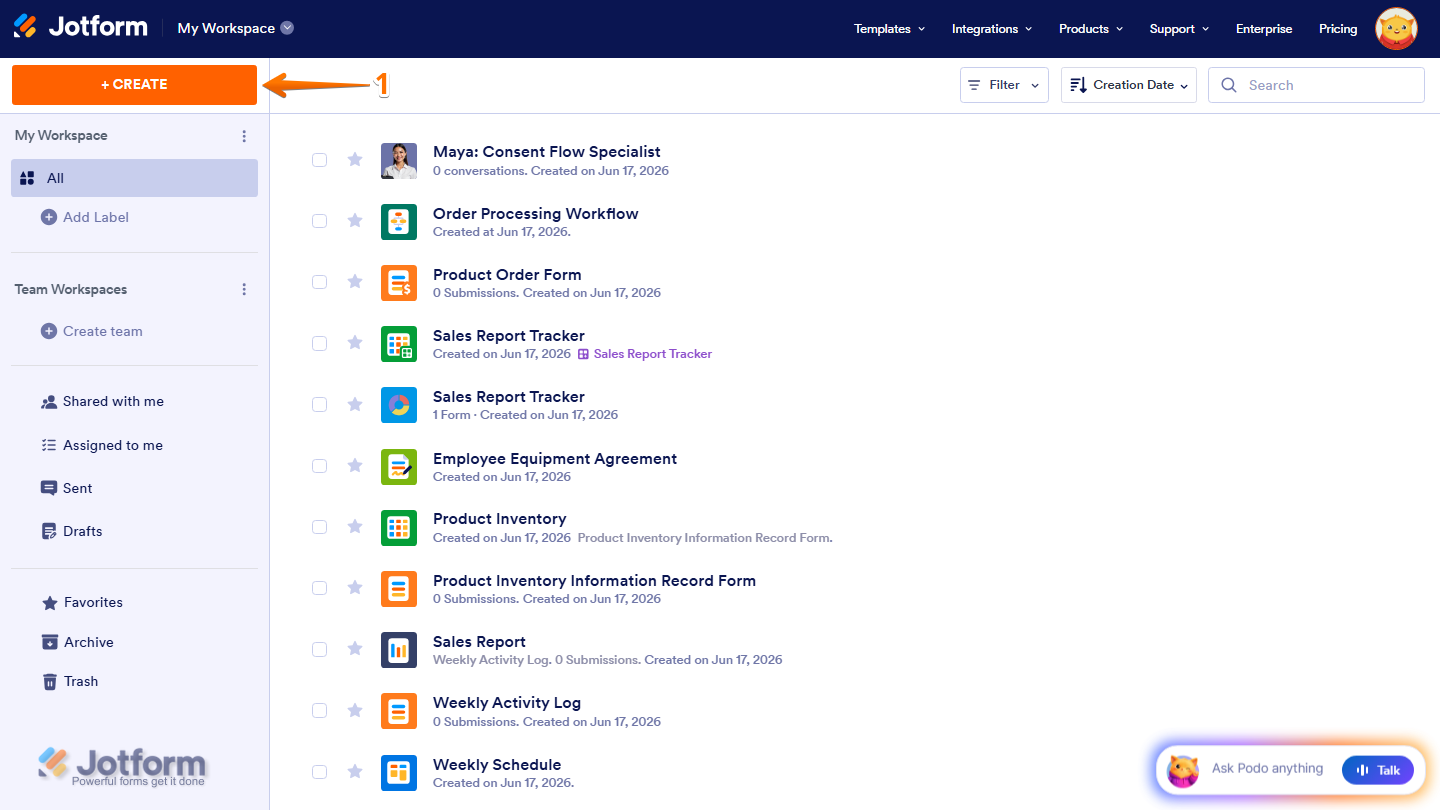
- On the top-left side of your Workspace page, click on Create.
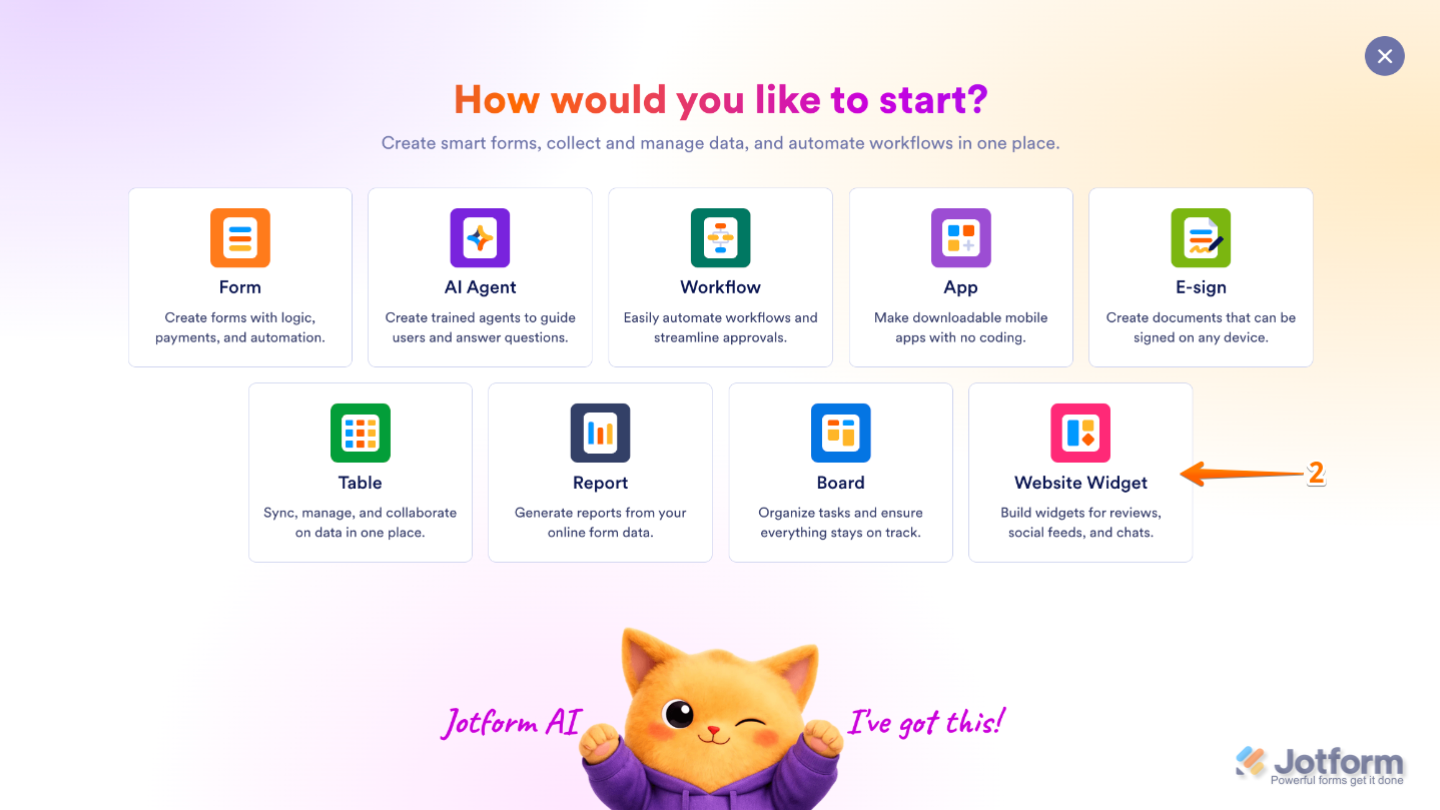
- Then, in the menu that opens up, select Website Widget.
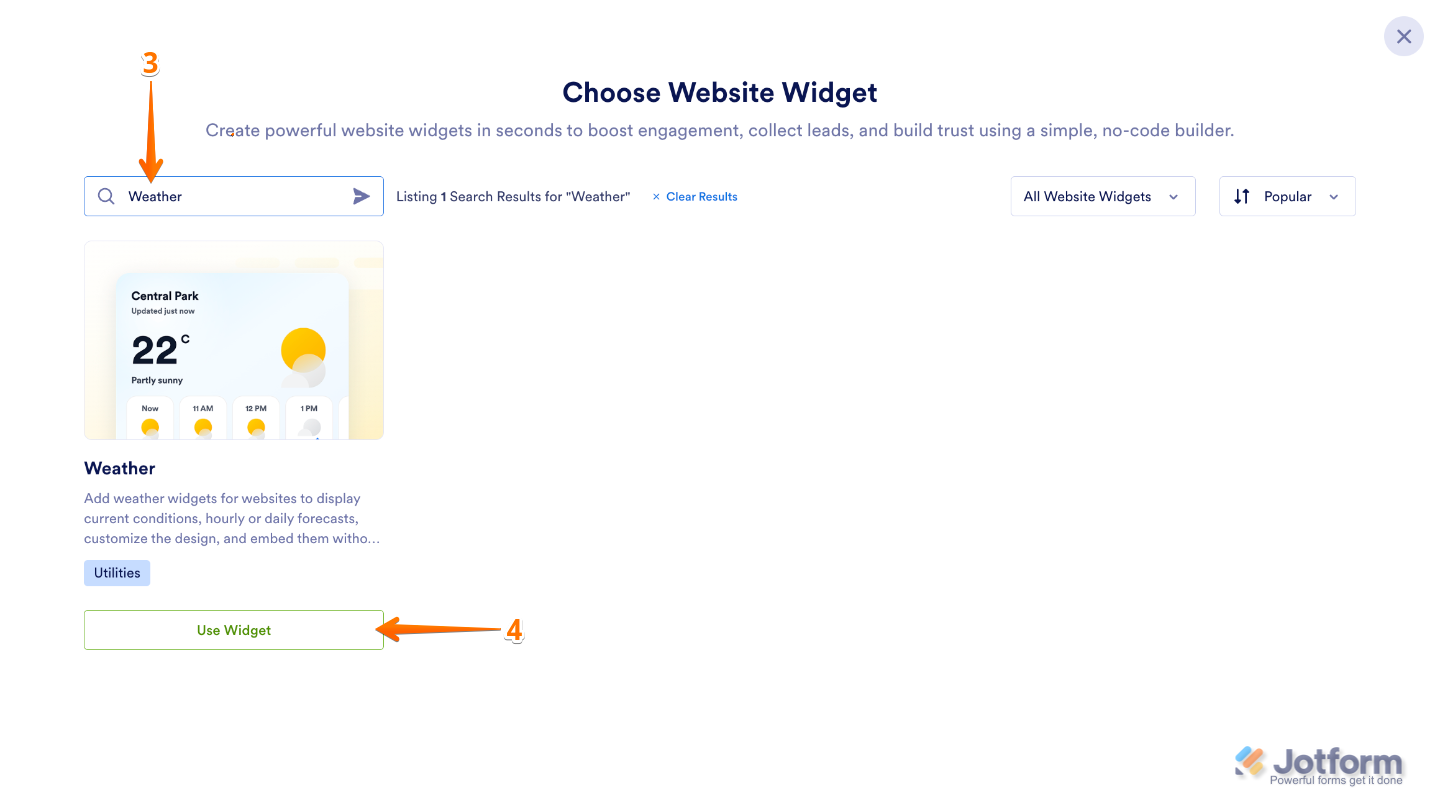
- Next, enter Weather in the Search bar in the upper-left corner of the Choose Website Widget page.
- Then, at the bottom of the search results, click on Use Widget.
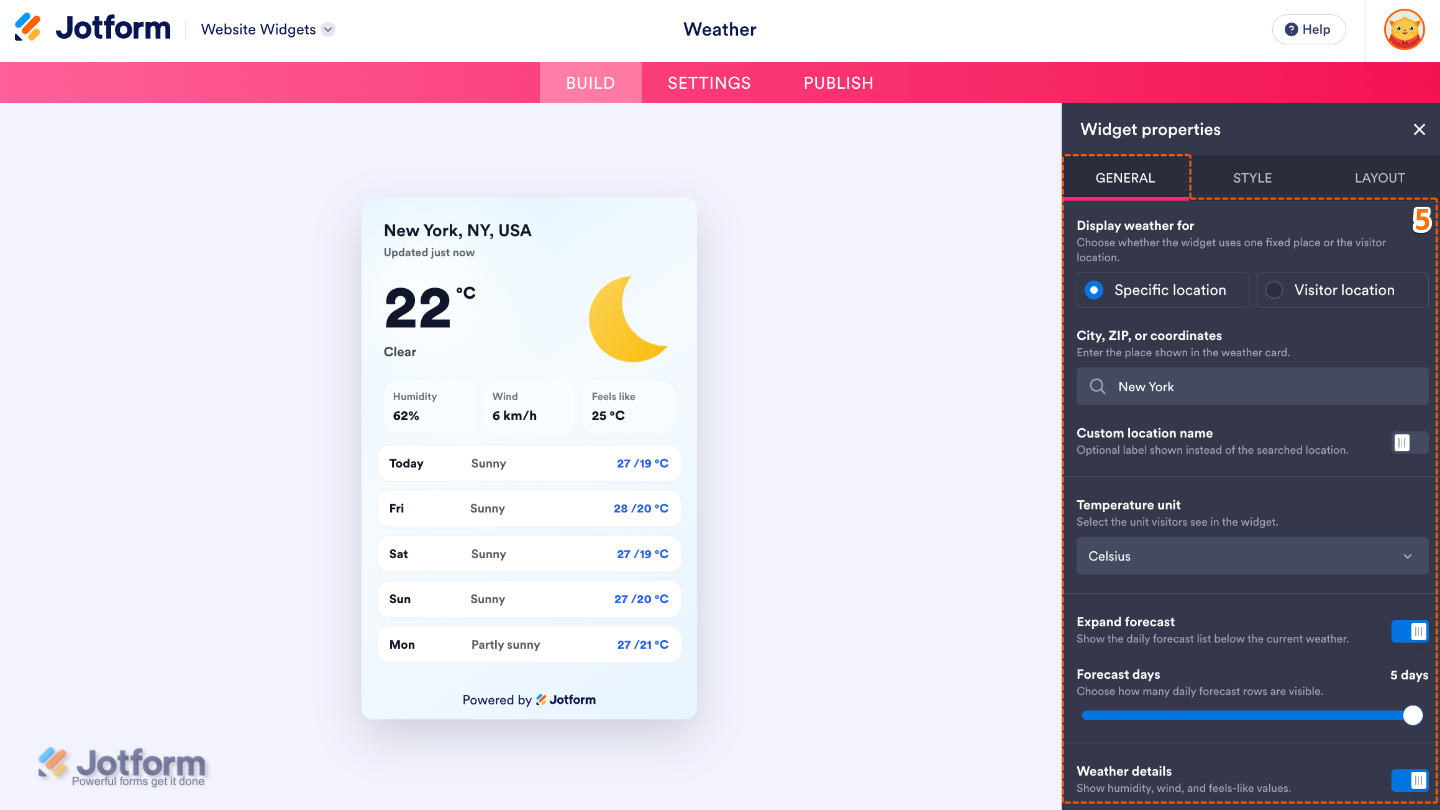
- Now, in the Widget Properties menu that opens on the right side of Website Widgets, set up these properties:
- Display Weather For — Choose whether to display weather information for a specific location or a visitor’s location.
- City, Zip, or Coordinates — Enter the location you want the widget to display weather information for.
- Custom Location Name — Replace the default location name with your own custom label.
- Temperature Unit — Choose whether temperatures are displayed in Celsius (°C) or Fahrenheit (°F).
- Expand Forecast — Show or hide the extended weather forecast below the current weather conditions.
- Forecast Days — Select how many days of weather forecast to display.
- Weather Details — Choose which weather information to show, such as humidity, wind speed, feels-like temperature, and other available details.
- Next, under the Styles tab, customize these properties:
- Weather Template — Choose a visual style for how the weather information is displayed.
- Weather Icon Animation — Enable or disable animated weather icons for a more dynamic appearance.
- Background — Choose a background color for the widget.
- Text — Set the color of the primary text displayed in the widget.
- Secondary — Customize the color of secondary text and supporting weather information.
- Corner Radius — Adjust how rounded the corners of the widget appear.
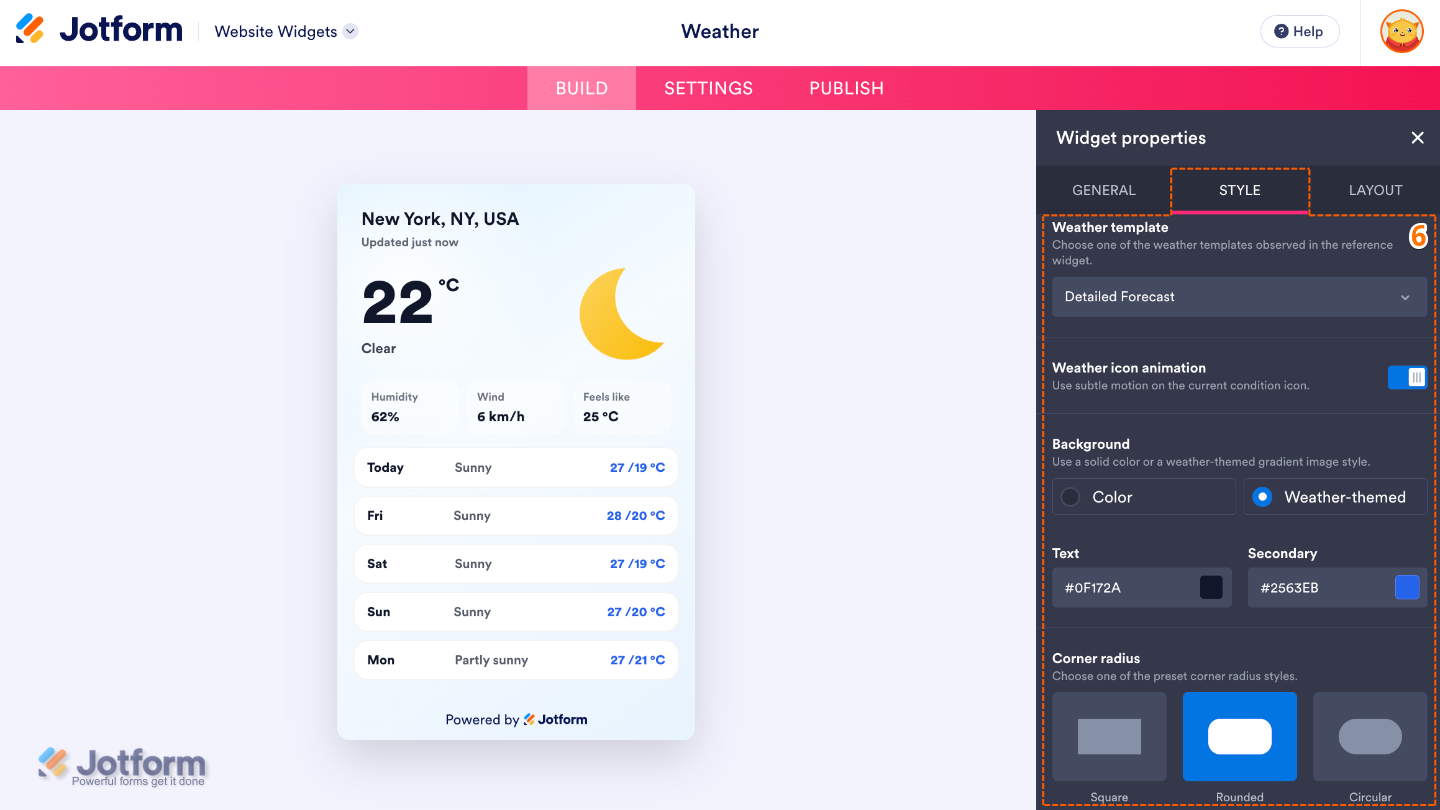
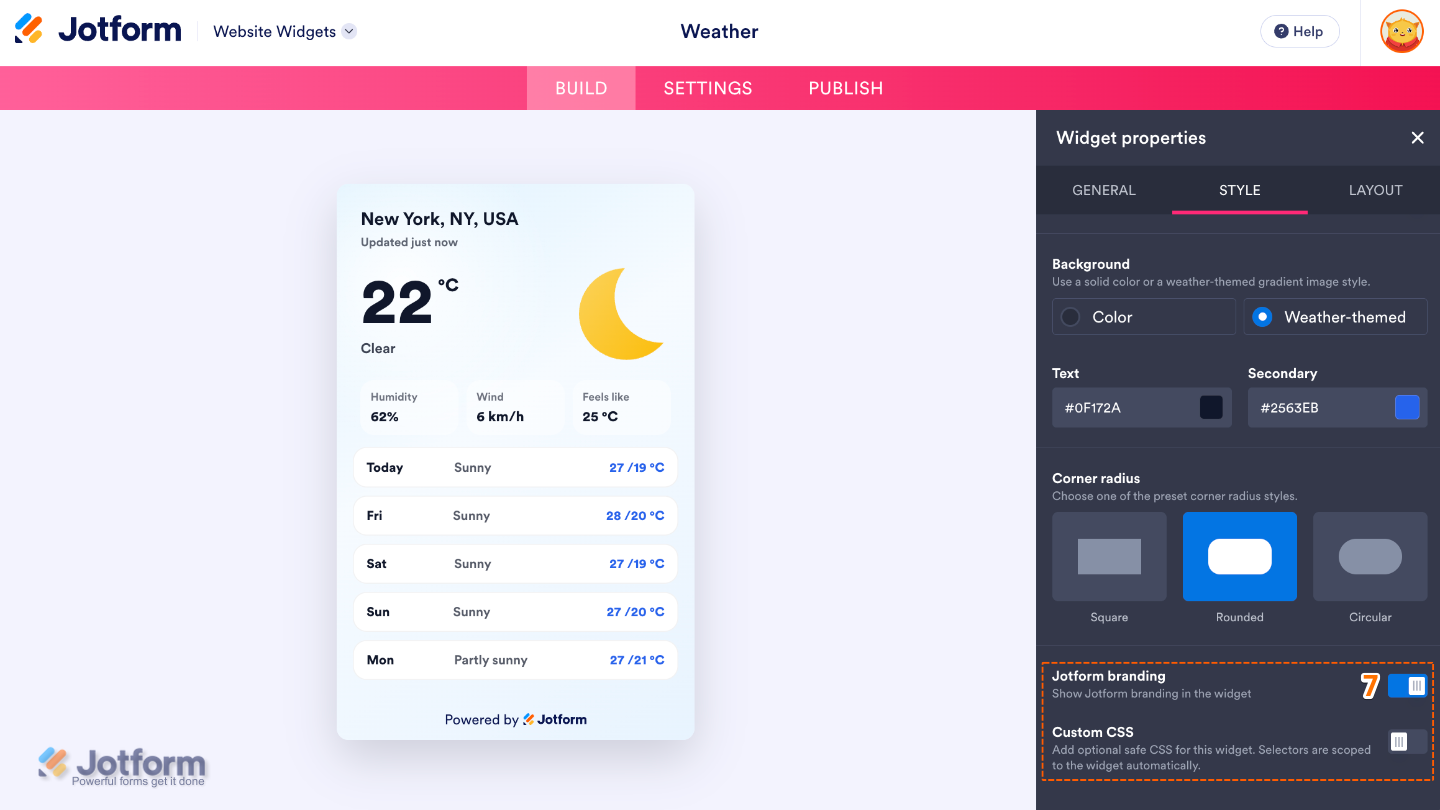
- Then, scroll down and adjust these settings:
- Jotform Branding — Show or hide Powered by Jotform in the widget.
- Custom CSS — Apply your own CSS code for advanced styling beyond the built-in settings.
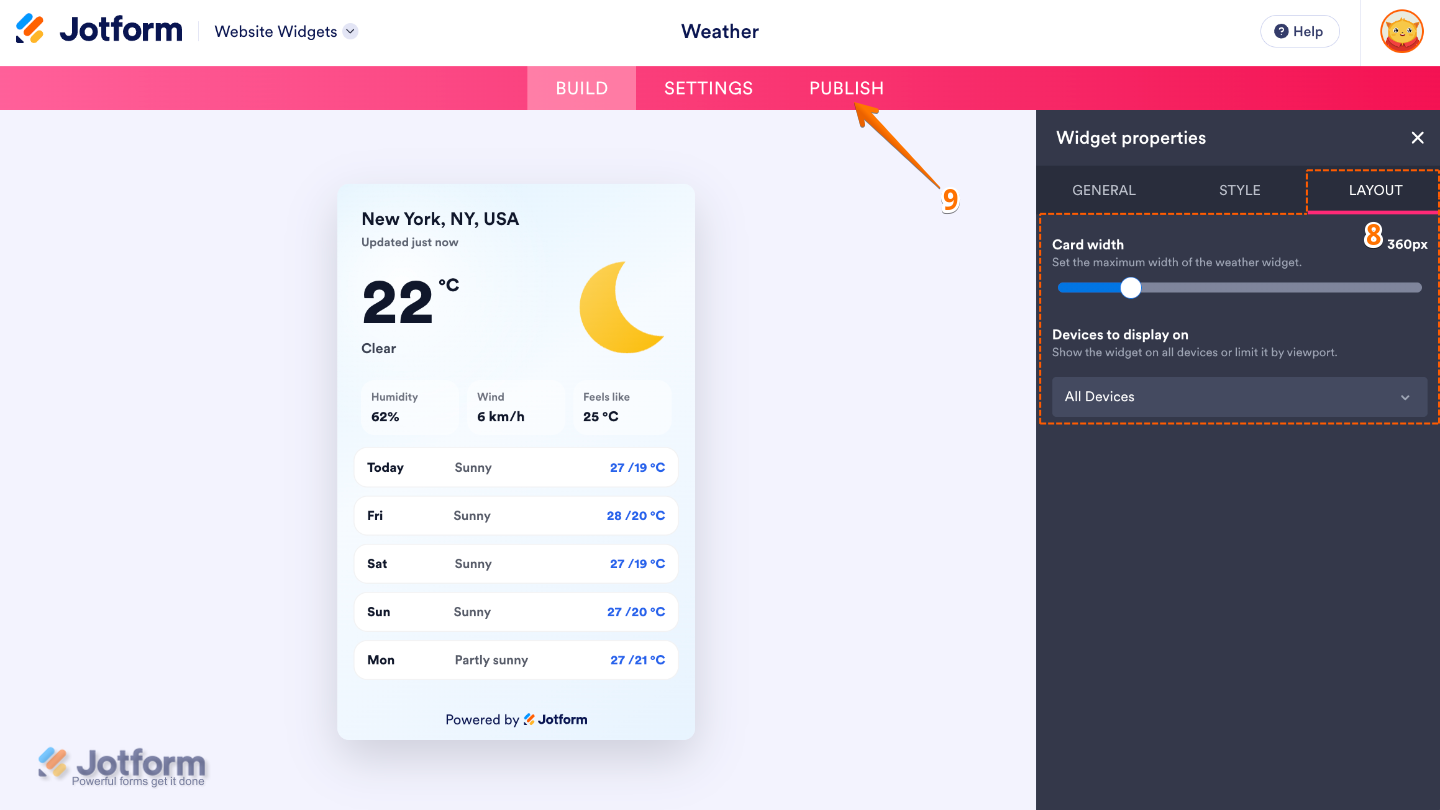
- Now, under the Layout tab, configure these properties:
- Card Width — Adjust the width of the widget to better fit your website’s layout.
- Devices to Display On — Choose whether the widget appears on desktop devices, mobile devices, or both.
- Once you’ve finished, in the pink navigation bar at the top of the page, click on Publish.
Note
You’ll be asked to log in to your Jotform account, if you’re not already, or sign up for one. Once you’ve done that, you’ll be able to get the embed code for your widget.
- Then, in the Embed section, click on Copy Code, and, if you already know how, paste that into the Embed section on your platform, and you’re good to go.
- To view embedding instructions for your widget, click on Platforms in the menu on the left side of the page.
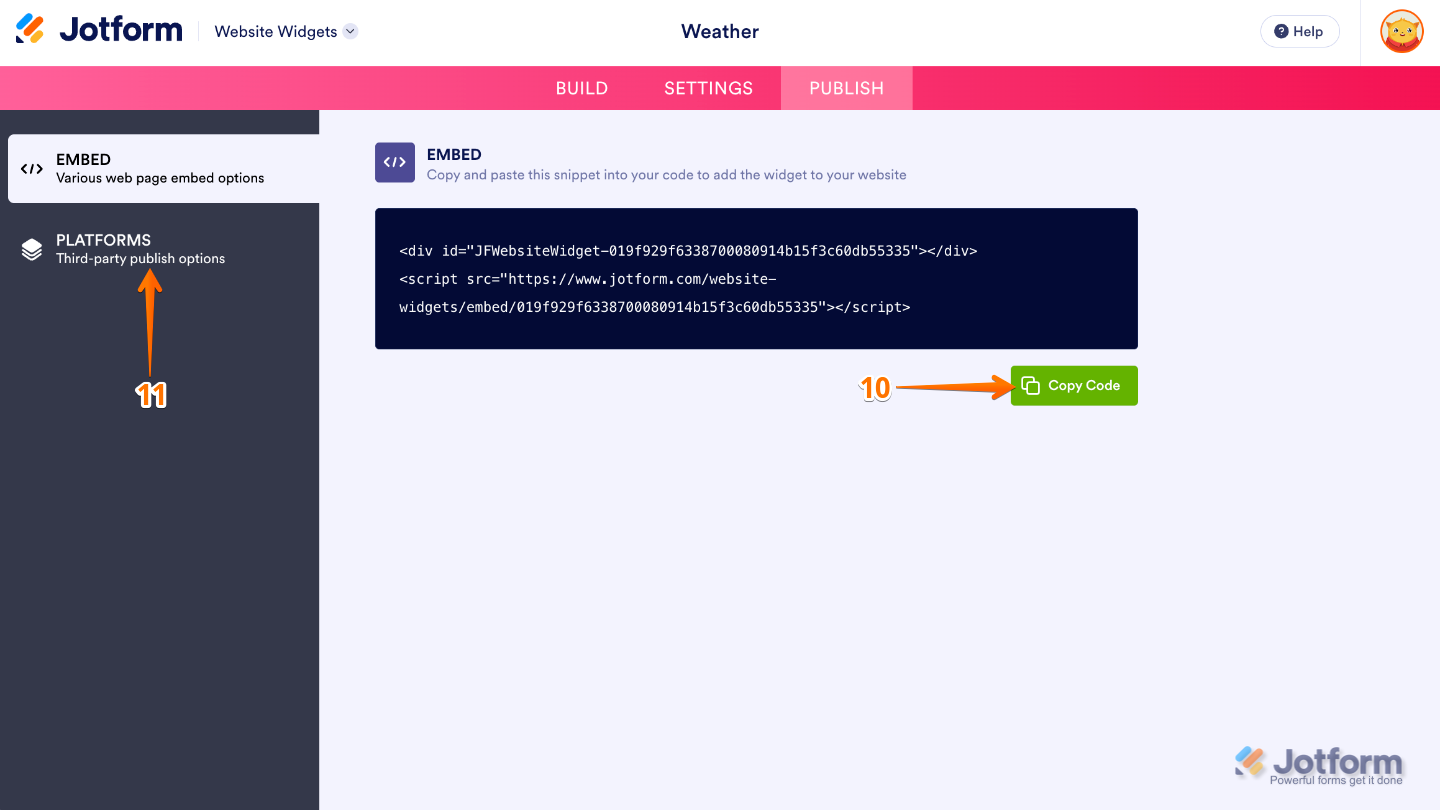
- Next, in the Platforms section on the right, select the platform you want to view embedding instructions for. Or, use the Search bar at the top of the section to find it easily.
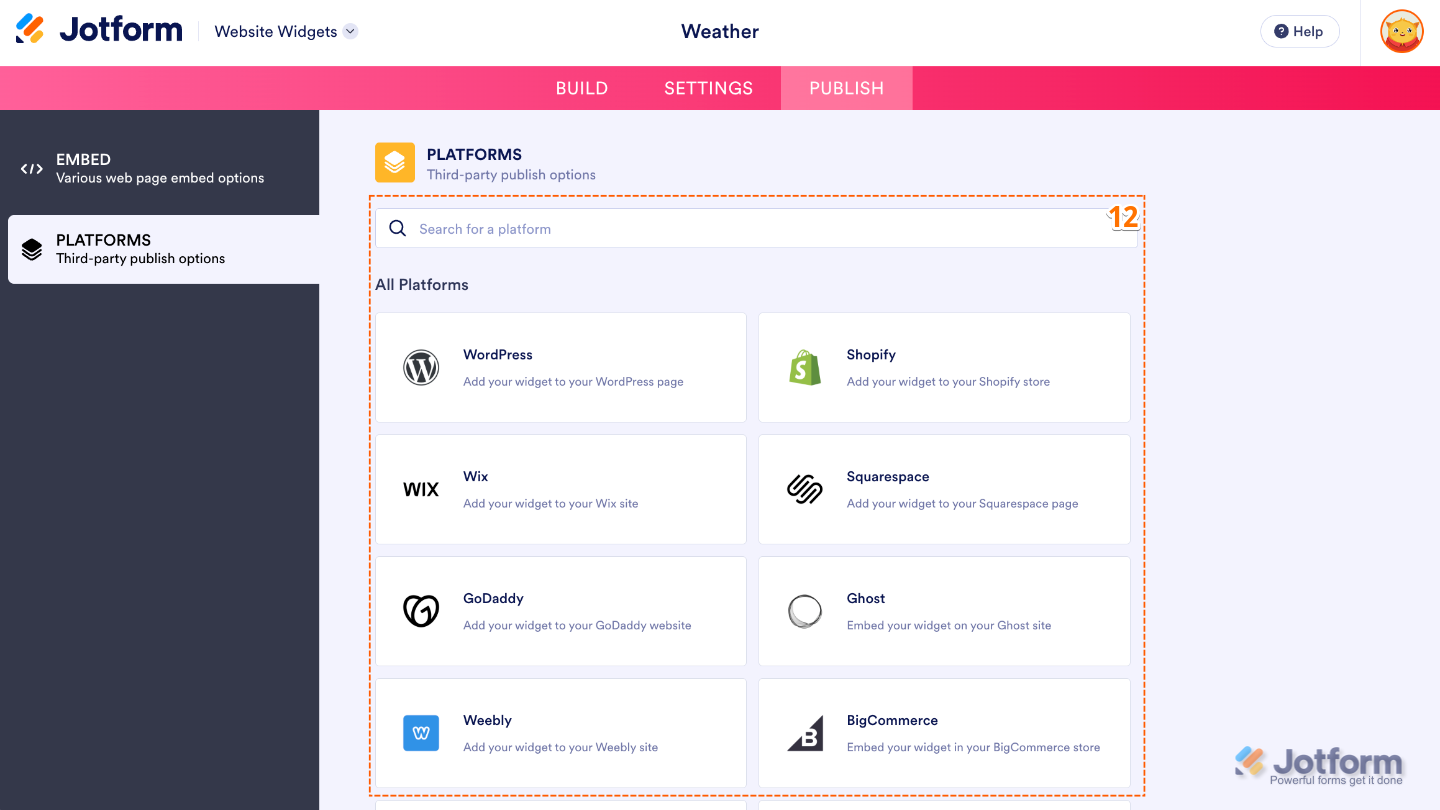
- Then, follow the steps in the How to Embed Your Widget section to add it to your website.
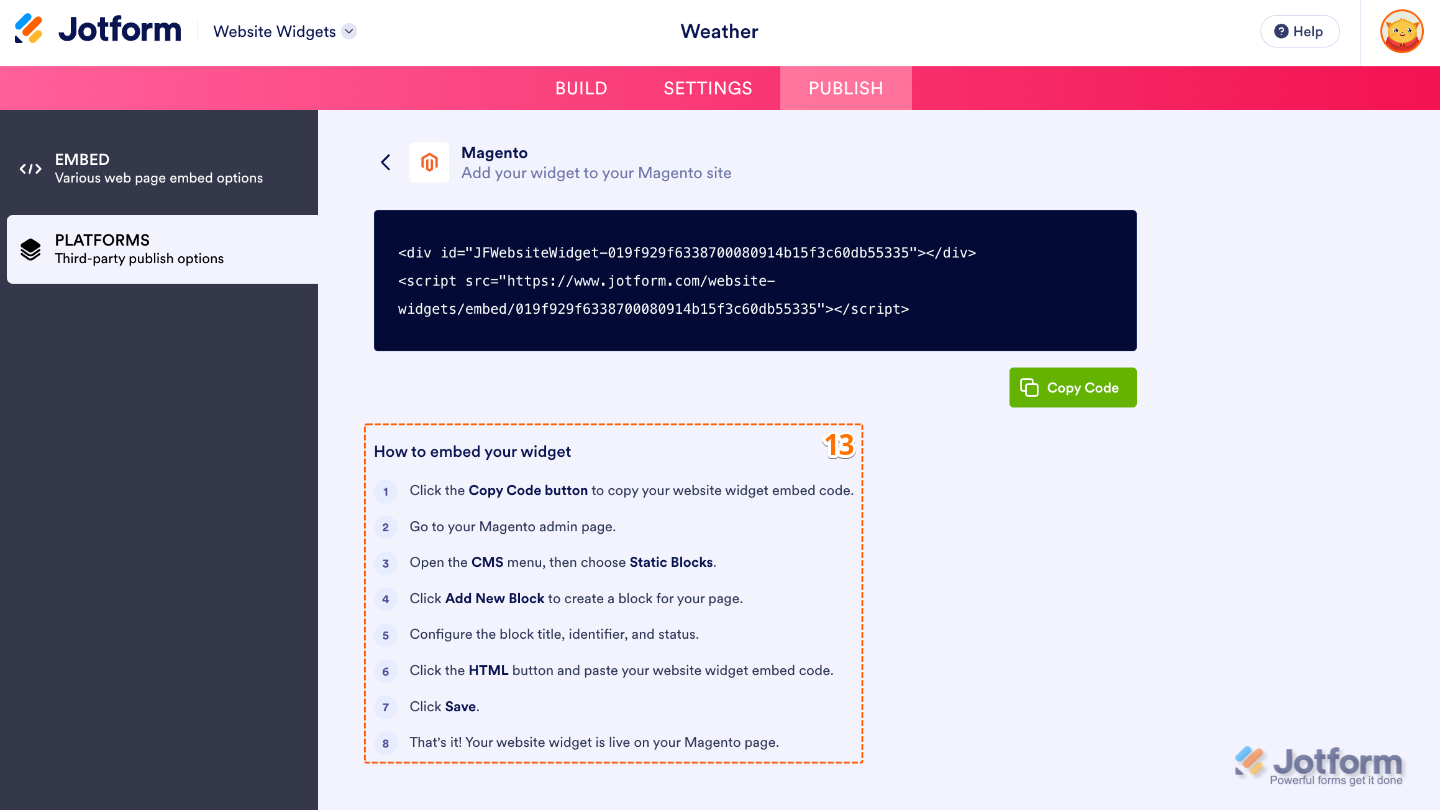
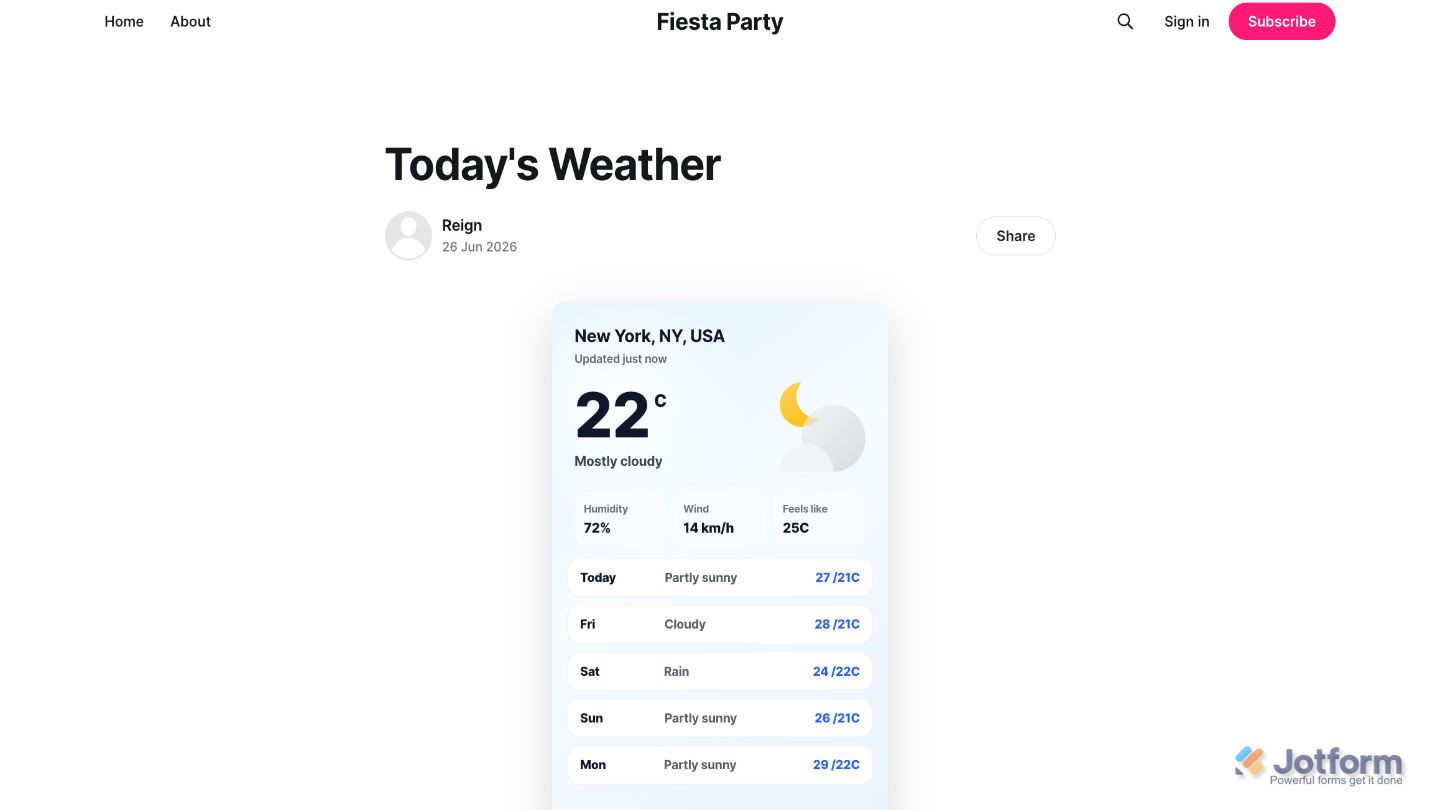
That’s it! Your Weather Widget will now appear on your website with the location, design, and settings you selected, giving visitors quick access to current weather conditions and forecasts. See the screenshot below for an example of how it looks.
Note
You can manage the website widgets you’ve created at any time from your account. For a full breakdown of how to do it, head over to our guide on How to Manage Website Widgets.
Pro Tips
- Showing multiple forecast days can be helpful for travel, event, and tourism websites, while a shorter forecast may work better for business or local community pages where visitors only need current conditions.
- Preview the widget on both desktop and mobile layouts to ensure it looks great on all screen sizes.


Send Comment: