Displaying a flipbook on your website is a great way to present PDFs, catalogs, brochures, magazines, menus, or reports in an interactive, page-turning format. Instead of asking visitors to download a PDF, you can let them browse your content directly on your website for a more engaging reading experience.
With the Flipbook widget, it’s easy to embed interactive flipbooks on your website without any coding experience. Jotform lets you customize the viewer’s appearance, adjust display settings, and seamlessly match the widget to your website’s overall design.
Creating and Getting Your Flipbook Widget Embed Code
To embed a Flipbook on your website, you’ll first need to configure the PDF Embed widget and copy its embed code. Here’s how to get started:
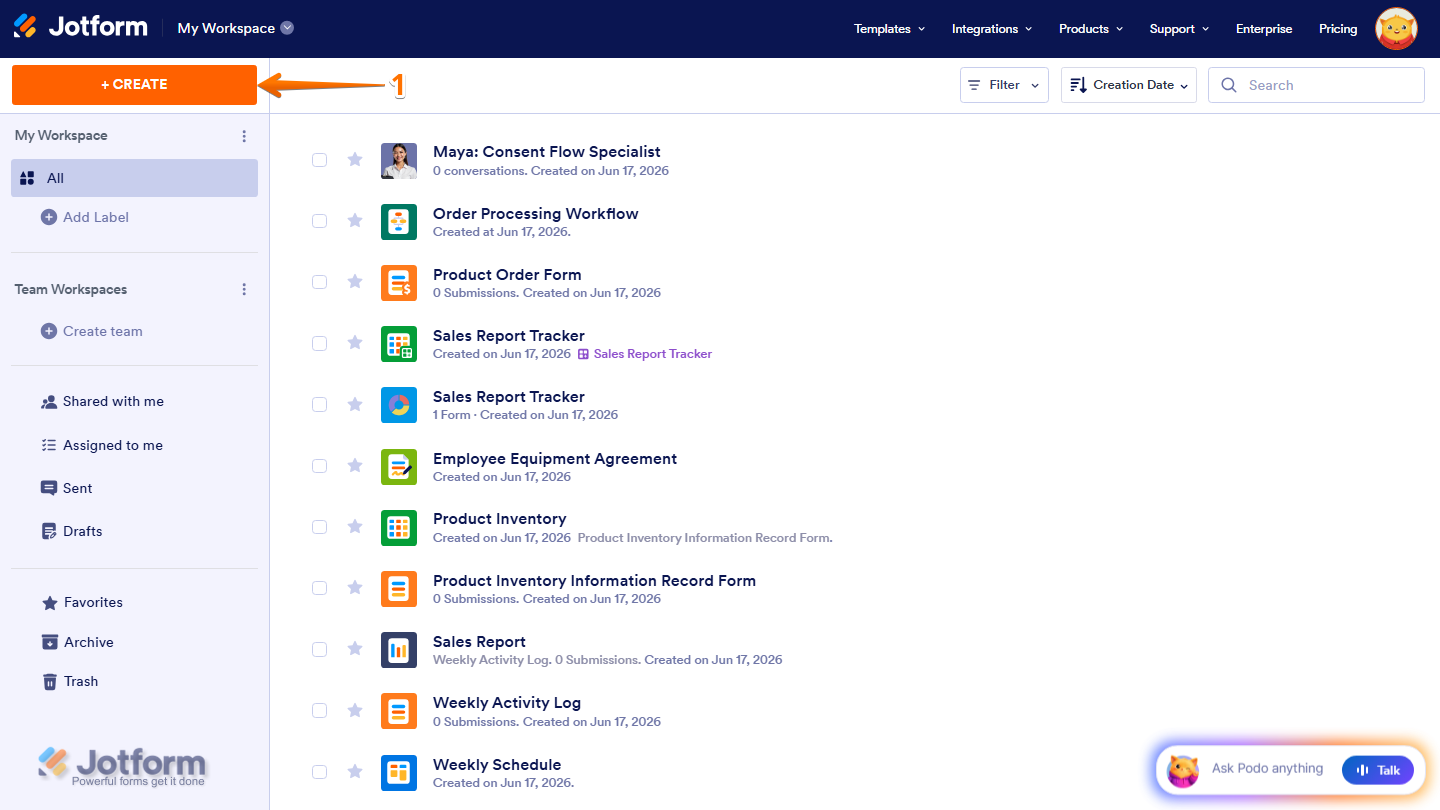
- On your Workspace page, click on Create on the top-left side of the page.
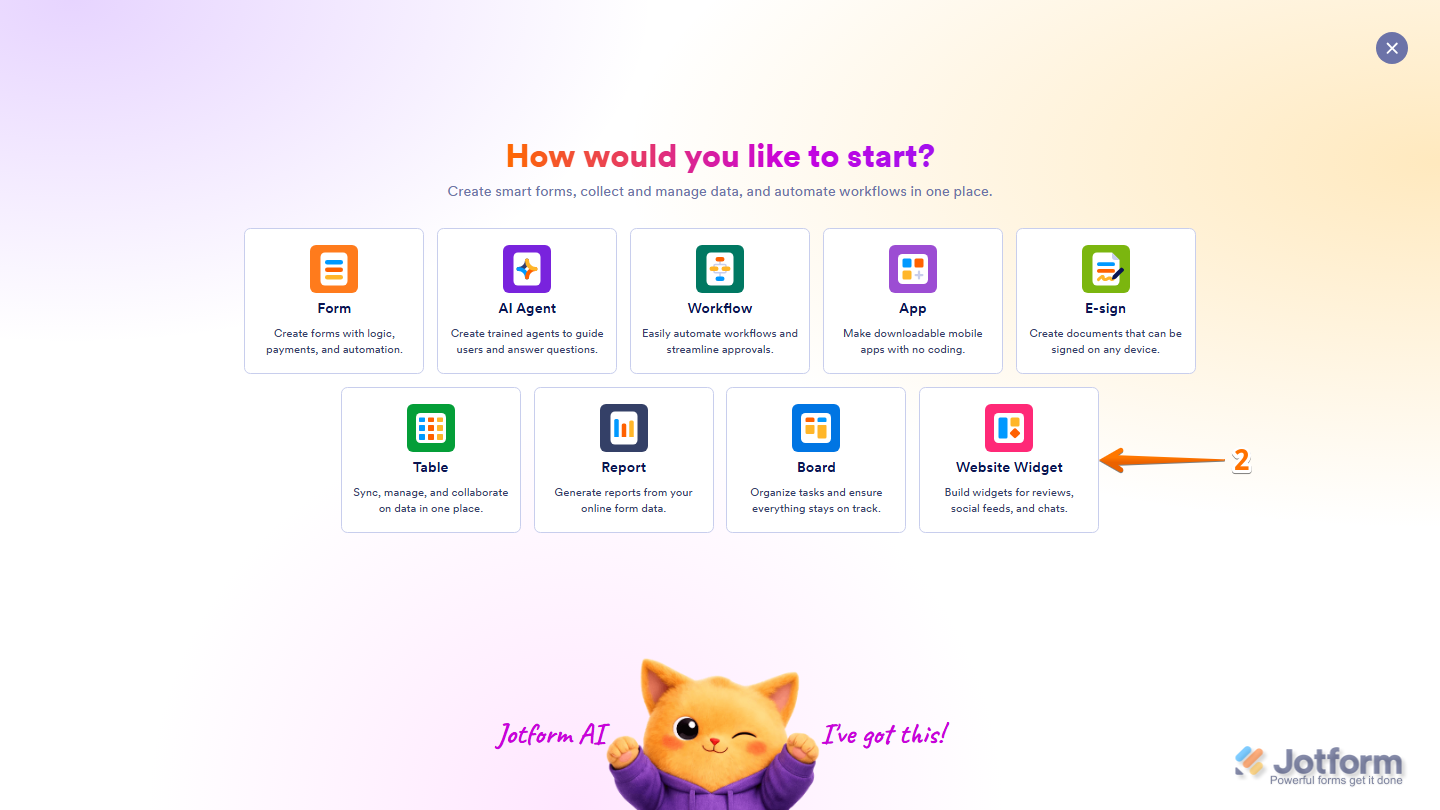
- Then, in the window that opens up, select Website Widget from the assets.
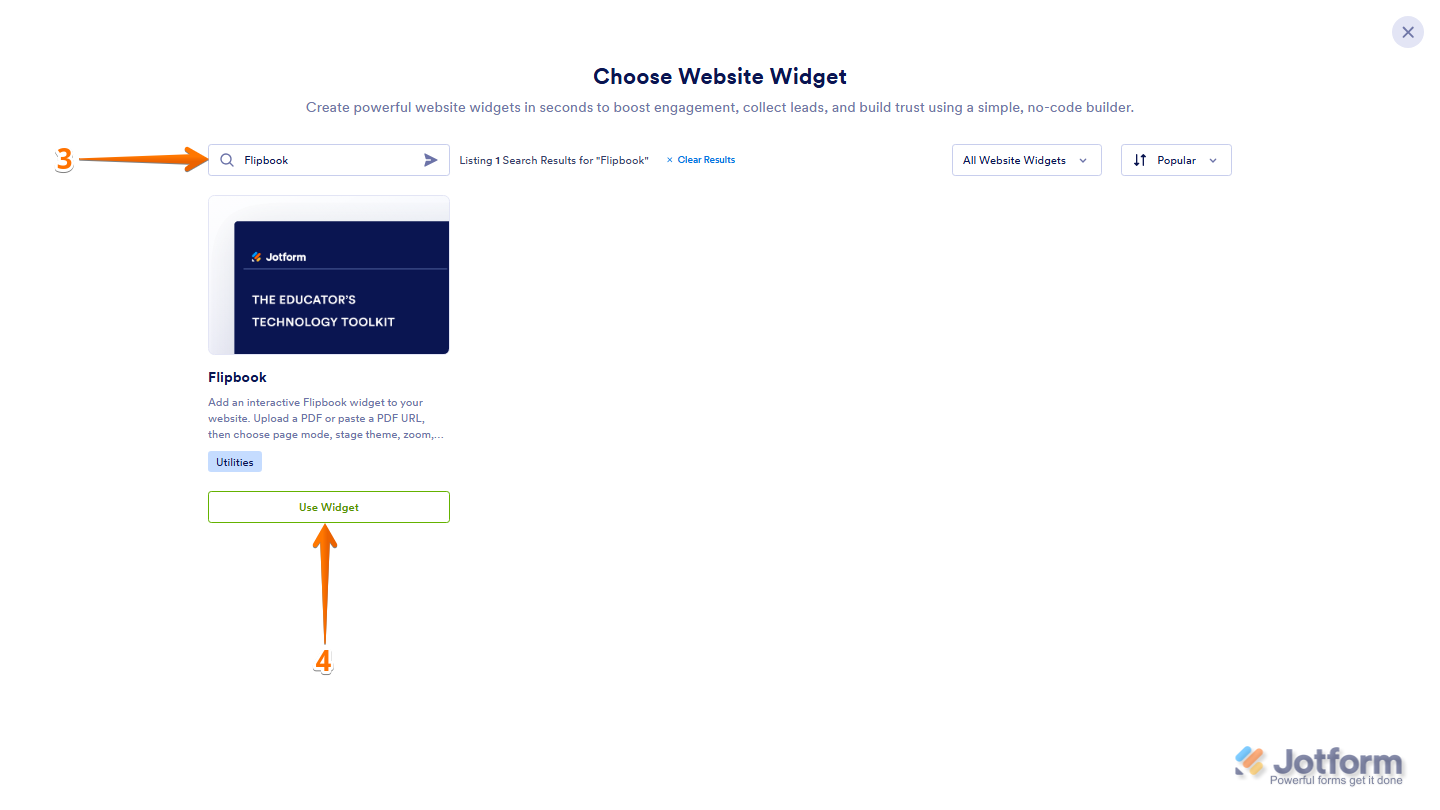
- Next, in the Search bar at the top of the Choose Website Widget page, search for the Flipbook.
- Now, in the search results, click on Use Widget.
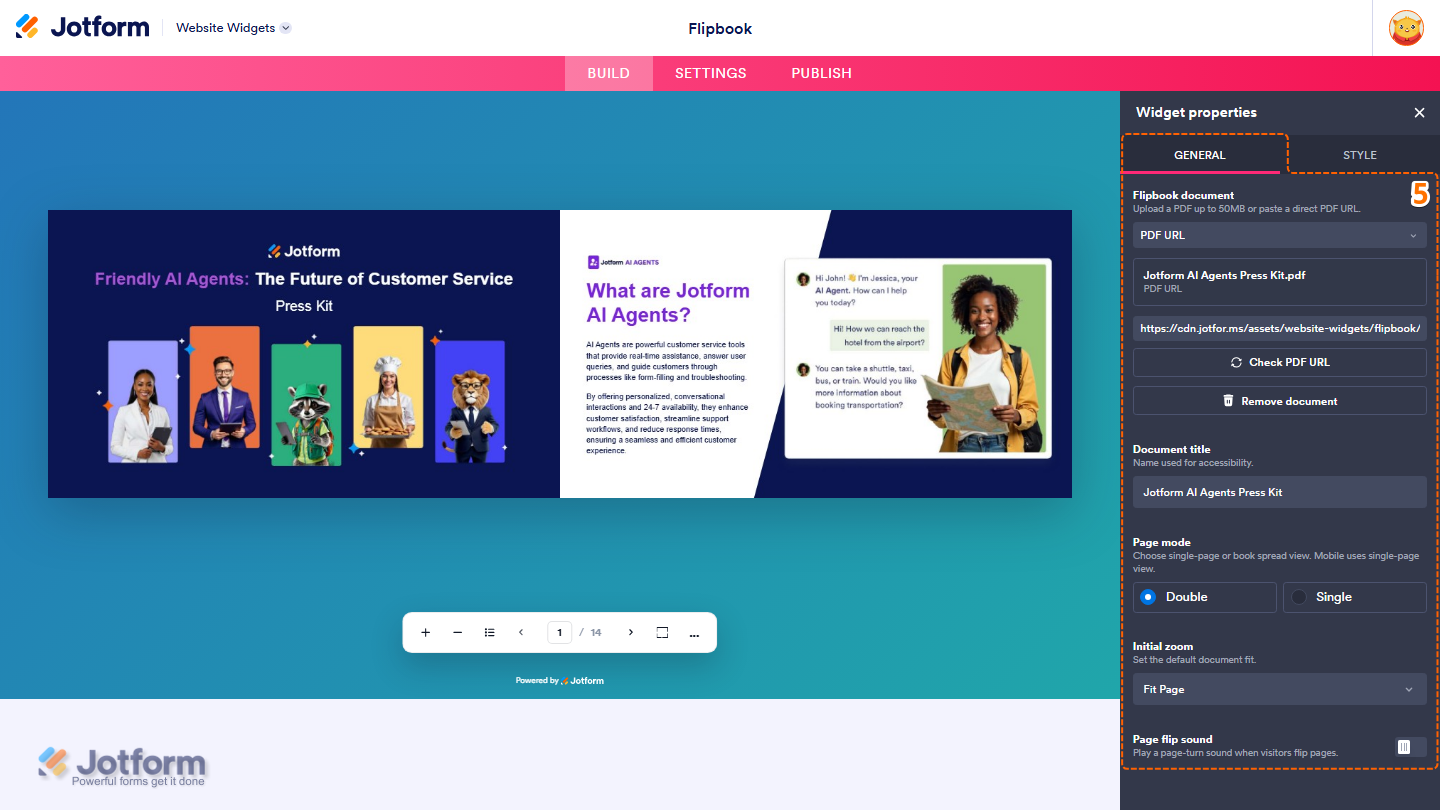
- Once the widget opens, in the Widget Properties menu that opens automatically on the right side of the Website Widgets, under the General tab, set up these things:
- Flipbook Document — Upload a PDF file from your device or paste a direct PDF URL.
- Document Title — Enter the title used to identify the flipbook.
- Page Mode — Choose whether the flipbook opens in Double or Single page view.
- Initial Zoom — Set the default zoom level when the flipbook opens.
- Page Flip Sound — Choose whether a page-turn sound plays while visitors flip through the document.
Note
- If you choose Paste a Direct PDF URL, the widget automatically validates the link after you paste it. You can also click on Check PDF URL at any time to validate it again.
- Make sure the URL points directly to a PDF file that opens in your browser. Links from file-sharing services, such as Google Drive, may not work.
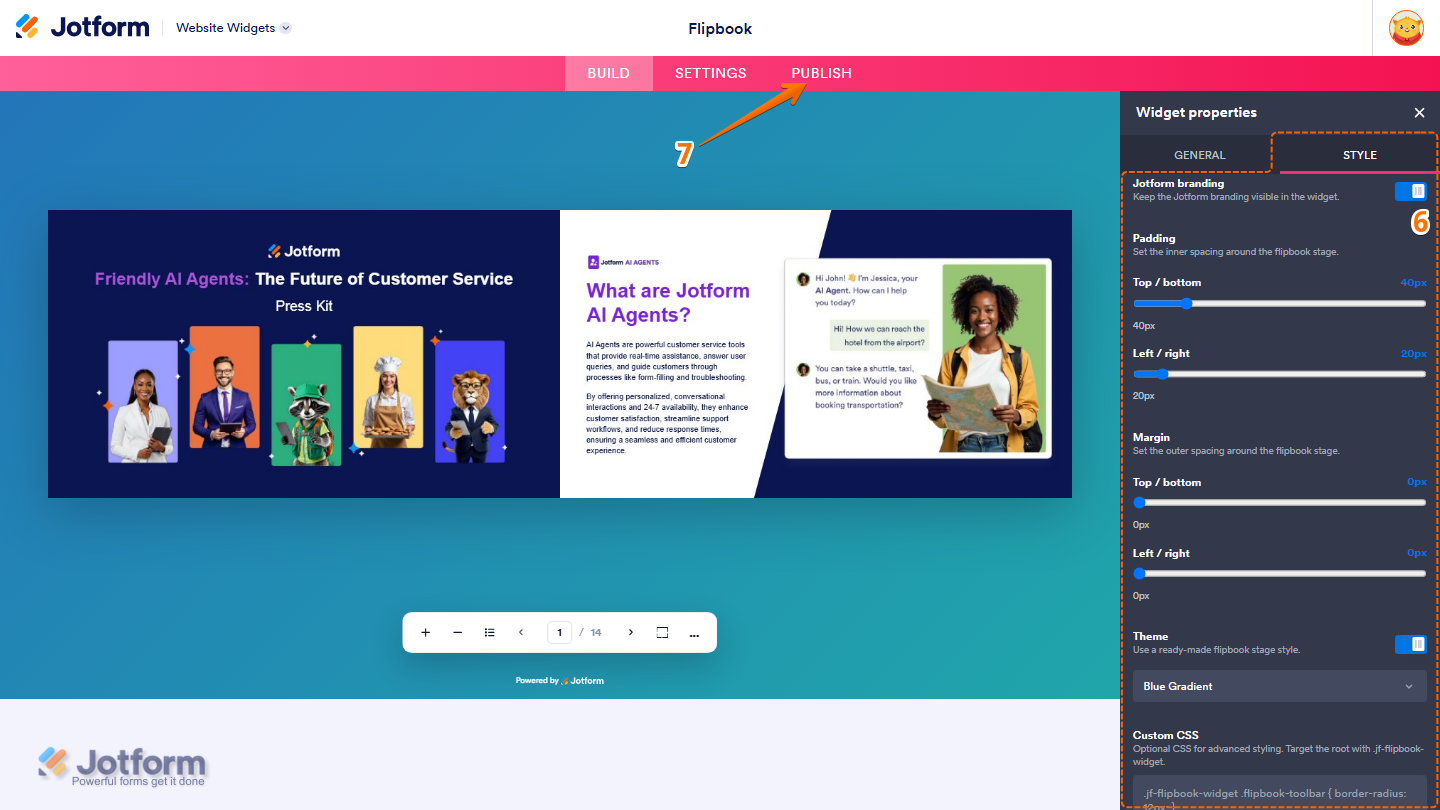
- Next, under the Styletab, customize the appearance of your flipbook with these options:
- Jotform Branding — Show or hide Jotform branding on the widget.
- Padding — Adjust the spacing around the flipbook stage.
- Margin — Set the outer spacing around the flipbook stage.
- Theme — Select a preset theme for your flipbook.
- Custom CSS — Add your own CSS for advanced styling.
- Once you’ve finished configuring the widget, in the pink navigation bar on the top of the page, click on Publish.
Note
If you’re not logged in, you’ll be asked to log in to your Jotform account or sign up for one. Once you’ve done that, you’ll be able to get the embed code for your widget.
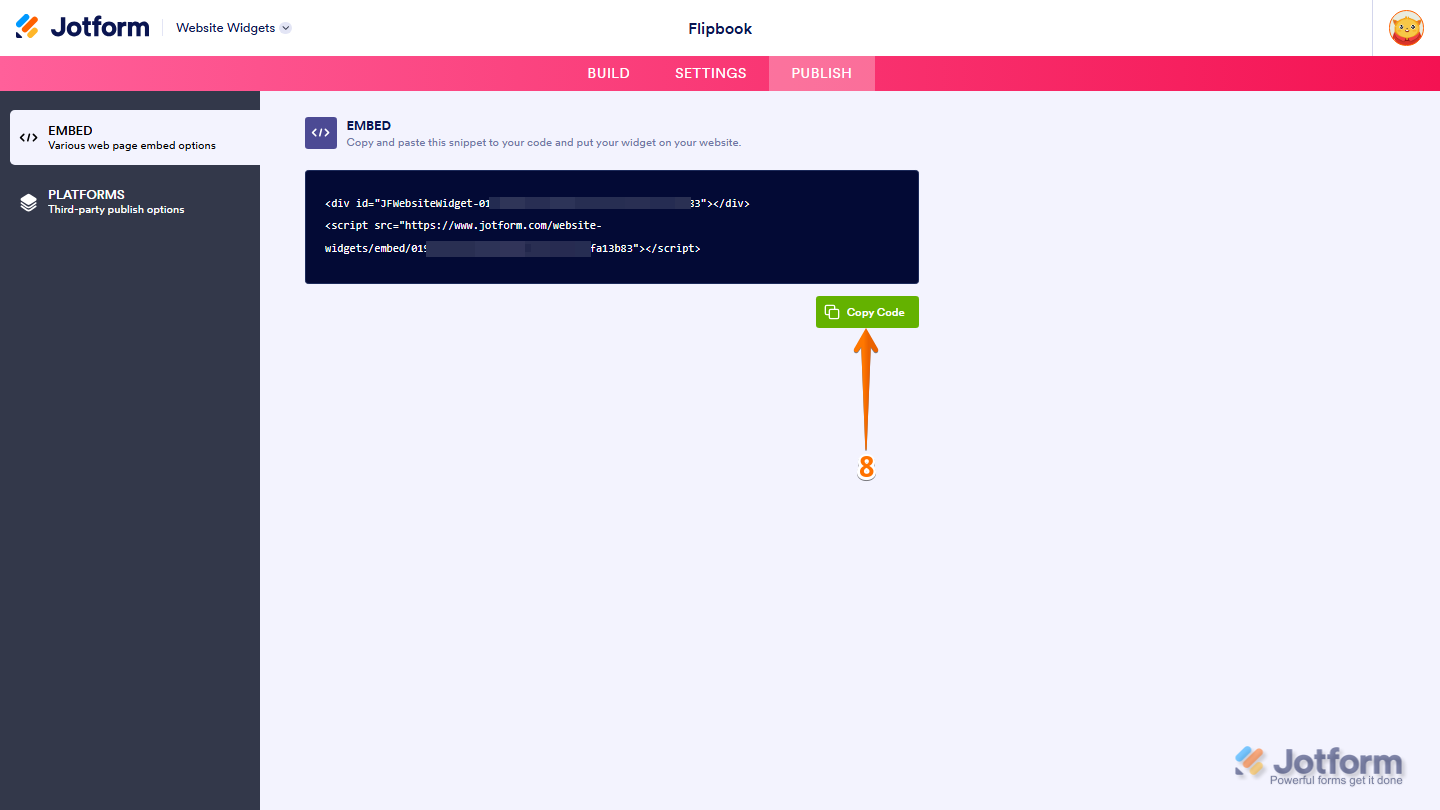
- Finally, in the Embed section, click on Copy Code.
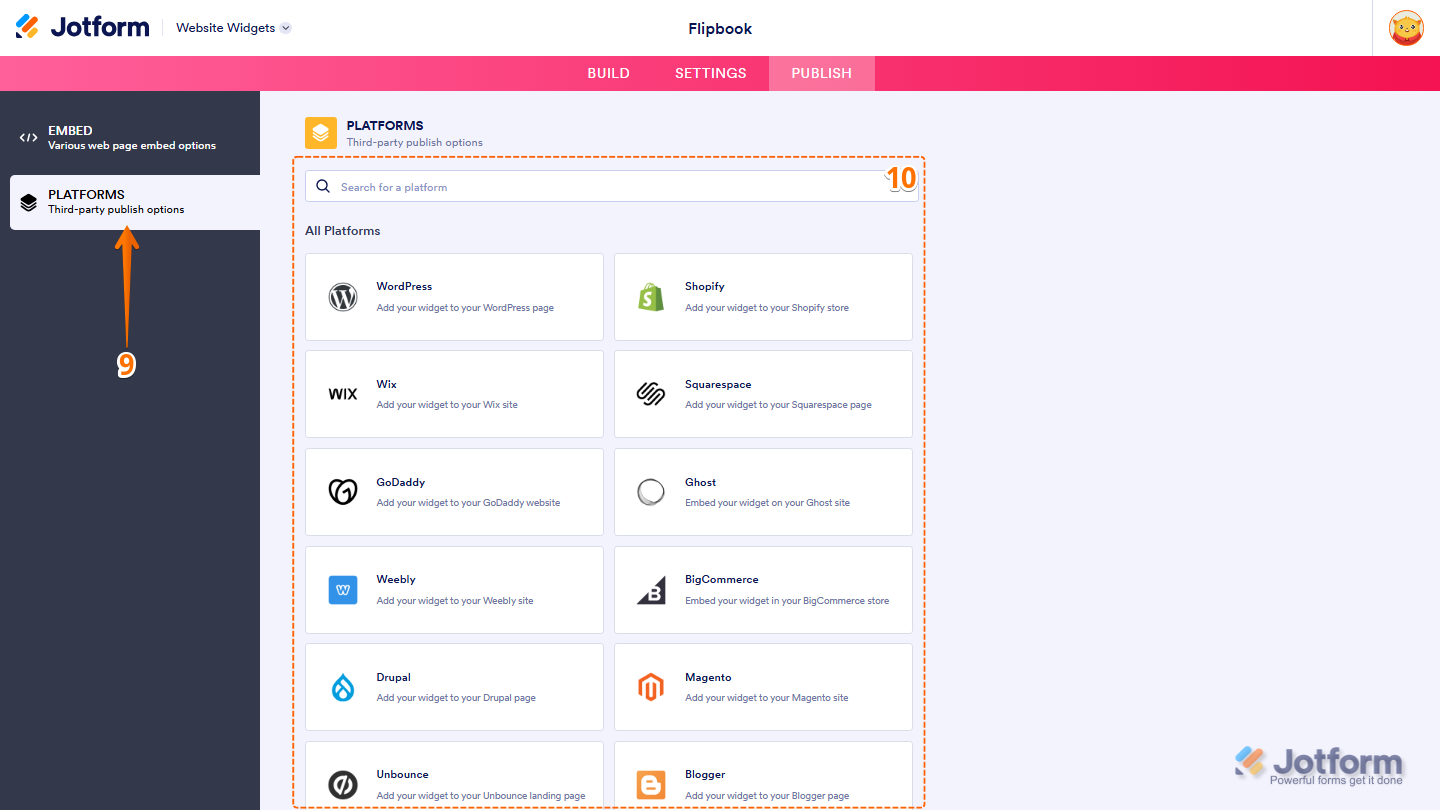
- Or, if your website is built on a supported platform, in the menu on the left side of the page, click on Platforms.
- Then, search for or select your platform to copy the embed code and view platform-specific embedding instructions, and you’re done.
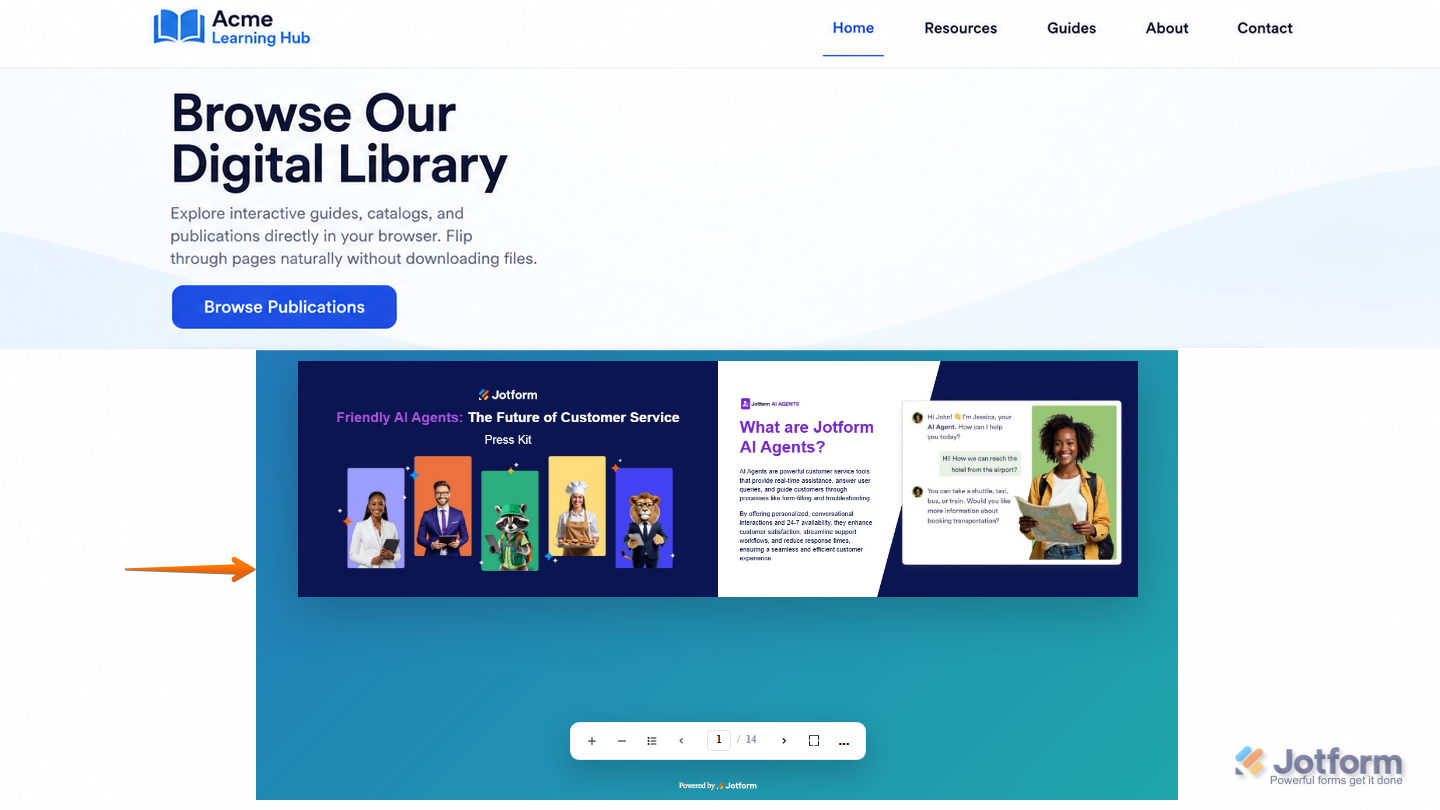
That’s it! You can now paste the copied embed code into your website or follow the platform-specific instructions to add the widget to your site. The screenshot below shows an example of how your Flipbook will look when embedded:
Note
Your Flipbook widget remains editable after it’s embedded on your website. Any changes you make will automatically appear on your website without requiring a new embed code. If you want to learn how to change the settings of your existing web widgets, you can check out our guide on How to Manage Website Widgets for more details.


Send Comment: