As an admin, you can enable or disable workflows individually or in bulk, giving you full control over their availability across the organization. By adjusting the workflow status as needed, you can ensure that only relevant and approved workflows are accessible to users, helping keep your workspace organized and reducing confusion.


Process
Disabling a Workflow
- In the Admin Console, click on Assets from the left-hand side menu.
- Next, click on Workflows.

- Click on the Three dots menu next to the workflow you’d like to disable and select Disable from the menu.
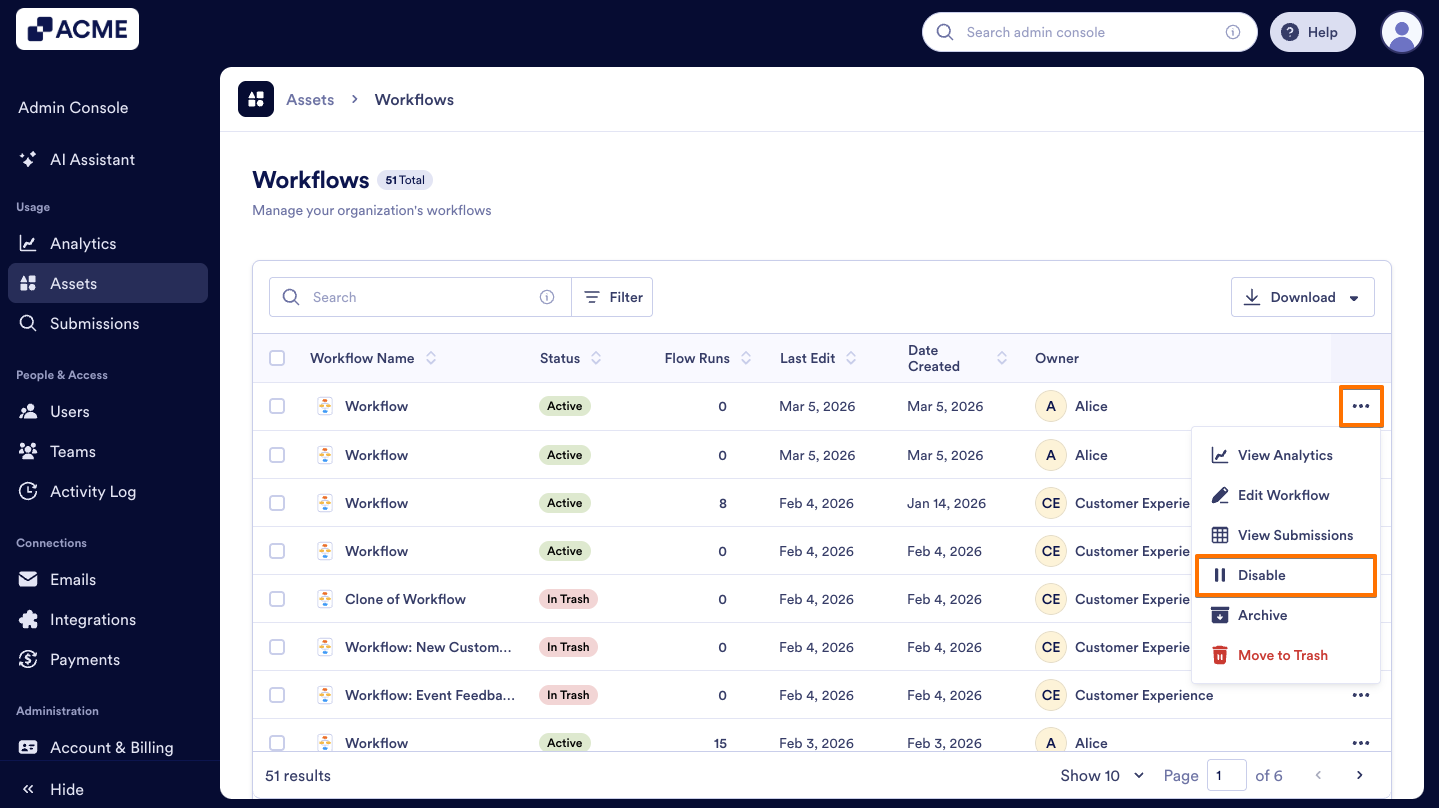
- Finally, click on Yes, Disable from the pop-up window.

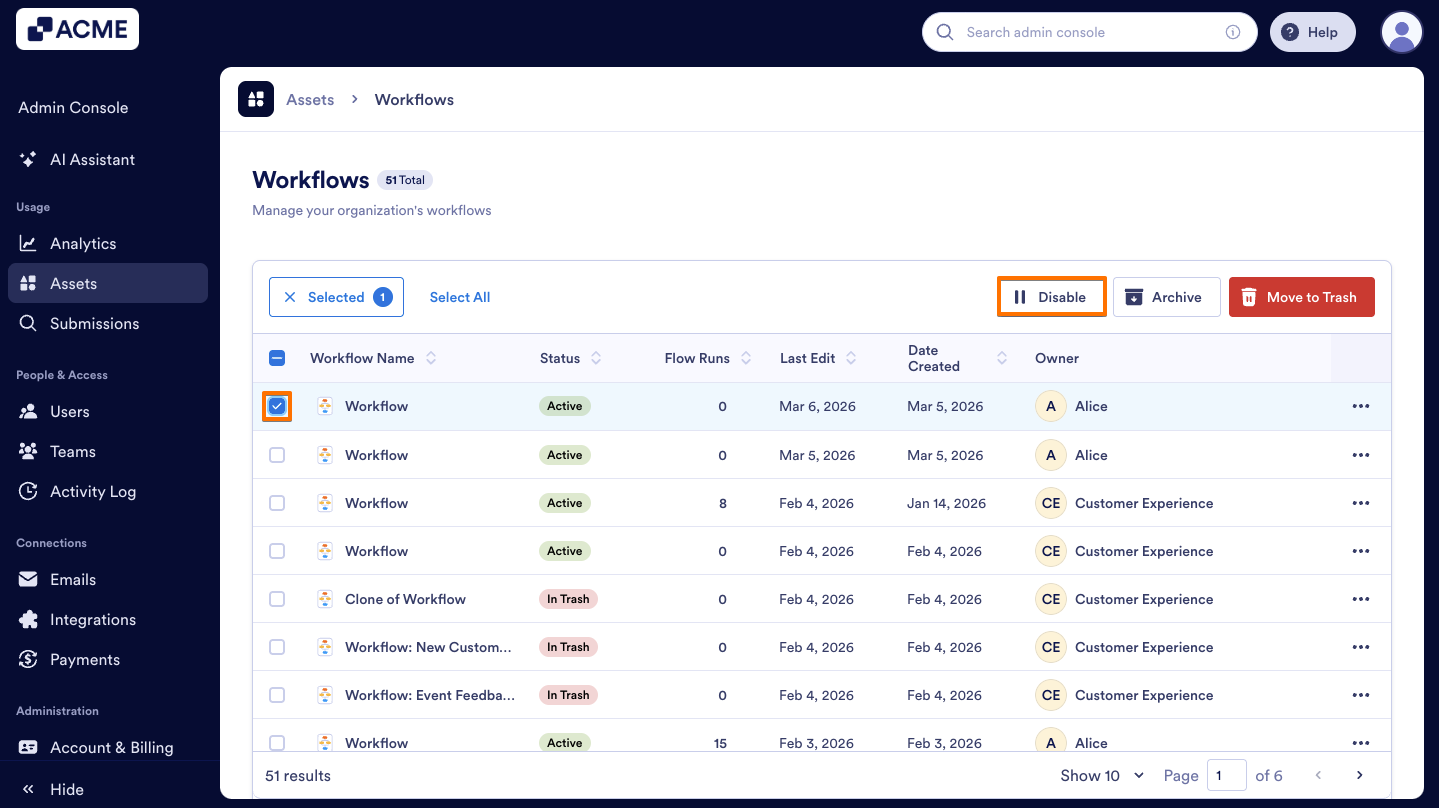
Another way to disable a workflow is to use the Disable button at the top of the list. Here’s how:
- On the Workflows Assets page, click on the Checkbox on the left side of the workflow you want to disable.
- Click on the Disable button at the top of the list.
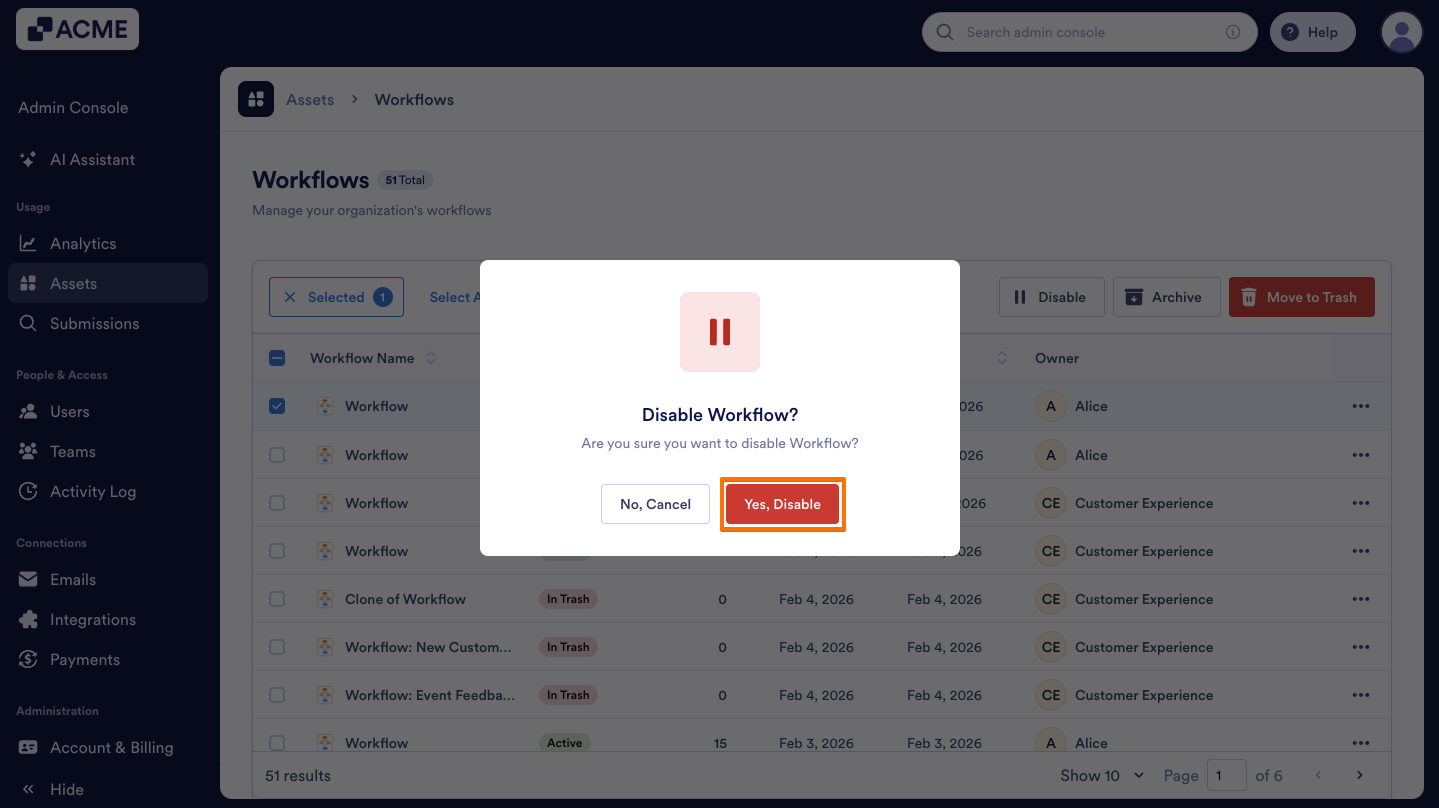
- In the pop-up window, select Yes, Disable to confirm.
Enabling a Workflow
- In the Admin Console’s Workflows Assets page, click on the Three dots icon next to the workflow you want to enable.
- Then, from the menu, select Enable.

- In the pop-up, click on Yes, Enable to confirm.
You can enable a workflow by using the Enable button above the list. Let me show you how:
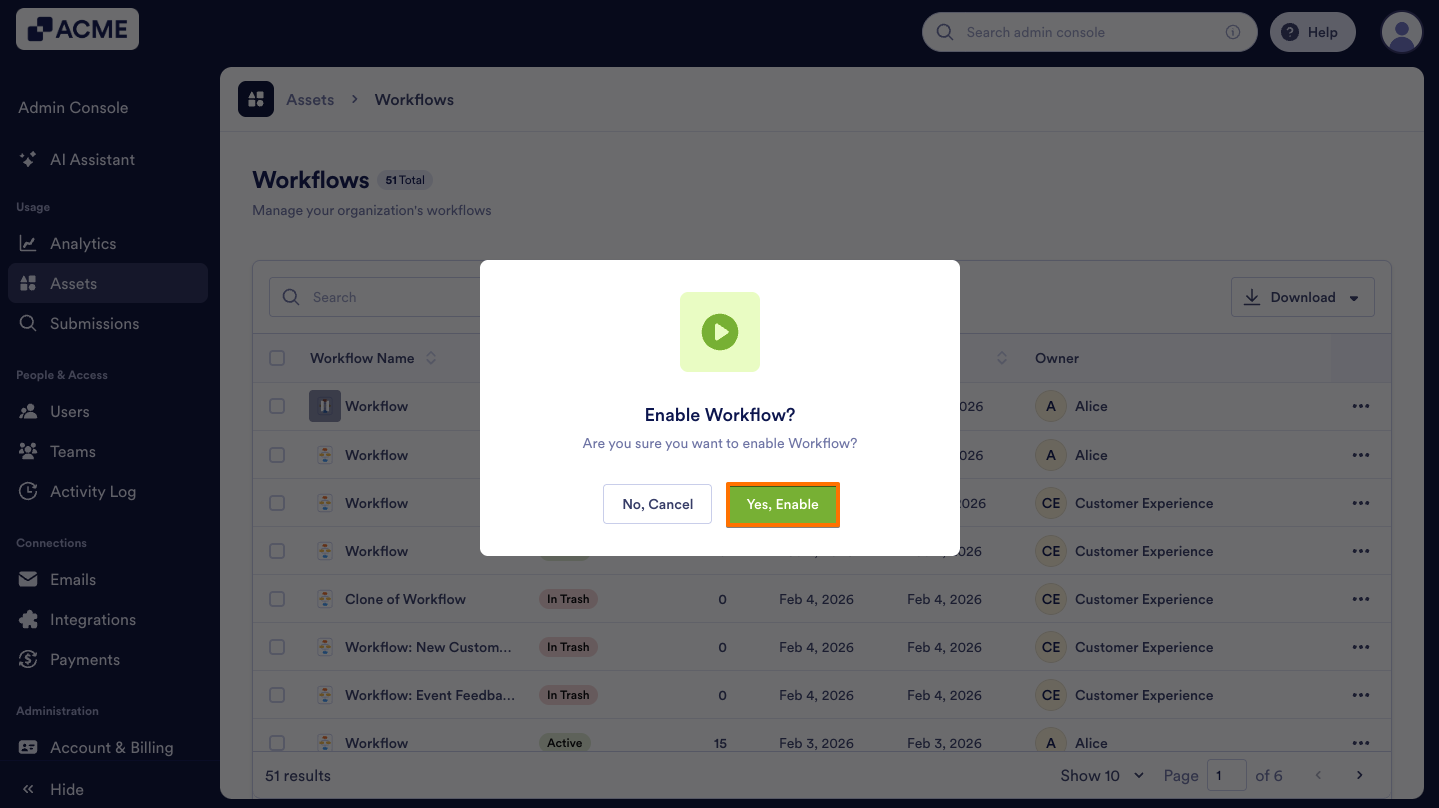
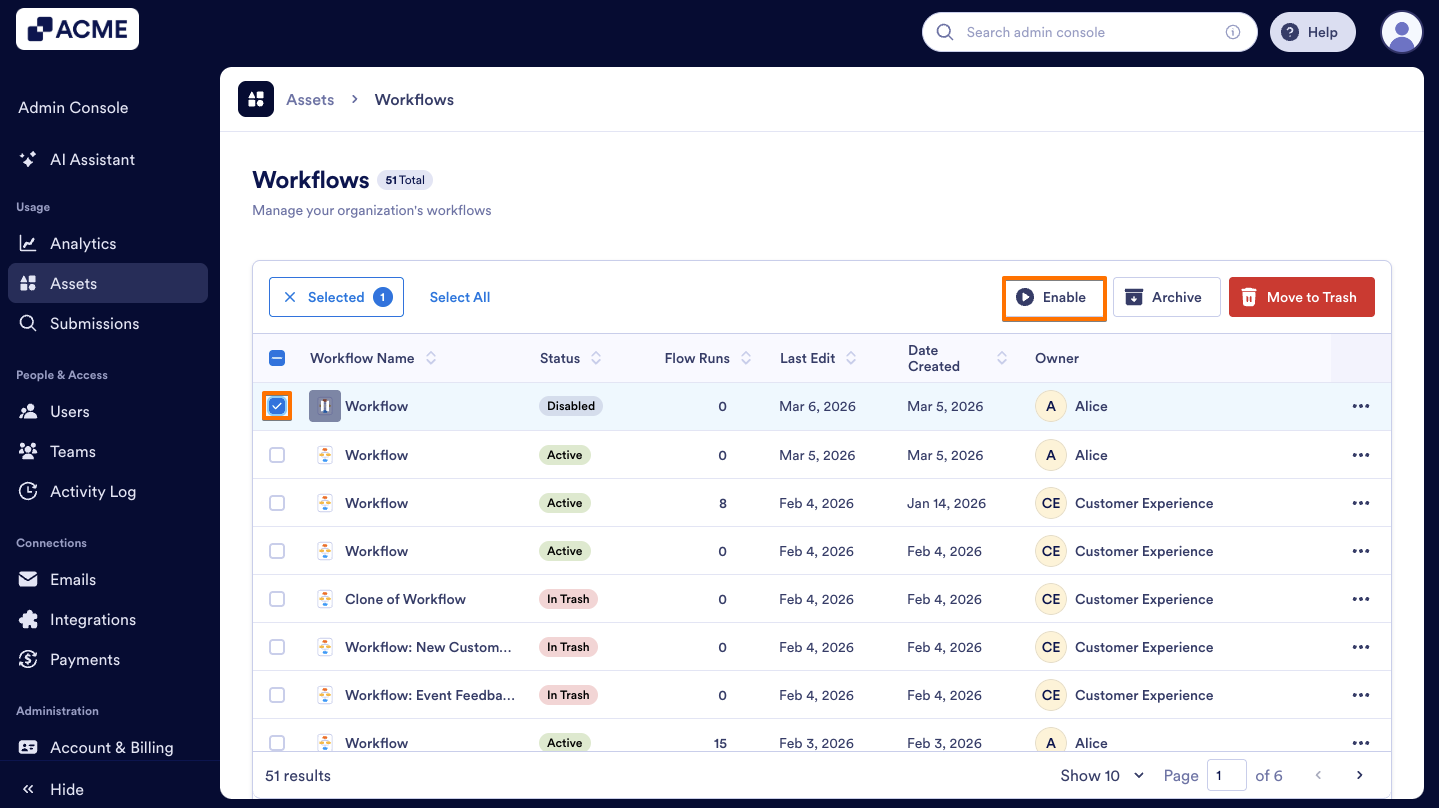
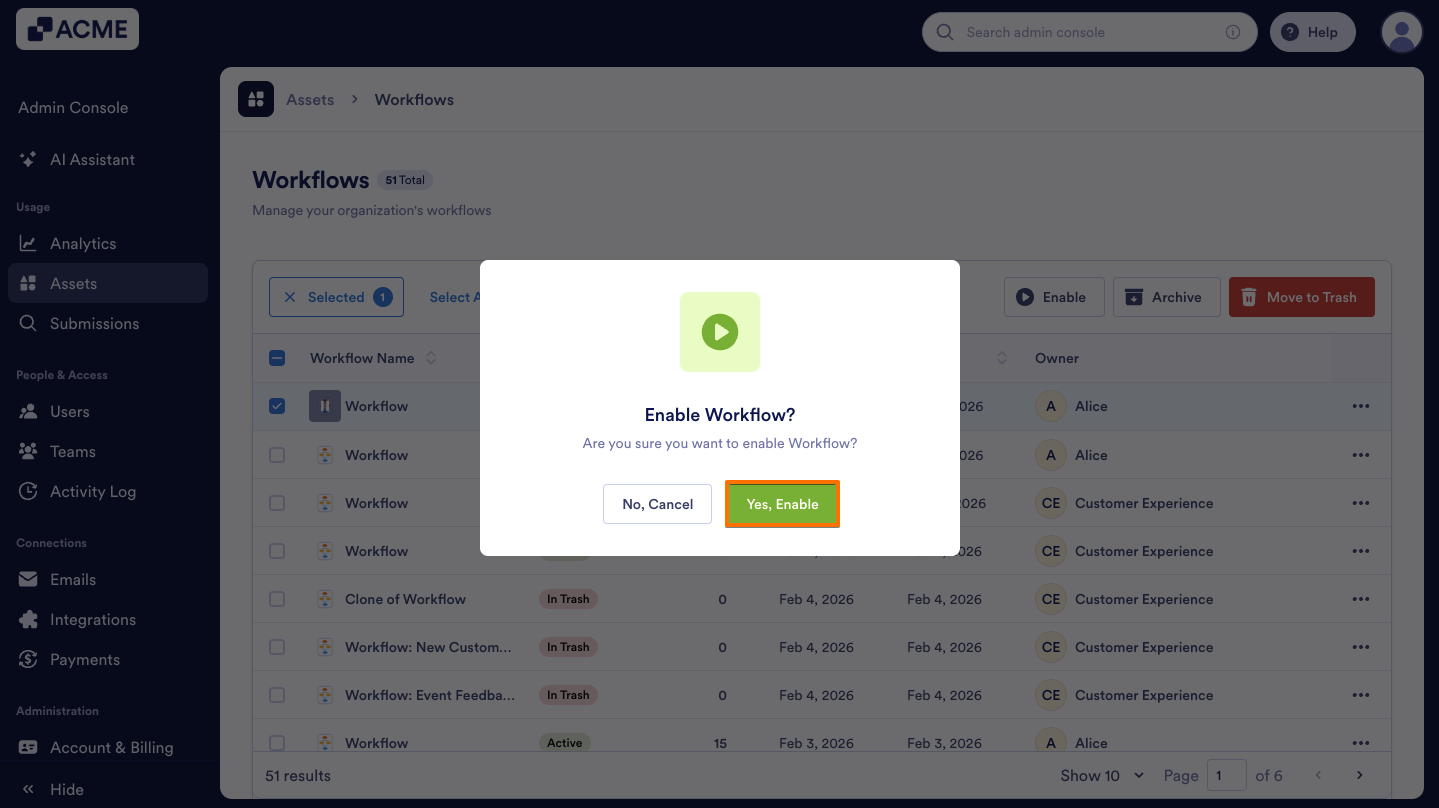
- On the Workflows Assets page, check the Checkbox on the left side of the workflow you want to enable, then click on the Enable button above.
- In the pop-up window, select Yes, Enable to confirm.
Disabling Workflows in Bulk
Bulk disabling workflows allows you to quickly deactivate multiple workflows at once, saving time and ensuring consistent workflow management across your organization.
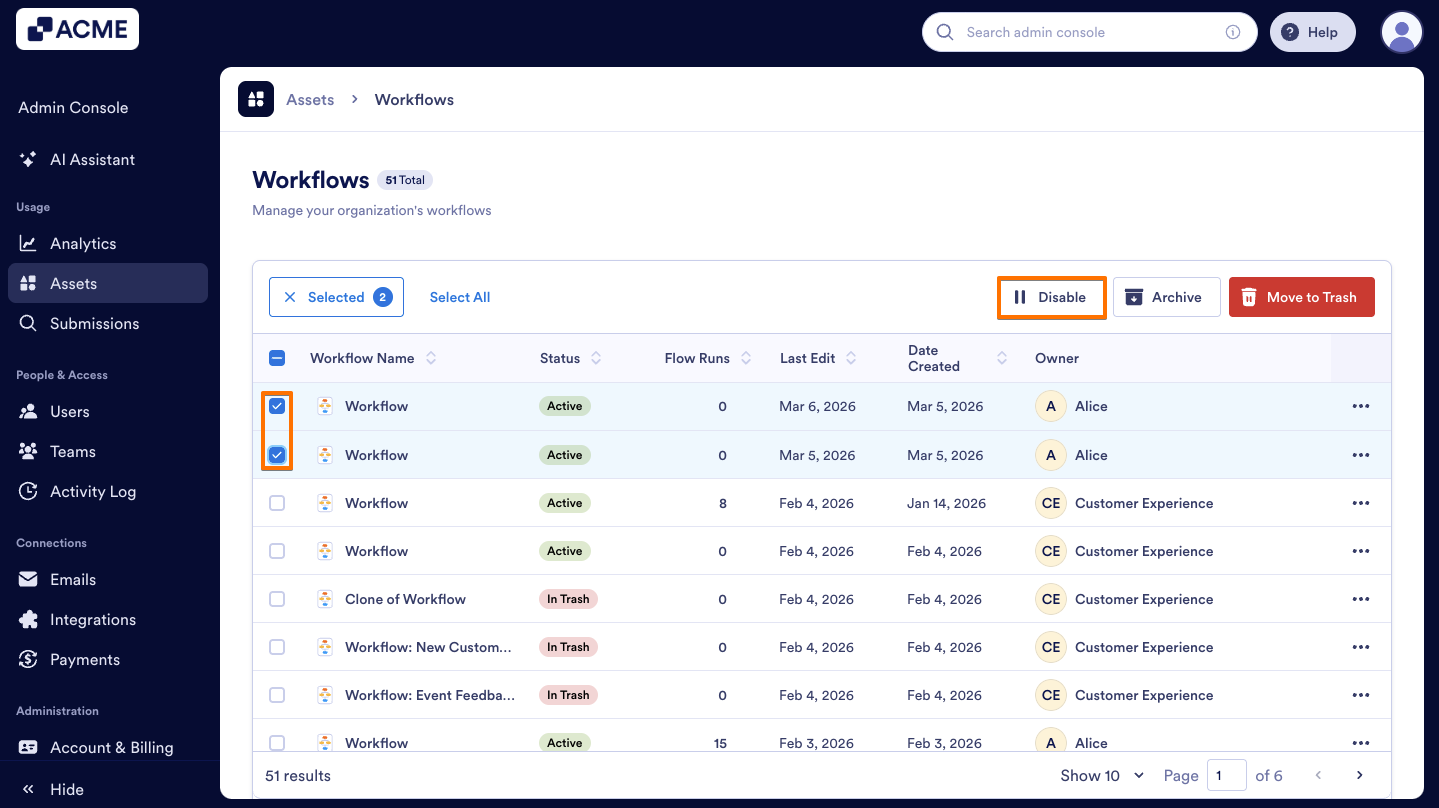
- On the Workflows Assets page in the Admin Console, on the left side of the workflows you want to disable, select the Checkboxes.
- Click on the Disable button above the list of workflows.
- Finally, in the pop-up window, select Yes, Disable.

Enabling Workflows in Bulk
- On the Workflows Assets page in the Admin Console, on the left side of the workflows that was previously disabled, select the Checkboxes.
- Then, click on the Enable button above the list.

- Finally, on the pop-up window, select Yes, Enable.

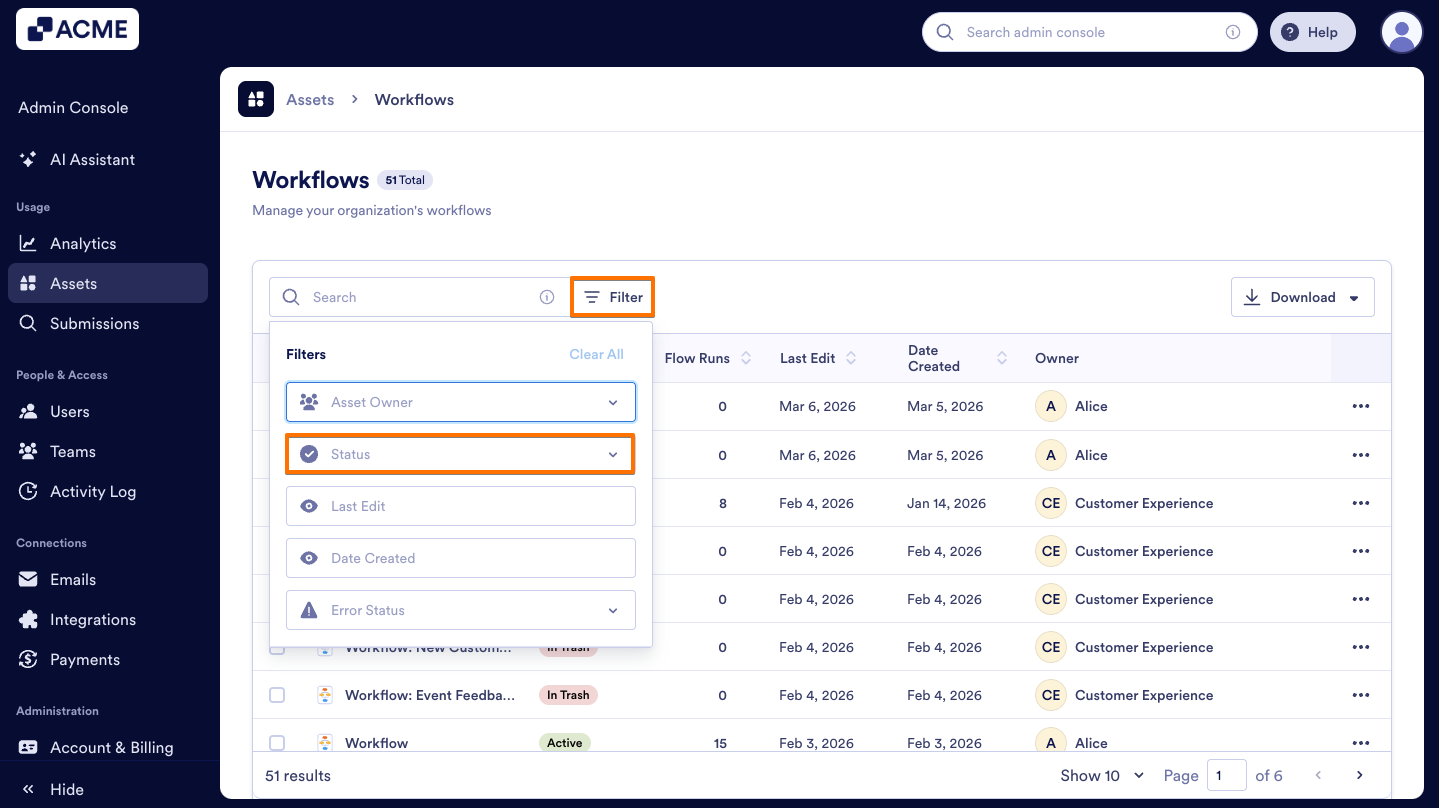
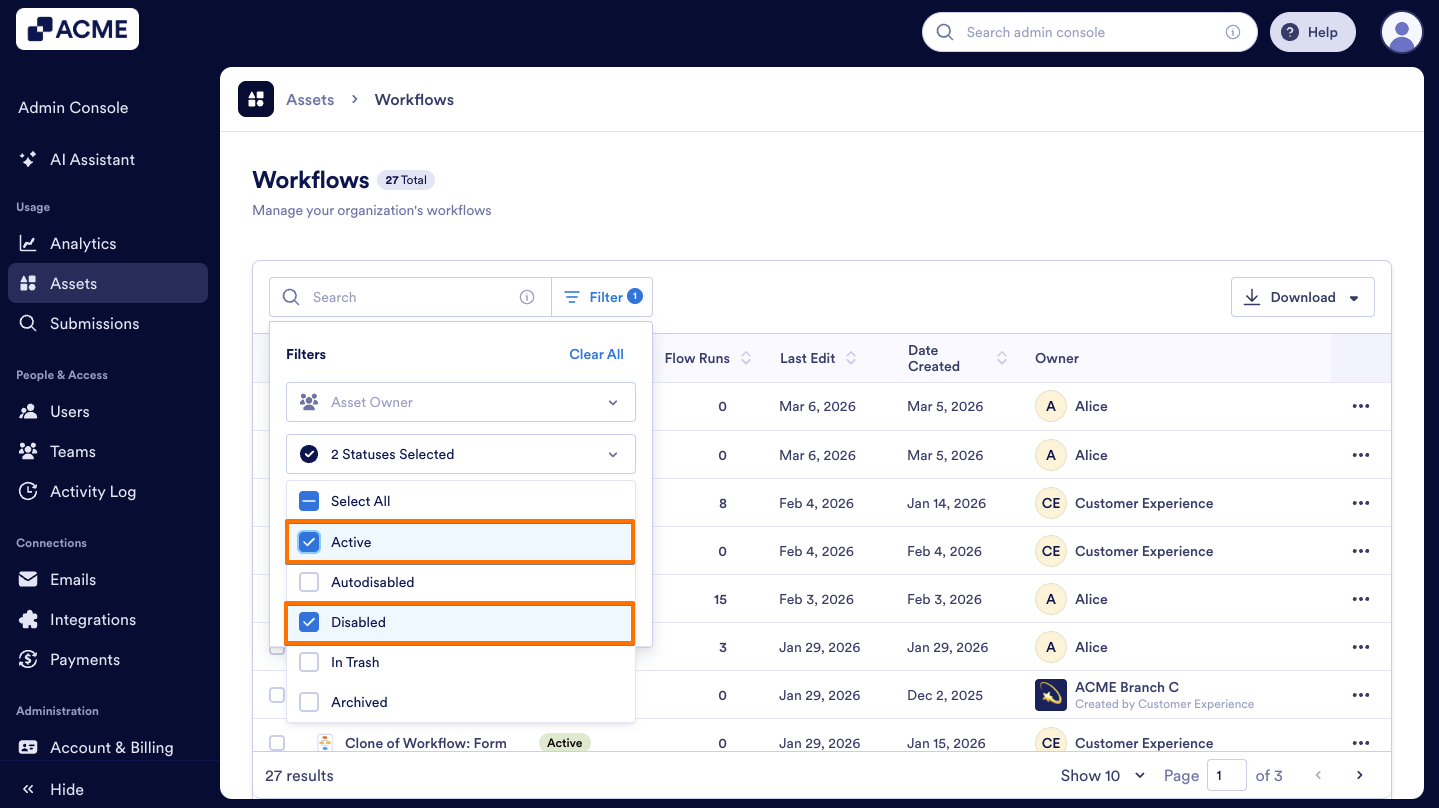
Filtering Workflows to View Disabled Workflows
- In the Admin Console’s Workflows Assets page, click on the Filter button on the right side of the Search bar.
- Then, click on the Status dropdown menu.
- In the dropdown menu, select Disabled, Active, or both to view disabled and enabled (active) workflows.

Send Comment: