Users can restrict Tables access to people and require Single Sign-On (SSO) credentials within your organization. This way, users will sign in once through your trusted Identity Provider (IdP), keeping access simple for them and secure for your organization.
SSO is especially useful for organizations that need stronger control over form access, to reduce the risk of unauthorized logins, and to make their account management easier. Whether your team is growing or already at enterprise scale, SSO helps ensure that only the right people get access to secure information, while also keeping the login process quick and frustration-free.
What You Need for This Setup
To require SSO login with your Table, an admin has to enable SSO for your organization first. You’ll find all the steps in our guide on How to Enable SSO Integration in Your Organization. Once that’s done, users can require SSO when setting up their Tables.
After logging in to your account in your organization, follow these steps to enable SSO for your Table:
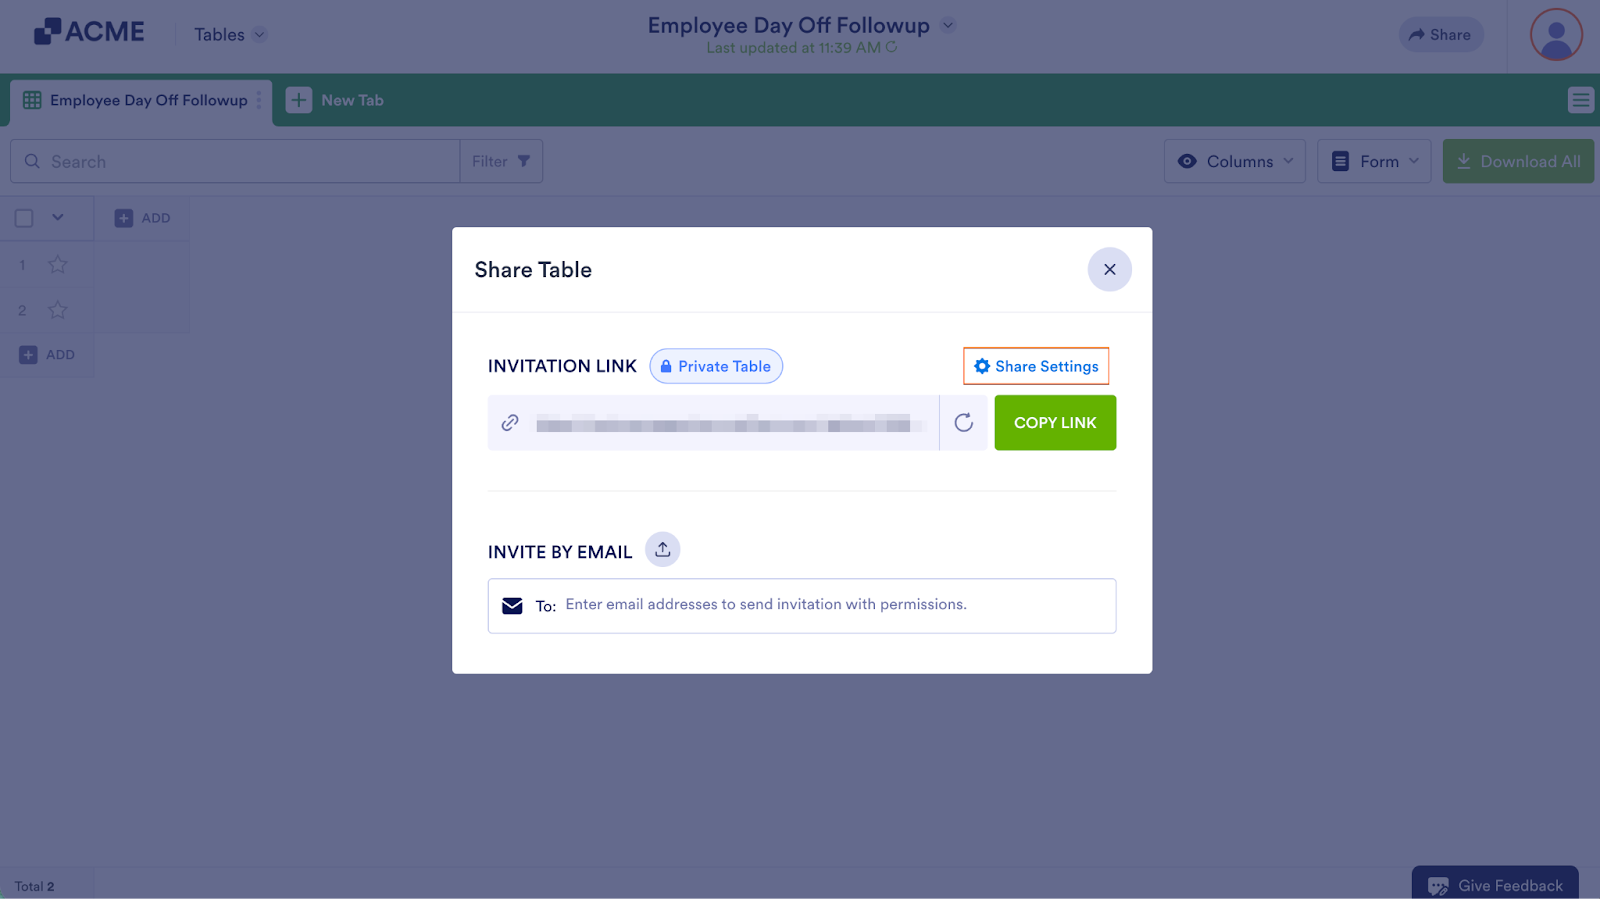
- First, in Tables, click on Share.
- Next, click on Share Settings to the right of the Invitation Link.
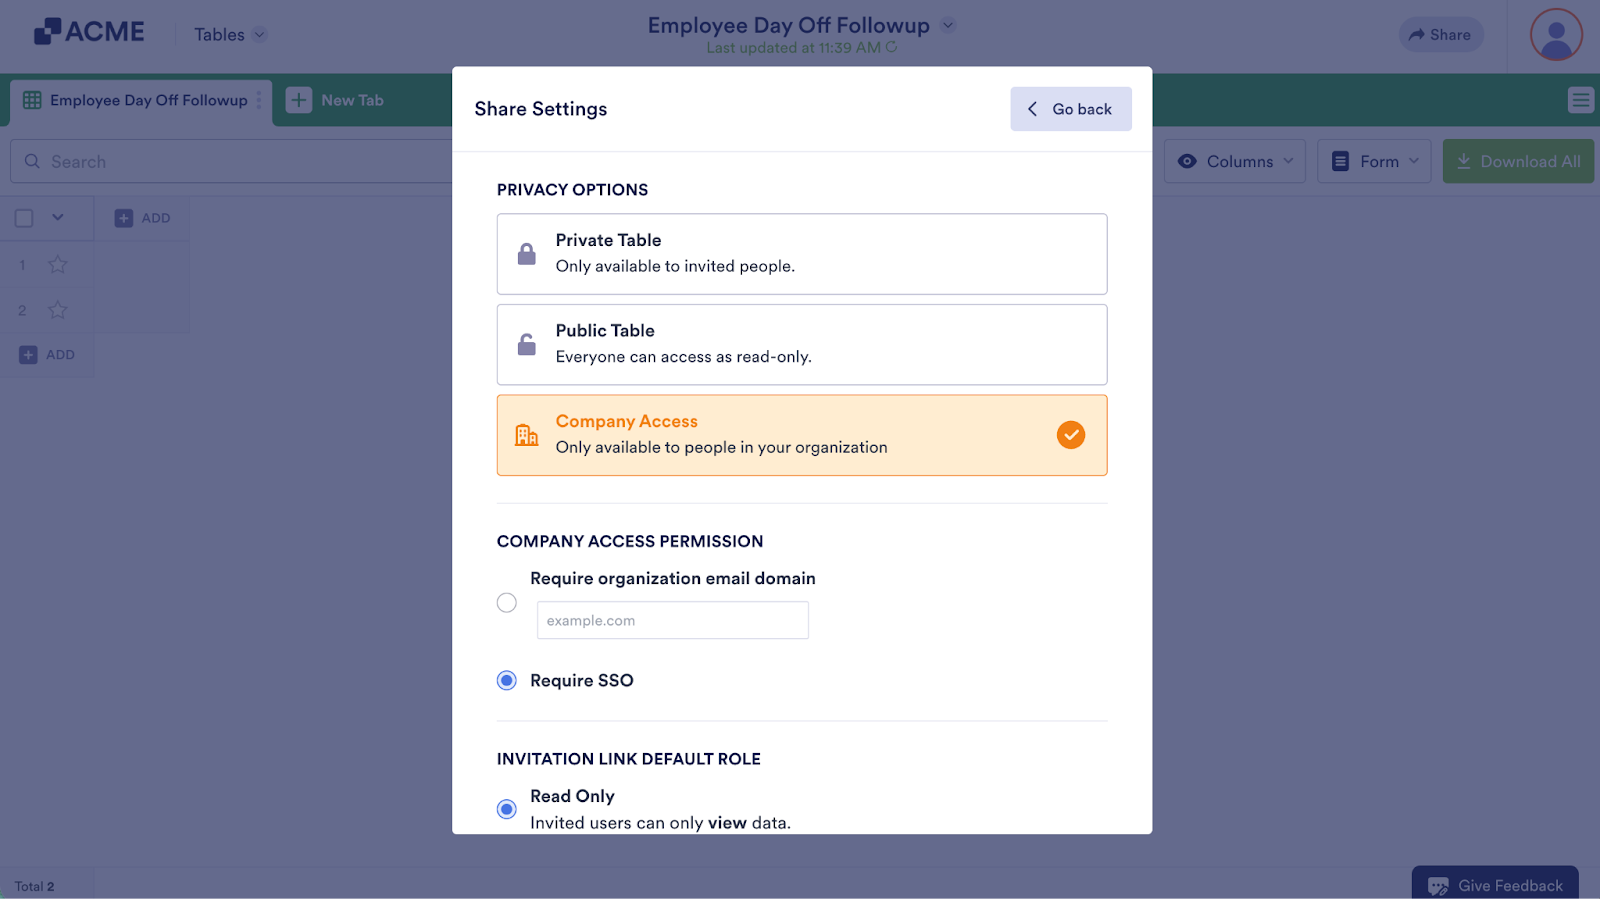
- Now, in the Settings window, click on Company Access.
- Then, under Company Access Permission, select Require SSO.

Send Comment: