Jotform’s WhatsApp Chat widget lets you add a customizable WhatsApp button to your website, making it easy for visitors to contact you instantly. Whether you’re running a business website, online store, portfolio, or service page, it’s an effective way to provide support, answer inquiries, and generate leads.
You can customize how it looks to match your website without any coding knowledge. In this guide, you’ll learn how to configure the widget and add it to your website.
Creating and Getting the Embed Code for Your WhatsApp Widget
The first step to embedding the WhatsApp widget on your website is to configure it and copy the embed code for it. Get started like this:
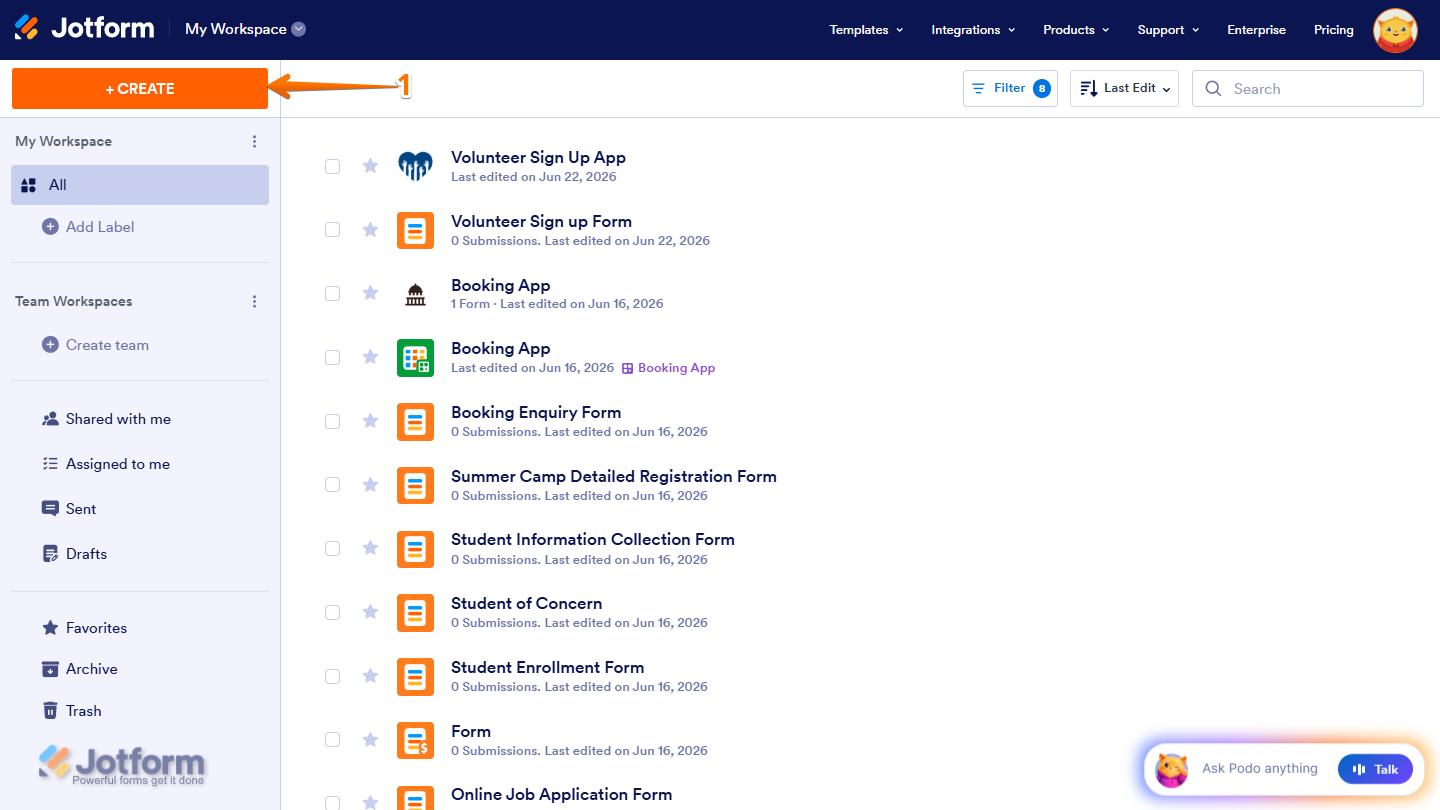
- On the top-left side of your Workspace page, click on Create.
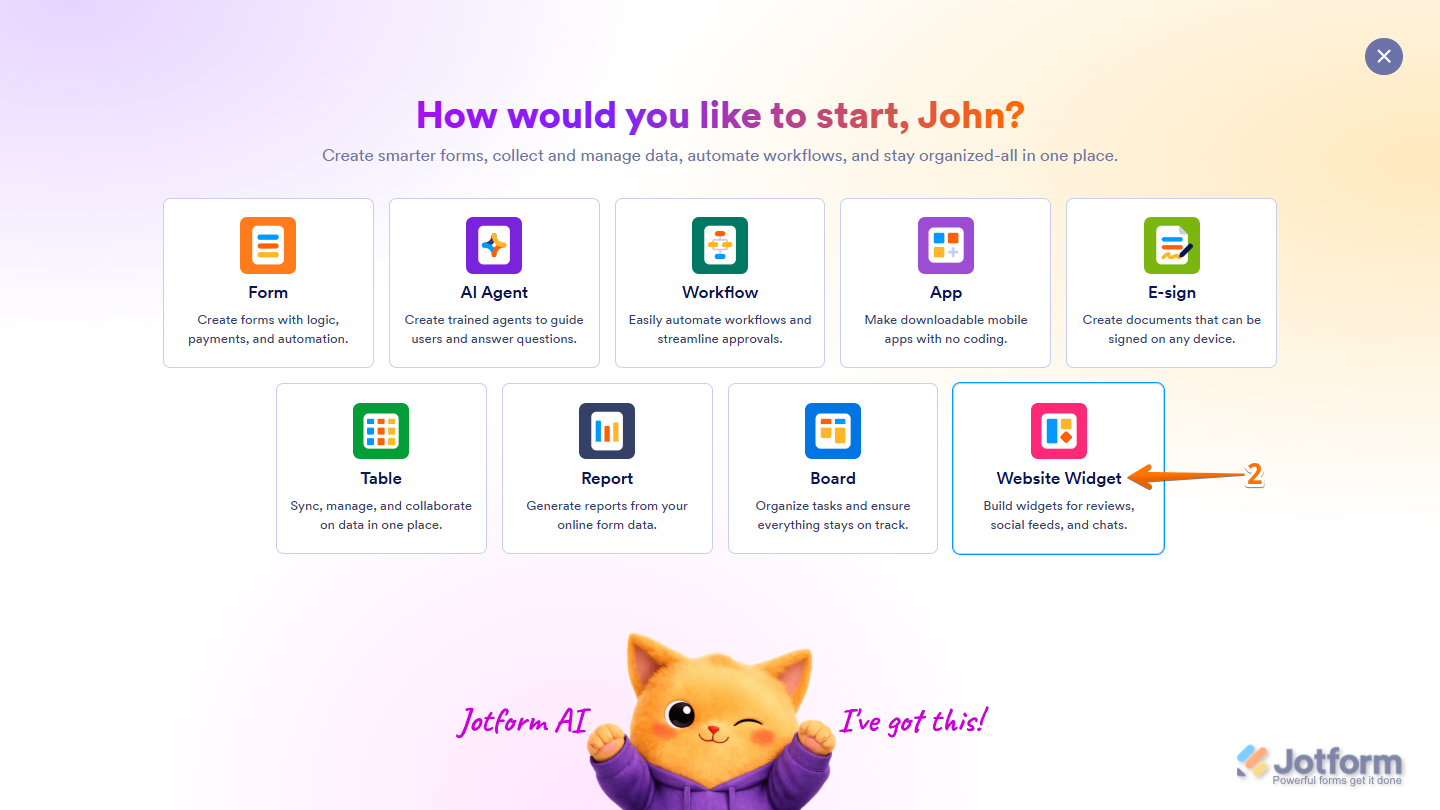
- Then, in the window that opens up, select Website Widget.
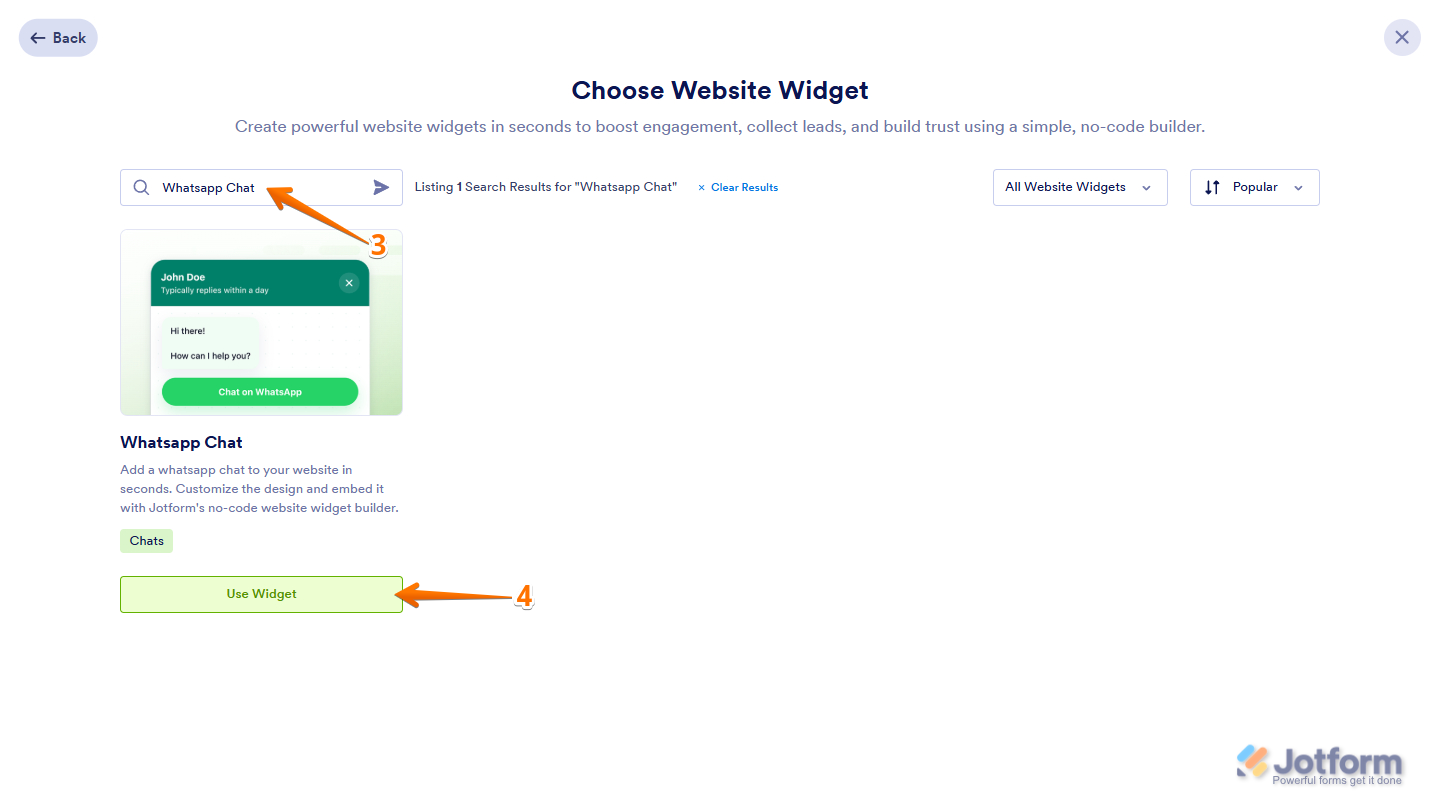
- Next, in the Search bar at the top of the Choose Website Widget page, search for WhatsApp Chat.
- Now, in the search results, click on Use Widget.
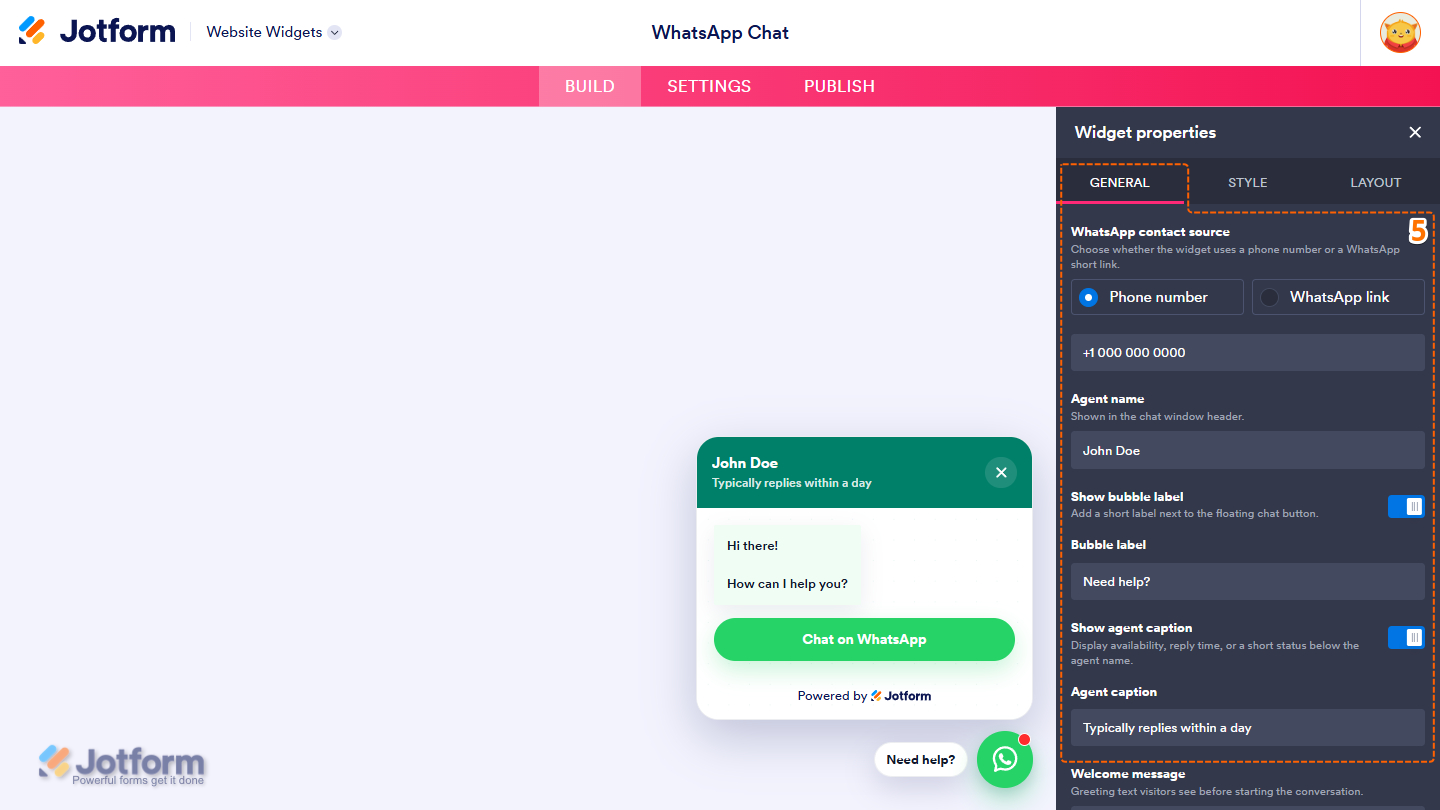
In the Widget Properties menu that opens on the right side of Website Widgets, under the General tab, set up these things:- WhatsApp Contact Source — Choose whether the widget uses a WhatsApp phone number or a WhatsApp short link.
- Agent Name — Enter the name displayed for the Chat Agent.
- Show Bubble Label — Toggle this on to display a short label next to the floating WhatsApp Chat button.
- Bubble Label — Enter the text to display next to the floating WhatsApp Chat button.
- Show Agent Caption — Toggle this on to display availability, reply time, or a short status below the agent name.
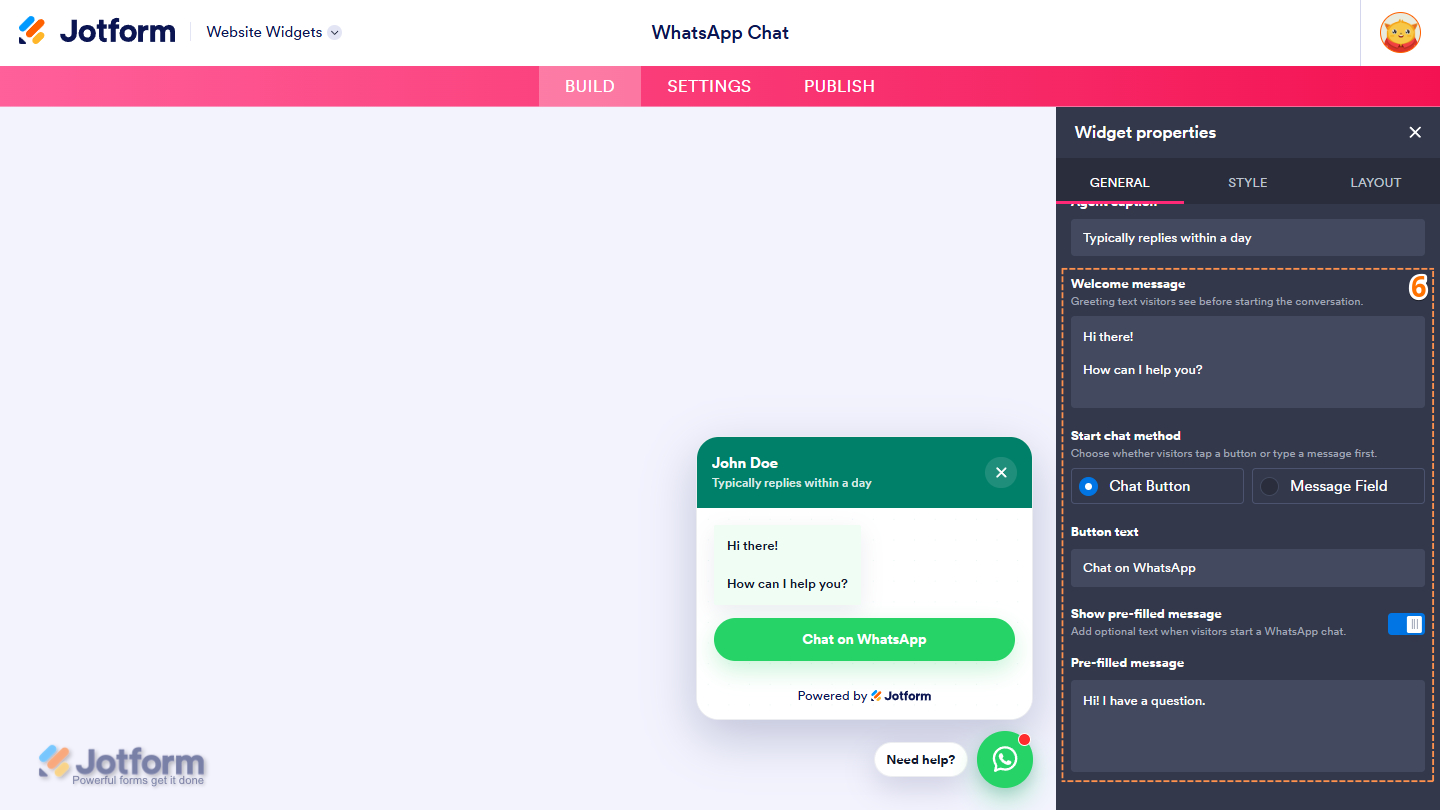
- Then, scroll down to the bottom and complete these things:
- Welcome Message — Enter a greeting that visitors see before starting the conversation.
- Start Chat Method — Choose whether visitors start the chat by tapping on a button or typing a message first.
- Button Text — Enter the text displayed on the Chat button if you selected Start Chat Button as the Start Chat Method.
- Show Pre-filled Message — Toggle this on to add optional text when visitors start a WhatsApp chat.
- Pre-filled Message — Enter a default message that automatically appears in the WhatsApp chat when visitors start a conversation.
- Message Field Placeholder — Enter the placeholder text displayed in the Message field if you selected Message Field as the Start Chat Method.
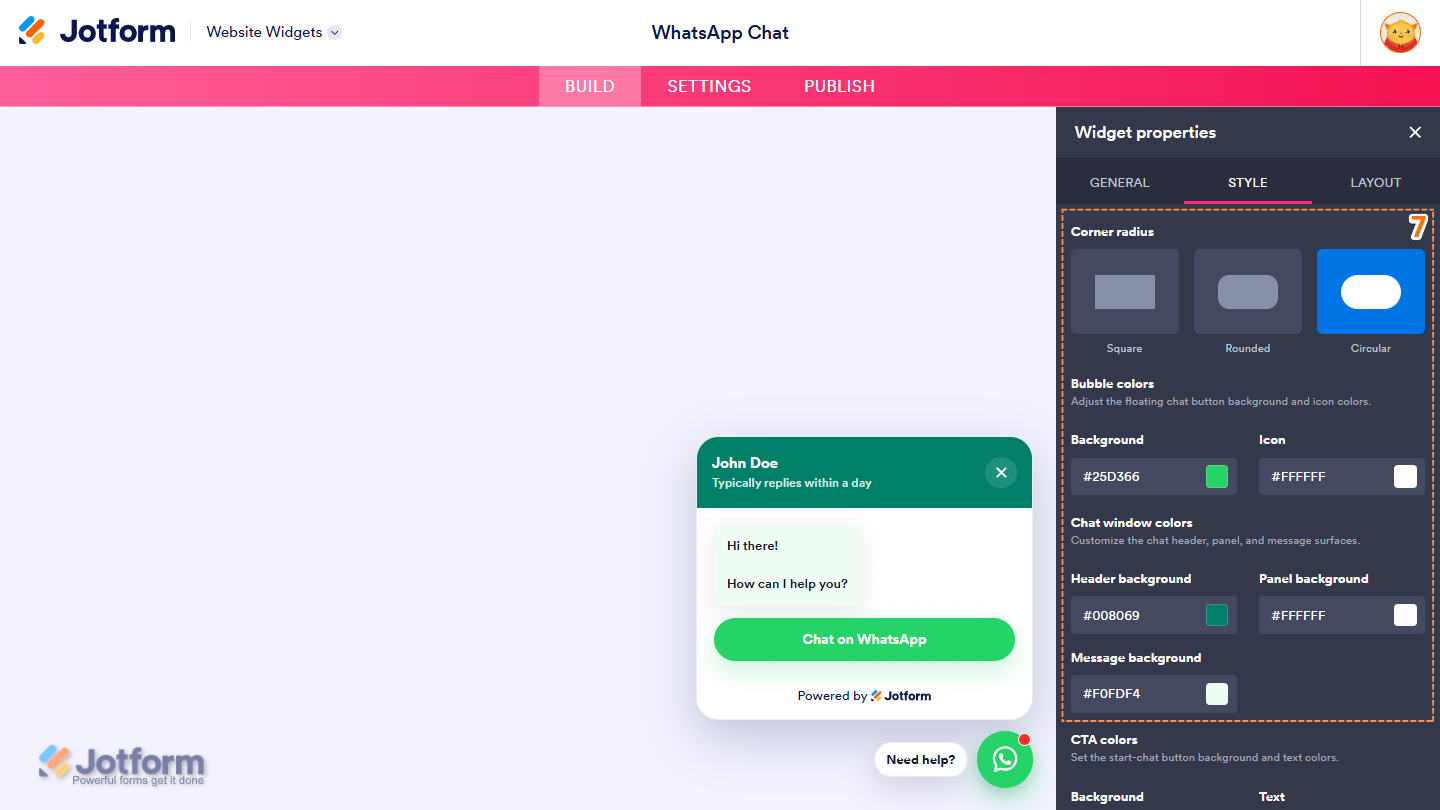
- Next, under the Style tab, personalize how the Chat box will look with these options:
- Corner Radius — Select the corner style for the Chat button and Chat window: Square, Rounded, or Circular.
- Bubble Colors — Customize the background and icon colors of the floating Chat button.
- Chat Window Colors — Customize the colors of the Chat Header, Panel, and Message Area.
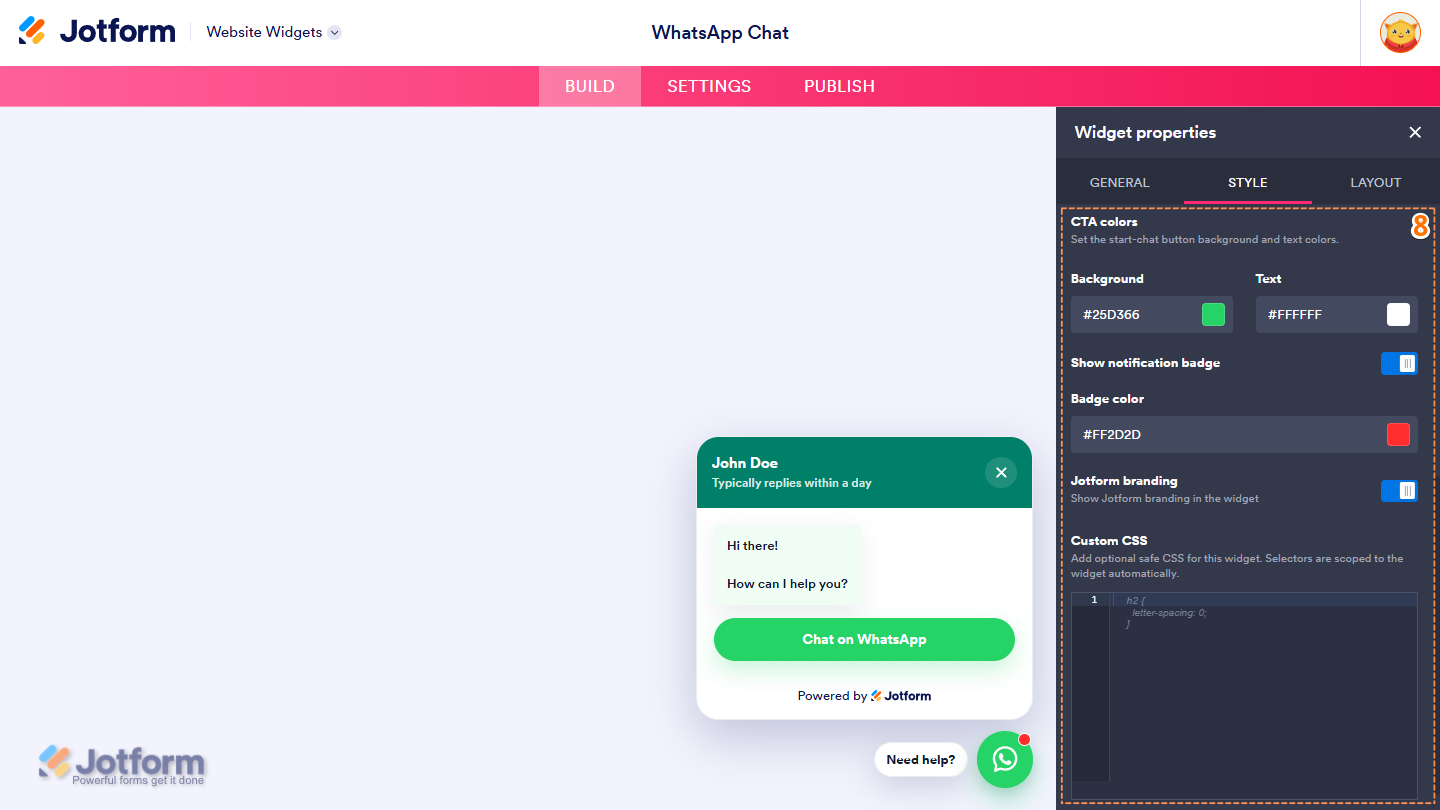
- Now, scroll down to the bottom and complete these things:
- CTA Colors — Customize the background and text colors of the Start Chat button.
- Show Notification Badge — Display a notification badge on the floating Chat button to attract visitors’ attention.
- Badge Color — Choose the notification badge color.
- Jotform Branding — Show or hide the Jotform branding in the chat window.
- Custom CSS — Add custom CSS to further customize the appearance of the widget beyond the available settings.
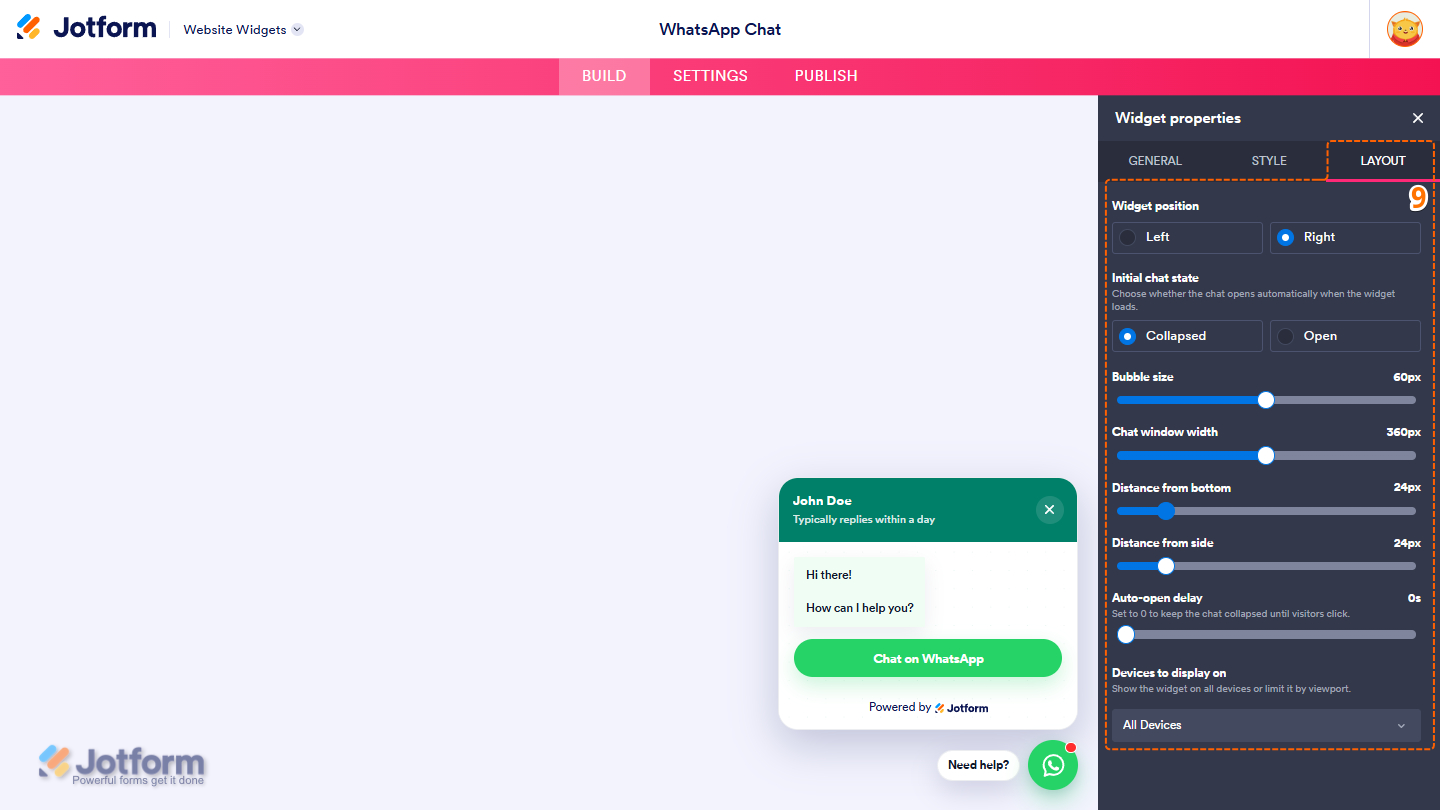
- Finally, under the Layout tab, set up these things:
- Widget Position — Choose whether to display the Chat widget on the left or right side of the page.
- Initial Chat State — Choose whether the Chat window opens automatically when the widget loads or stays closed until a visitor clicks on the Chat button.
- Bubble Size — Adjust the size of the floating Chat button.
- Chat Window Width — Set the width of the Chat window.
- Distance from Bottom — Adjust the spacing between the widget and the bottom edge of the page.
- Distance from Side — Adjust the spacing between the widget and the left or right edge of the page.
- Auto-open Delay — Set how long to wait before the Chat window opens automatically, when enabled. Set it to 0 to keep the chat window closed until visitors click on it.
- Devices to Display On — Choose whether to display the Chat widget on Desktop, Mobile, or Both.
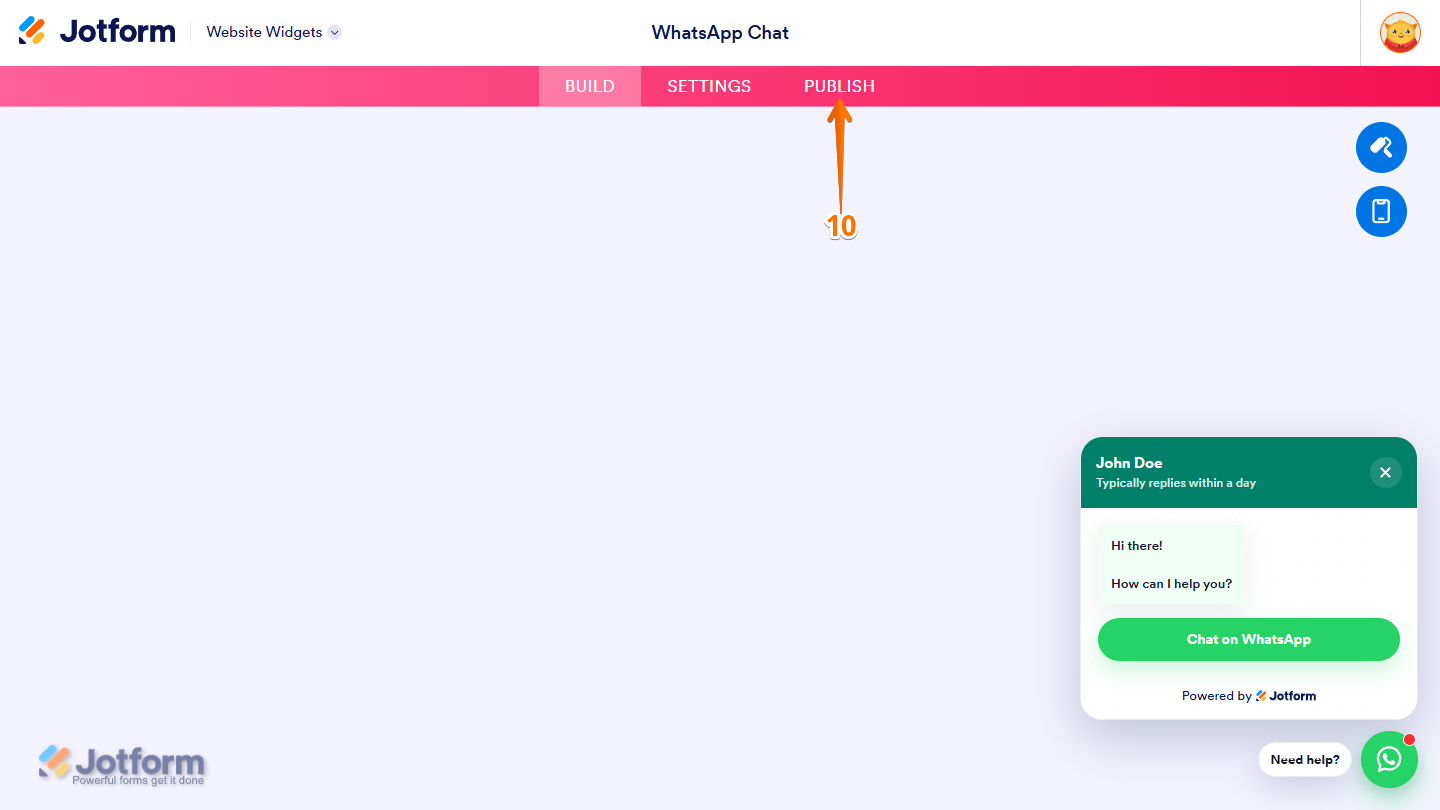
- Once you’ve finished configuring the widget, in the pink navigation bar at the top of the page, click on Publish.
Note
If you’re not logged in, you’ll be asked to log in to your Jotform account or sign up for one. Once you’ve done that, you’ll be able to get the embed code for your widget.
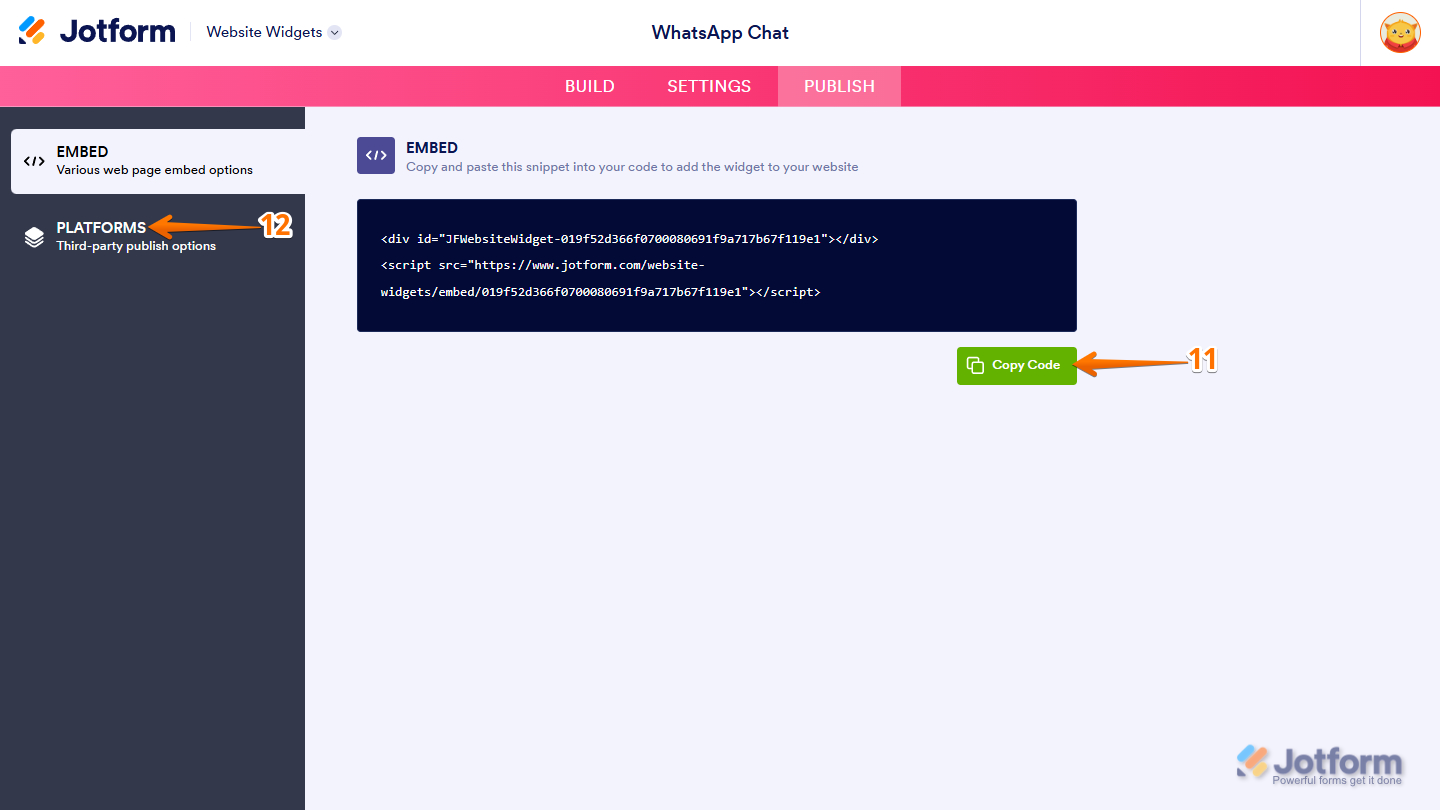
- Then, in the Embed section, click on Copy Code, and, if you already know how, paste that into the Embed section on your platform, and you’re good to go.
- To view embedding instructions for your widget, click on Platforms in the menu on the left side of the page.
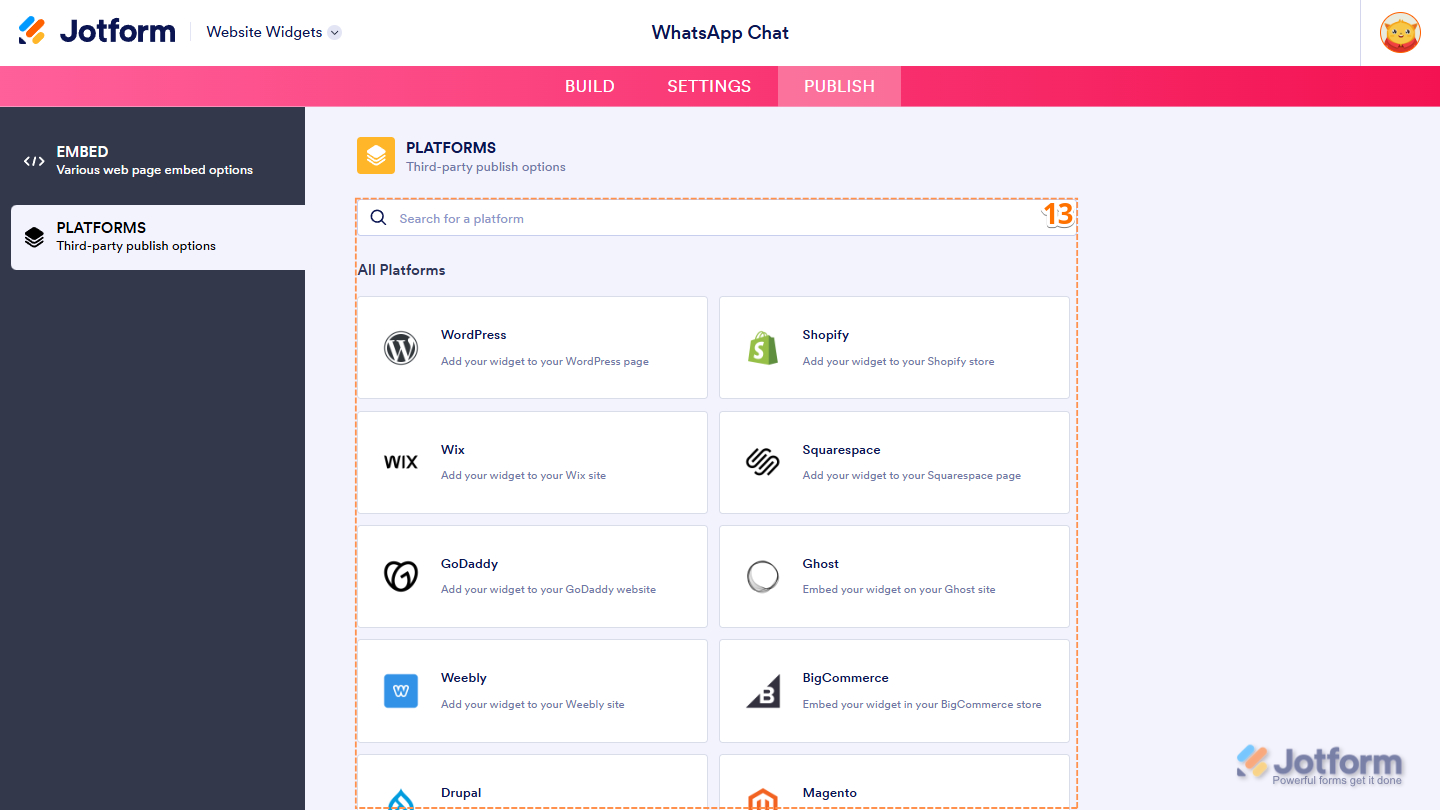
- Then, in the Platforms section on the right, select the platform you want to view embedding instructions for. Or, use the Search bar at the top of the section to find it easily.
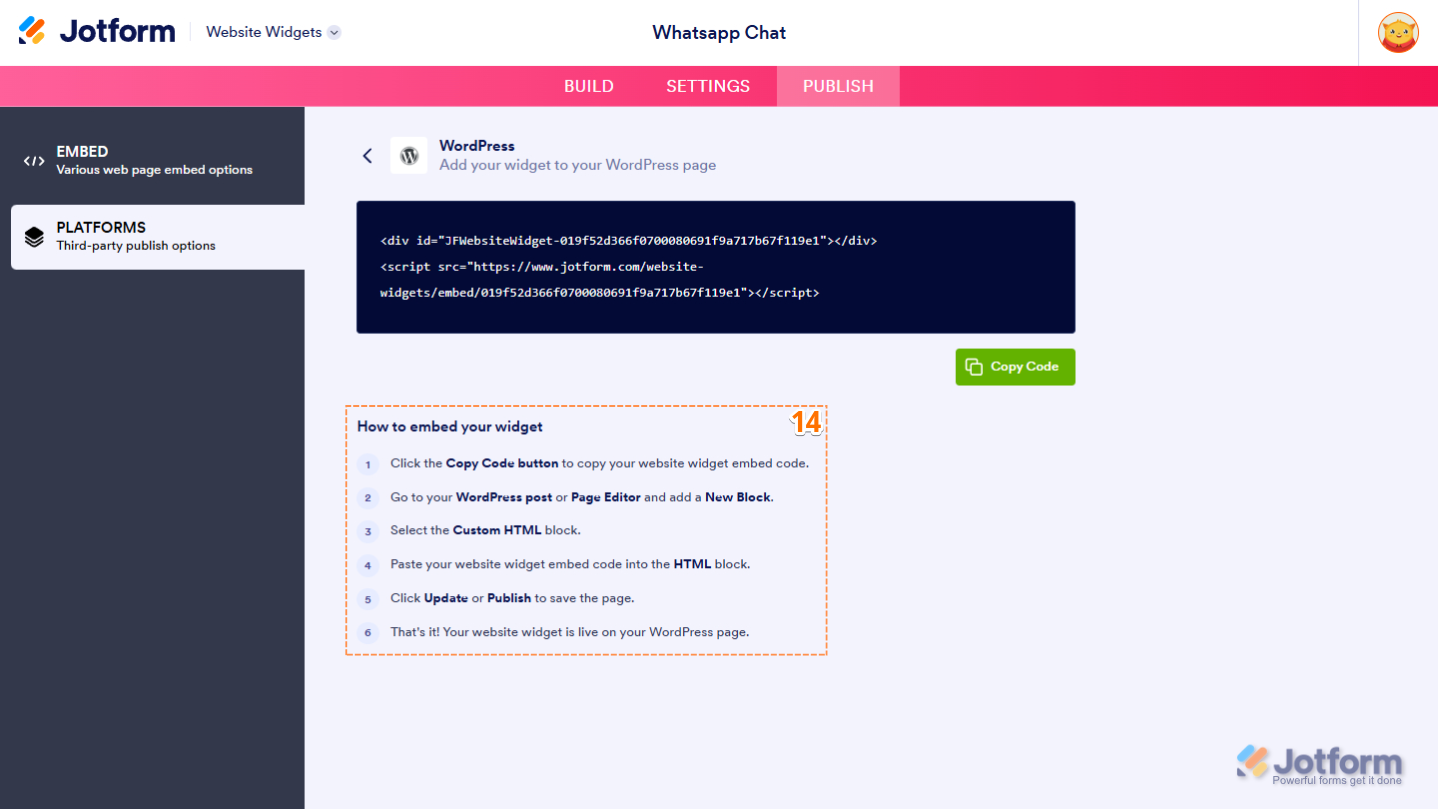
- Now, follow the steps in the How to Embed Your Widget section to add it to your website.
Pro Tip
The WhatsApp widget is a sitewide widget, so it’s best to embed it in the <head> section of your website. This ensures it remains available across your site.
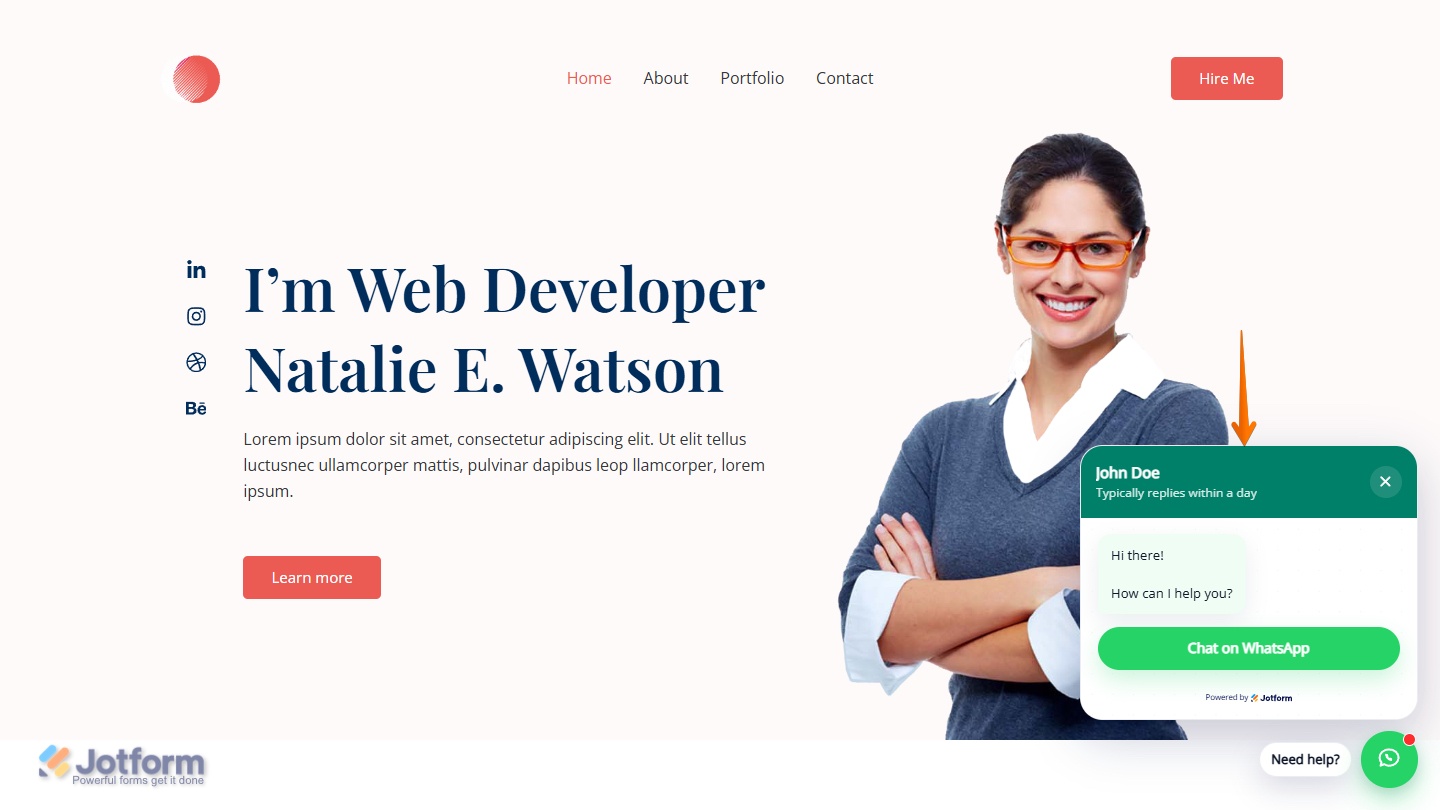
That’s it, your WhatsApp Chat widget is now ready to be embedded on your website, making it easy for visitors to start a conversation with you directly through WhatsApp. The screenshot below shows an example of how the widget will look when embedded:
Updating Your WhatsApp Chat Widget
You can update your WhatsApp Chat widget at any time after it’s embedded on your website. Here’s a quick how-to:
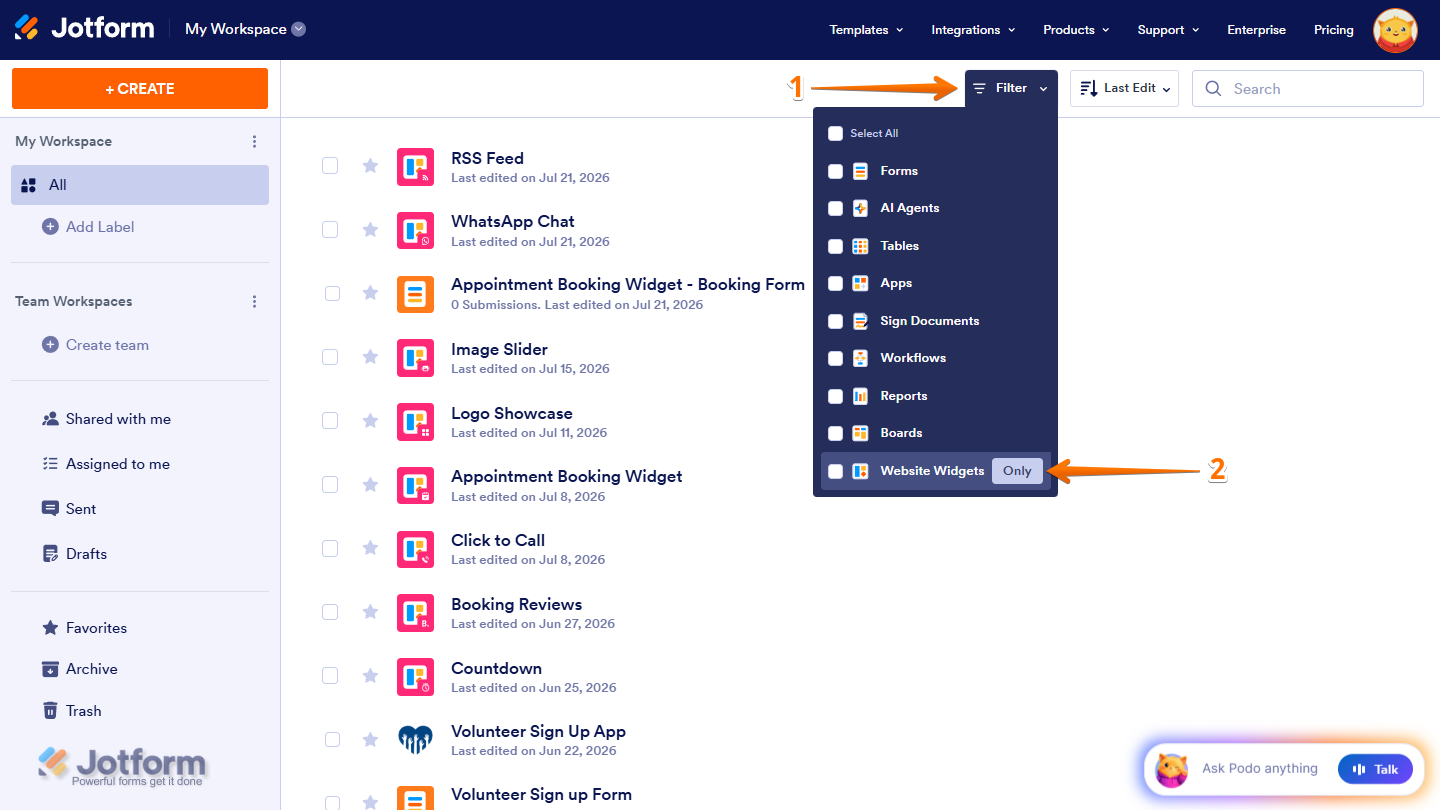
- At the top of your Workspace page, click on Filter.
- Then, in the Dropdown menu that opens, hover your mouse over Website Widgets, and on the right side of it, click on Only.
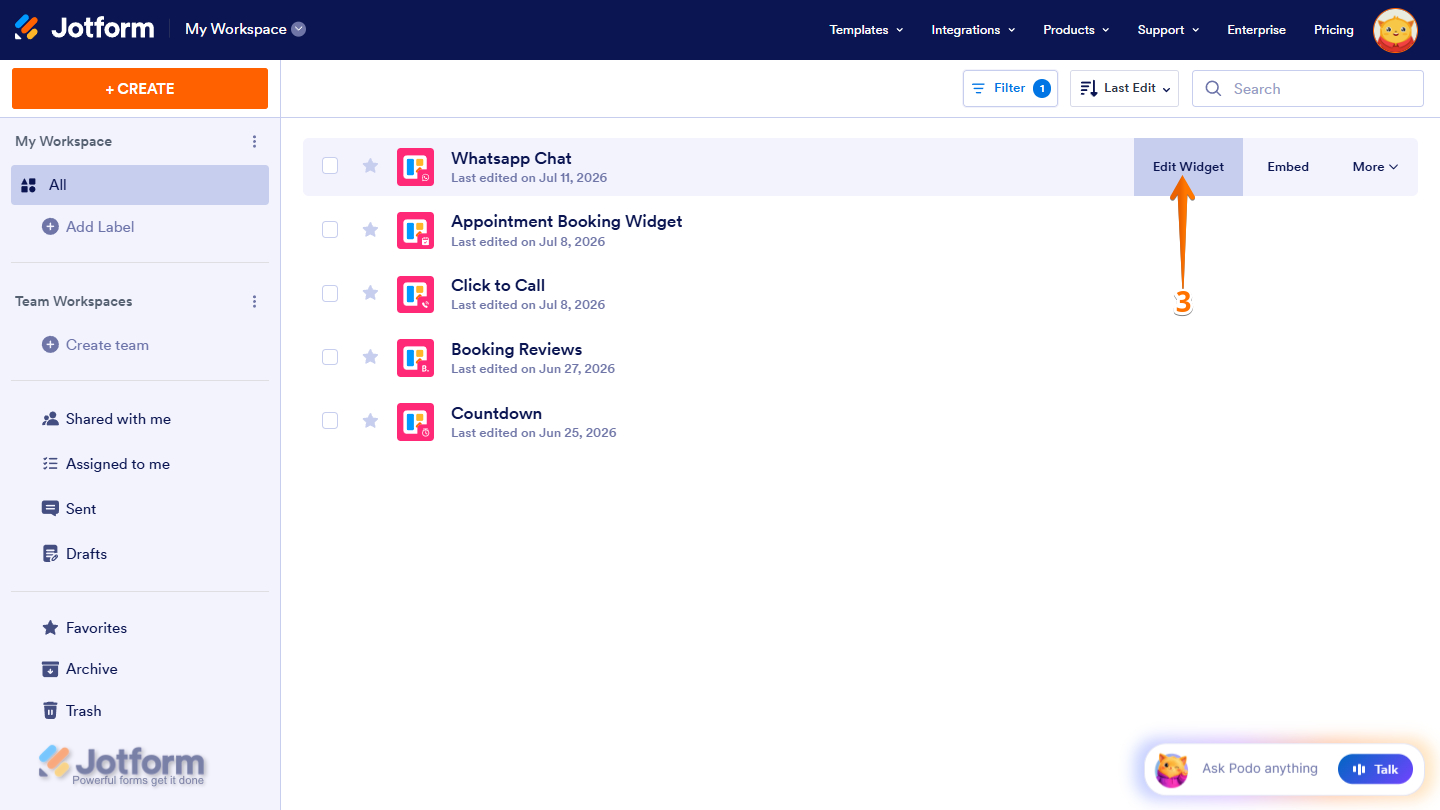
- Next, hover your mouse over the widget you want to edit and click on Edit Widget on the right side of the page.
- Now, in the Widget Properties menu that opens on the right side of Website Widgets, under the General, Style, and Layout tabs, edit the properties you want to change.
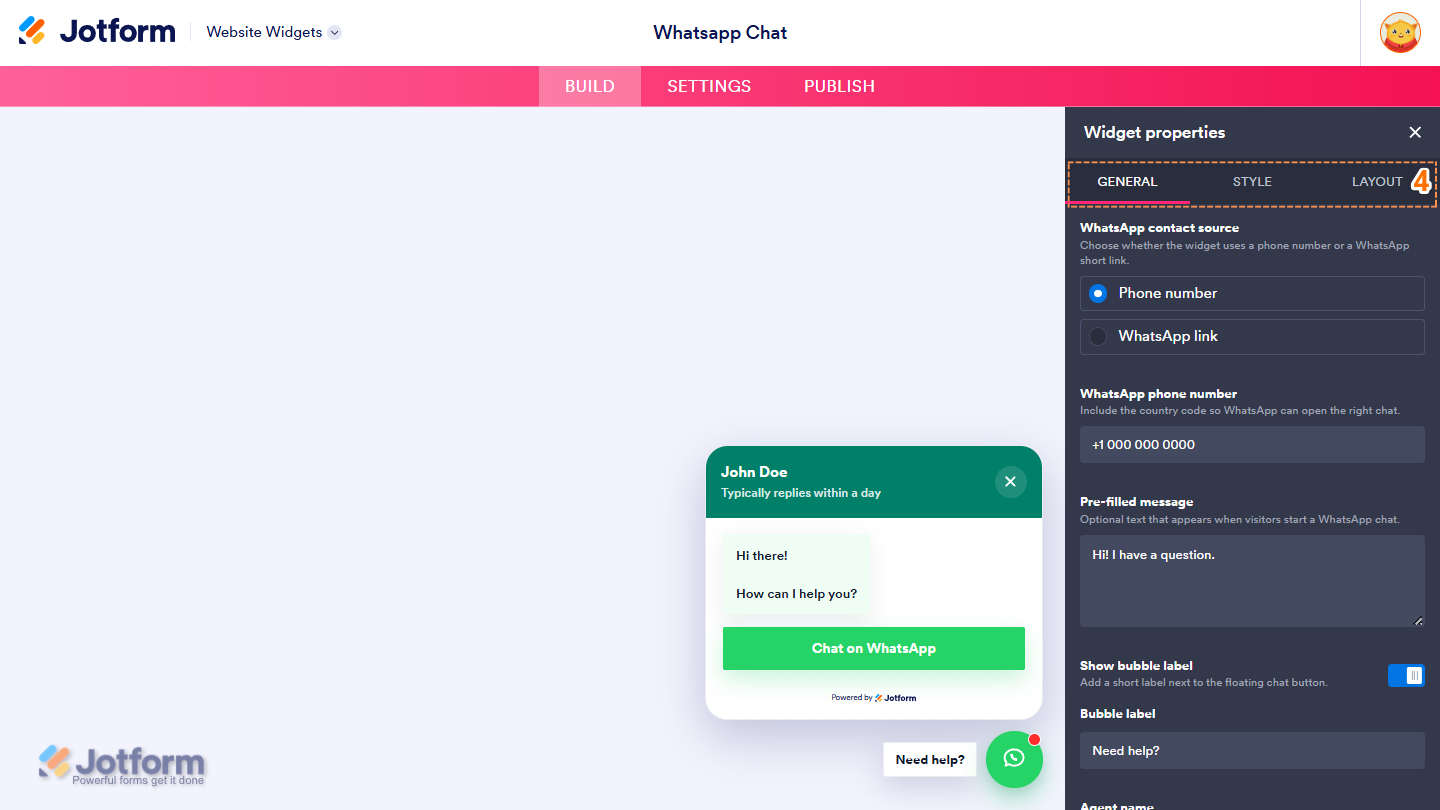
That’s it! Your changes will be automatically applied to your WhatsApp Chat widget.
Note
Your widget remains editable after it’s embedded on your website. Any changes you make will automatically appear on your website without requiring a new embed code.


Send Comment: