Jotform makes it easy to manage your AI WhatsApp Agent from one place. Once you’ve connected your WhatsApp Business account or purchased a phone number for your AI Agent, you can manage automated messages, share or embed your agent, and keep track of its activity.
Whether you need to disconnect a business number, update automated messages, share your agent with users, or review conversations, the WhatsApp Agent section gives you the tools to manage your AI Agent and its WhatsApp experience.
Before You Begin
Make sure you’ve already connected your AI WhatsApp Agent to a WhatsApp Business account or purchased a phone number for your agent. If you haven’t set up your WhatsApp Agent yet, check out our How to Create a WhatsApp Chatbot with AI Agents to learn more.
Accessing Your AI WhatsApp Agent
Once you’ve connected your WhatsApp Business account or purchased a phone number for your AI Agent, you can manage your integration from the WhatsApp Agent section. Here’s how to get going:
- In AI Agent Builder, in the blue navigation bar at the top of the page, click on Publish.
- Then, in the menu on the left, click on WhatsApp Agent.
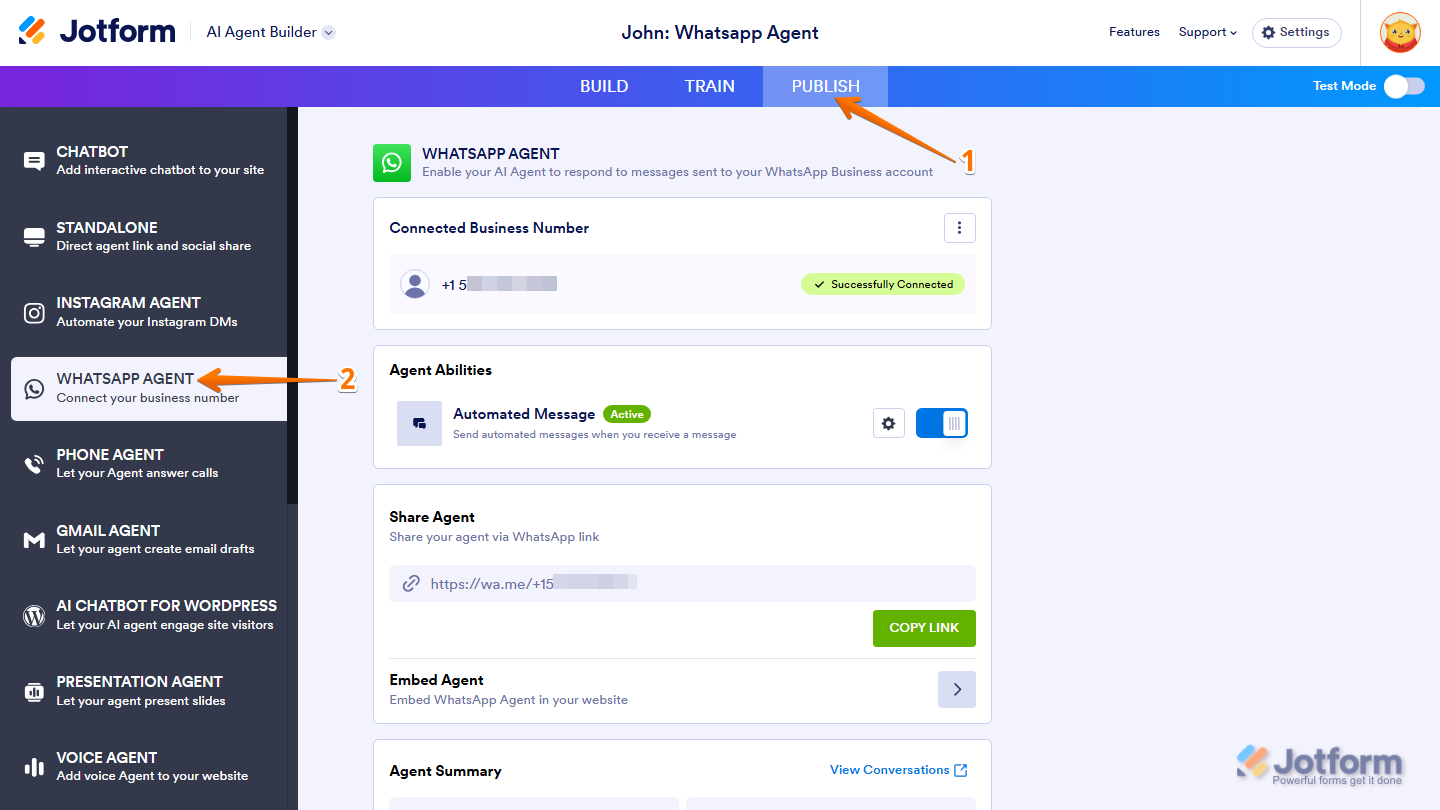
From here, you can manage your WhatsApp integration using the following options:
- Disconnecting a Connected WhatsApp Business Number
- Managing Automated Messages
- Copying the WhatsApp Agent Link
- Embedding the WhatsApp Agent
- Viewing Agent Activity
Disconnecting a Connected WhatsApp Business Number
If you no longer want to use the connected WhatsApp Business number with your AI Agent, you can disconnect it from your WhatsApp integration. You can do it in just a few steps:
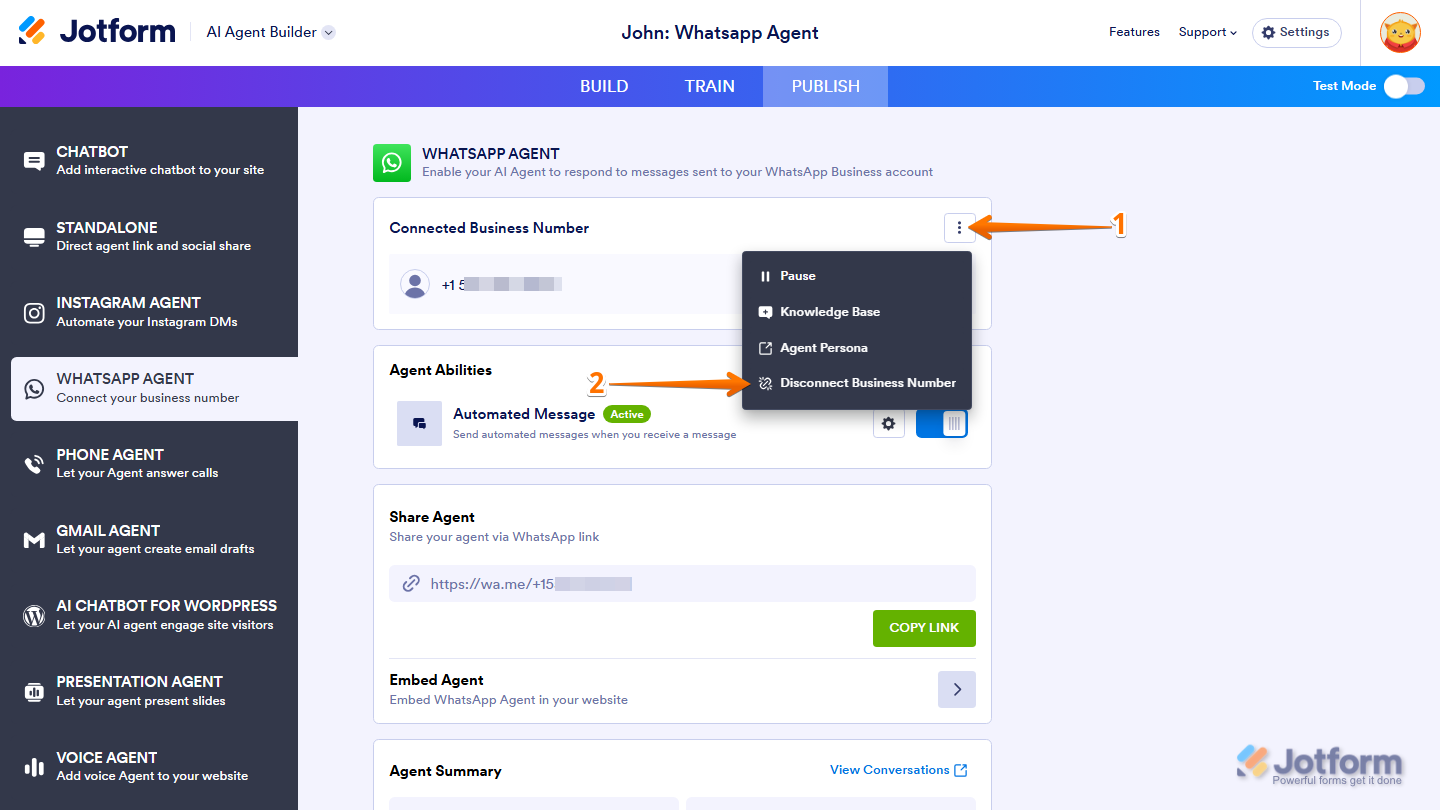
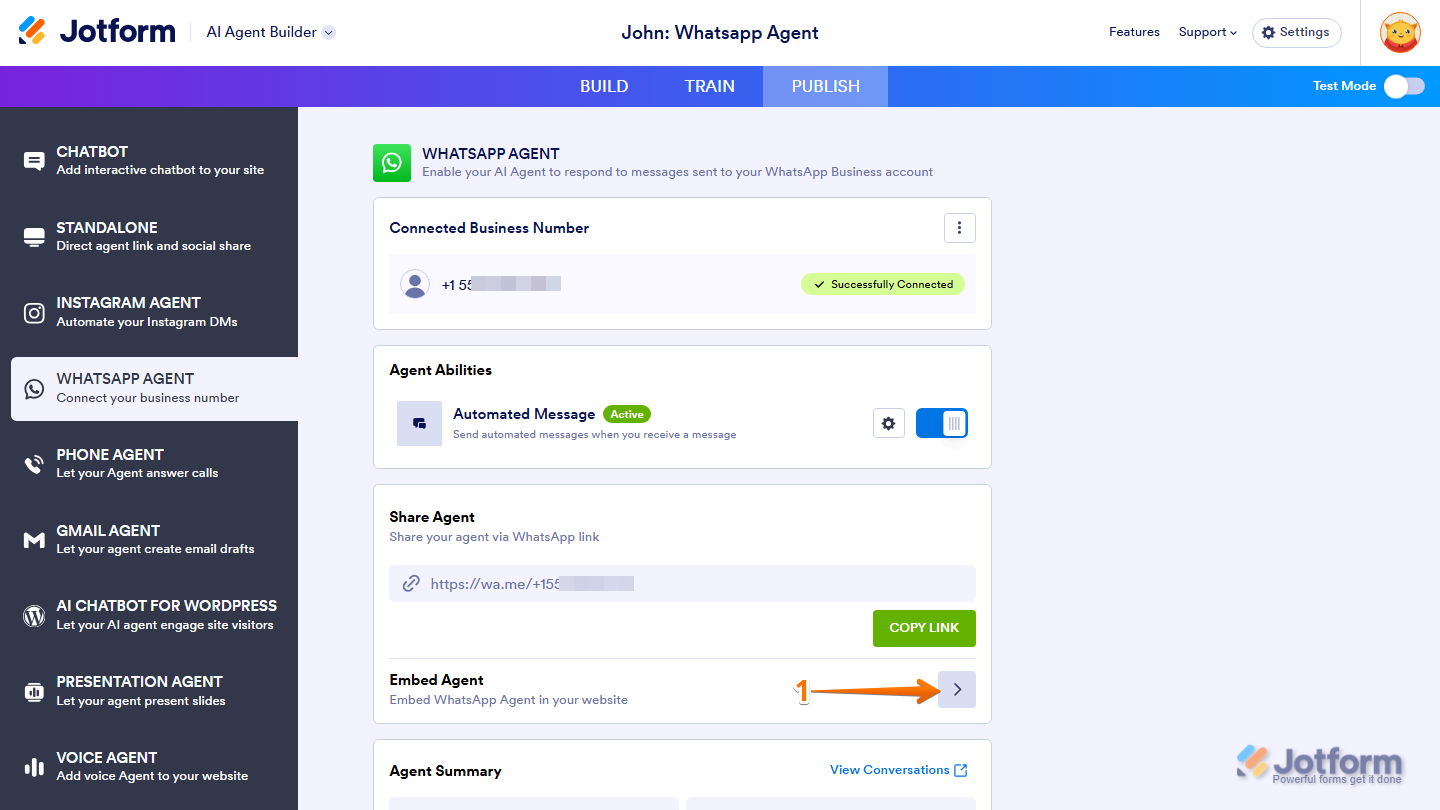
- In the Connected Business Number section, click on the Three Dots icon next to your connected number.
- Then, select Disconnect Business Number.
Managing Automated Messages
You can enable or disable automated messages and adjust their settings to control how your AI Agent communicates with users. Here’s what to do next:
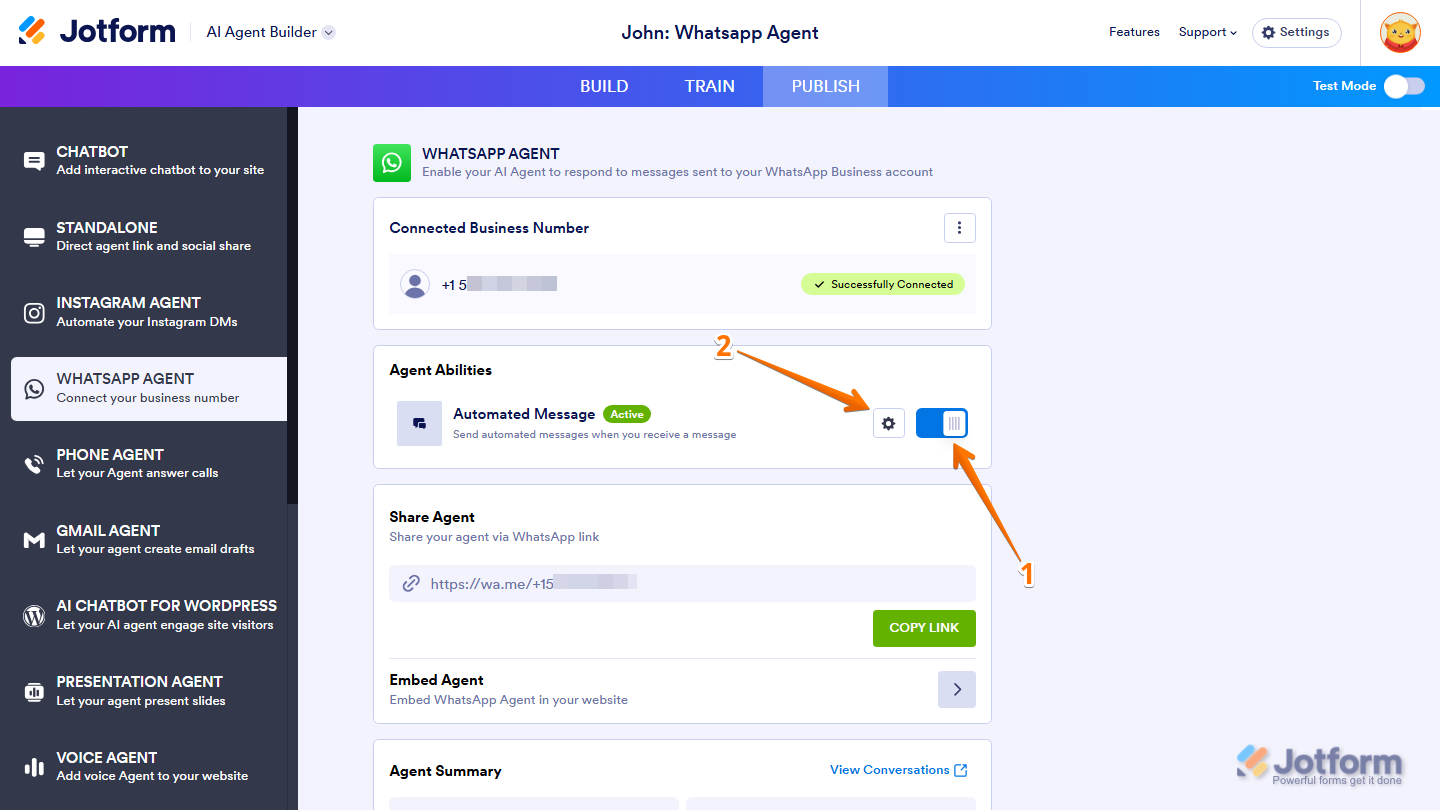
- In the Agent Abilities section, toggle on or off the Automated Message to enable or disable it.
- To configure the automated message settings, click on Gear icon.
Copying the WhatsApp Agent Link
You can share your WhatsApp Agent directly with users by copying its link. Here’s how to get going:
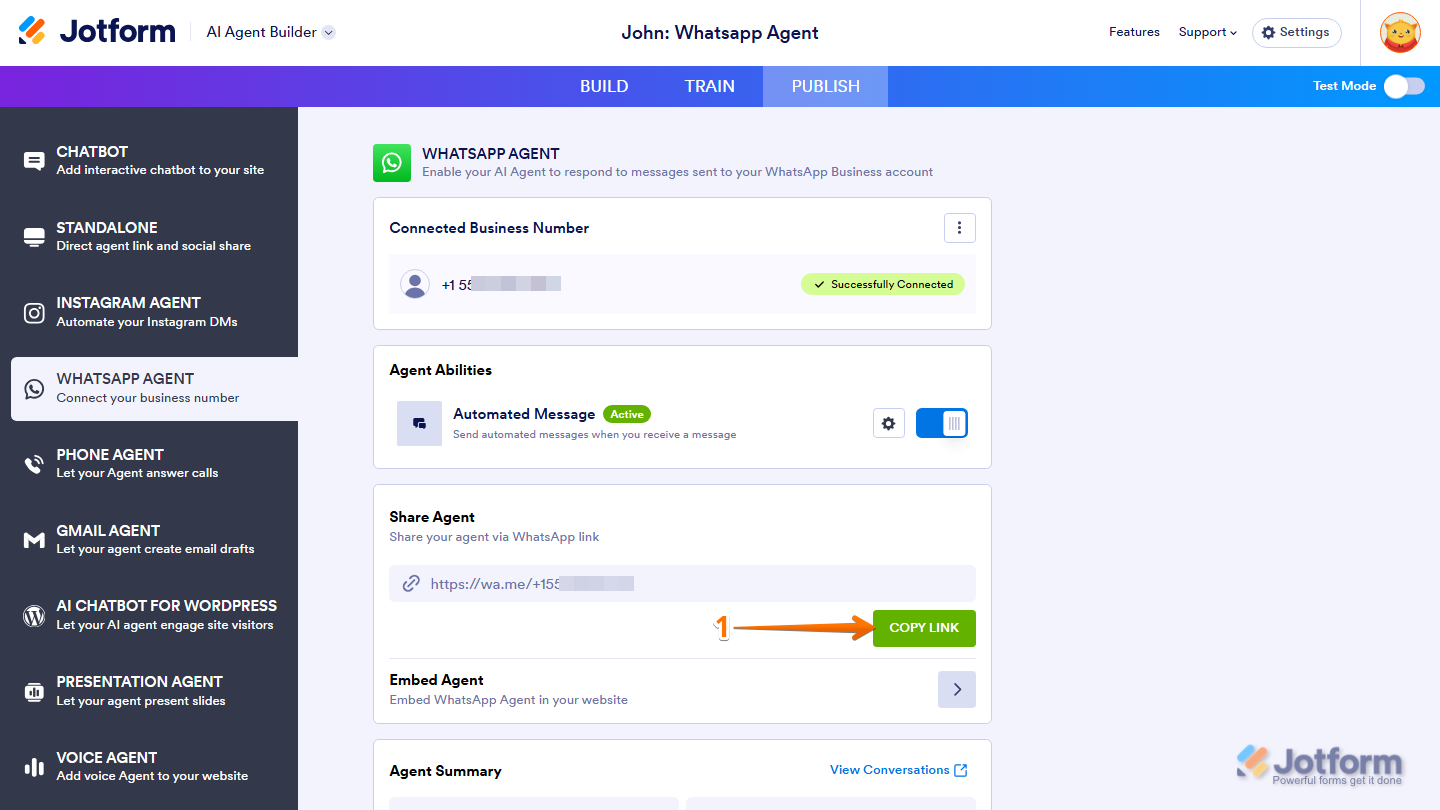
- In the Share Agent section, click on Copy Link, then paste the link wherever you want to share your WhatsApp Agent.
Embedding the WhatsApp Agent
You can also add your WhatsApp Agent to your website by embedding it directly on a page. Getting started is simple—here’s what to do:
- In the Embed Agent section, click on the Forward Arrow icon.
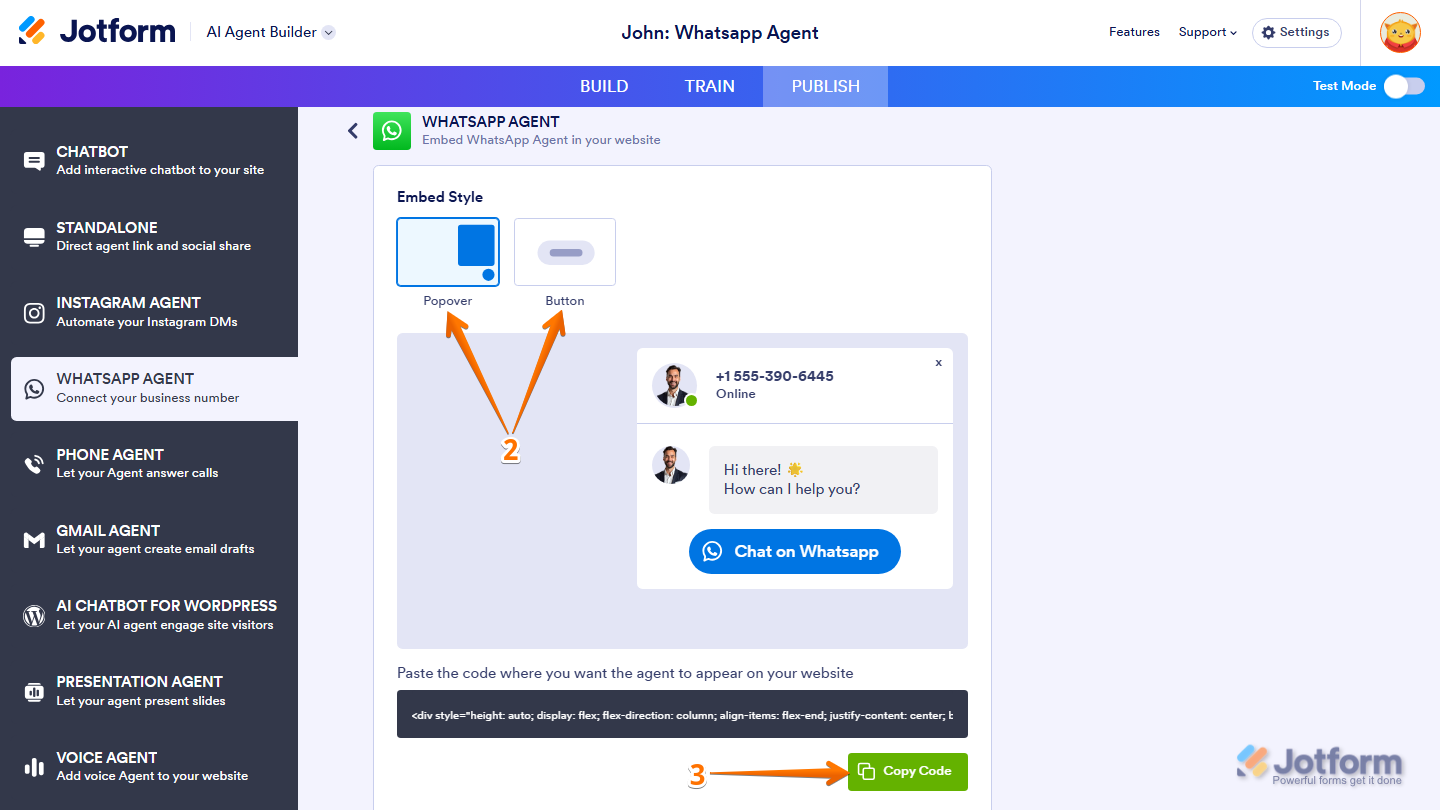
- Then, select your preferred Embed Style:
- Popover — Displays the WhatsApp Agent as a pop-up chat window.
- Button — Displays the WhatsApp Agent as a button.
- Now, click Copy Code and paste the copied code into the desired location on your website.
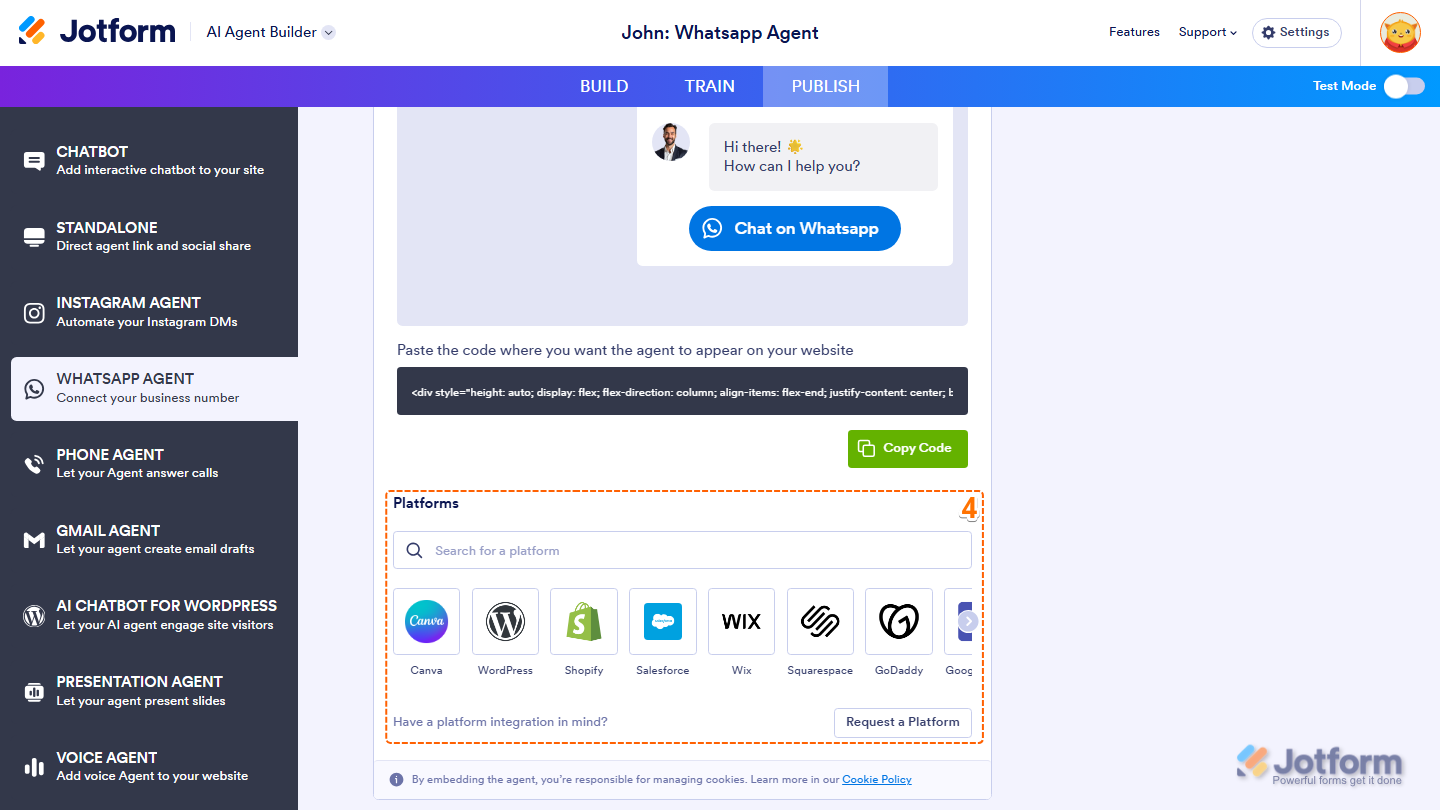
- To view embedding instructions for a supported website, scroll down to the Platforms section and select the platform you want to view embedding instructions for. Or, use the Search bar at the top of the section to find it easily.
Viewing Agent Summary
You can review your AI Agent’s activity and conversations from the WhatsApp section. Here’s the quick way to do it:
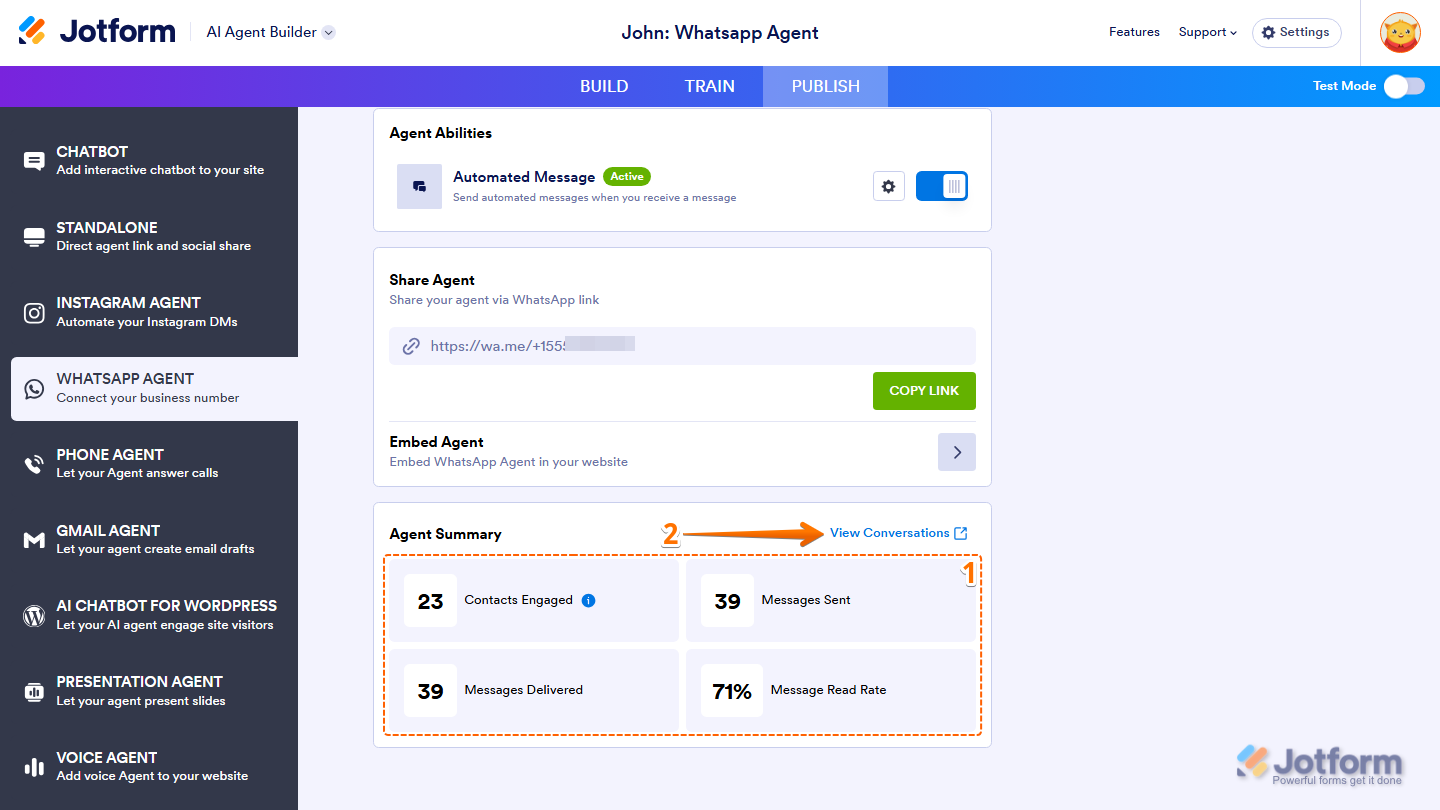
- Scroll down to the Agent Summarysection to view your agent’s activity.
- Contacts Engaged — Displays the number of contacts who have interacted with your WhatsApp Agent.
- Messages Sent — Displays the total number of messages sent by your WhatsApp Agent.
- Messages Delivered — Displays the number of messages successfully delivered to contacts.
- Message Read Rate — Displays the percentage of messages that have been read by contacts.
- To review your conversations, click on View Conversations.

Send Comment: