


The Input Table element has an input type called Multi-type Columns. This allows you to set different input types for each column, such as Single Choice, Checkbox, Textbox, and Dropdown. To set up Multi-type columns:
- Click your Input Table’s Gear icon to open its properties panel.
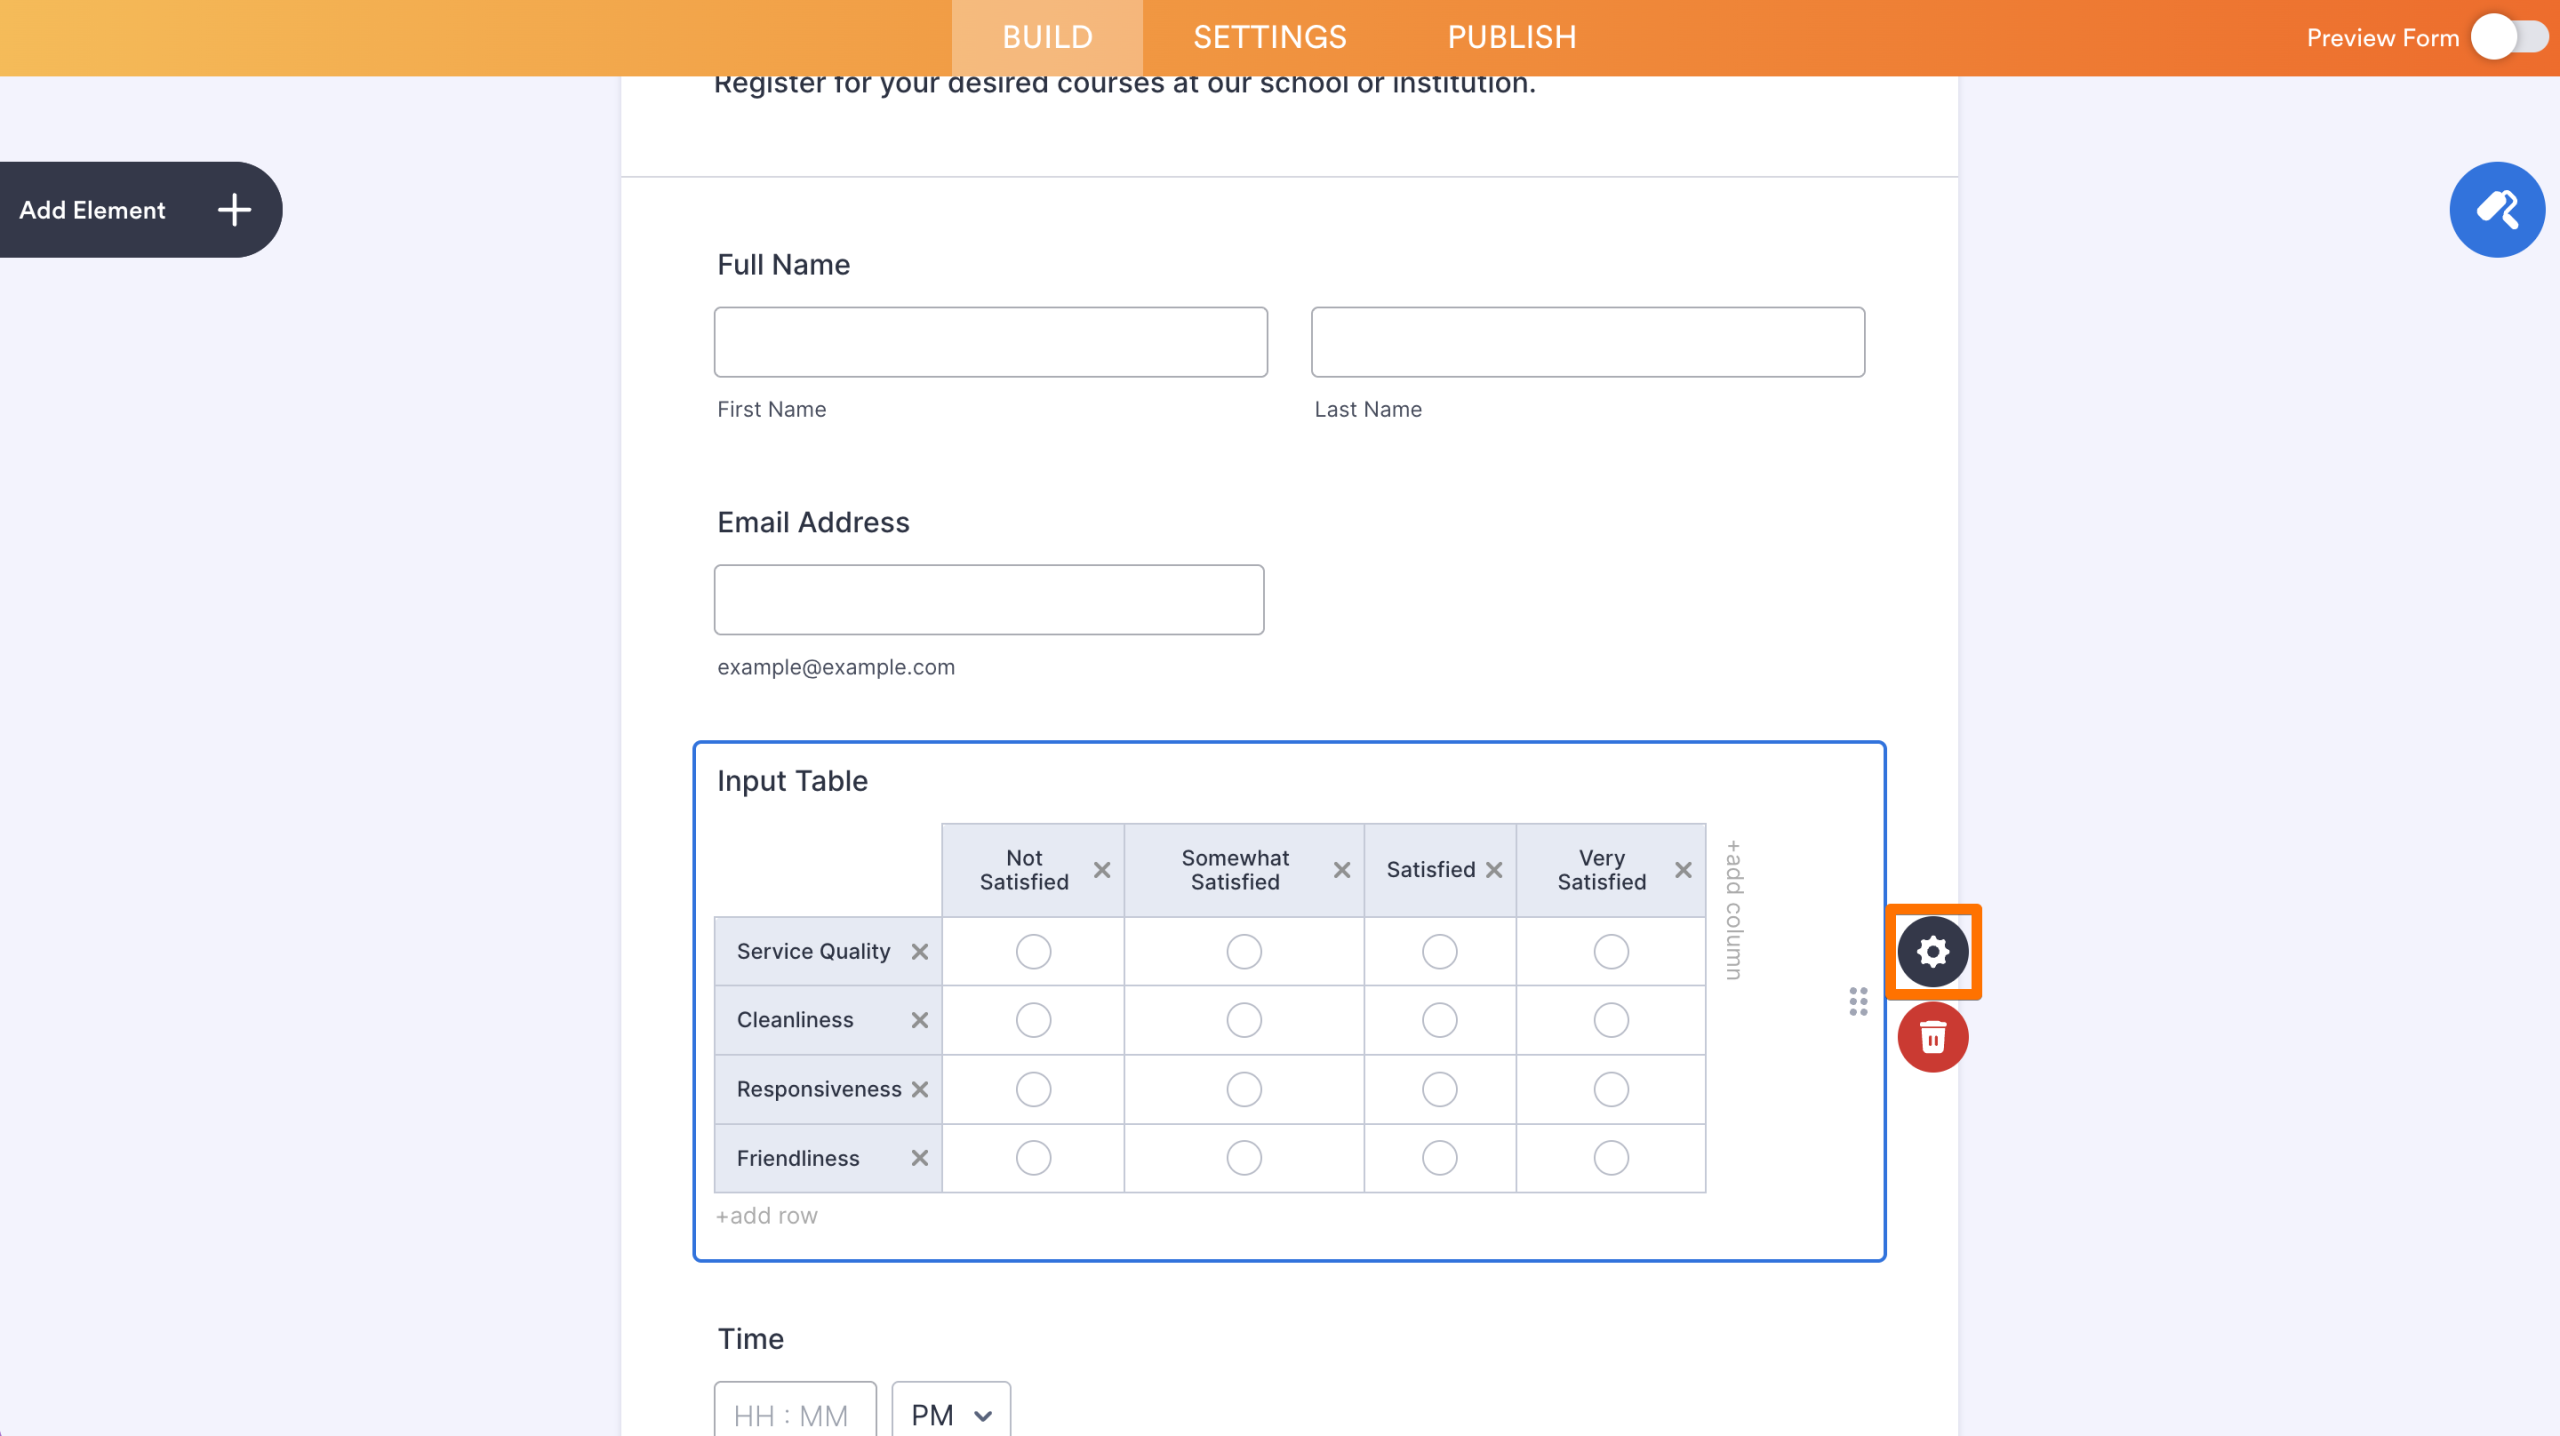
- Go to the Fields tab.
- Select Multi-type Columns from the Input Type options.
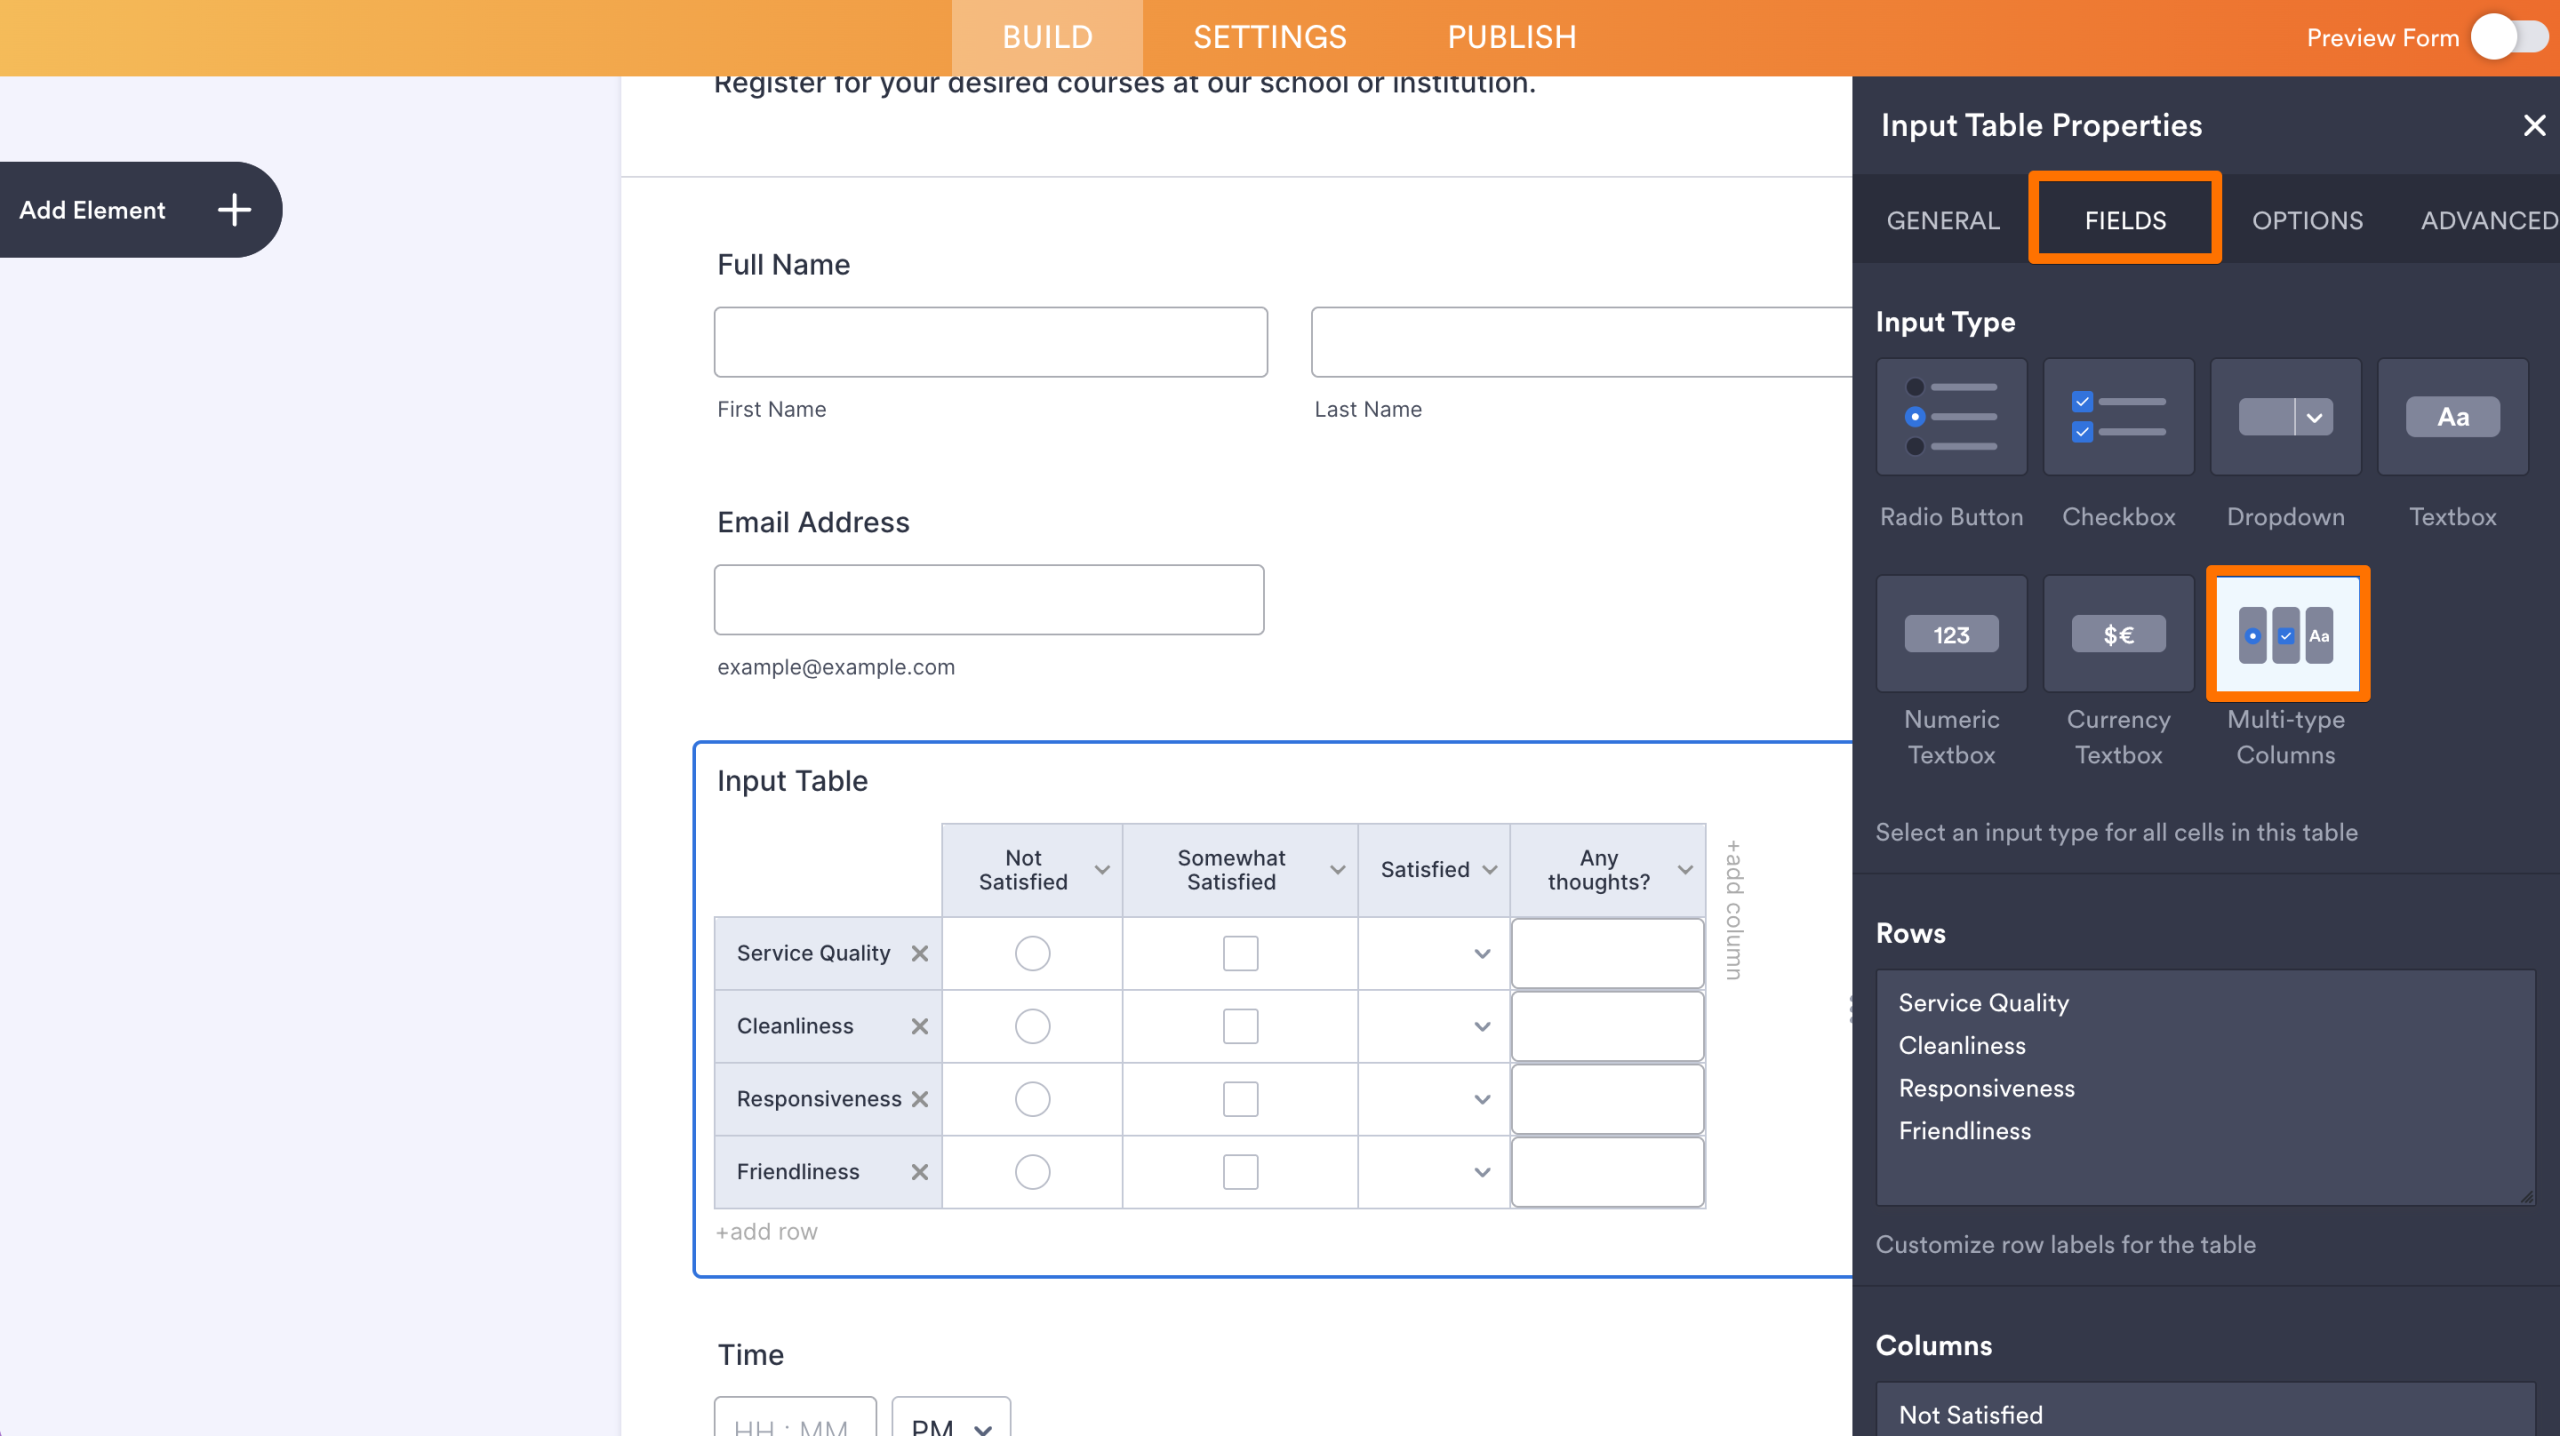
Like the other input types, you can add, edit, and delete rows and columns — and much more with Multi-type columns.
Changing Row and Column Labels
Instead of going through the properties panel, you can directly change the Input Table’s row and column labels.
Adding New Rows and Columns
To add a new row or column to the Input Table, click on add row at the bottom or add column on the right side.

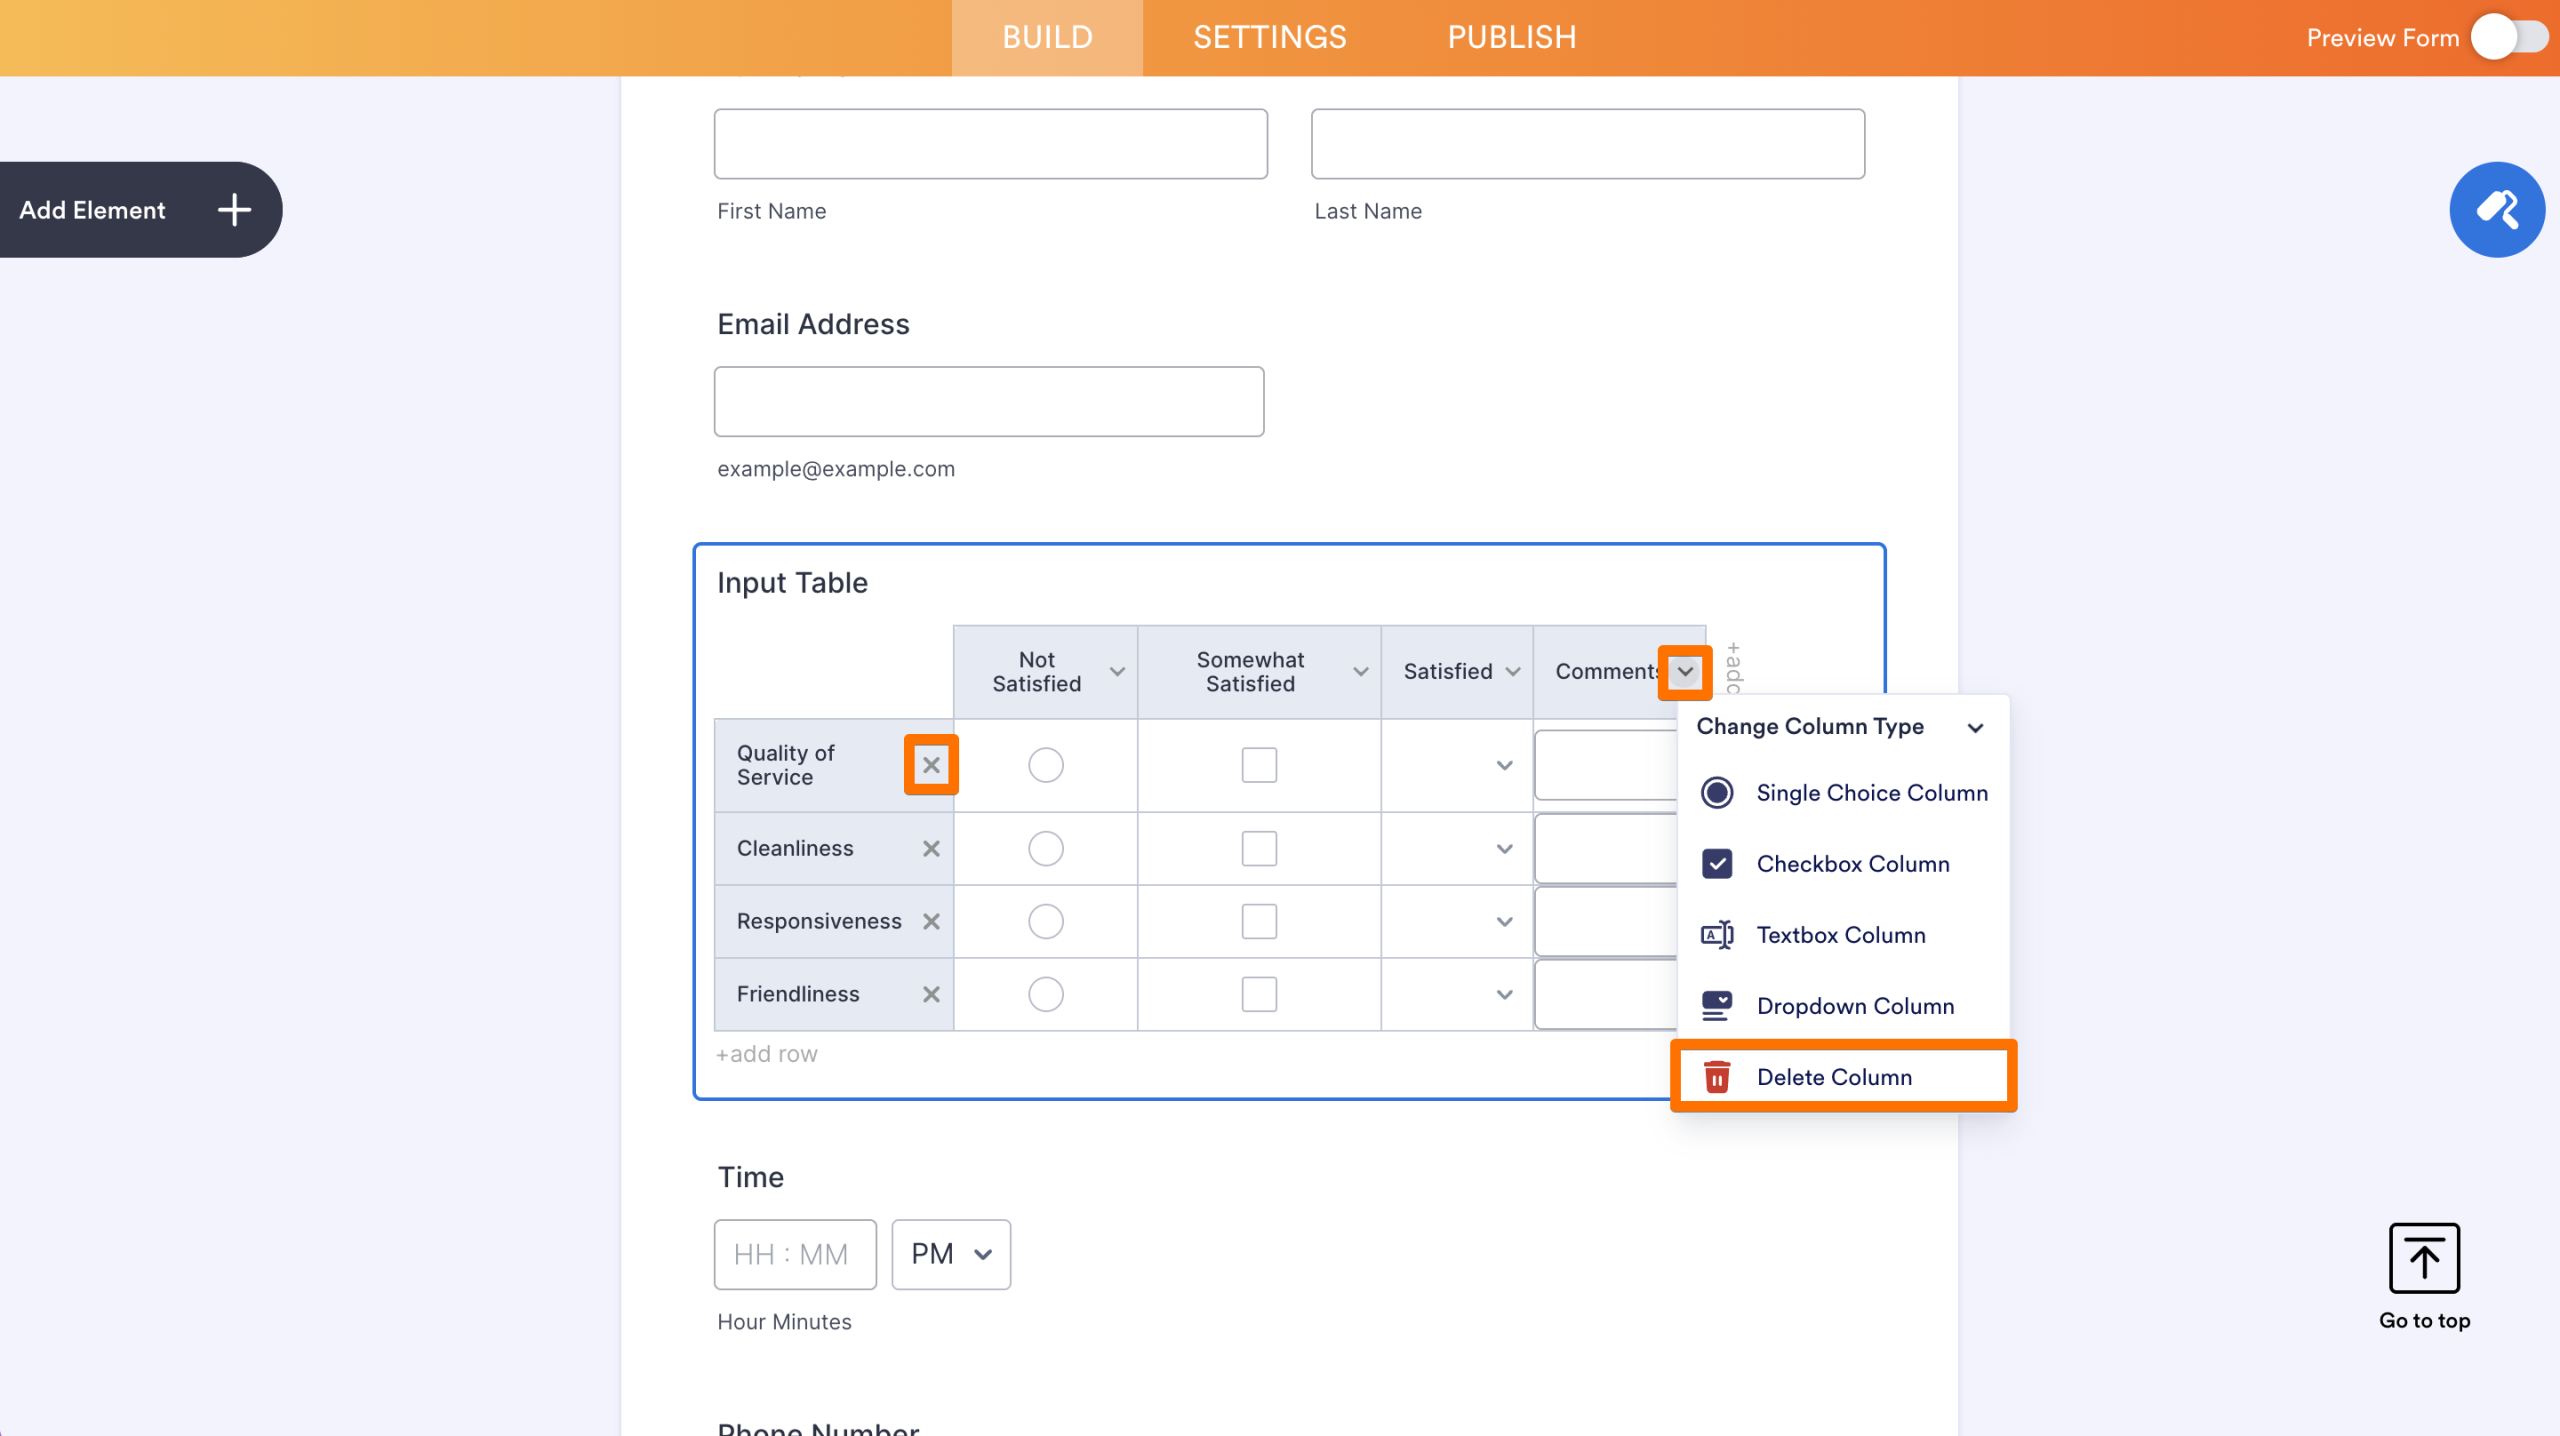
Deleting Rows and Columns
Clicking the X icon next to a row label deletes that row. To delete a column, click the angle-down icon next to the column label then select Delete Column from the menu.
Changing Dropdown Options
You can set options for a dropdown type column by clicking the angle-down icon next to its label. Enter your desired options in the text field and click Save Changes.
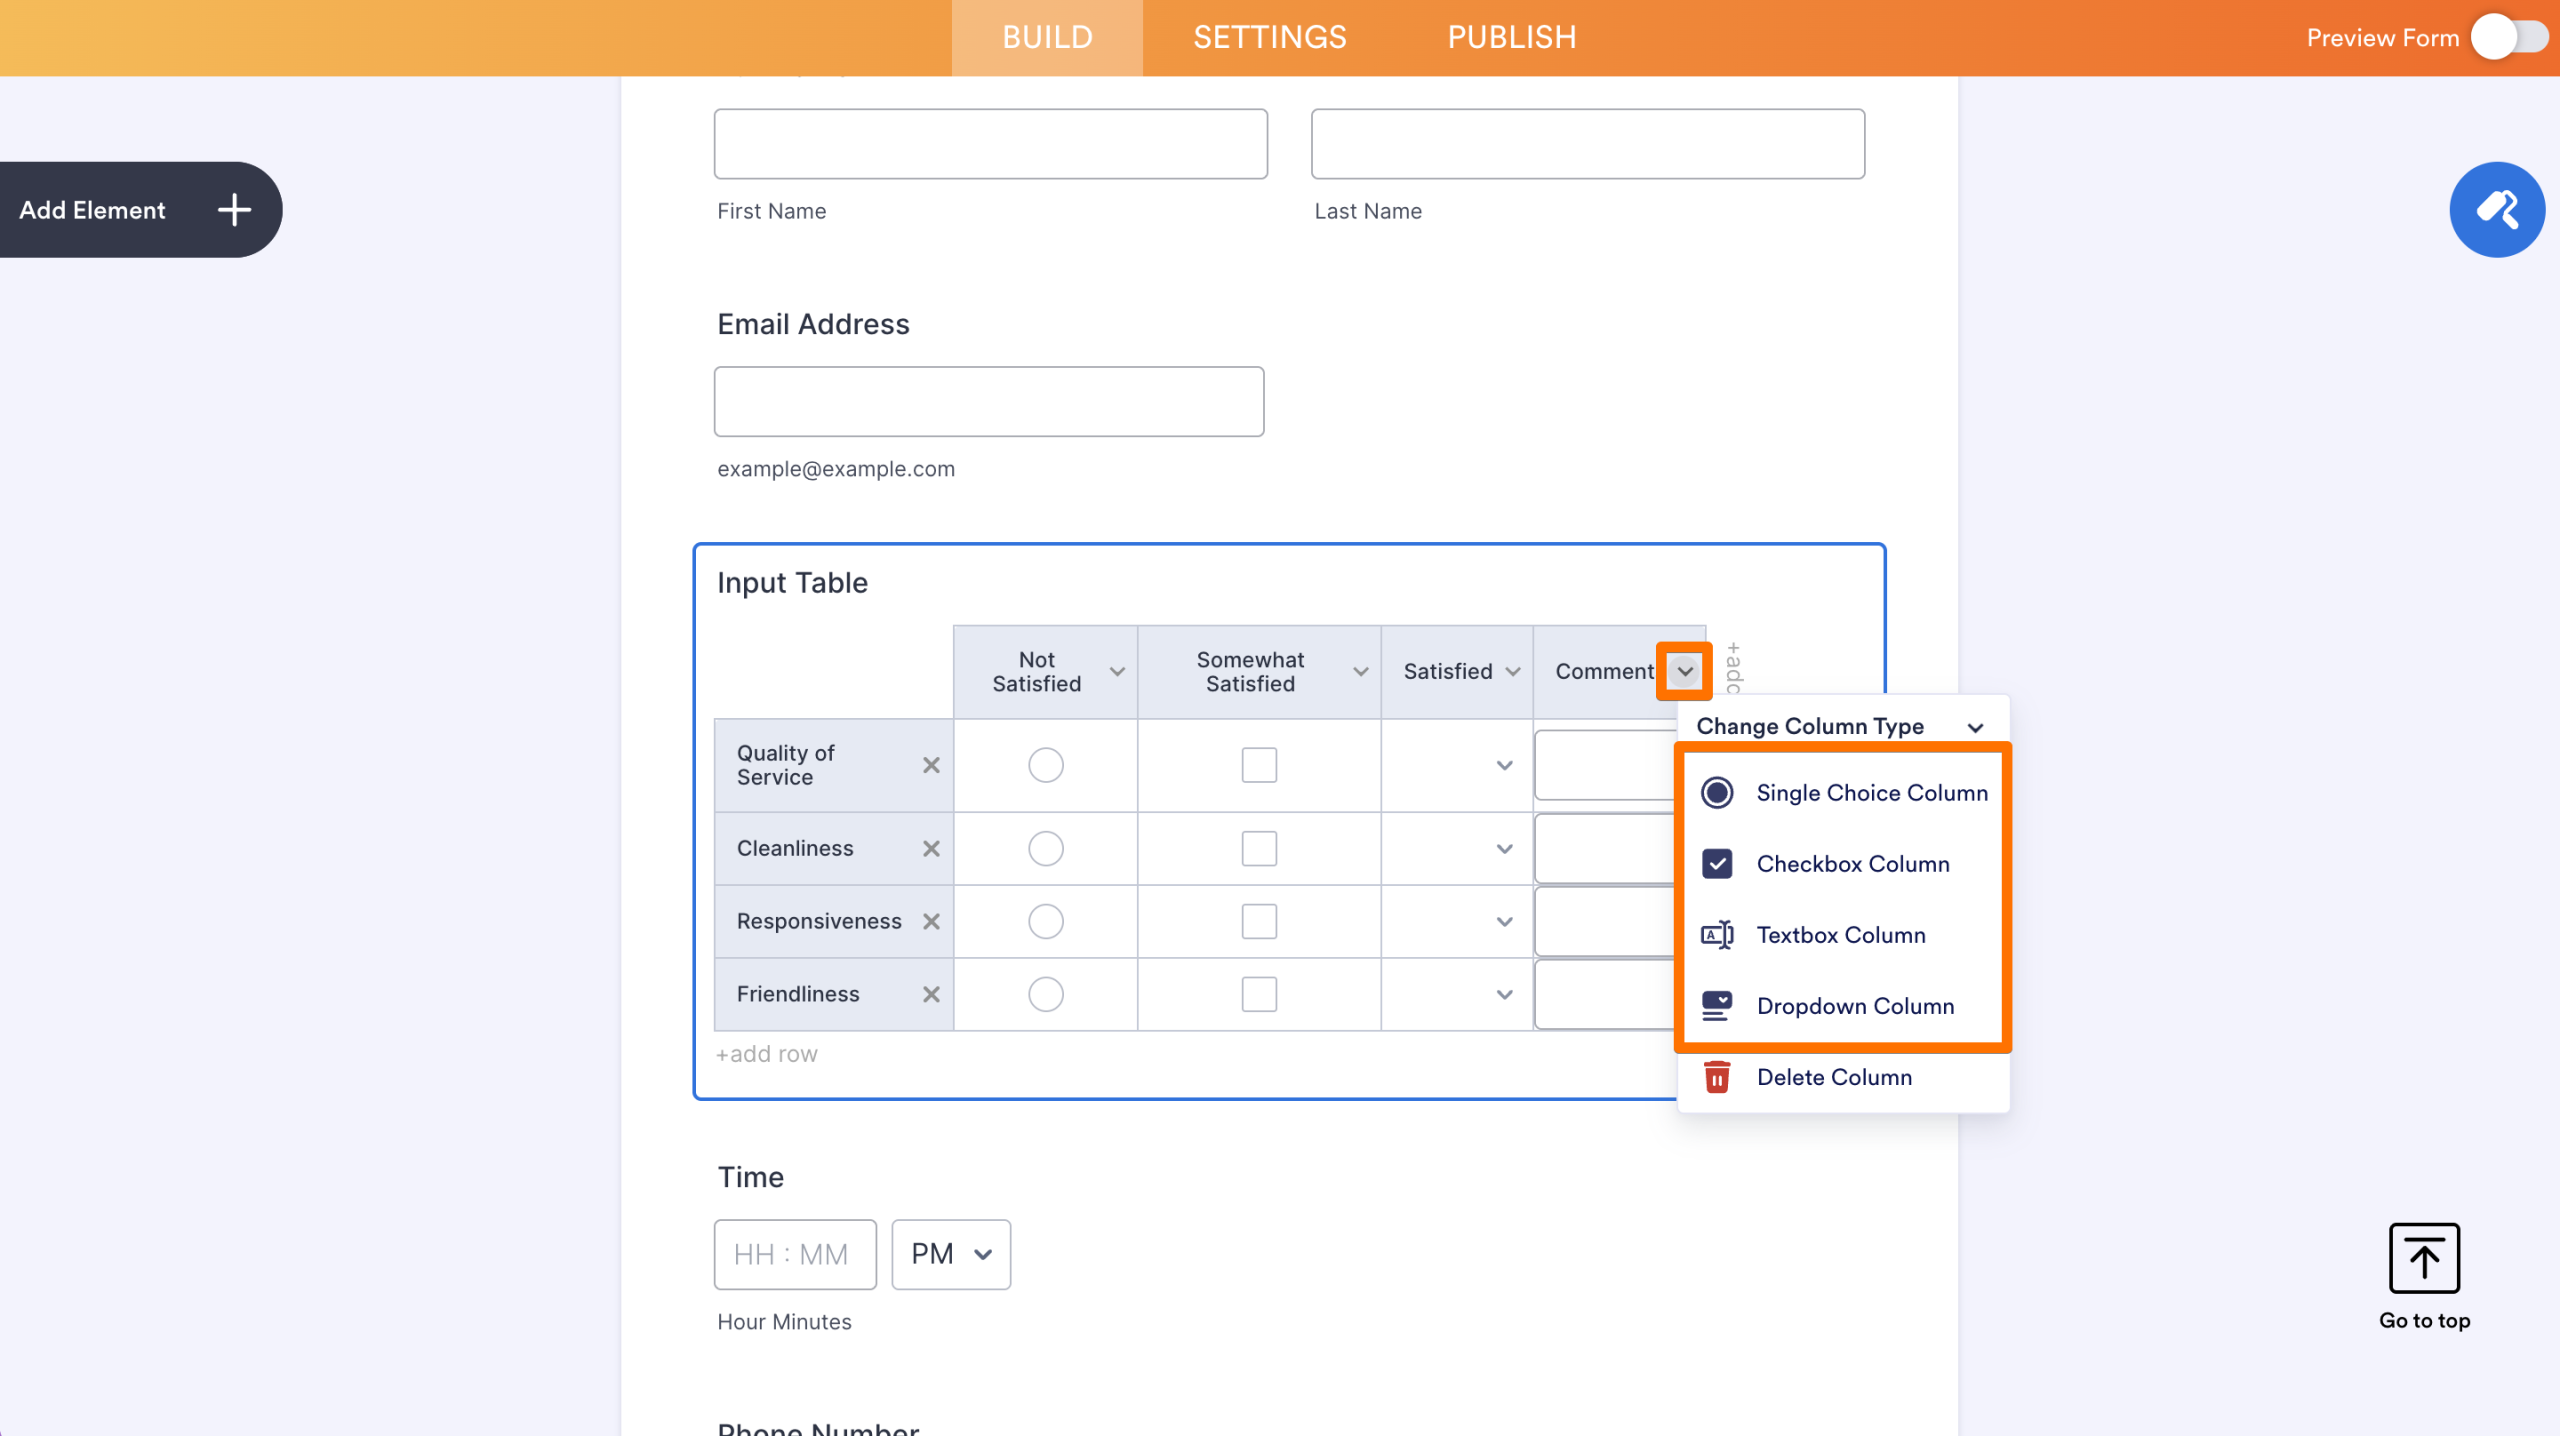
Changing Column Types
Change a column type (i.e., Single Choice, Checkbox, Textbox, or Dropdown) by clicking on the angle-down icon and selecting an option from the menu.

Send Comment: