With the Edit URL feature, you have more control over how form entries are updated. You can choose which fields stay visible and which ones remain hidden when someone edits a submission, making the process cleaner and more focused. Edit URLs can be included in your form emails, allowing updates to specific submission details without requiring anyone to log in. You can also share these links directly with your form fillers, giving them an easy way to review and update their information whenever needed.
Sometimes, you may need to show or hide certain fields while editing an entry—especially for administrative purposes. This can be helpful in situations like the following:
- Adding a status to form fillers’ submissions
- Adding extra details
- Updating admin-only fields
- Hiding fields you don’t want form fillers to update
To make this work, you’ll need to use a combination of the Get Form Page URL widget and conditional logic. Together, these features let you control which fields appear or stay hidden when an entry is being edited, giving you more flexibility and control over the editing experience.
Adding the Get Form Page URL Widget
First, you’ll need to add the Get Form Page URL widget to your form. This widget quietly captures the exact URL where the form is opened or submitted. Here’s how to do it:
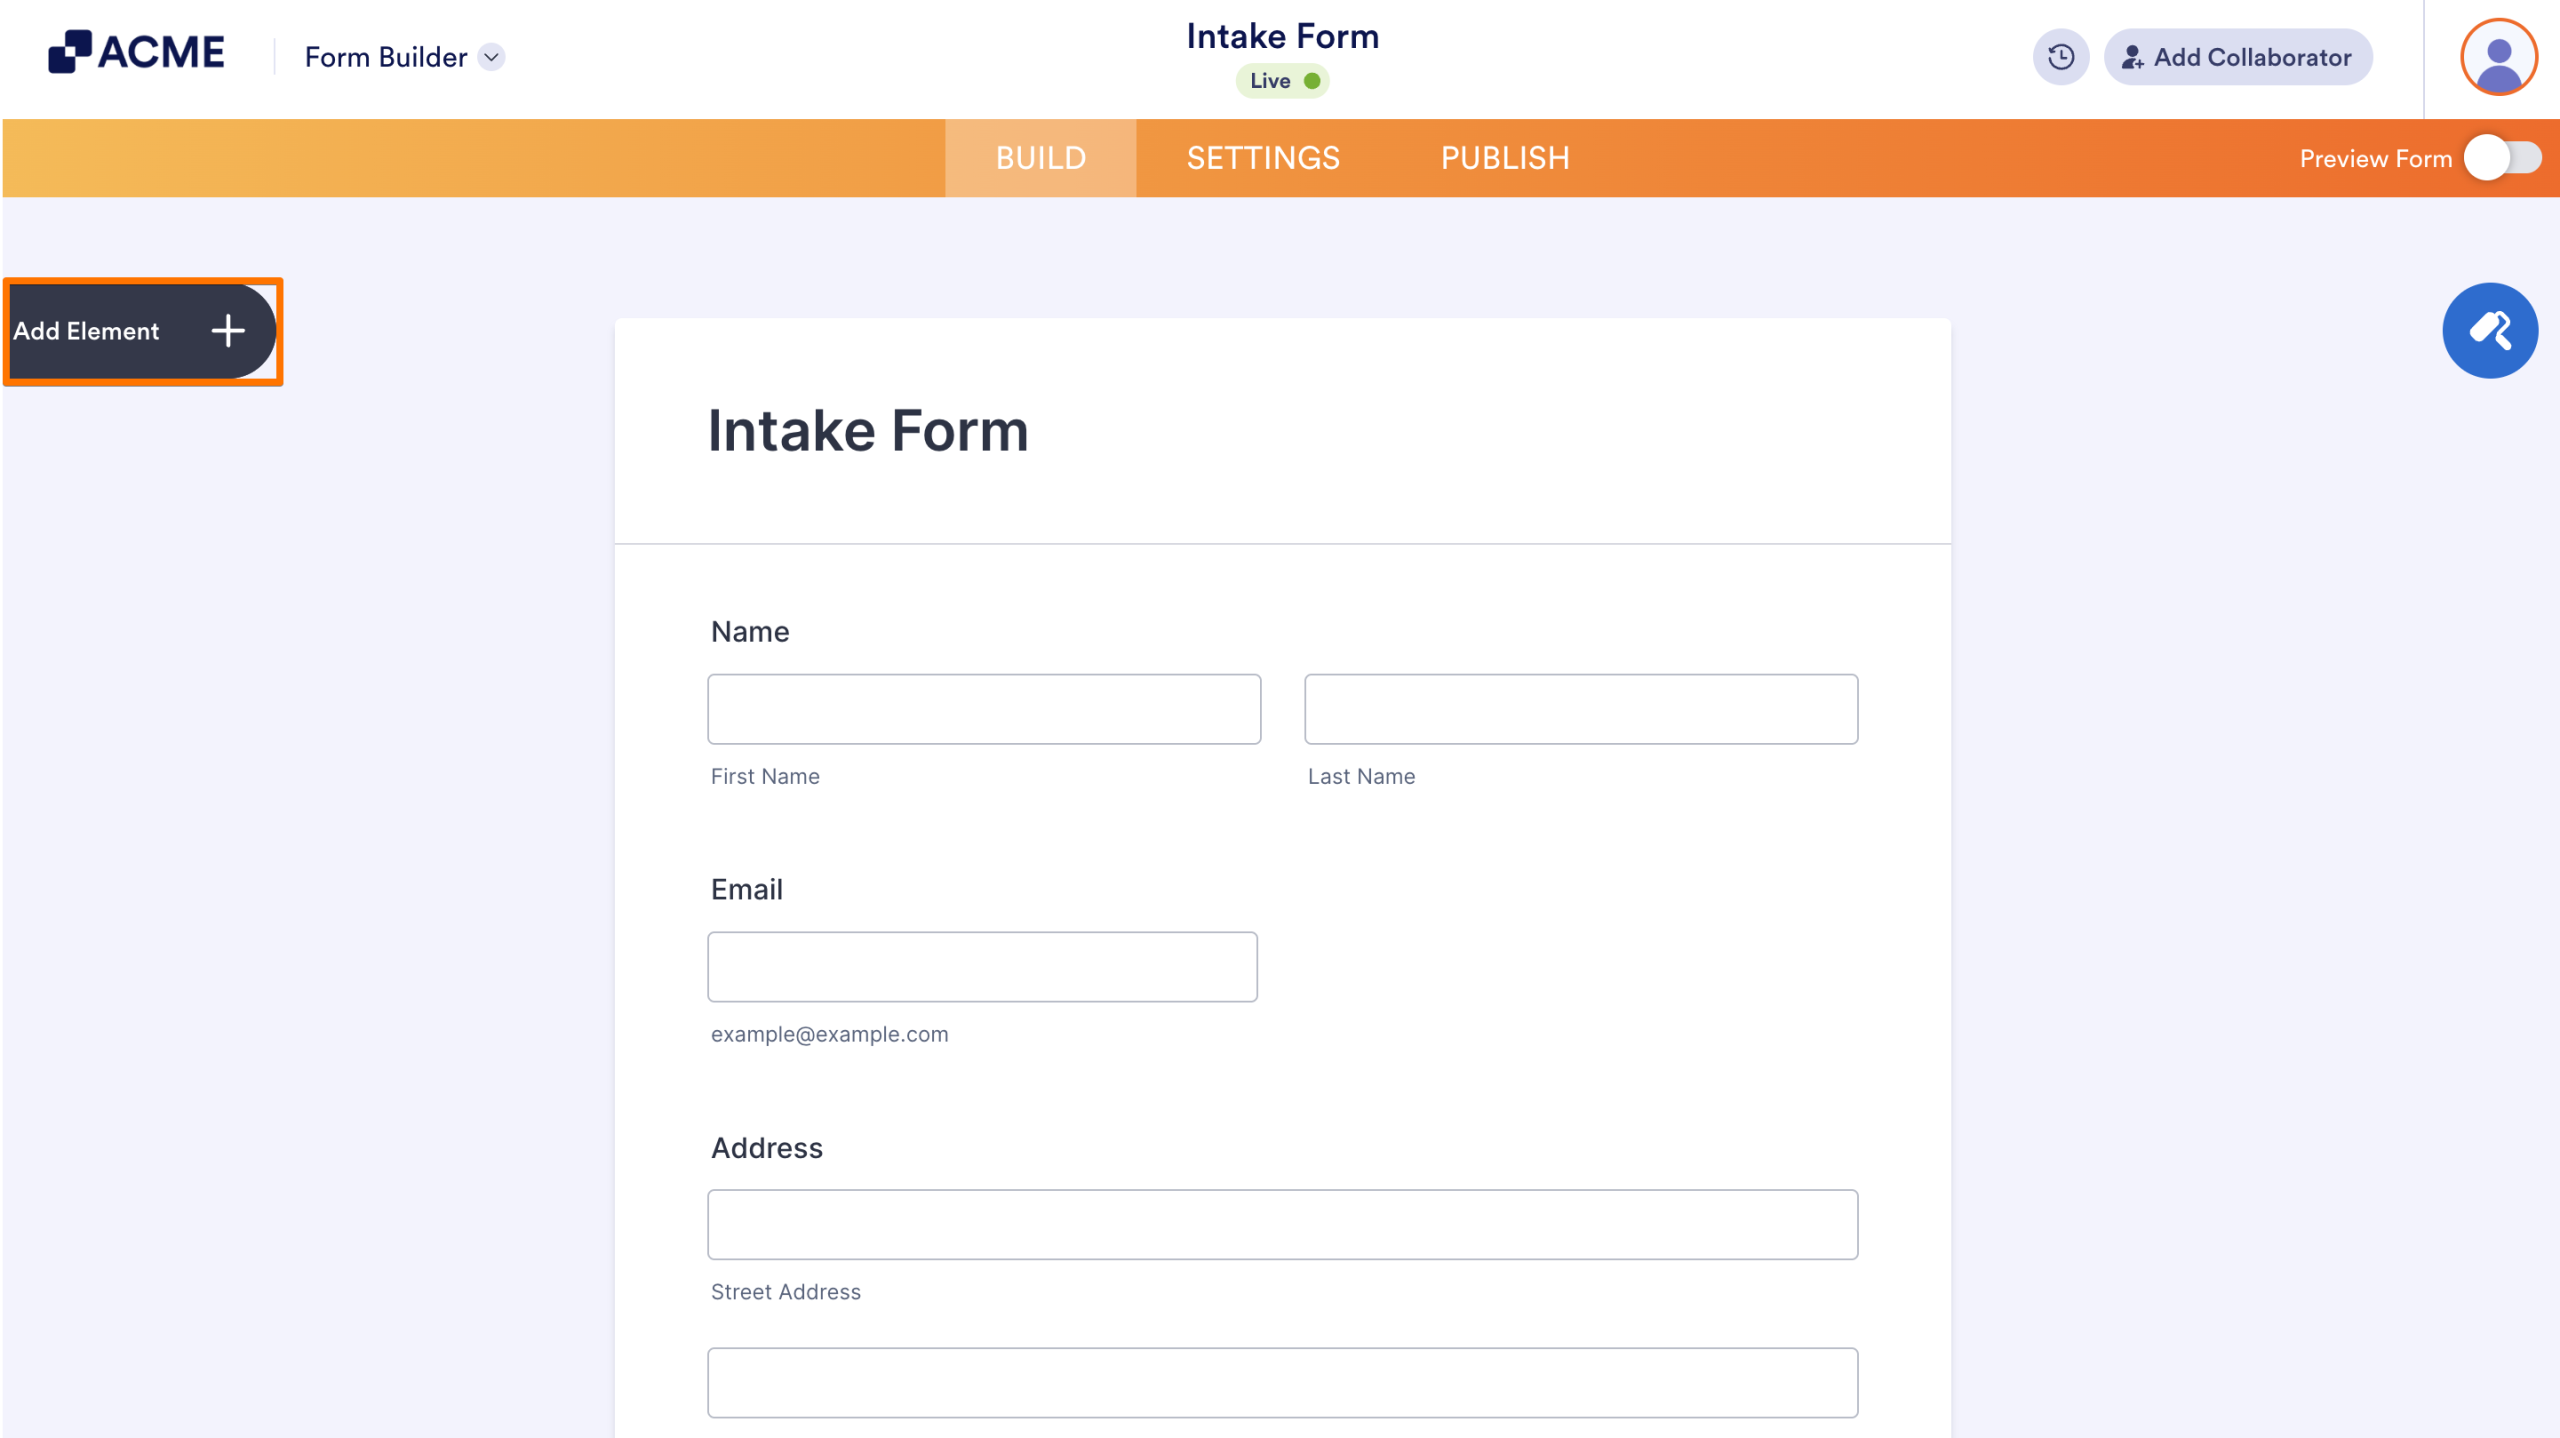
- In Form Builder, click on the Add Element menu on the left side of the page.
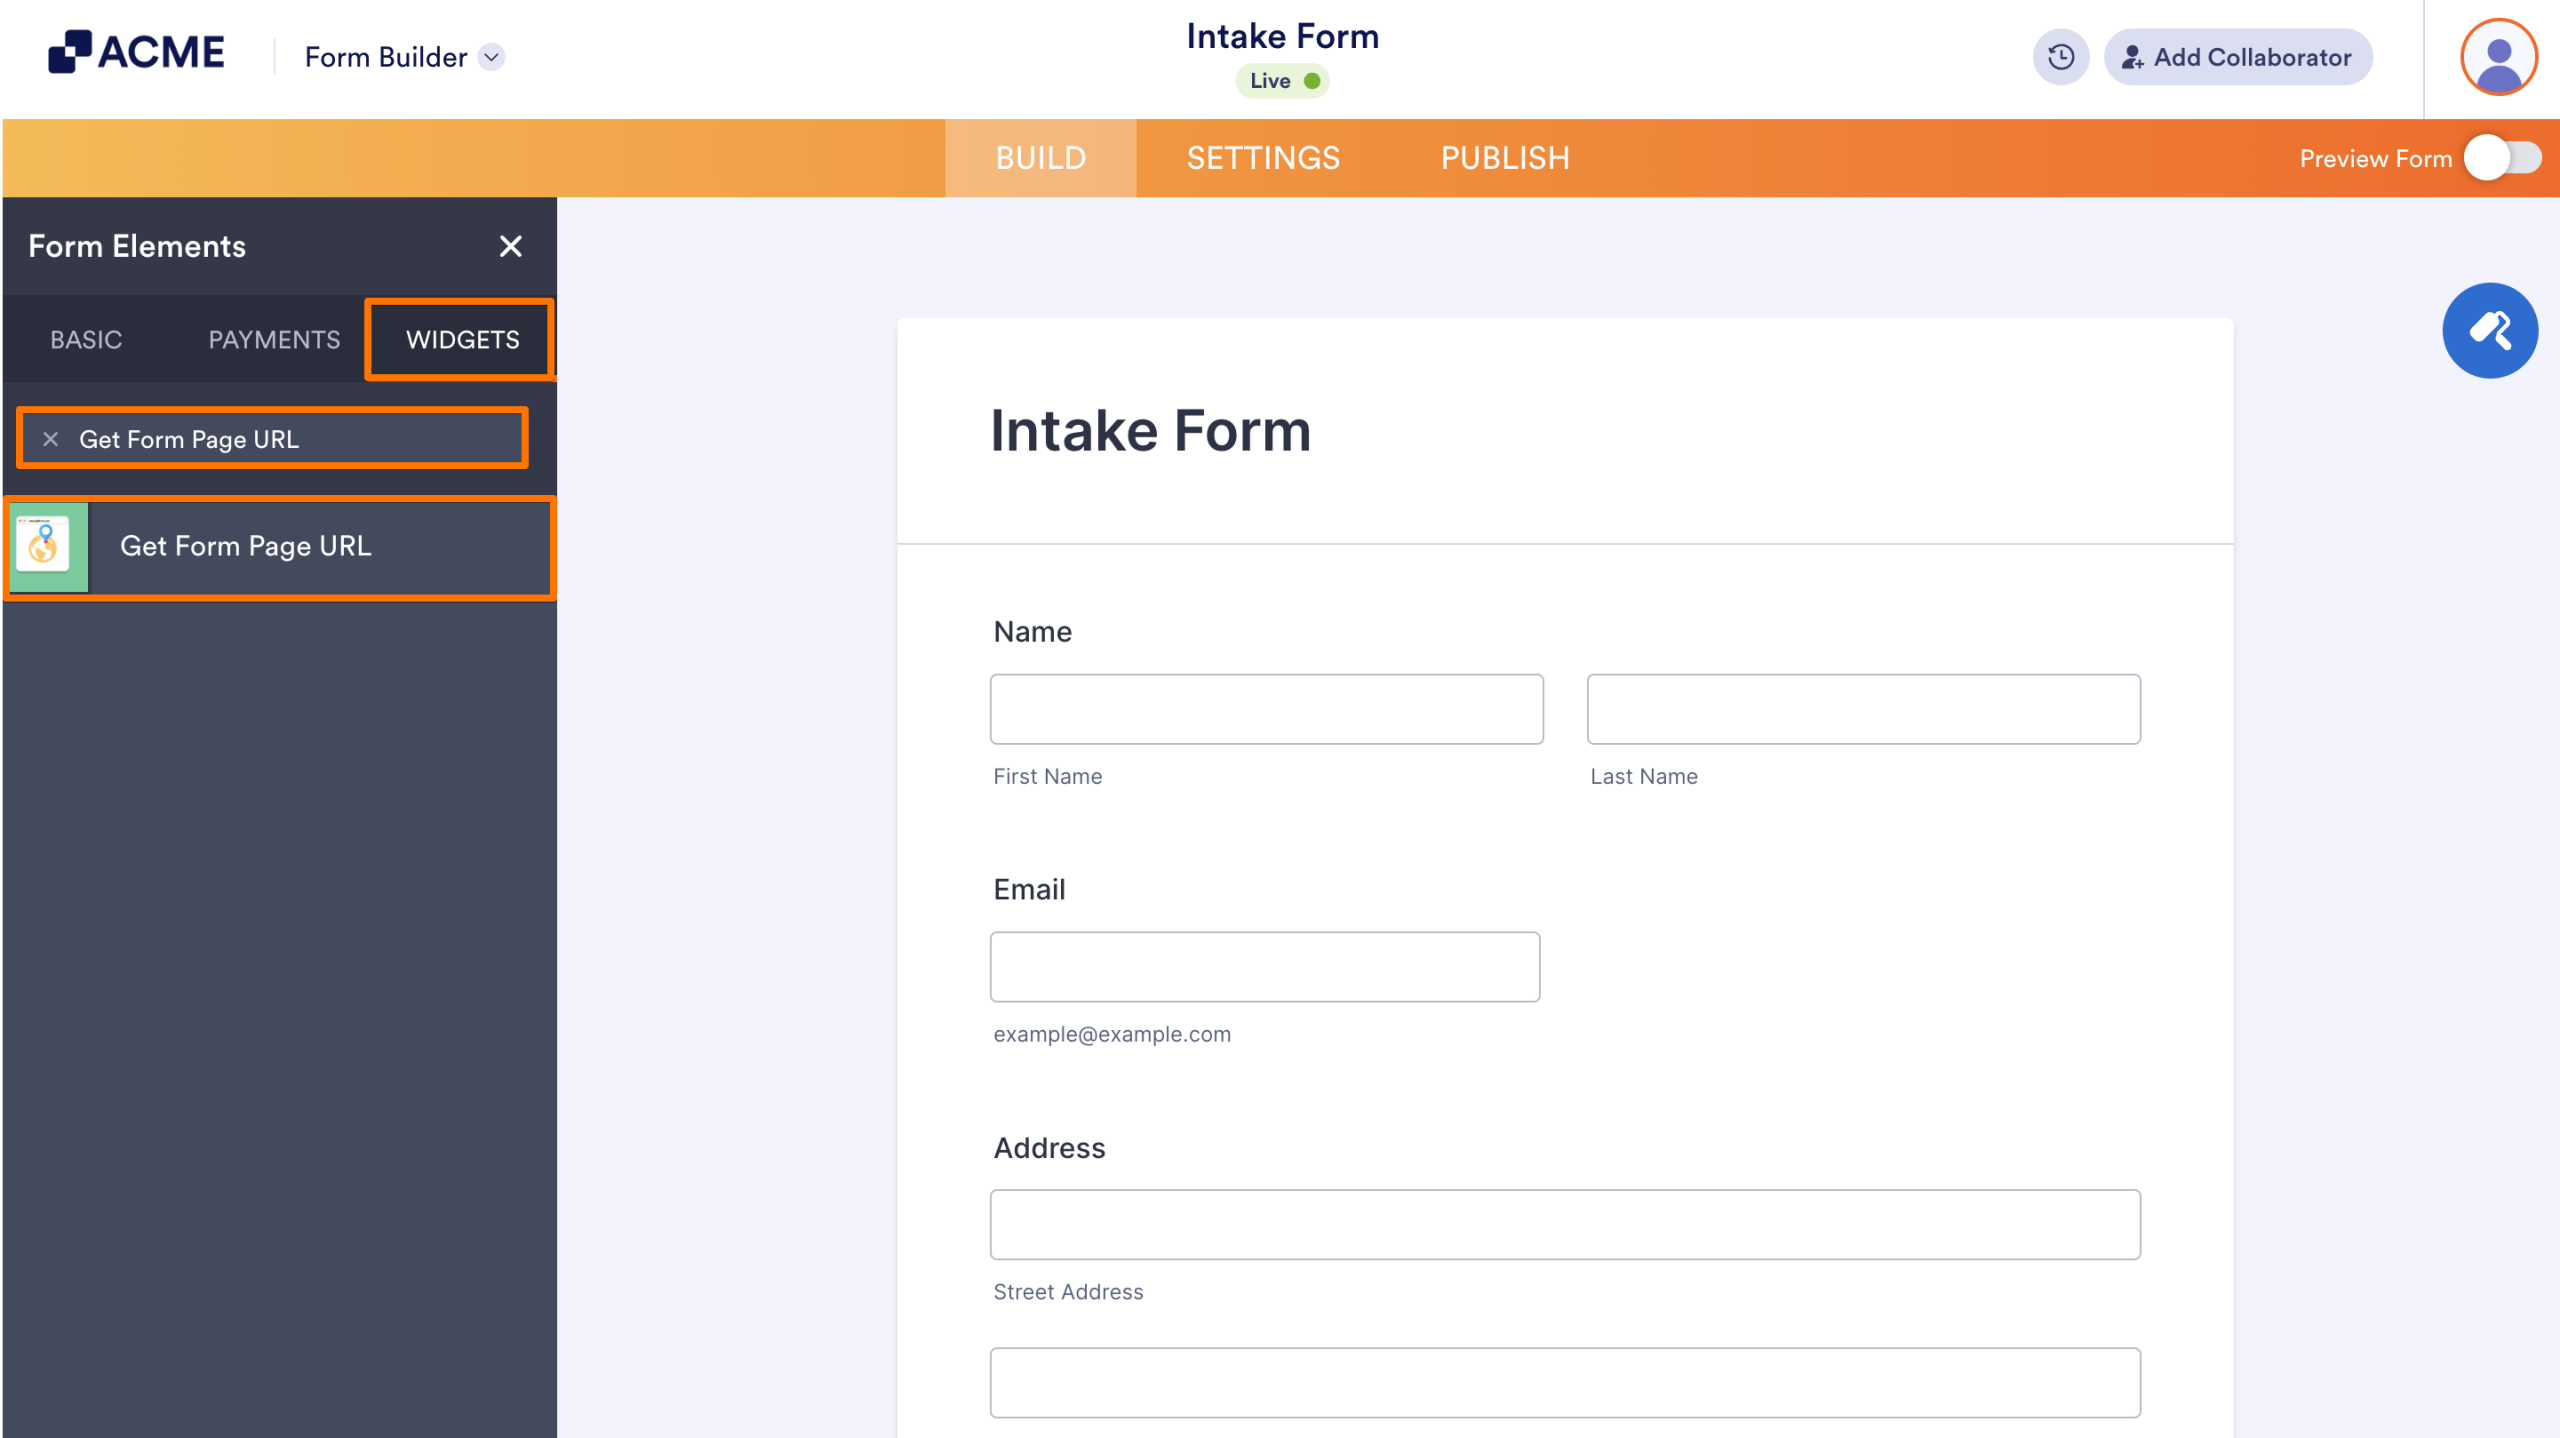
- Now, in the Form Elements menu, under the Widgets tab, search for the Get Form Page URL widget and then click on it. Or, just drag and then drop it to where you want it to be on your form.
Setting up the Conditional Logic
Setting up the condition to show or hide fields is the final step. By showing only what’s needed and hiding the rest, you create a smoother, more personalized experience for anyone editing or submitting the form. You can set it up like this:
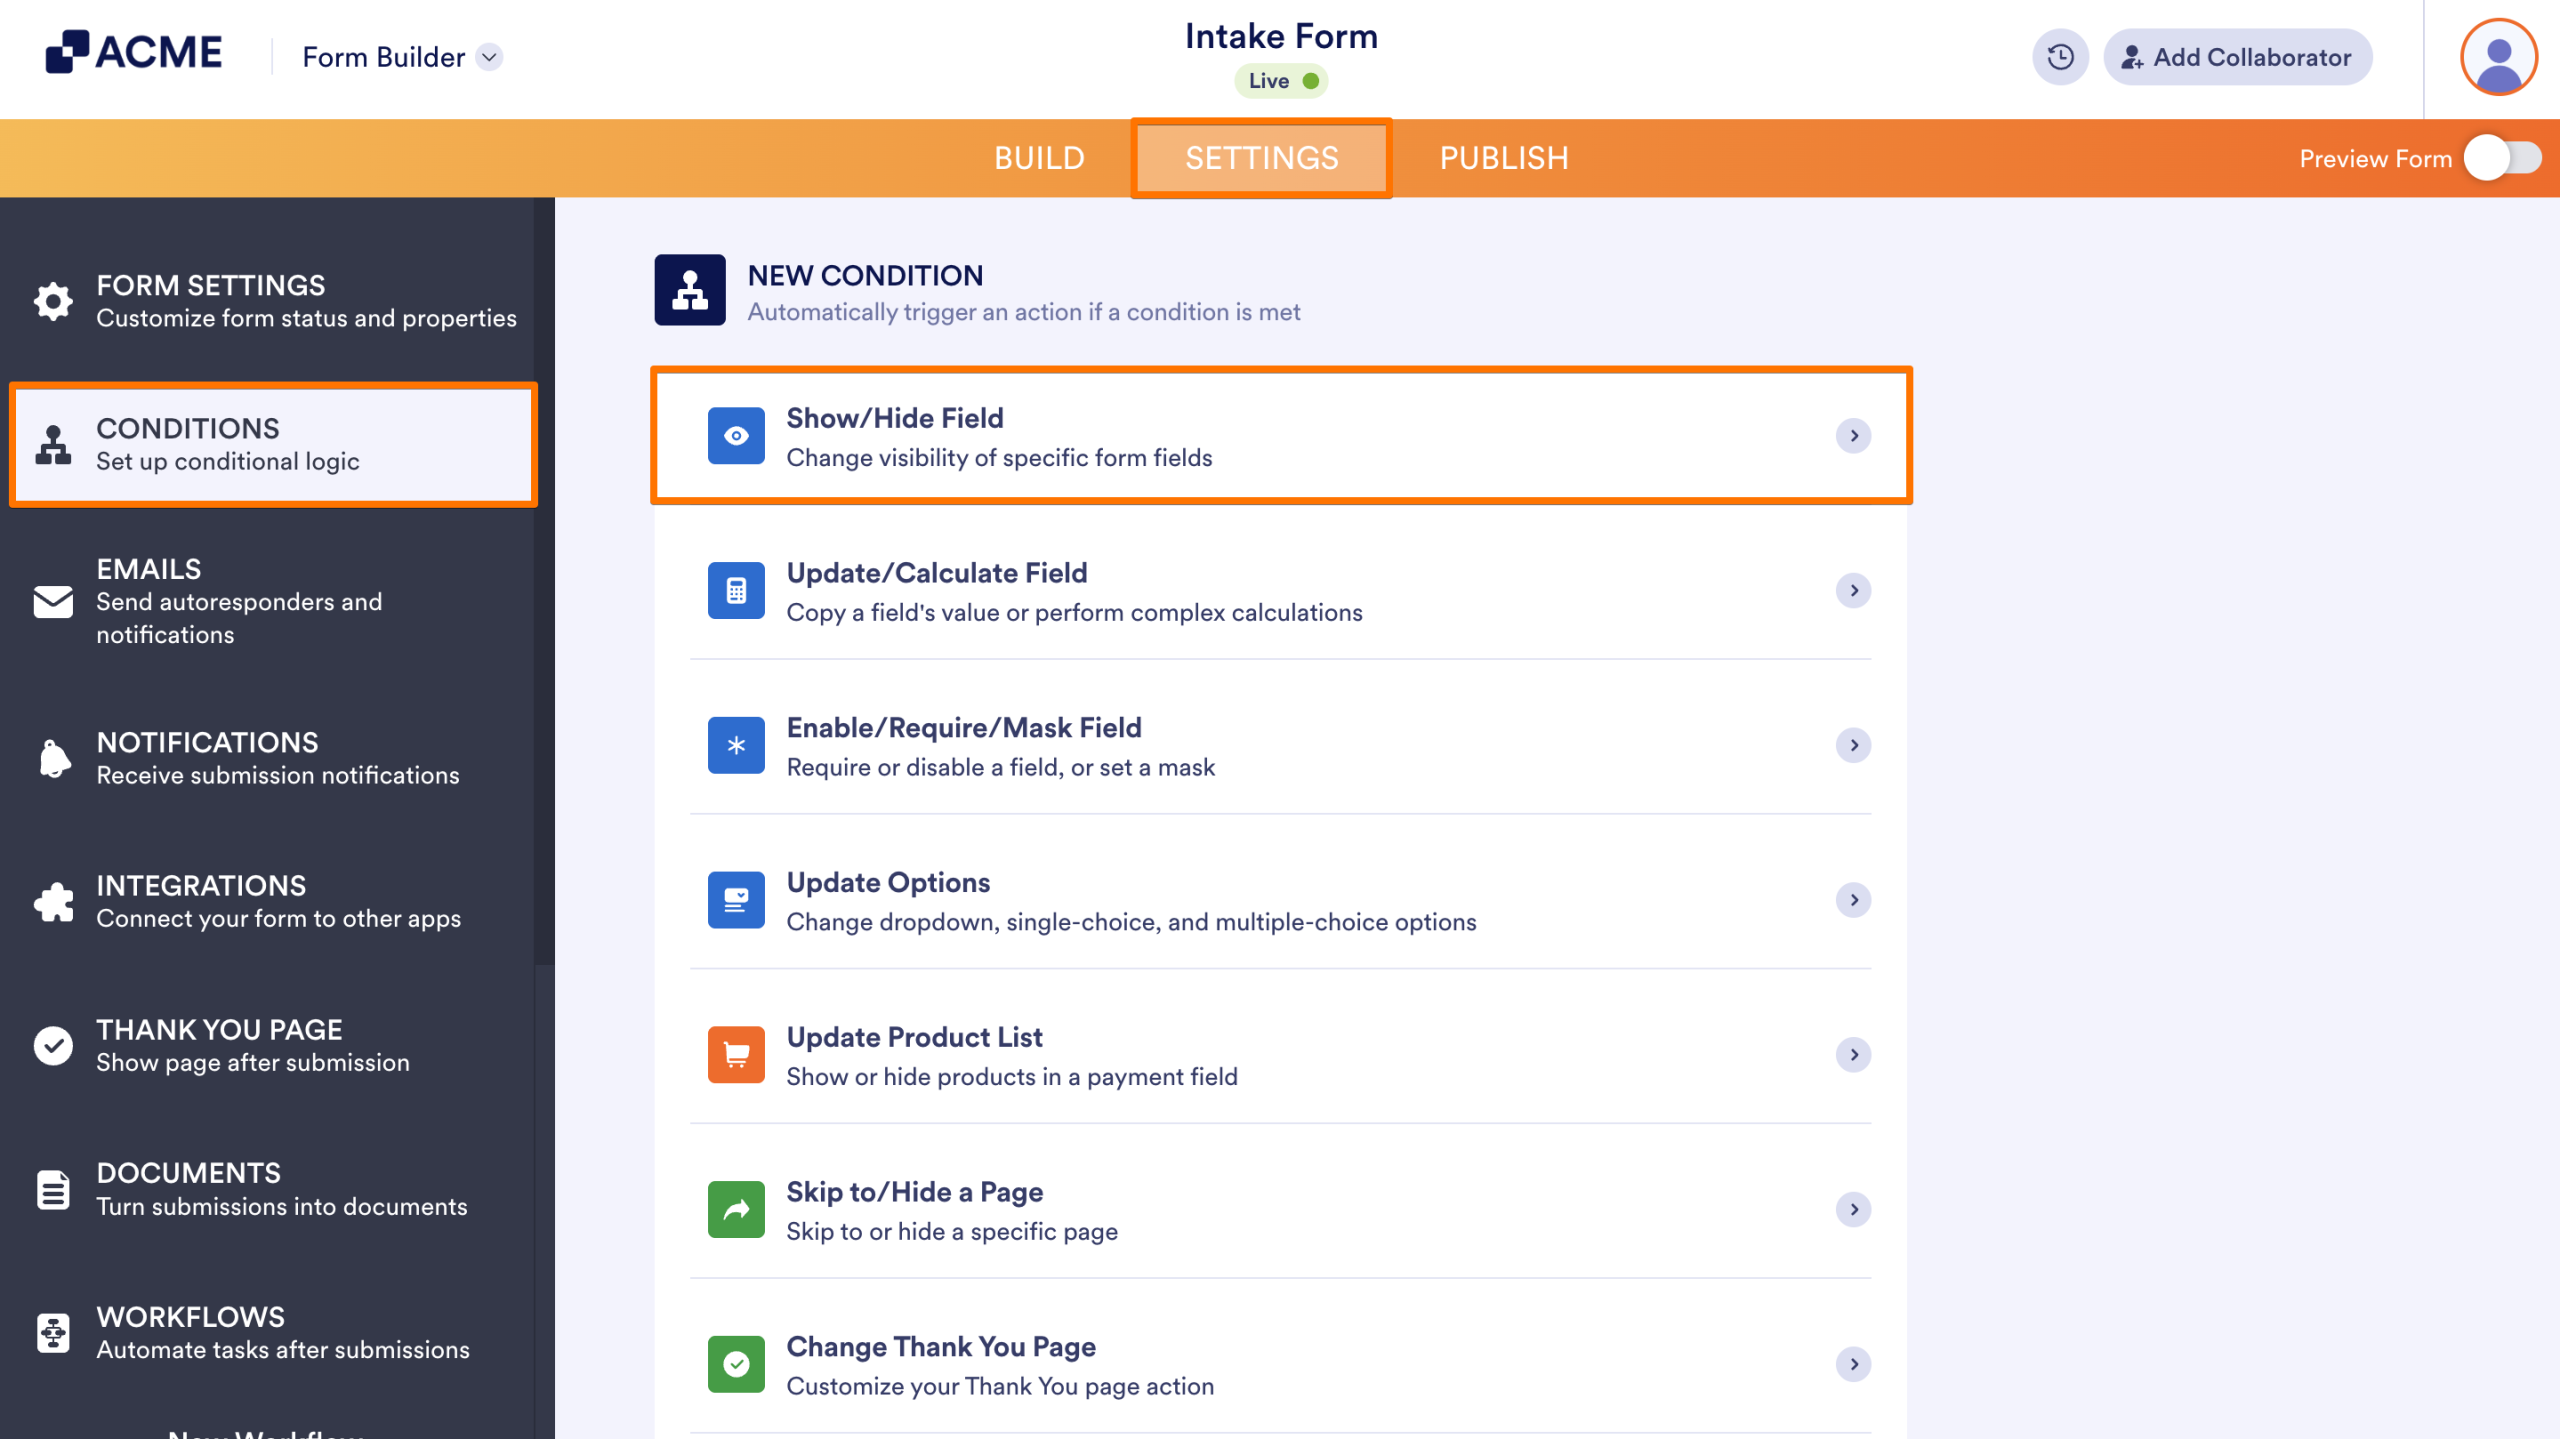
- In Form Builder, in the orange navigation bar at the top of the page, click on Settings.
- Click on Conditions in the menu on the left side of the page.
- Then, select the Show/Hide Field condition.
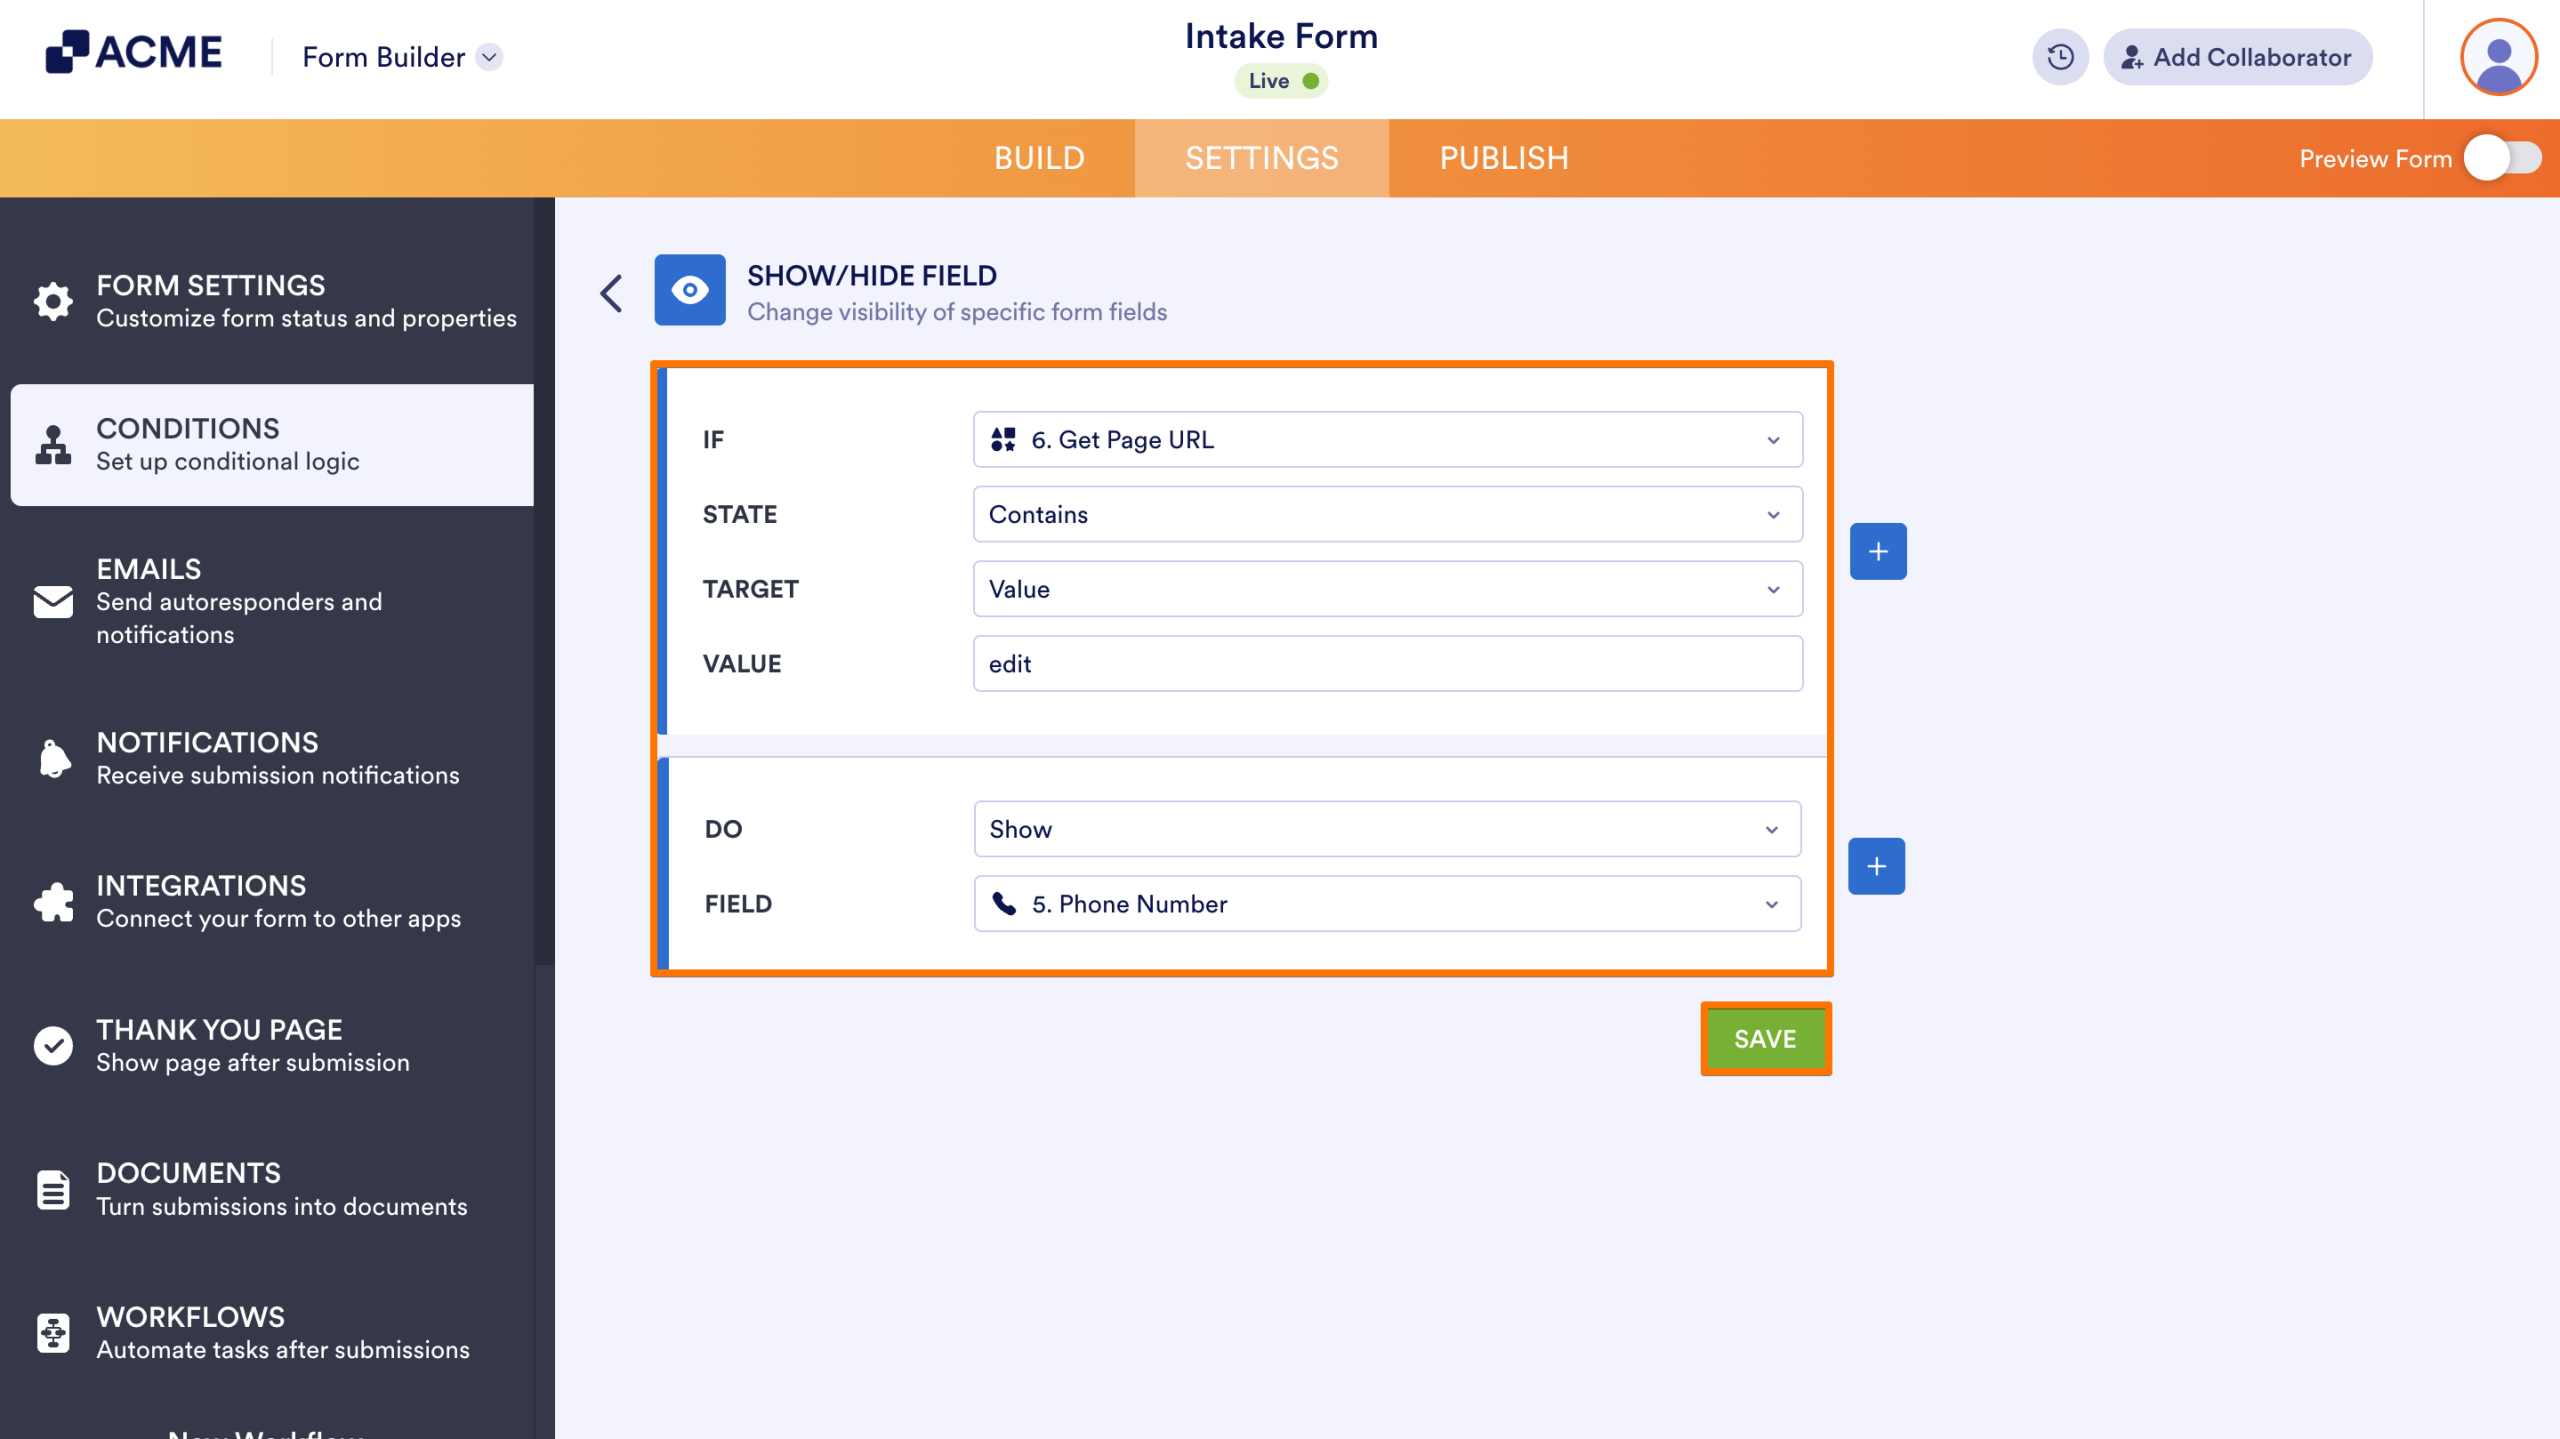
- Next, in the Show/Hide Field section, configure these fields to set an If rule for your condition, and then click on Save:
- IF — Select a supported form field whose value or status will determine when the condition triggers. You can use the Search bar at the top of the menu to find a specific one easily.
- STATE — Select the status that the condition should check for in the field you chose. You can use the Search bar at the top of the menu to find a specific one easily.
- TARGET — This appears when the selected status is neither Is Empty nor Is Filled. Select whether you want to compare the value or selection of the field you chose to a specified value or to the value of another field.
- VALUE — This appears when Value is selected as the target. Enter a specific text that the selected field’s value will be compared to.
- DO — This defines the action that should happen when the condition is met. For the Show/Hide Field, it either make a field appear or disappear.
- FIELD — This appears when Field is selected as the target. Choose the field whose value will be compared to the field you selected in the If Dropdown menu. You can use the Search bar at the top of the menu to find a specific one easily.
That’s it. Now, when the form owner edits a submission using the edit link in the notification email, the hidden field will appear as intended.
Tip
The heart of this condition is setting Get Form Page URL as the source field, selecting Contains as the condition type, and entering edit as the target value. This ensures the rule only triggers when someone is editing a submission via the edit link.

Send Comment: