Learn how to efficiently manage workflows in your organization using the Admin Console. This guide explains how admins can move workflows to the trash, restore previously deleted workflows, and keep workflow management organized while ensuring important processes can be recovered when needed.
How to Move a Workflow to Trash
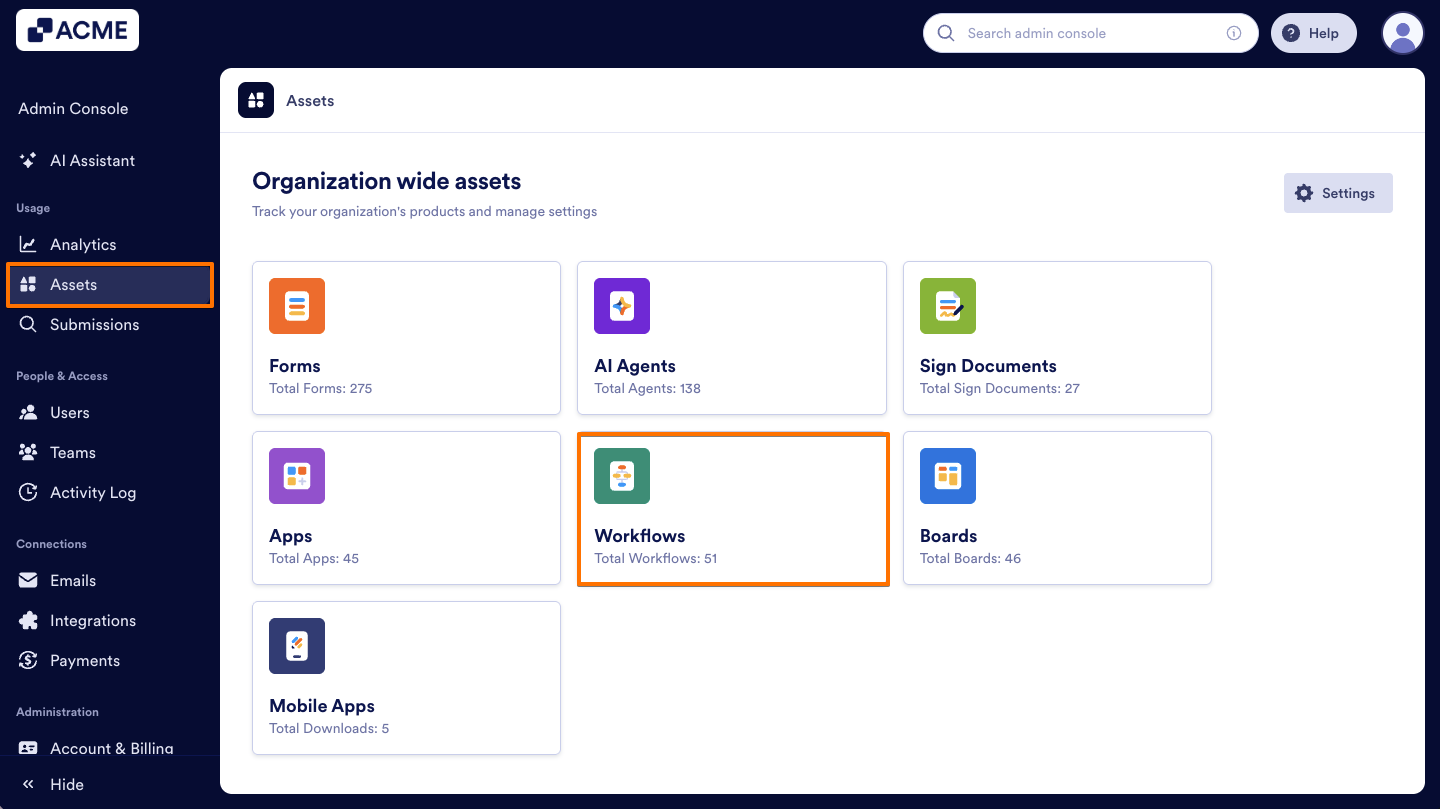
- In the Admin Console, click on Assets from the left-hand side menu.
- Next, click on Workflows to load all Workflows on your server.
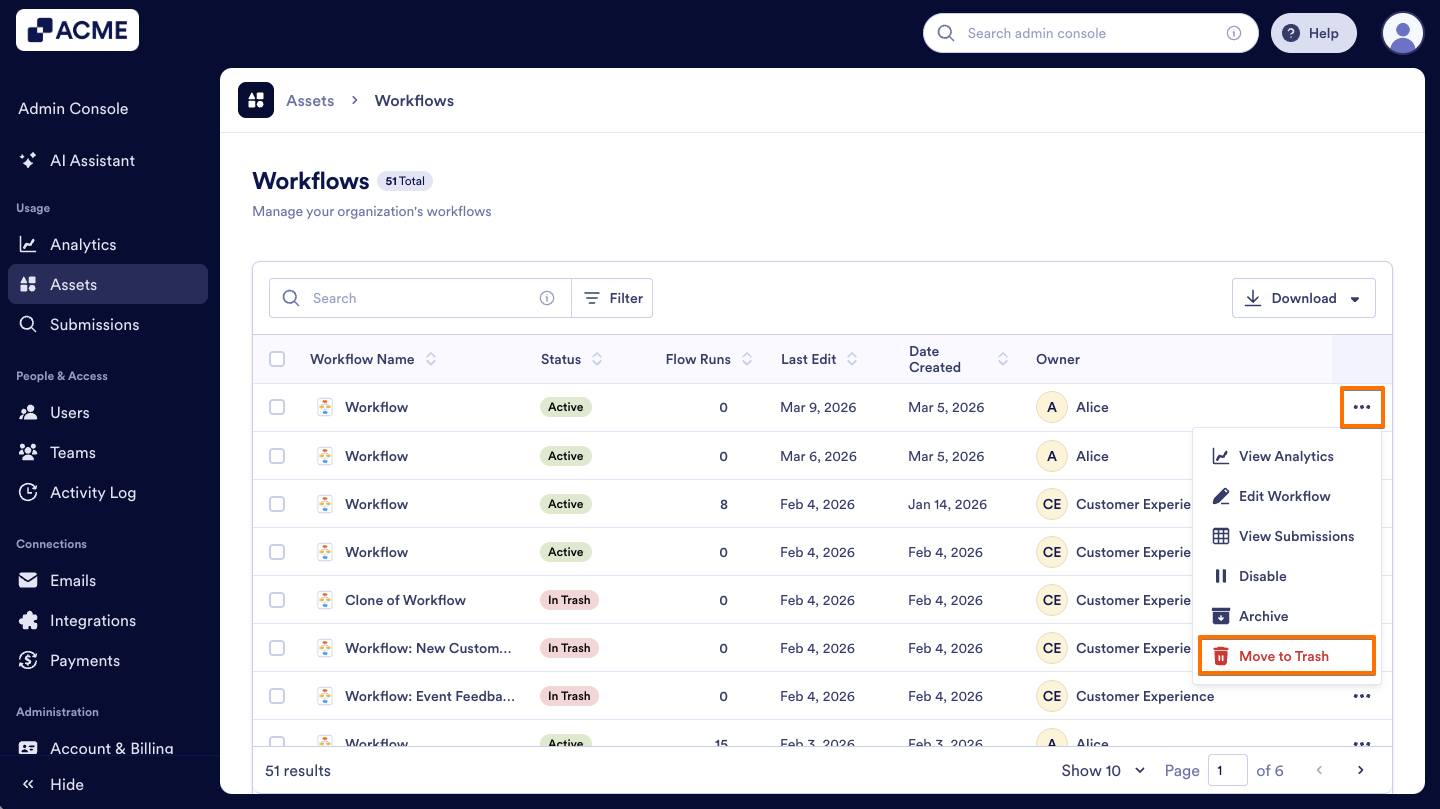
- Click on the Three dots menu next to the Workflow you’d like to delete and select Move to Trash.
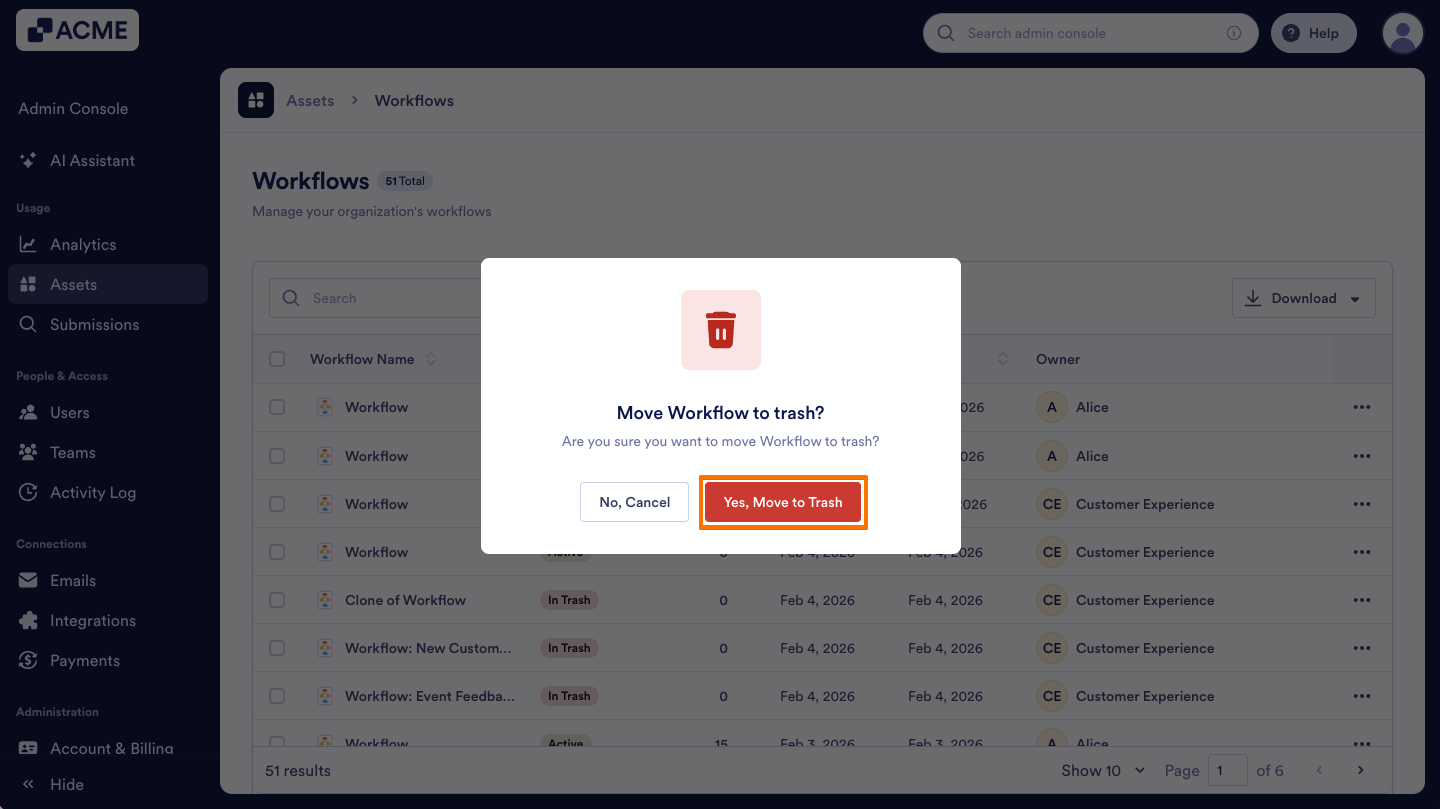
- Finally, click Yes, Move to Trash from the pop-up window.
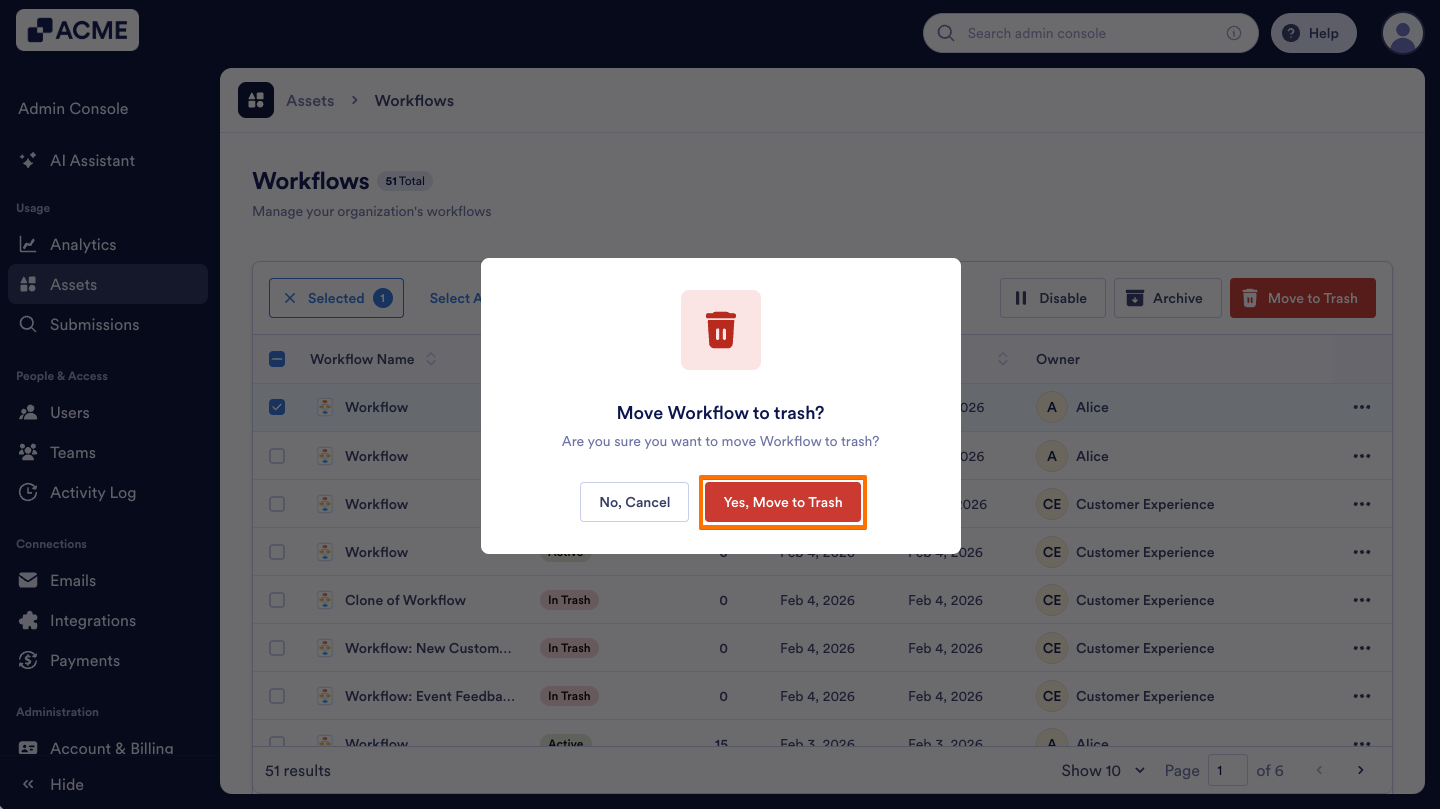
You can also move a workflow to the trash by using the Move to Trash button that appears when you select a workflow from the list. Here’s how:
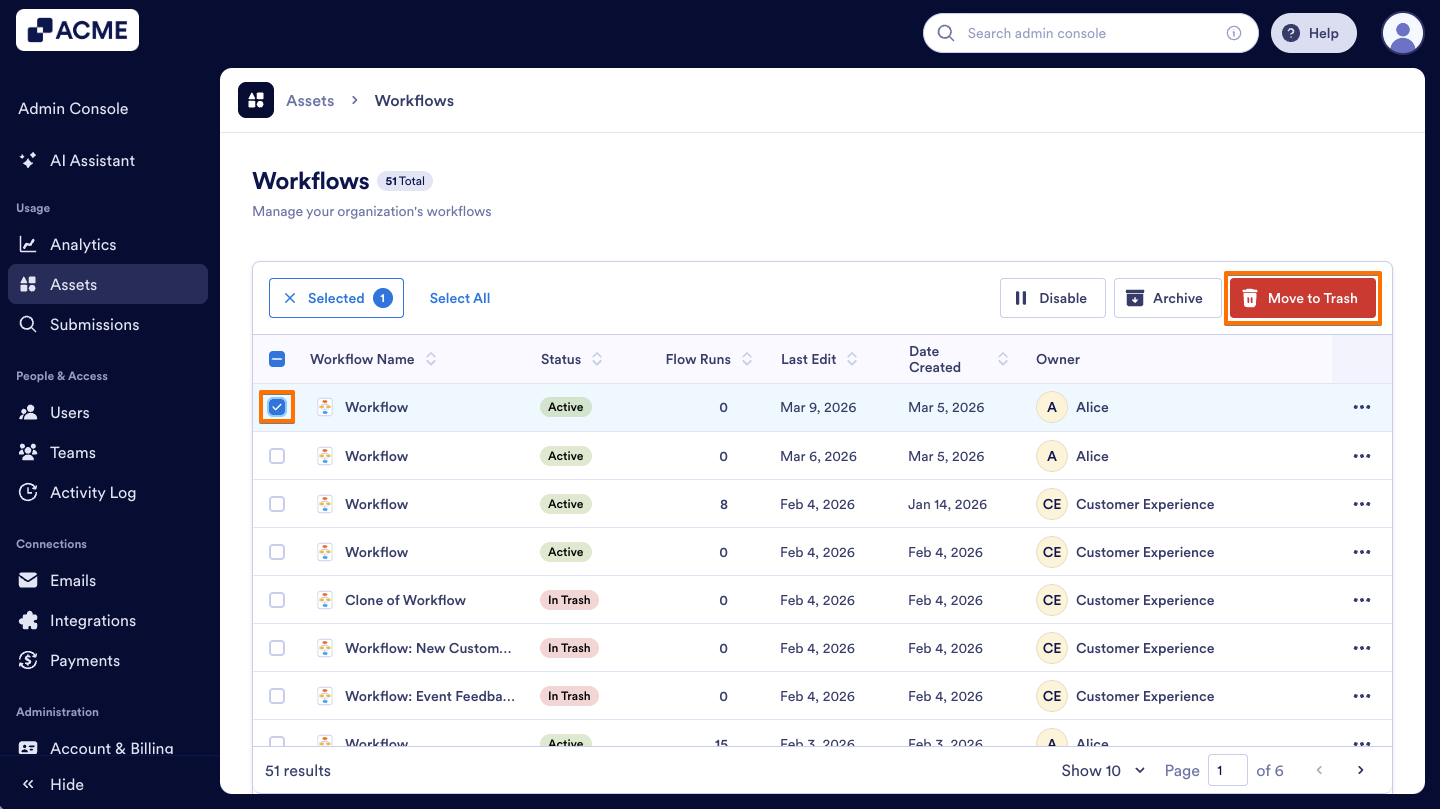
- In the Workflow Assets page, on the left side of the Workflow, click on the Checkbox.
- At the top of the list, click the Move to Trash button.
- In the pop-up window, select Yes, Move to Trash to confirm.
How to Restore a Workflow from the Trash
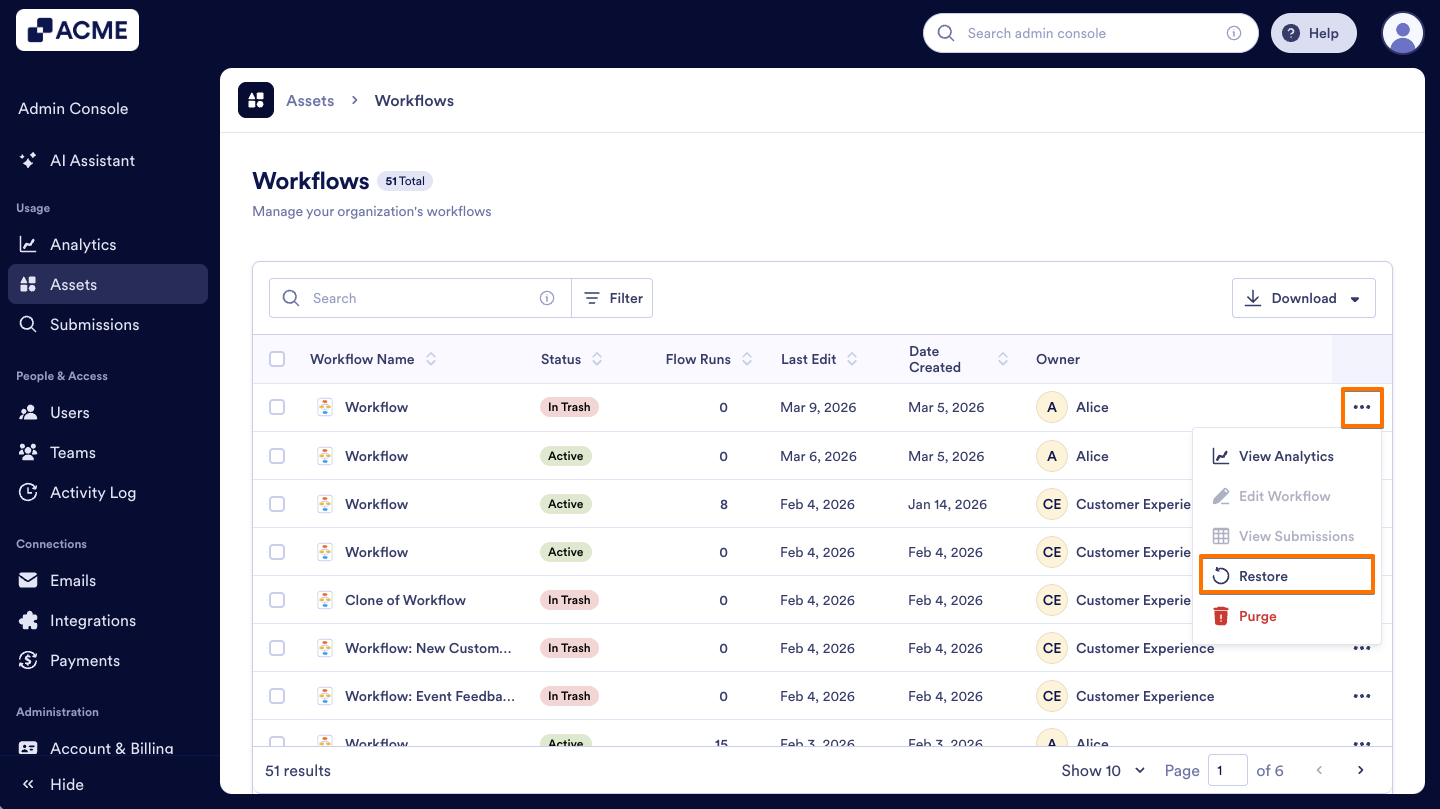
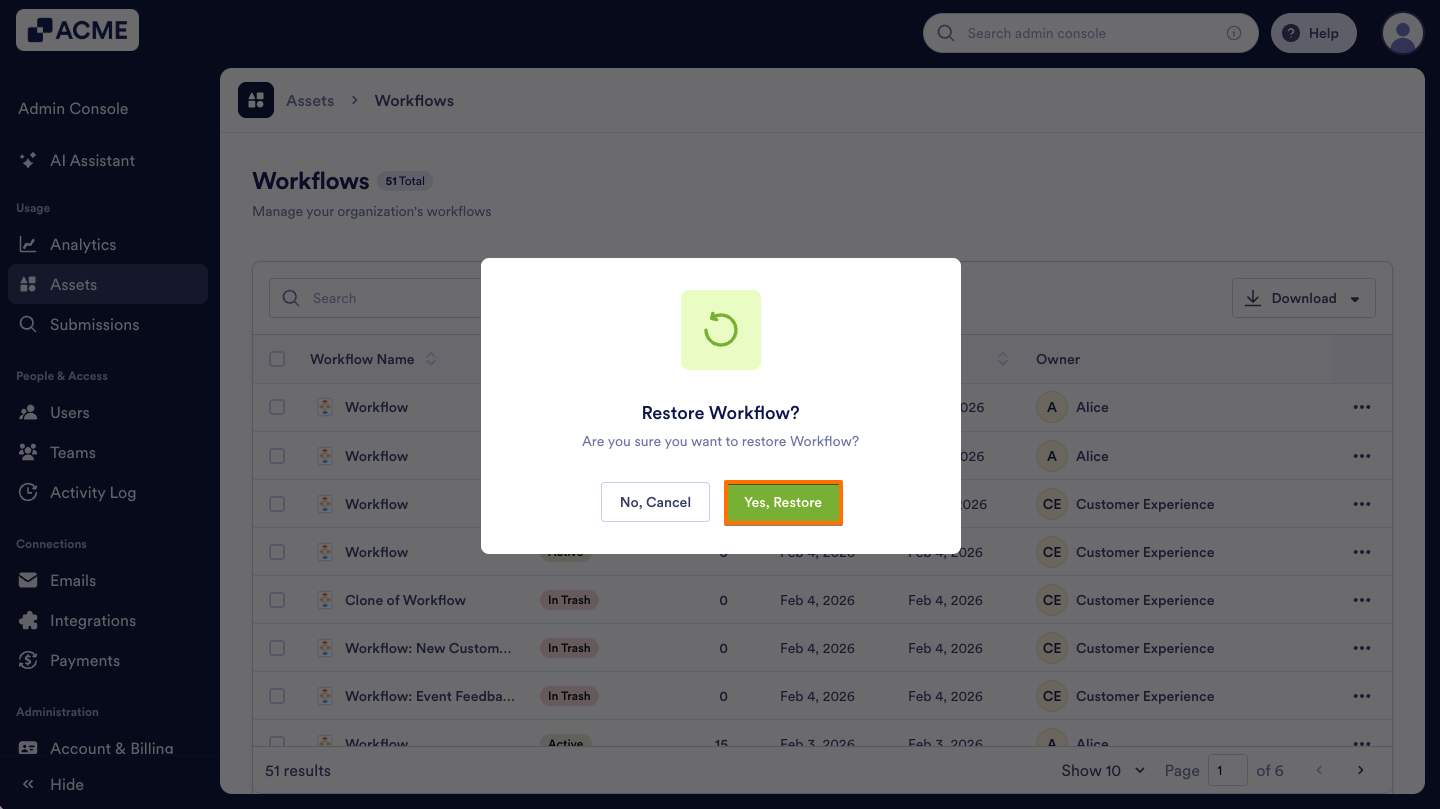
- In the Workflow Assets page, on the right side of the Workflow that was trashed, click on the Three dots icon.
- Select Restore in the menu.
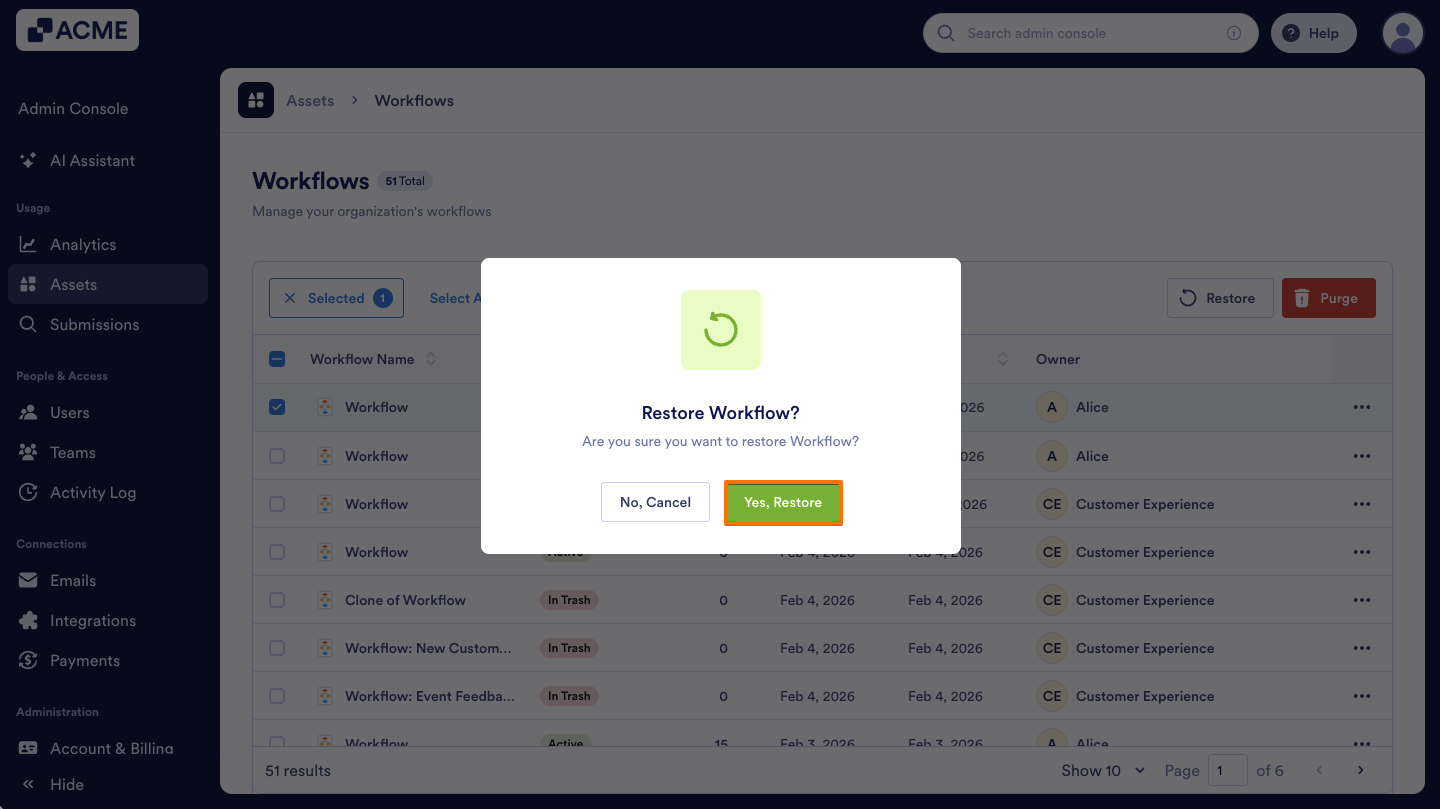
- Finally, click on Yes, Restore to confirm.
Another way to Restore a trashed Workflow is to use the Restore button at the top of the list. Let me show you how:
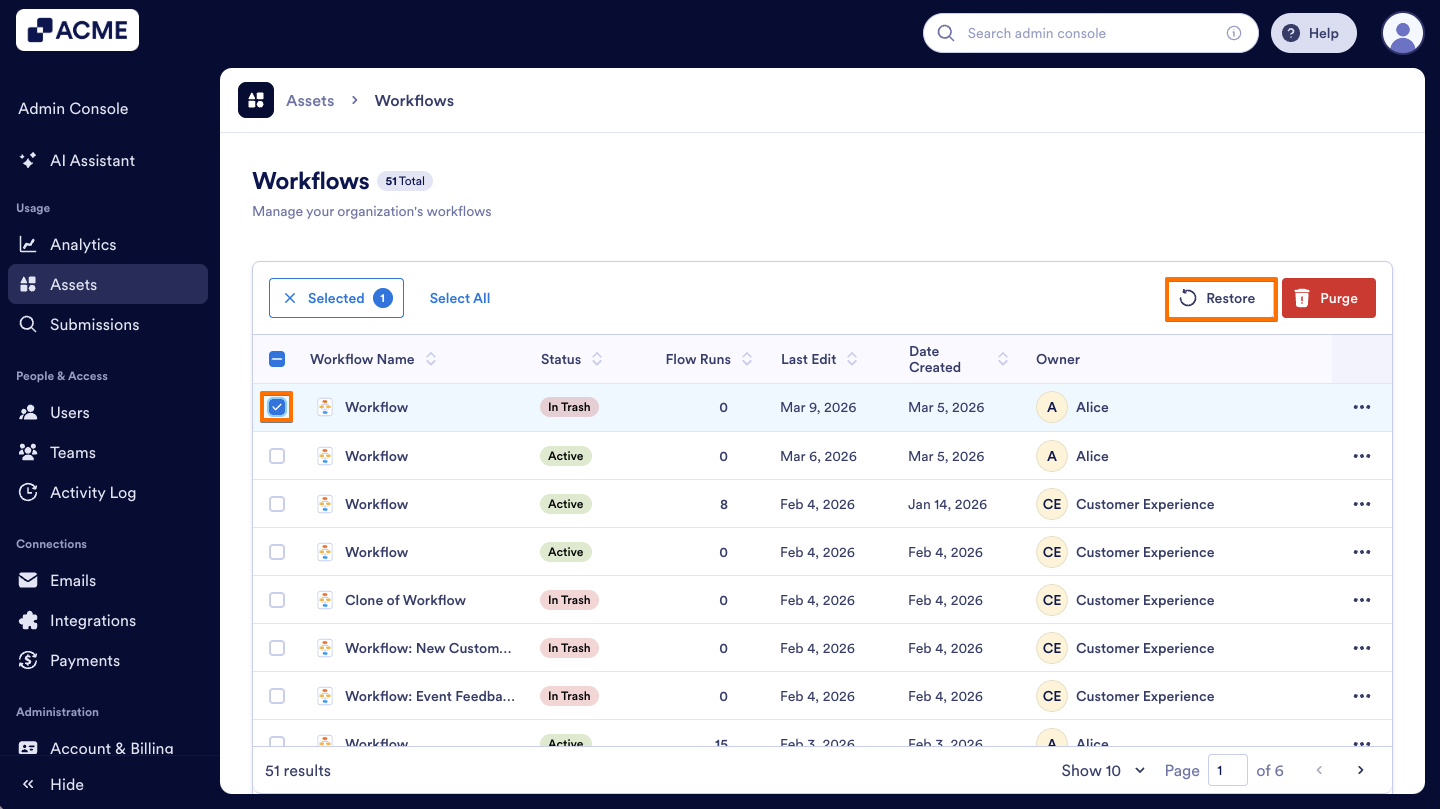
- In the Workflow Assets page, on the left side of the Workflow, click on the Checkbox.
- Then, click on the Restore button above the list.
- In the pop-up window, select Yes, Restore.
Purging the Trashed Workflows
If you want to permanently delete the workflows, you can Purge them from the Admin Console. Let me show you how:
- In the Workflow Assets page, next to the Workflow that was trashed before, click on the Three dots icon.
- From the menu, select Purge.

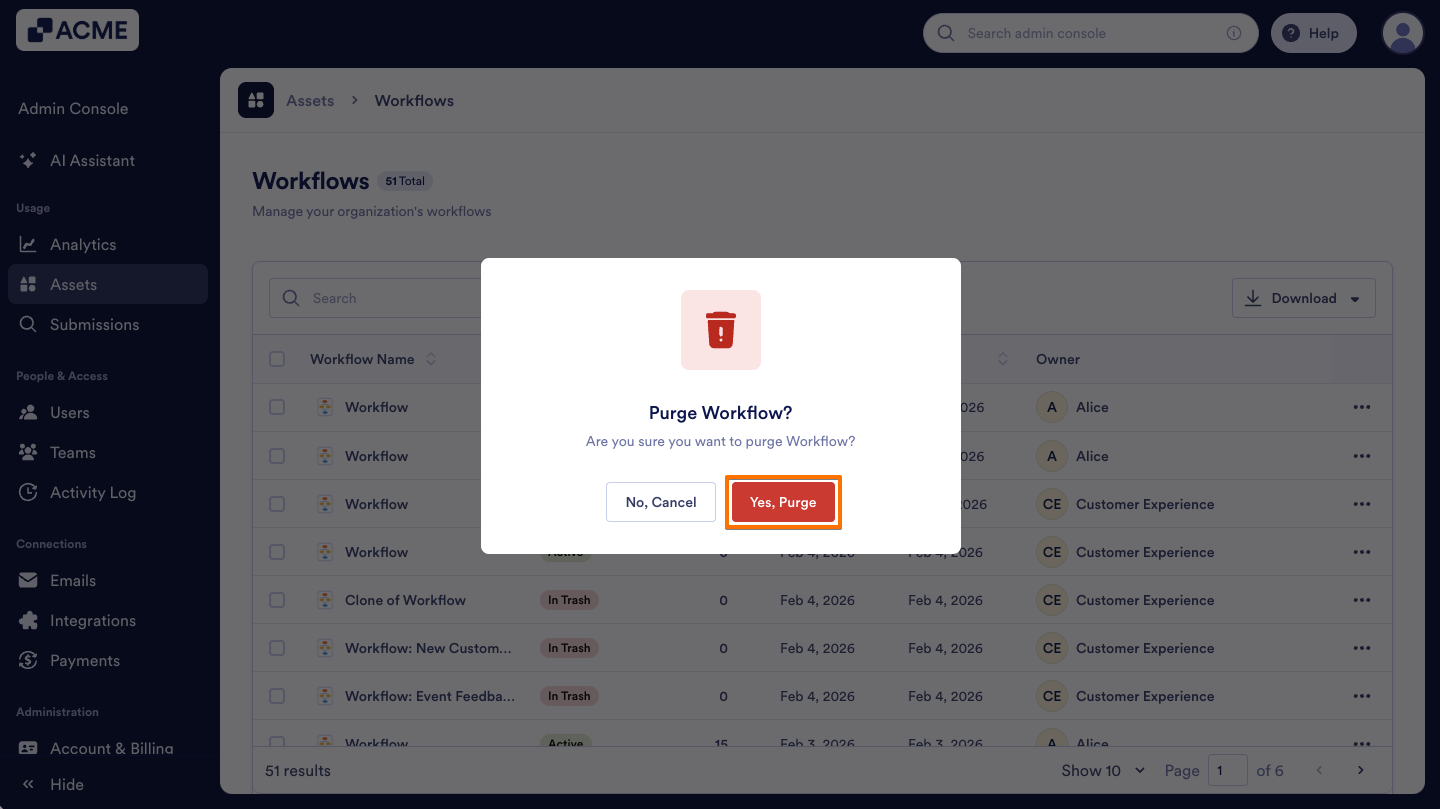
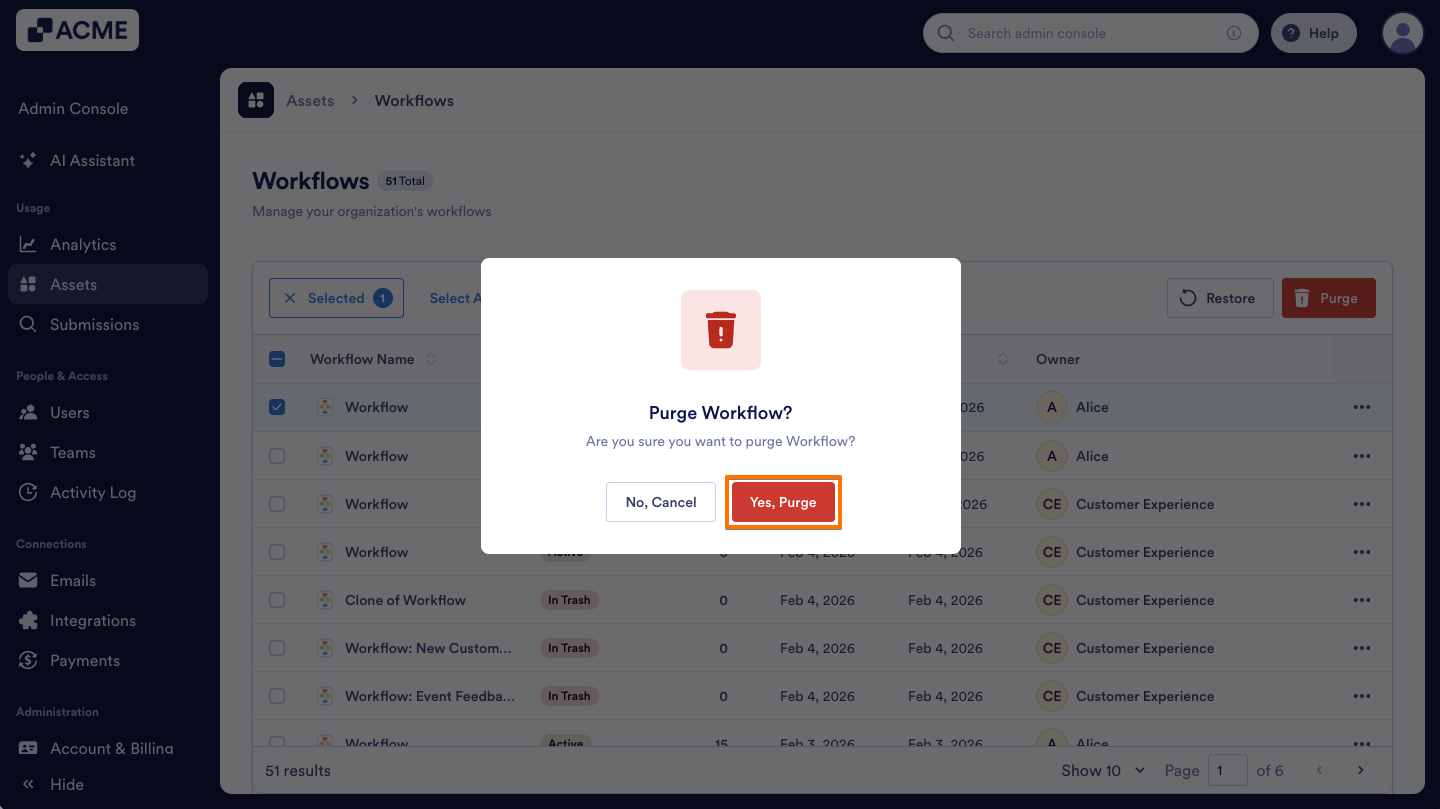
- In the pop-up window, click on Yes, Purge.
Another way to purge a workflow is to use the Purge button at the top of the list. Here’s what to do:
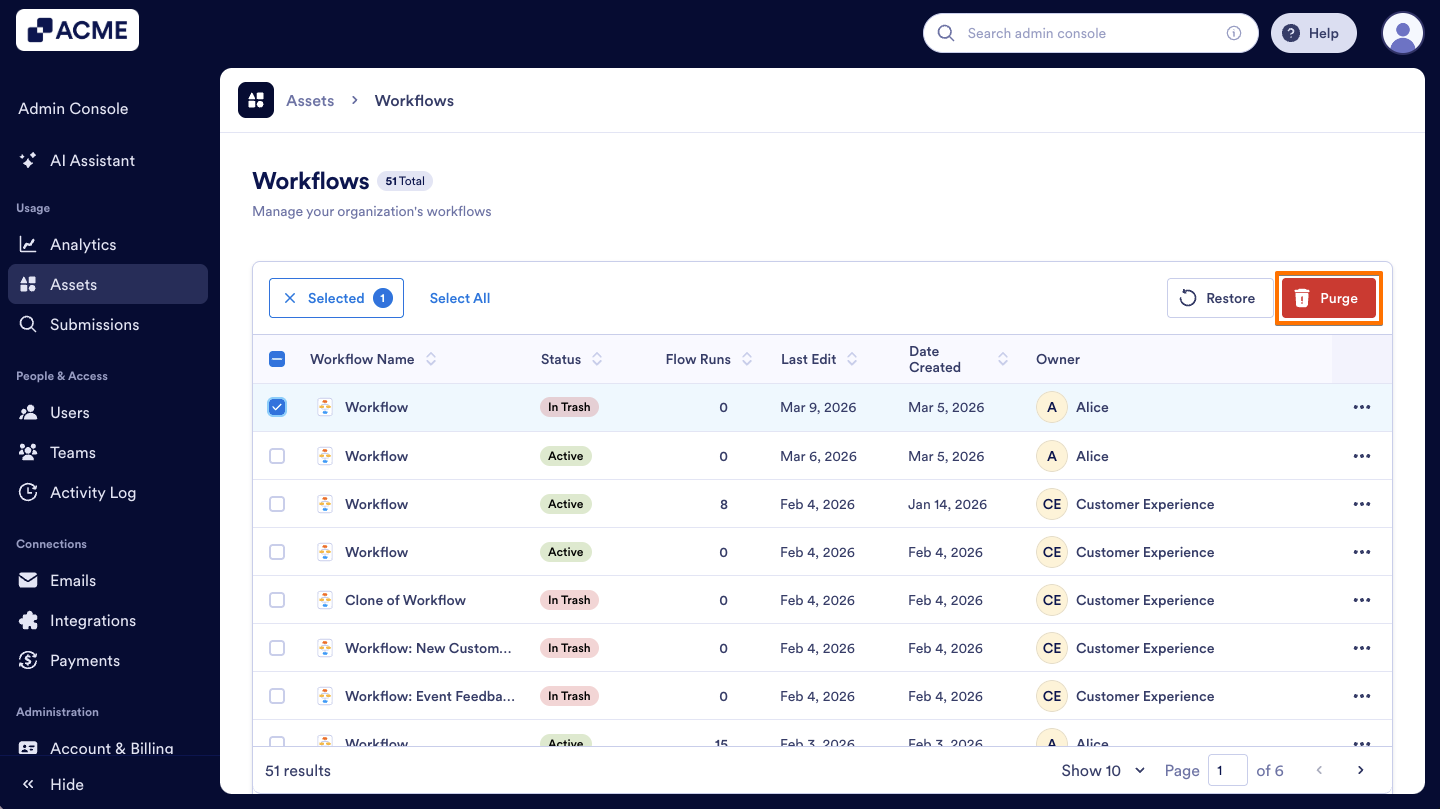
- In the Workflow Assets page, on the left side of the Workflow you want to purge, select the Checkbox.
- Then, at the top of the list, click on the Purge button.
- In the pop-up window, select Yes, Purge to confirm.
How to Move Workflows to the Trash in Bulk
- In the Workflow Assets page, click on the Checkboxes next to the Workflows you’d like to trash.
- Then, at the top of the list, click the Move to Trash button.
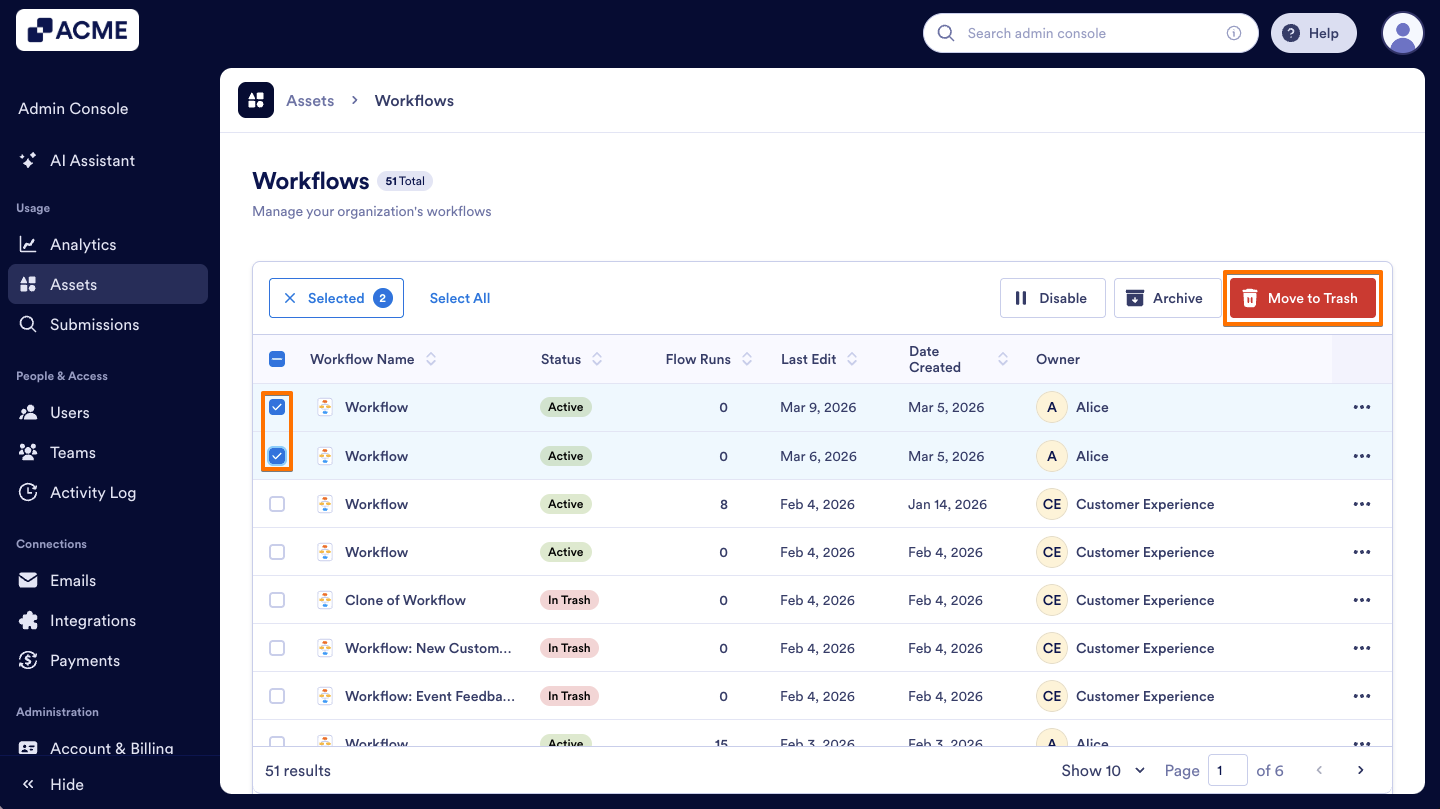
- Finally, select Yes, Move to Trash in the pop-up window.

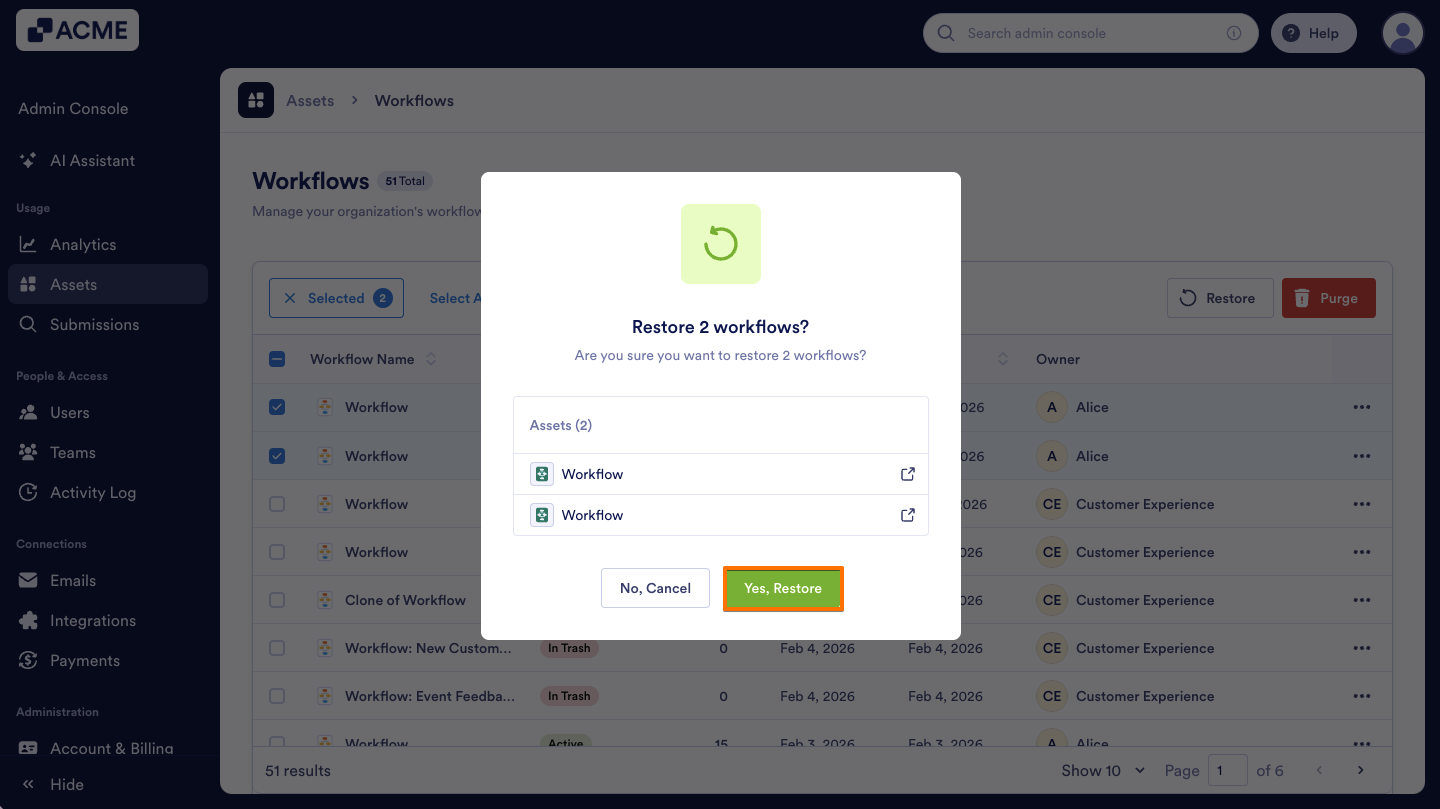
How to Restore Workflows in Bulk
- In the Workflow Assets page, click on the Checkboxes next to the Workflows that were trashed.
- Then, at the top of the list, select the Restore option.
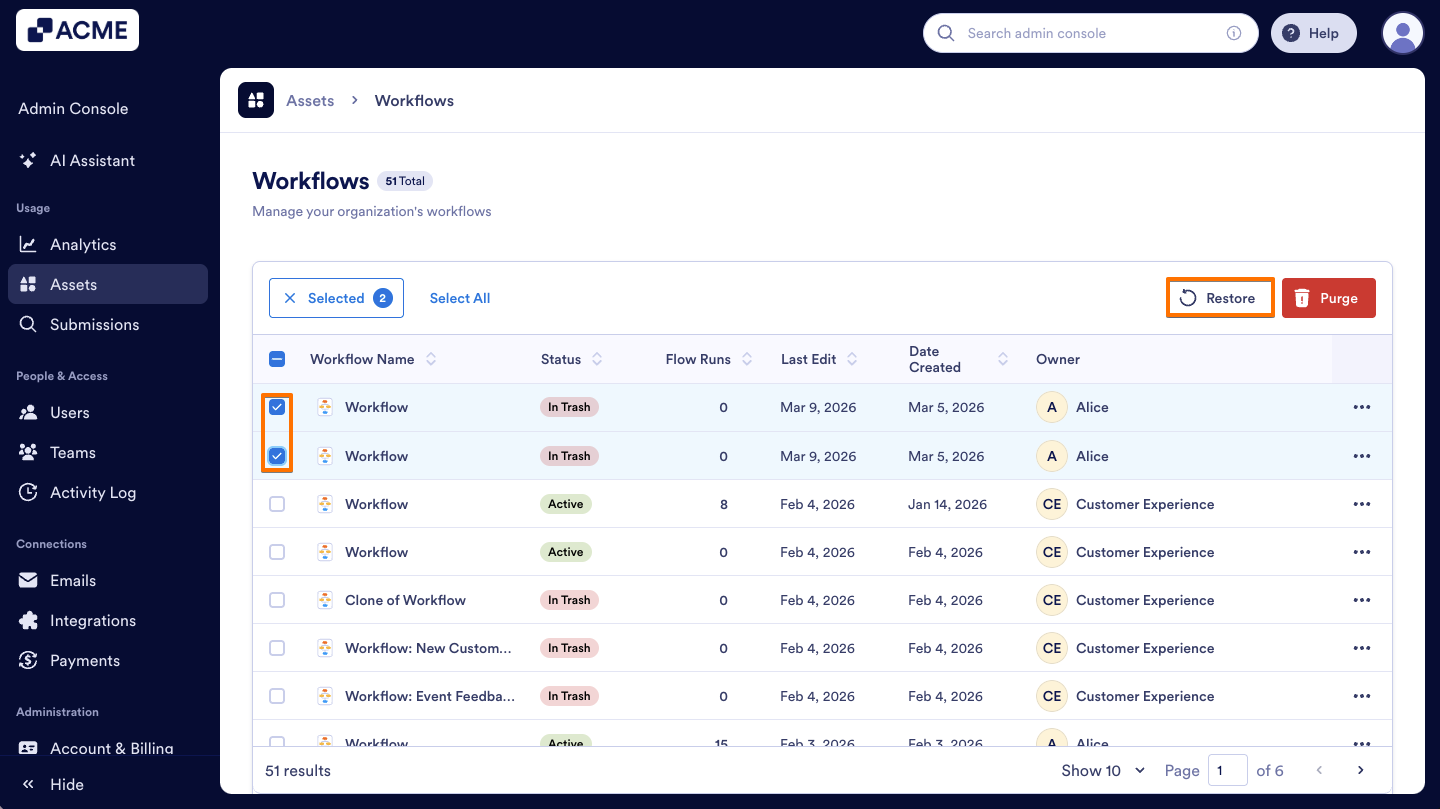
- In the pop-up window, select Yes, Restore to confirm.
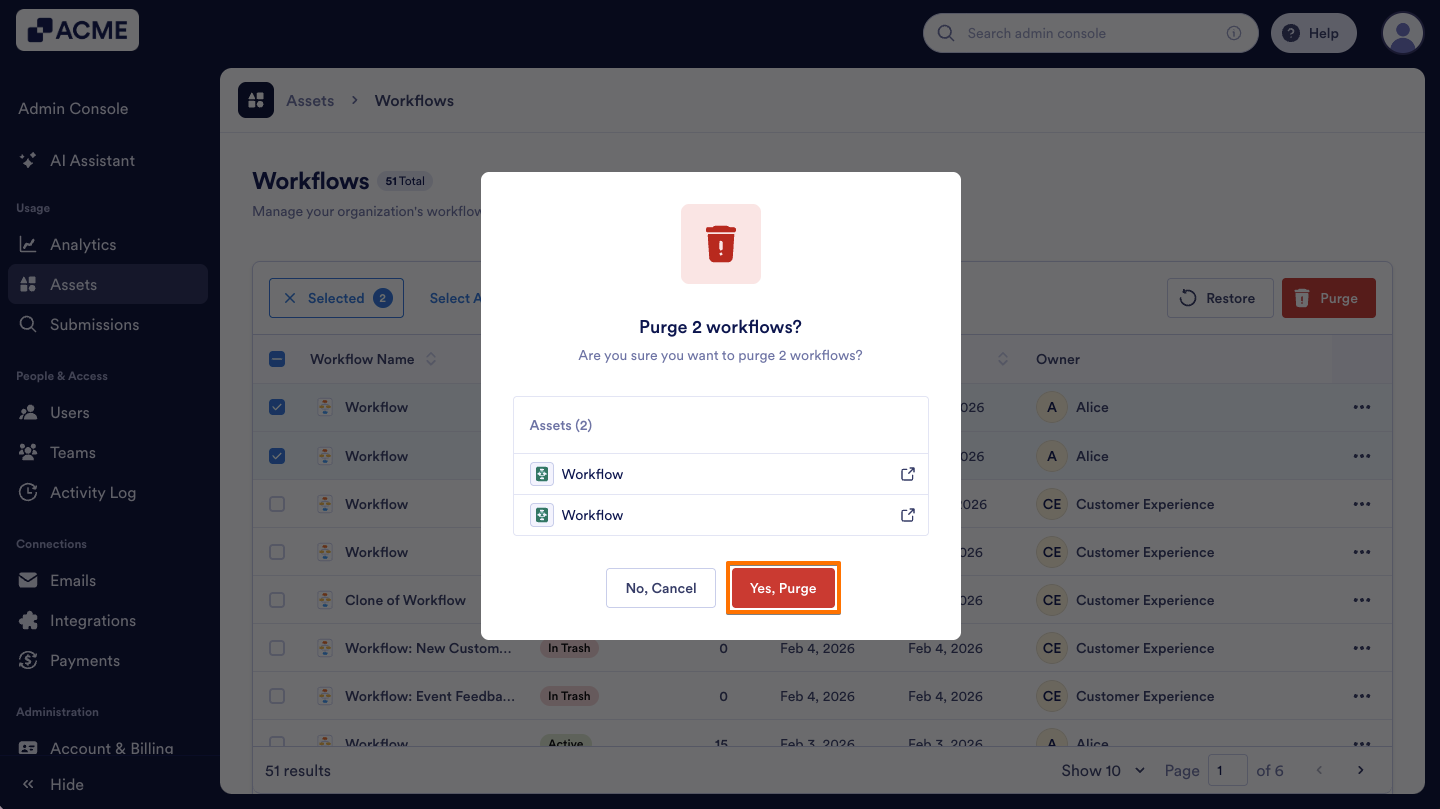
How to Purge Workflows in Bulk
- On the Admin Console’s Workflow Assets page, select the Checkboxes to the left of the Workflows you want to permanently delete.
- Then, click on the Purge button above the list.
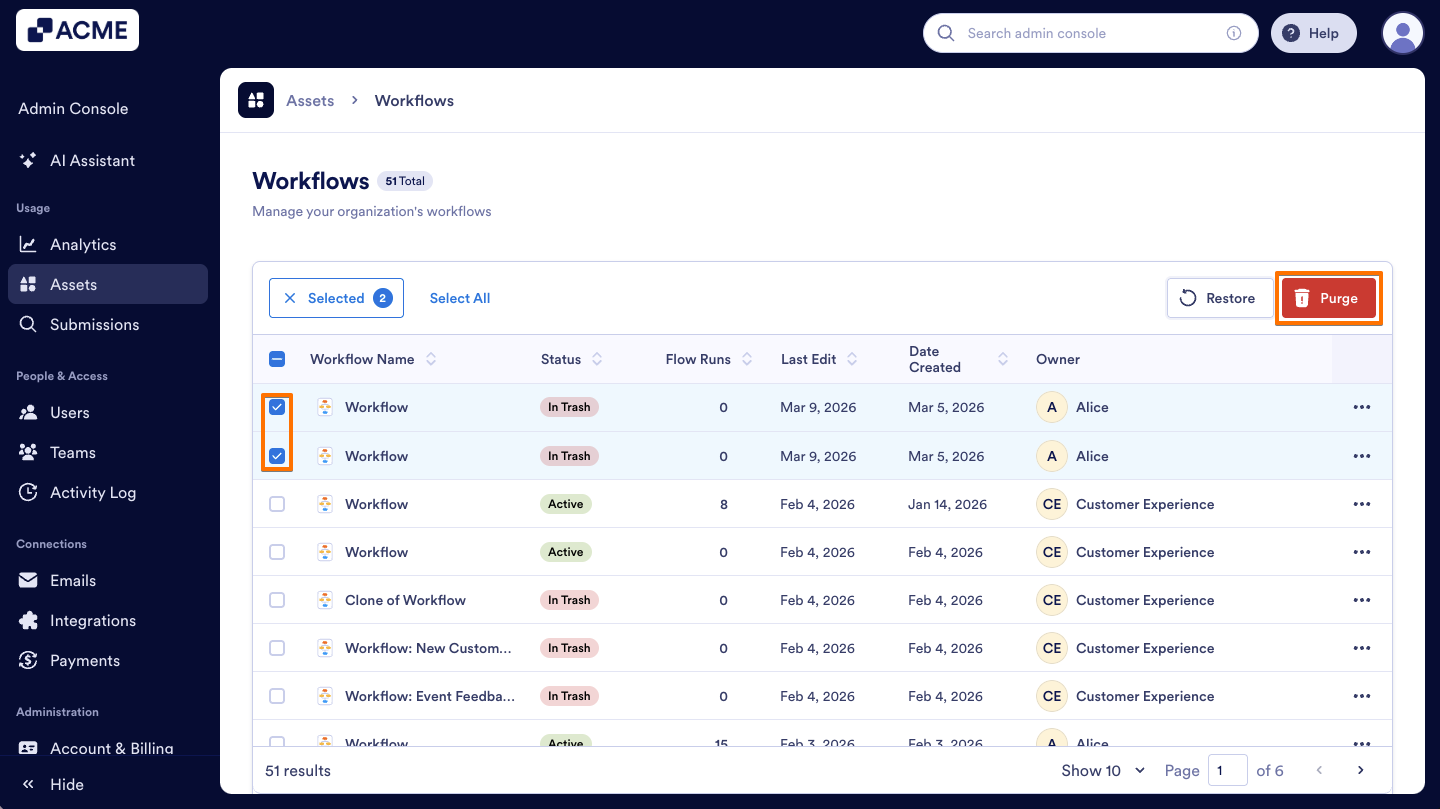
- Finally, in the pop-up window, click on Yes, Purge.
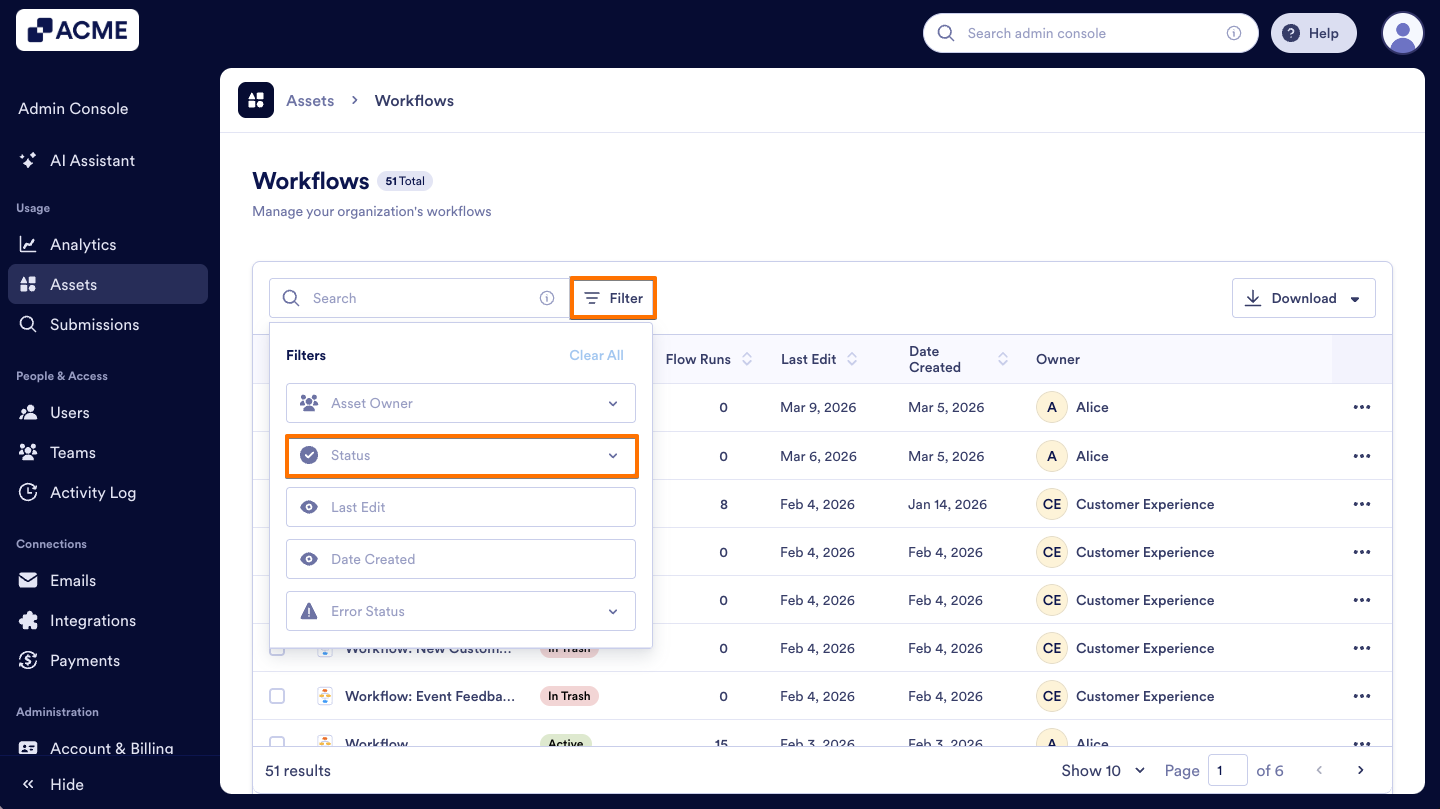
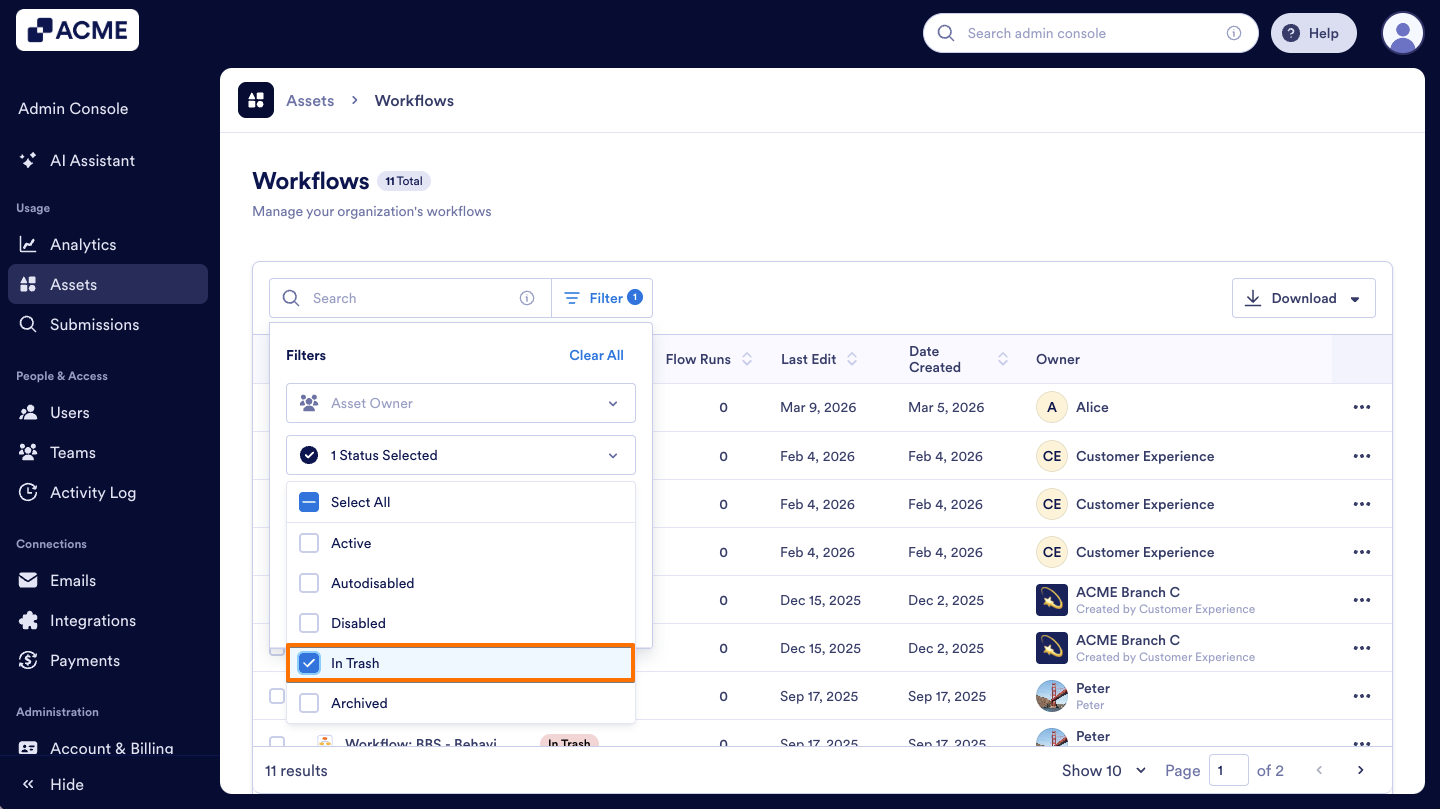
How to View Trashed Workflows Using Filters
- On the Admin Console’s Workflow Assets page, on the right side of the Search Bar, click on Filter.
- Then, click on the Status Dropdown menu.
- In the menu, select the In Trash option to view them.

Send Comment: