


With Jotform’s ChatGPT App, you can create, update, and review your forms in one place using simple, conversational prompts. It offers a convenient way to work on your forms right within ChatGPT, making it easier to turn ideas into actions as you go.
This is especially useful for anyone who wants a more flexible way to manage forms—whether you’re starting a new form, refining an existing one, or exploring your submission data. You can seamlessly move between ChatGPT and Jotform whenever needed, giving you the freedom to work where it feels most comfortable while staying productive.
Setting Up the Jotform ChatGPT Plugin
You can enable Jotform’s ChatGPT Form Builder for your ChatGPT account in just a few easy steps. Setting it up is quick—here’s how:
- Log in to your ChatGPT account and in the menu on the left side of the page, click on Plugins.
- Then, in the Plugins section on the right, search for Jotform and click on it.
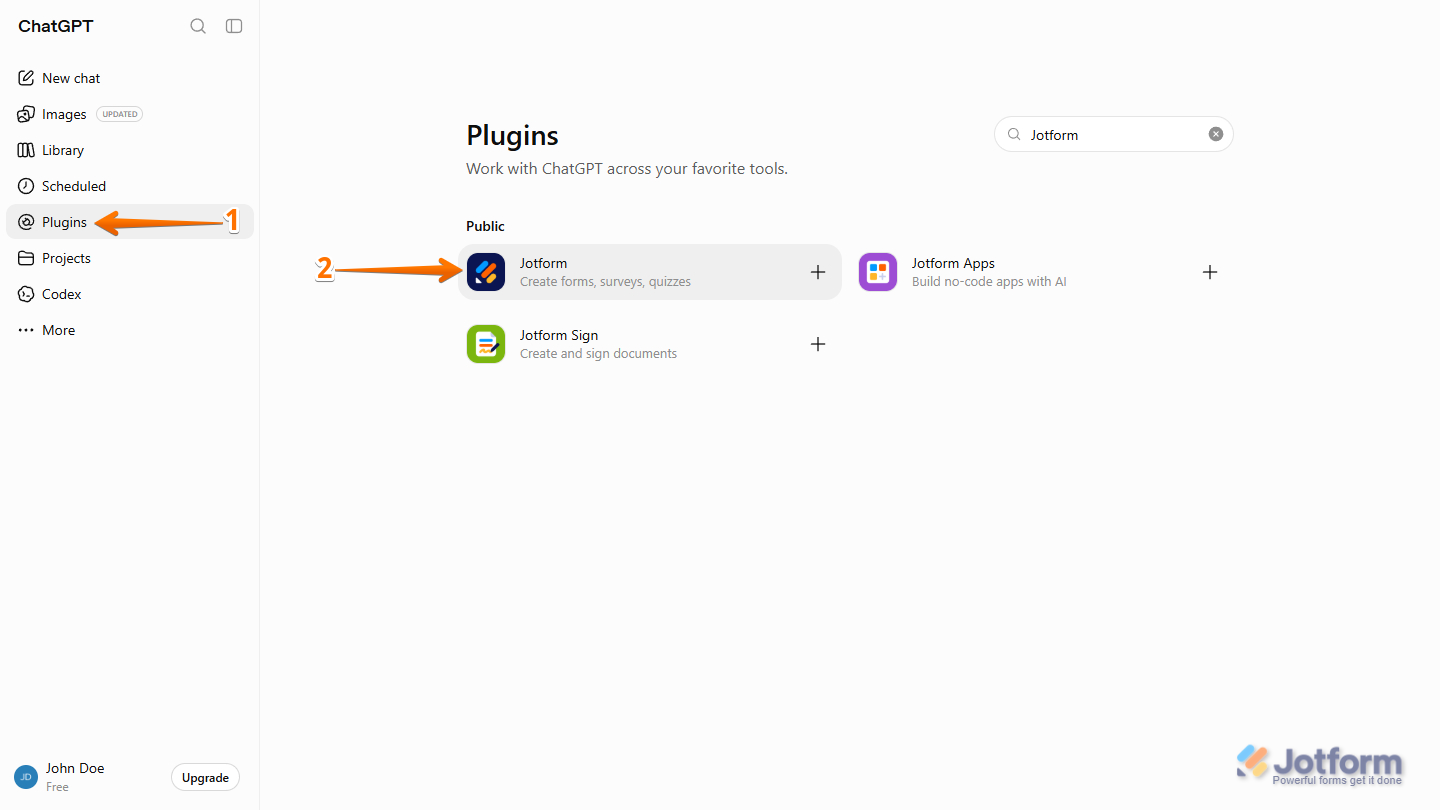
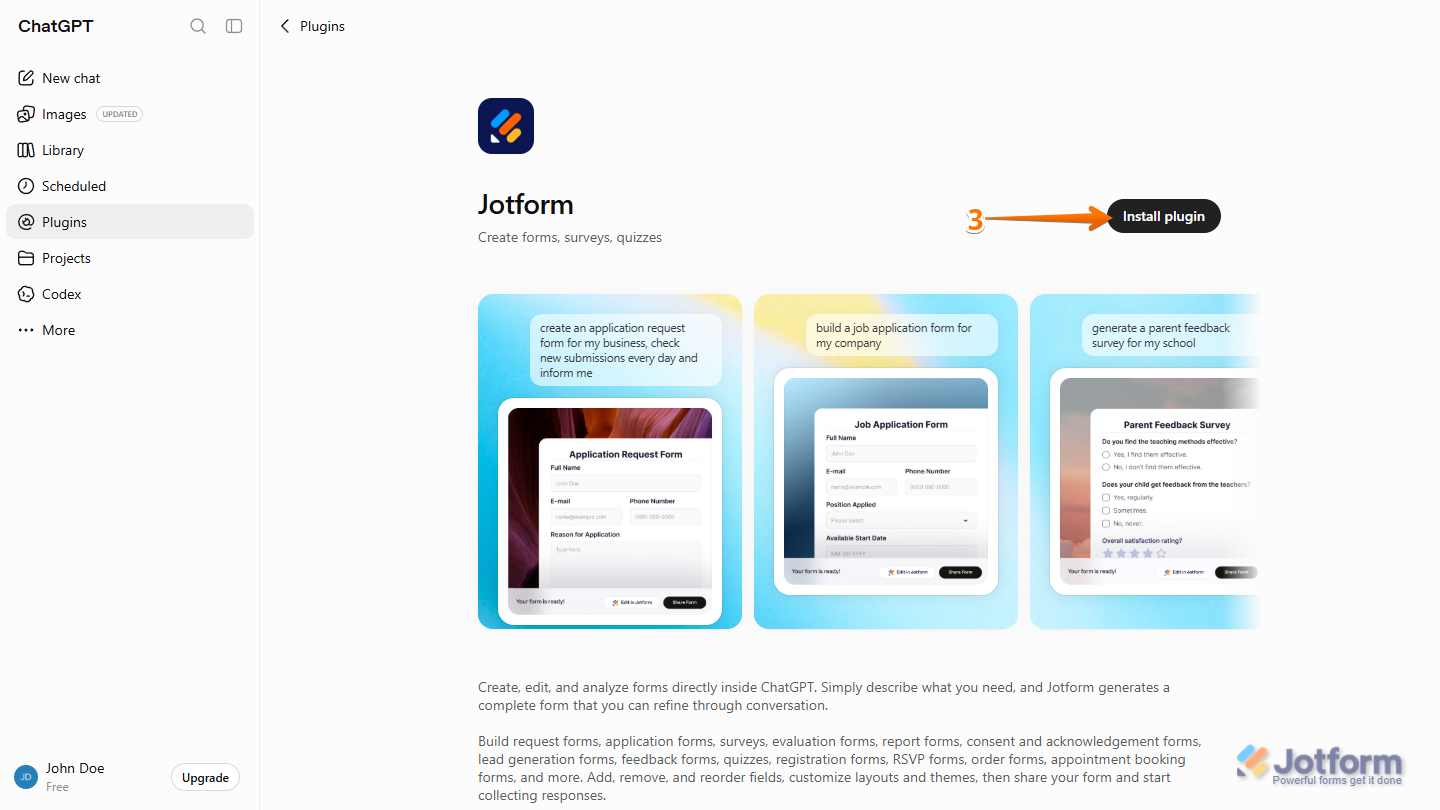
- Now, on the right side of the page, click on Install Plugin.
Note
If you are signed in to your Jotform account in the same browser, clicking Install Plugin will briefly open a new tab to authenticate your account. This happens automatically. If you are not signed in, log in to your Jotform account to complete the authentication and continue with the installation.
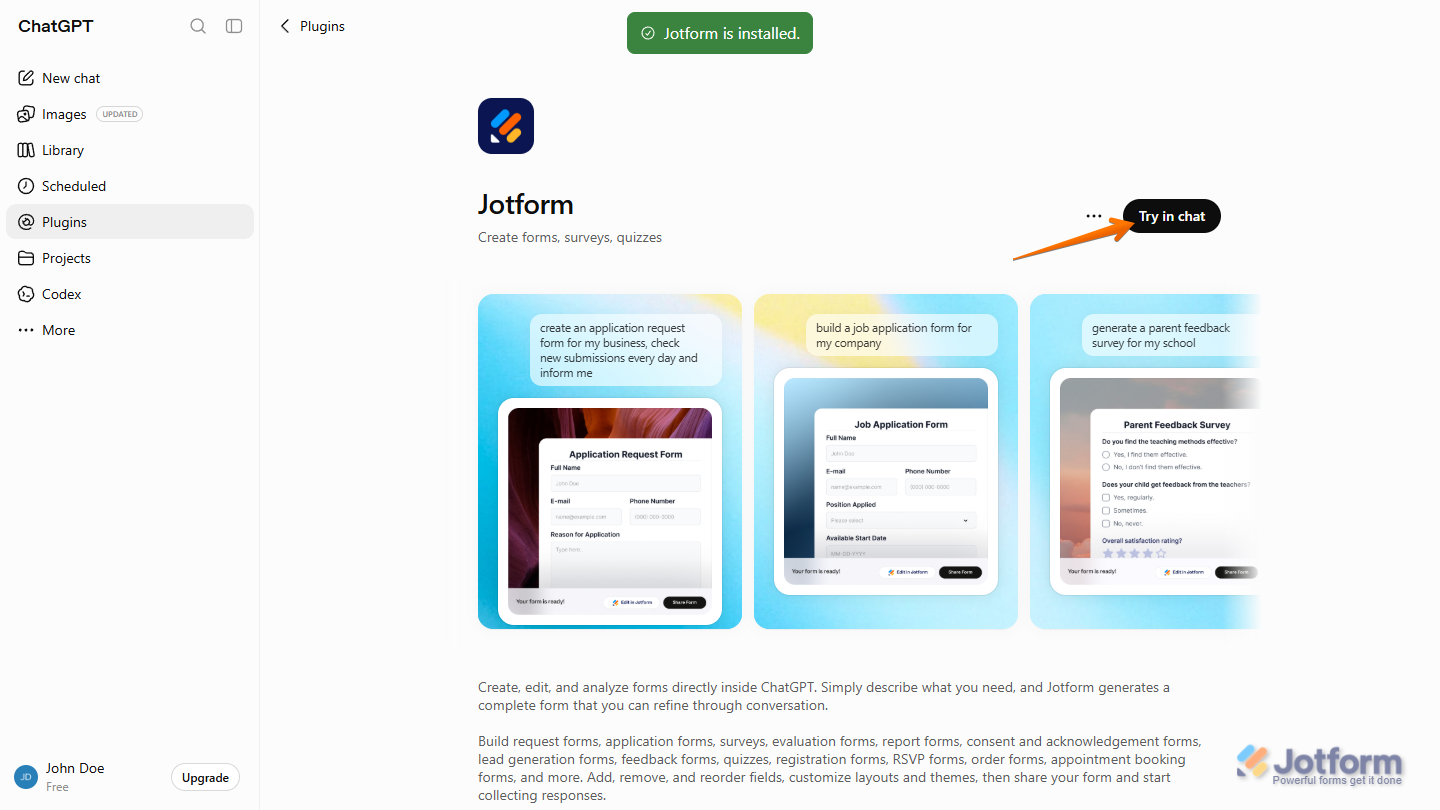
Now you’ll see a message confirming that the Jotform plugin is installed. On the right side of the page, click on Try in Chat to use it right away.
Using the Jotform ChatGPT Plugin
Once you’ve set up the Jotform ChatGPT Plugin, you can start using prompts to manage the forms in your Jotform account. Whether you’re creating a form from scratch, updating an existing one, or reviewing submissions, you can do everything right within ChatGPT. Here’s how to get started:
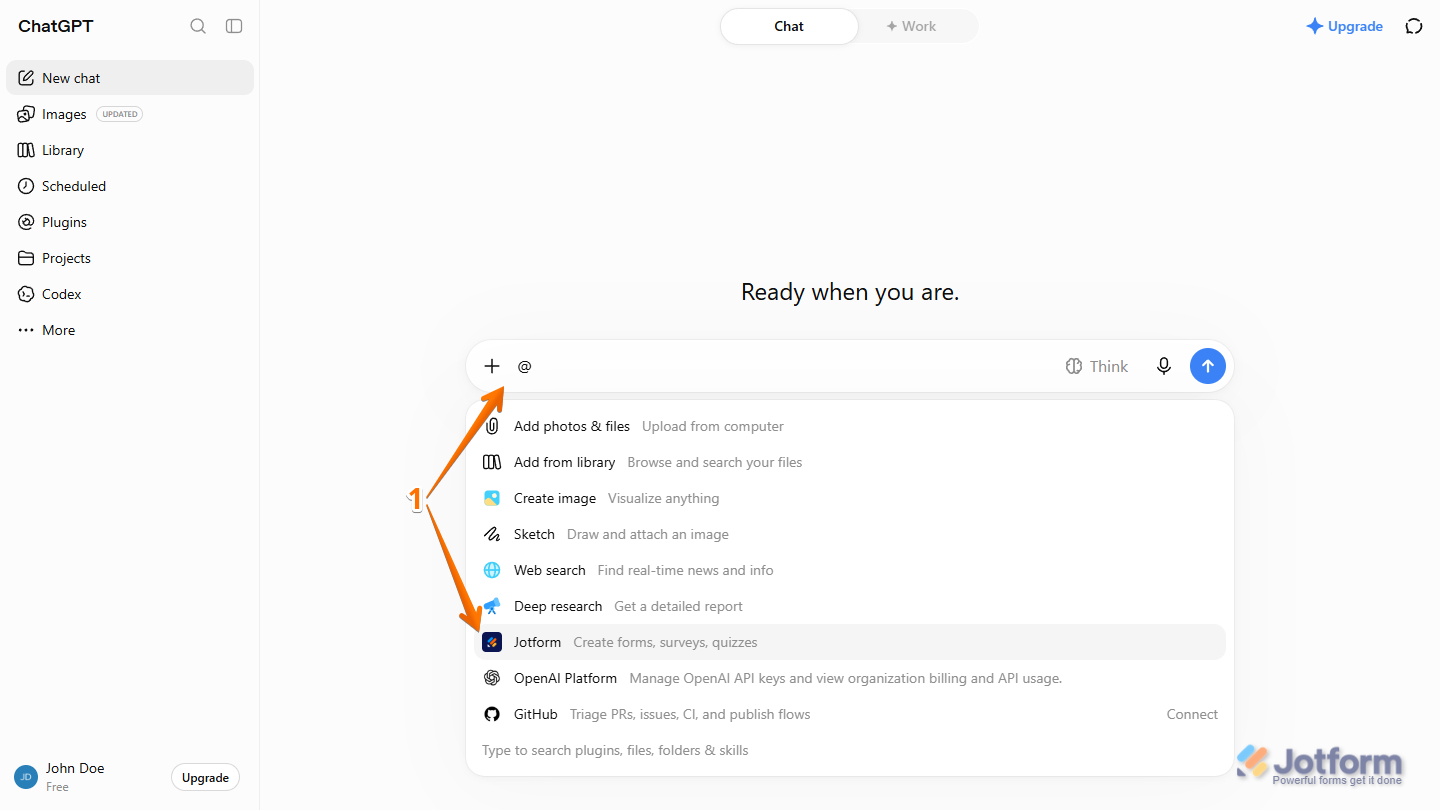
- In the ChatGPT prompt box, enter the At Sign (@) and, in the menu that comes up, select Jotform to use the Jotform ChatGPT Plugin.
Pro Tip
You can also type @Jotform and press the Spacebar or Tab key on your keyboard to select it more quickly.
- Then, depending on what you want to do, enter a prompt for one of these:
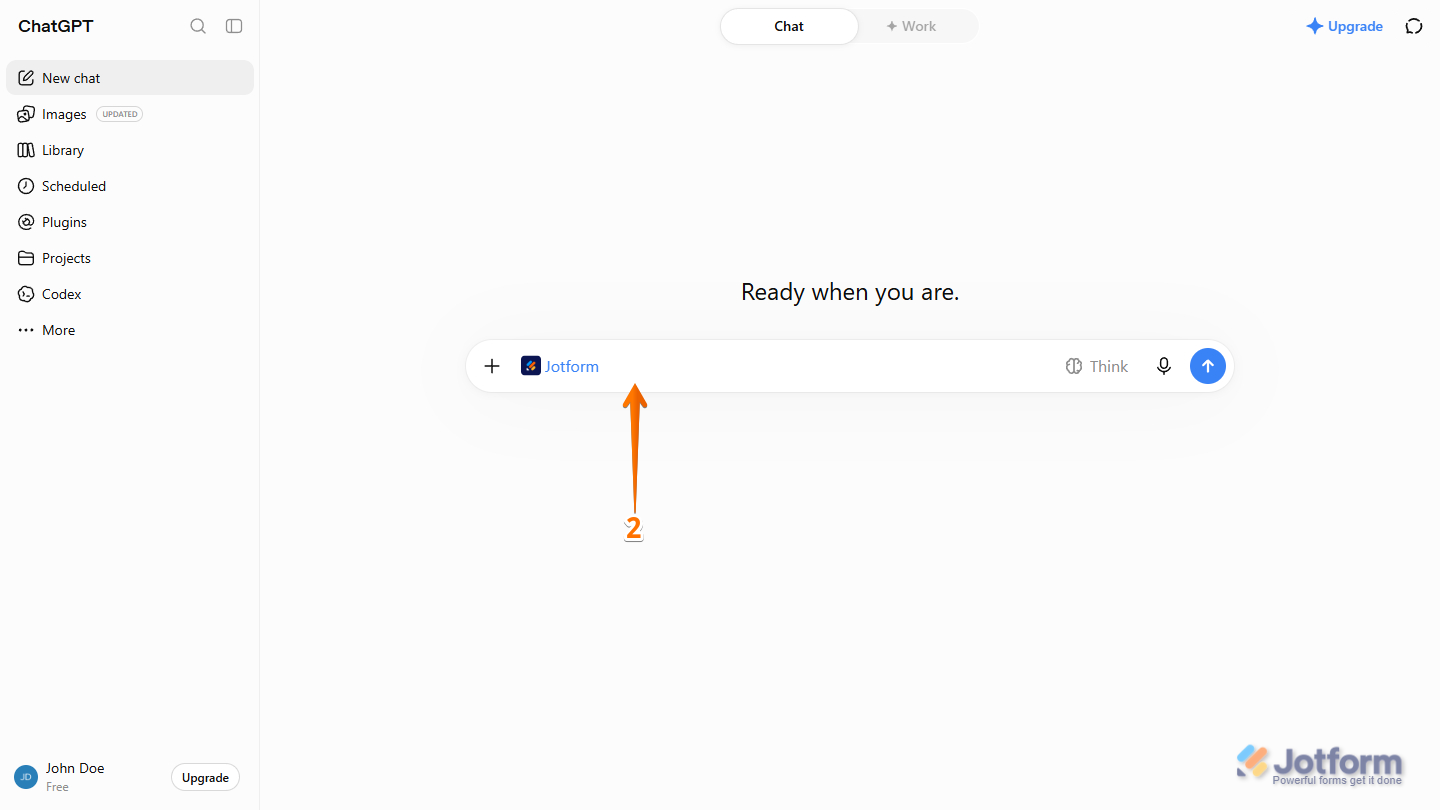
Creating a Form From Scratch
While using the Jotform ChatGPT Plugin, you can create a new form from scratch in your Jotform account using prompts. Here’s how it’s done:
- In the ChatGPT prompt box, enter a prompt describing the type of form you want to create, including its name and the questions you want to include.
- Then, press the Enter key on your keyboard or click on the Upward Arrow icon on the right side of the Prompt box.
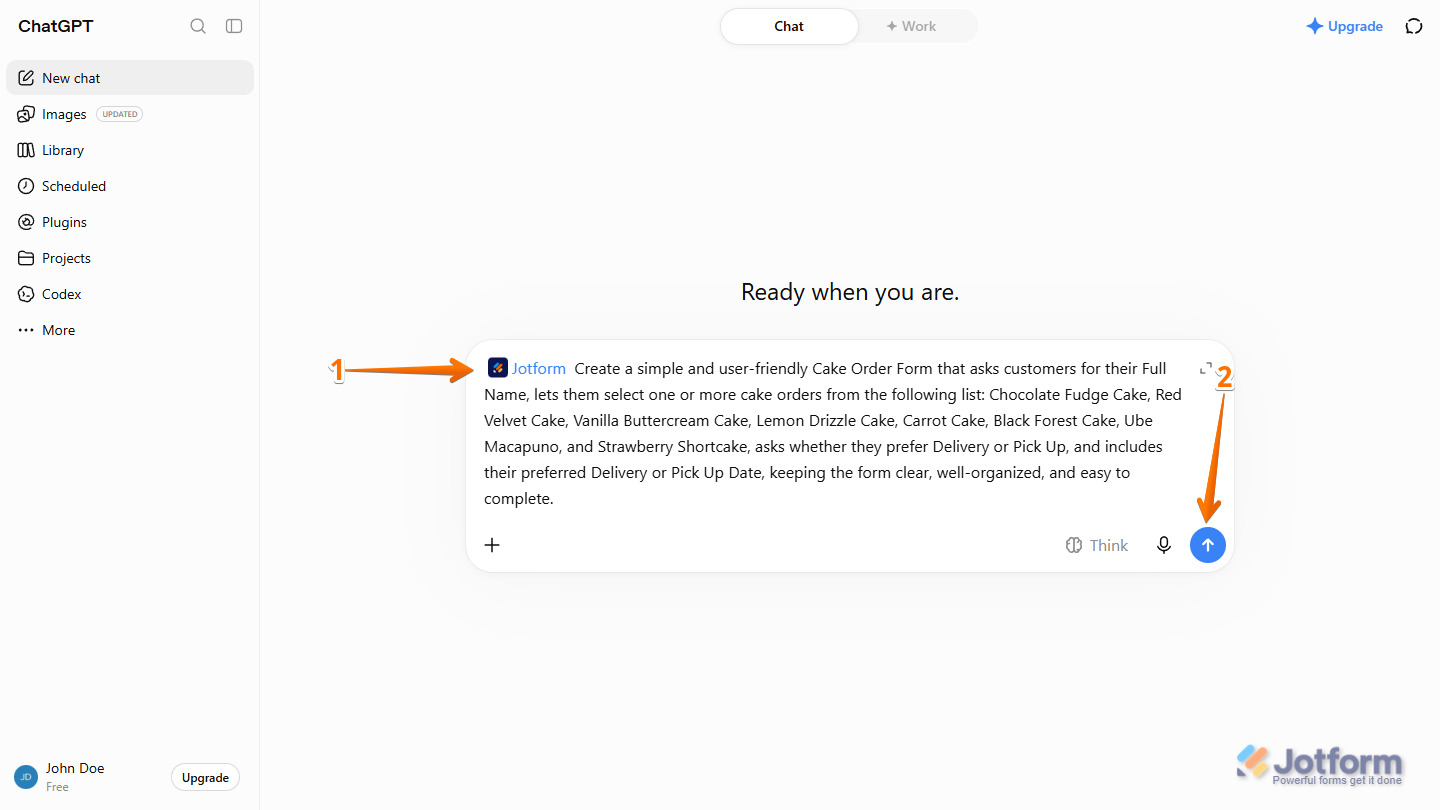
That’s it. ChatGPT will use your prompt to create your form, and you’ll see a preview that you can test right in the Chat window. You’ll also have the option to edit in Form Builder, share, or open the form in a new browser tab.
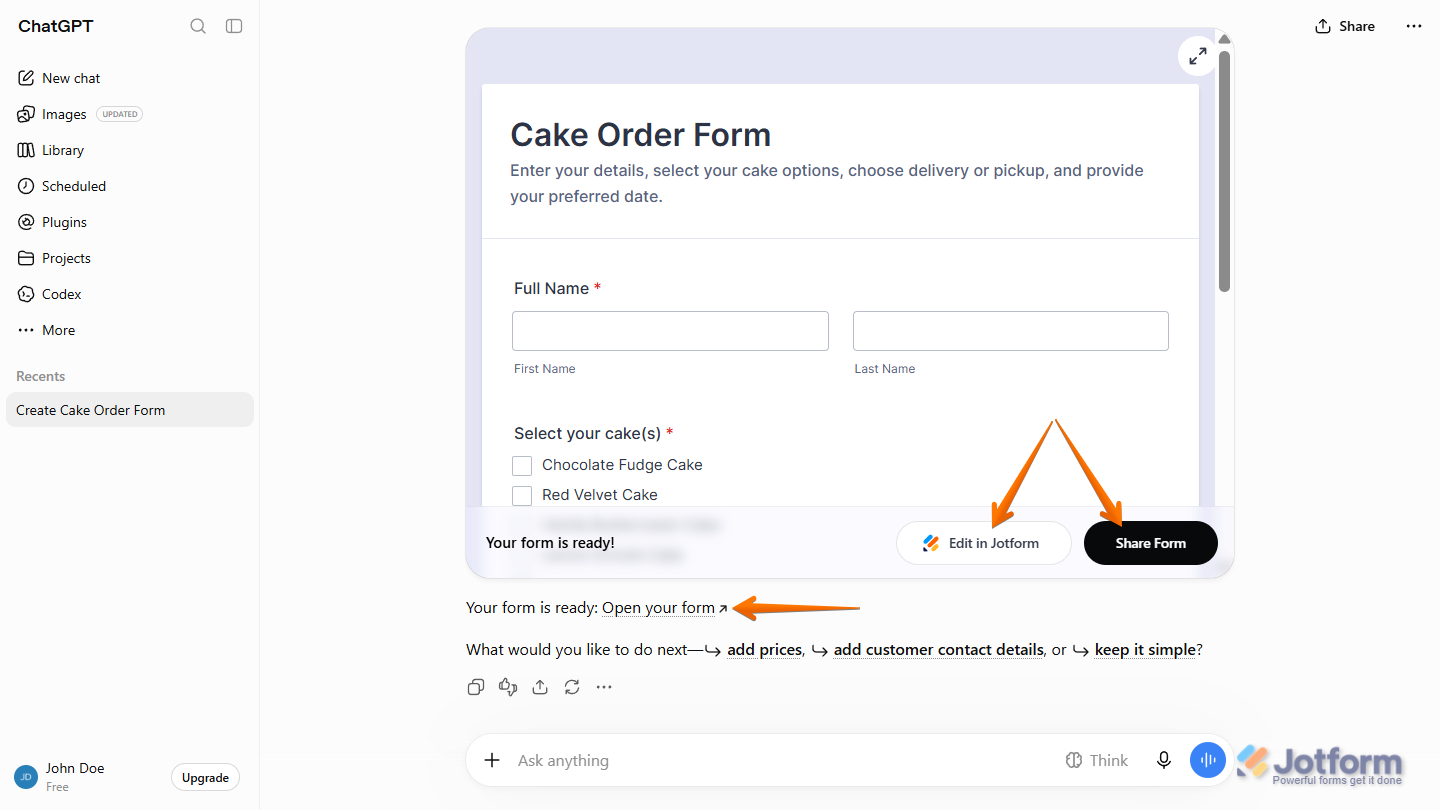
Creating a Form from PDF, Image, or Doc File
Jotform ChatGPT also lets you create a form from a PDF (fillable or not), an image, or a document. This is how it’s done:
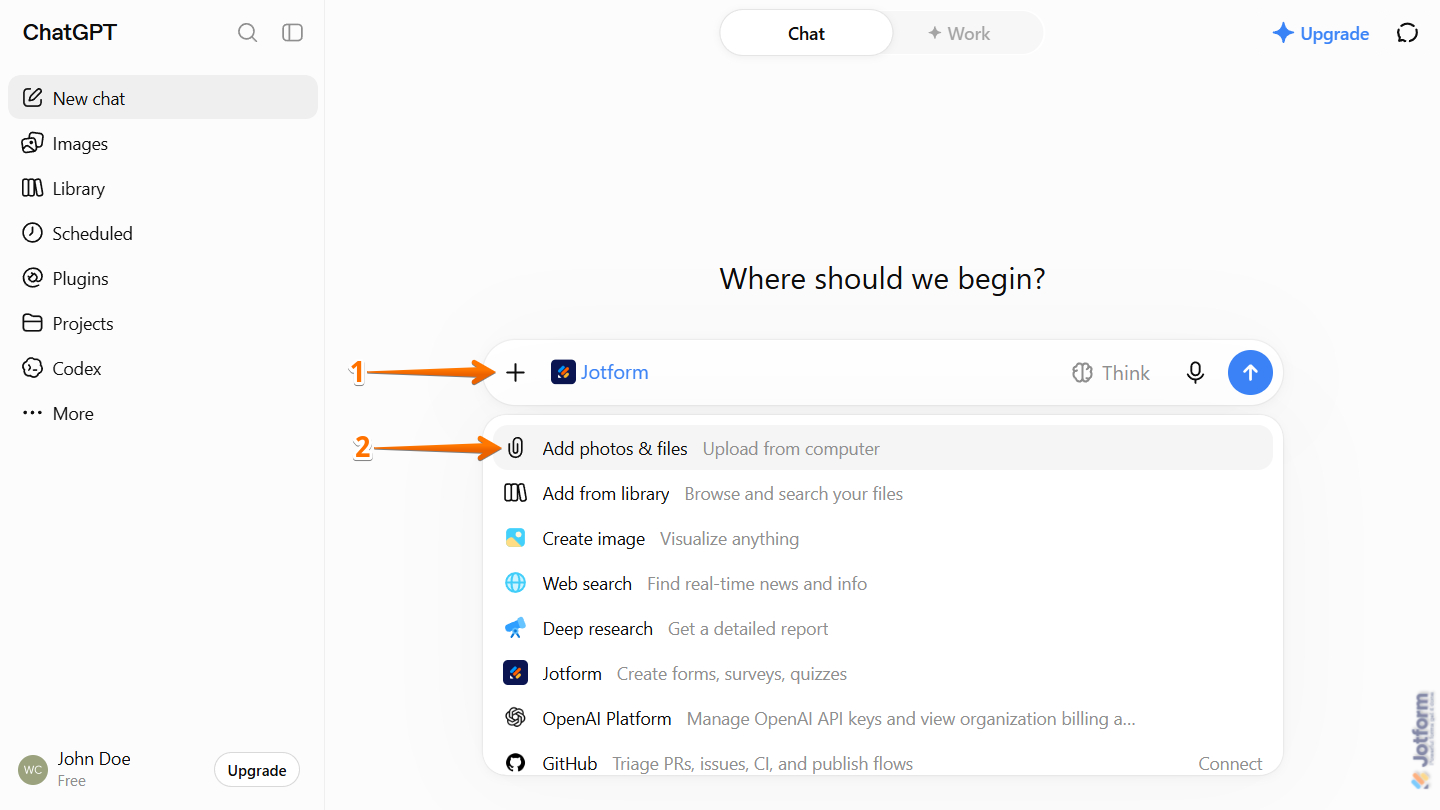
- In the ChatGPT prompt box, while Jotform is active, click on the Plus icon.
- Then, in the Dropdown menu that opens, click on Add Photos & Files and select the PDF form, image, or Doc file from your device.
- Next, enter a prompt telling ChatGPT to create the form based on the attached file.
- Now, press the Enter key on your keyboard or click on the Upward Arrow icon on the right side of the Prompt box.
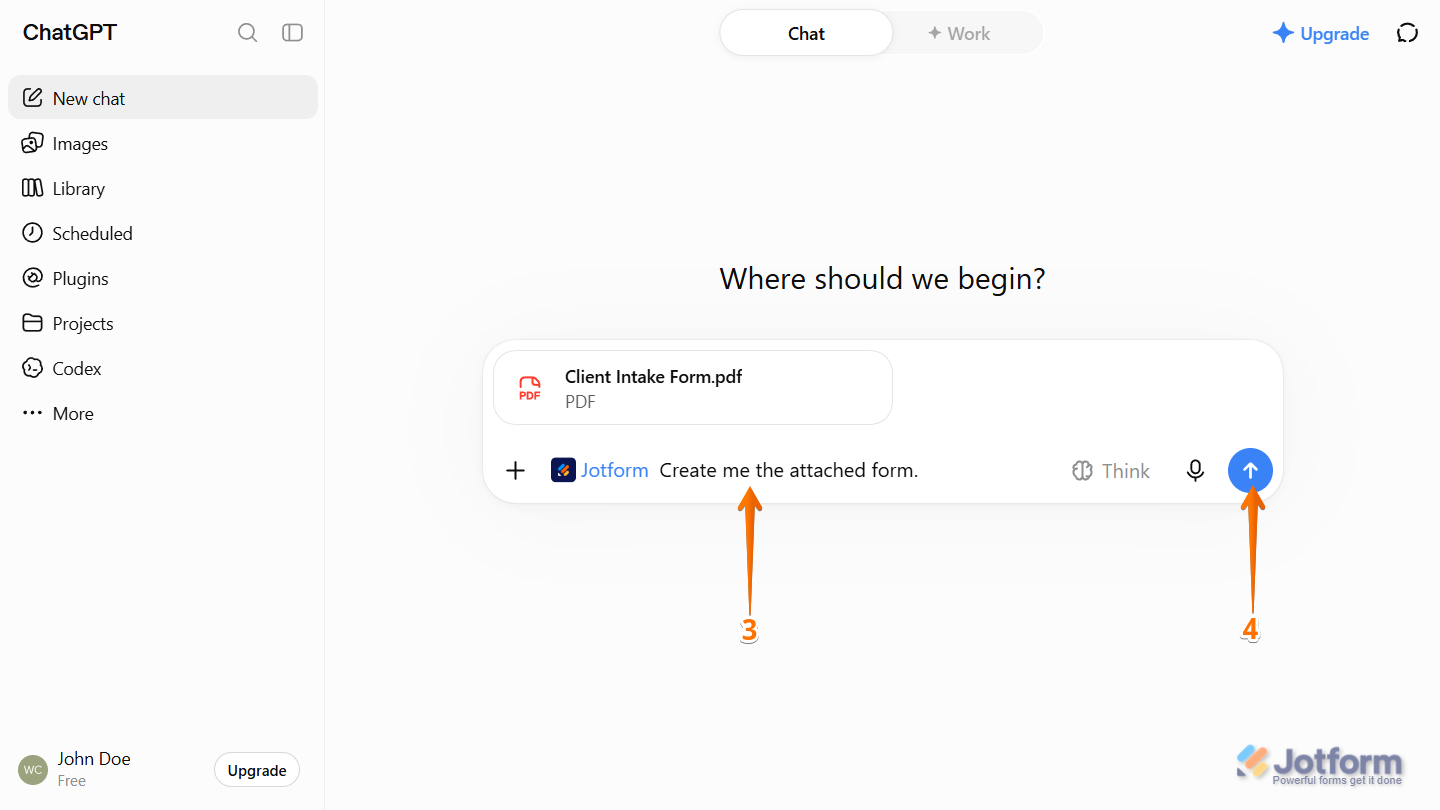
- Then, click on Always Allow to let ChatGPT use Jotform for all subsequent chats.
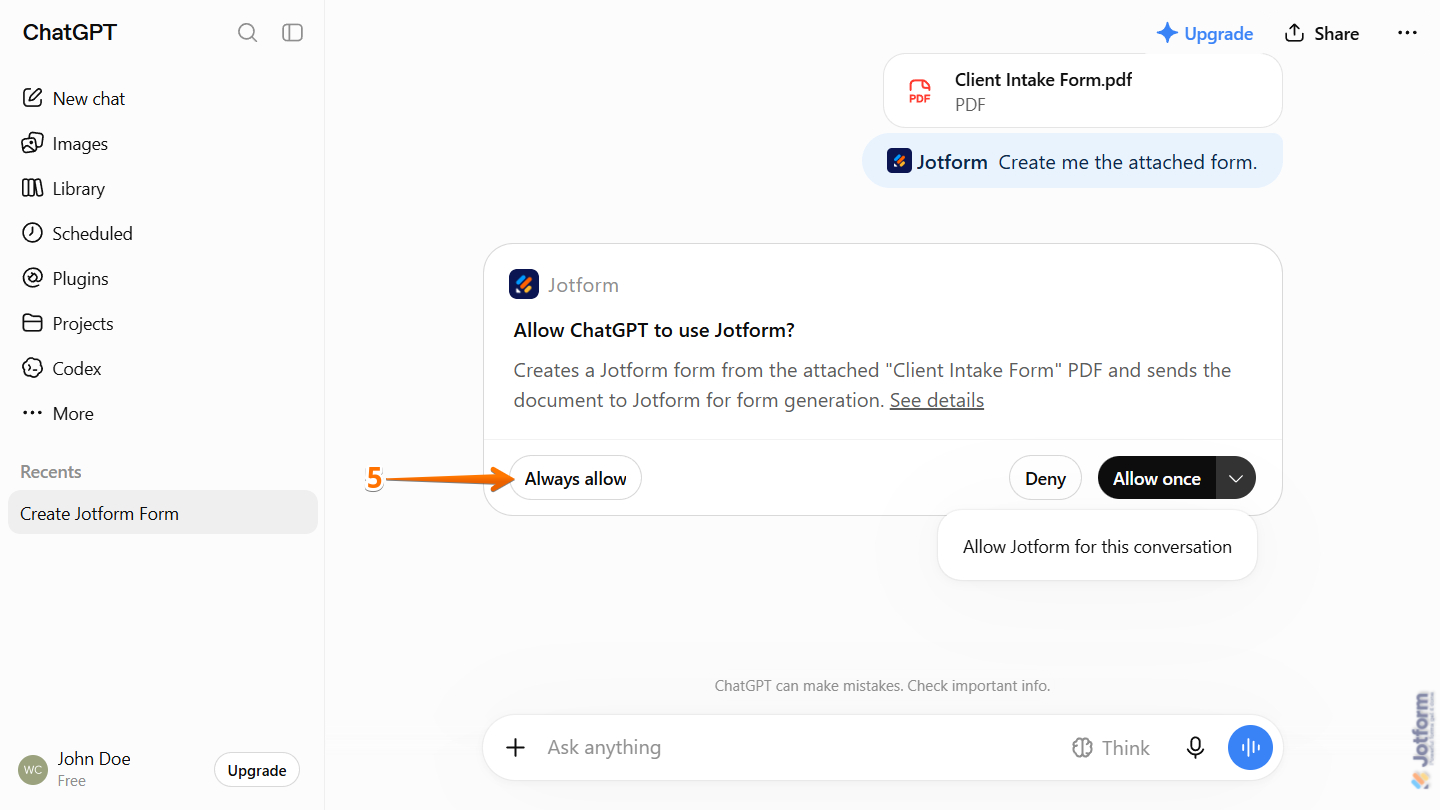
Note
Clicking on Allow Once in the permission prompt grants access only for the current prompt. To let ChatGPT use Jotform throughout the current conversation, click the Downward arrow icon next to Allow Once, then select Allow Jotform for this Conversation.
That’s it! Your form is now created. You can open it in the Form Builder, quickly copy its link, or embed code for sharing on various social media channels.
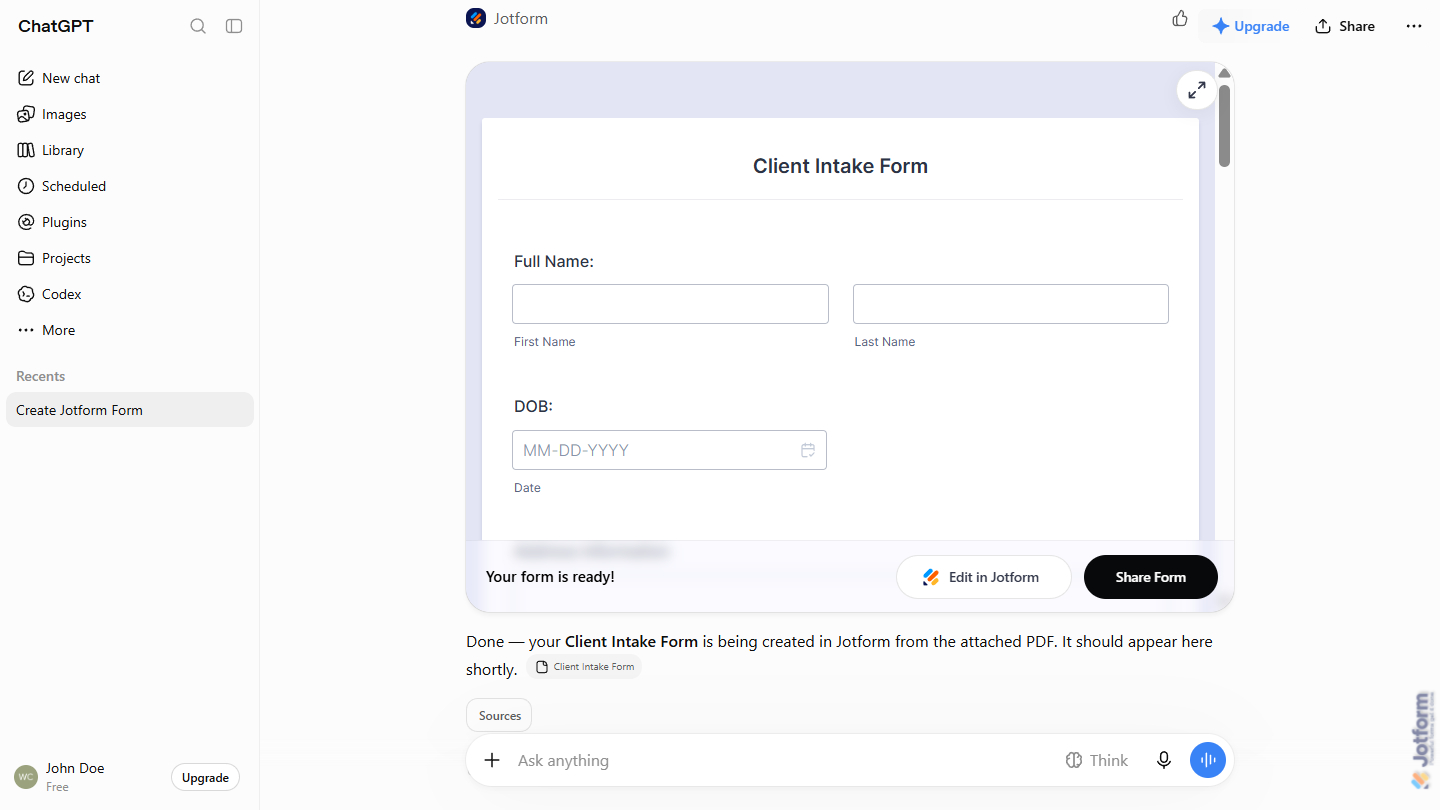
Editing an Existing Form
While using the Jotform ChatGPT Plugin, you can update an existing form by simply describing the changes you want. Here’s what to do:
- In the ChatGPT prompt box, enter a prompt describing the changes you want to make and include the name of the form you want them applied to.
- Then, press the Enter key on your keyboard or click on the Upward Arrow icon on the right side of the Prompt box.
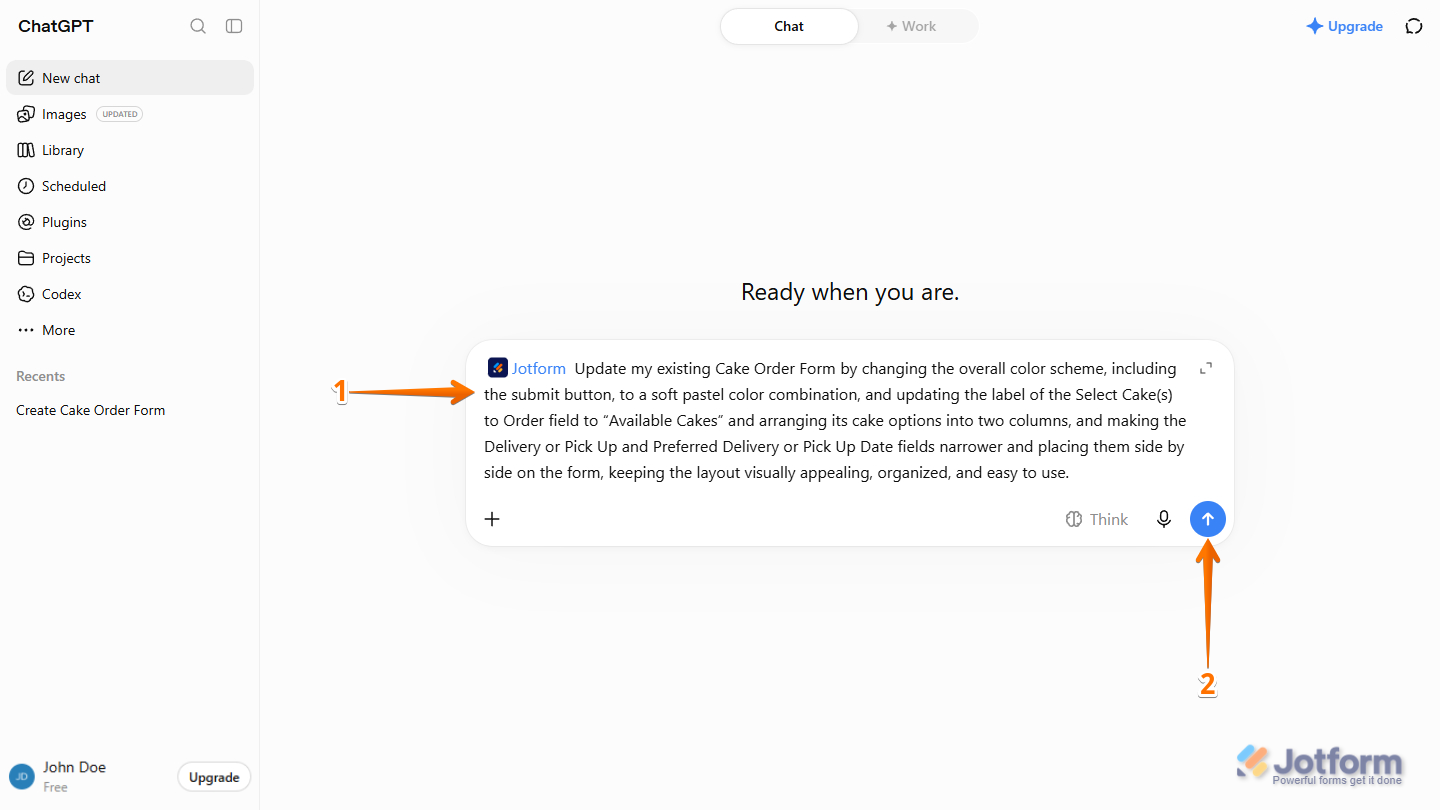
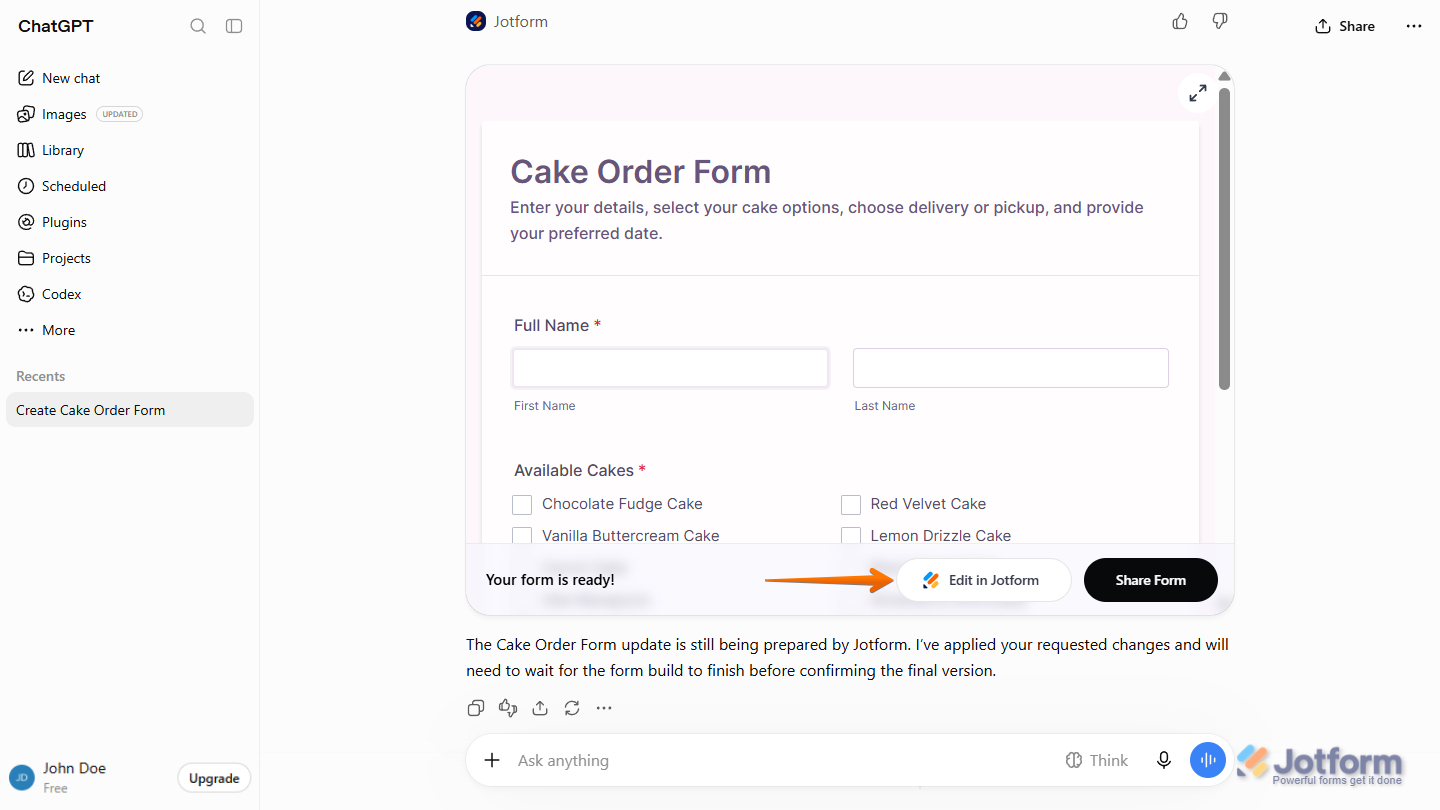
That’s it. Your form will be updated based on your prompt, and you’ll see a preview of the changes that you can review and test right in the Chat window. If you’d like to keep customizing the form, click on Edit in Jotform to open it in the Form Builder.
Viewing Form Submissions
While using the Jotform ChatGPT Plugin, you can view your form submissions by simply asking for them in a prompt. Here’s how to do it:
- In the ChatGPT prompt box, enter a prompt asking for the submissions you want to view, including the form name and what you want to find.
- Then, press the Enter key on your keyboard or click on the Upward Arrow icon on the right side of the Prompt box.
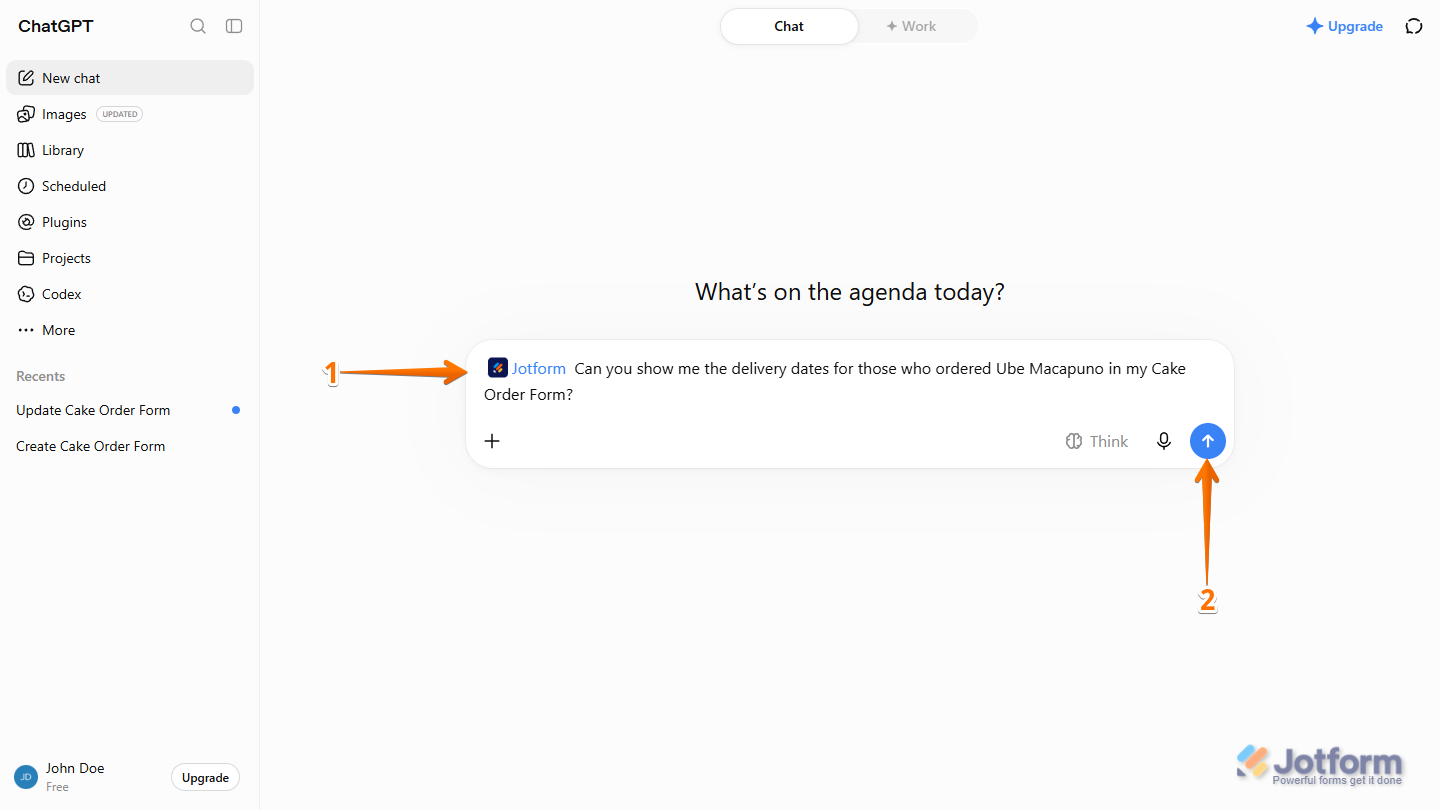
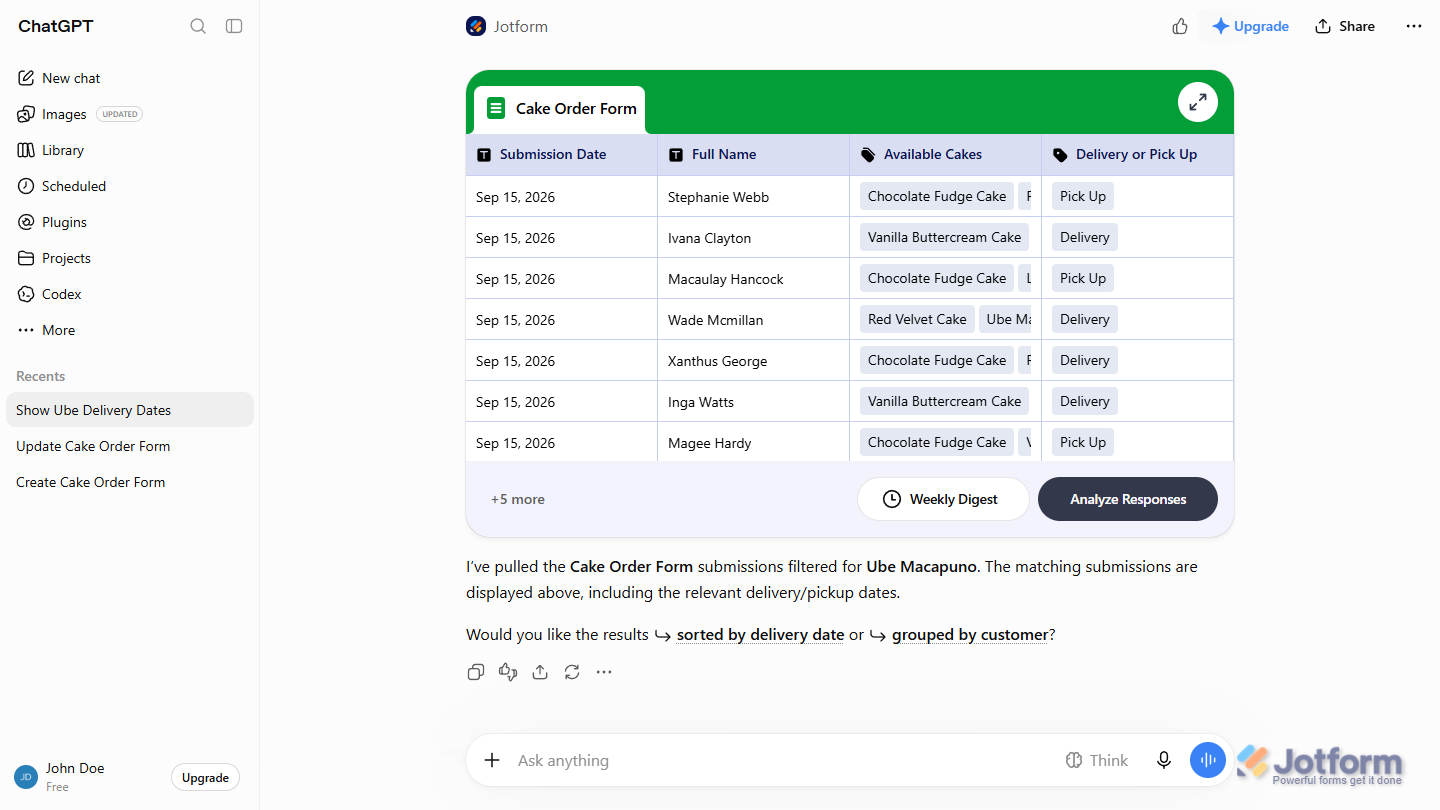
That’s it. You’ll see the submissions that match what you asked for, and you can review them right in the Chat window.
Here is a detailed tutorial displaying how to create forms in ChatGPT:


Send Comment: