As an Admin, you can use the Admin Console to see which assets are assigned to each user and manage those assignments as needed.


Viewing and Managing Assigned Assets
You can view and manage your organization's assigned assets-from two different locations—in your User Management screen or within the Asset Tab located in a specific user’s profile. Let’s walk through both of those options together, down below:
From the User Management Screen
- Starting in the Admin Console, click on Users in the menu on the left side of the page.

- Next, click on the Users tab located at the top of the User Management page.
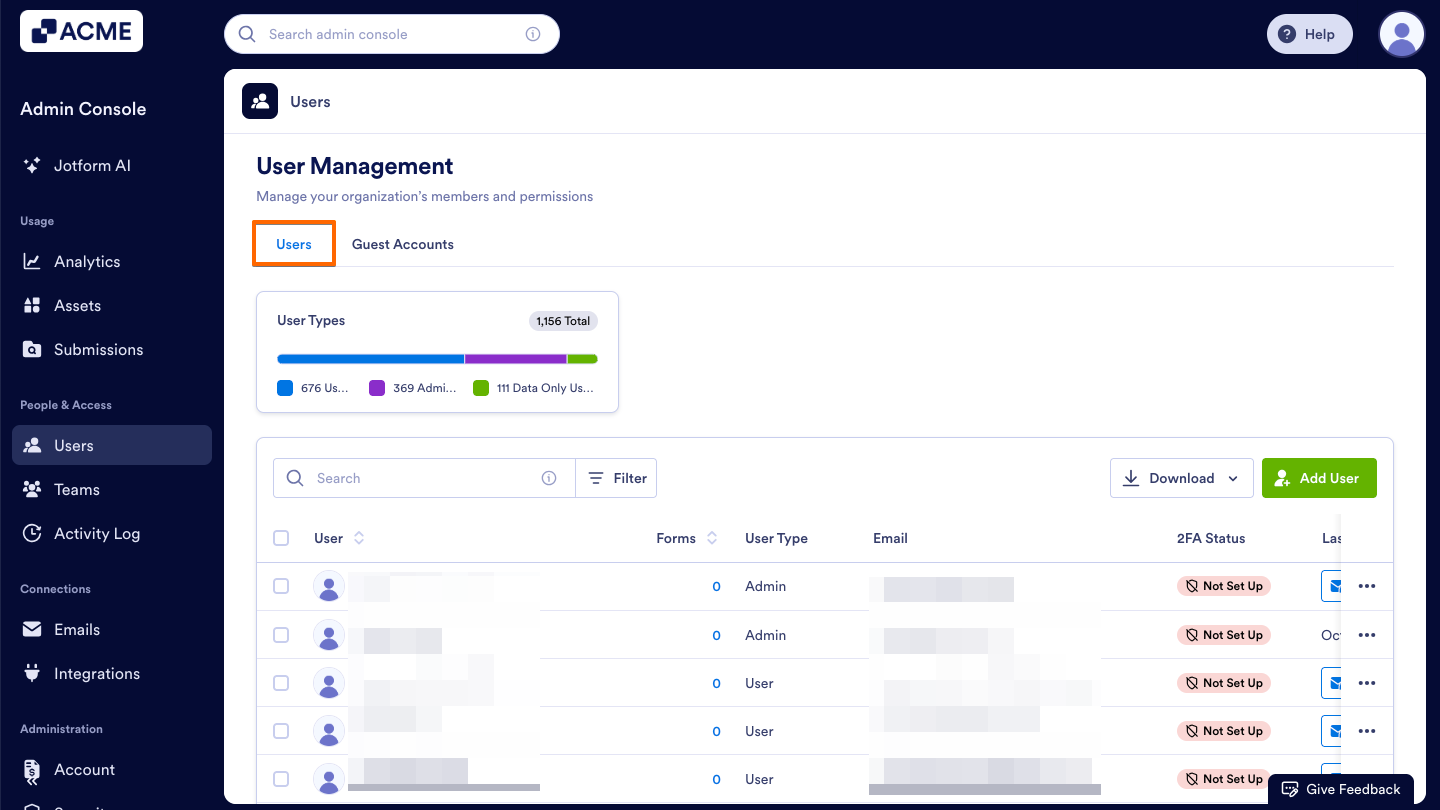
- Then, decide which user’s assets you’d like to view and click on their username. This opens a sidebar on the right side of the screen that contains several tabs, such as Details, Assets, and Activity.

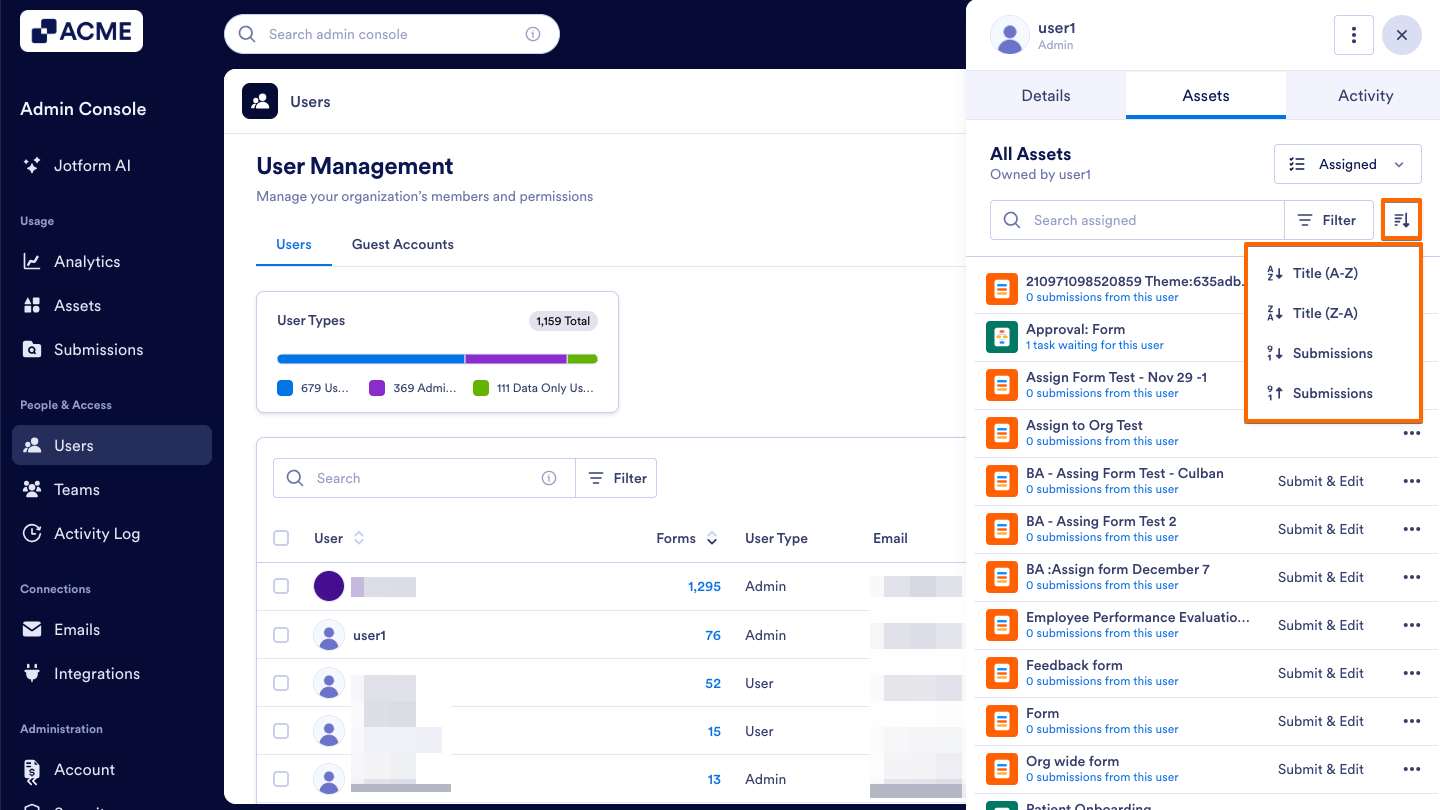
- In that sidebar, select the Assets tab to view that specific user’s assets.
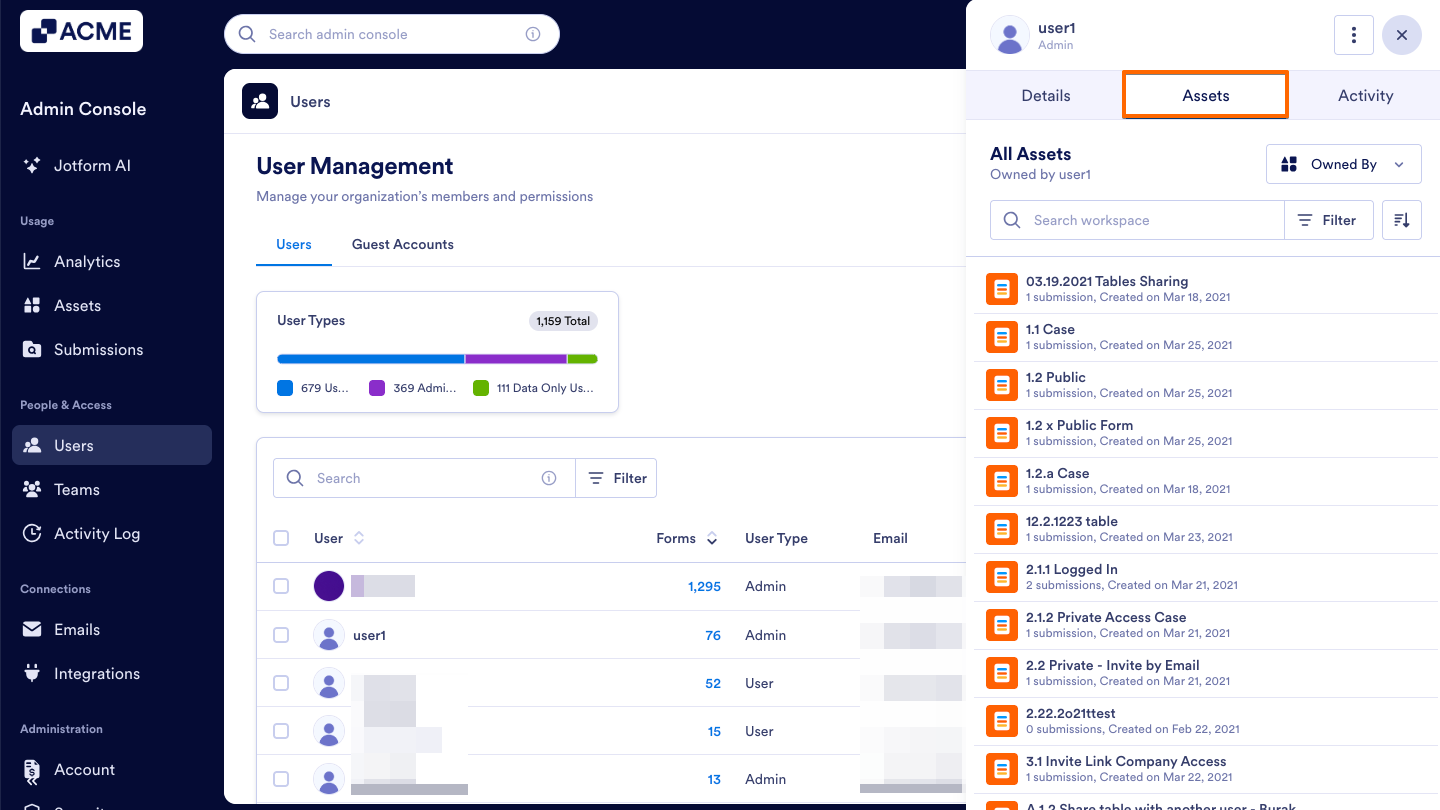
- Finally, click on the dropdown located near the top right of the sidebar and change the asset type to Assigned.

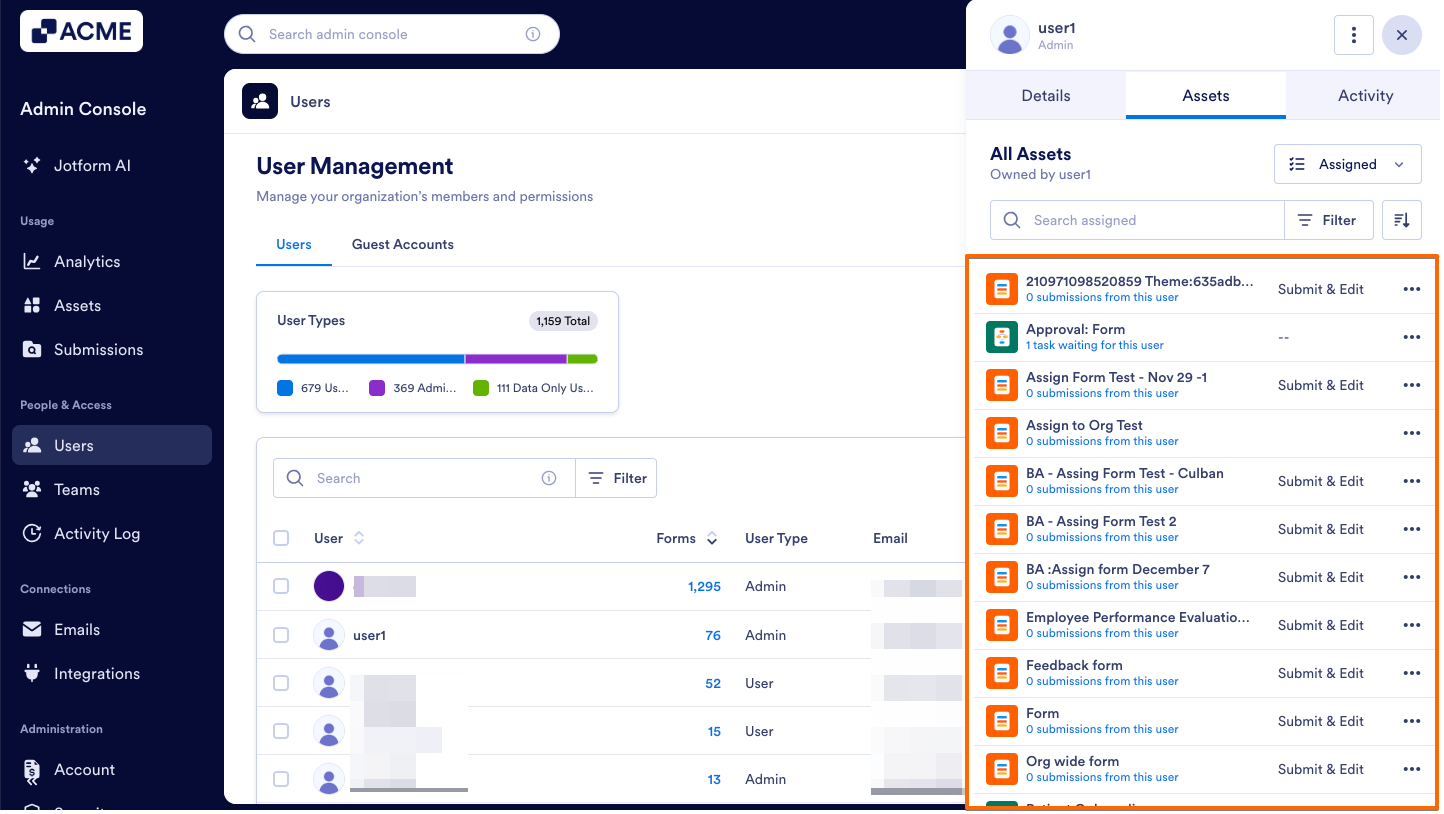
You will now see all assets that have been assigned to that specific user:
From the Assets Tab within a Specific User’s Profile
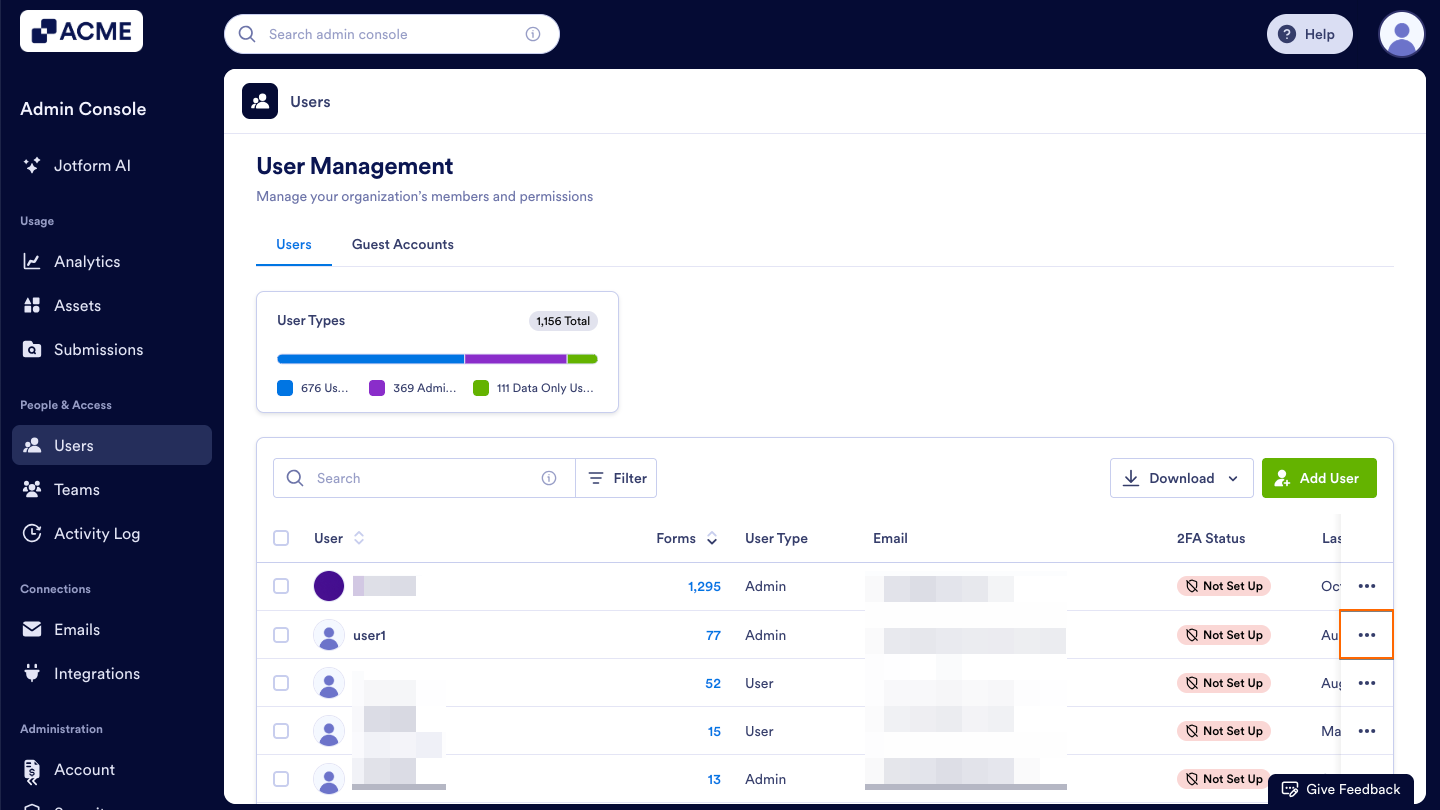
- Starting in the Admin Console, click on Users in the menu on the left side of the page.

- Next, click on the Users tab located at the top of the User Management page.

- Then, decide which user’s assets you’d like to view and click the Three Dots icon to the right of their name.
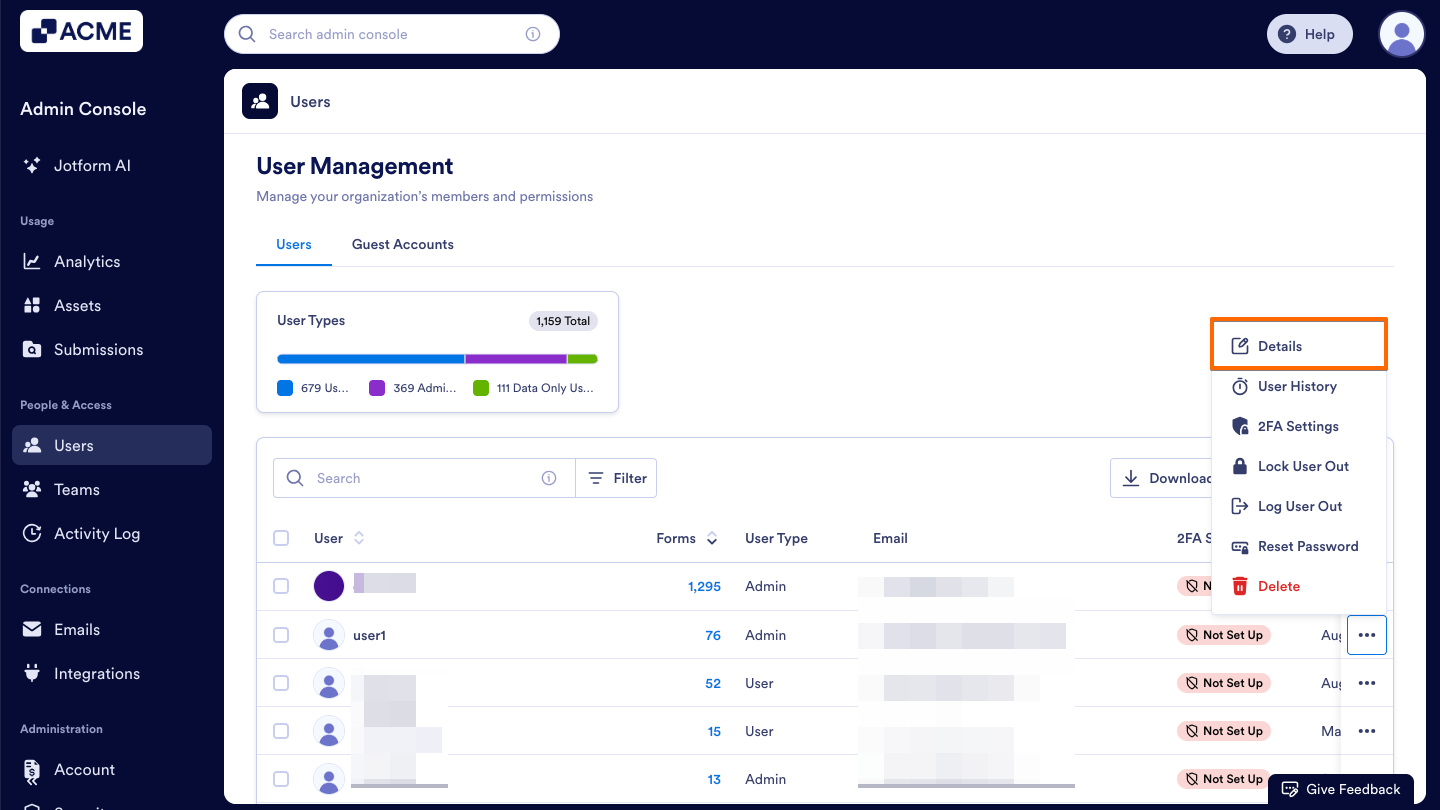
- Now, select Details in the dropdown menu.This opens a sidebar on the right side of the screen that contains several tabs, such as Details, Assets, and Activity.
- In that sidebar, select the Assets tab to view that specific user’s assets.

- Finally, click on the dropdown located near the top right of the sidebar and change the asset type to Assigned.
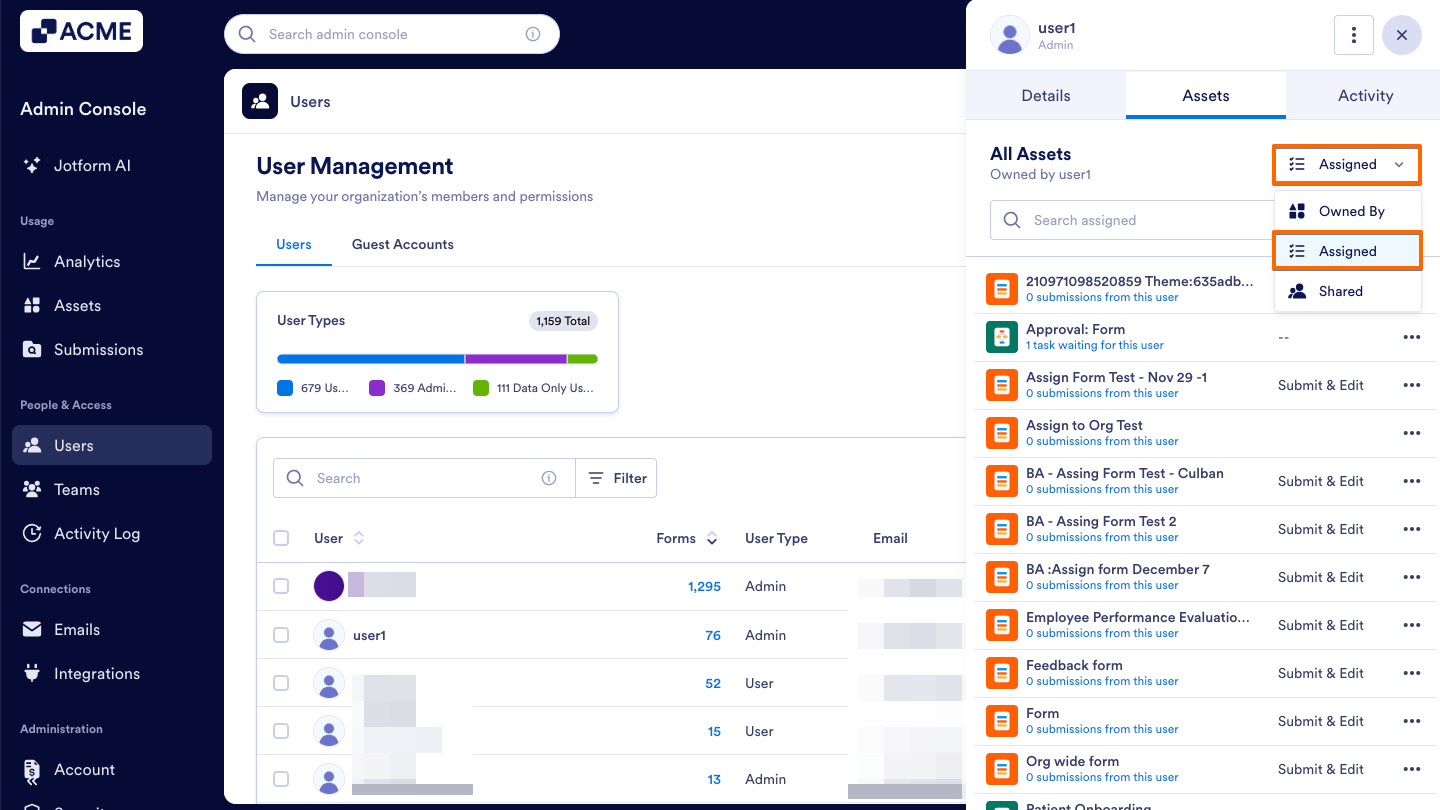
You will now see all assets that have been assigned to that specific user:

Tip
If you’d like to view assets that the user owns instead of their assigned ones, see How to View Users Owned Assets in Your Organization from the Admin Console.
Managing Assigned Assets
In the Assigned section, you can view each asset assigned to the selected user and perform quick actions for each asset. Each assigned form appears in a list displaying its Form Name, Submission Count, and Permission Type.
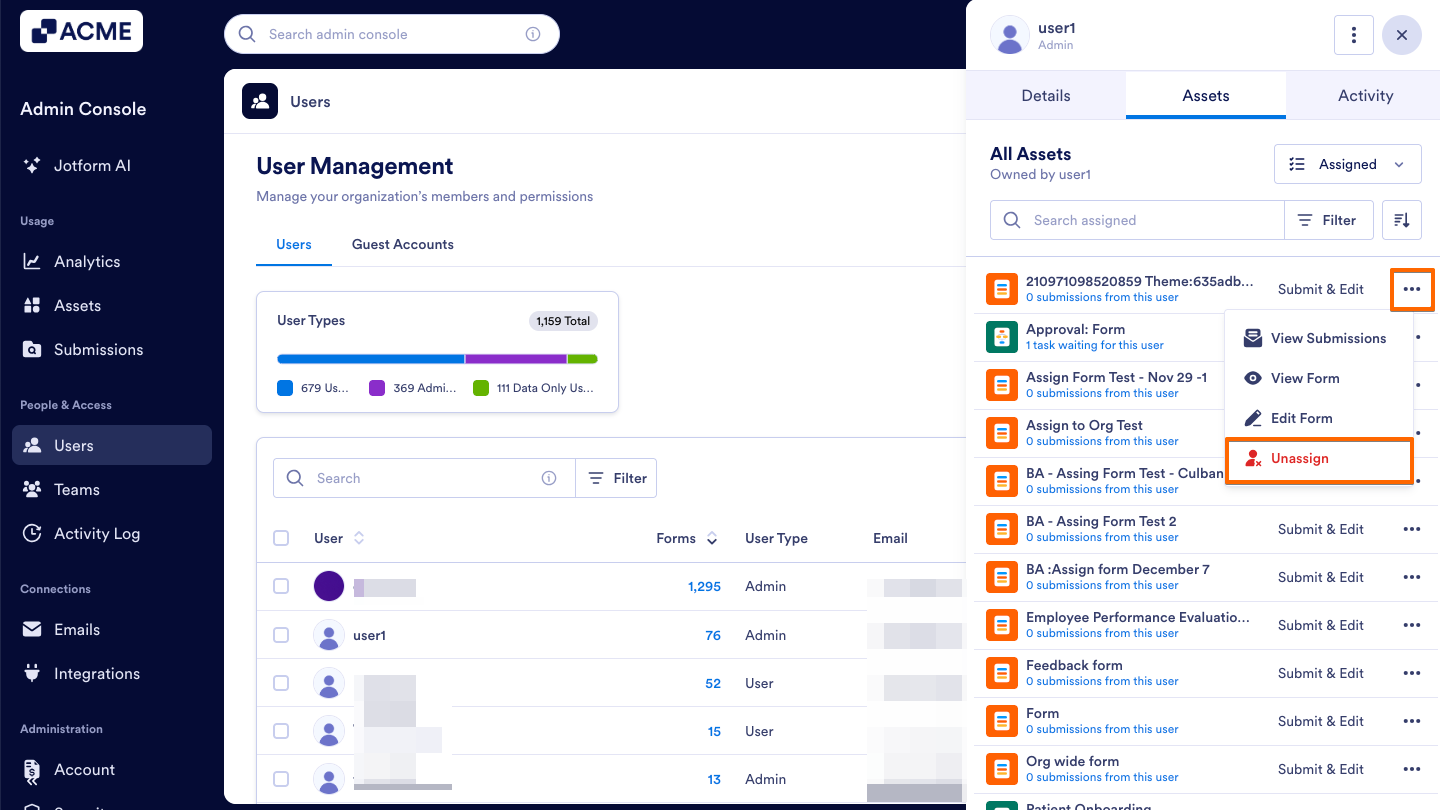
By clicking on the Three Dots icon next to an asset name, the following options are available:
- View Submissions: Opens the submission page for the selected shared form.
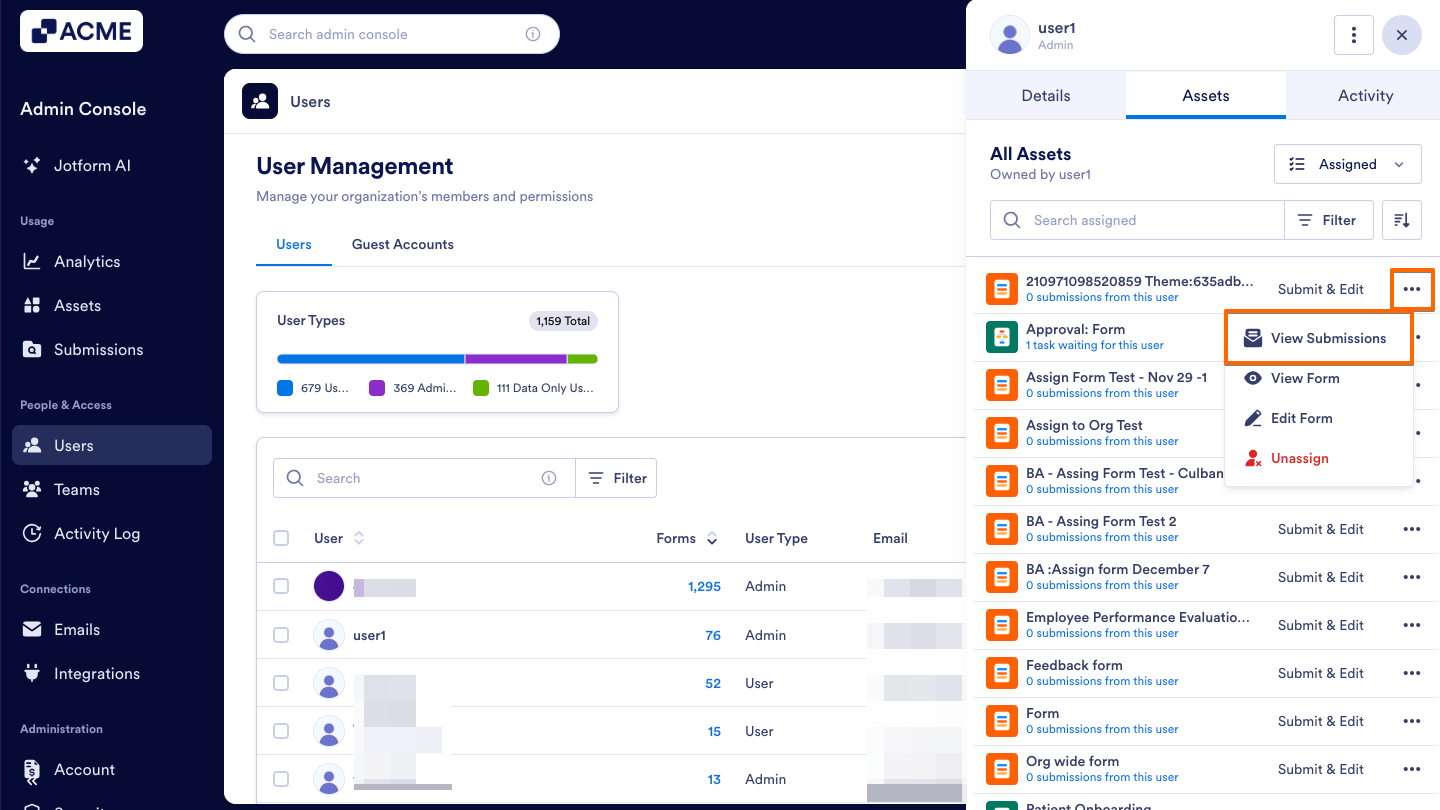
- View Form: Opens the form in the builder to review its setup and content.
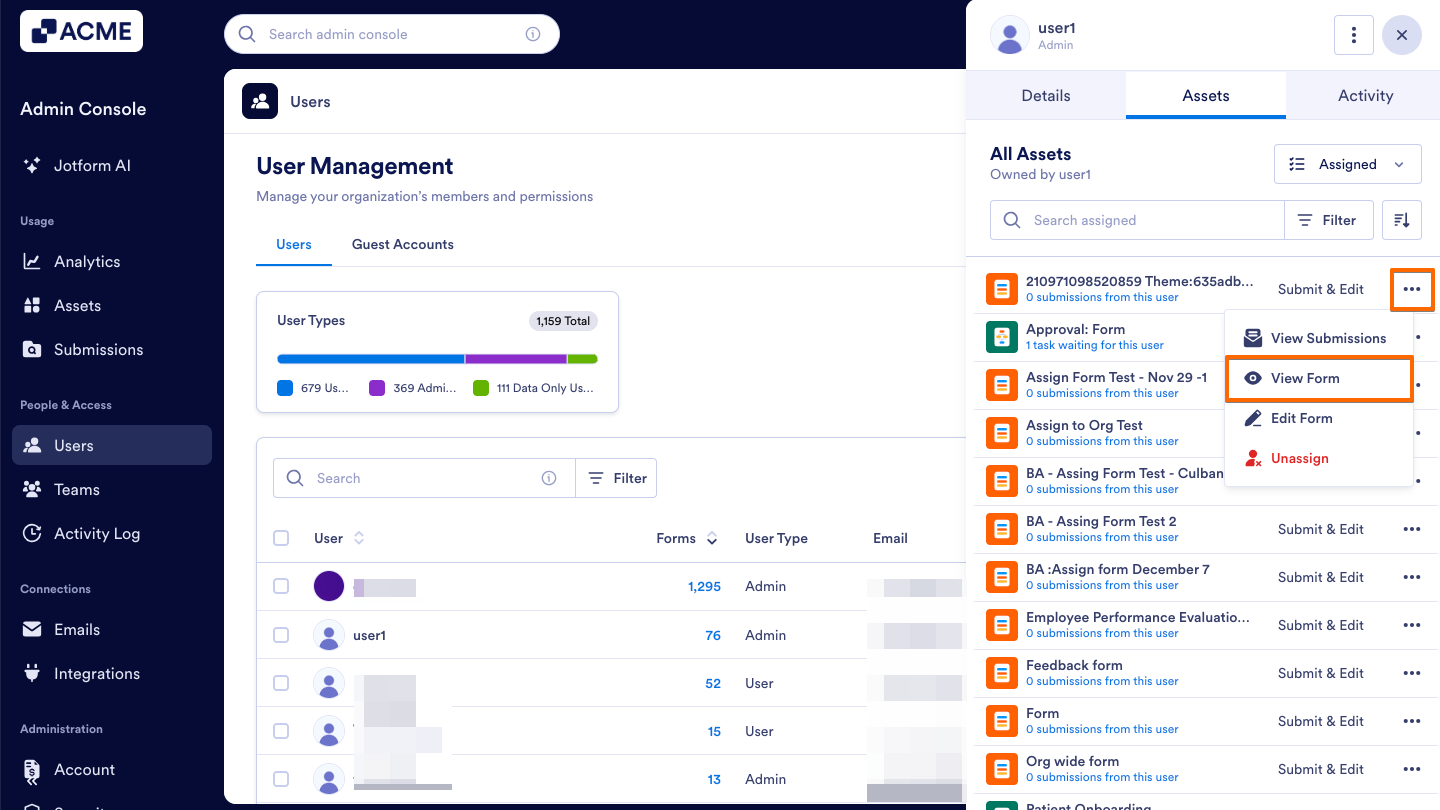
- Unassign: Removes the selected user’s access to the assigned asset.
- Edit Form: Opens the form in the builder, allowing you to make updates to its structure, fields, design, or settings as needed.

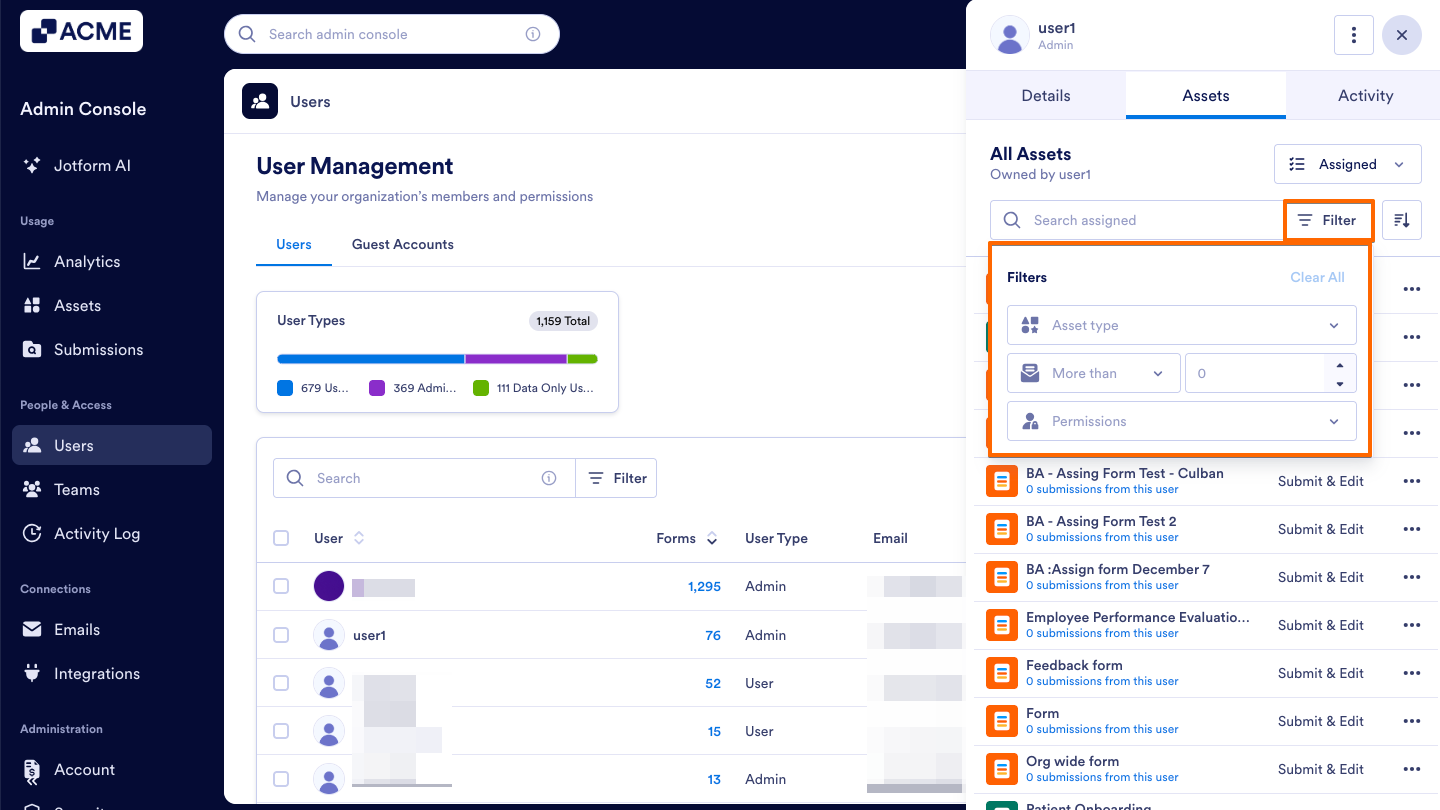
You can refine this list using our additional Filter, Search, and Sort options:
Filter menu
You can use the Filter button to narrow these results down by asset type, submission count, or permissions.
The available permission filters are:
- Submit Only: Forms where the user can fill out and submit the form, but cannot view or edit any submissions.
- Submit & View: Forms where the user can submit new responses and view their own submissions.
- Submit & Edit: Forms where the user can submit new responses, view, and edit their own submissions.
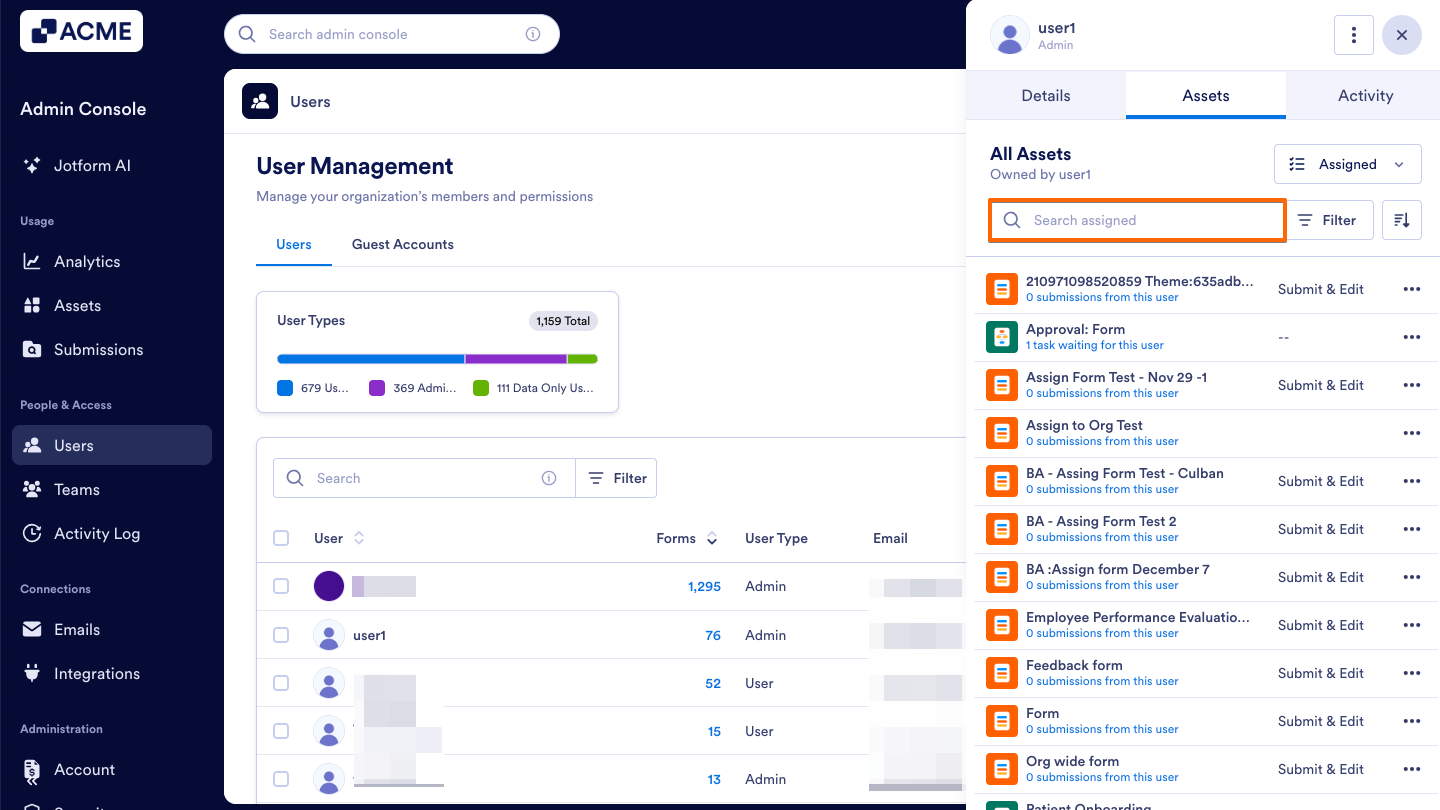
Search by name
Start typing part of any asset’s name into the Search bar, to help locate specific forms, apps, or tables.
Sort dropdown
Click on the Sort icon to reorganize these results by alphabetical order or submission count (both ascending and descending).
See also:
- How to View and Manage Shared Assets in Your Organization from the Admin Console
- How to Unassign Assets in Your Organization from the Admin Console
- How to Revoke Users Access to Assets in Your Organization from the Admin Console
- How to View and Manage Assigned Asset Access for Guest Accounts in Your Organization from the Admin Console

Send Comment: